Manage Data Records
Momen ships a visual database management tool. Developers and managers can browse tables and maintain records by hand.
Open data management from Data → Database. The sidebar has four parts, top to bottom:
- Database selector — switch between the Main database and your sub-databases, and create new sub-databases from here.
- Default — the tables in your data model.
- Custom — read-only cross-table views.
- Import & Export — bulk import, export, and the task history of the last 7 days.
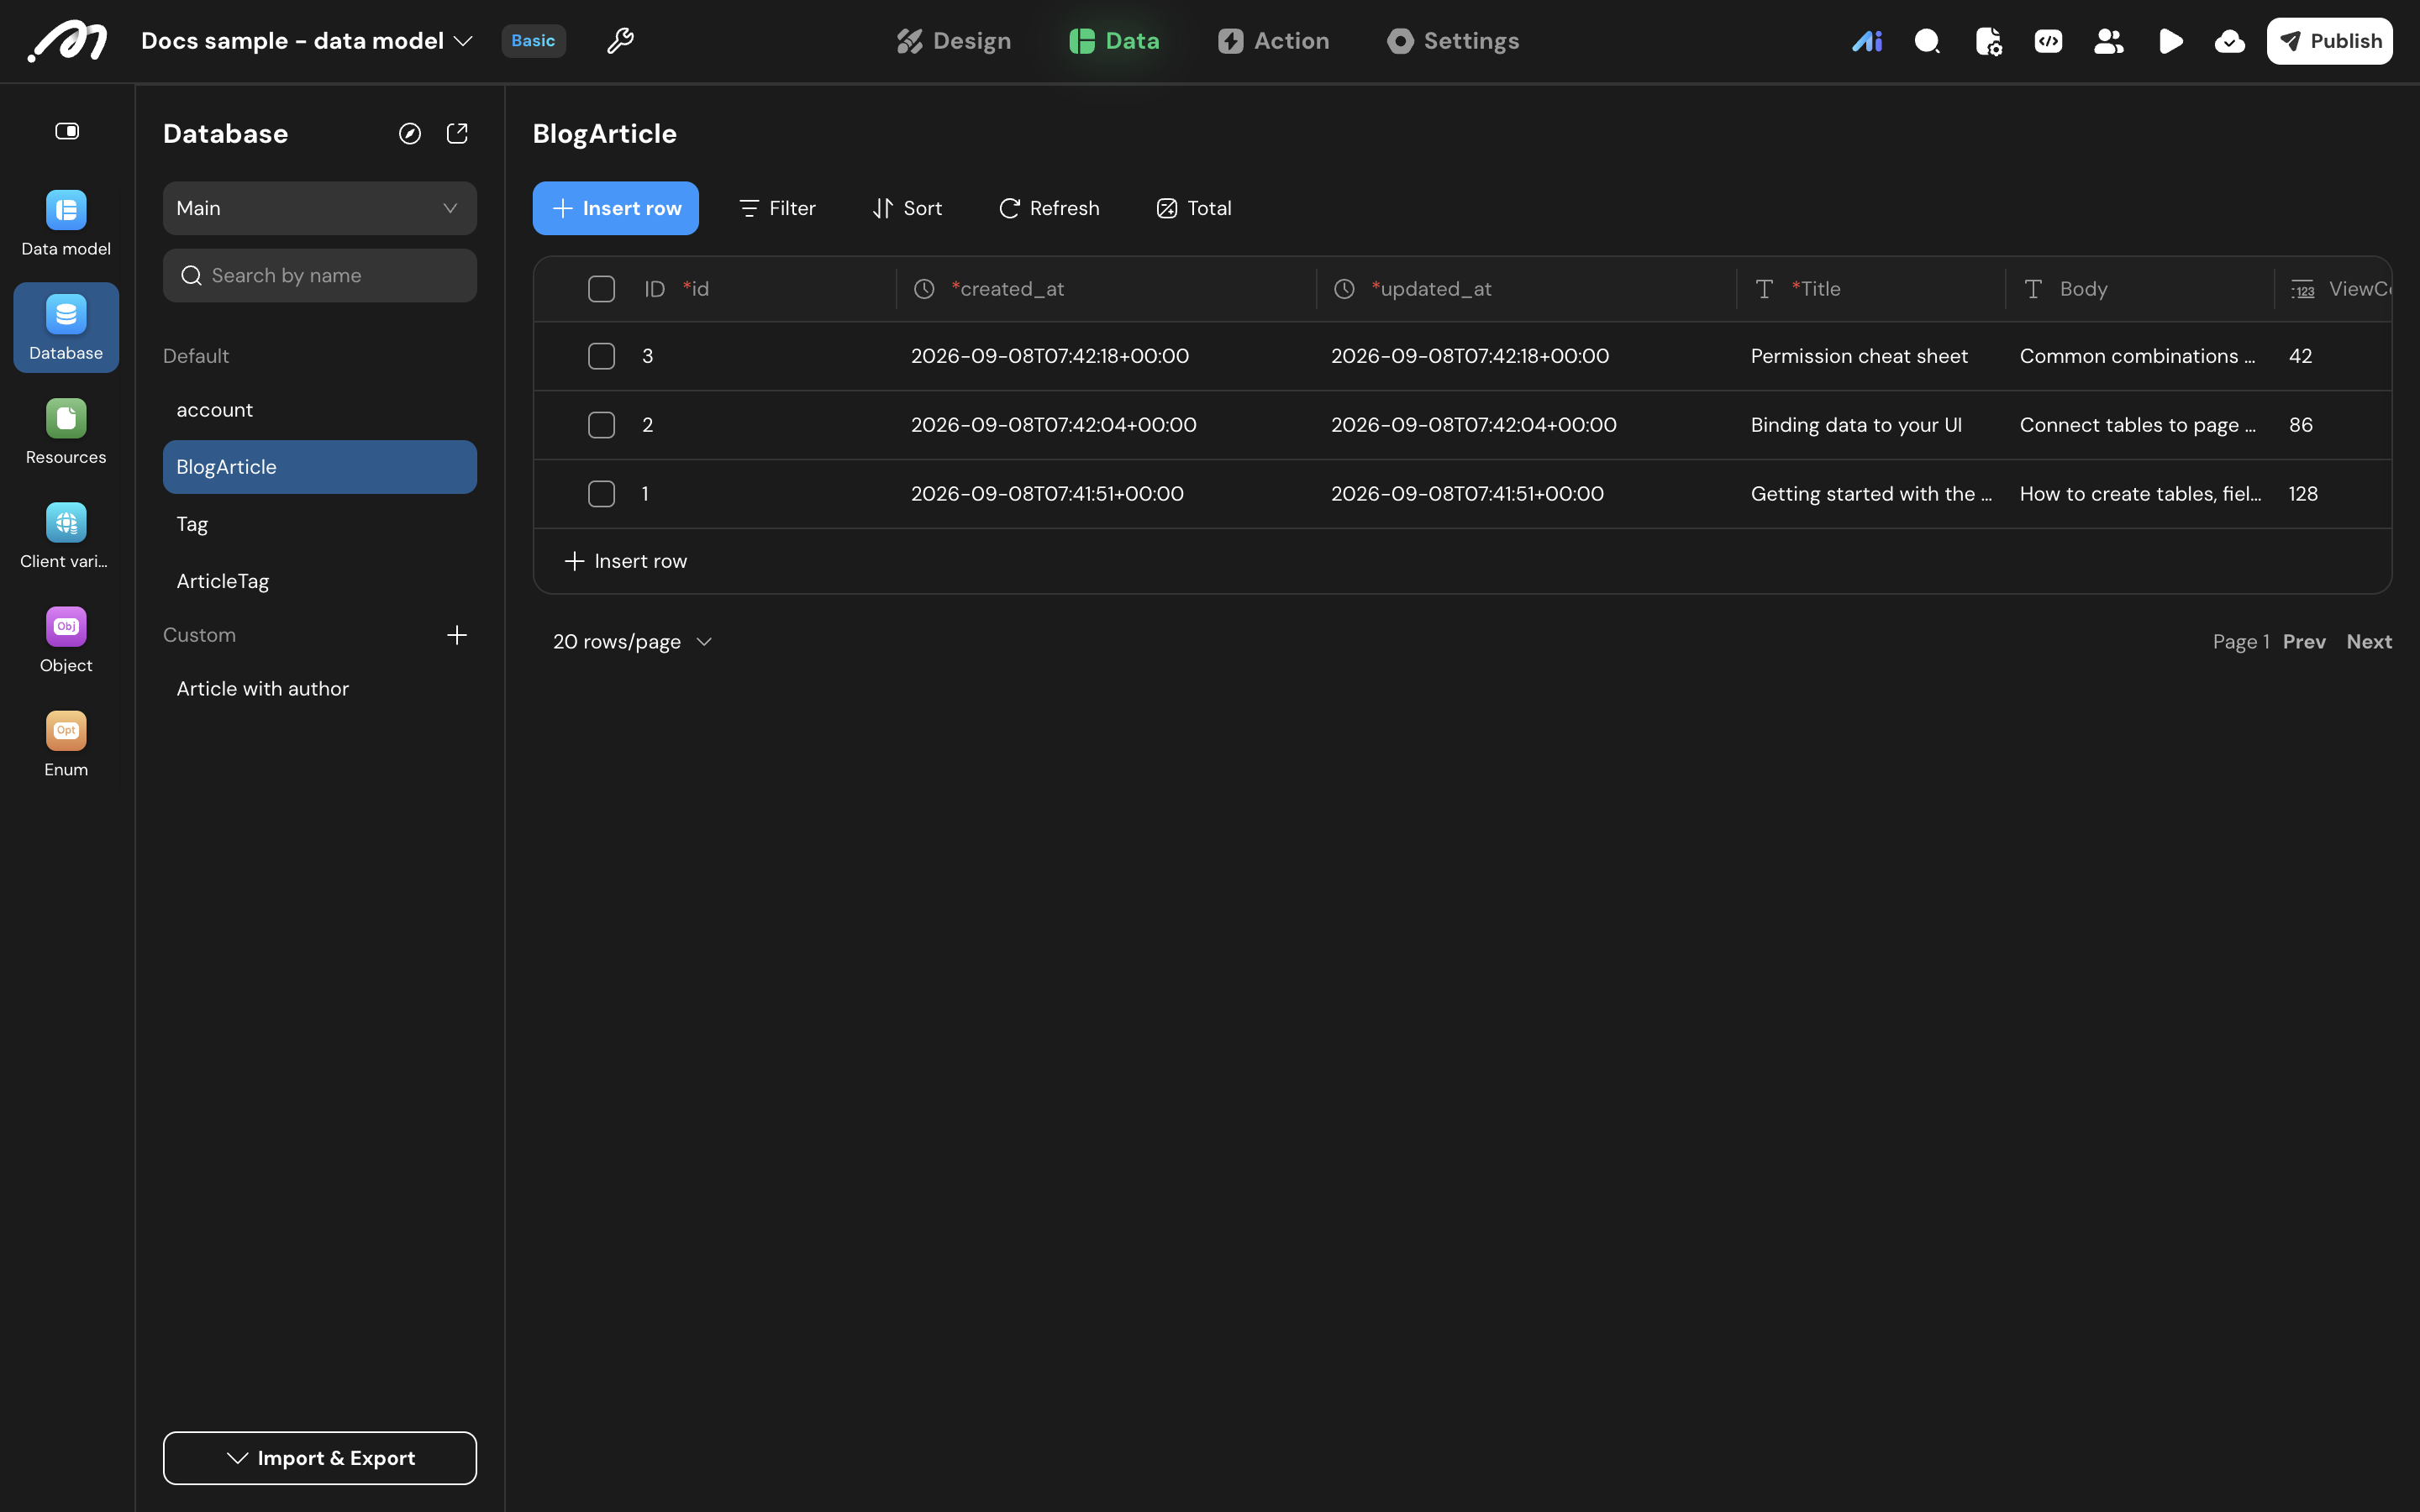
Manage data records
Each table can be viewed and edited through a spreadsheet-like interface. The toolbar above the grid offers Insert row, Filter, Sort, Refresh, and Total; below the grid you can set the page size and page through the rows.
Read
- Select the table in the sidebar to open data management.
- Filter — opens the condition dialog, where you combine several conditions into AND/OR groups. Once a filter is set, the Filter button in the toolbar stays highlighted.
- Sort — pick a field and the sort direction.
- Total — see the total row count for the current table.
- Filters and sorting apply to the current session only; they are cleared when the page is refreshed or closed.
Create
Click Insert row in the toolbar or at the bottom of the grid, fill in the fields in the form that opens on the right, then click Create.
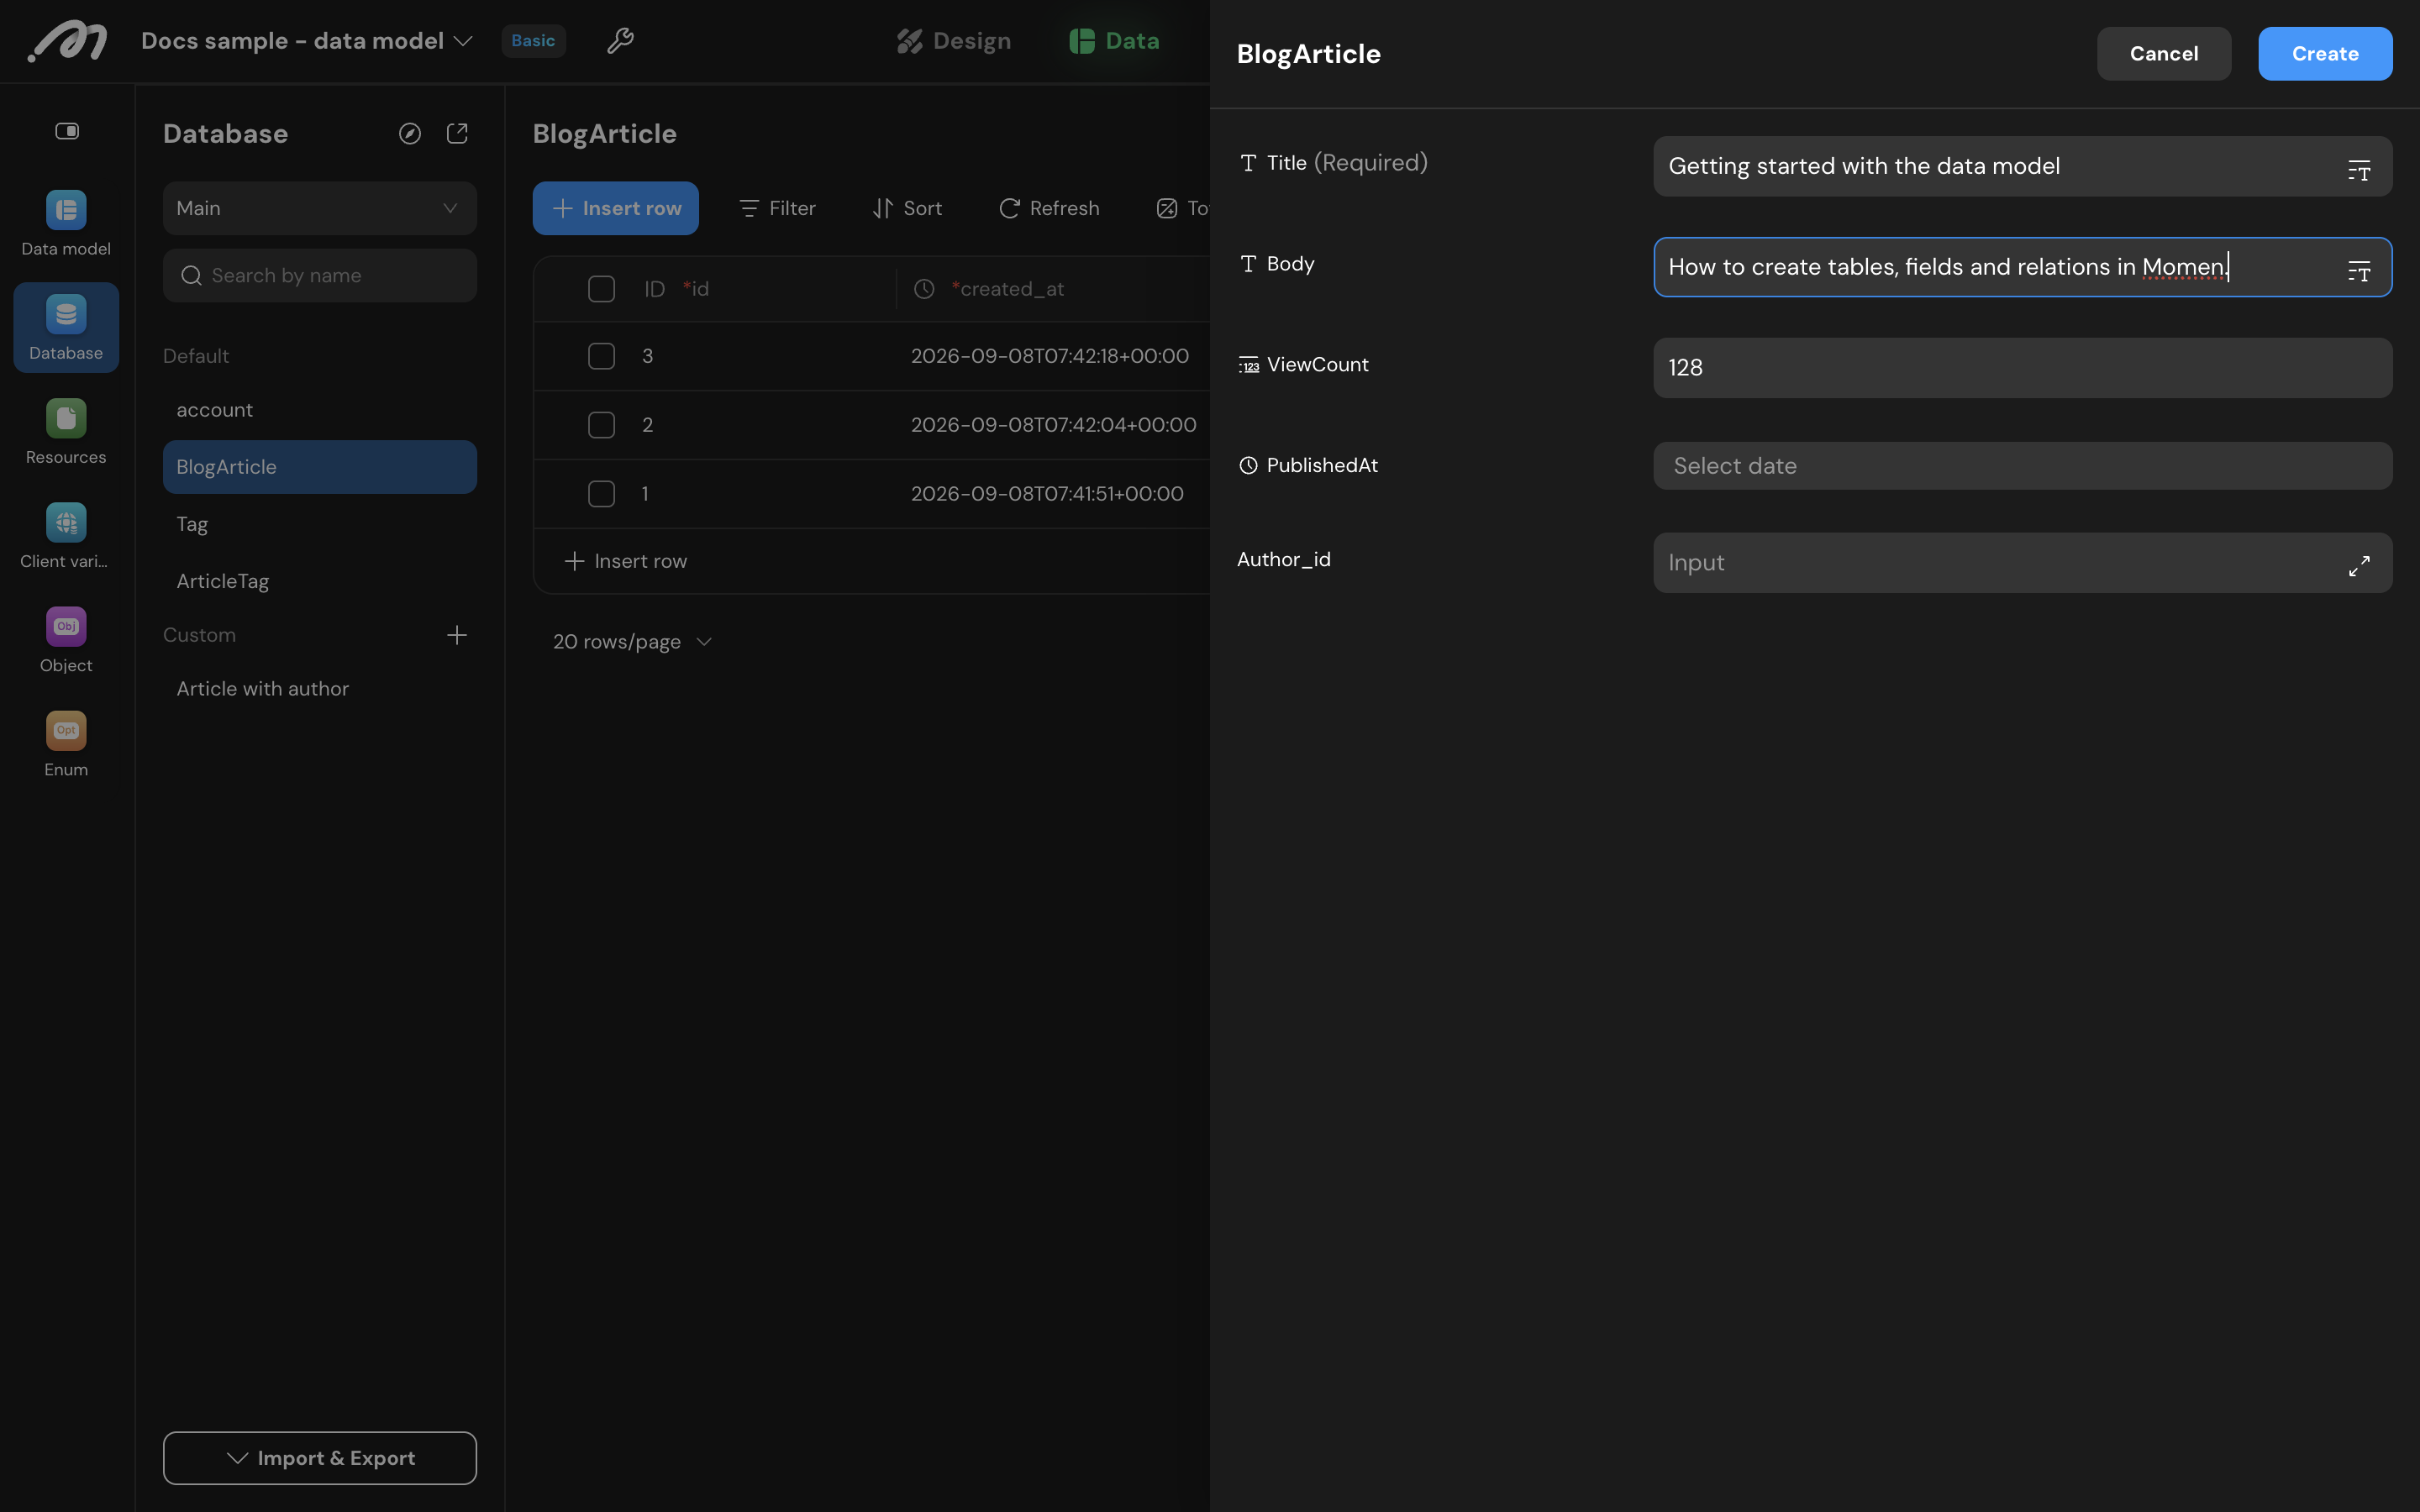
Update
Click a cell to edit it; the change is saved automatically when the cell loses focus. System fields cannot be edited by hand.
Delete
Select one or more rows and click Delete. Deleting removes the data from the database and cannot be undone, so it only runs after you confirm in the dialog.
Account table
Rows are added to the account table through Create account rather than “Insert row”. In the Create account dialog, fill in any one or more of Username, Phone number, and Email, set a Password, and the account record is created directly.
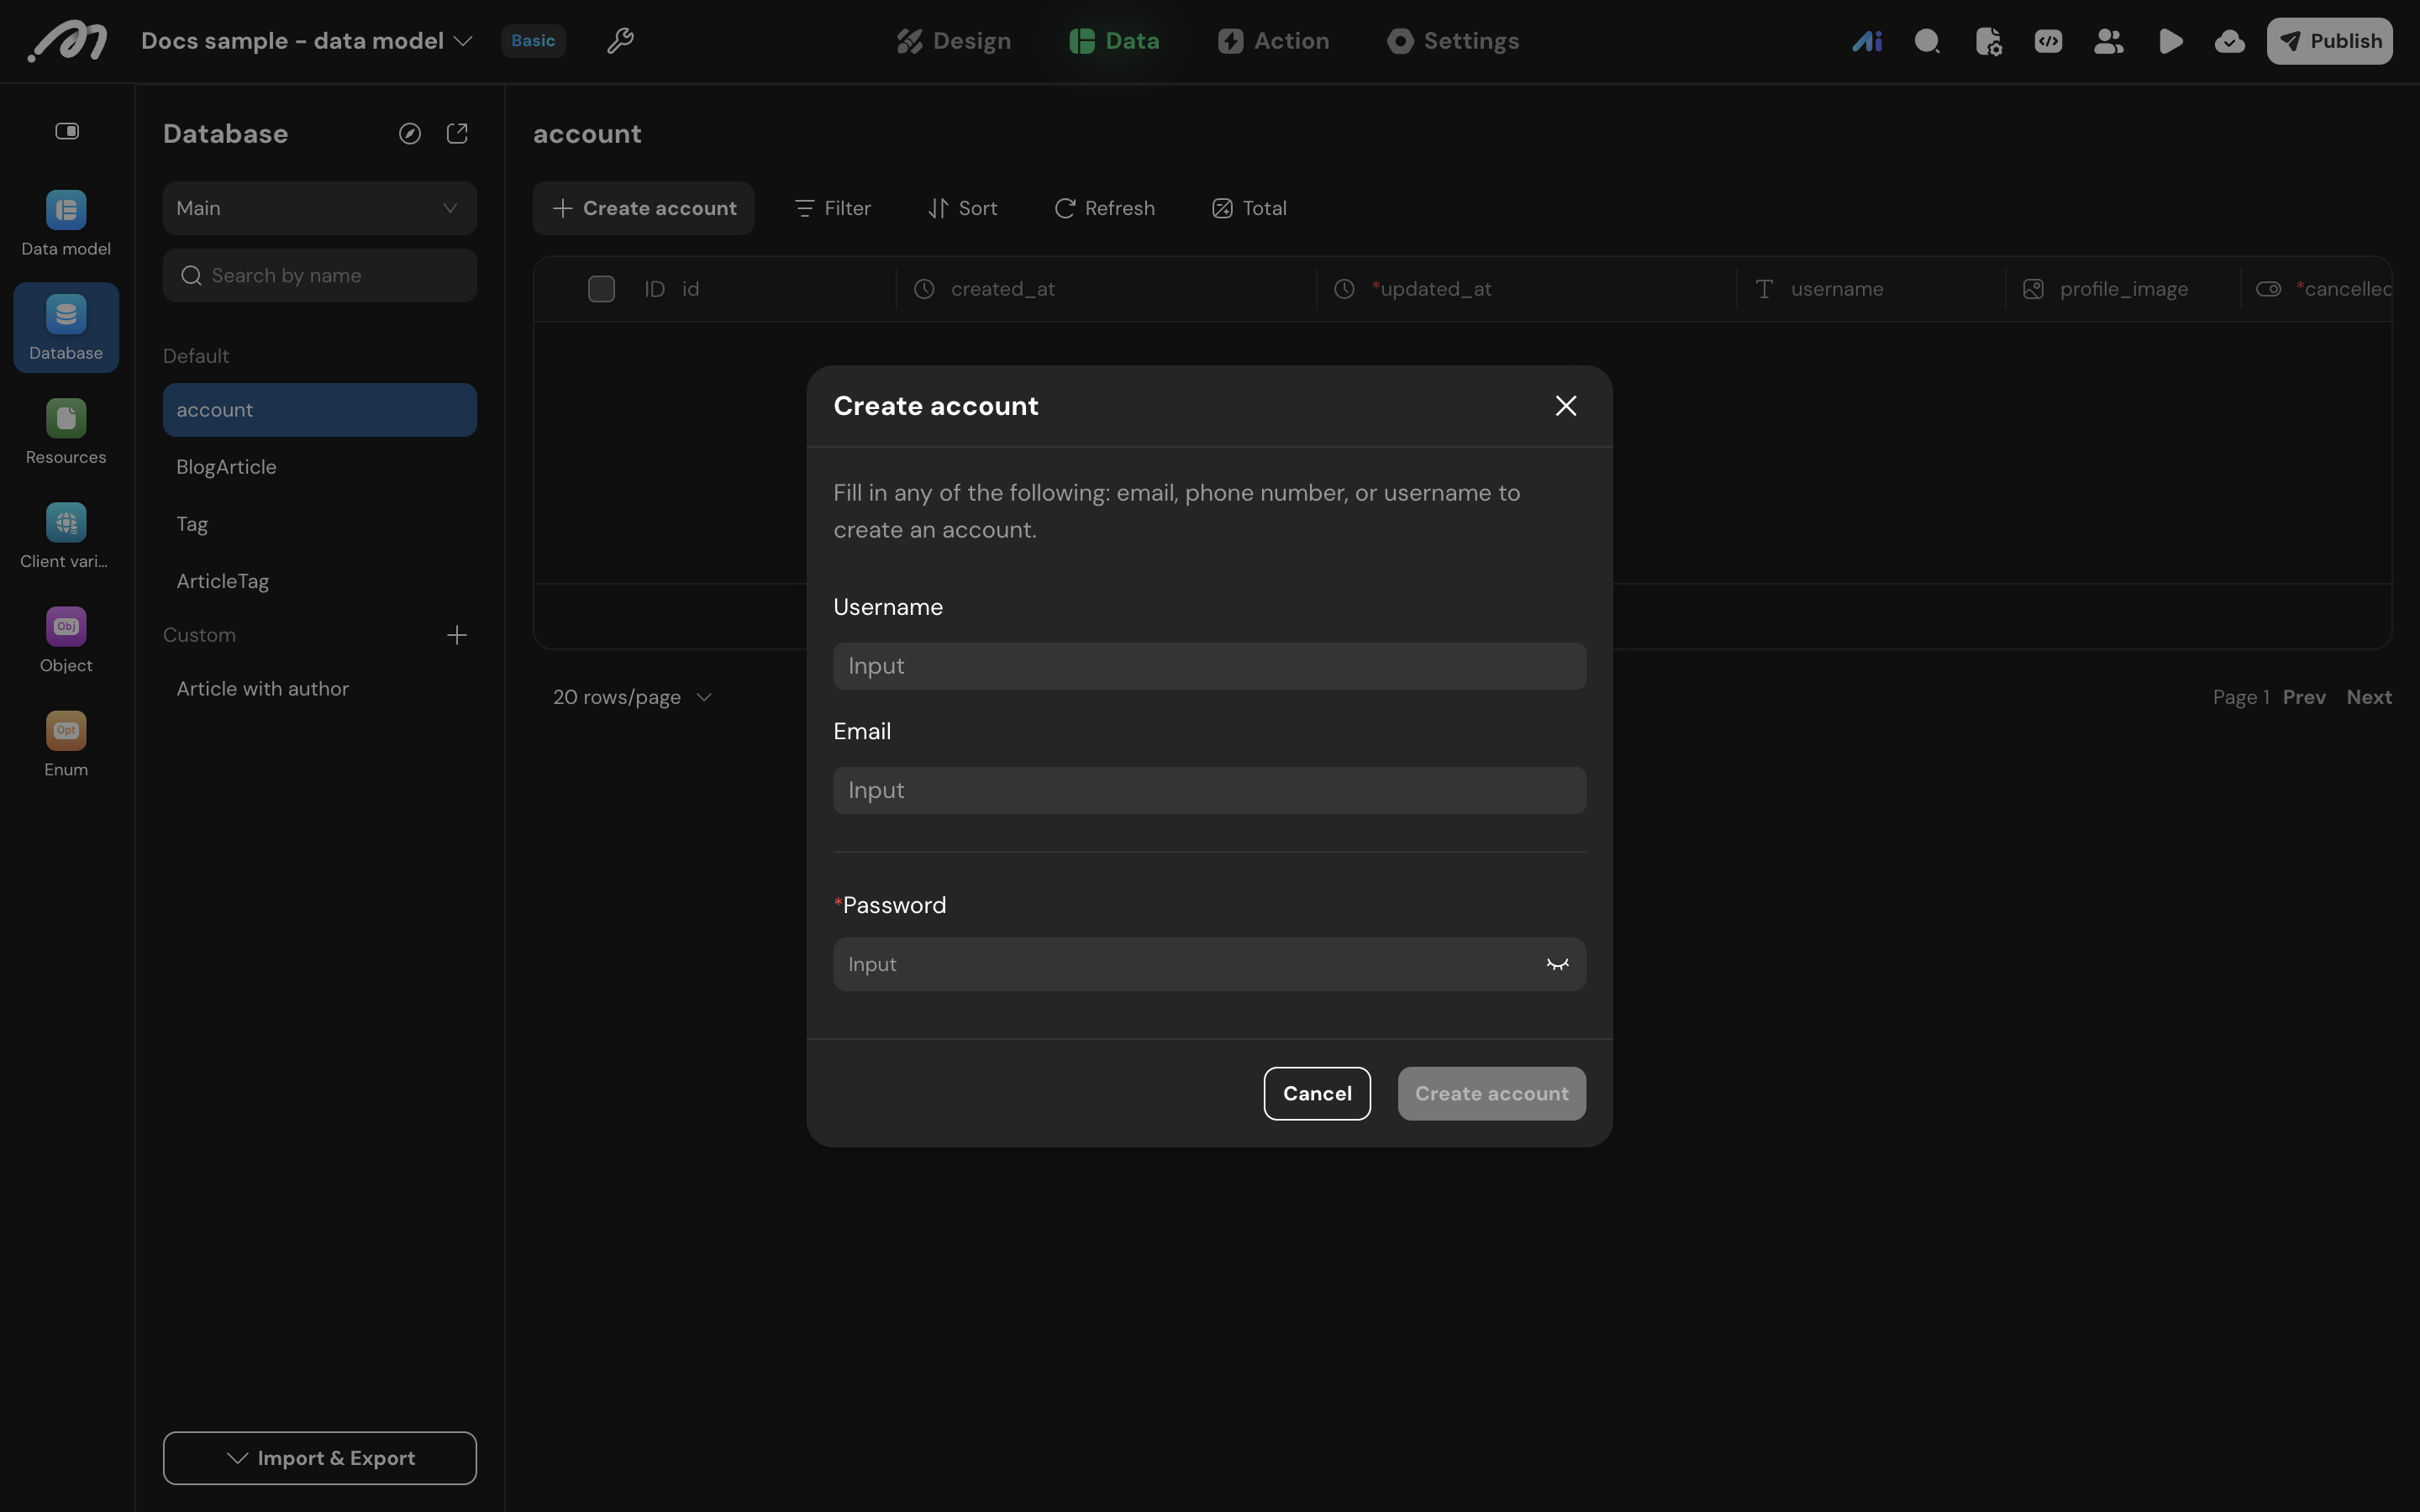
Import and export
Import & Export at the bottom of the sidebar offers four entries:
- History (last 7 days) — execution records and logs of import and export tasks.
- Import account — bulk-create accounts.
- Import data — load CSV data into a table, with field mapping and conflict-handling strategies.
- Export — export data by table or custom view, choosing the fields and setting filter conditions.
For the detailed steps, see Import and Export Data.
Custom views
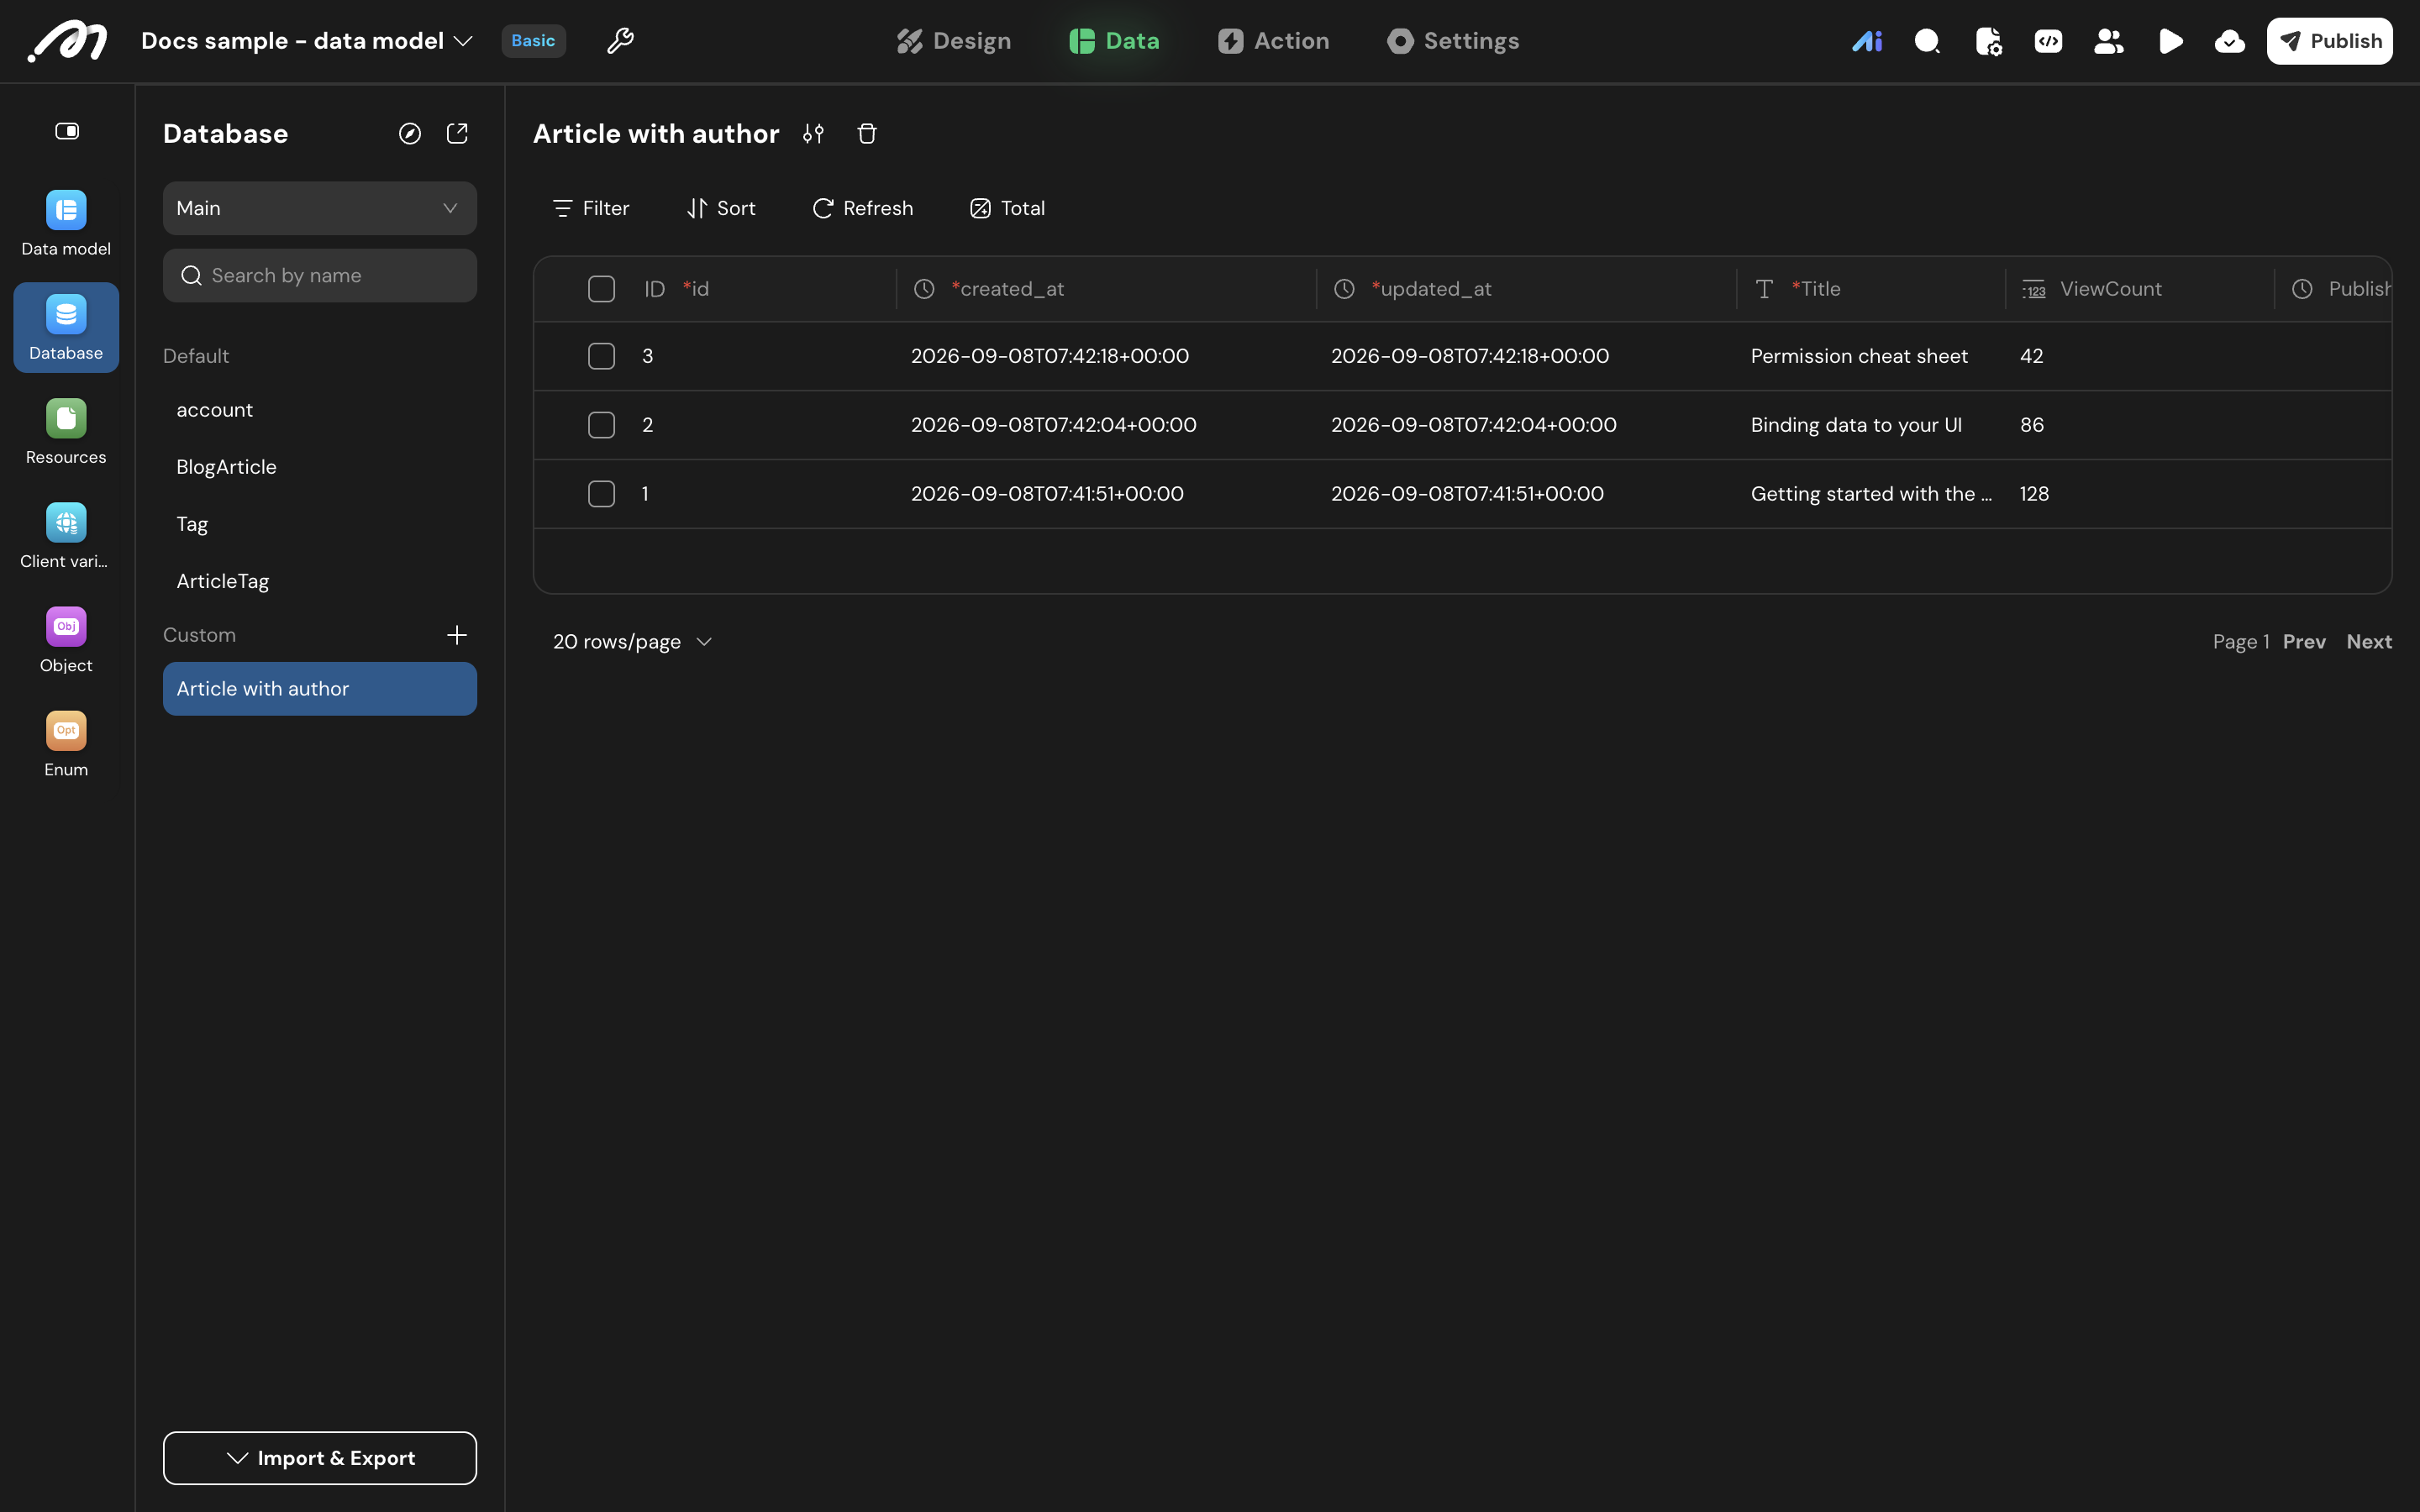
Custom views combine fields from a base table and its related tables into a single read-only view, which makes them convenient for querying and exporting.
Use cases
- Orders with customer information — show the related account’s phone number and nickname on the order view.
- Products with categories for export — combine product and category fields and export them together.
- Read-only — data cannot be edited in a custom view; go back to the source table.
- Query performance — the more related tables, the slower queries and loading usually get. Only select the tables and fields you need.
- Dependencies — deleting a related source table invalidates the custom views that depend on it.
Create a custom view
Create the view
Click + to the right of Custom in the sidebar and fill in the Create a custom data table dialog:
- Name — the view’s name, e.g.
Article with author. - Table — the base table of the view.
Select visible fields
Click edit visible fields opens the Edit column dialog.
- Tabs at the top split the base table from each relation, e.g.
Base table (BlogArticle),Author (account),TagLinks (ArticleTag). - Tick the fields you want to show in the view on each tab.
- An alias box appears on the right of each ticked field, where you can set the display name. For example, show
customer_nameas “Customer name” and avoid clashes between same-named fields from different tables.
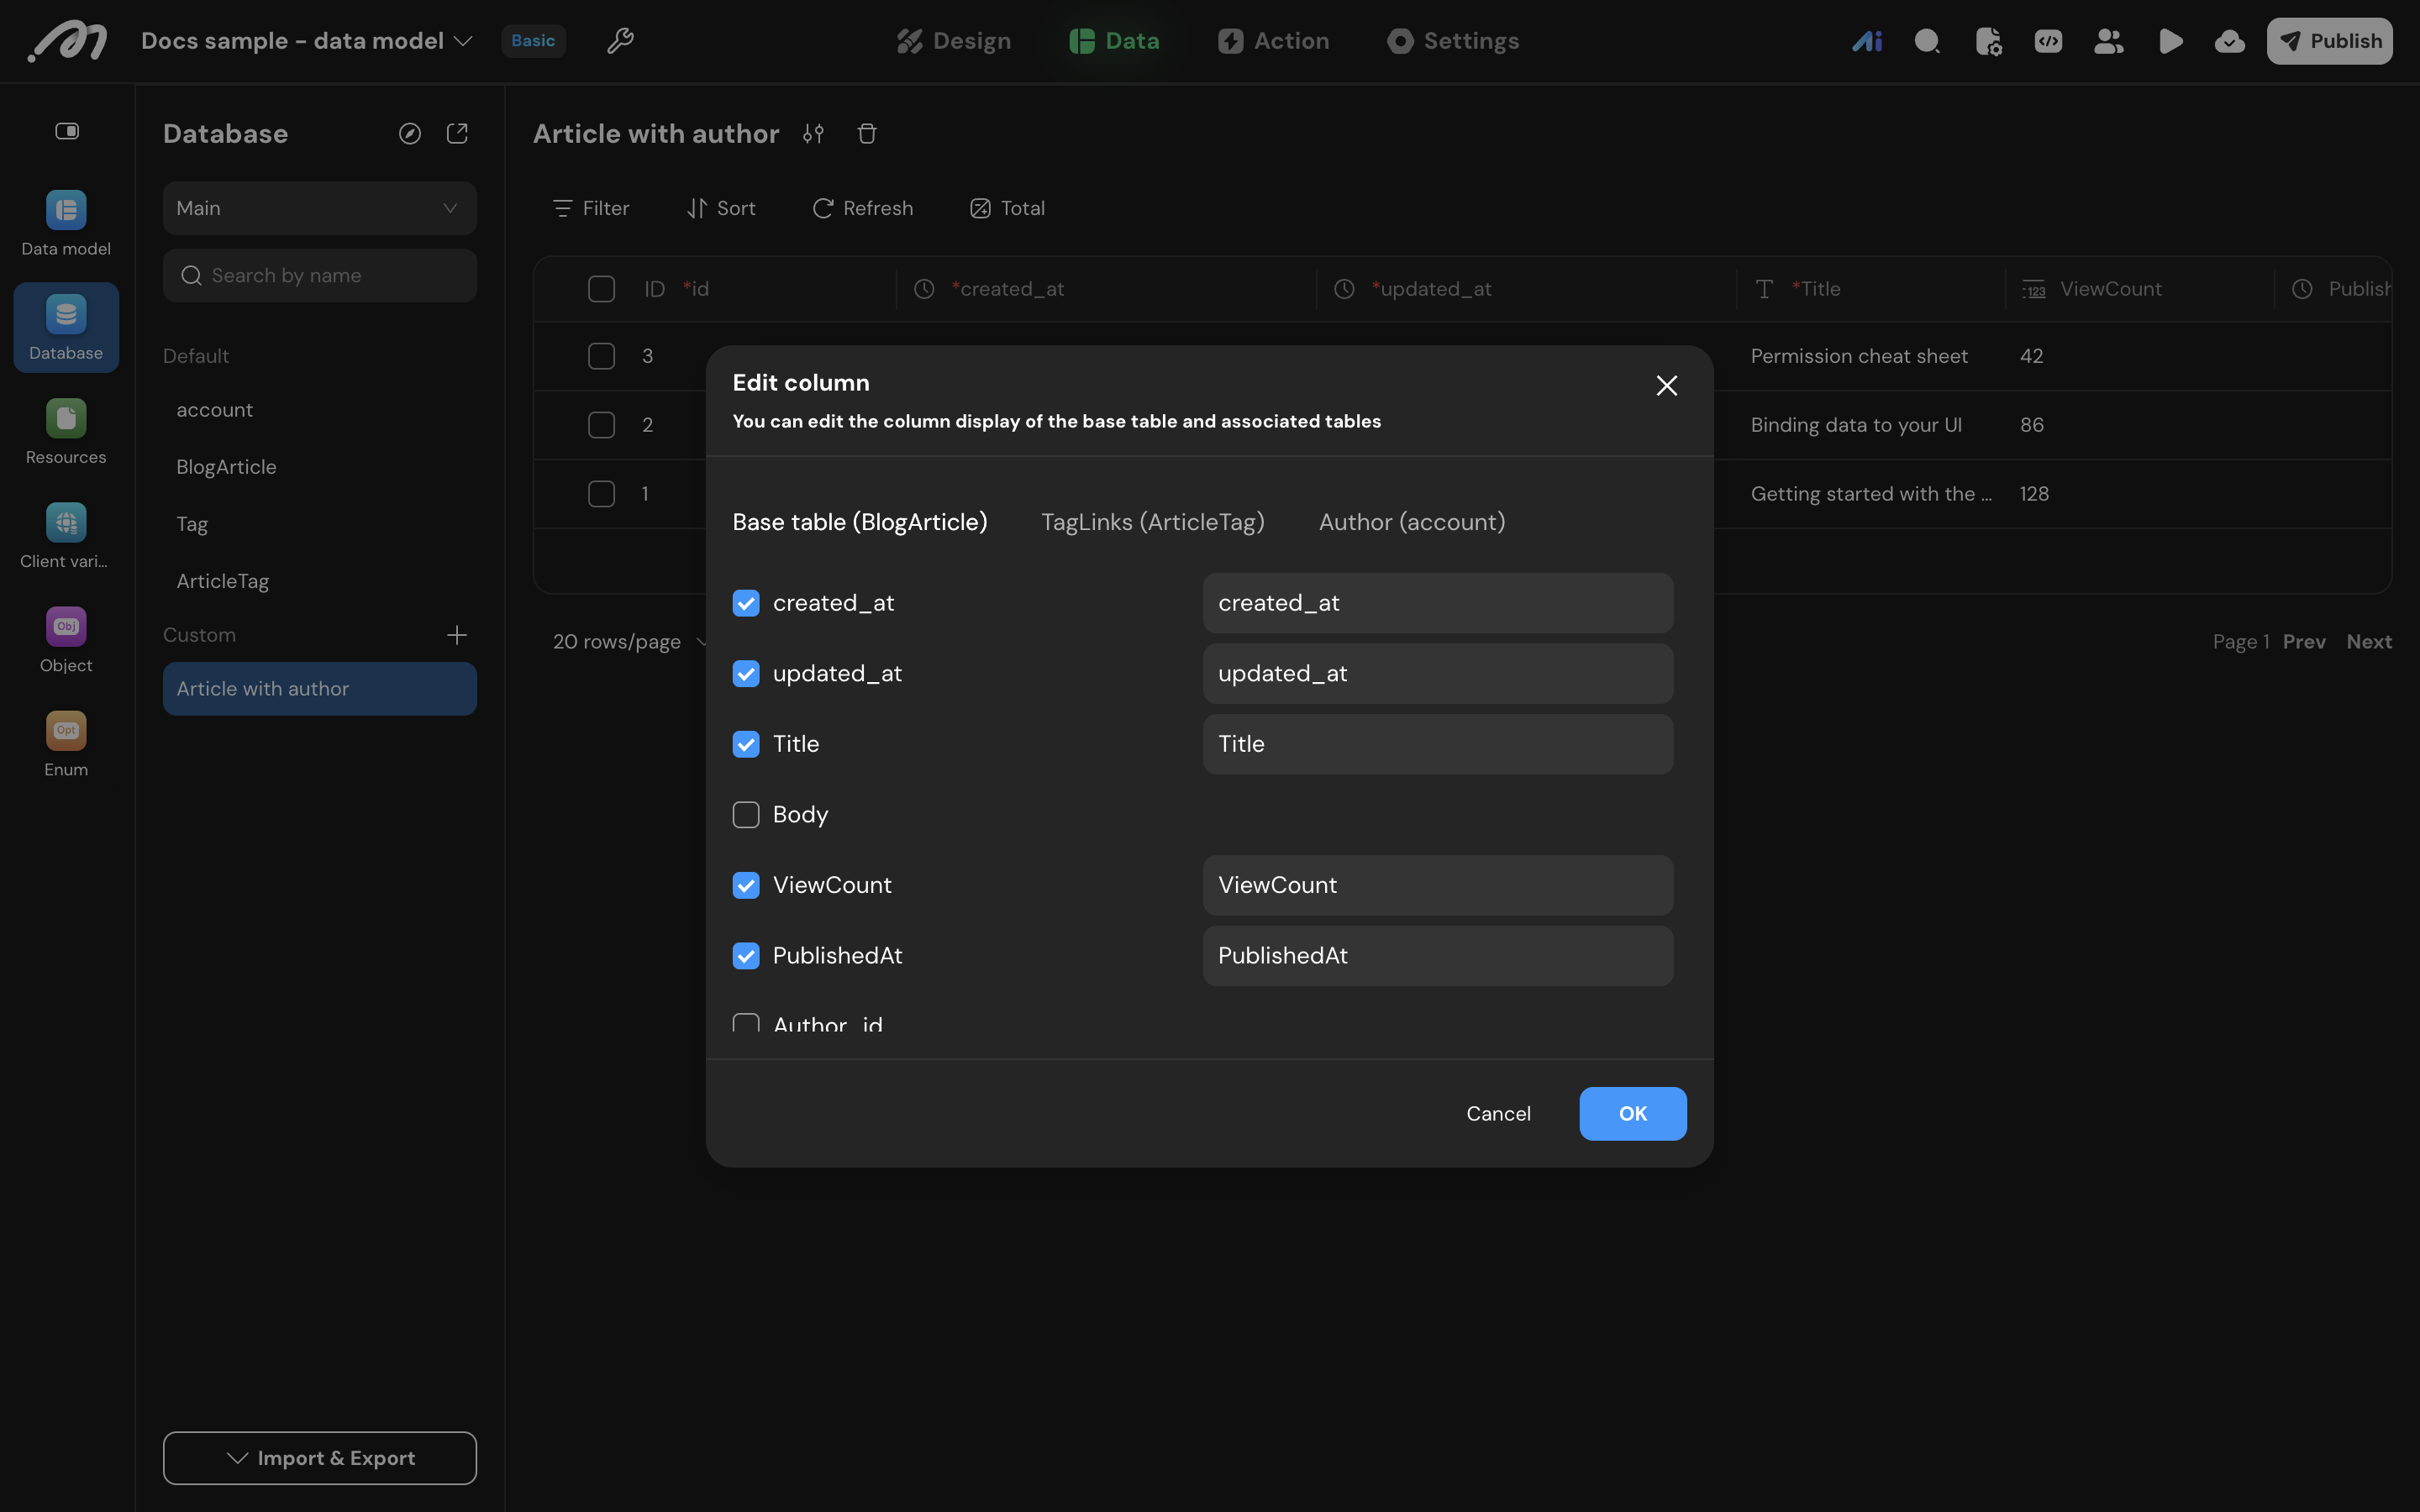
Save and view
Click OK to close the field dialog, then Create to save the view.
The view appears under Custom in the sidebar. Once open it supports Filter, Sort, and Total, but has no Insert row entry; edit and delete buttons sit to the right of the view name.
Sub-database
A sub-database (formerly “custom database”) lets the project owner or a manager pick a subset of the main database’s tables, fields, and records, creating a restricted data workspace for collaborators.
Build the workspace subset
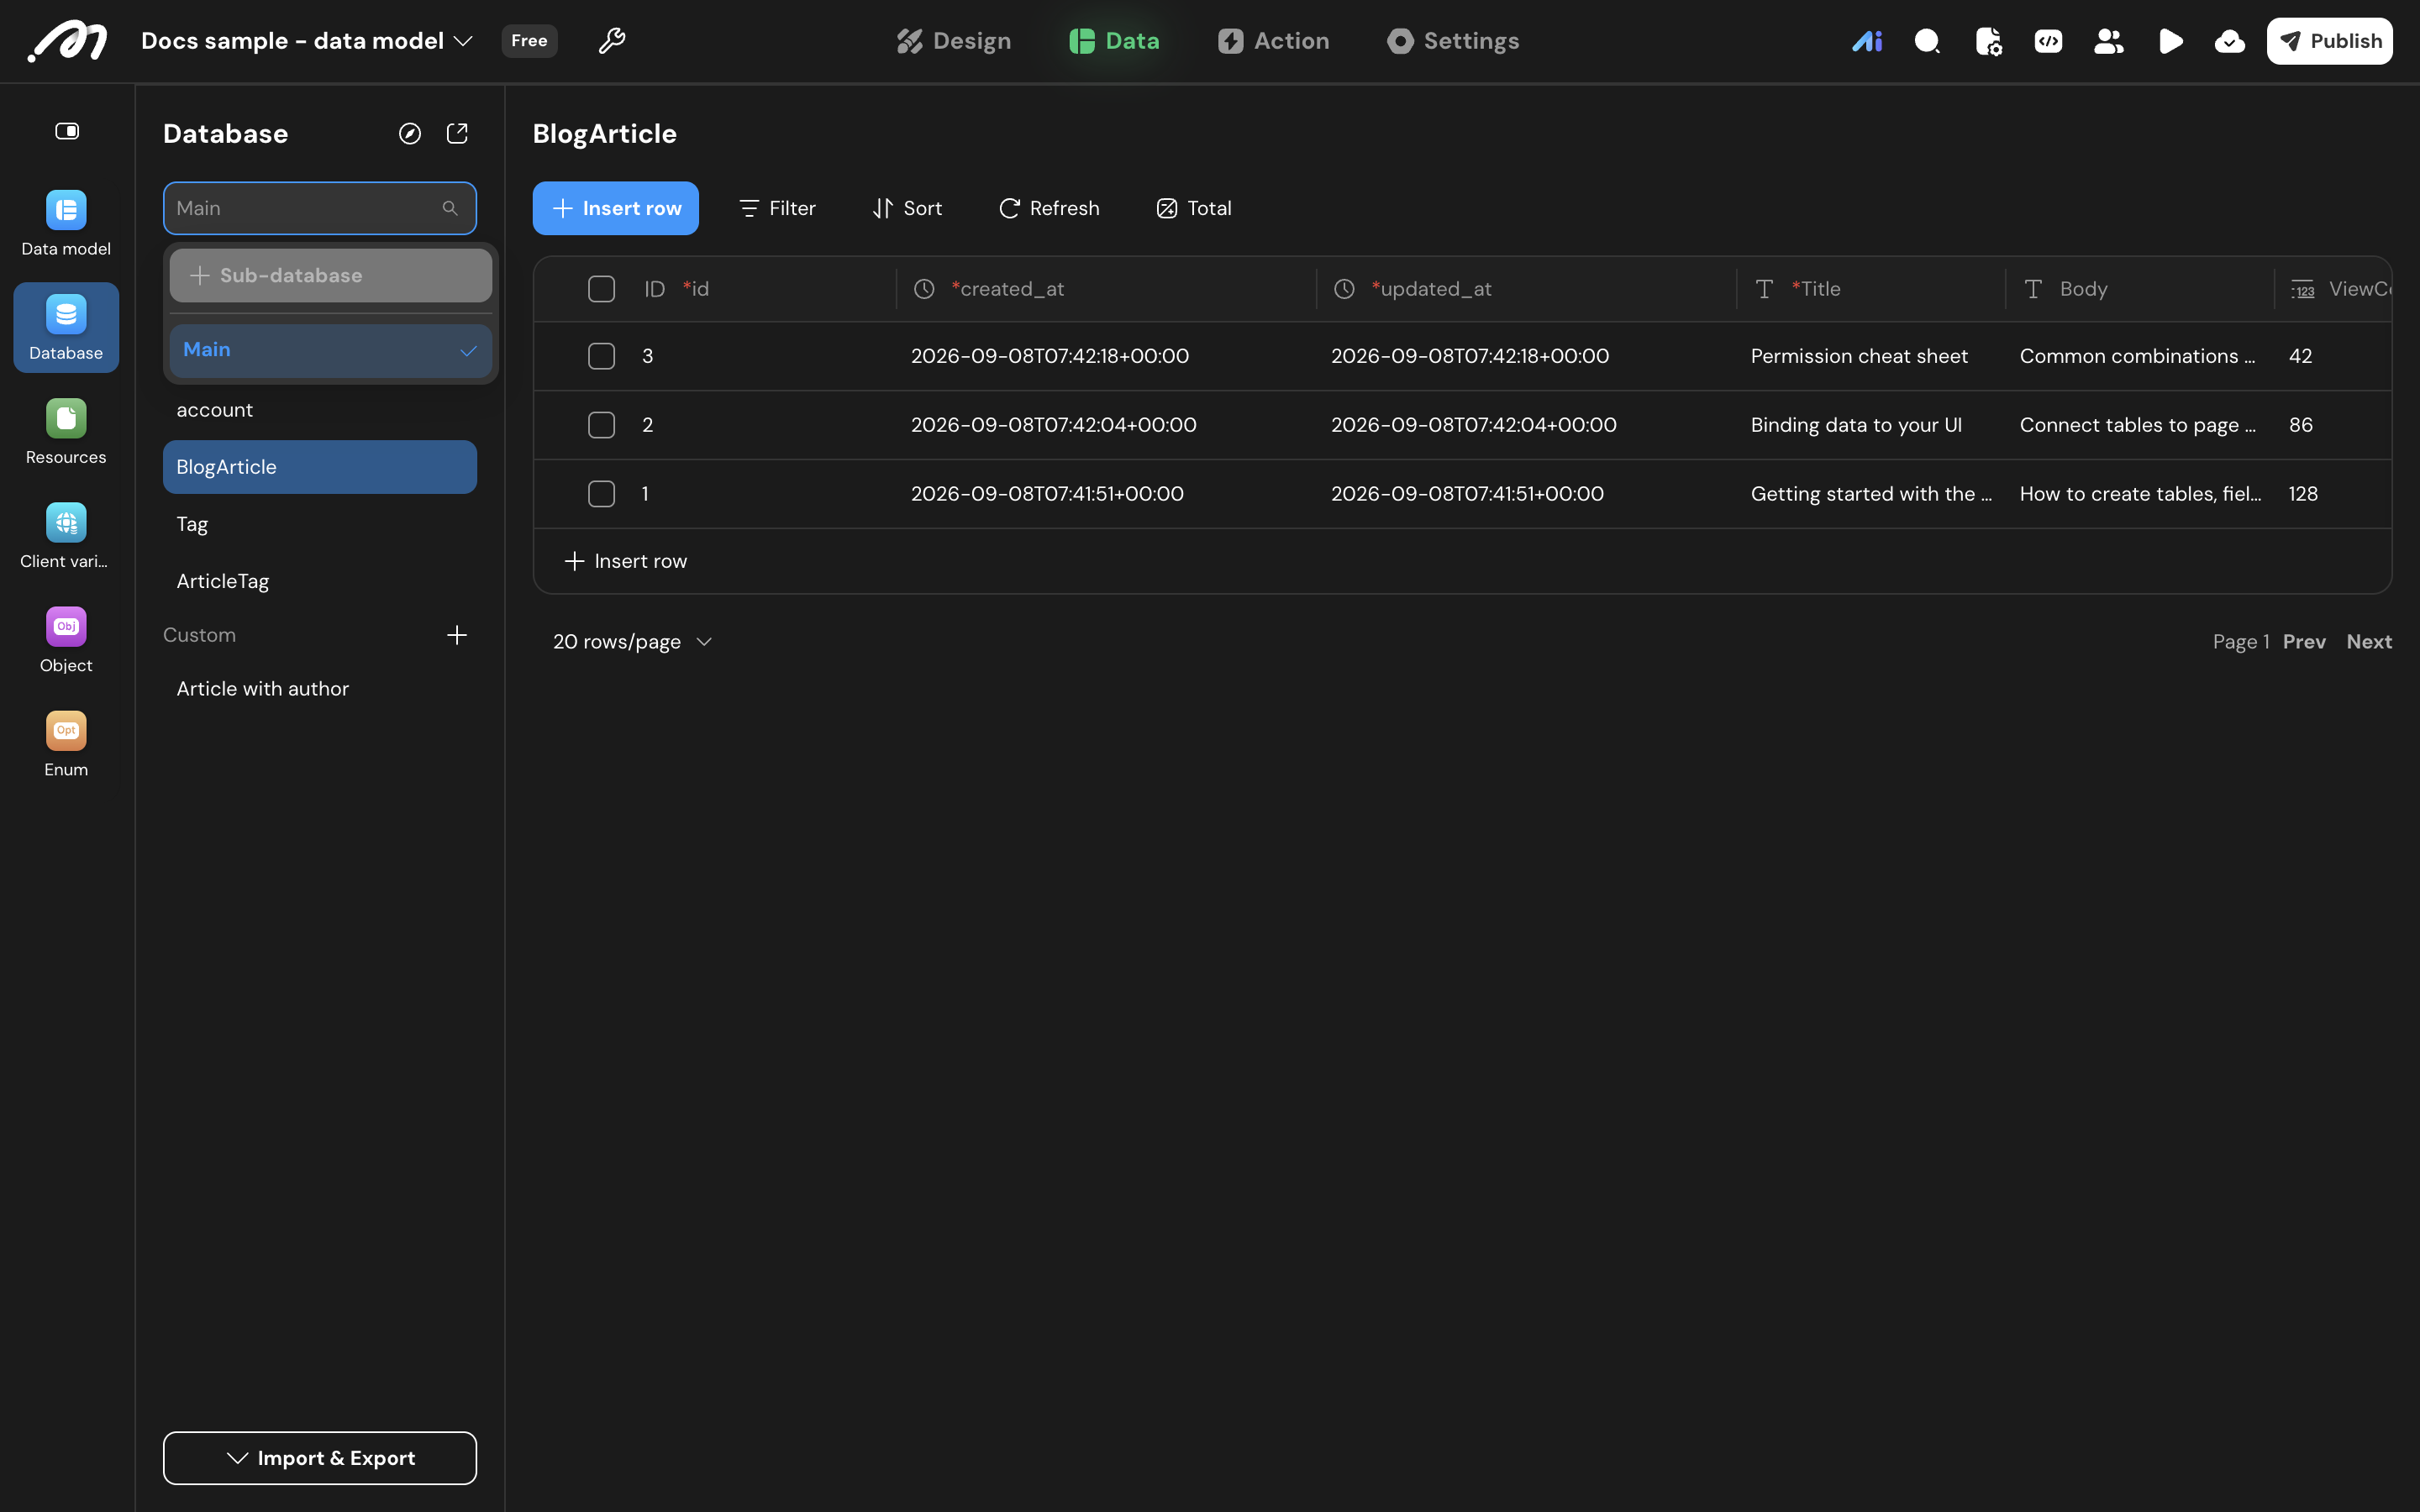
- Click the database selector at the top of the sidebar and choose + Sub-database from the dropdown. Only the project owner or a manager can create one.
- Set a globally unique name.
- Select the tables and fields to expose, and use filter conditions to limit which records are included. A sub-database can only select original tables, not custom views.
The number of sub-databases is limited by the project plan. When your current plan does not support creating more, upgrade the project to unlock it.
Grant access to collaborators
- On creation, the sub-database inherits the project’s permissions.
- Permissions for that sub-database can be adjusted independently.
- Collaborators with access can only view or operate on data within the authorized scope, and can create custom views within that scope.
- Once created, use the database selector at the top of the sidebar to switch between the Main database and your sub-databases.