Build Actionflows
An Actionflow is reusable business logic that runs on the server. It can accept inputs, orchestrate multiple nodes, and return outputs. It can be called by a frontend action, a Trigger, the Runtime API, or another Actionflow.
If you are not yet familiar with the boundary between frontend actions and backend Actionflows, start with the Interaction model.
Free projects can create one Actionflow. Basic and higher plans can create unlimited Actionflows. Scheduled and database-change Triggers consume automation runs.
Use cases
- Create an order and deduct inventory as one database transaction.
- Check unpaid orders on a schedule and send notifications.
- Receive a Webhook and update business state from its payload.
- Package server logic for reuse by multiple pages, Runtime API clients, or other Actionflows.
- Run complex work that combines APIs, AI, conditions, For each nodes, or Run code nodes.
Build an Actionflow
Create an Actionflow and choose an execution mode
Open Action → Actionflow, create an Actionflow, and give it a descriptive name. The execution mode determines transaction and timeout behavior:
- Synchronous: Database-operation nodes can commit or roll back together, but the entire Actionflow is subject to the synchronous runtime cap.
- Asynchronous: The Actionflow does not provide one transaction across all database nodes and is suited to longer-running work. Actionflows containing AI Agent nodes must be asynchronous.
Execution mode affects transactions and timeouts. See Execution modes and transactions and Timeout policy.
Define inputs, outputs, and variables
- Inputs: Values the caller must provide. Every node in the Actionflow can reference them.
- Outputs: Values returned to the caller after the Actionflow completes.
- Actionflow variables: Temporary values shared inside the Actionflow. Update them with Assign Actionflow Variable, commonly to carry results out of a branch.
Use clear, stable names and make sure each type matches the value supplied or consumed by callers.
A caller can pass null into an Actionflow input in several ways:
- The input is not bound to anything.
- The input is bound to a value that is
nullat runtime. - The input is explicitly bound to a null value.
The Actionflow cannot tell these cases apart, so do not rely on whether an input is null to infer what the caller meant.
Add nodes
Select + to add Database, API, Actionflow, AI Agent, Condition, For each, Run code, or other nodes in business order.
A later node can read an earlier node’s result through:
Actionflow data → Node name → Field name
Data flows from nodes that have already executed to later nodes. Results created inside a condition or loop have branch scope. To use a value outside that branch, assign it to an Actionflow variable first.
For every available node and its parameters, see Actionflow nodes.
Add triggers
An Actionflow can have multiple Triggers:
- Scheduled: Run at a configured time or Cron schedule.
- Database change: Run when matching database data changes.
- Webhook: Run when an external system calls its endpoint. Payment callbacks are a specialized Webhook use case.
Bind each Trigger’s data to the inputs required by the Actionflow. See Backend Triggers for configuration details.
An Actionflow that is called only by a page, the Runtime API, or another Actionflow does not need a Trigger.
Set permissions
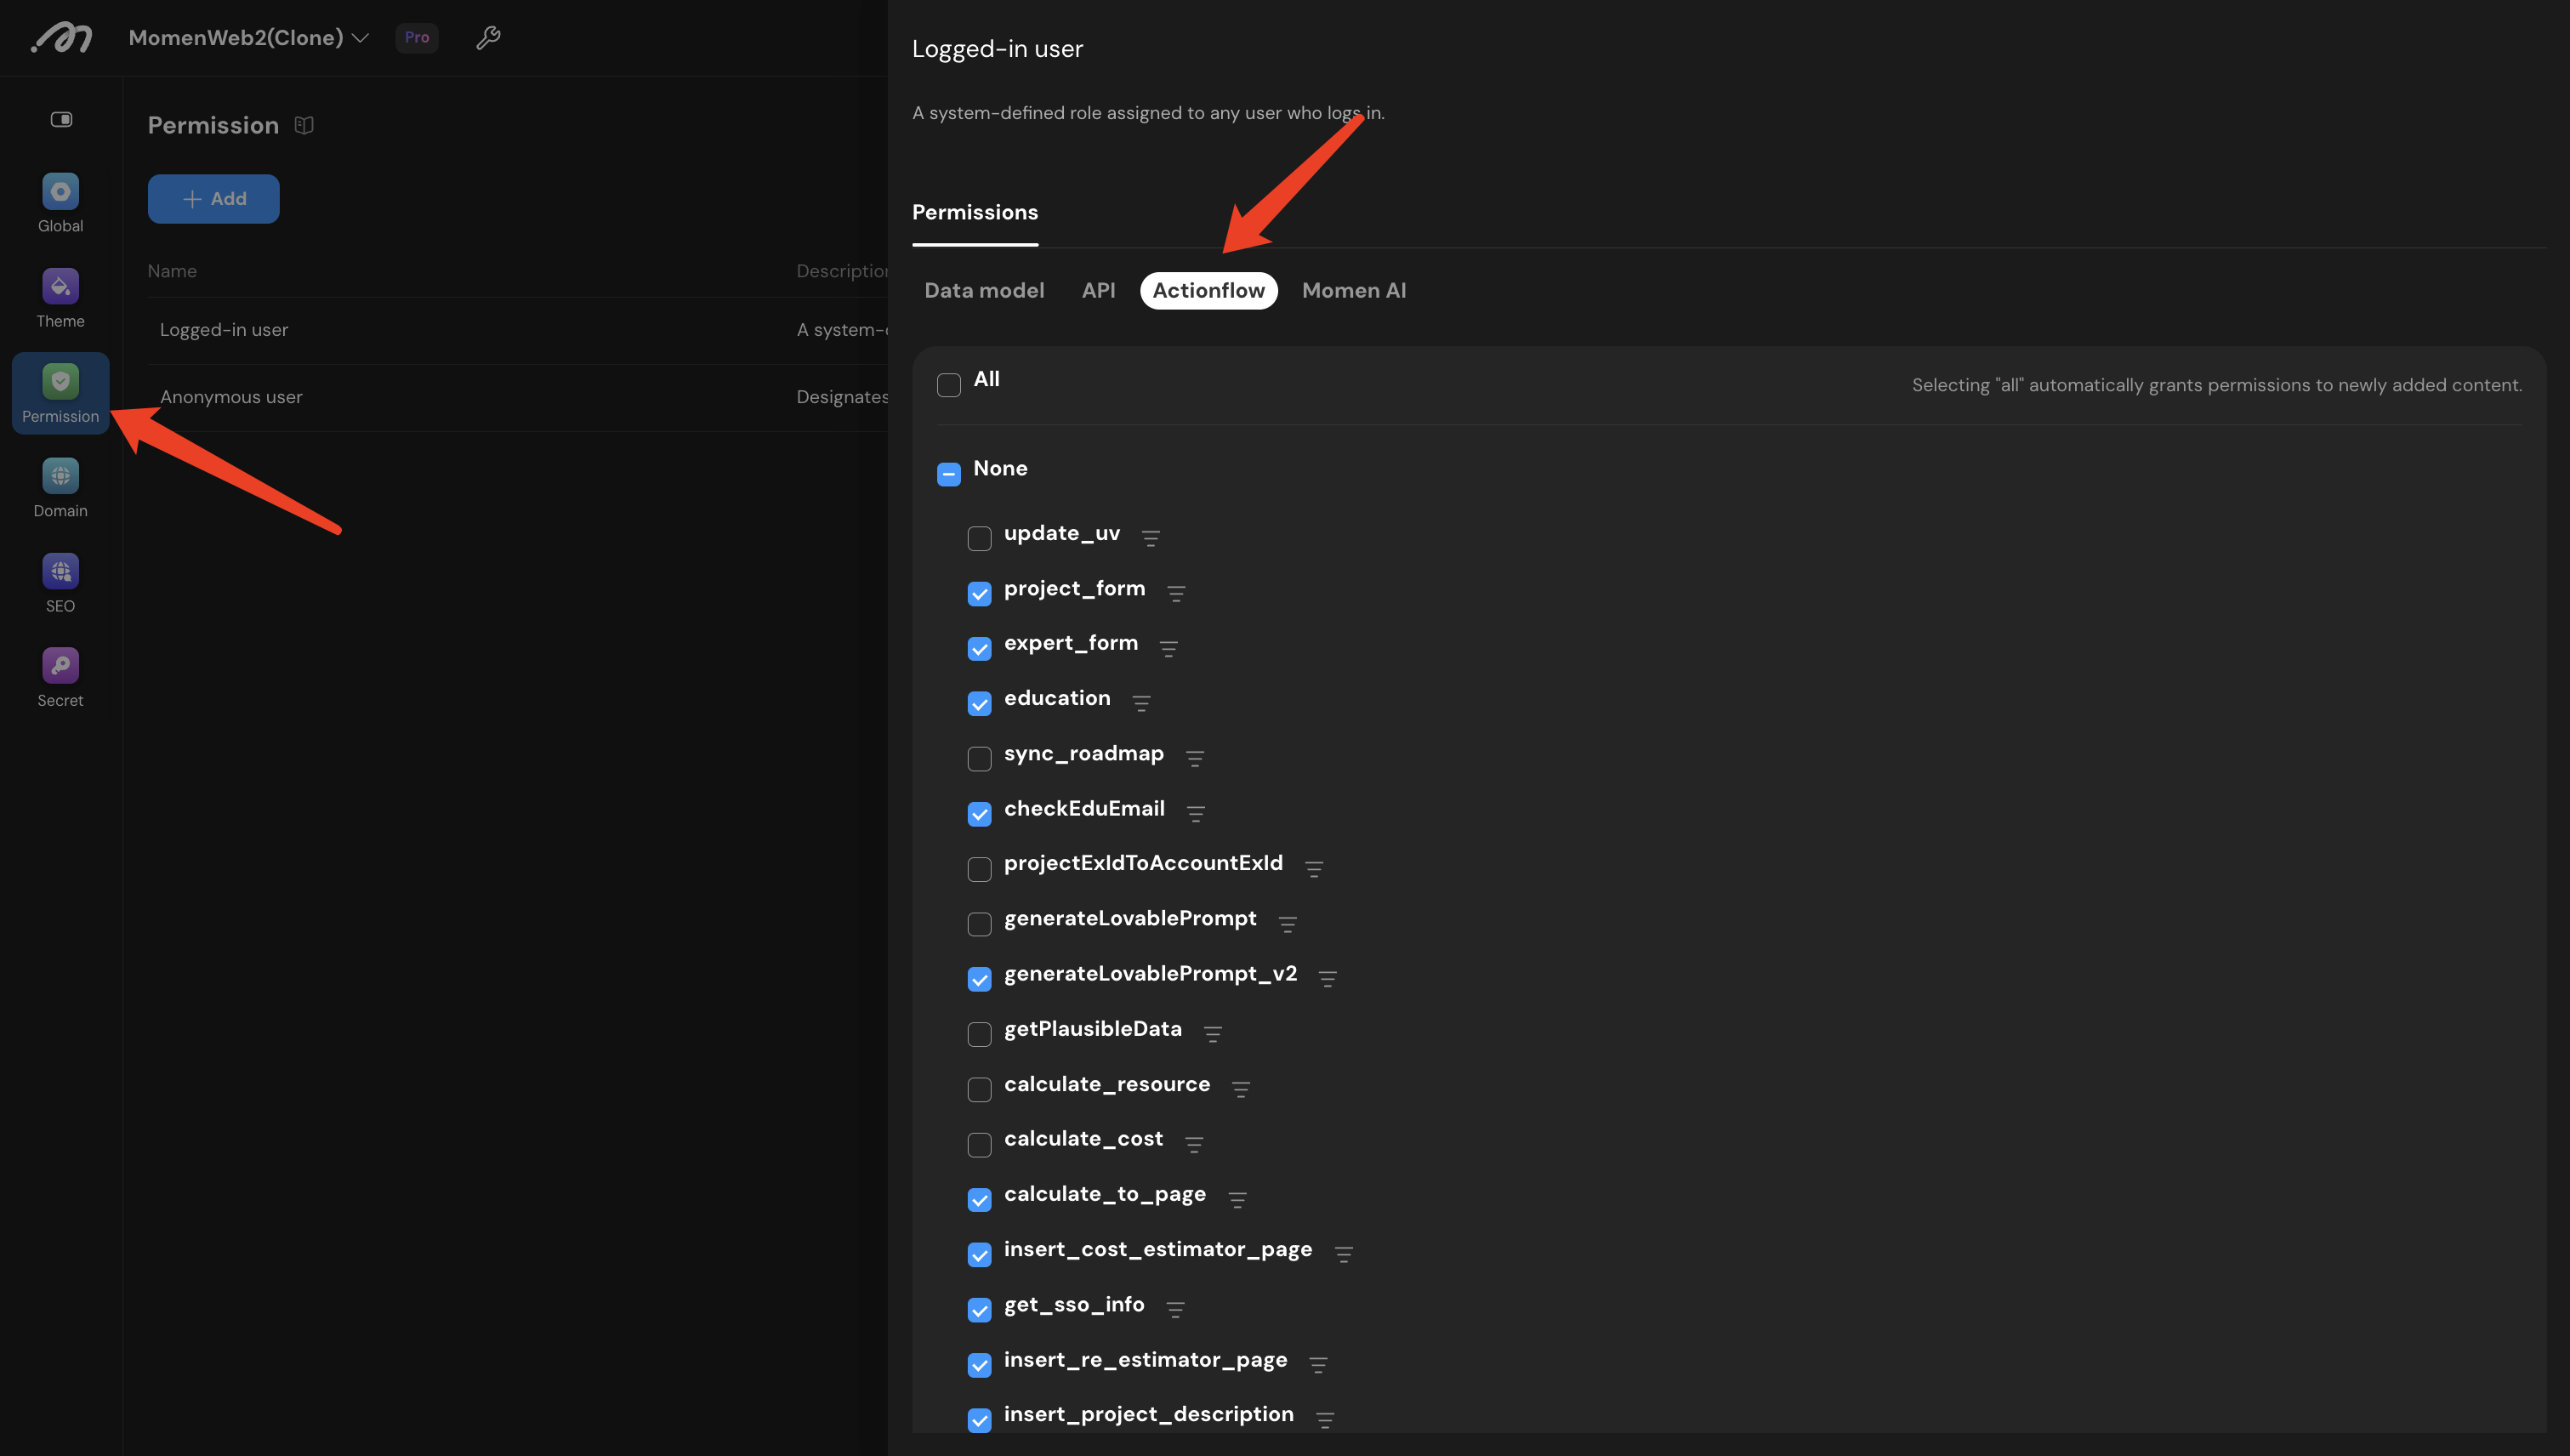
Under Settings → Permissions, select which roles may call the Actionflow.
Permissions apply to:
- Calls made by a frontend Call Actionflow action.
- Direct calls made through the Runtime API.
Permissions do not block Scheduled, Database change, or Webhook Triggers, or server-side calls from another Actionflow.
Publish changes
Actionflow edits are saved automatically. Both operations below publish the latest Actionflow configuration:
- Update preview: Refreshes the frontend preview and publishes Actionflow, API, AI Agent, and other backend configurations.
- Sync changes: Publishes Actionflow, API, AI Agent, and other backend configurations without refreshing the frontend preview.
Publishing an Actionflow affects live apps immediately. A published frontend calling that Actionflow will execute its latest published configuration. Review the impact on both preview and live apps before changing an existing flow.
Call an Actionflow
An Actionflow can be called in the following ways:
- Trigger: Configure a Scheduled, Database change, or Webhook Trigger. One Actionflow can have multiple Triggers.
- Page or component: Add a Call Actionflow action under a Trigger, choose the Actionflow, and bind its inputs.
- Another Actionflow: Add a Call Actionflow node, choose the Actionflow, and bind its inputs. Later nodes can read the outputs returned by that node.
- Runtime API: Call an Actionflow or retrieve asynchronous task results in code. See Runtime API Reference — Actionflows.
When called from a page or component, the action enters On success after the Actionflow completes and On failure if execution fails. Under On success, read Actionflow outputs from:
Context → Action results → Call Actionflow → Field name
View runtime logs
Open Project details → Runtime logs to inspect execution status, node inputs and outputs, and errors. Filter by Actionflow ID to locate a specific flow.
Execution modes and transactions
Synchronous execution
A synchronous Actionflow waits for its execution result. Only database-operation nodes participate in the database transaction:
- If the Actionflow succeeds, database changes in the transaction commit together.
- If the Actionflow fails, database changes already completed in that transaction roll back together.
- API, AI, payment, file, and other external operations are outside the database transaction. Their side effects are not rolled back automatically.
When a flow interacts with external systems, design for idempotency, retries, or compensation instead of relying on a database rollback to reverse external side effects.
Asynchronous execution
An asynchronous Actionflow runs in the background and does not provide one transaction across all database nodes.
In the editor, later actions or nodes continue after the Actionflow completes. Code clients can use the Runtime API to retrieve or subscribe to asynchronous task results.
AI Agent nodes run only in asynchronous Actionflows. Reaching an AI Agent node in a synchronous run — or in the Actionflow debugger — fails with an error and stops the flow.
The node creates a conversation and suspends the flow, which is then resumed from an action-flow task once the model answers. A synchronous run and a debug run both have no such task, so there is nothing to resume.
This means the debugger cannot be used to verify an AI Agent node. To exercise one, invoke the whole Actionflow asynchronously and read the result through the Runtime API.
Timeout policy
Actionflow timeouts depend on execution mode, project plan, and node type.
By execution mode
- Synchronous: The API gateway limits how long a caller can wait to approximately 60 seconds. If that limit is reached, the client receives an error while the backend continues until the project-plan execution cap is reached.
- Asynchronous: There is no global total-duration limit. The Actionflow can continue in the background as long as its individual nodes do not time out.
Project-plan caps
For a synchronous Actionflow, the plan cap limits the total runtime. For an asynchronous Actionflow, it limits the maximum runtime of an individual node, such as a Run code node.
| Project plan | Execution cap |
|---|---|
| Free | 15 seconds |
| Basic / Pro | 10 minutes |
| Dedicated instance | No fixed cap; 10 minutes by default |
Node-level limits
Node-specific limits apply before the general cap:
| Node or scenario | Timeout |
|---|---|
| AI Agent node | 10 minutes on every plan |
| Payment callback | 5 minutes |
| API node | 60 seconds from request start until the full response is received |
| Database node | Connection queue waits are usually limited to about 5 seconds; SQL execution is ultimately bounded by the project-plan cap |
A synchronous Actionflow may continue on the server after the frontend has entered On failure because of the gateway timeout. Do not rely on a synchronous result that takes longer than the gateway wait limit; use asynchronous execution for long-running work.