Password Strength Meter
Demo Project
https://editor.momen.app/tool/MGAZXjej0RA/WEB?code=2V7MQ6BqJZ0ob
Introduction
- Goal: Show users how strong their password is while they type, with a live indicator and a checklist of the rules they have already met.
- Use Cases: Sign-up forms, password reset flows, and account security settings.
- Core Logic: A page variable holds a strength score. On every keystroke, an Actionflow resets the score to
0and runs fiveREGEX_MATCHchecks in sequence, adding 1 for each rule met. Conditional Views read that score to render the indicator.
This indicator is a display component: it tells users how strong their password is but does not block a weak one. If you also need to enforce a minimum, add the same REGEX_MATCH checks to your sign-up Actionflow.
Steps
This tutorial uses pre-styled layout blocks from the “Common UI Presets ” template page to speed up the visual setup. Those presets only carry basic styling and typography — no conditional logic, data bindings, or Actionflows. When building your own app, copy the elements from that template page to skip manual styling and focus on the logic.
Page Setup
Create two pages so you can compare the two layout approaches side by side:
- Page 1 — the whole indicator lives in one Conditional View, with one state per strength level.
- Page 2 — the text and each bar get their own Conditional View.
On Page 1, add a Text input component for the password and rename it Password Input. Every formula in this tutorial binds to Password Input / Value, so the name has to match.
Page Variable Definition
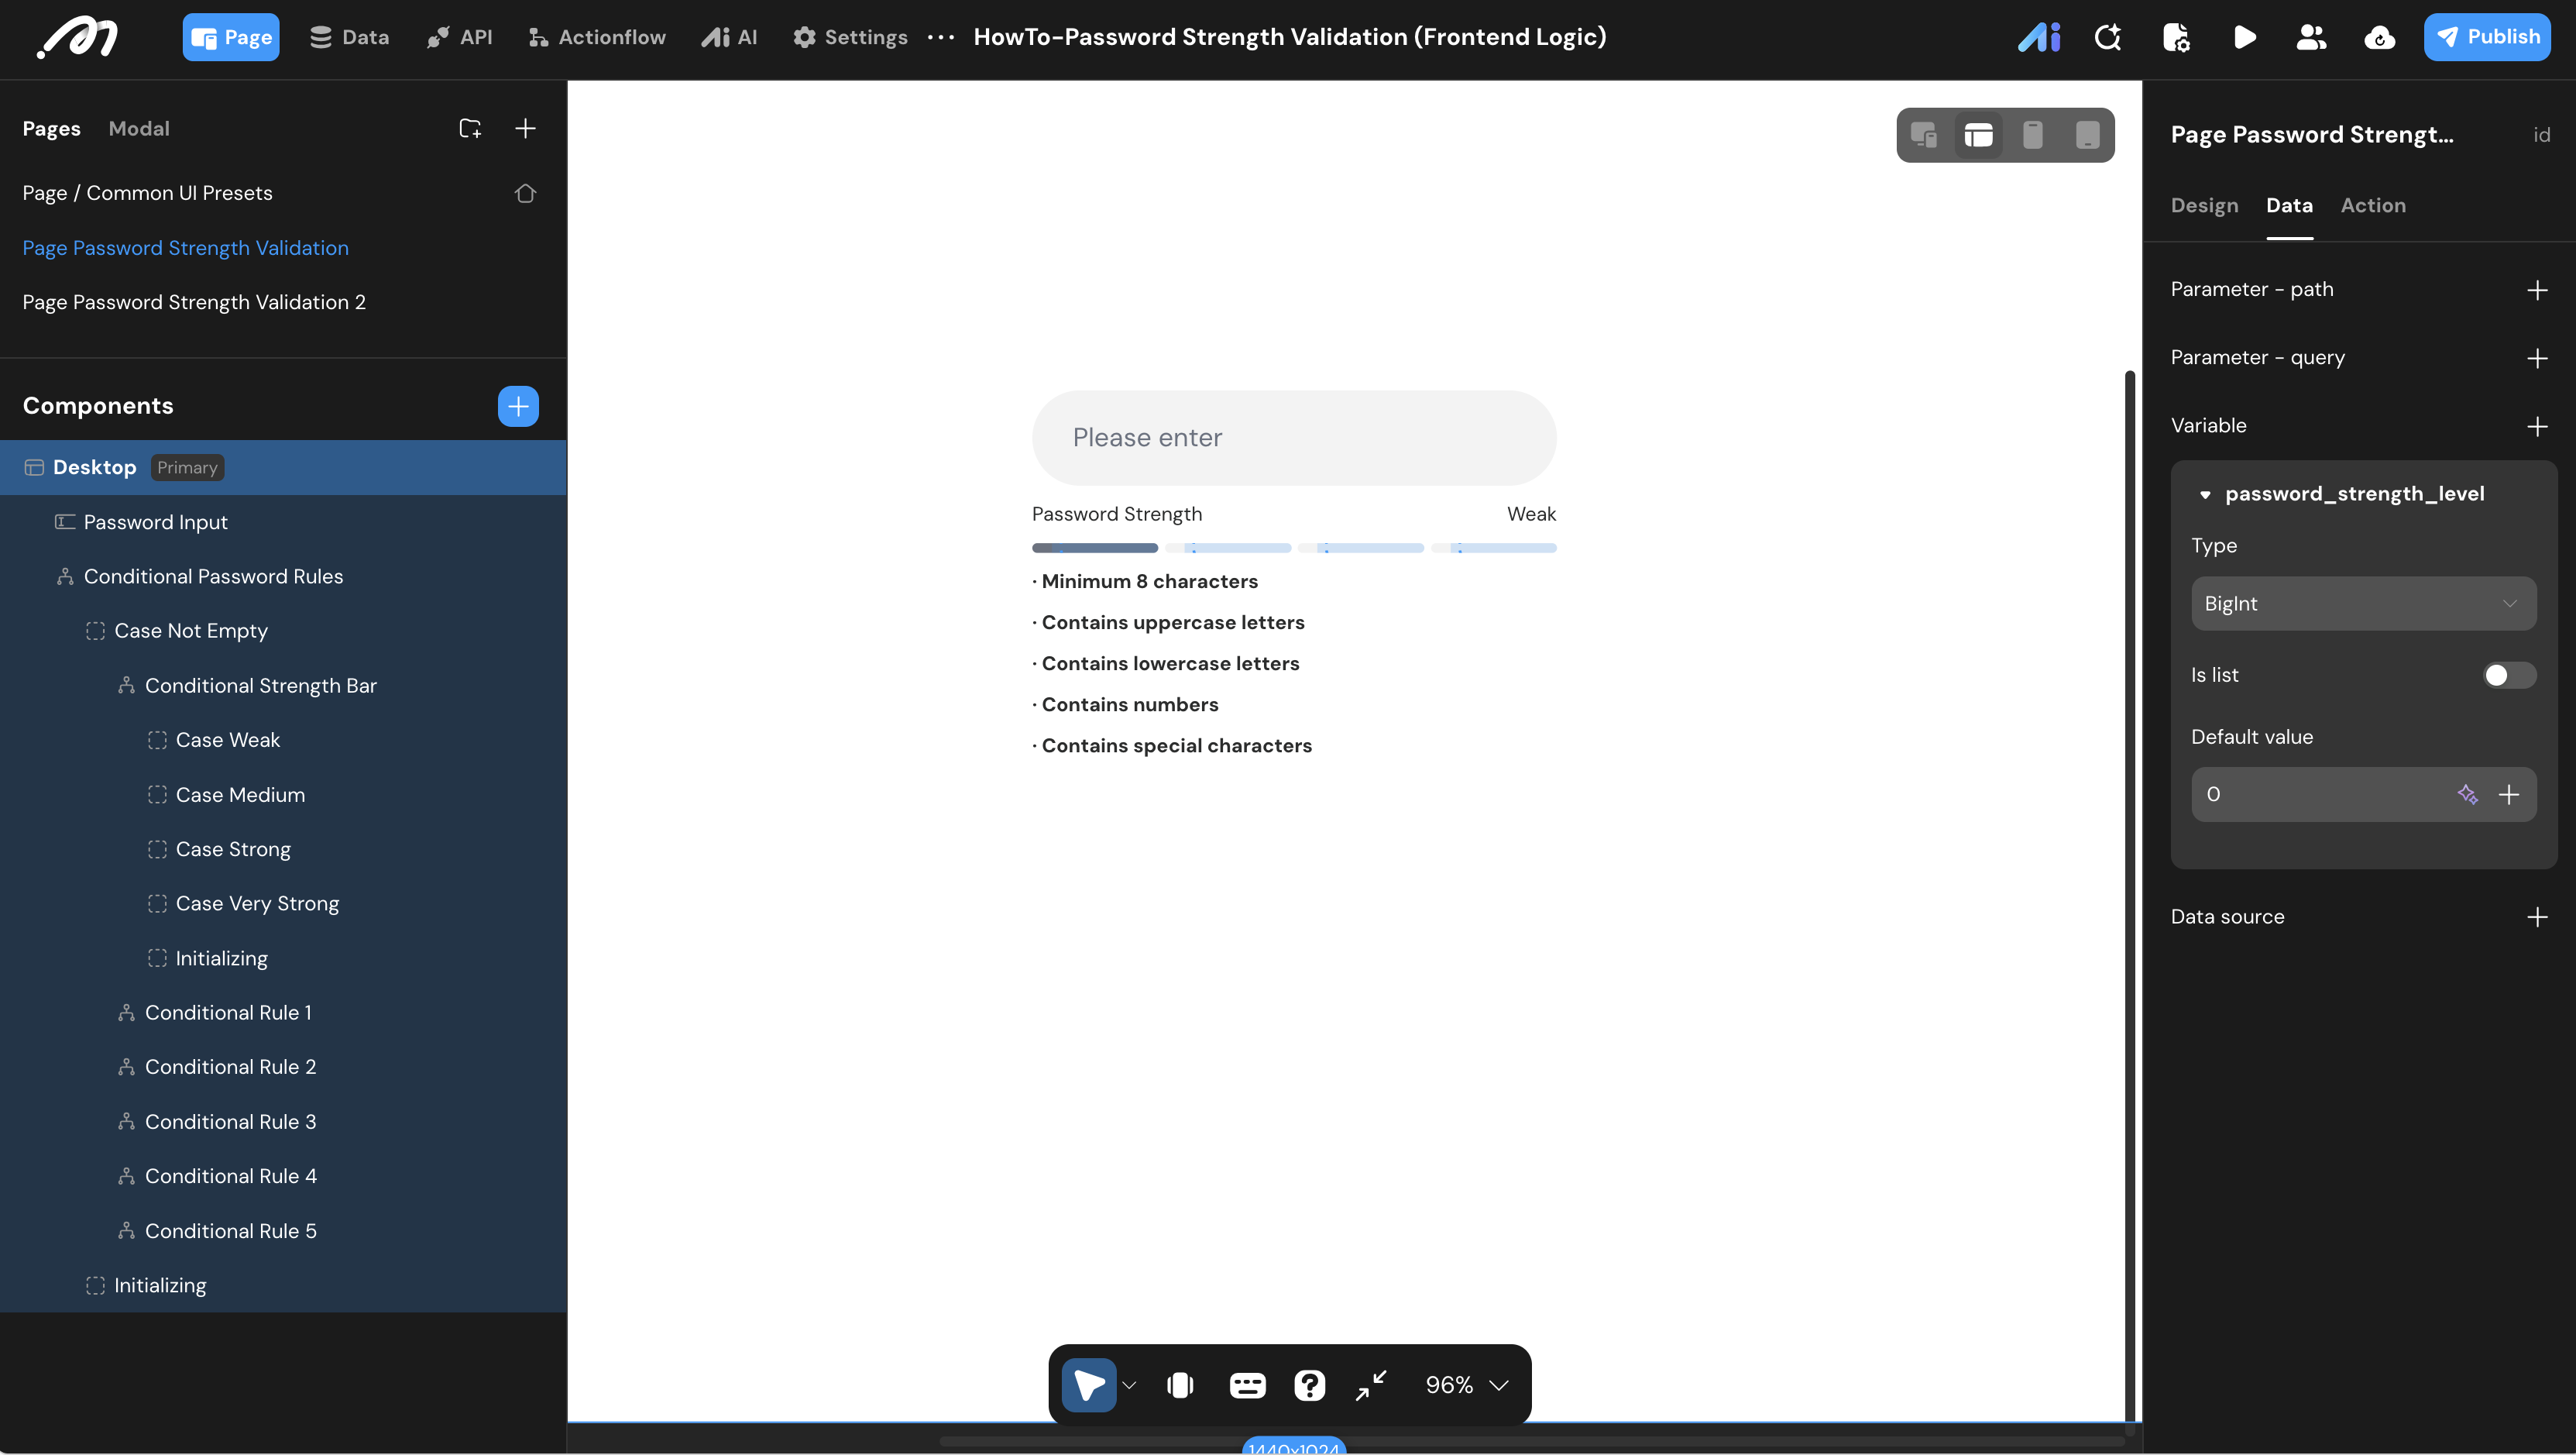
- Go to the Pages tab, select the current page, and switch to the Data tab in the right sidebar.
- Create a page variable to hold the score.
- Variable Name:
password_strength_level - Type:
BigInt - Default Value:
0
- Variable Name:
Input Actionflow Construction
Configure the scoring logic on the Password Input component so it recomputes on every keystroke.
- Trigger:
On change
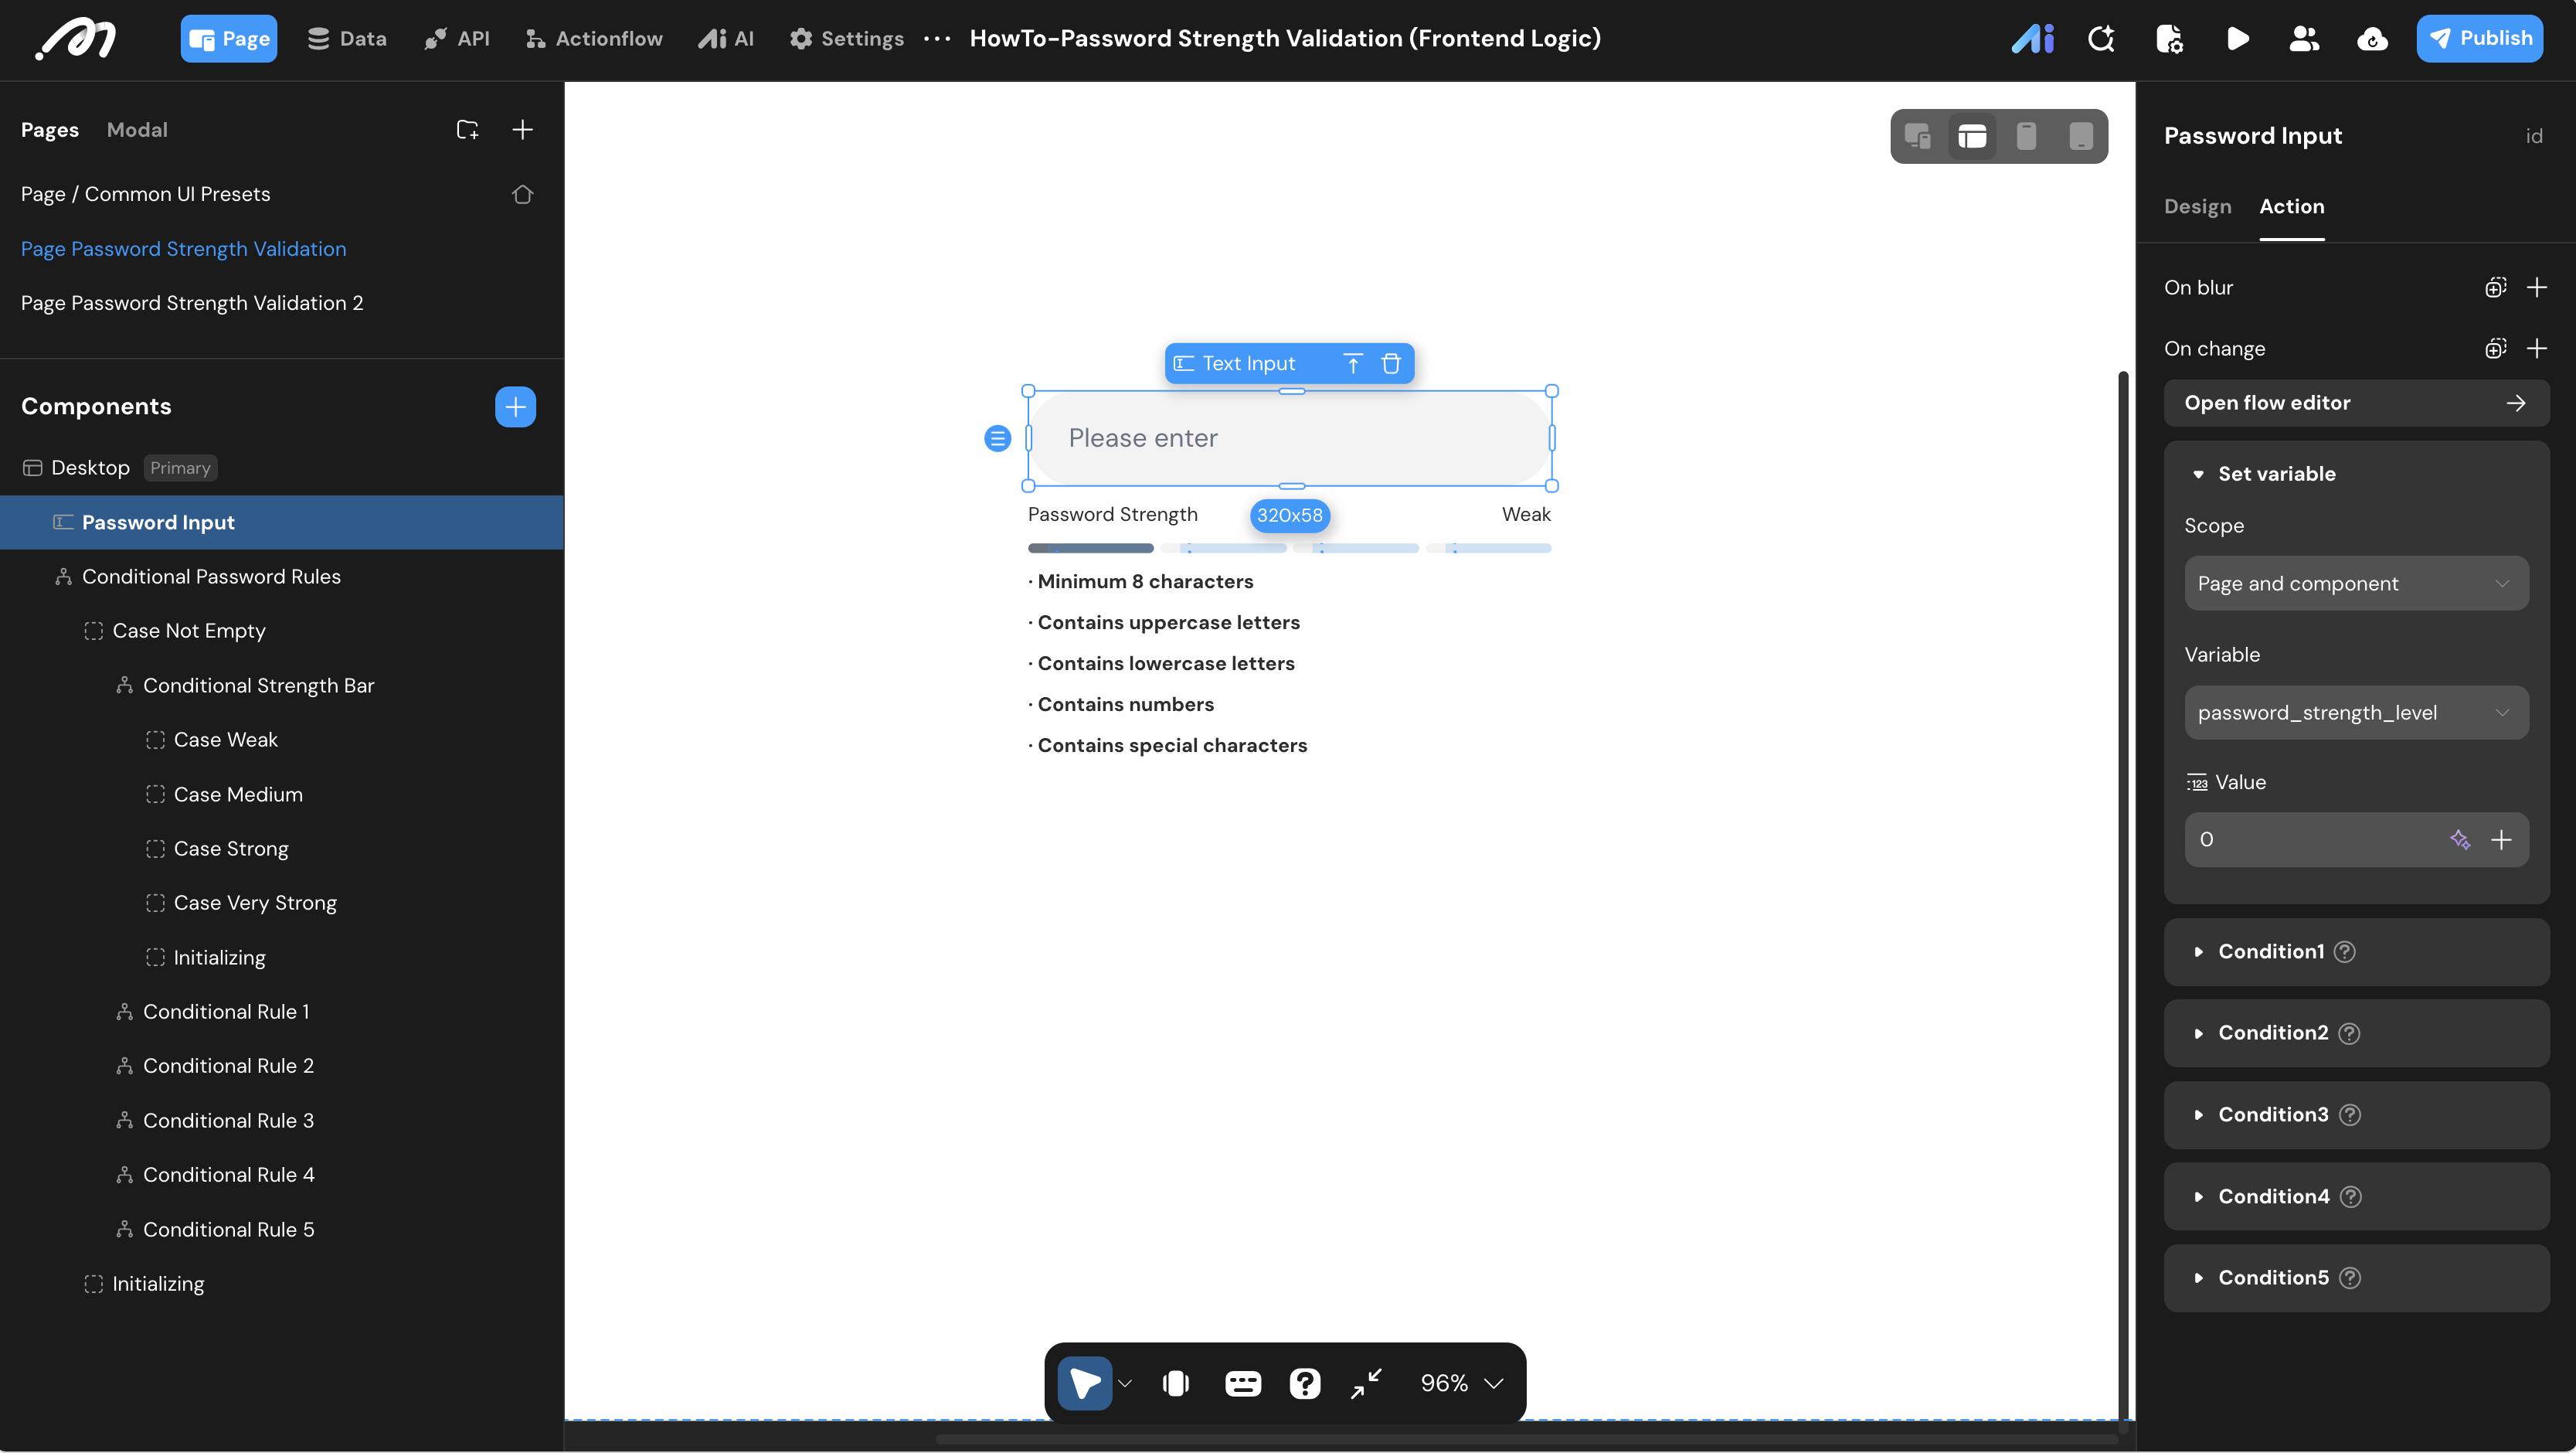
Step 1 — Reset the score
Add a Set Variable node as the first node in the flow and set password_strength_level to 0, so the score is recalculated from scratch on every change rather than accumulating.
Step 2 — Check the first rule (minimum 8 characters)
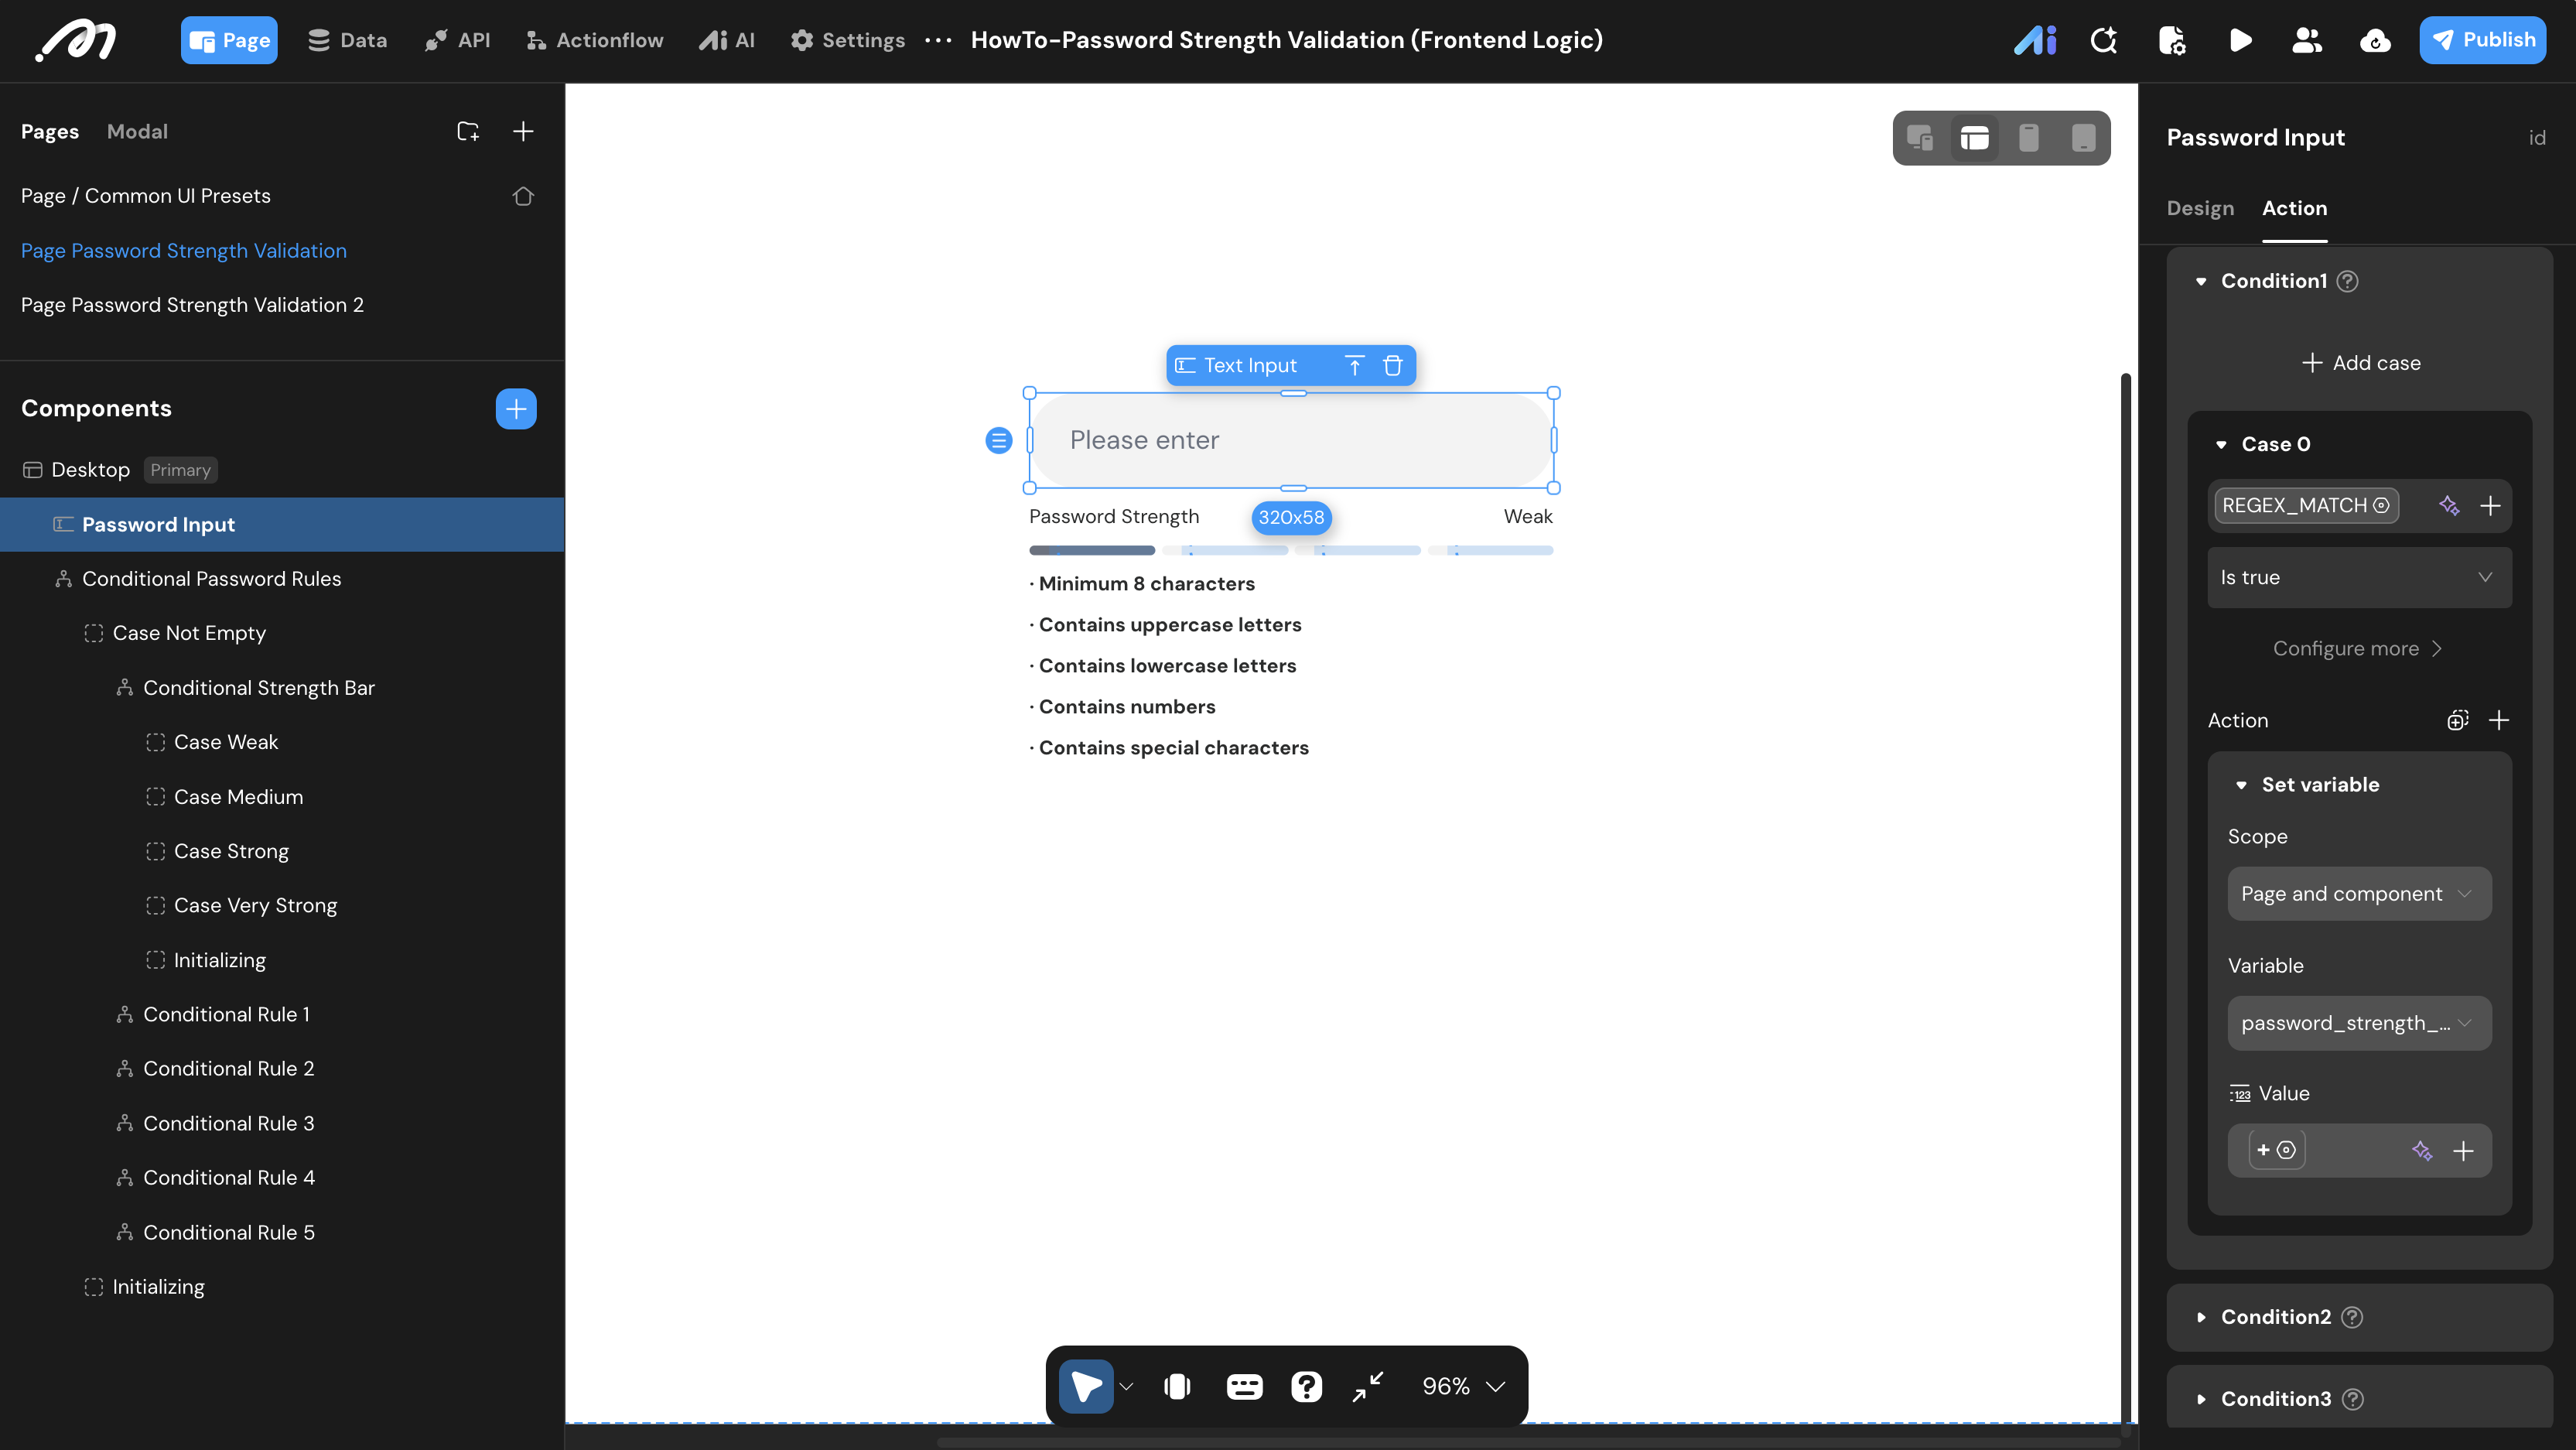
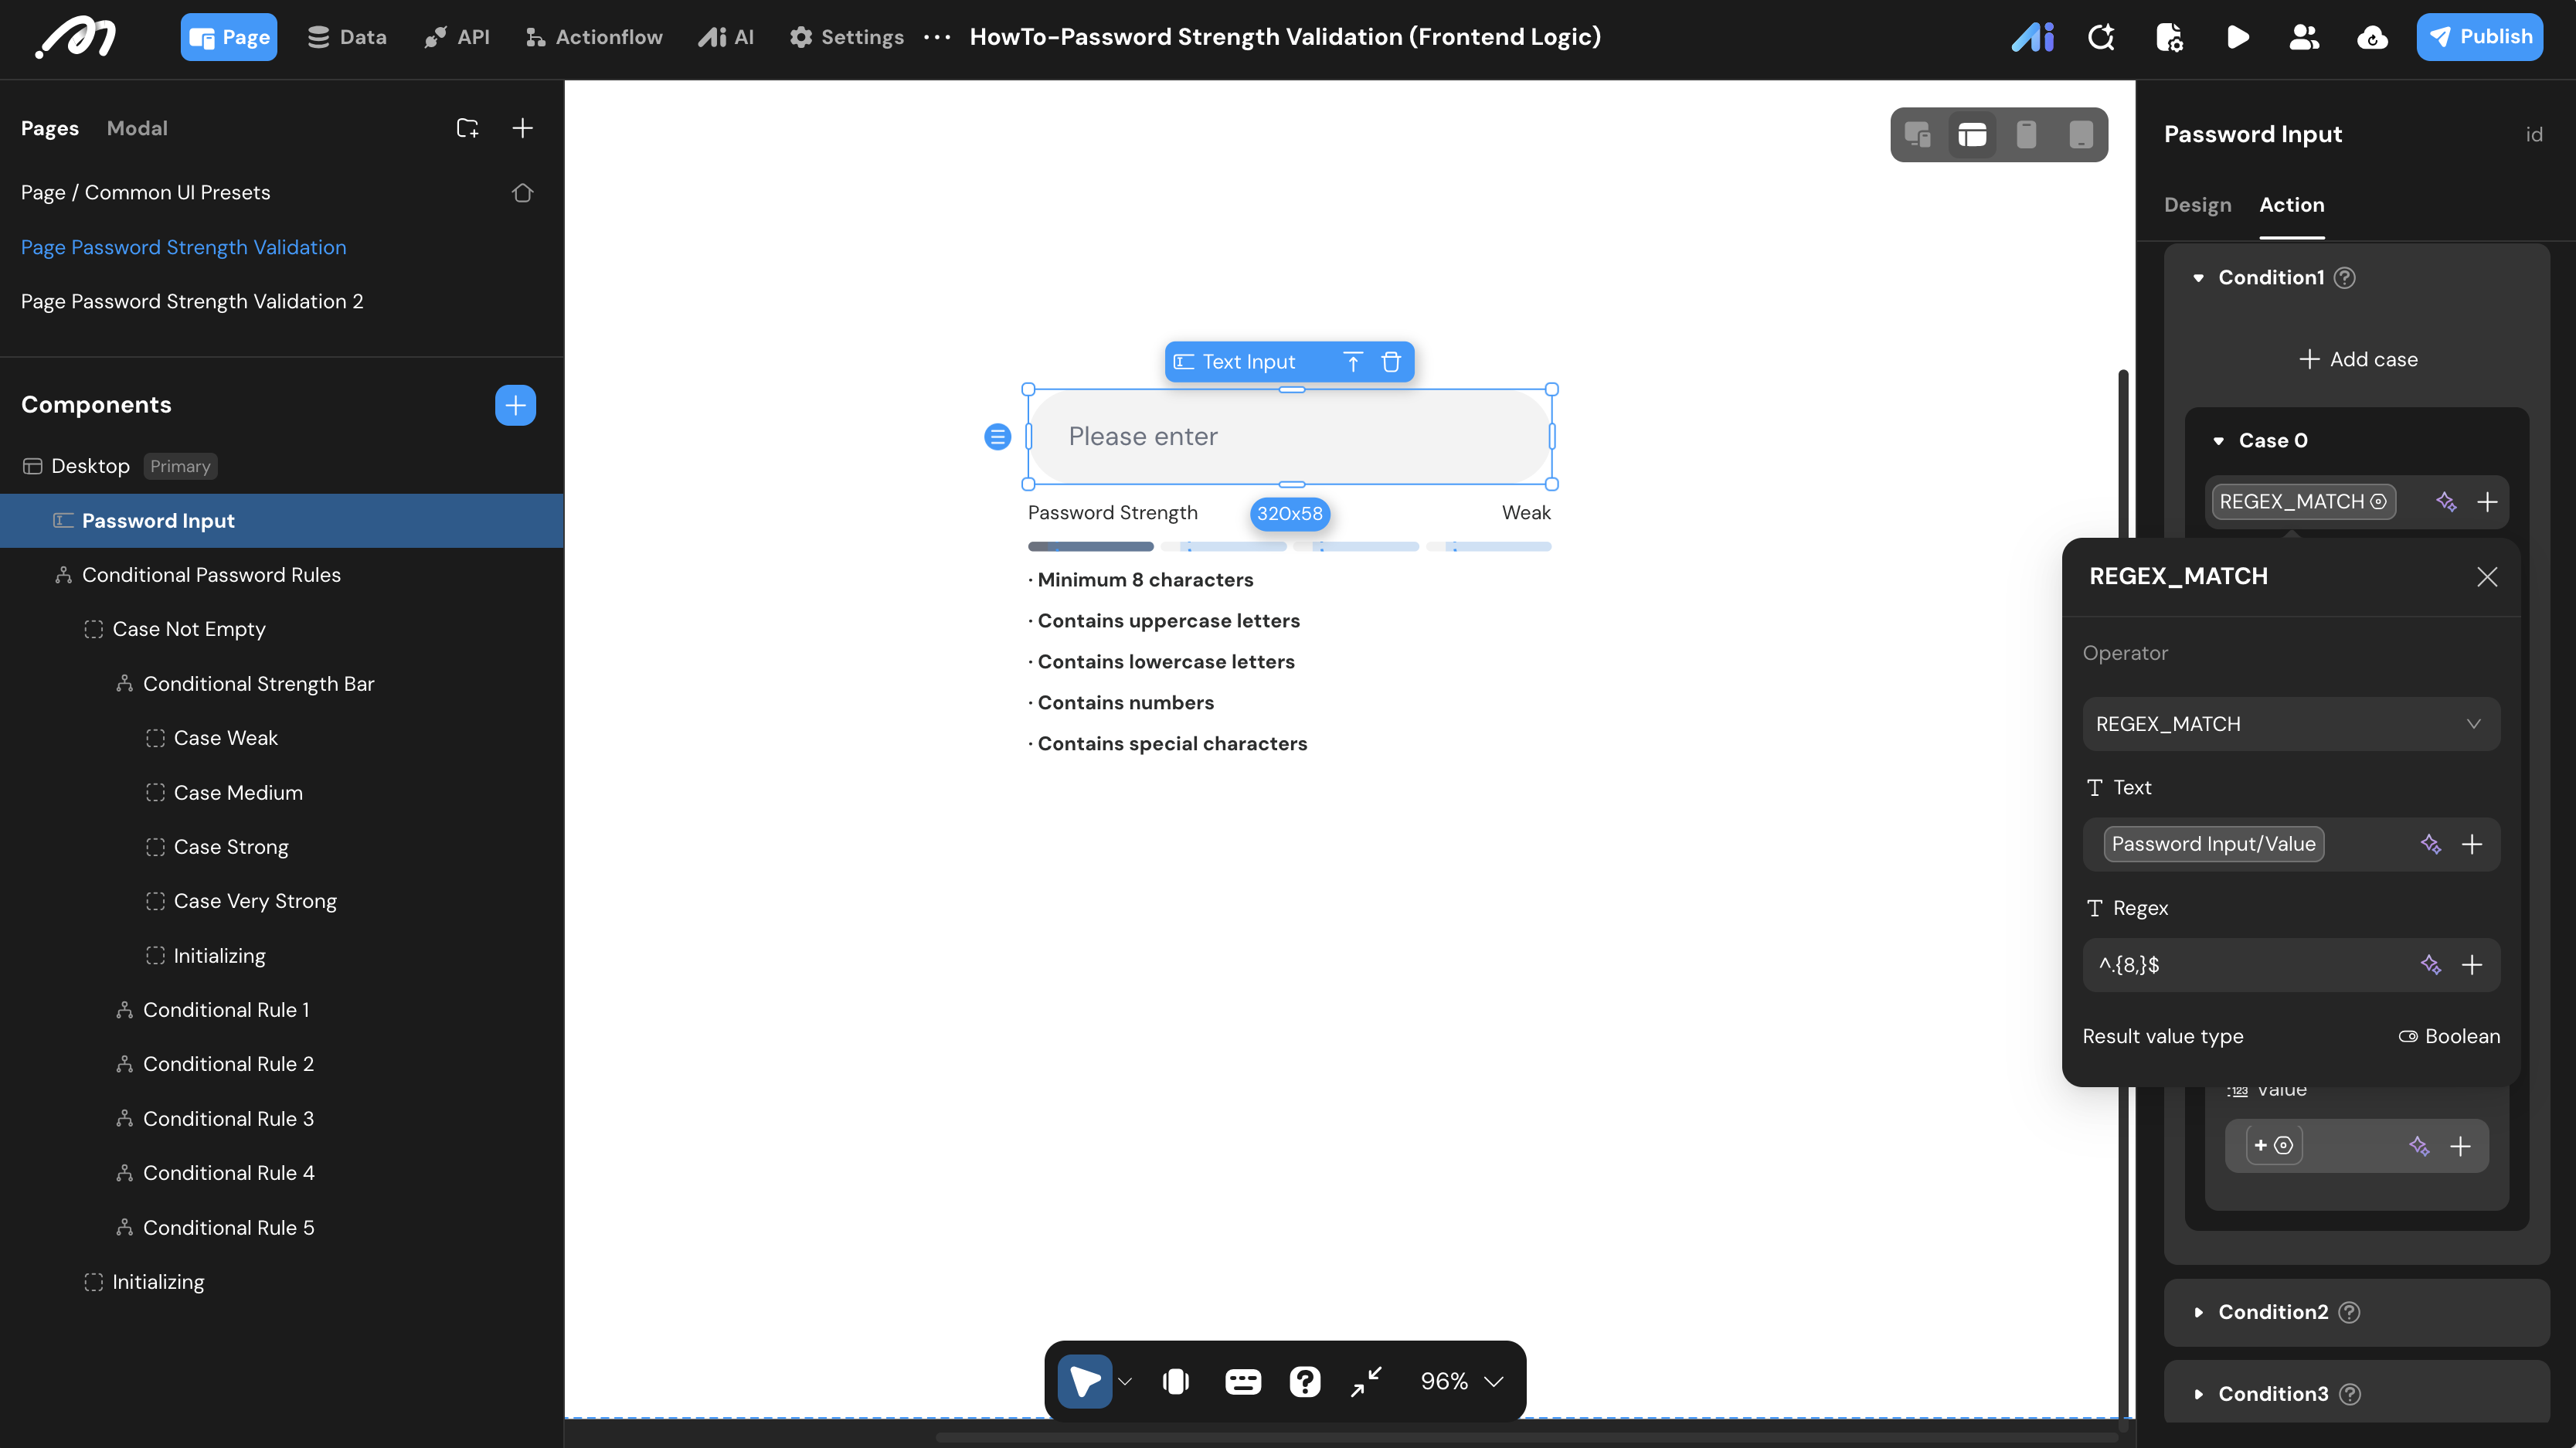
Add a Condition node:
- Formula:
REGEX_MATCH - Text:
Password Input / Value - Regex:
^.{8,}$ - Result Value Type:
Boolean
Step 3 — Increment the score on the True branch
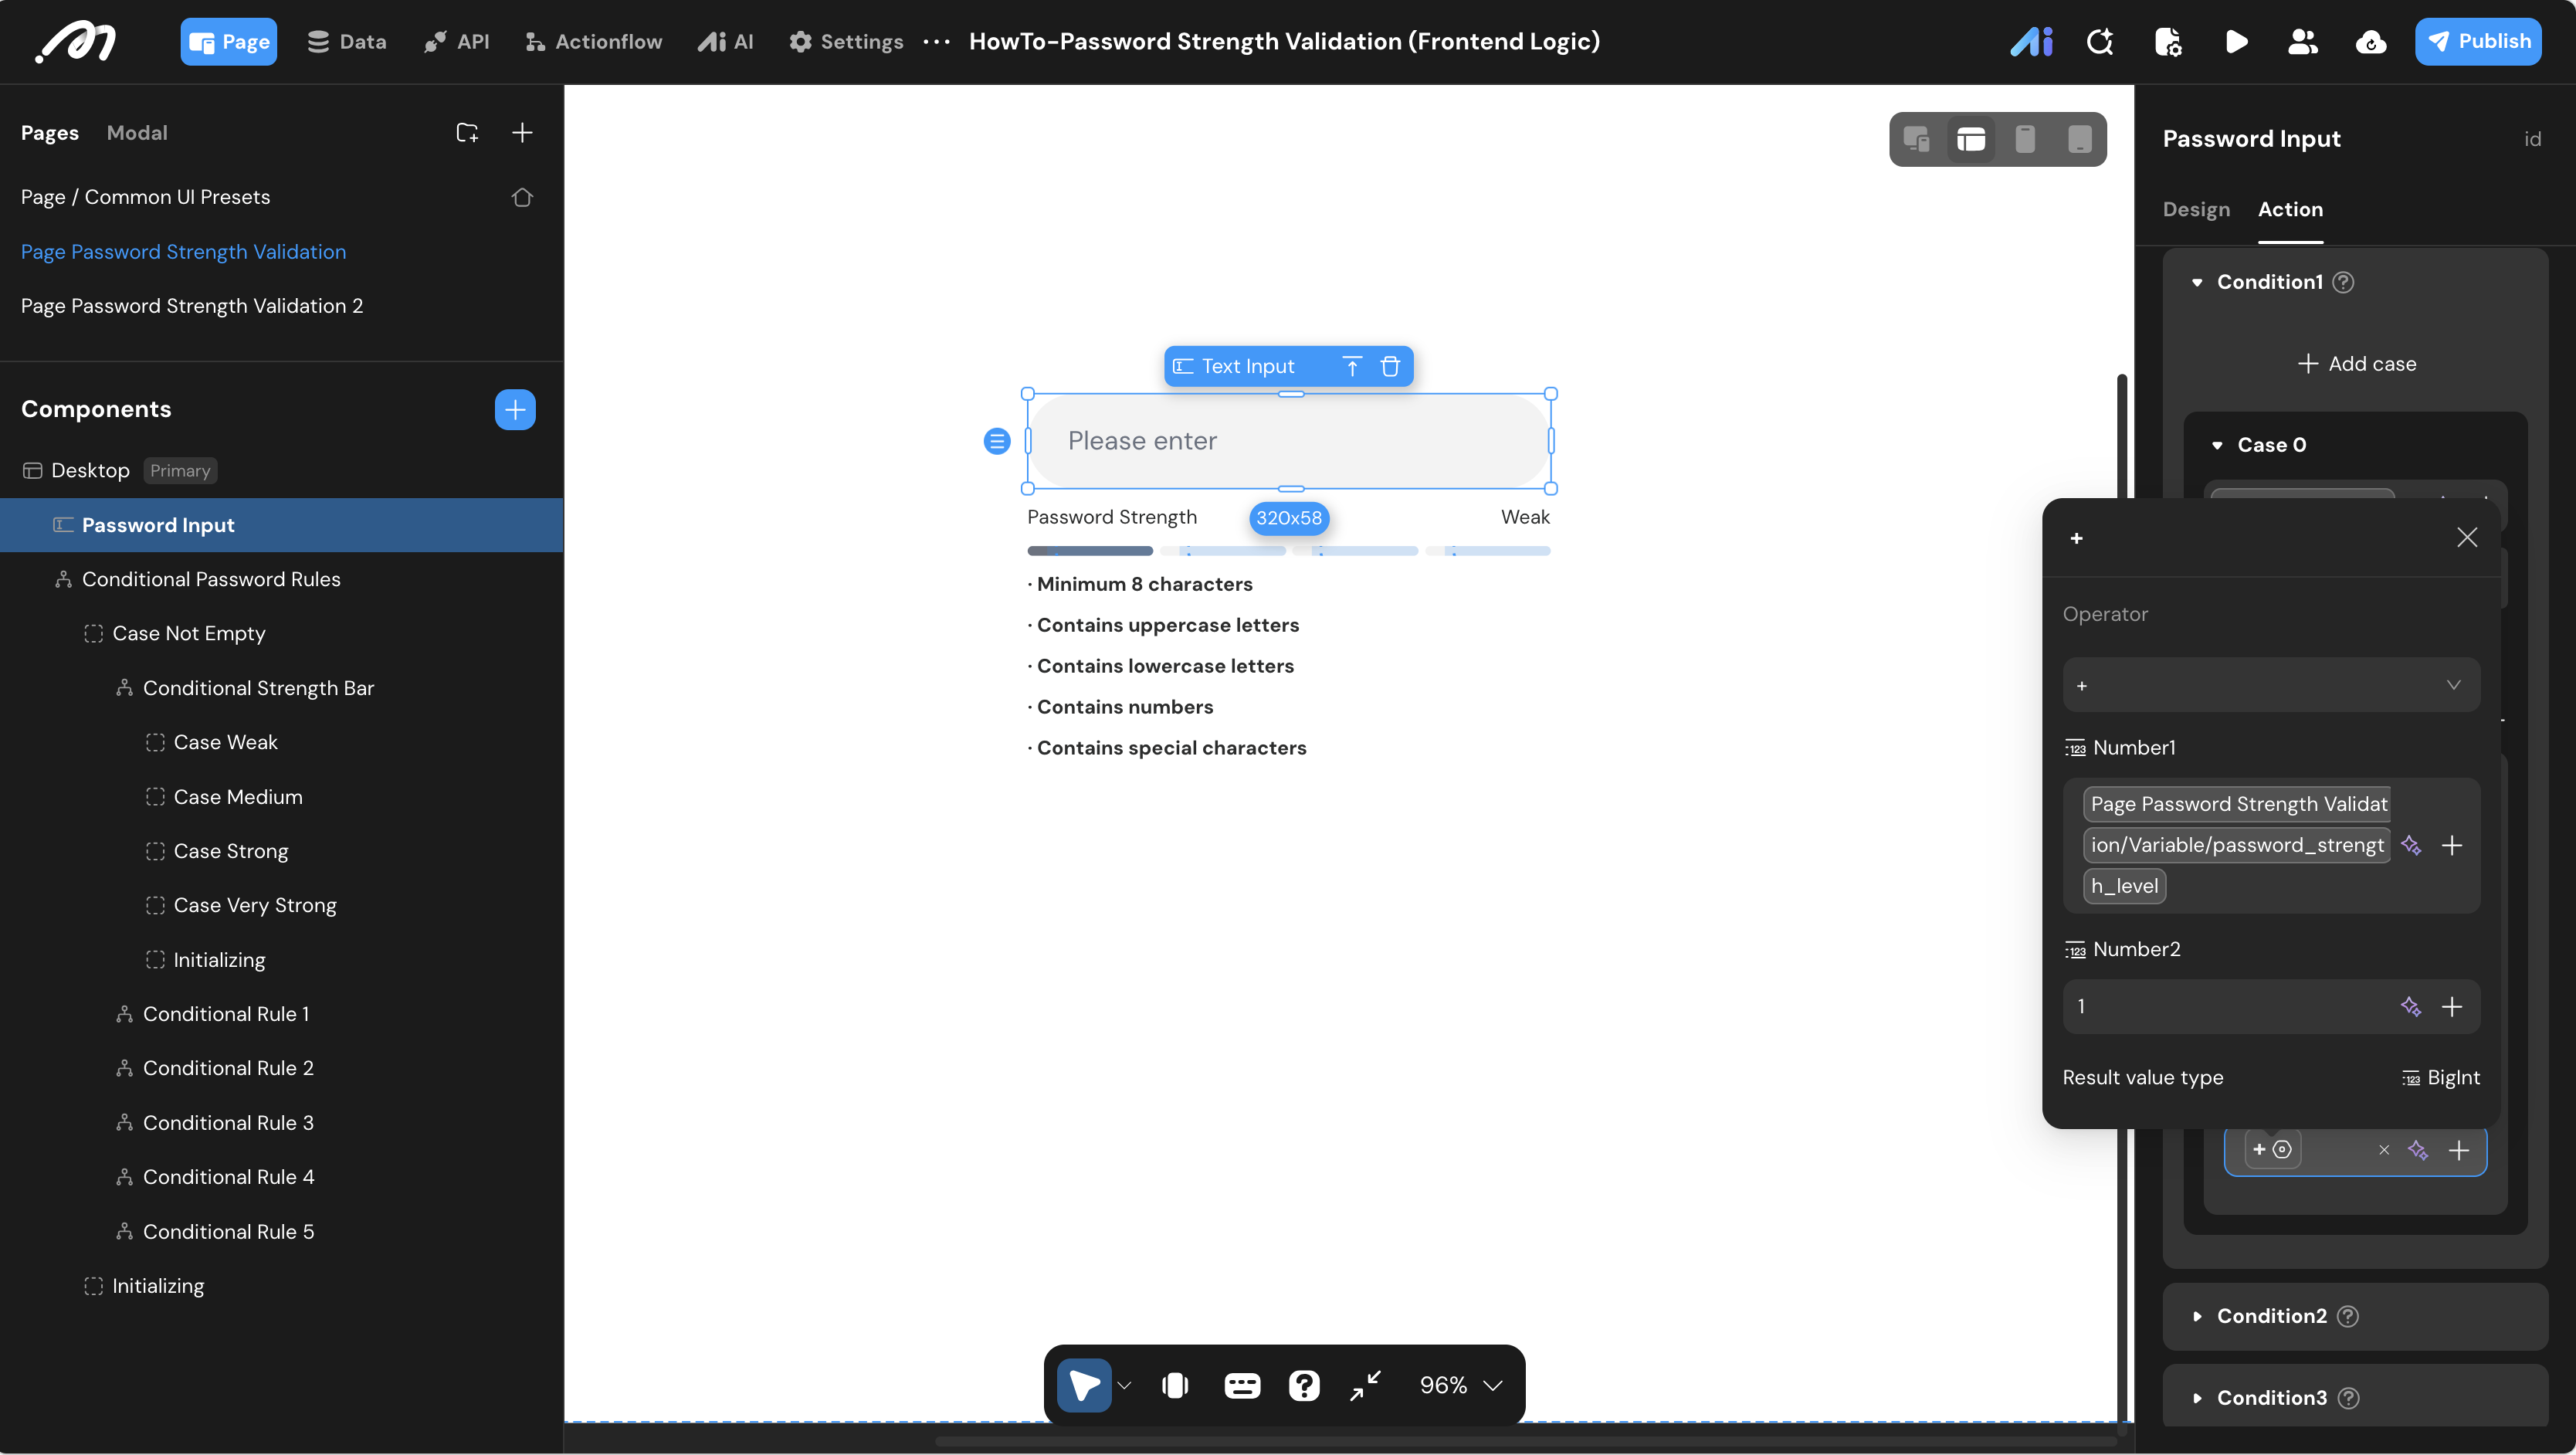
On the True branch of that condition, add a Set Variable node that increments the score by 1:
- Operator:
+ - Number 1:
password_strength_level - Number 2:
1 - Result Value Type:
BigInt
Step 4 — Add the remaining four rules
Repeat the condition + increment pair for each remaining rule:
| Rule | Regex |
|---|---|
| Contains an uppercase letter | [A-Z] |
| Contains a lowercase letter | [a-z] |
| Contains a number | [0-9] |
| Contains a special character | [^A-Za-z0-9] |
The score ranges from 0 to 5: the number of rules the current value satisfies. In practice, any non-empty value matches at least one rule, so 0 only appears while the field is empty.
UI Construction & Interaction
Master Container
So the indicator and the rule list stay hidden until the user types, wrap the whole feedback UI in an outer container.
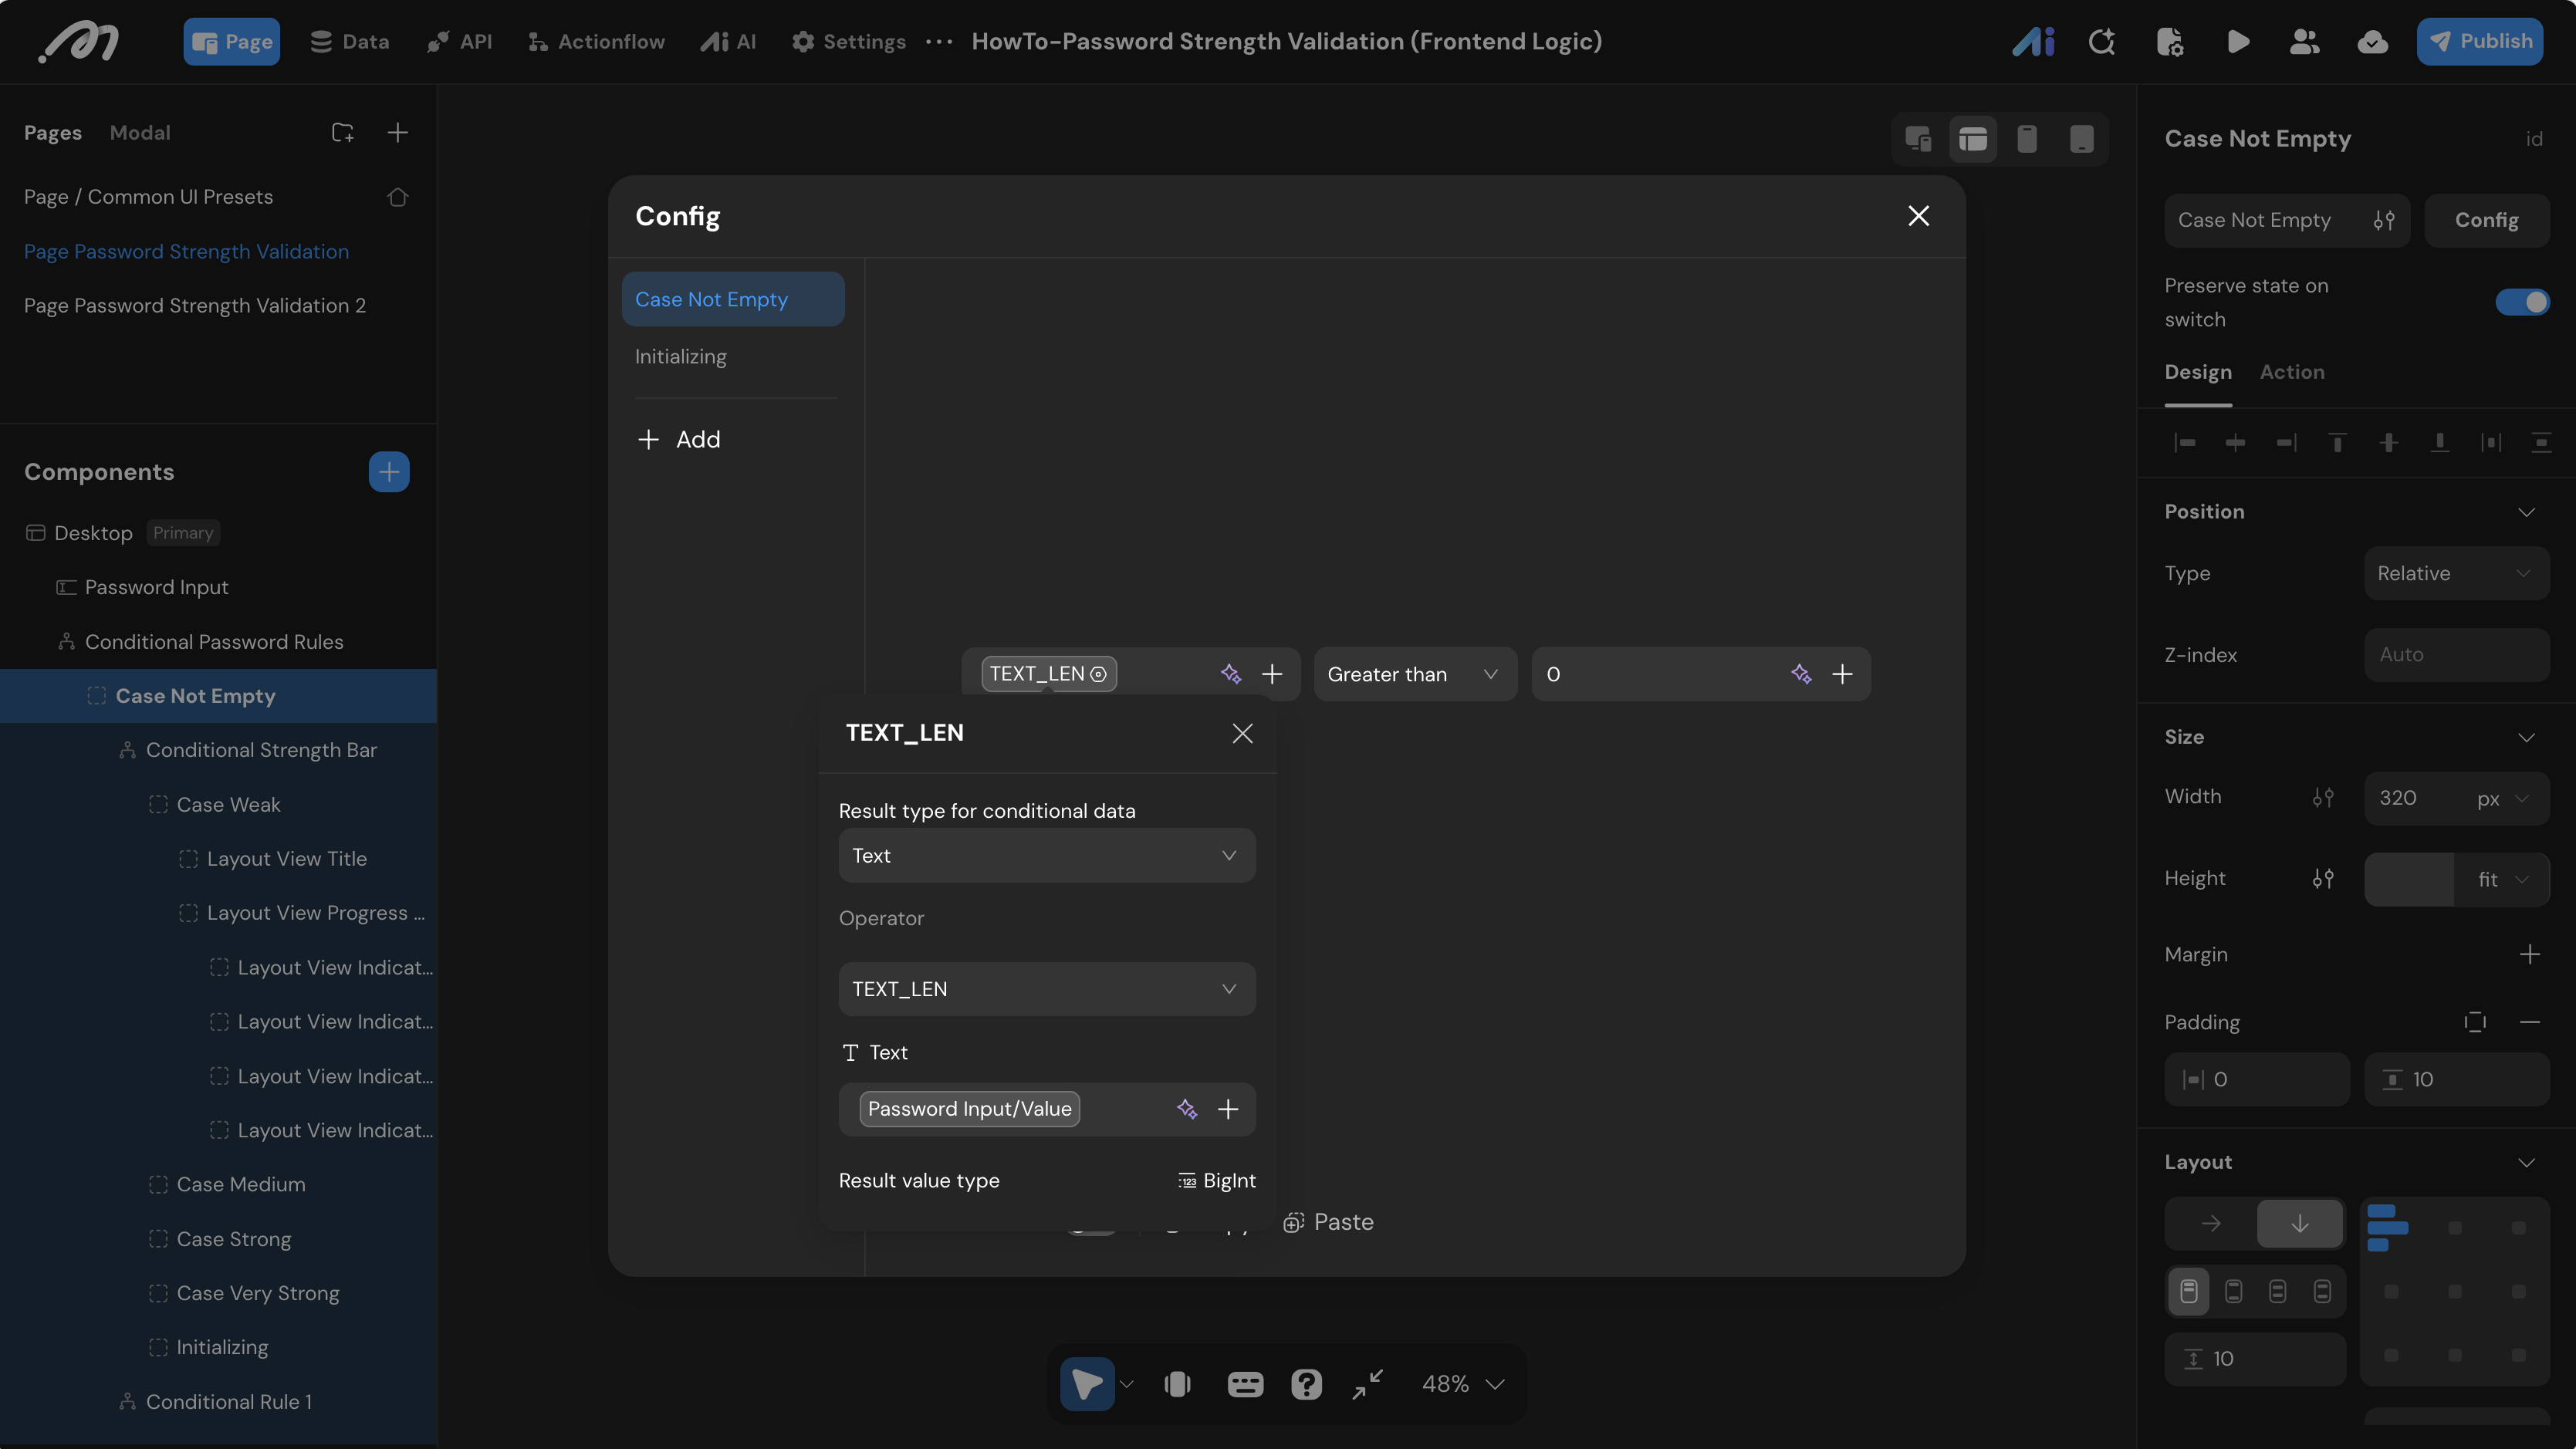
- Master Conditional View: Place a Conditional View component directly below the input field and name it
Conditional Password Rules. - Configure States: Create two states,
Case Not EmptyandInitializing. - Set Entry Condition (
Case Not Empty):- Formula:
TEXT_LEN - Text:
Password Input / Value - Operator:
Greater than0
- Formula:
The feedback UI now appears as soon as the user starts typing, and reverts to Initializing if the field is cleared.
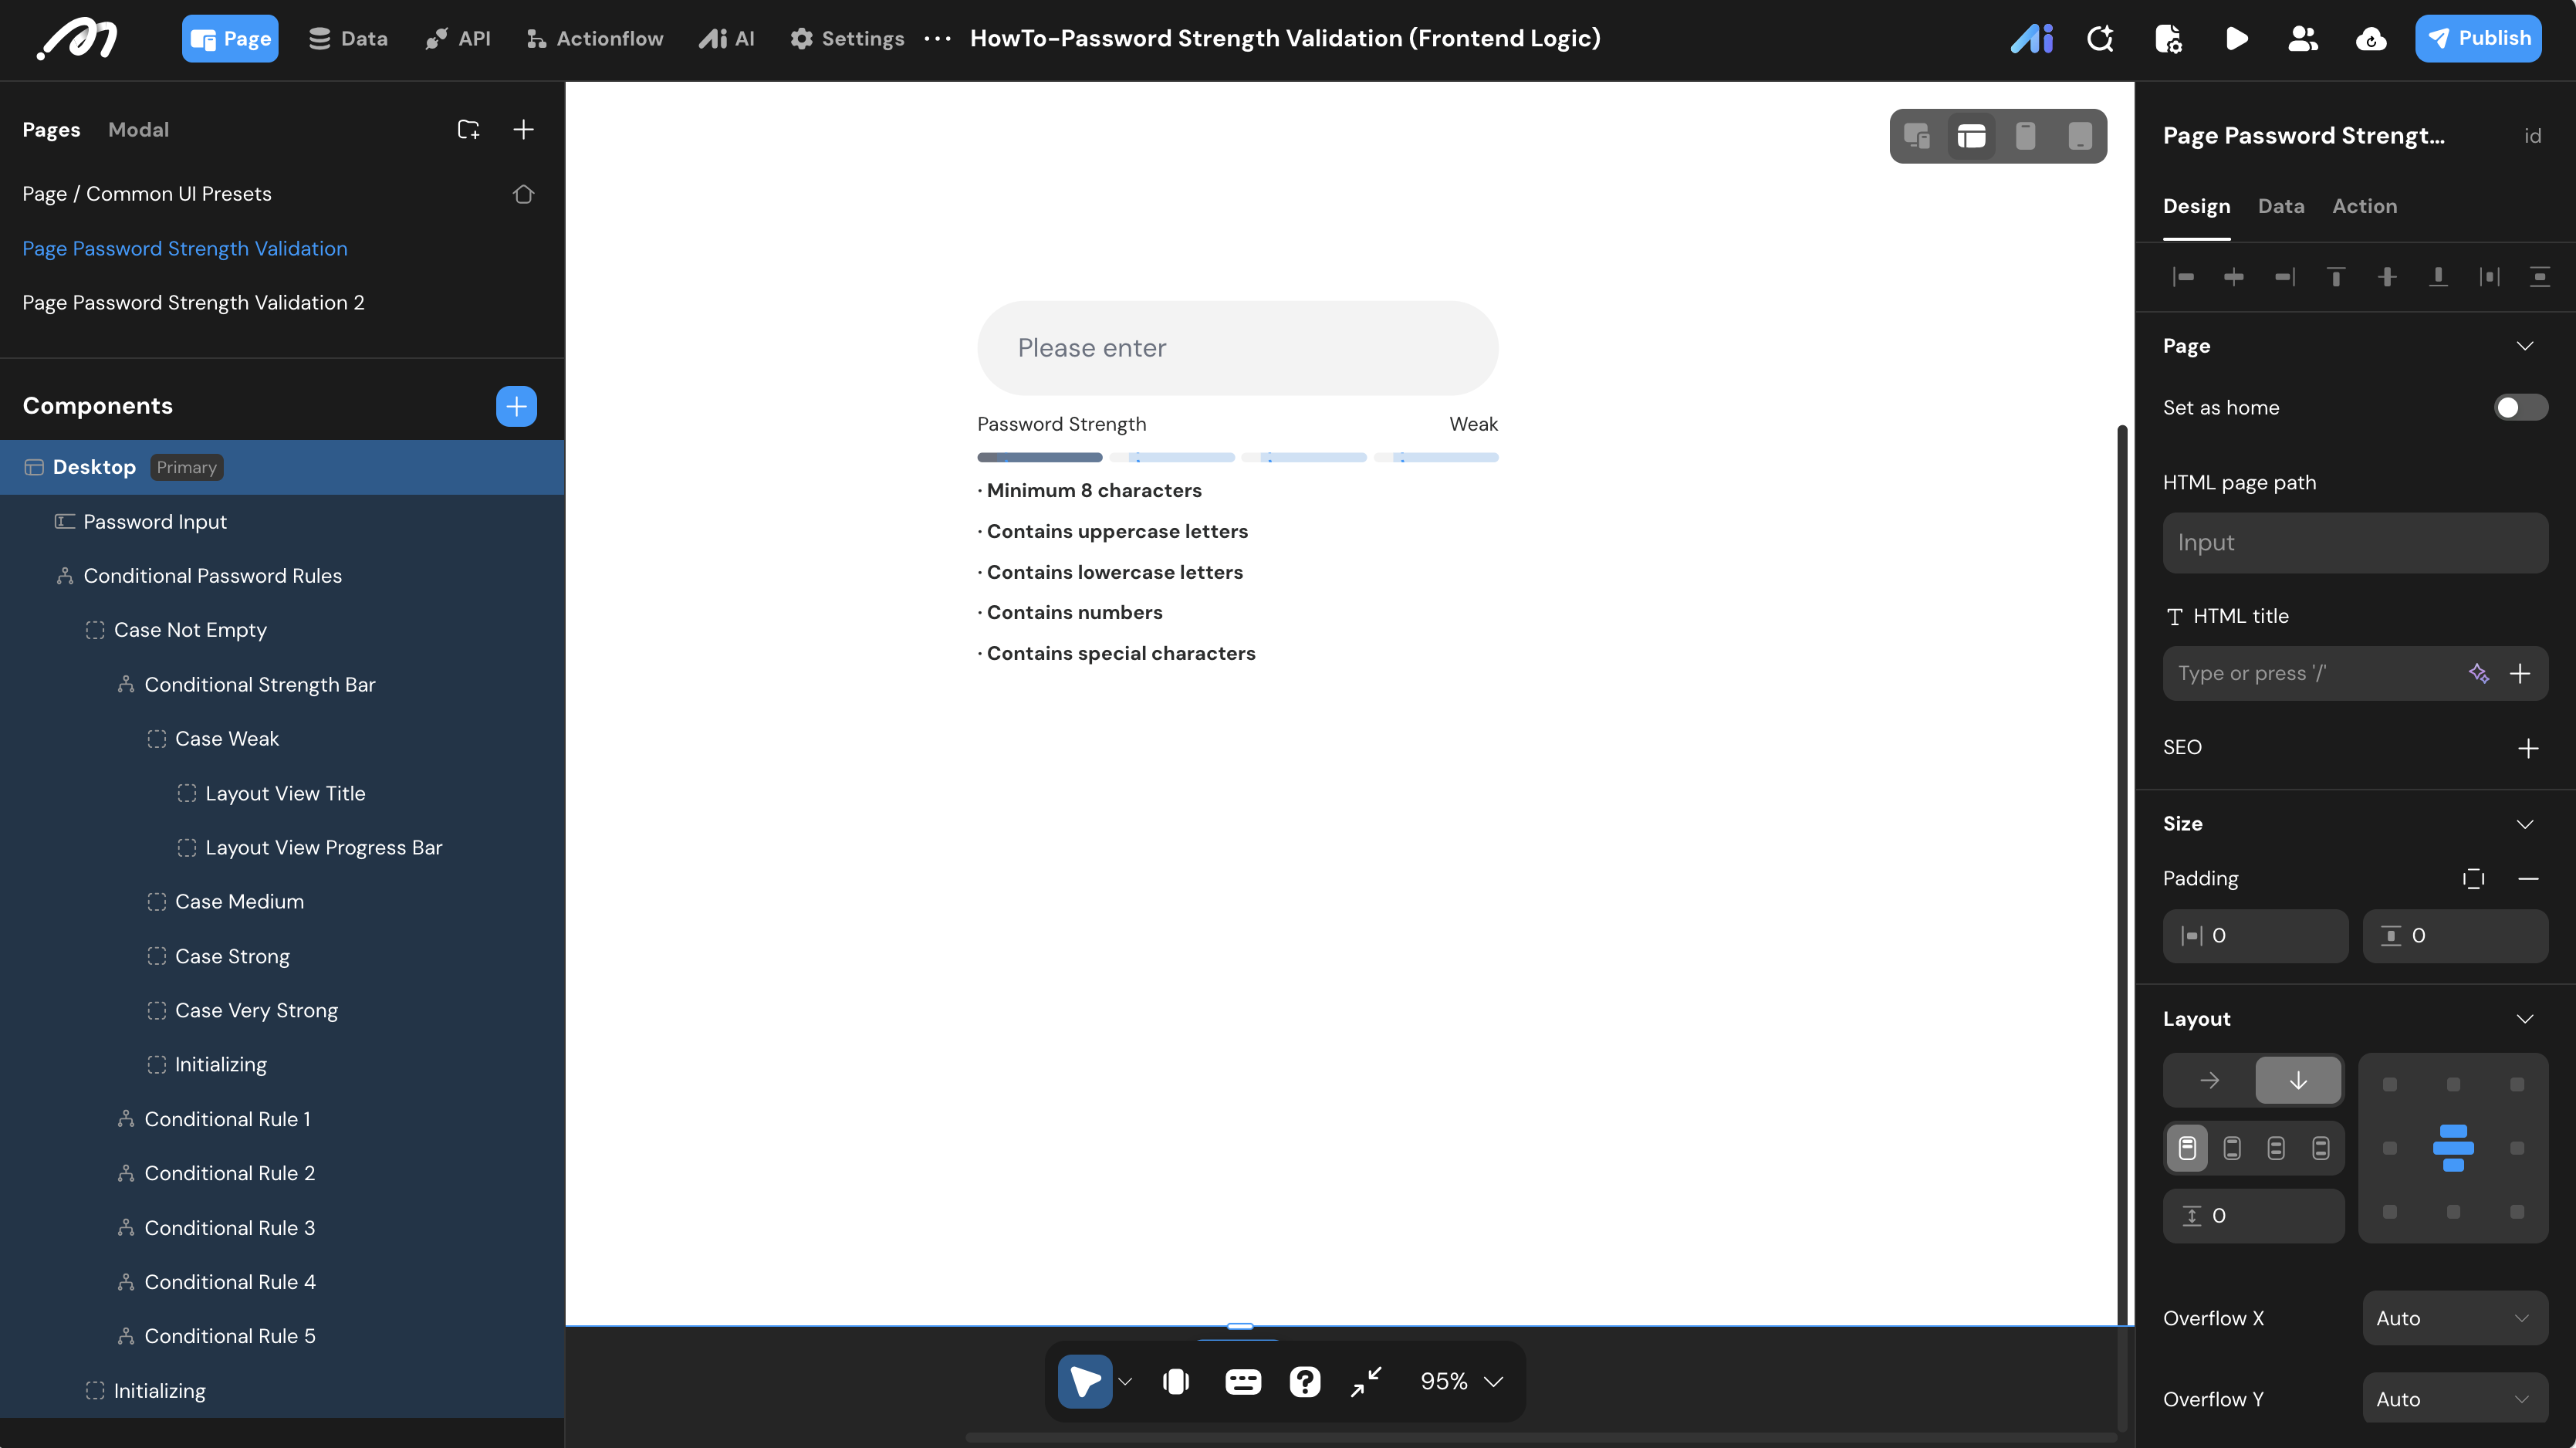
Note that the five rules collapse into four display tiers: 1 and 2 rules both read as Weak, so there are four bars and four labels, not five.
Below are two ways to drive those tiers from password_strength_level. They differ in more than structure — see the callout under Method 2 before choosing.
Method 1: One Container, One State Per Level (Page 1)
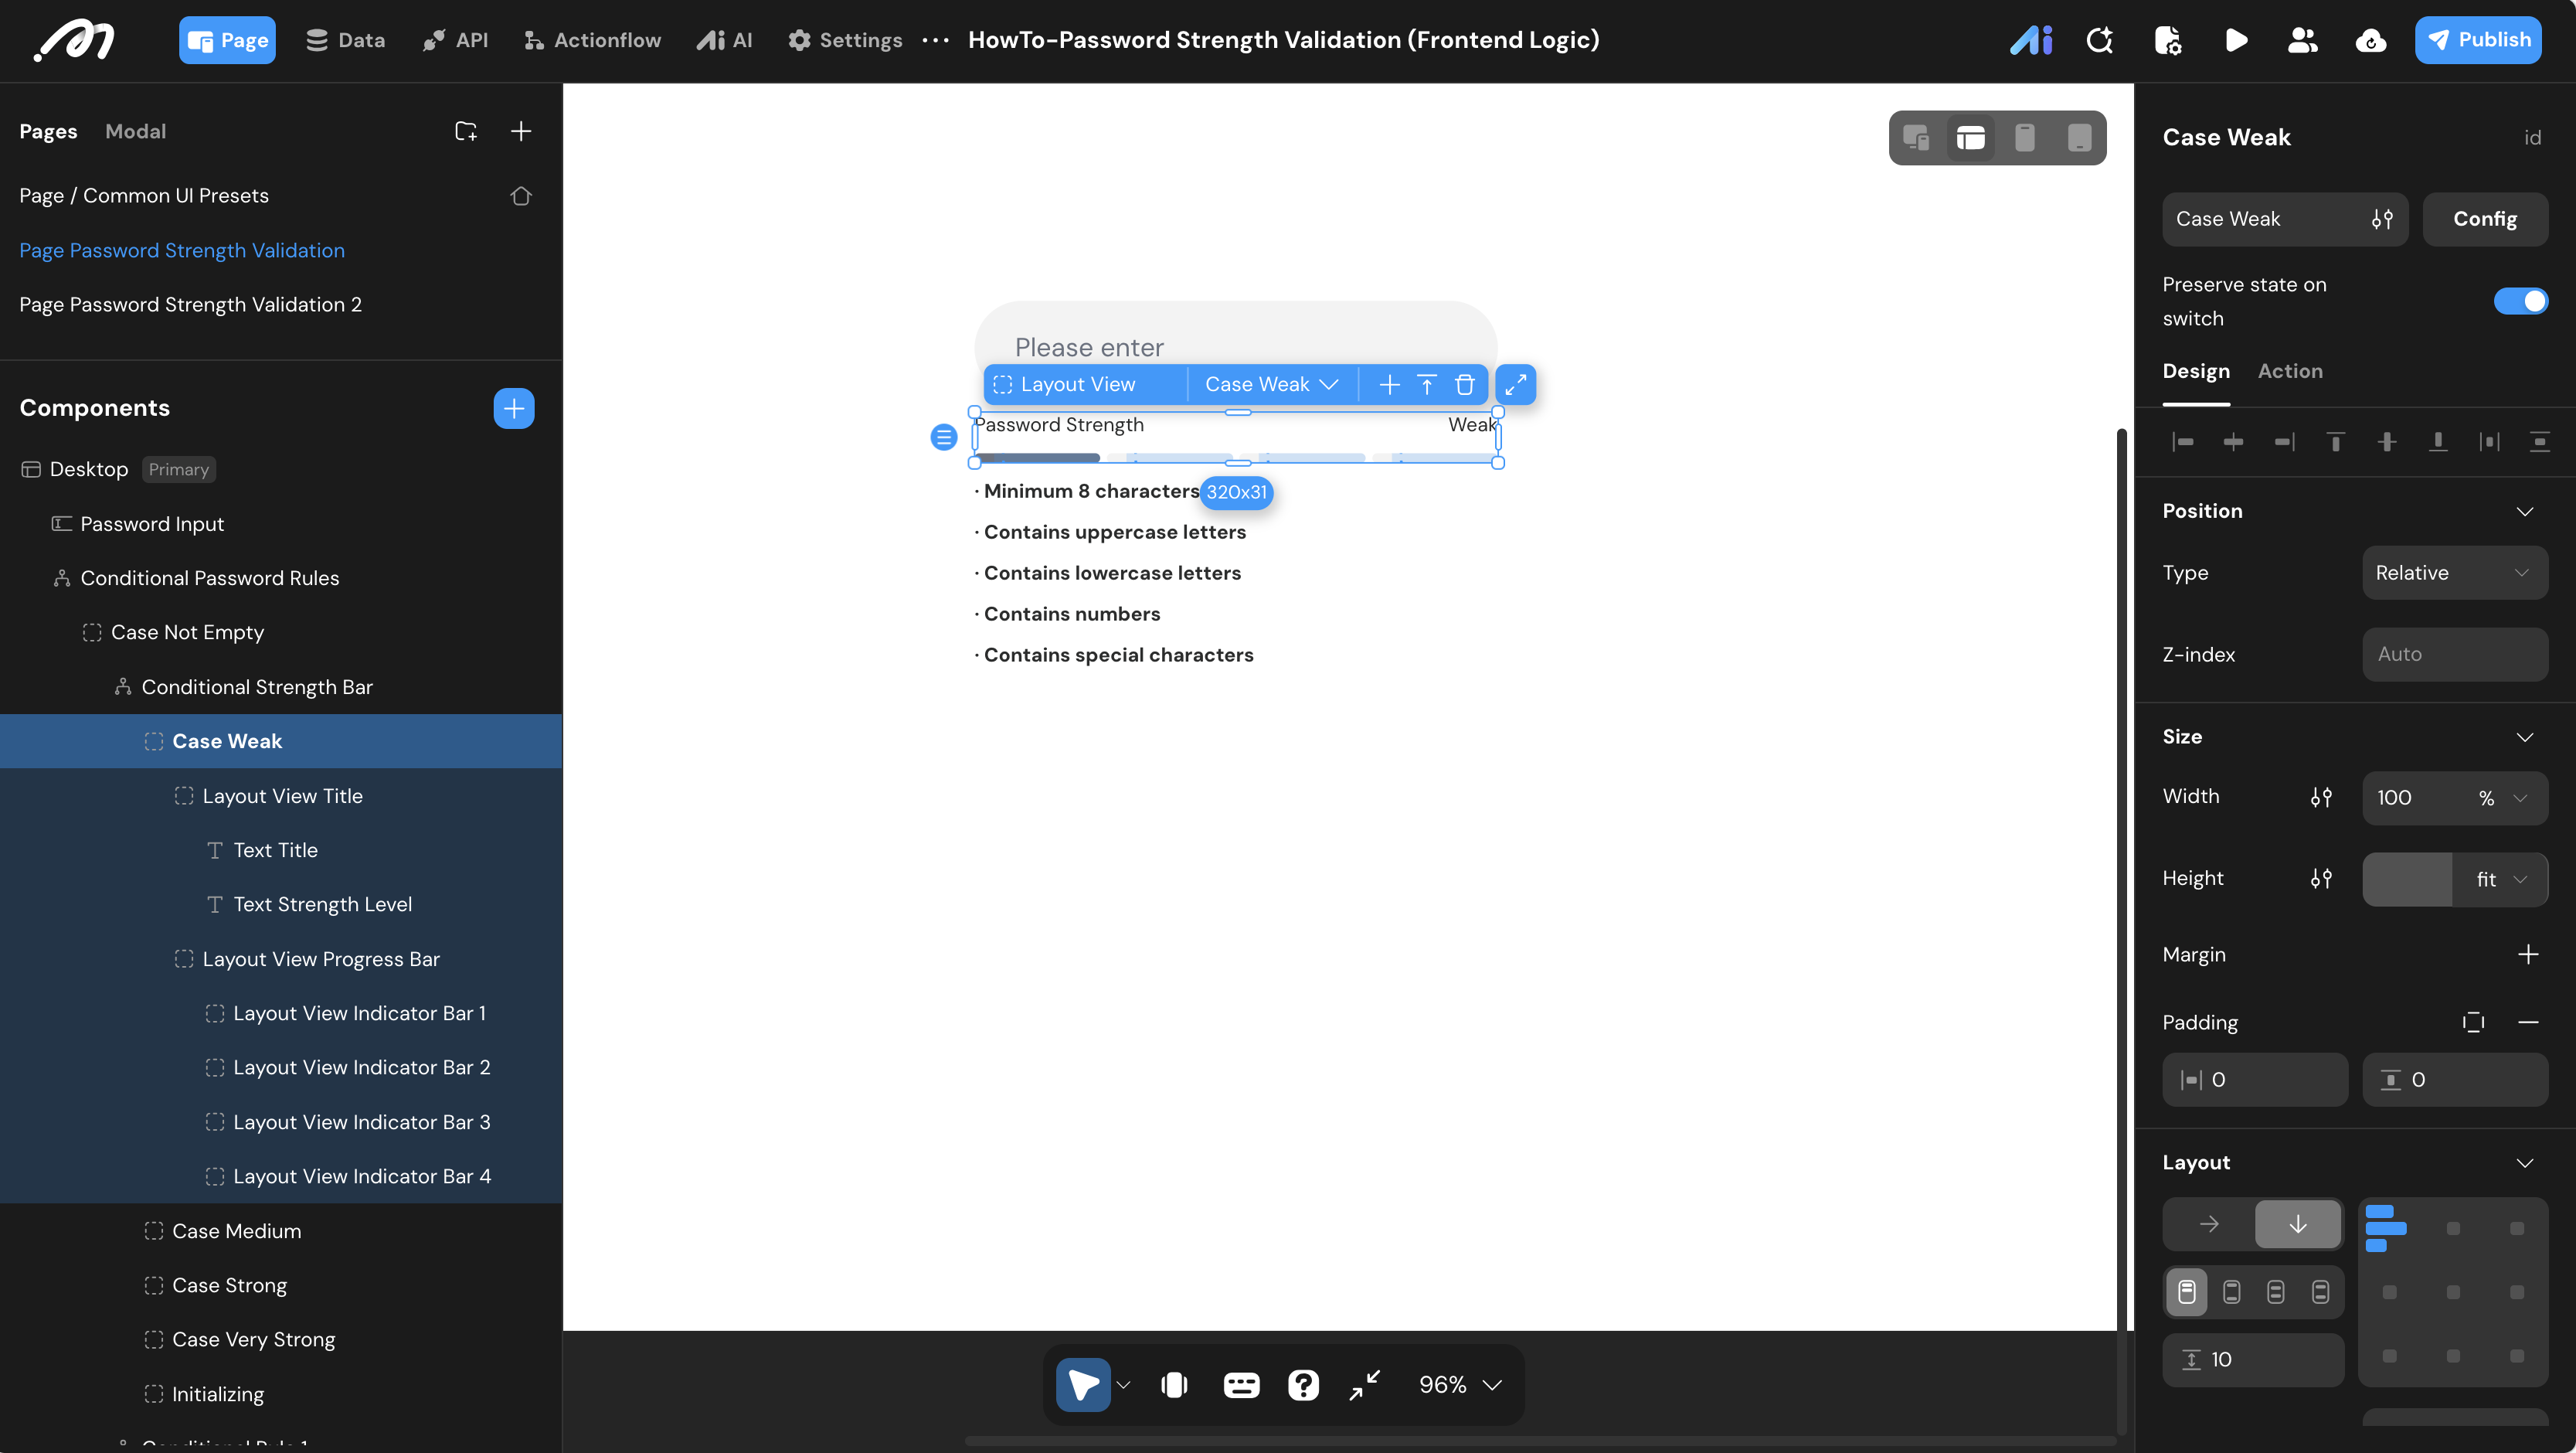
This keeps the level text and all bars inside a single Conditional View and swaps between four pre-designed layout blocks.
- Add Conditional View: Inside the
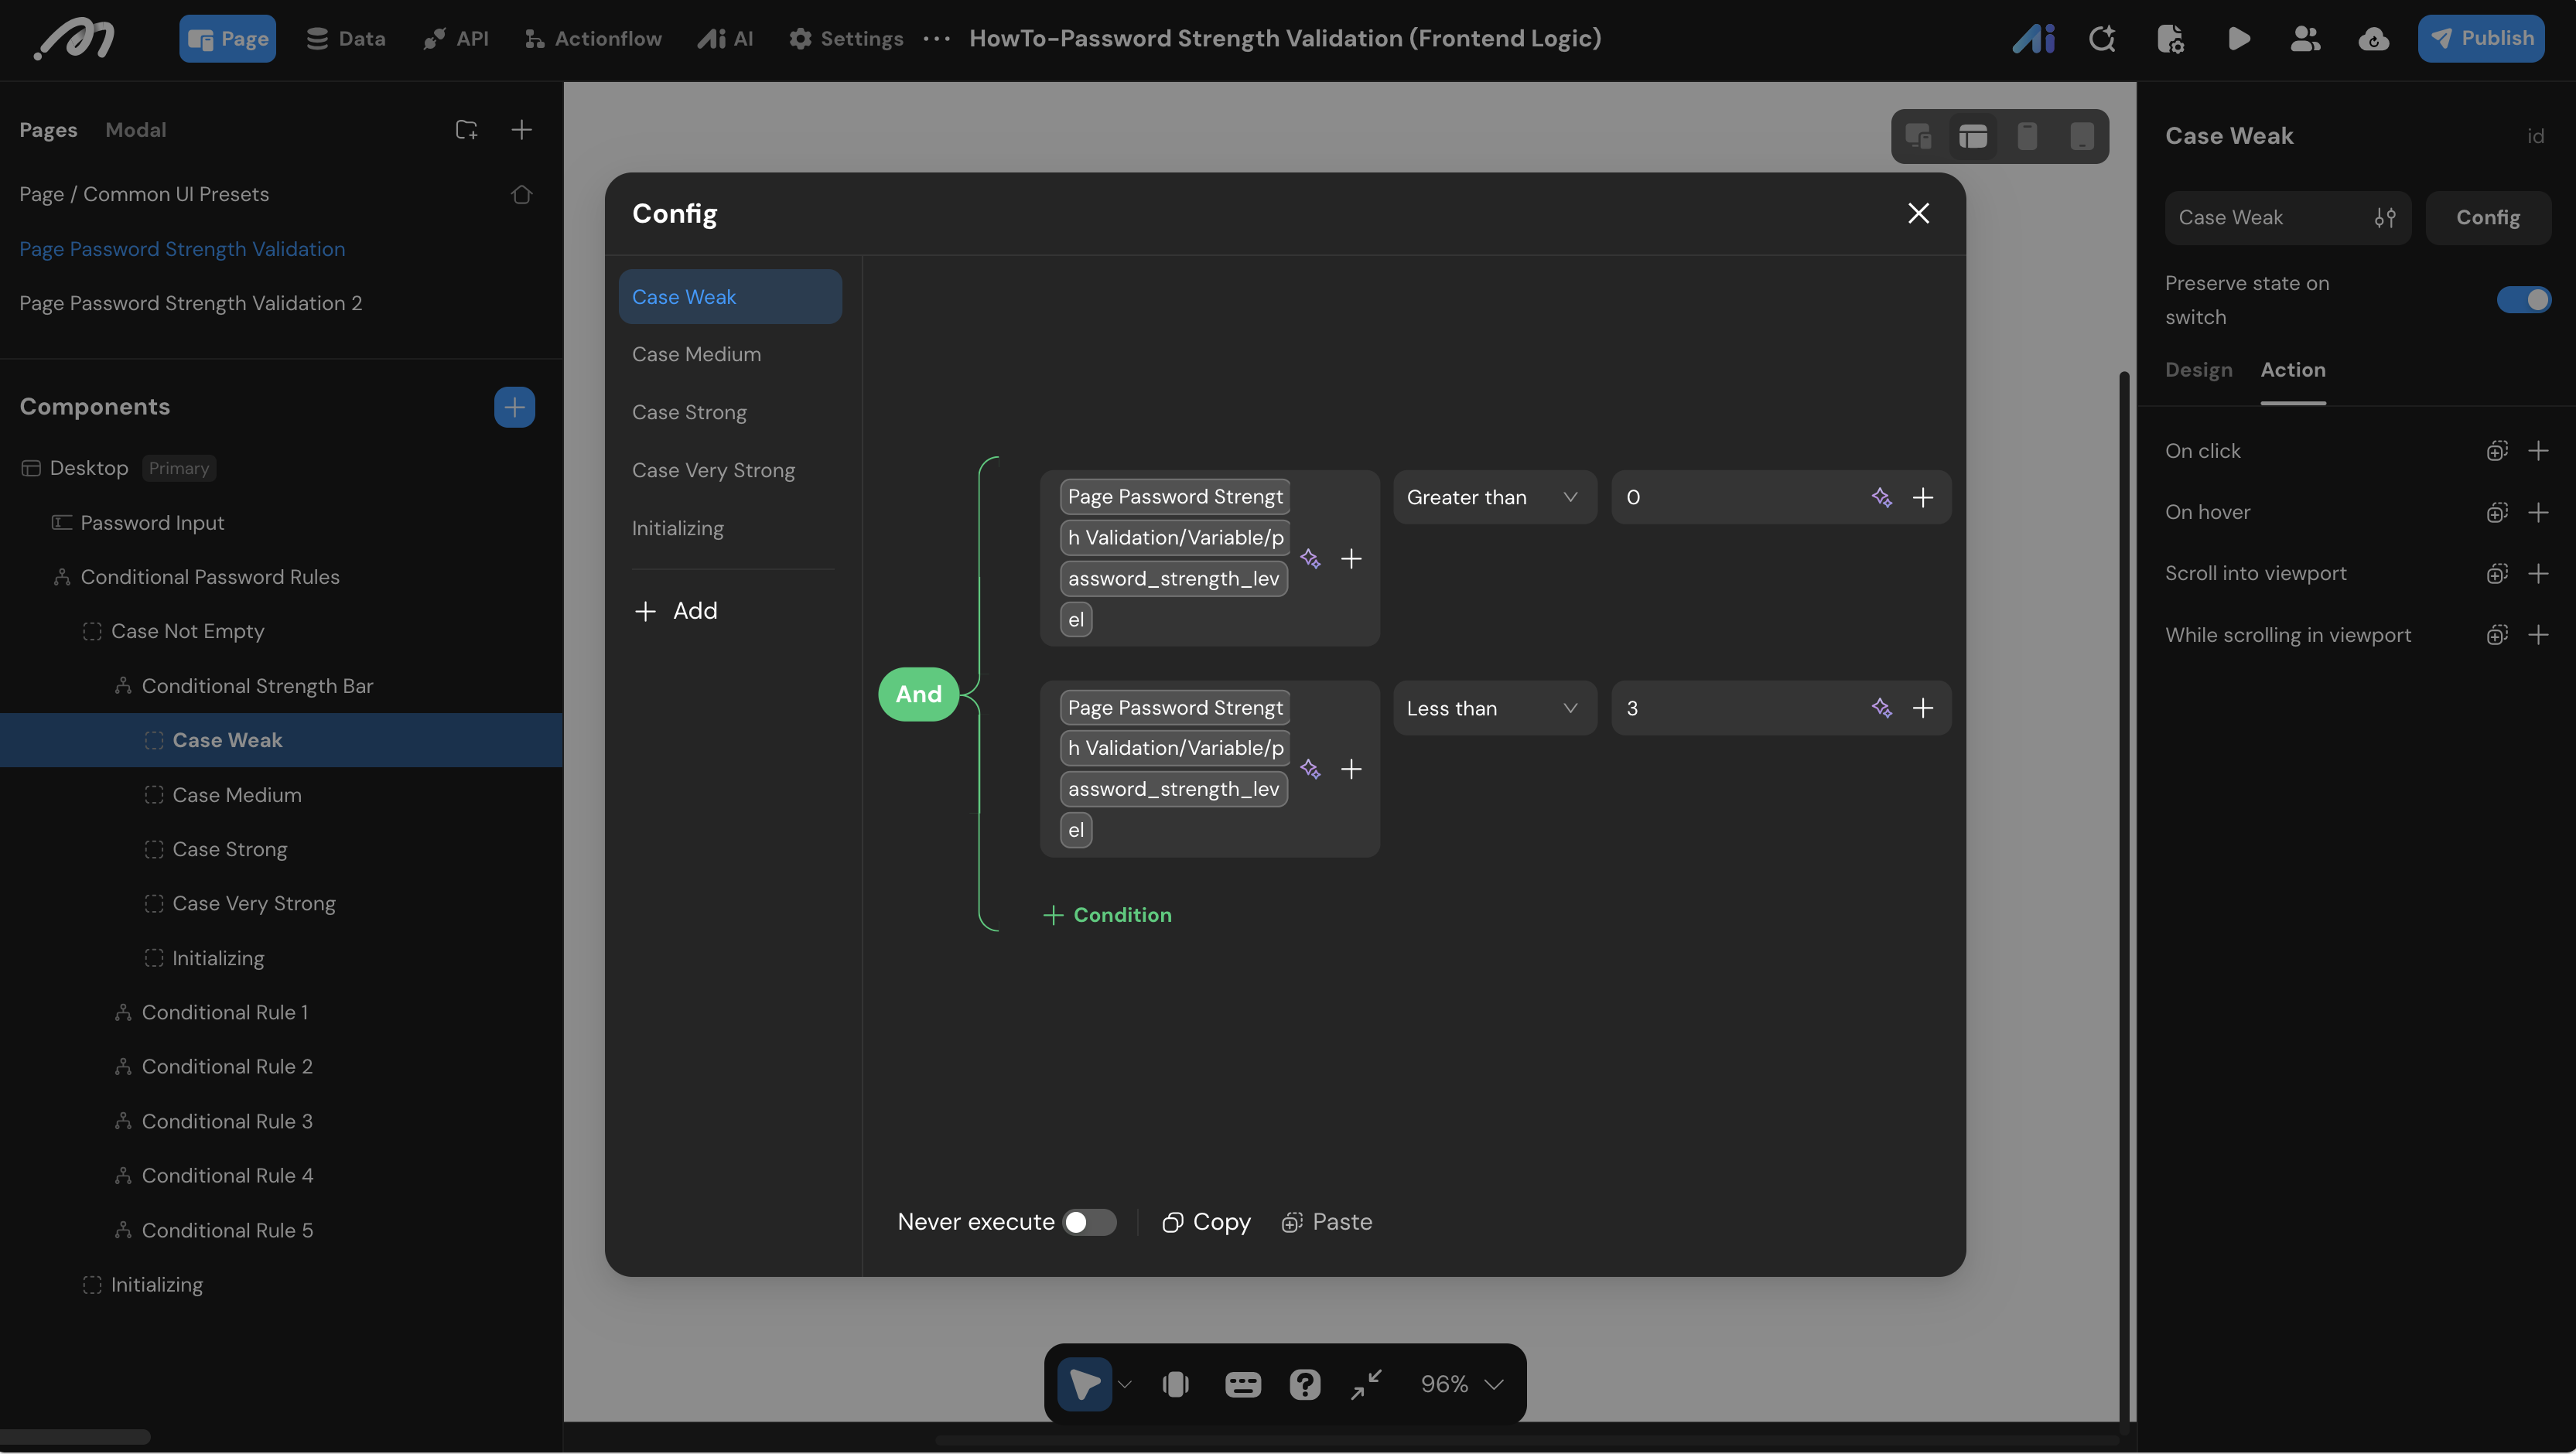
Case Not Emptybranch of the master container, add a Conditional View namedConditional Strength Bar. - Configure States: Create five branches —
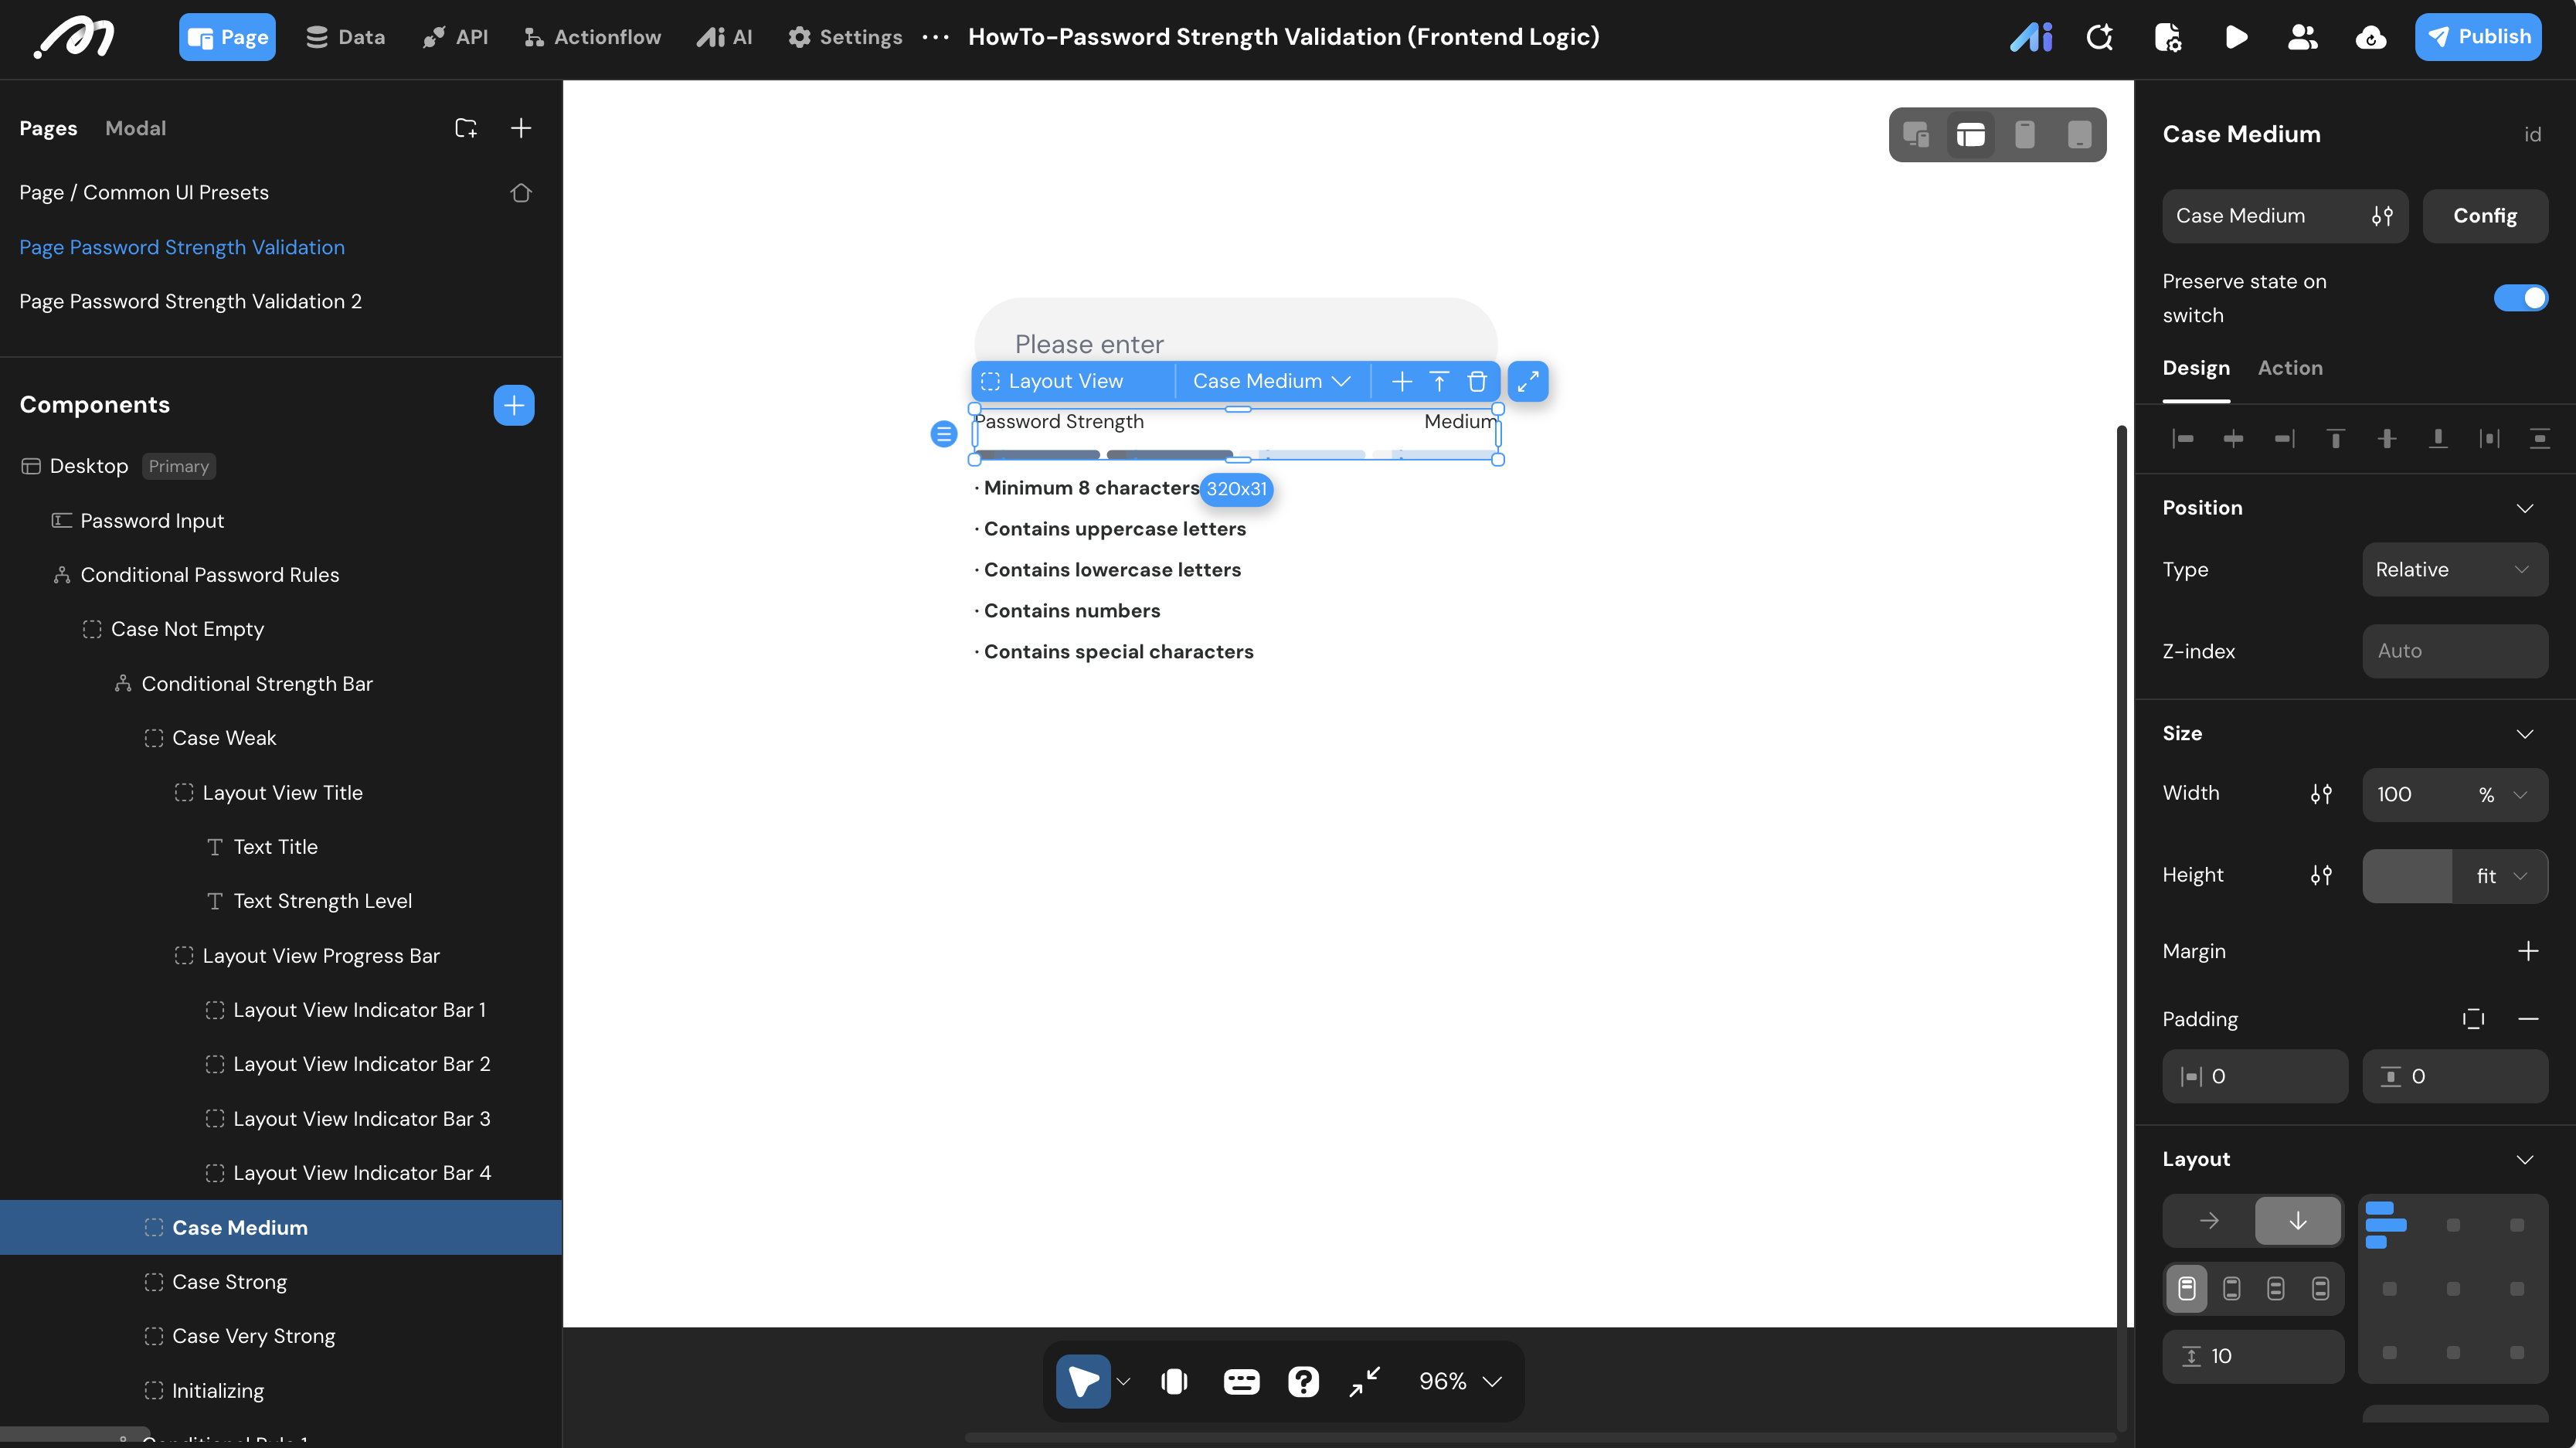
Case Weak,Case Medium,Case Strong,Case Very Strong, andInitializing.Initializingis the fallback and takes no condition. - Set Entry Conditions:
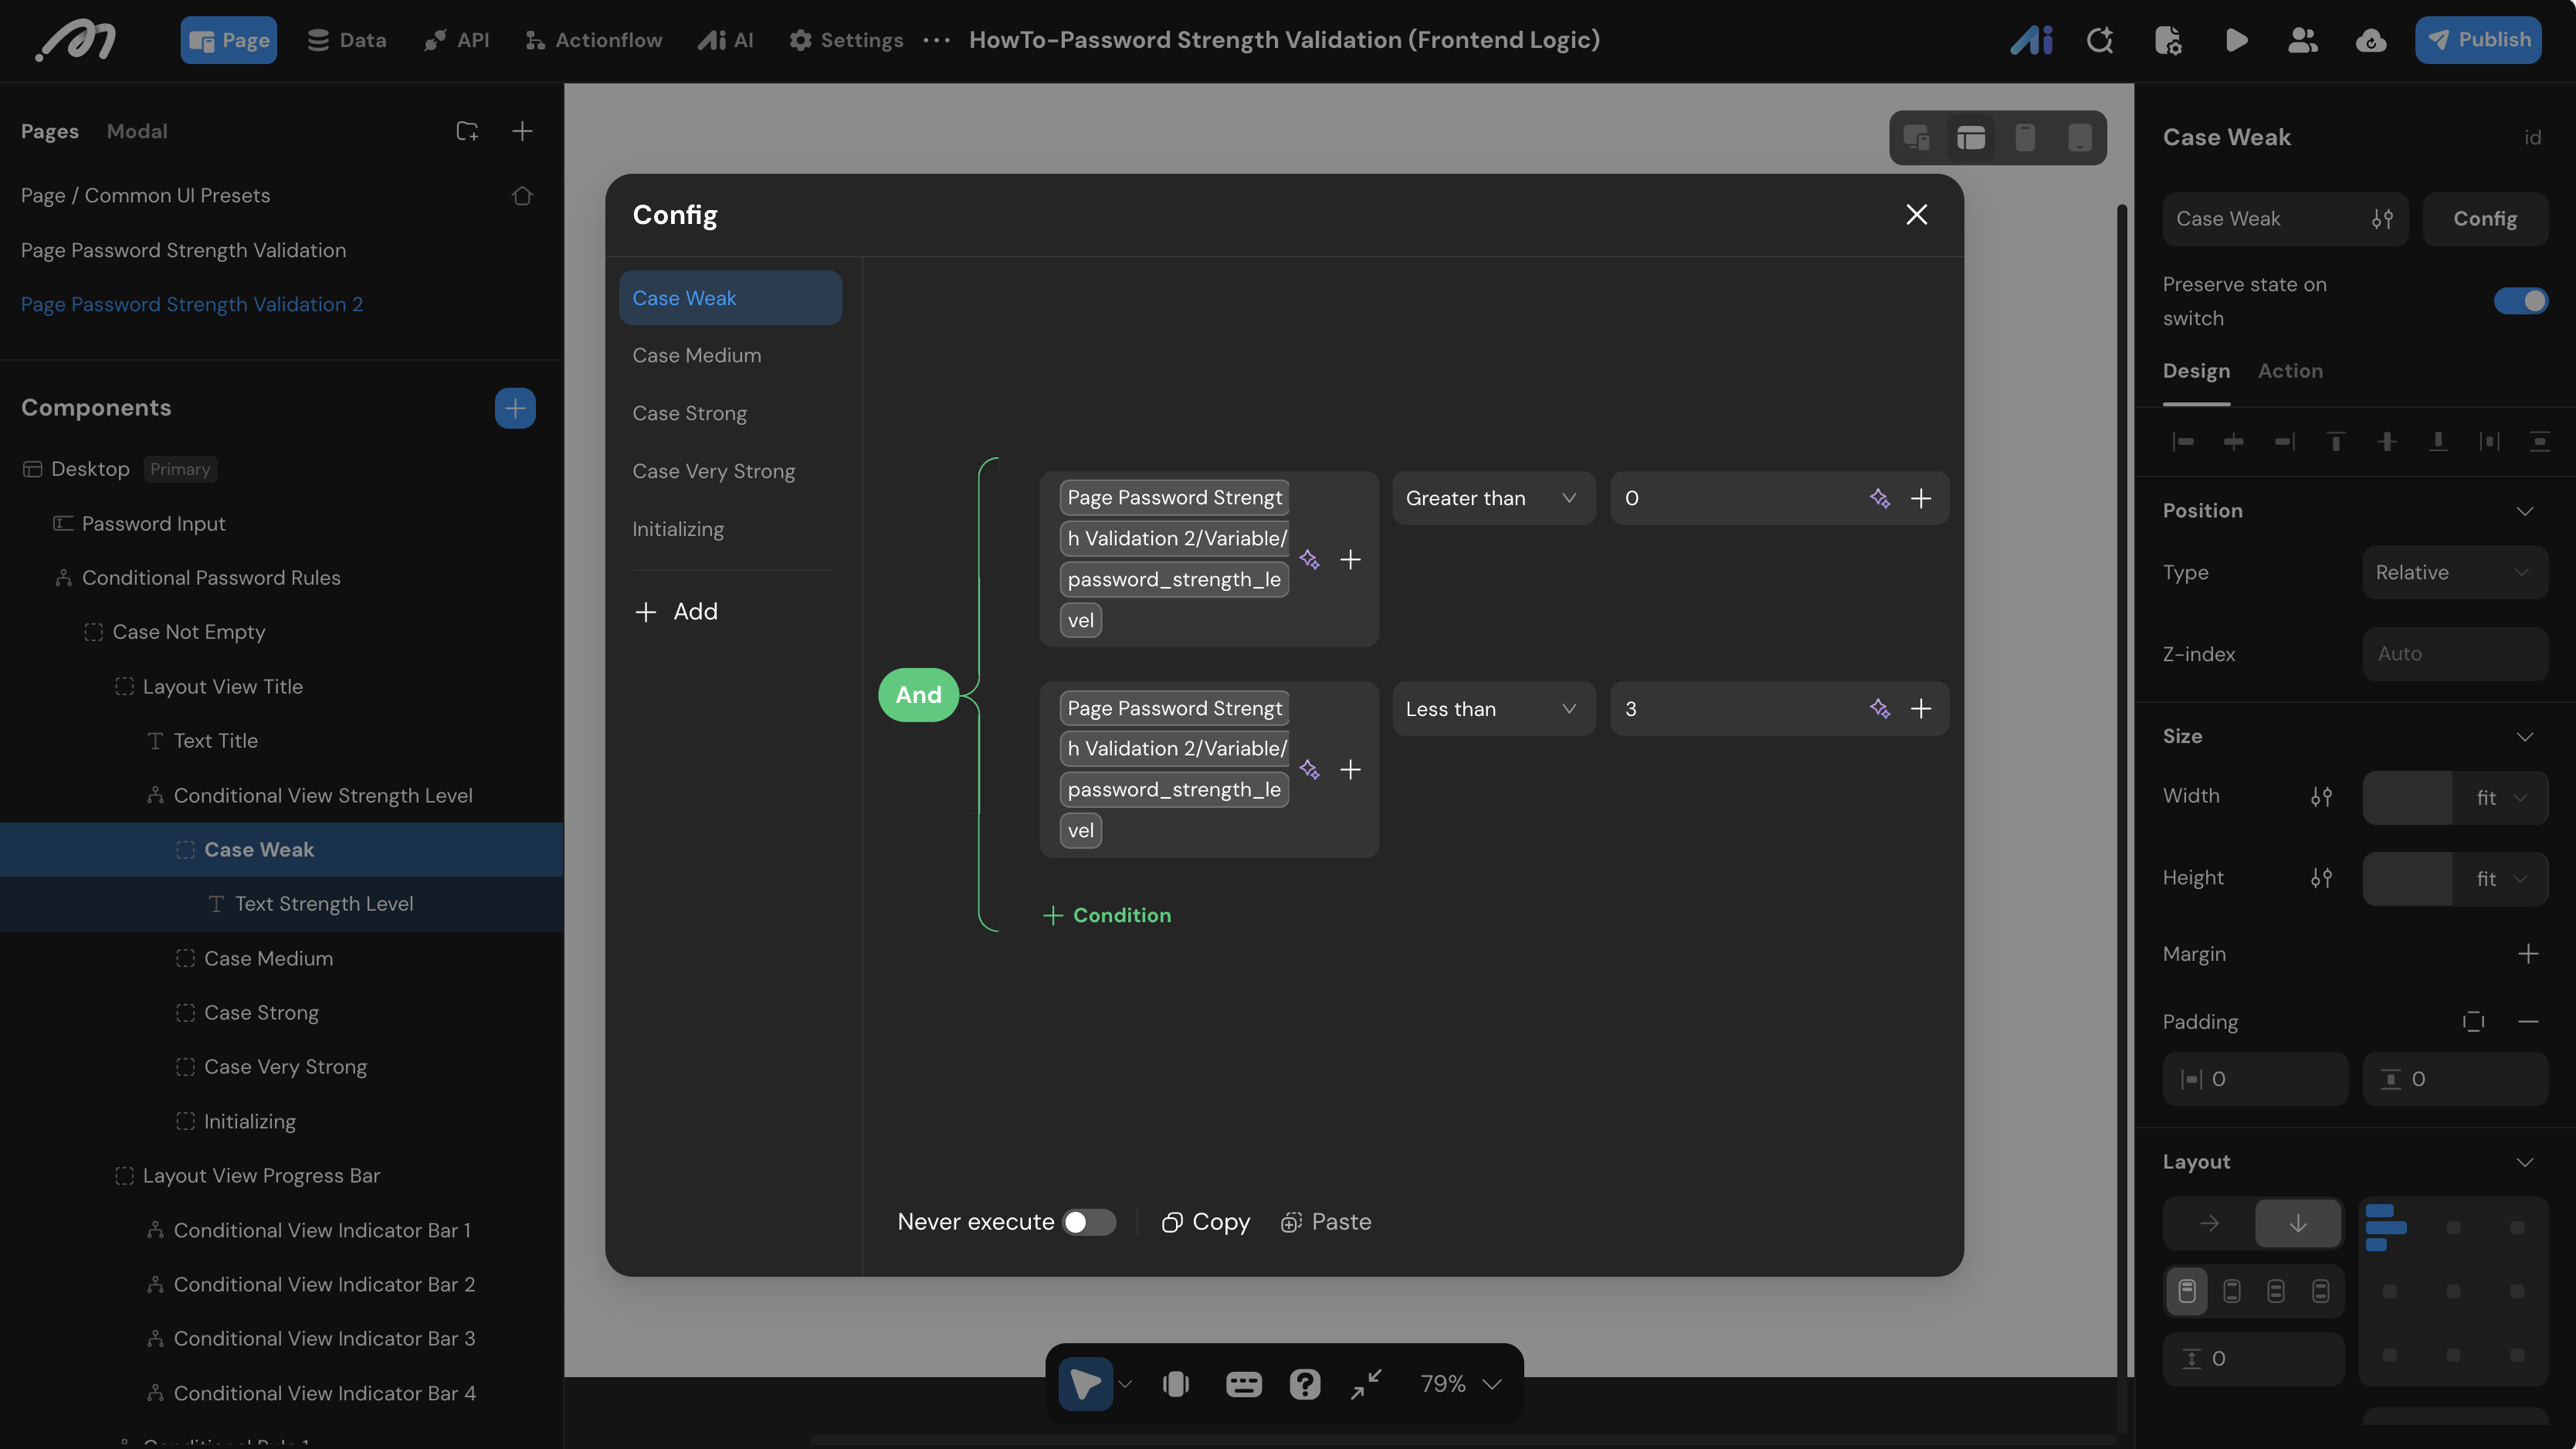
- Case Weak:
password_strength_levelGreater than0ANDLess than3 - Case Medium:
password_strength_levelEqual to3 - Case Strong:
password_strength_levelEqual to4 - Case Very Strong:
password_strength_levelEqual to5
- Case Weak:
- Design Within Each Case: Select each state and place the label and the four bars. Because each state is a separate layout, you can color the bars per level — one bar for Weak, two for Medium, and a different color at each tier.
Method 2: Per-Component States (Page 2)
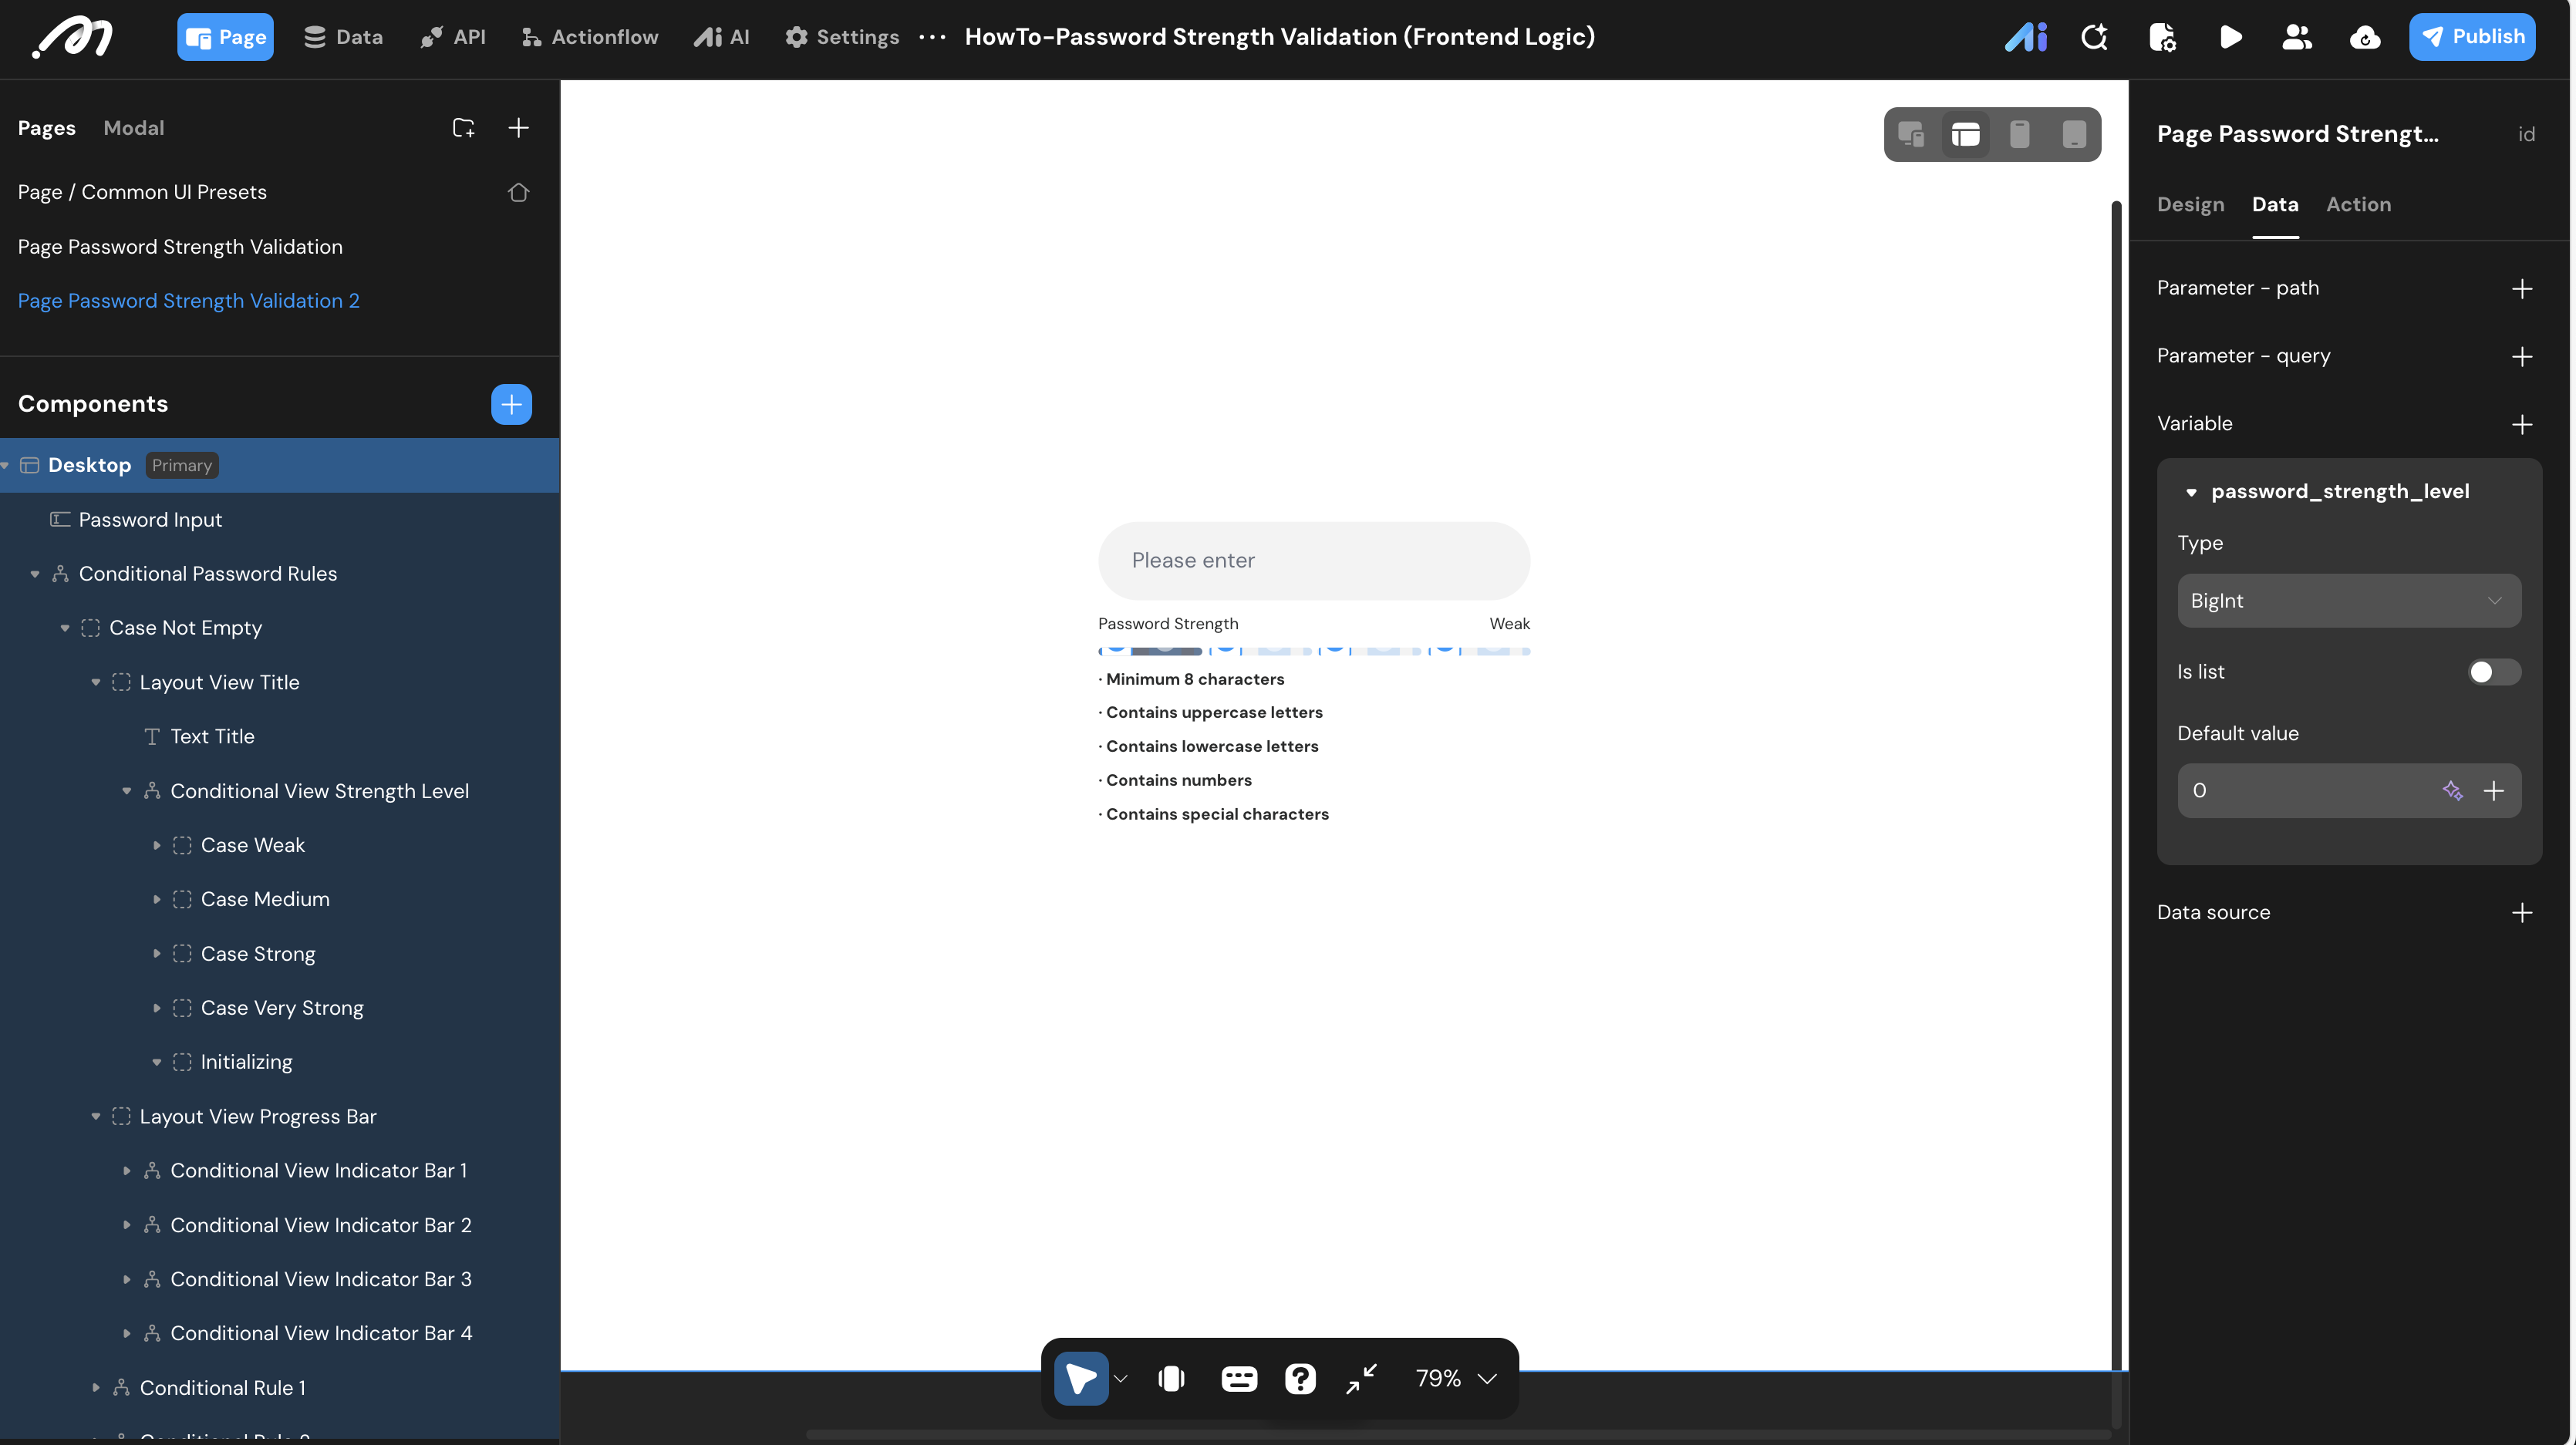
To avoid rebuilding the identical bar track in four branches, duplicate Page 1 and rework it: remove the master bar container, then give the label and each of the four bars its own lightweight Conditional View.
- Decouple the strength label
- Wrap the text block showing Weak / Medium / Strong / Very Strong in its own container named
Conditional View Strength Level. - Give it the same entry conditions as Method 1 so the wording switches with the score.
- Wrap the text block showing Weak / Medium / Strong / Very Strong in its own container named
-
Configure each bar independently
- Wrap each of the four bar segments in its own conditional container (Bar 1 through Bar 4).
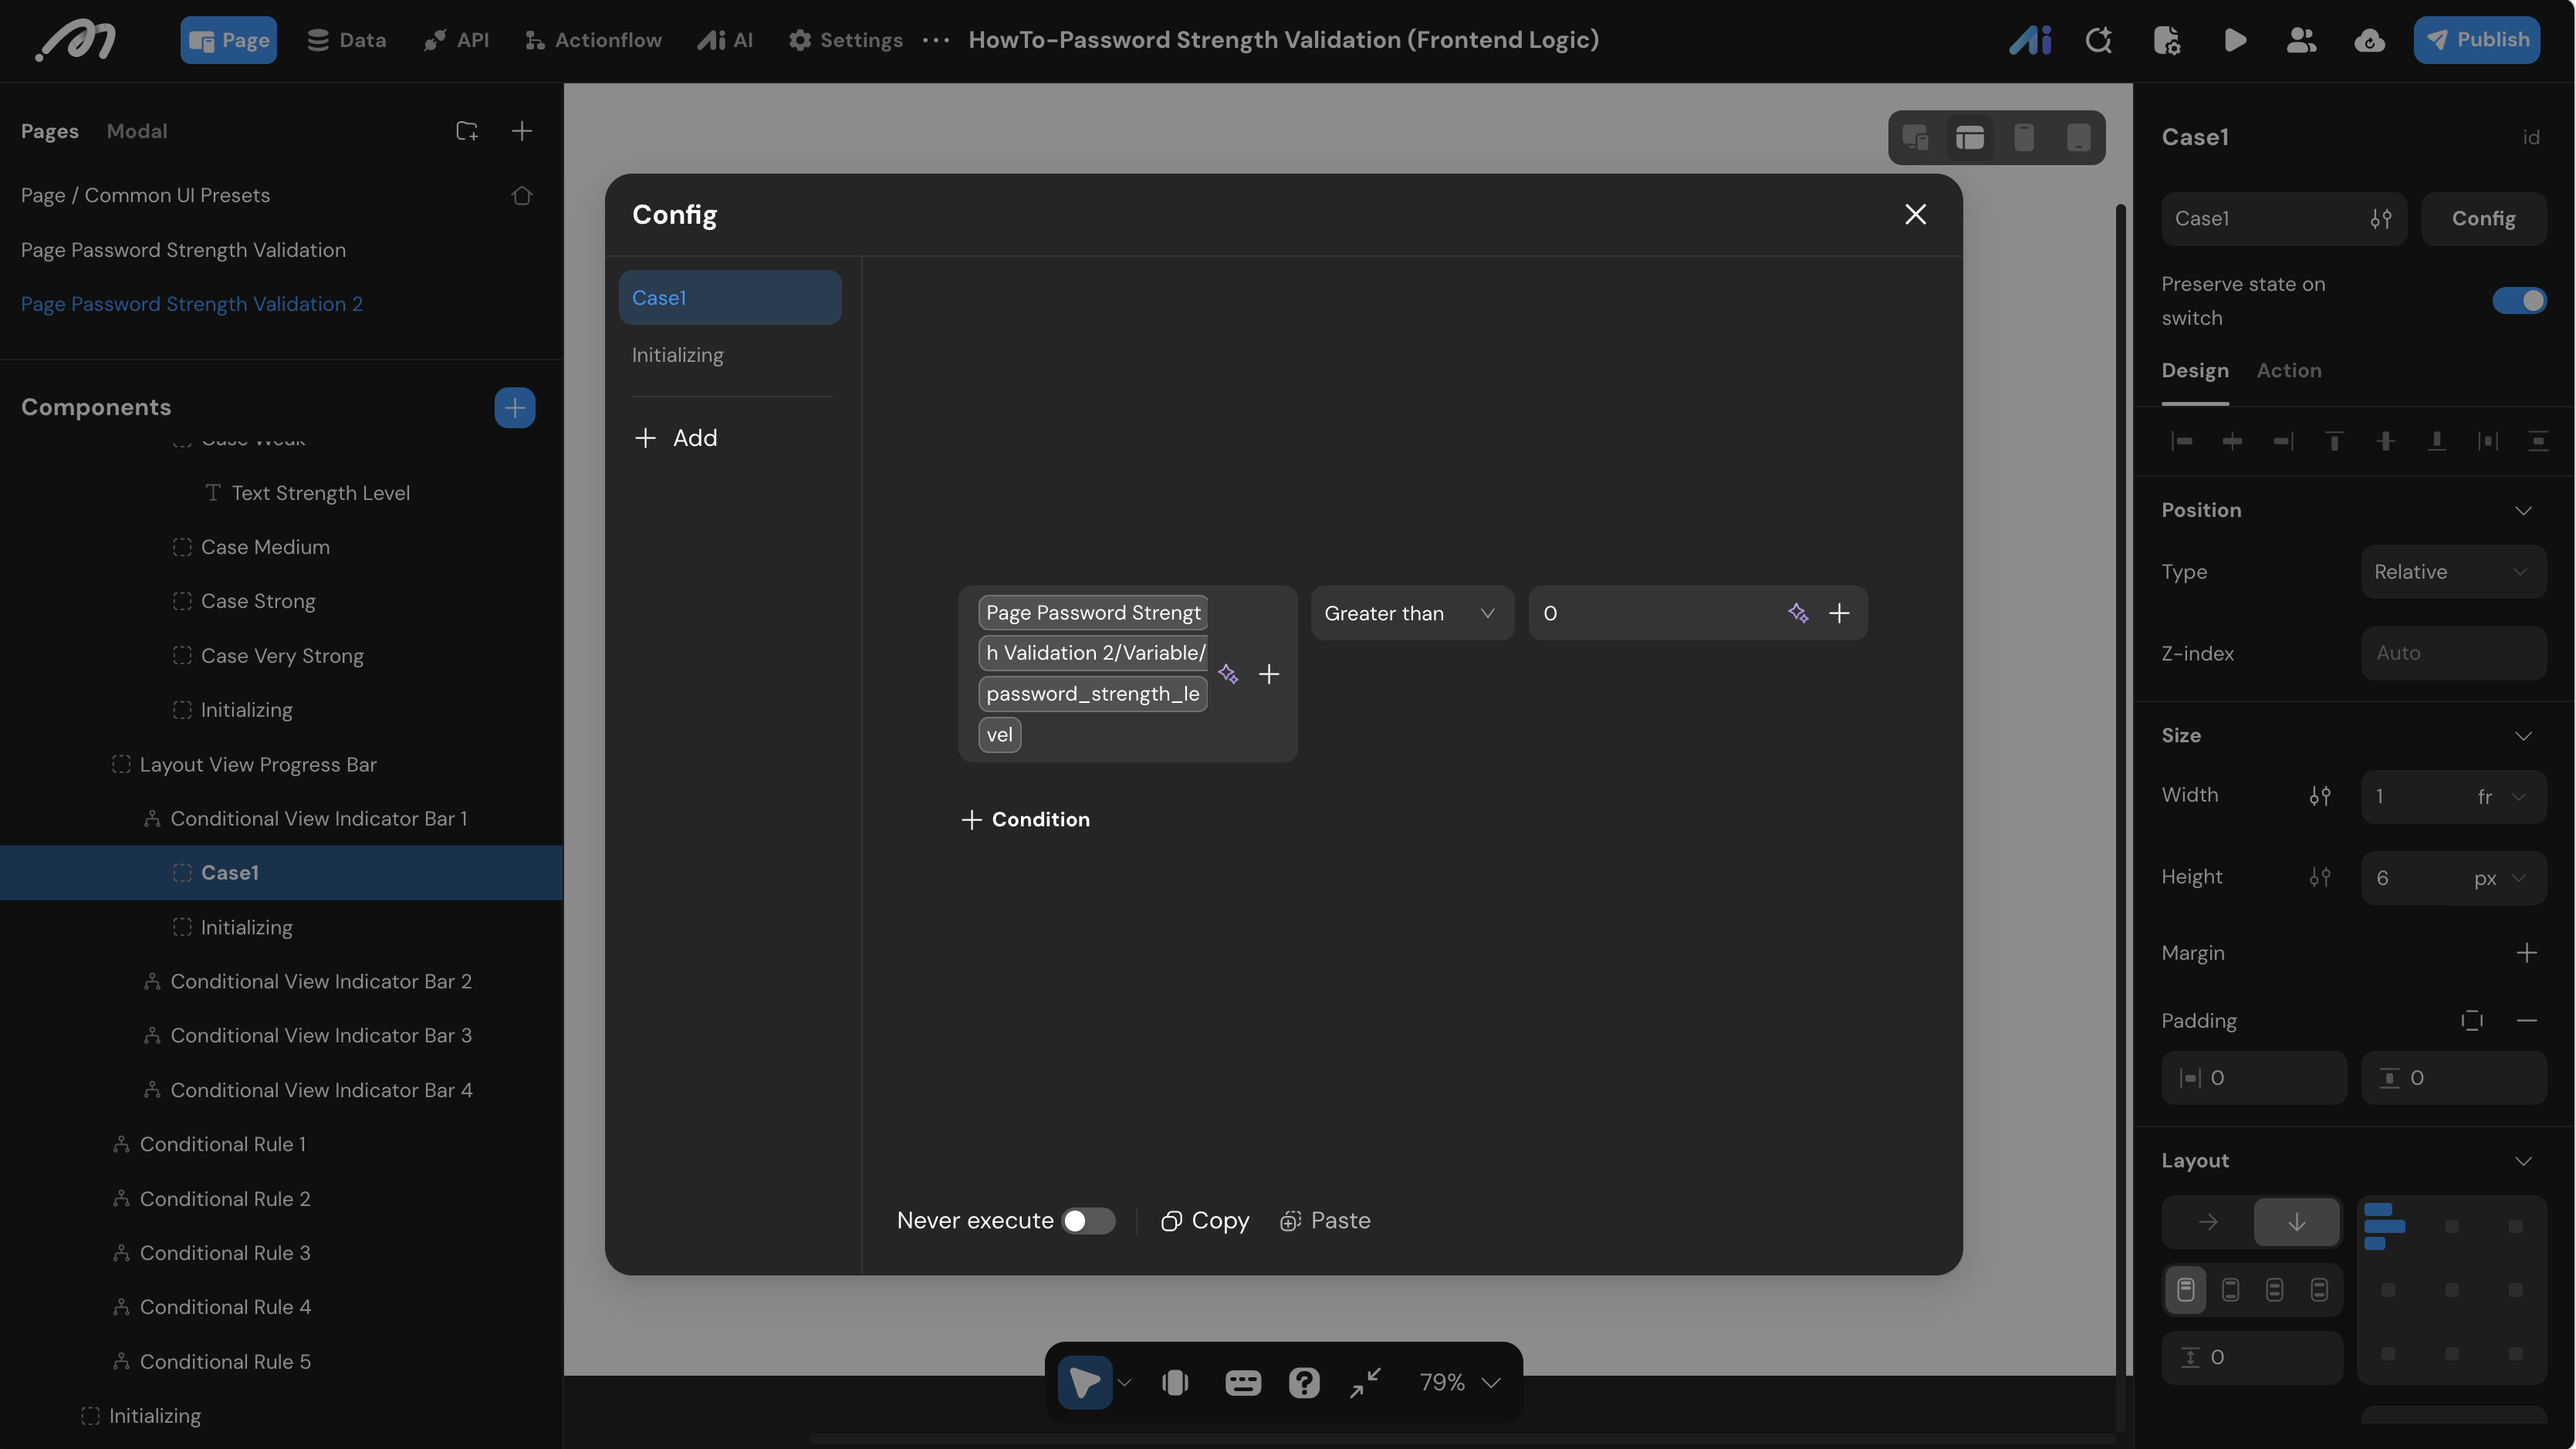
- Give each one two branches: the active state
Case1and the inactive defaultInitializing. - Bar 1:
password_strength_levelGreater than0 - Bar 2:
password_strength_levelGreater than2 - Bar 3:
password_strength_levelGreater than3 - Bar 4:
password_strength_levelGreater than4
These thresholds produce the same tiers as Method 1 — 1 bar for Weak, 2 for Medium, 3 for Strong, 4 for Very Strong.
- Style the two states
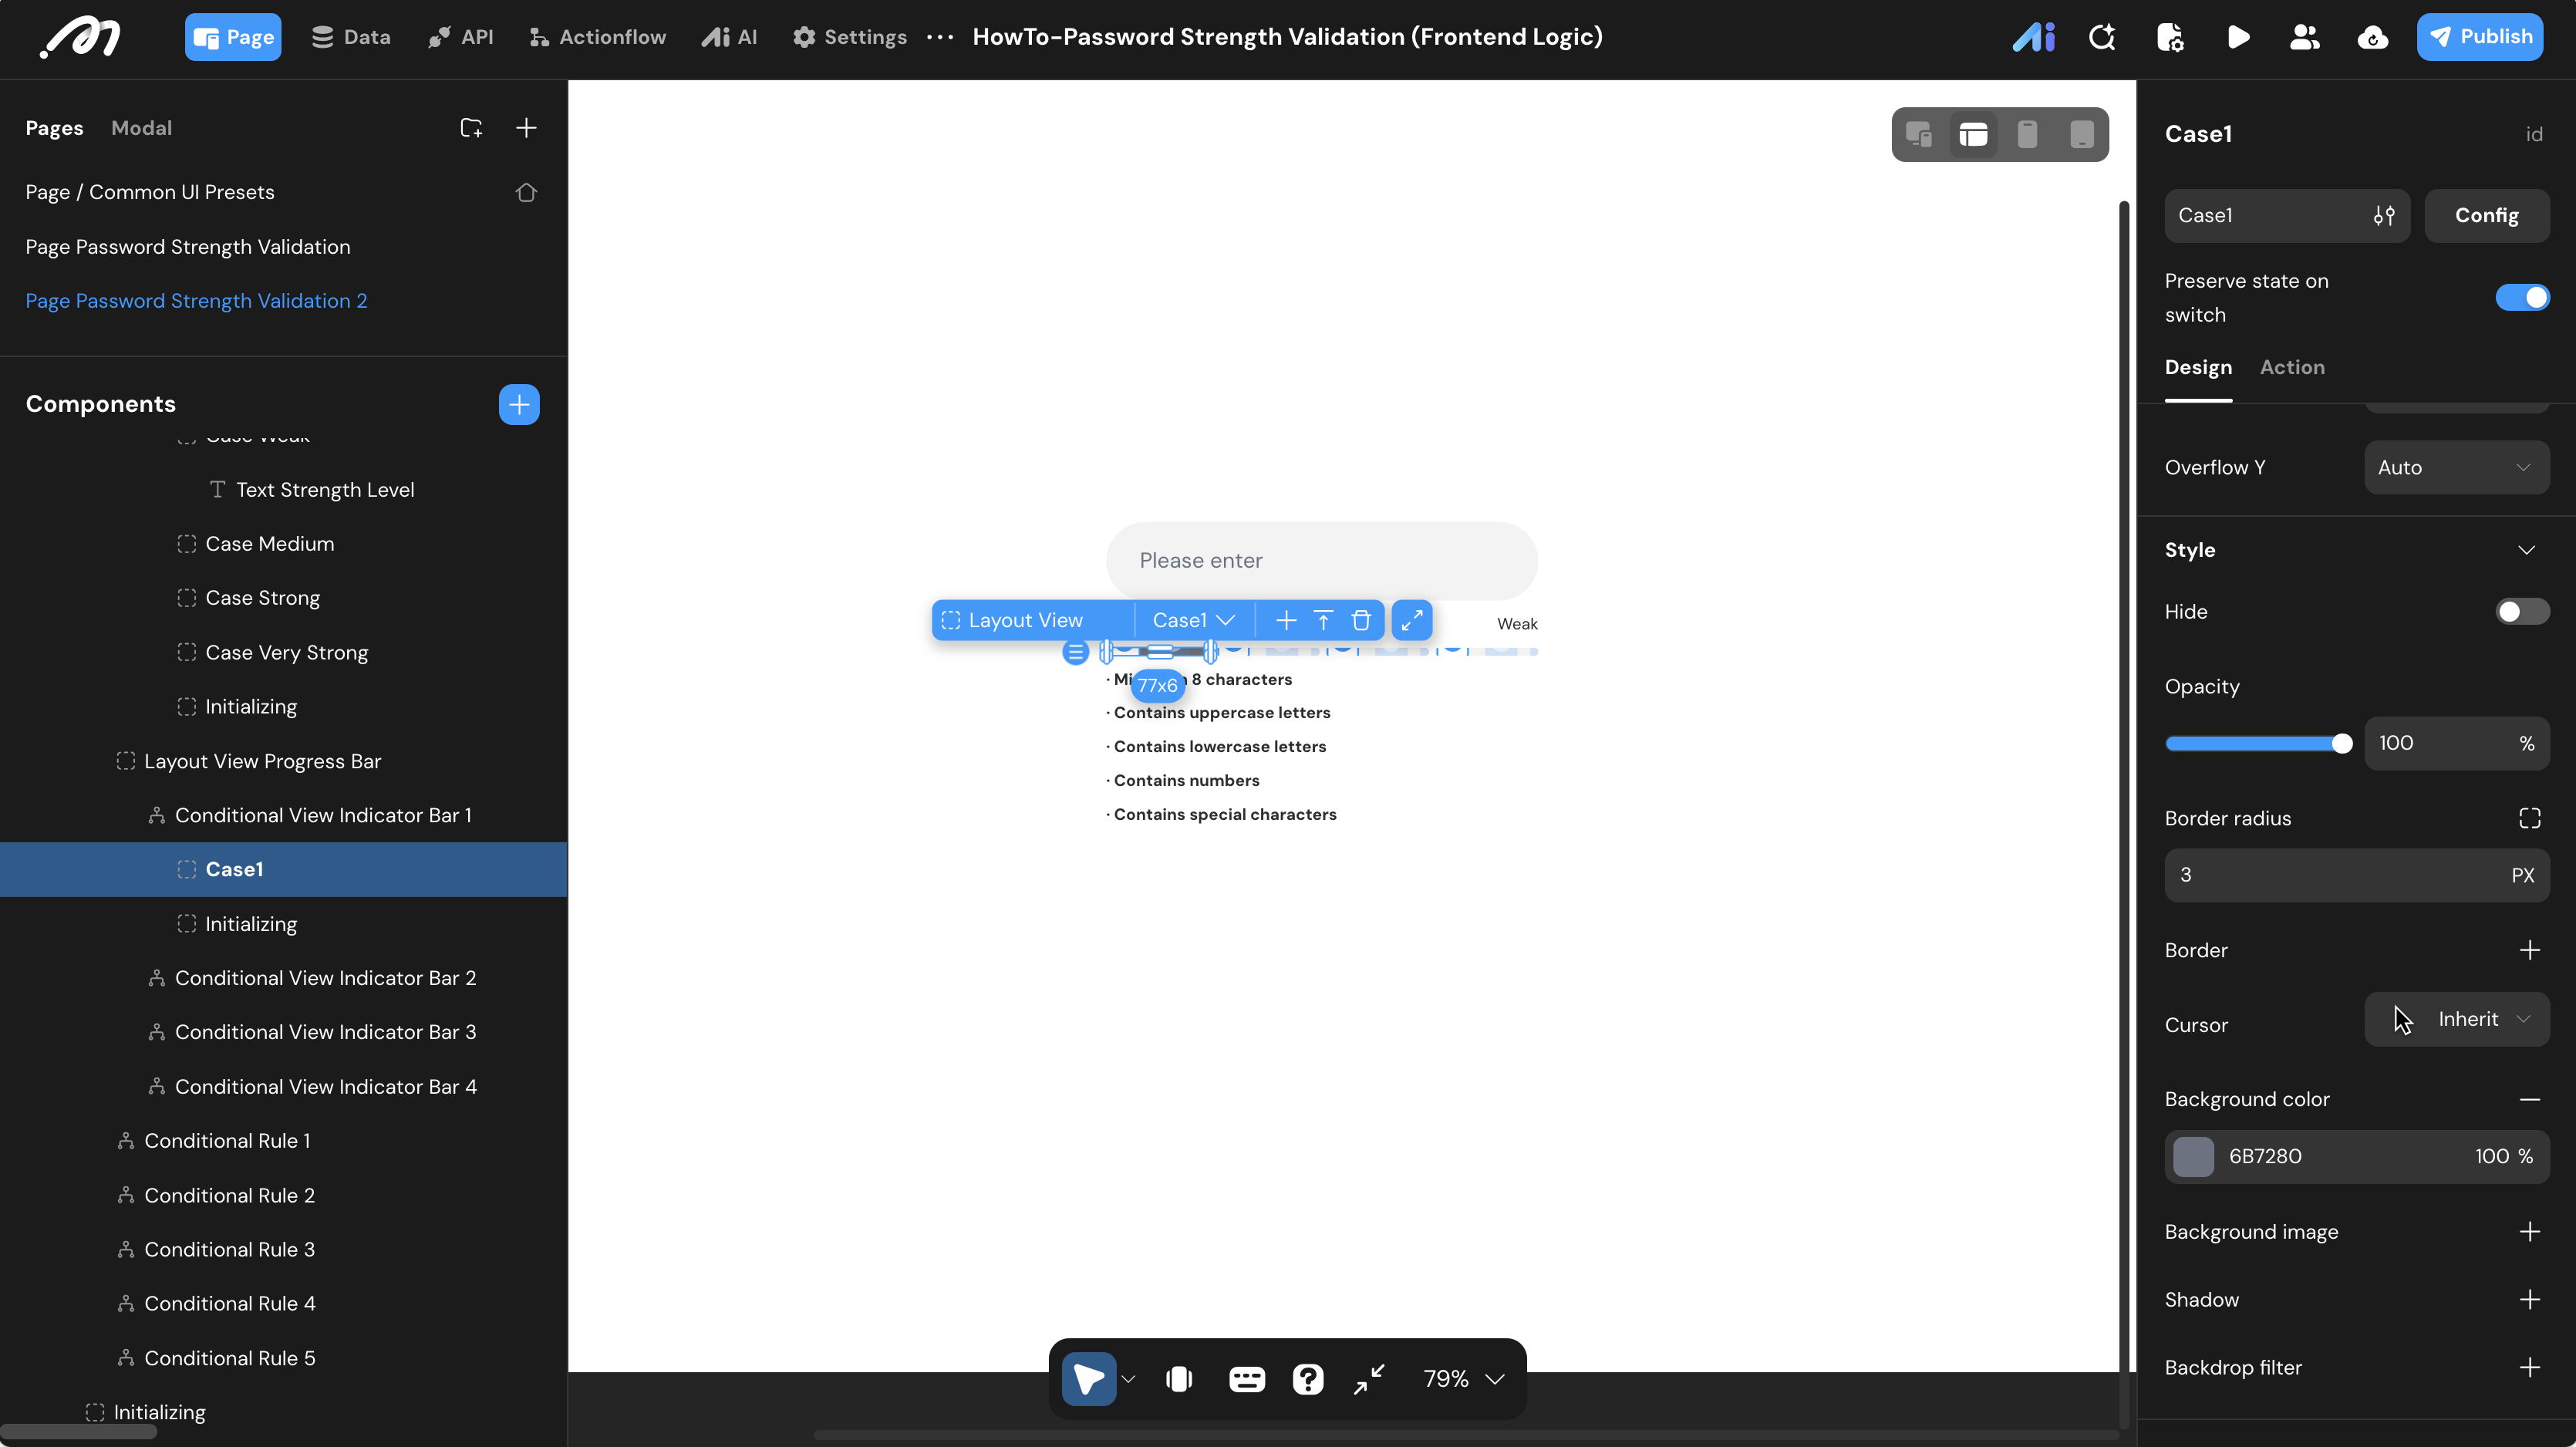
- Select a bar track under
Case1, open the Style panel, set Background color to a medium gray (#6B7280), border radius to3px, and height to6px. - Switch to the
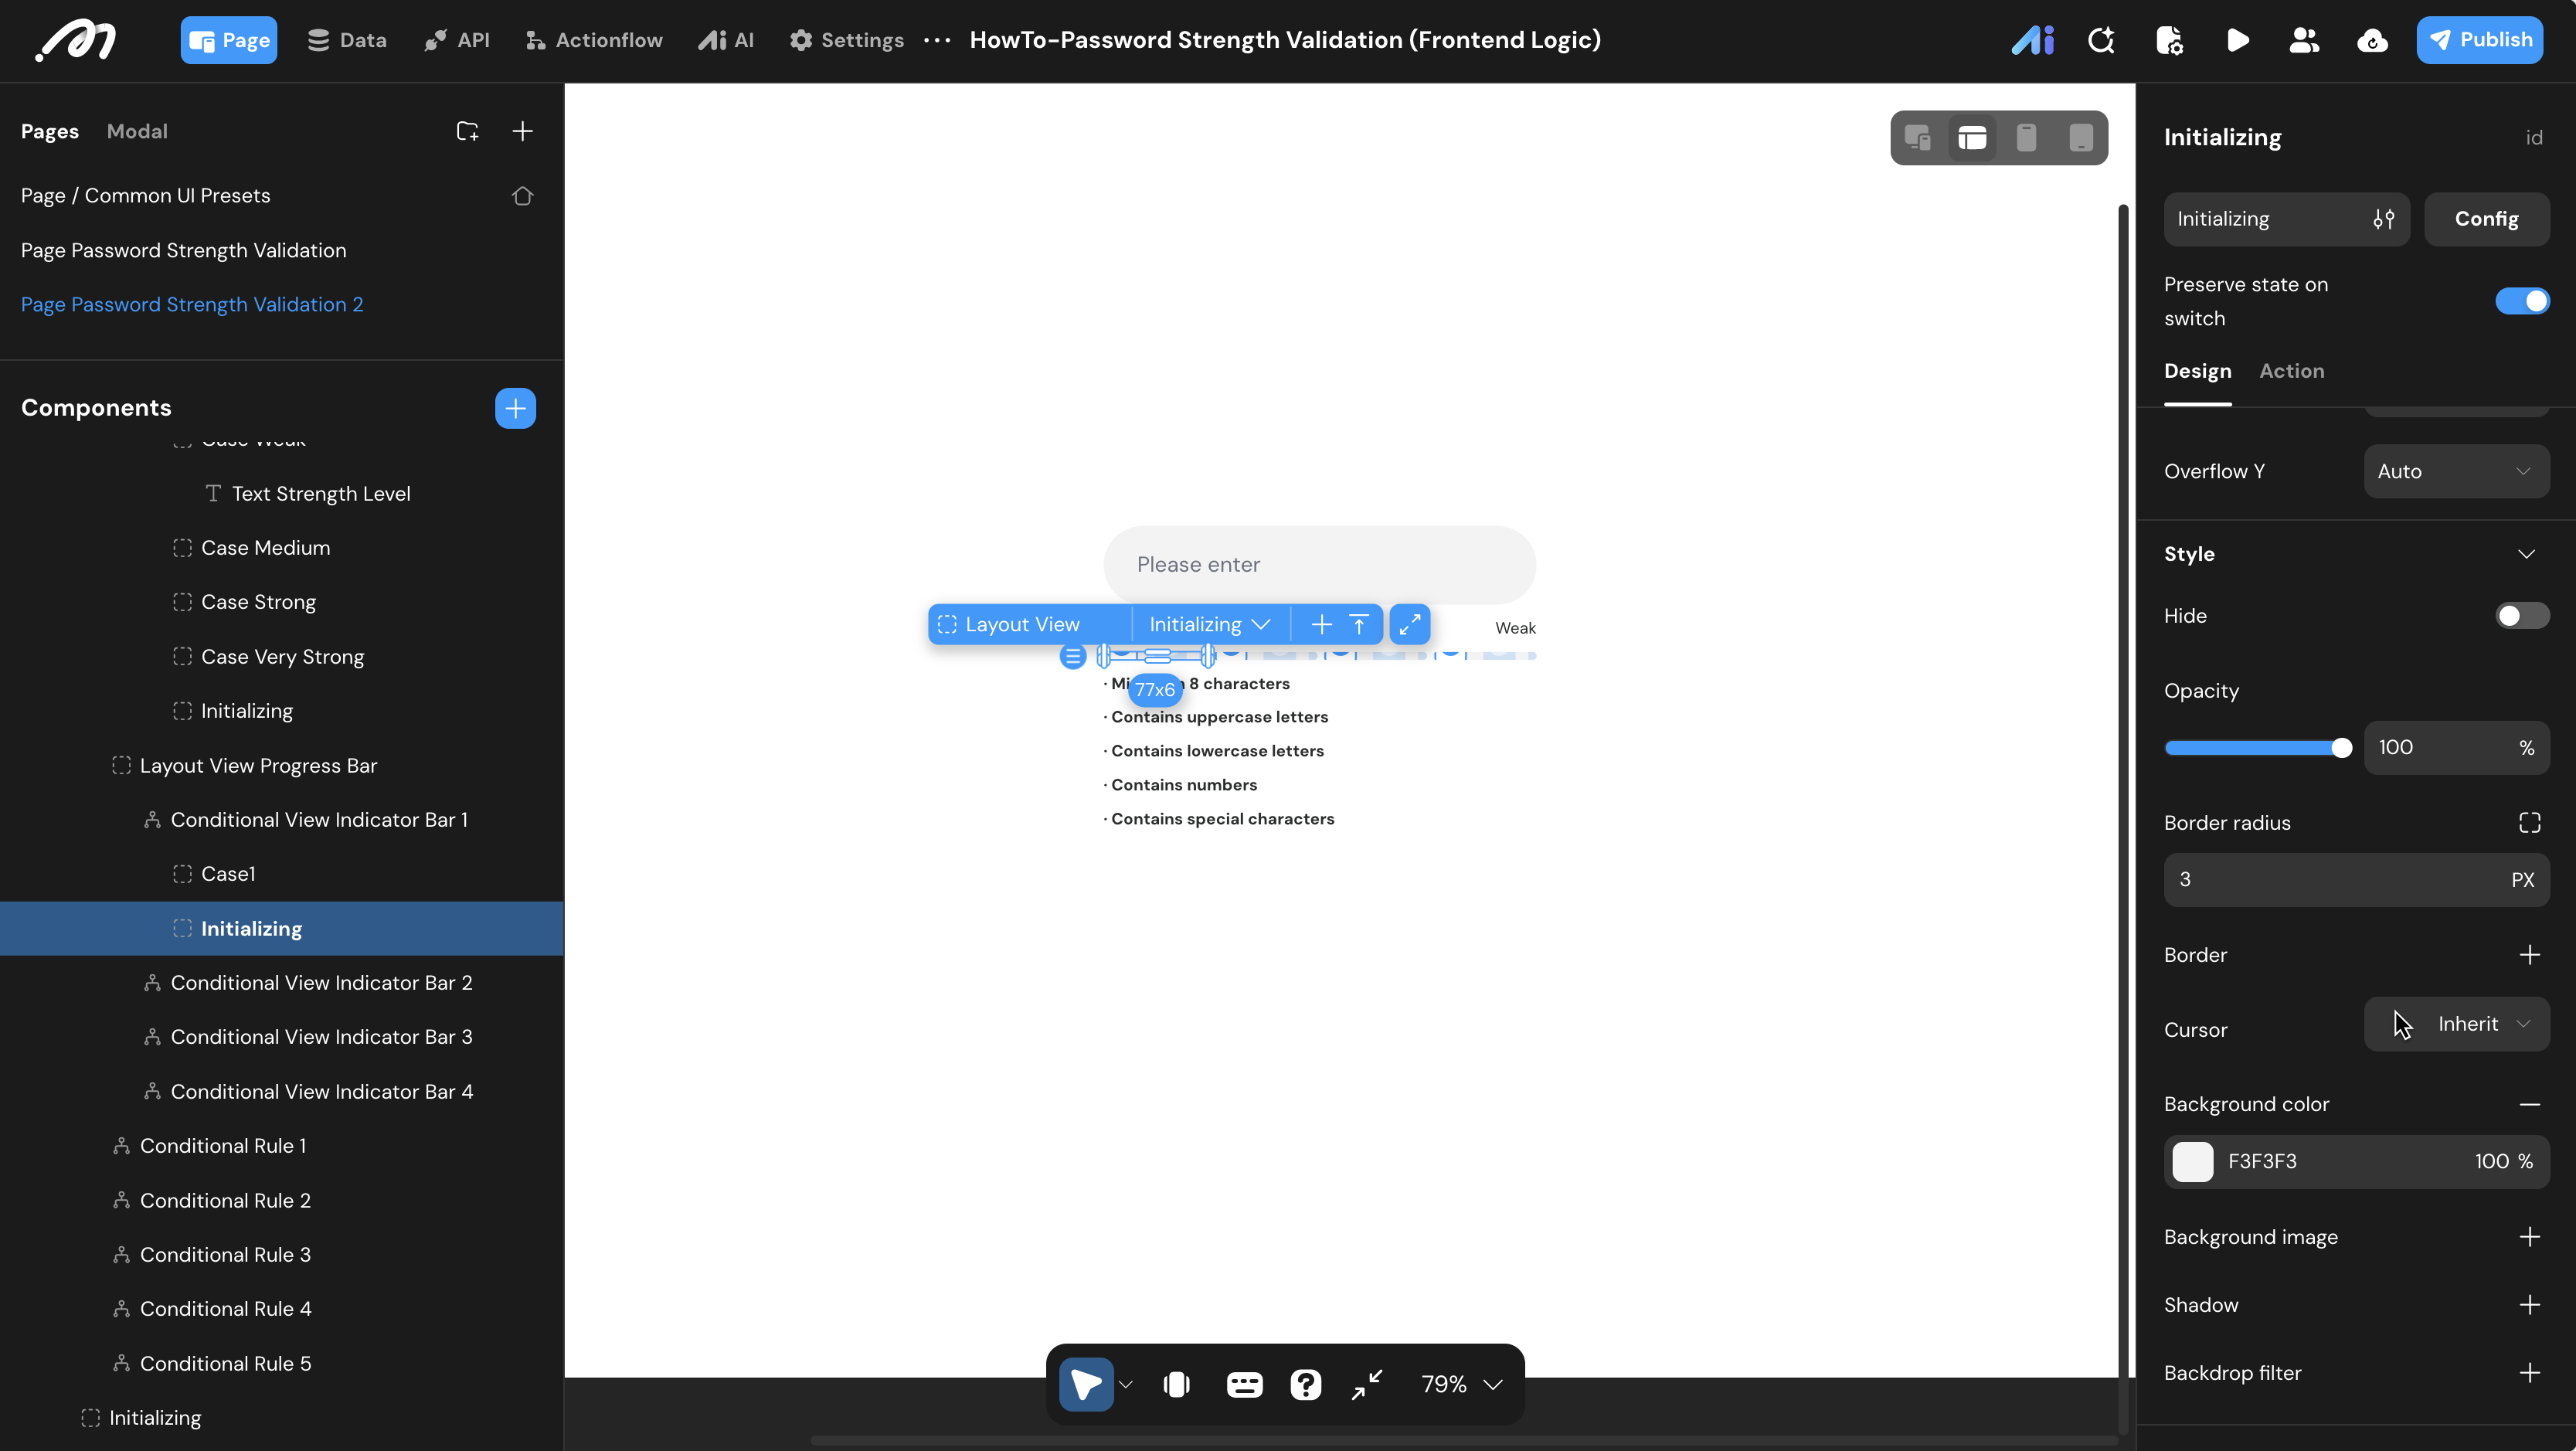
Initializingbranch and set Background color to light gray (#F3F3F3) for the inactive contrast.
- Select a bar track under
The two methods are not visually equivalent. Each bar here only knows active or inactive, not which tier is active, so every lit bar is the same color. Method 1 can color the bars per level because each level is its own layout. Pick Method 2 when you would rather not maintain four copies of the bar row; pick Method 1 when the red-to-green color progression matters.
Dynamic Rule List (applies to both methods)
To highlight each rule in the checklist as it starts passing:
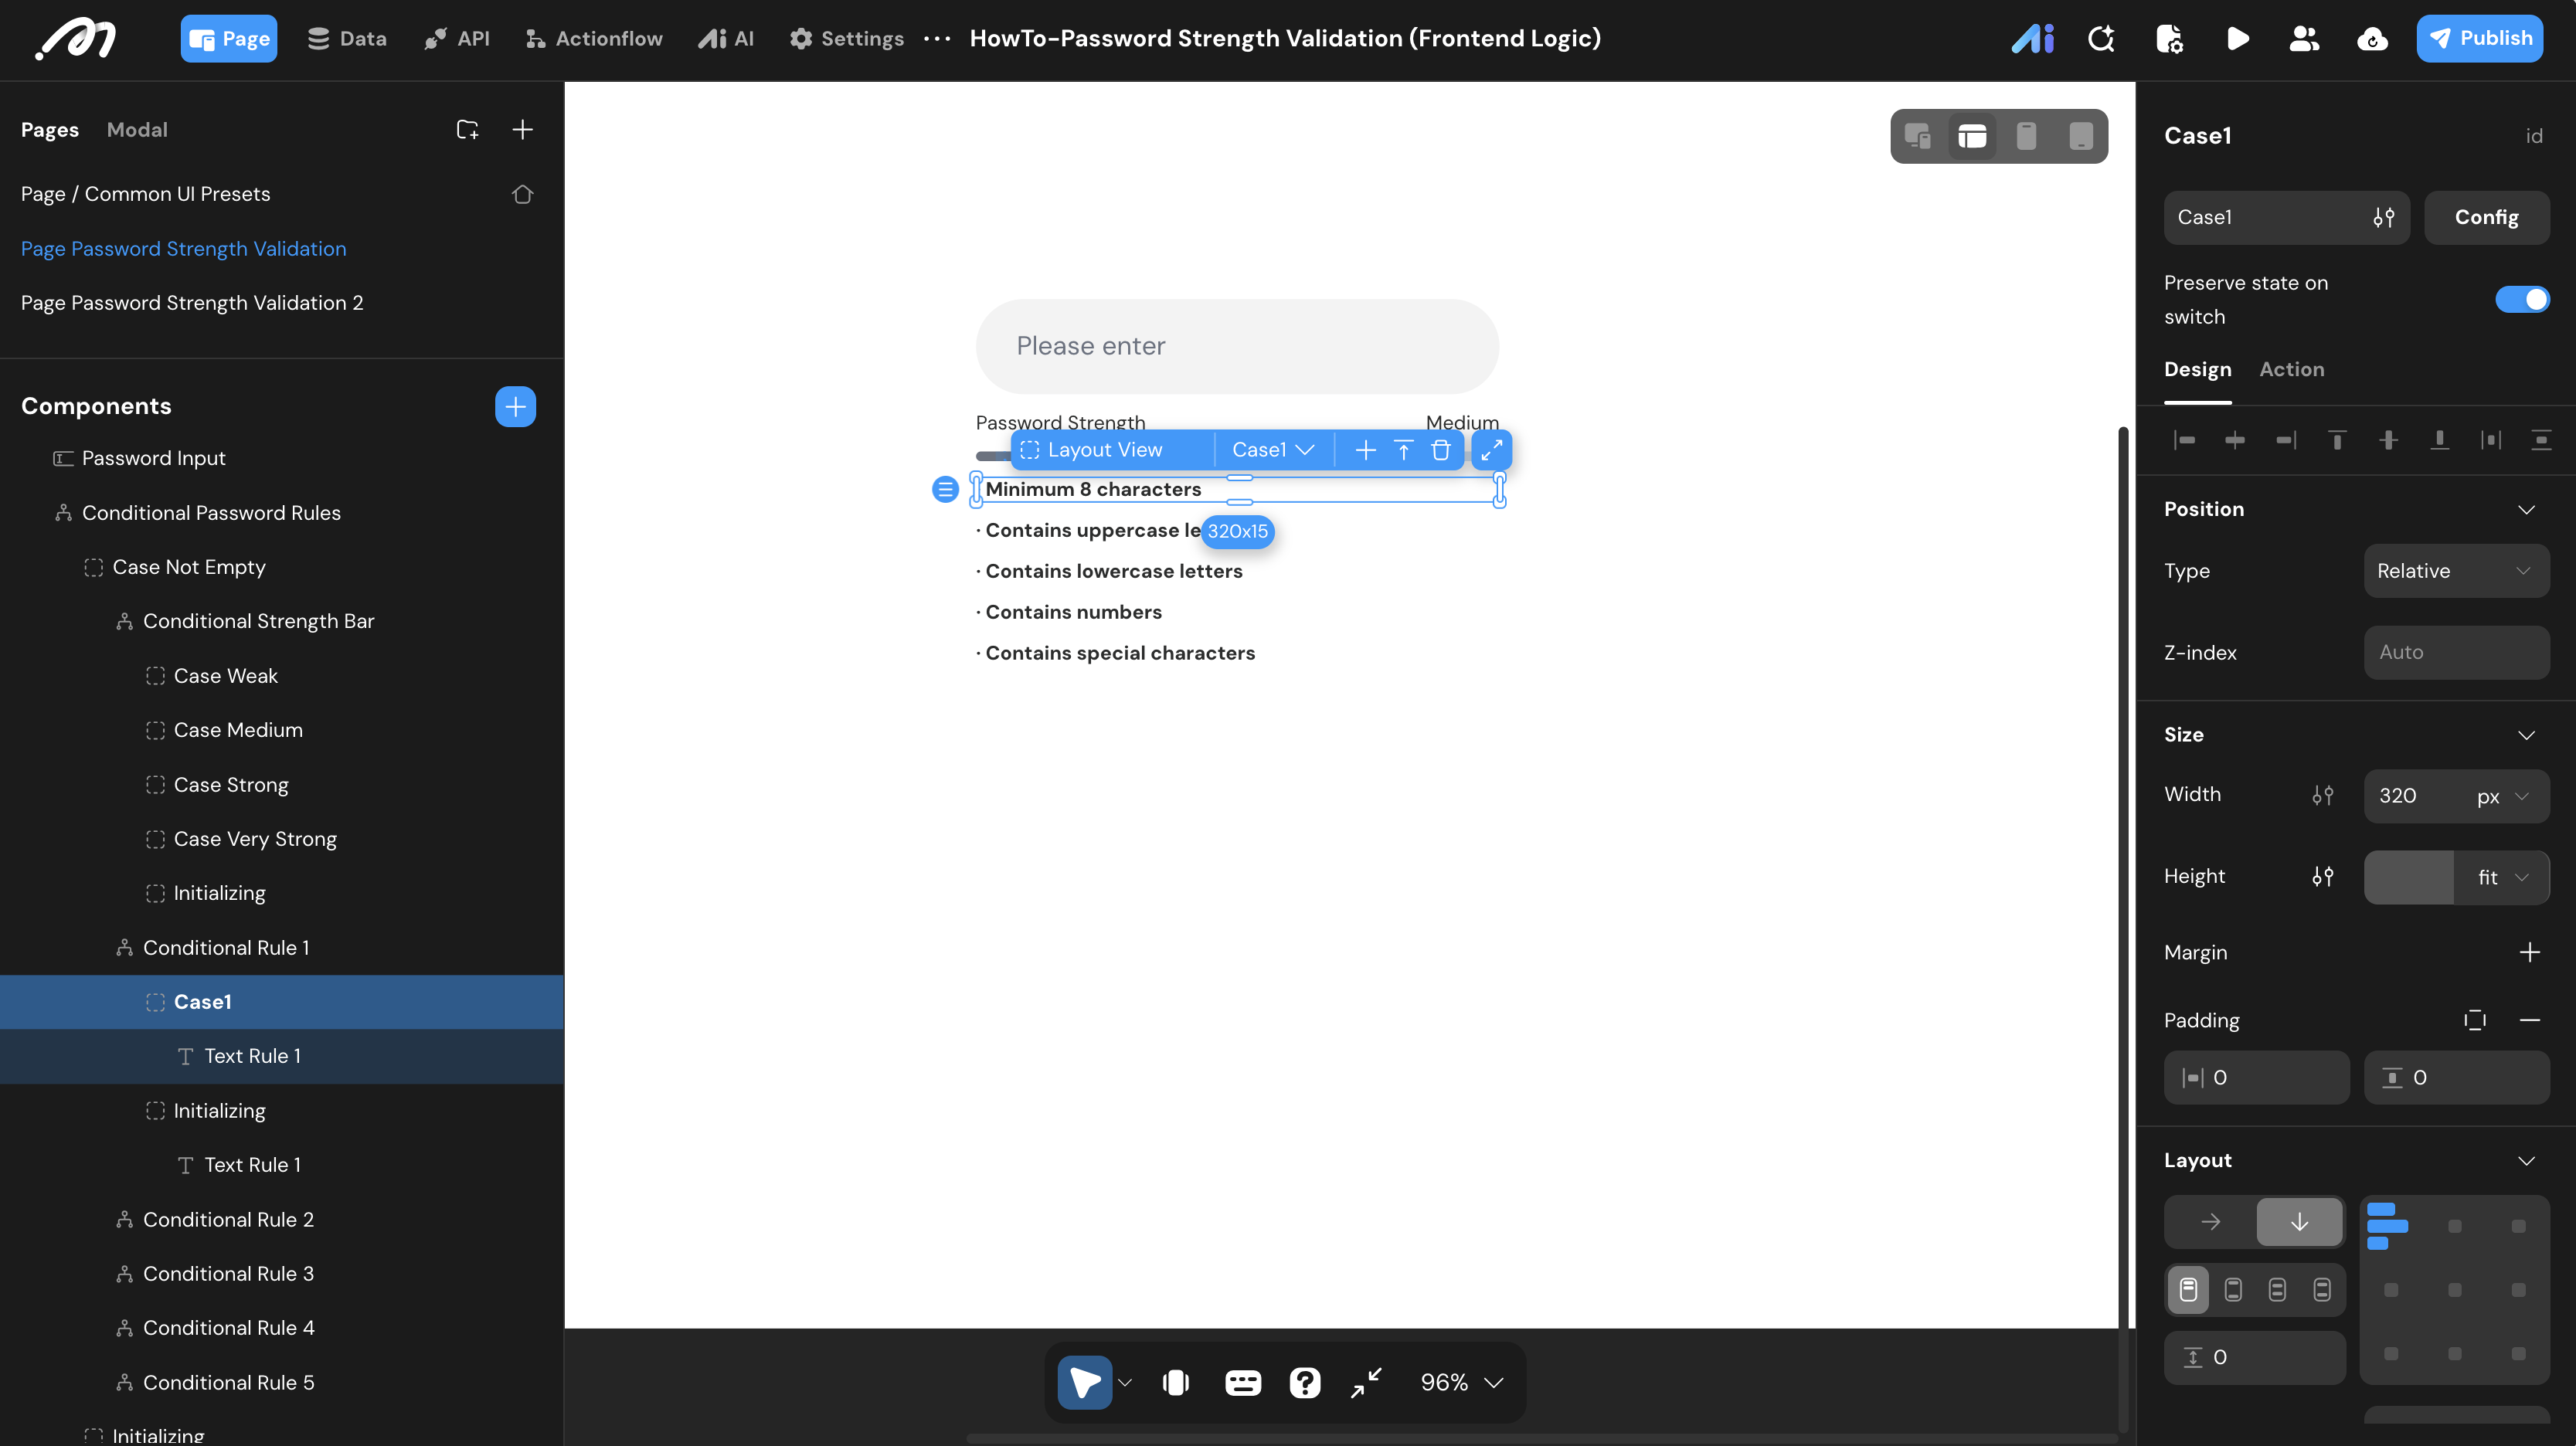
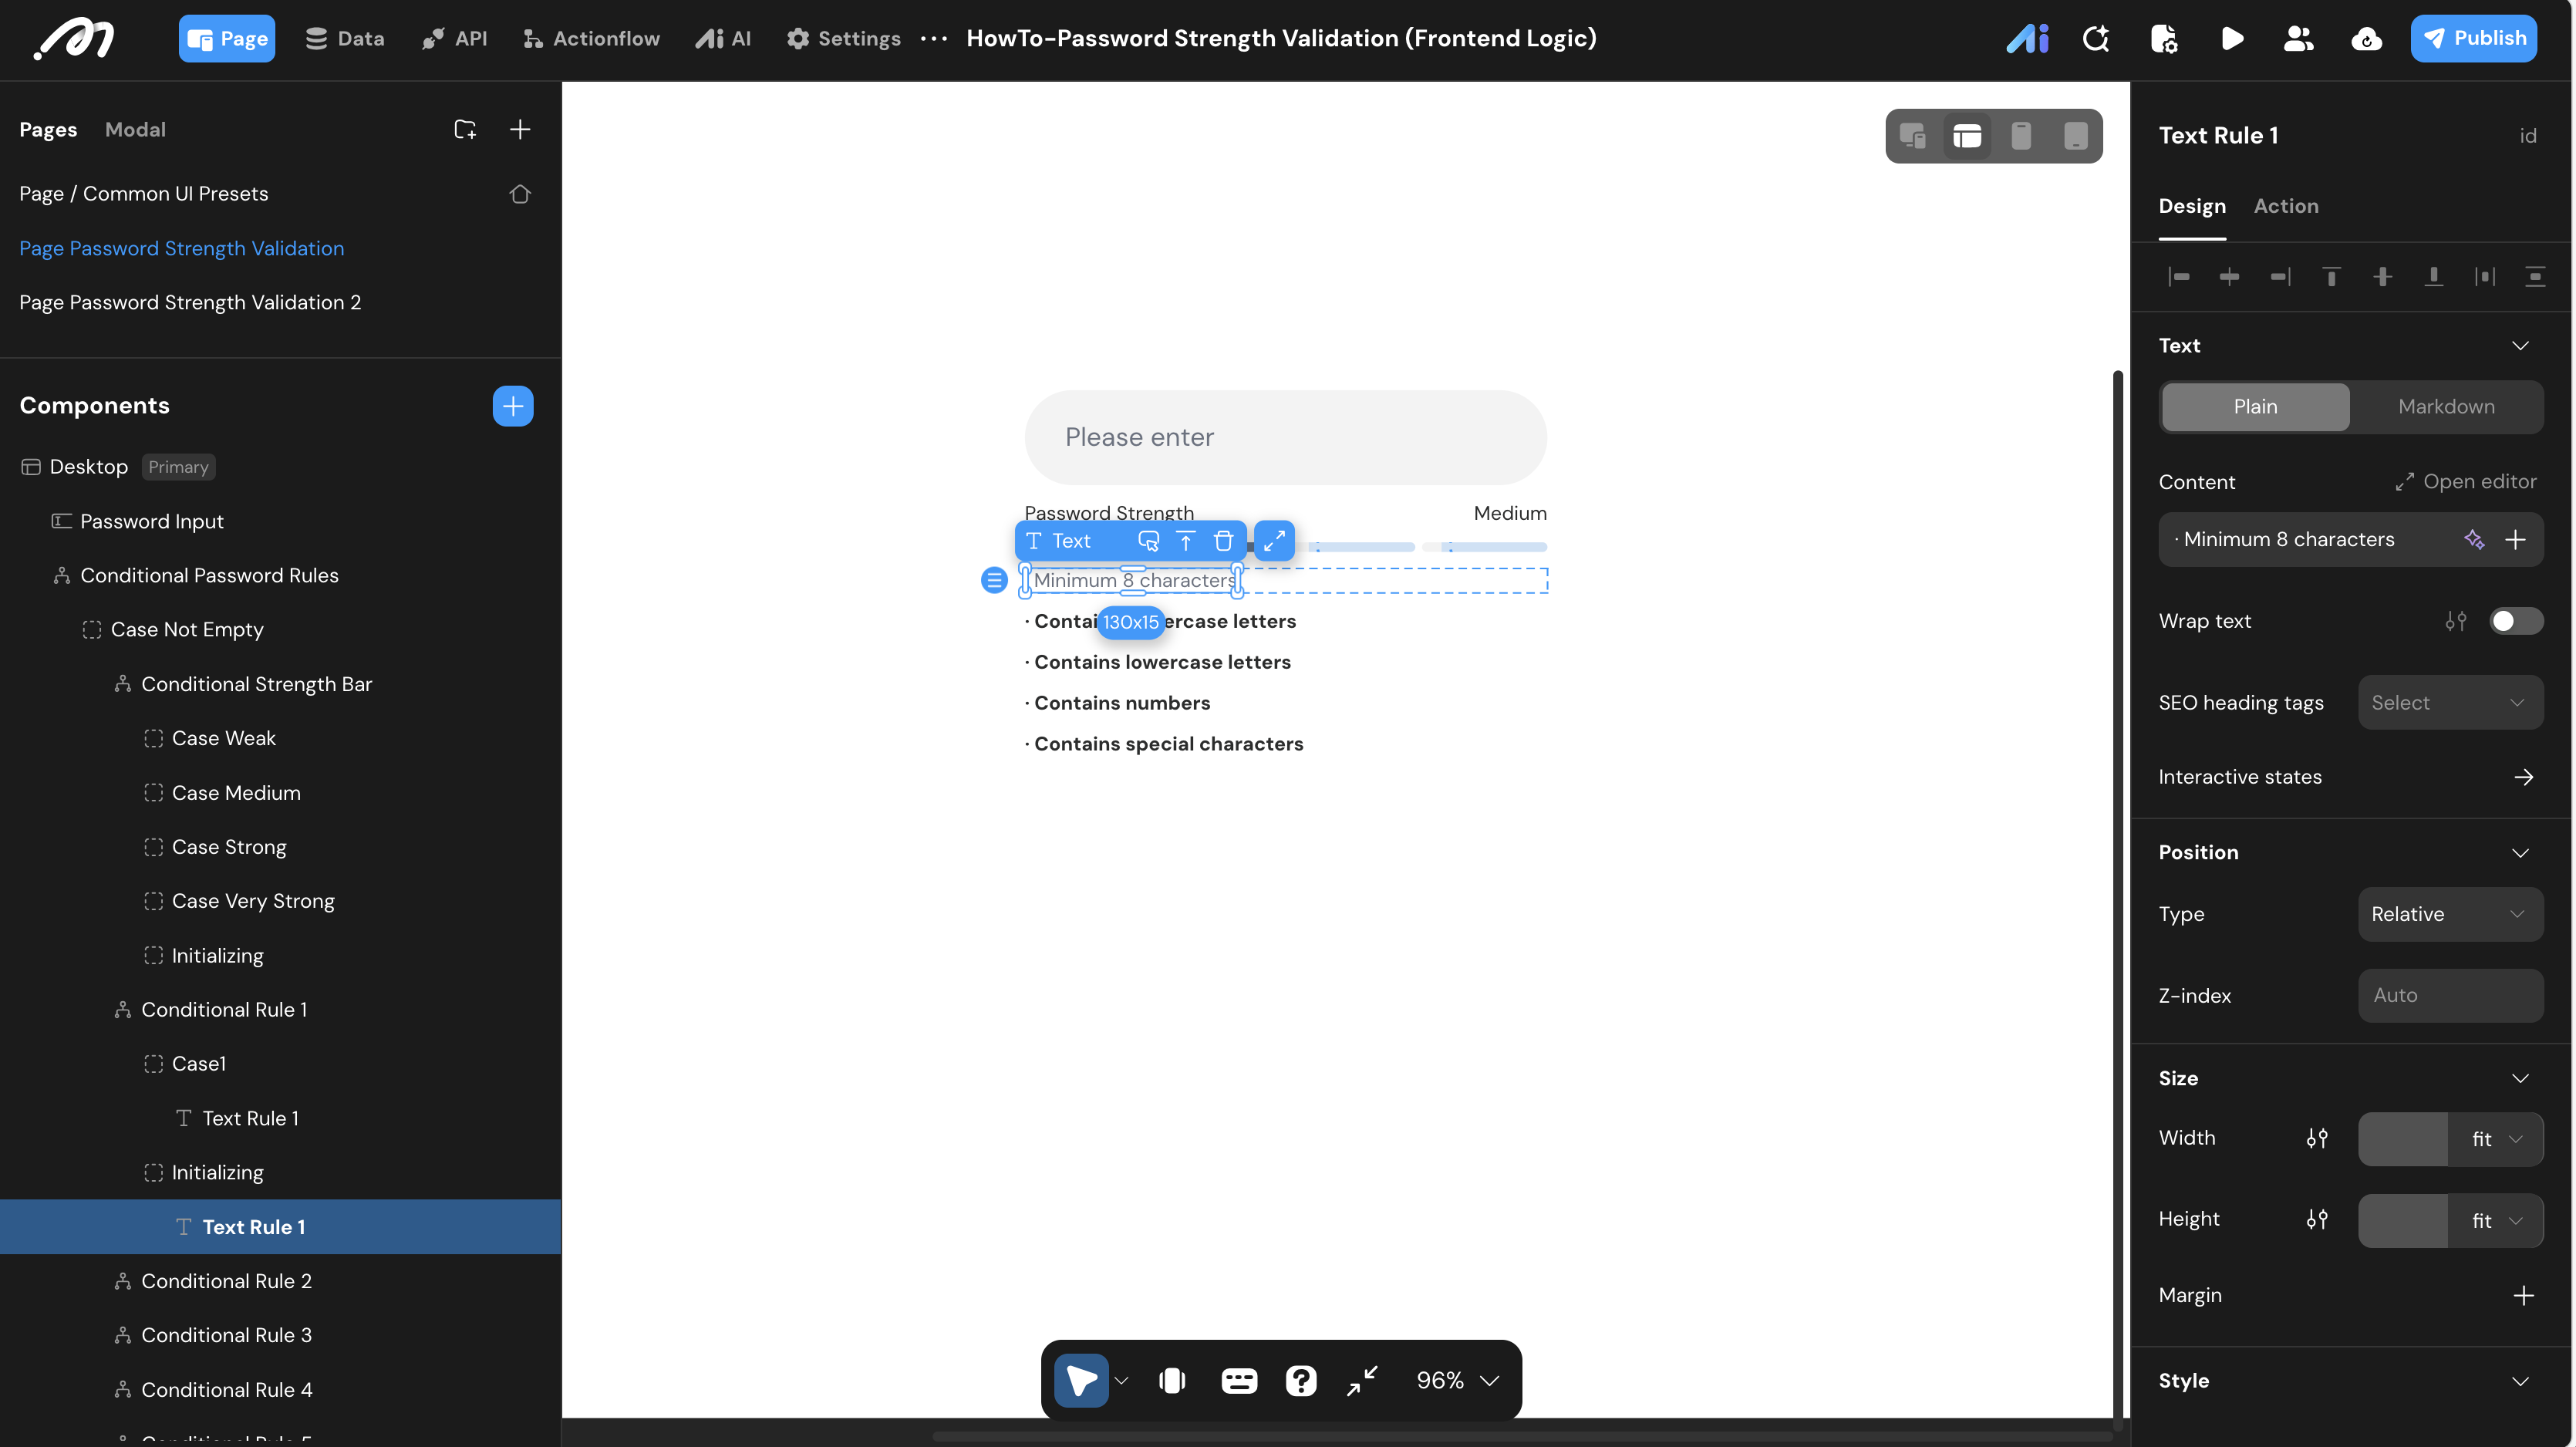
- Wrap each rule label (e.g.
· Minimum 8 characters) in its own Conditional View (e.g.Conditional Rule 1). - Give it two branches:
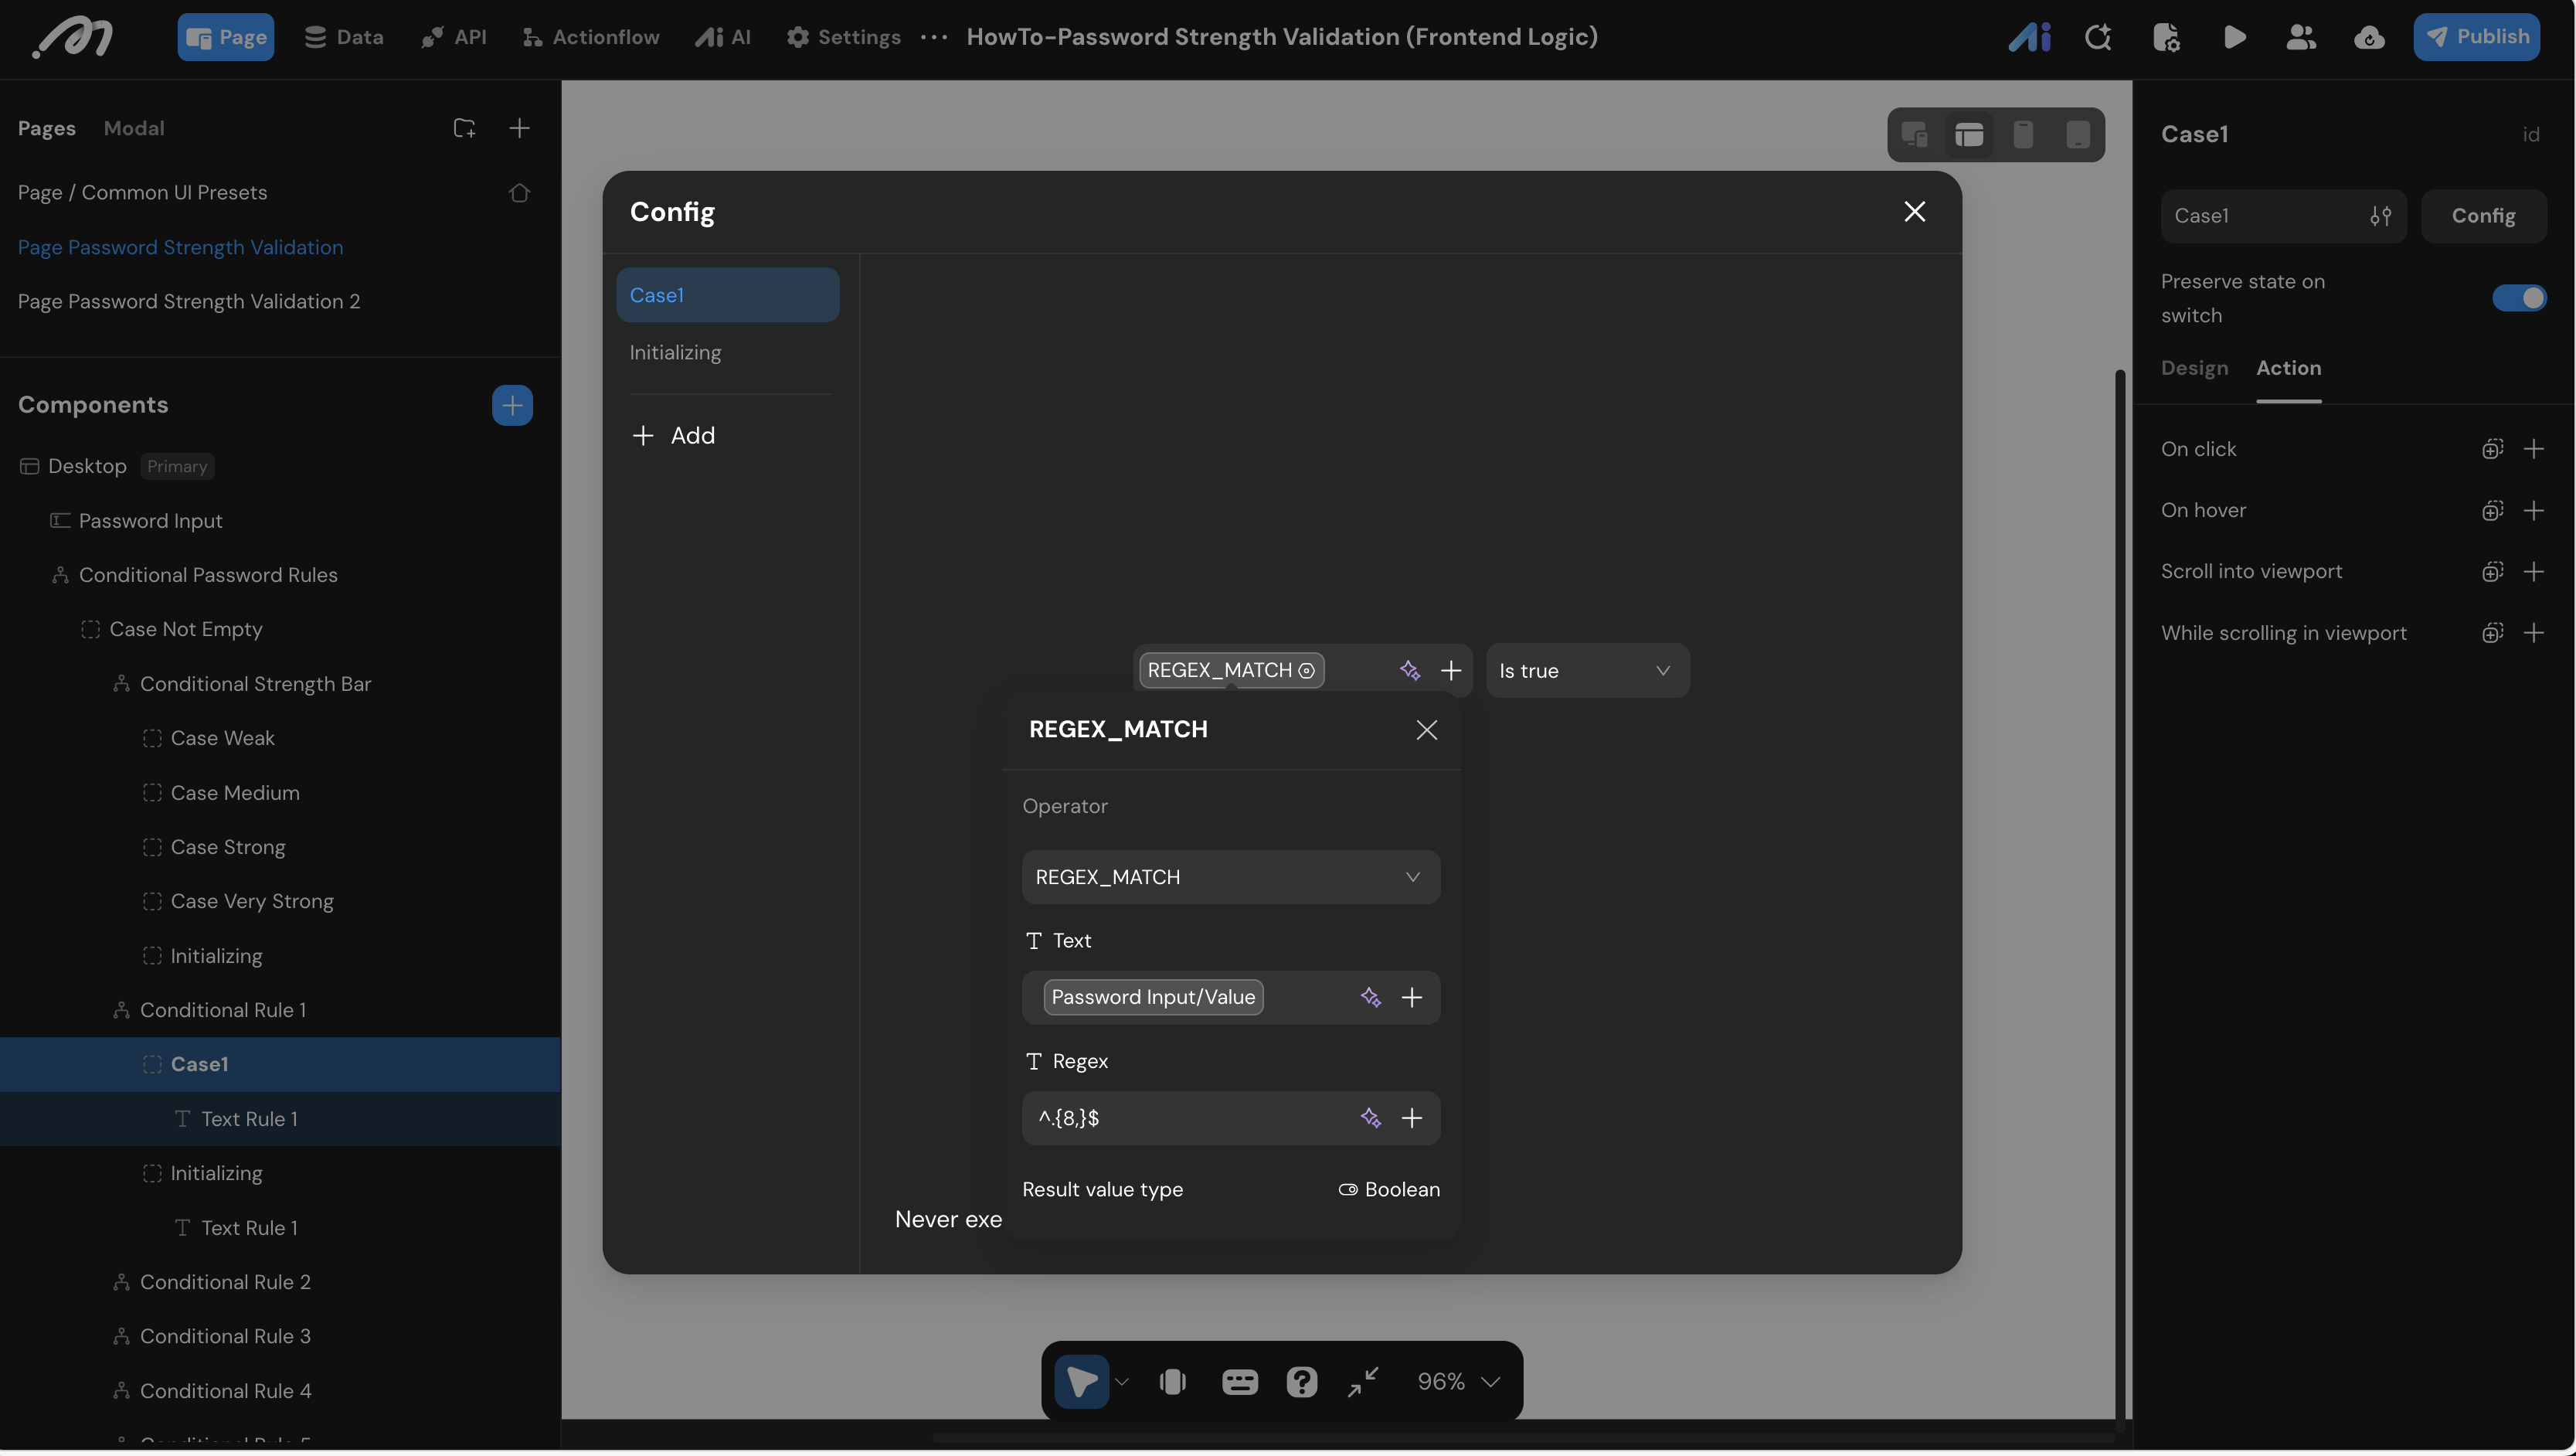
Case1andInitializing. - Inline formula: put a
REGEX_MATCHformula straight into theCase1entry condition — for rule 1,REGEX_MATCH(Password Input / Value, "^.{8,}$") is true. - Under
Case1, set the text to bold and change its color from light gray to near-black.
These inline formulas repeat the same five patterns already used in the Actionflow, so each rule is now defined in two places. When you change a rule, change it in both — otherwise the checklist and the score disagree.
Verification
Click Preview and type into the input field.
Step 1: Empty Input
- Action: Leave the field blank.
- Expected Result:
Conditional Password Rulesstays inInitializing— no bars, no level label, and no checklist on the page. The input field itself is of course still visible.
Step 2: Build the Password Up in Four Steps
Enter 1 → A → a → # → 1111, checking the UI after each step:
- Action 1: type
1- Expected Result: the master container sees a length above 0 and reveals the feedback UI. “Contains a number” matches, the score becomes
1, the label reads Weak, and bar 1 lights up.
- Expected Result: the master container sees a length above 0 and reveals the feedback UI. “Contains a number” matches, the score becomes
- Action 2: append
A(value1A)- Expected Result: “Contains an uppercase letter” matches and the score reaches
2. The label stays Weak and only bar 1 stays lit — bar 2 needs a score of 3.
- Expected Result: “Contains an uppercase letter” matches and the score reaches
- Action 3: append
a(value1Aa)- Expected Result: “Contains a lowercase letter” matches, score
3. The label switches to Medium and bars 1–2 are lit.
- Expected Result: “Contains a lowercase letter” matches, score
- Action 4: append
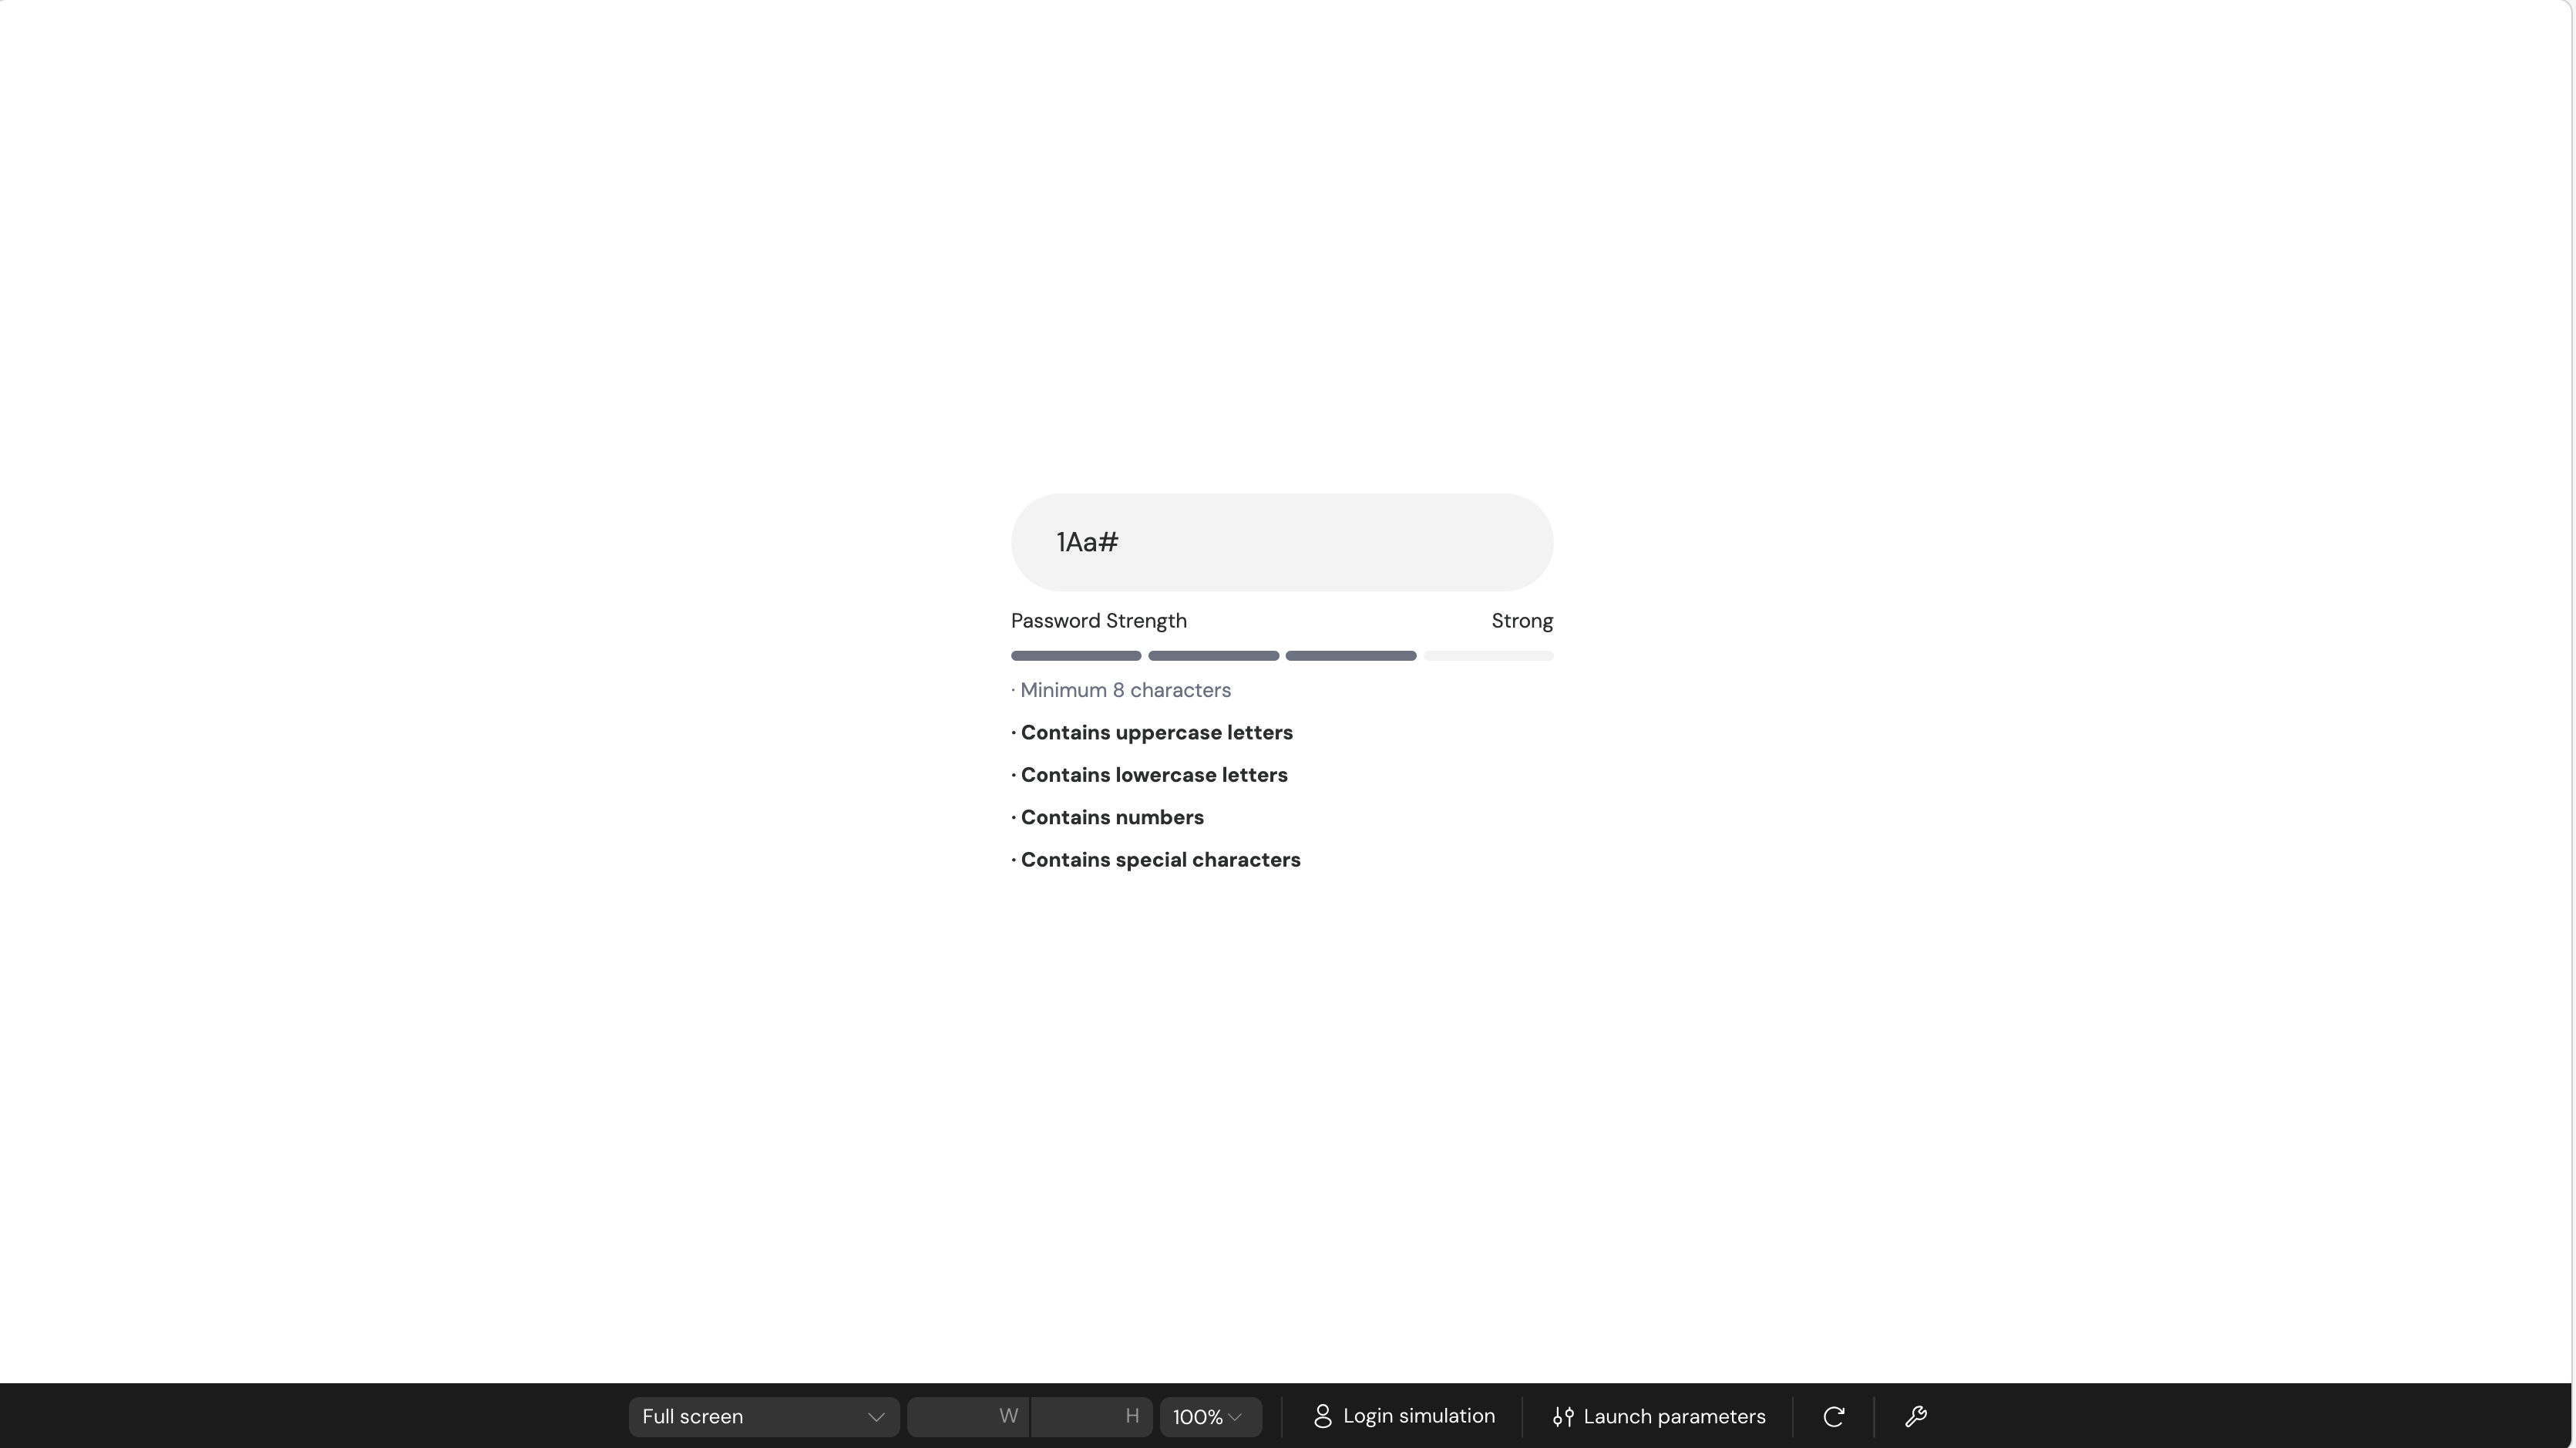
#(value1Aa#)- Expected Result: “Contains a special character” matches, score
4. The label reads Strong, bars 1–3 are lit, and the four matched rule labels are now bold.
- Expected Result: “Contains a special character” matches, score
- Action 5: append
1111(value1Aa#1111)- Expected Result: “Minimum 8 characters” is now satisfied too, reaching the maximum score of
5. The label reads Very Strong and all four bars are lit.
- Expected Result: “Minimum 8 characters” is now satisfied too, reaching the maximum score of
Keep the reset node (setting password_strength_level to 0) as the first node in the On change Actionflow. If it is missing, the score accumulates across keystrokes; if it runs after any of the checks, it wipes out the points those checks just added. Either way the indicator stops matching the password.