Role-Based Content Gating
Demo Project
https://editor.momen.app/tool/jnPx6858ZxD/WEB?code=1xPyKE00apemt&ref=0562398
Introduction
- Goal: Show different content to different users based on their role or membership tier, using the two mechanisms Momen provides for it.
- Use Cases: Tiered membership sites where premium posts stay hidden from free members, internal document libraries where access depends on seniority, and customer portals where each account only sees its own records.
- Core Logic: two mechanisms, one per table, so you can compare them side by side.
- Client-side filtering (the
noticetable): the list component builds its query from the logged-in user’s attributes. Best for tiered display of non-sensitive content, because it needs no permission setup and reacts instantly to the user’s own data. - Server-side permissions (the
filetable): Momen’s Role-Based Access Control (RBAC) plus a row-level security (RLS) rule filters rows during query execution, before any data leaves the database. Required for anything sensitive.
- Client-side filtering (the
Pick the mechanism by how sensitive the data is, not by which is easier to build. A client-side filter lives in the GraphQL request, so a user who edits that request and drops the filter receives the full table. For financial records, personal documents, or anything else that must never leak, use server-side permissions.
Steps
This tutorial uses pre-styled layout blocks from the “Common UI Presets ” template page to speed up the visual setup. Those presets only carry basic styling and typography — no conditional logic, data bindings, or Actionflows. When building your own app, copy the elements from that template page to skip manual styling and focus on the logic.
Data Model
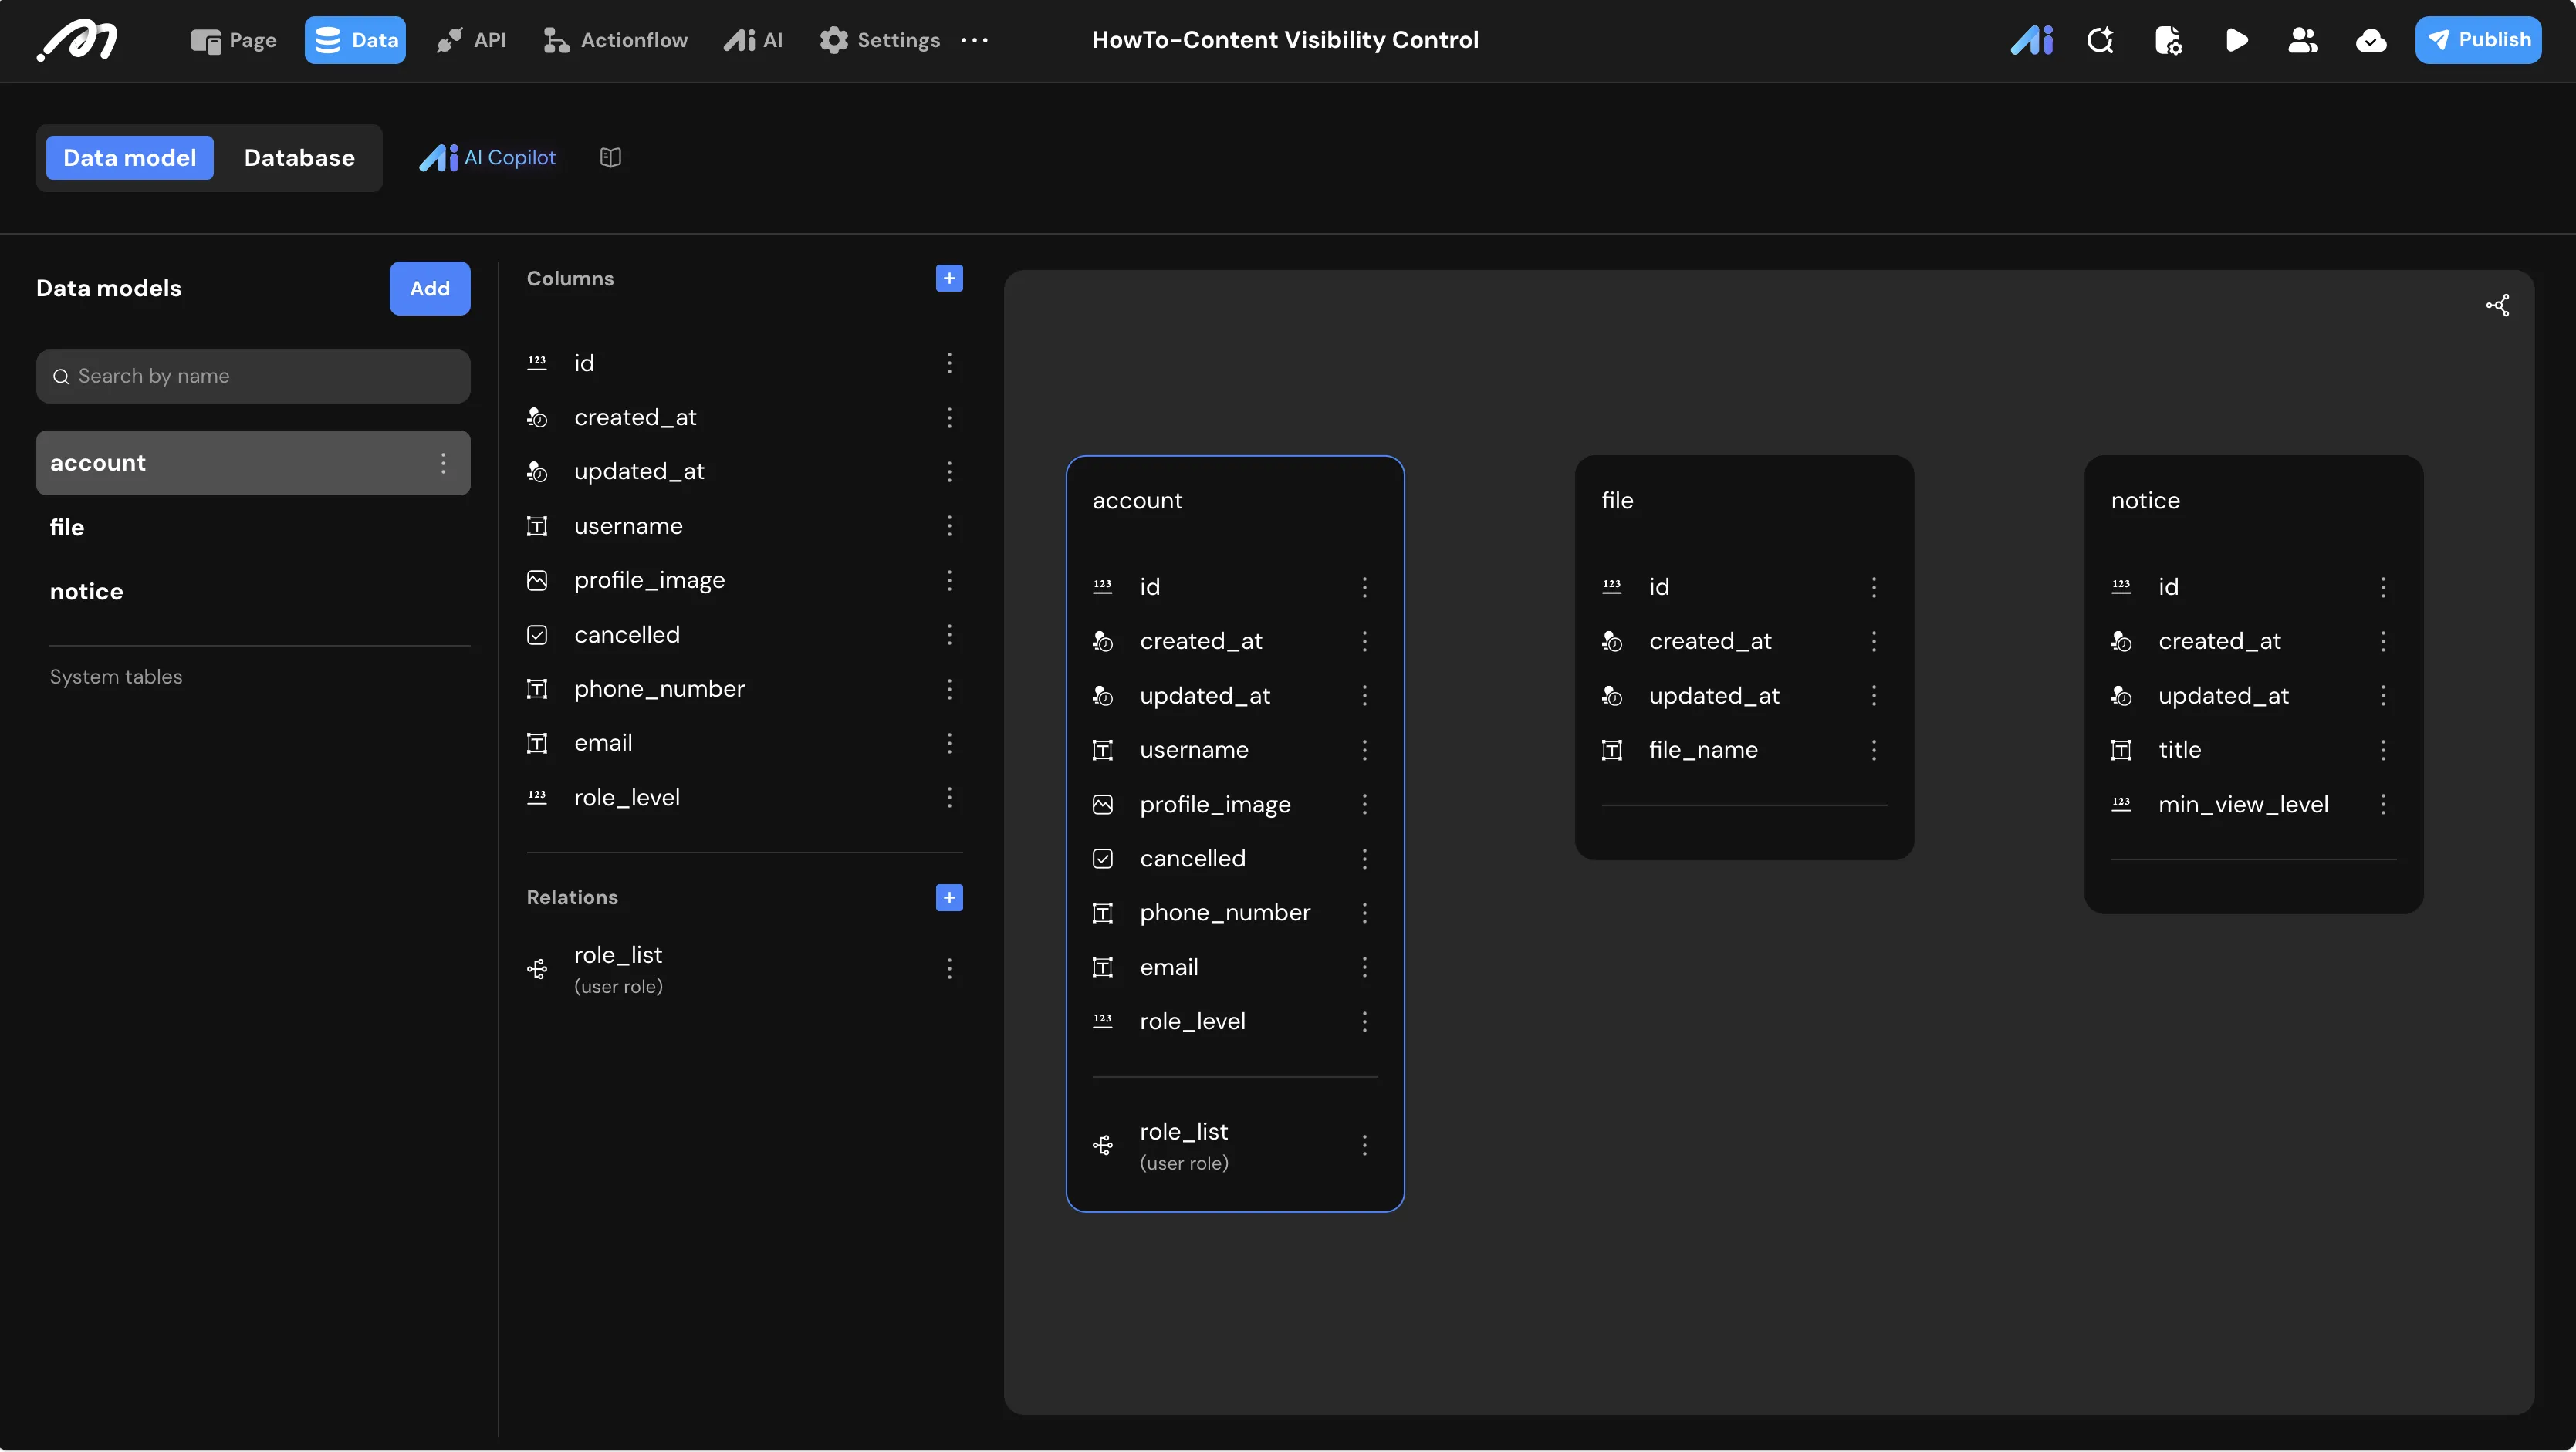
You need three tables: account (system-default), file (secured server-side), and notice (filtered client-side).
Every Momen table already includes id (Bigint, auto-generated) plus the system-managed created_at and updated_at timestamps, so the tables below list only the fields you need to create.
1. Table: account
The system-default table storing user profiles. Add one custom field to it:
| Field Name | Type | Note |
|---|---|---|
role_level | Bigint | Custom field — add this yourself. A higher value grants broader access (1 = Standard Member, 2 = Premium Member). Set a default of 1 for new accounts: a user whose role_level is null falls through to the Default query branch configured in Method 1 and sees no notices at all. |
2. Table: file
Stores file assets, isolated by a server-side RLS rule.
| Field Name | Type | Note |
|---|---|---|
file_name | Text | The display name of the file |
3. Table: notice
Stores announcements, restricted by client-side list filtering.
| Field Name | Type | Note |
|---|---|---|
title | Text | The announcement title |
min_view_level | Bigint | The lowest role_level allowed to see this announcement |
The two tables model the threshold differently on purpose. notice stores it per row in min_view_level, so editors can change who sees what from the CMS. file hardcodes it in the RLS rule to keep the permission example minimal — an RLS condition can reference a table field too.
Sample Records
Populate the tables so there is something to test against.
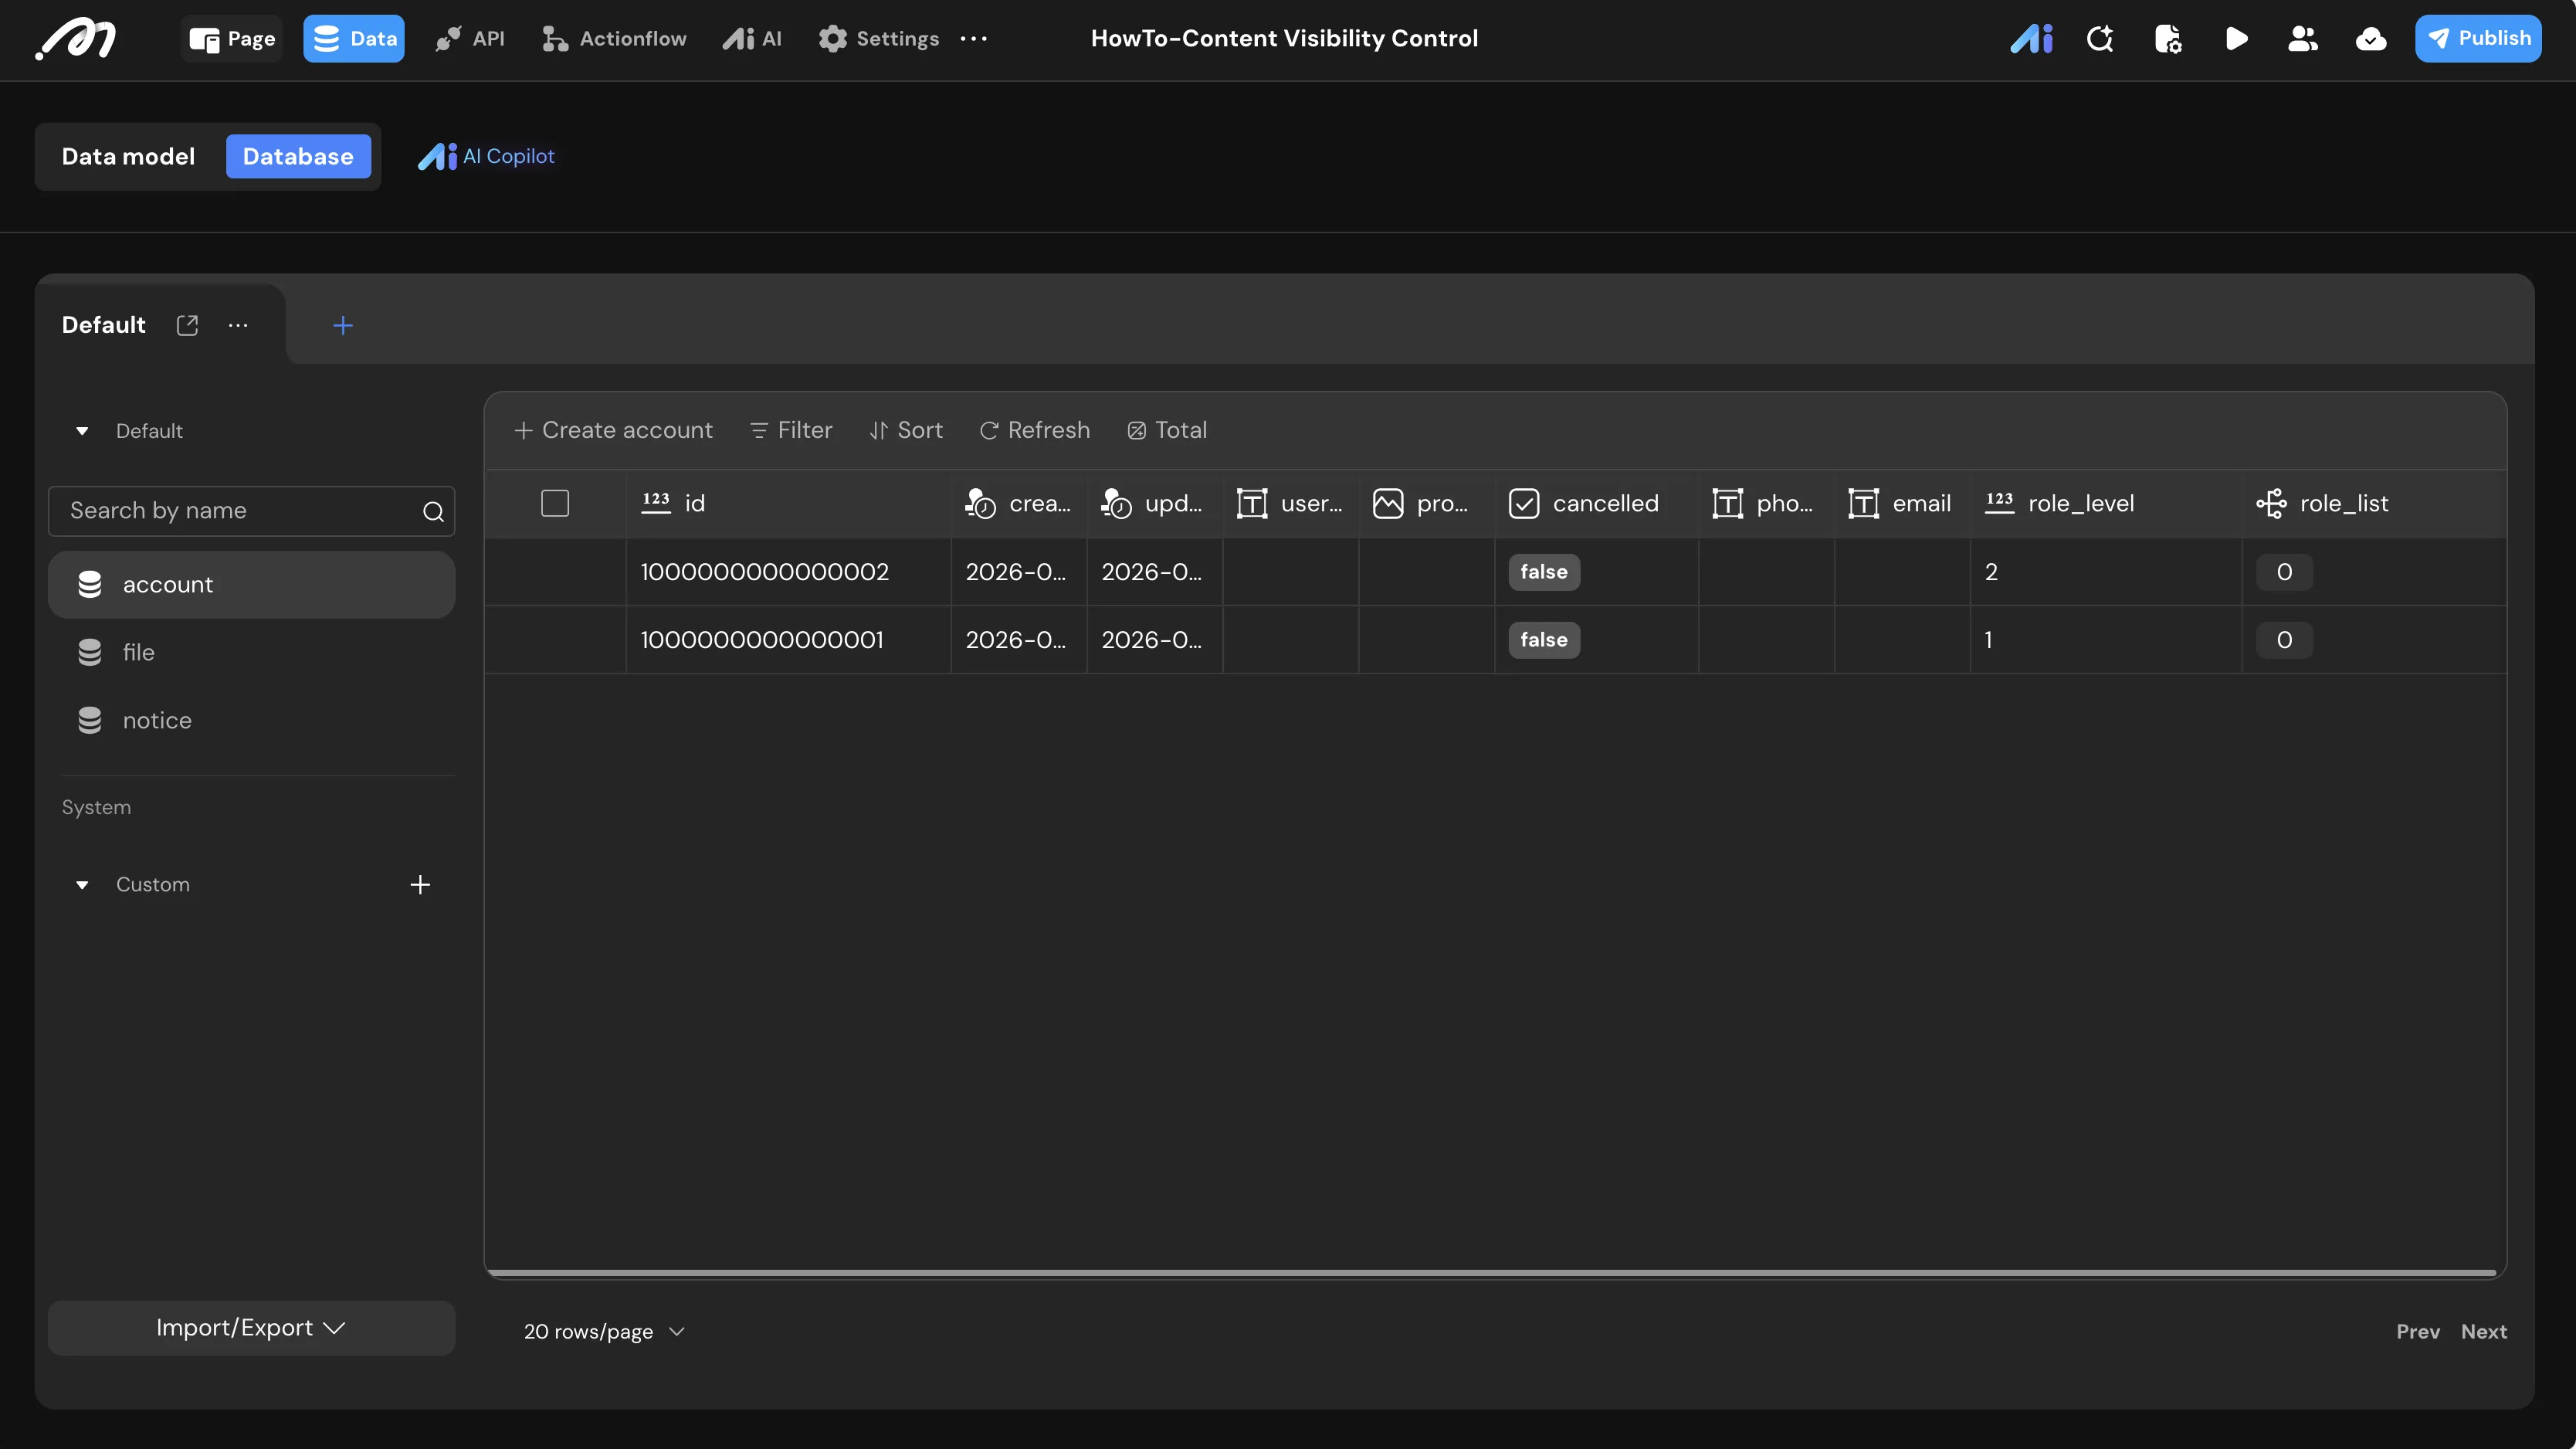
1. account Records
Create the test users with Login simulation, in the preview bar at the bottom of the editor — it is also the tool you will use to switch users during verification.
- User 1:
id=100000000000001,role_level=1(Standard Member) - User 2:
id=100000000000002,role_level=2(Premium Member)
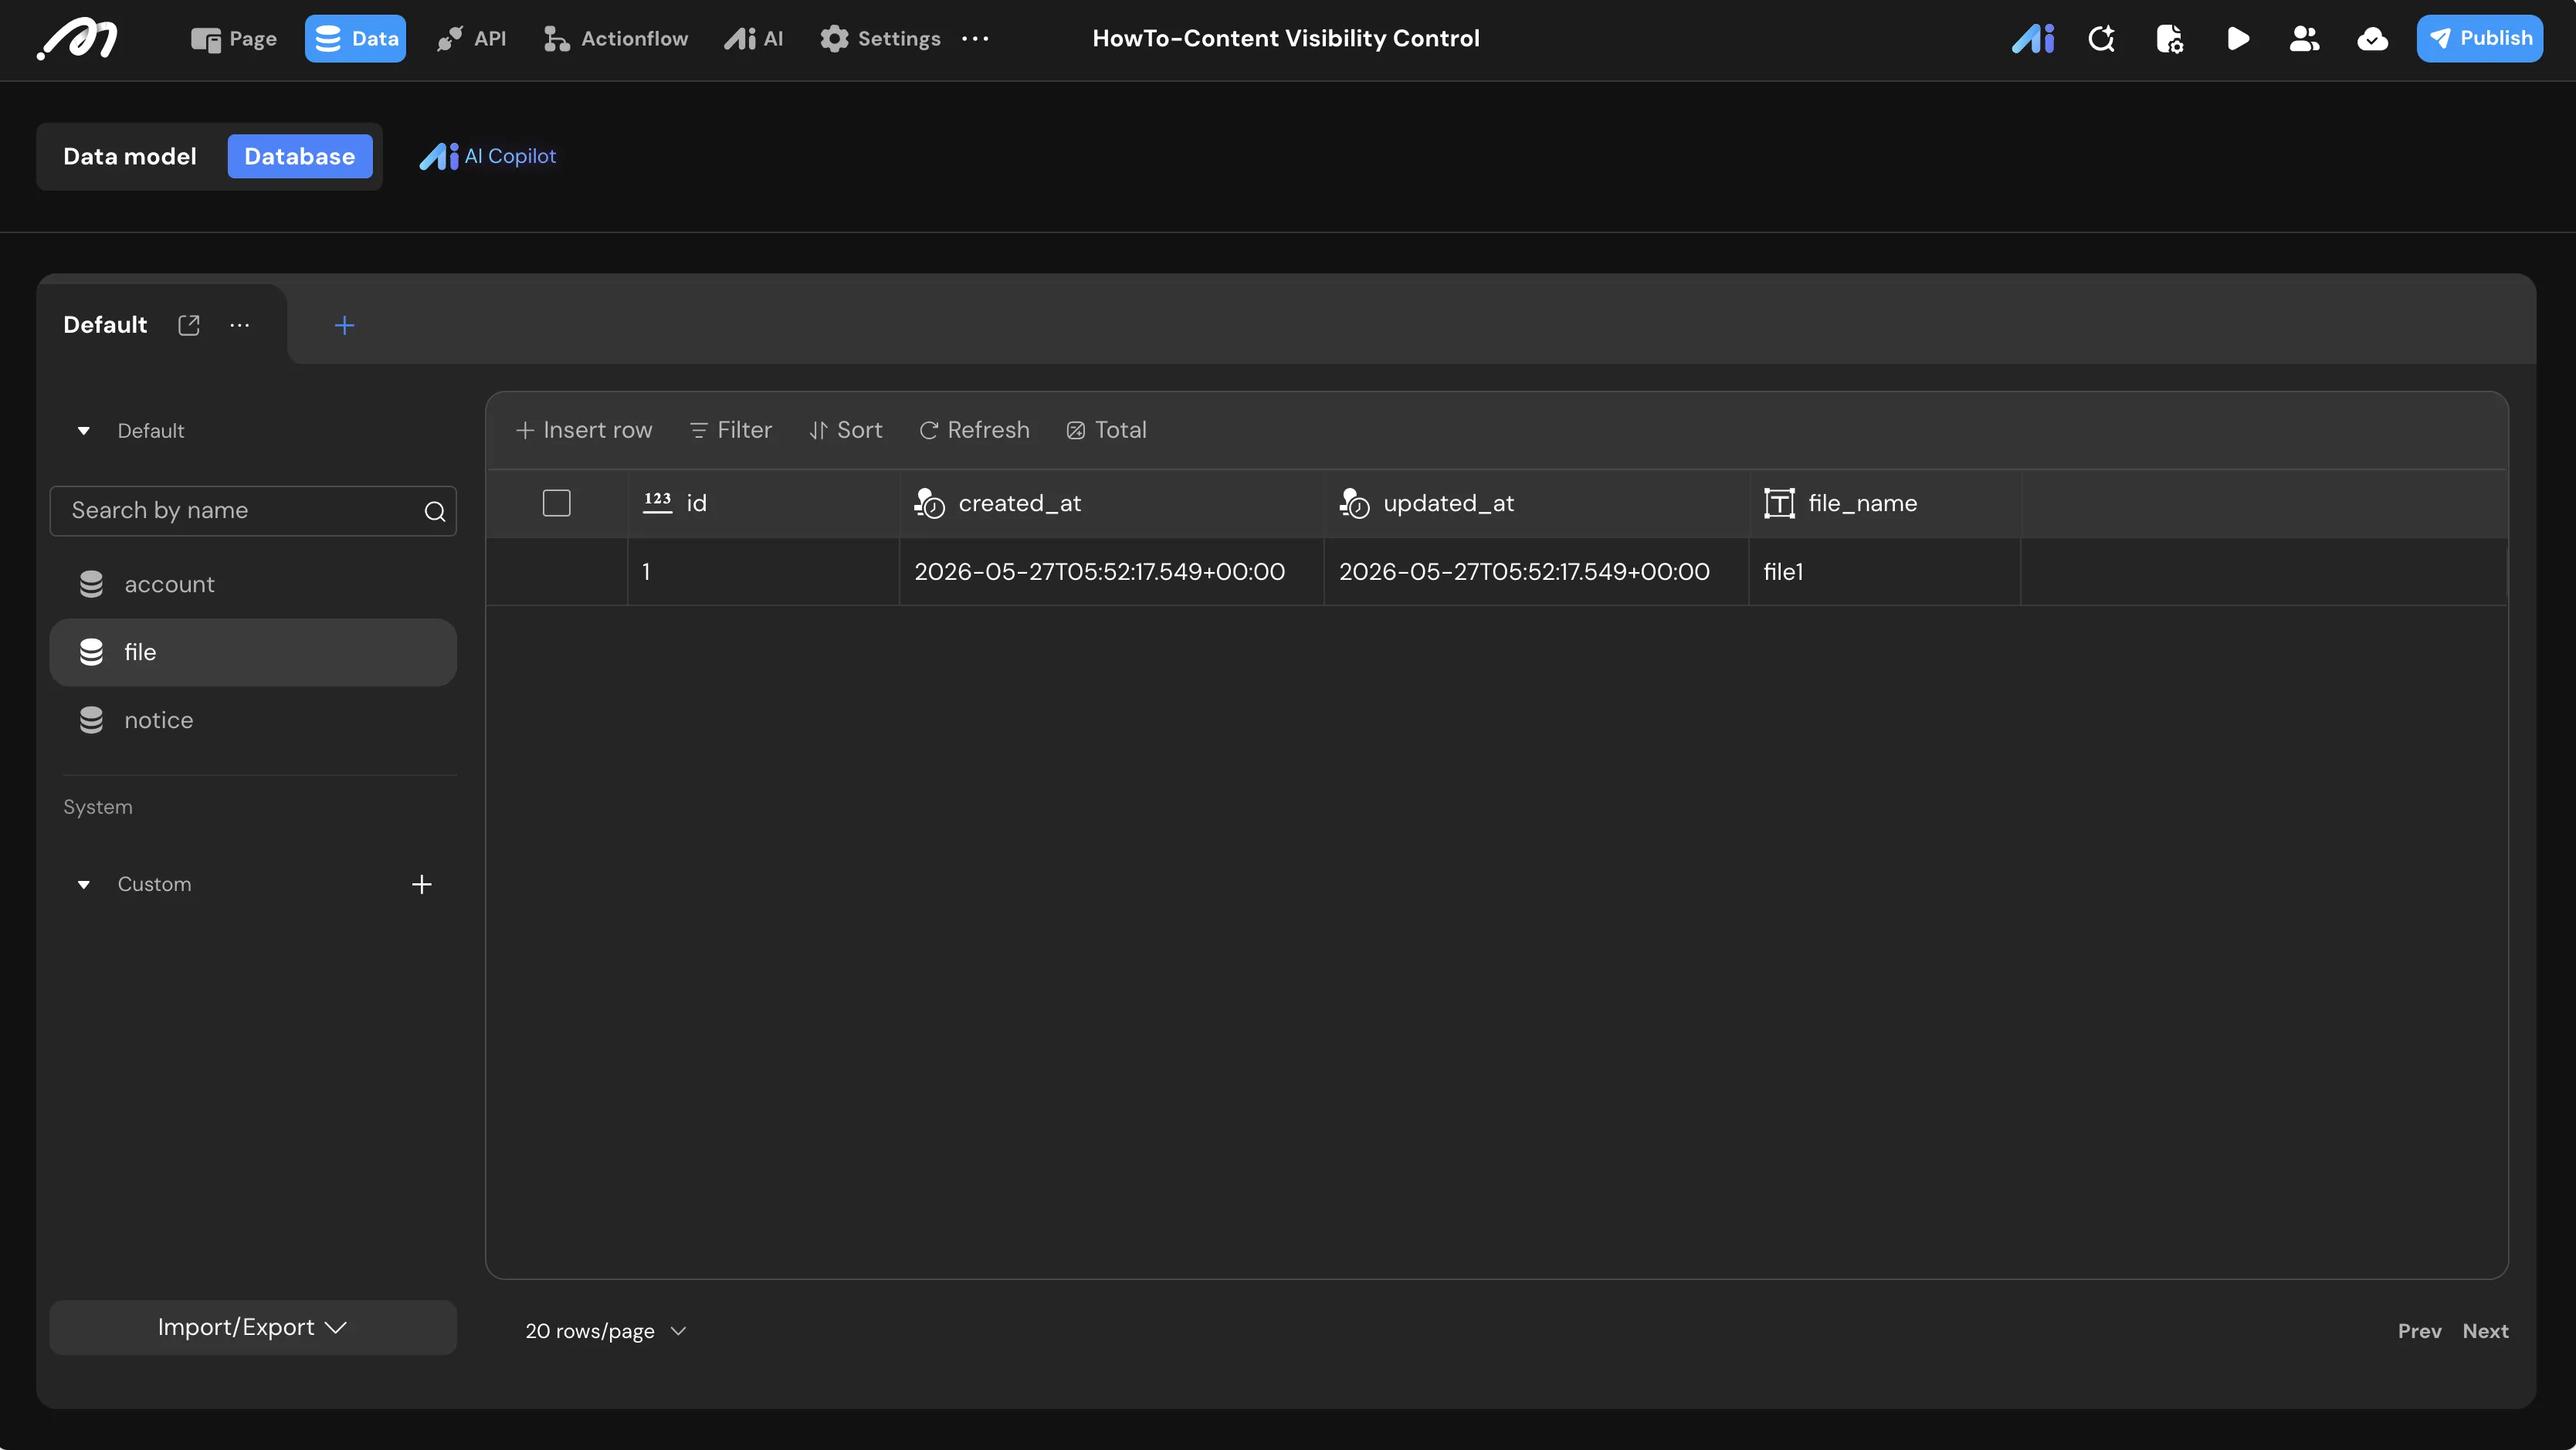
2. file Records
- Record 1:
id=1,file_name=file1
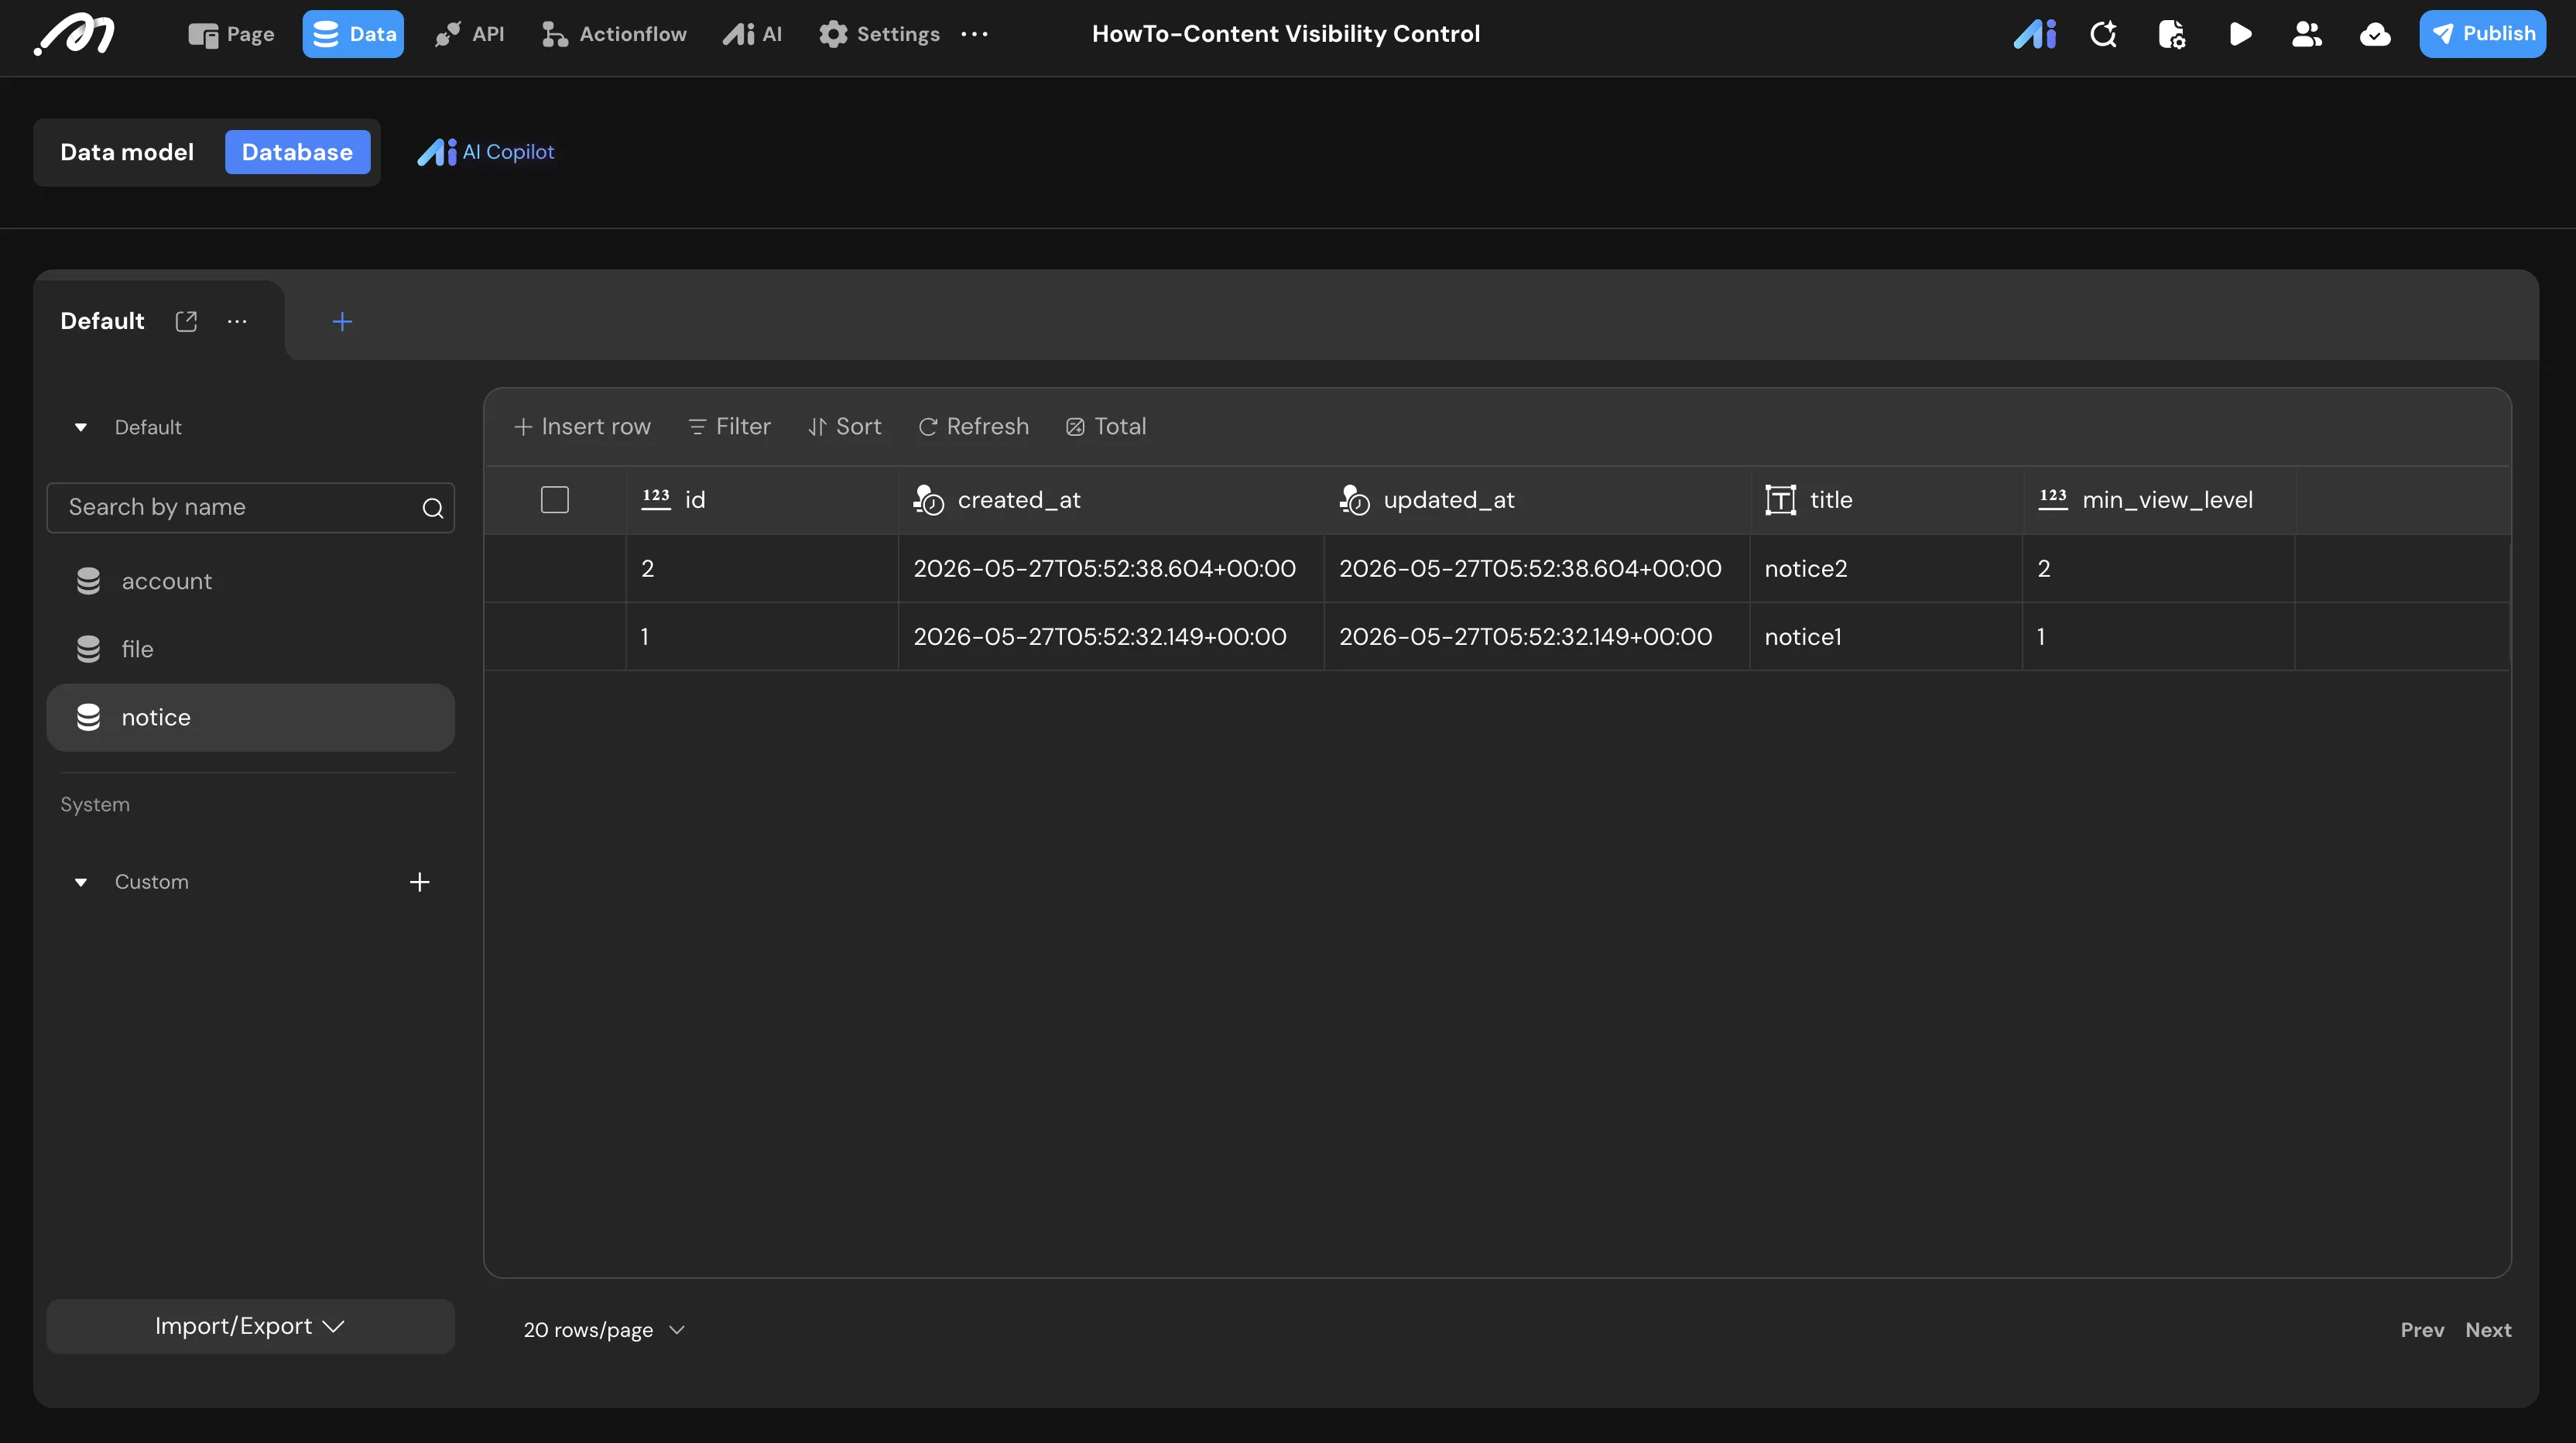
3. notice Records
- Record 1:
id=1,title=notice1,min_view_level=1 - Record 2:
id=2,title=notice2,min_view_level=2
Page Setup
Create a page and copy the basic layout components — elevated cards and list containers — from your UI presets.
Method 1 — Client-Side Filtering (notice table)
The List notice component builds its own query from the logged-in user’s role_level.
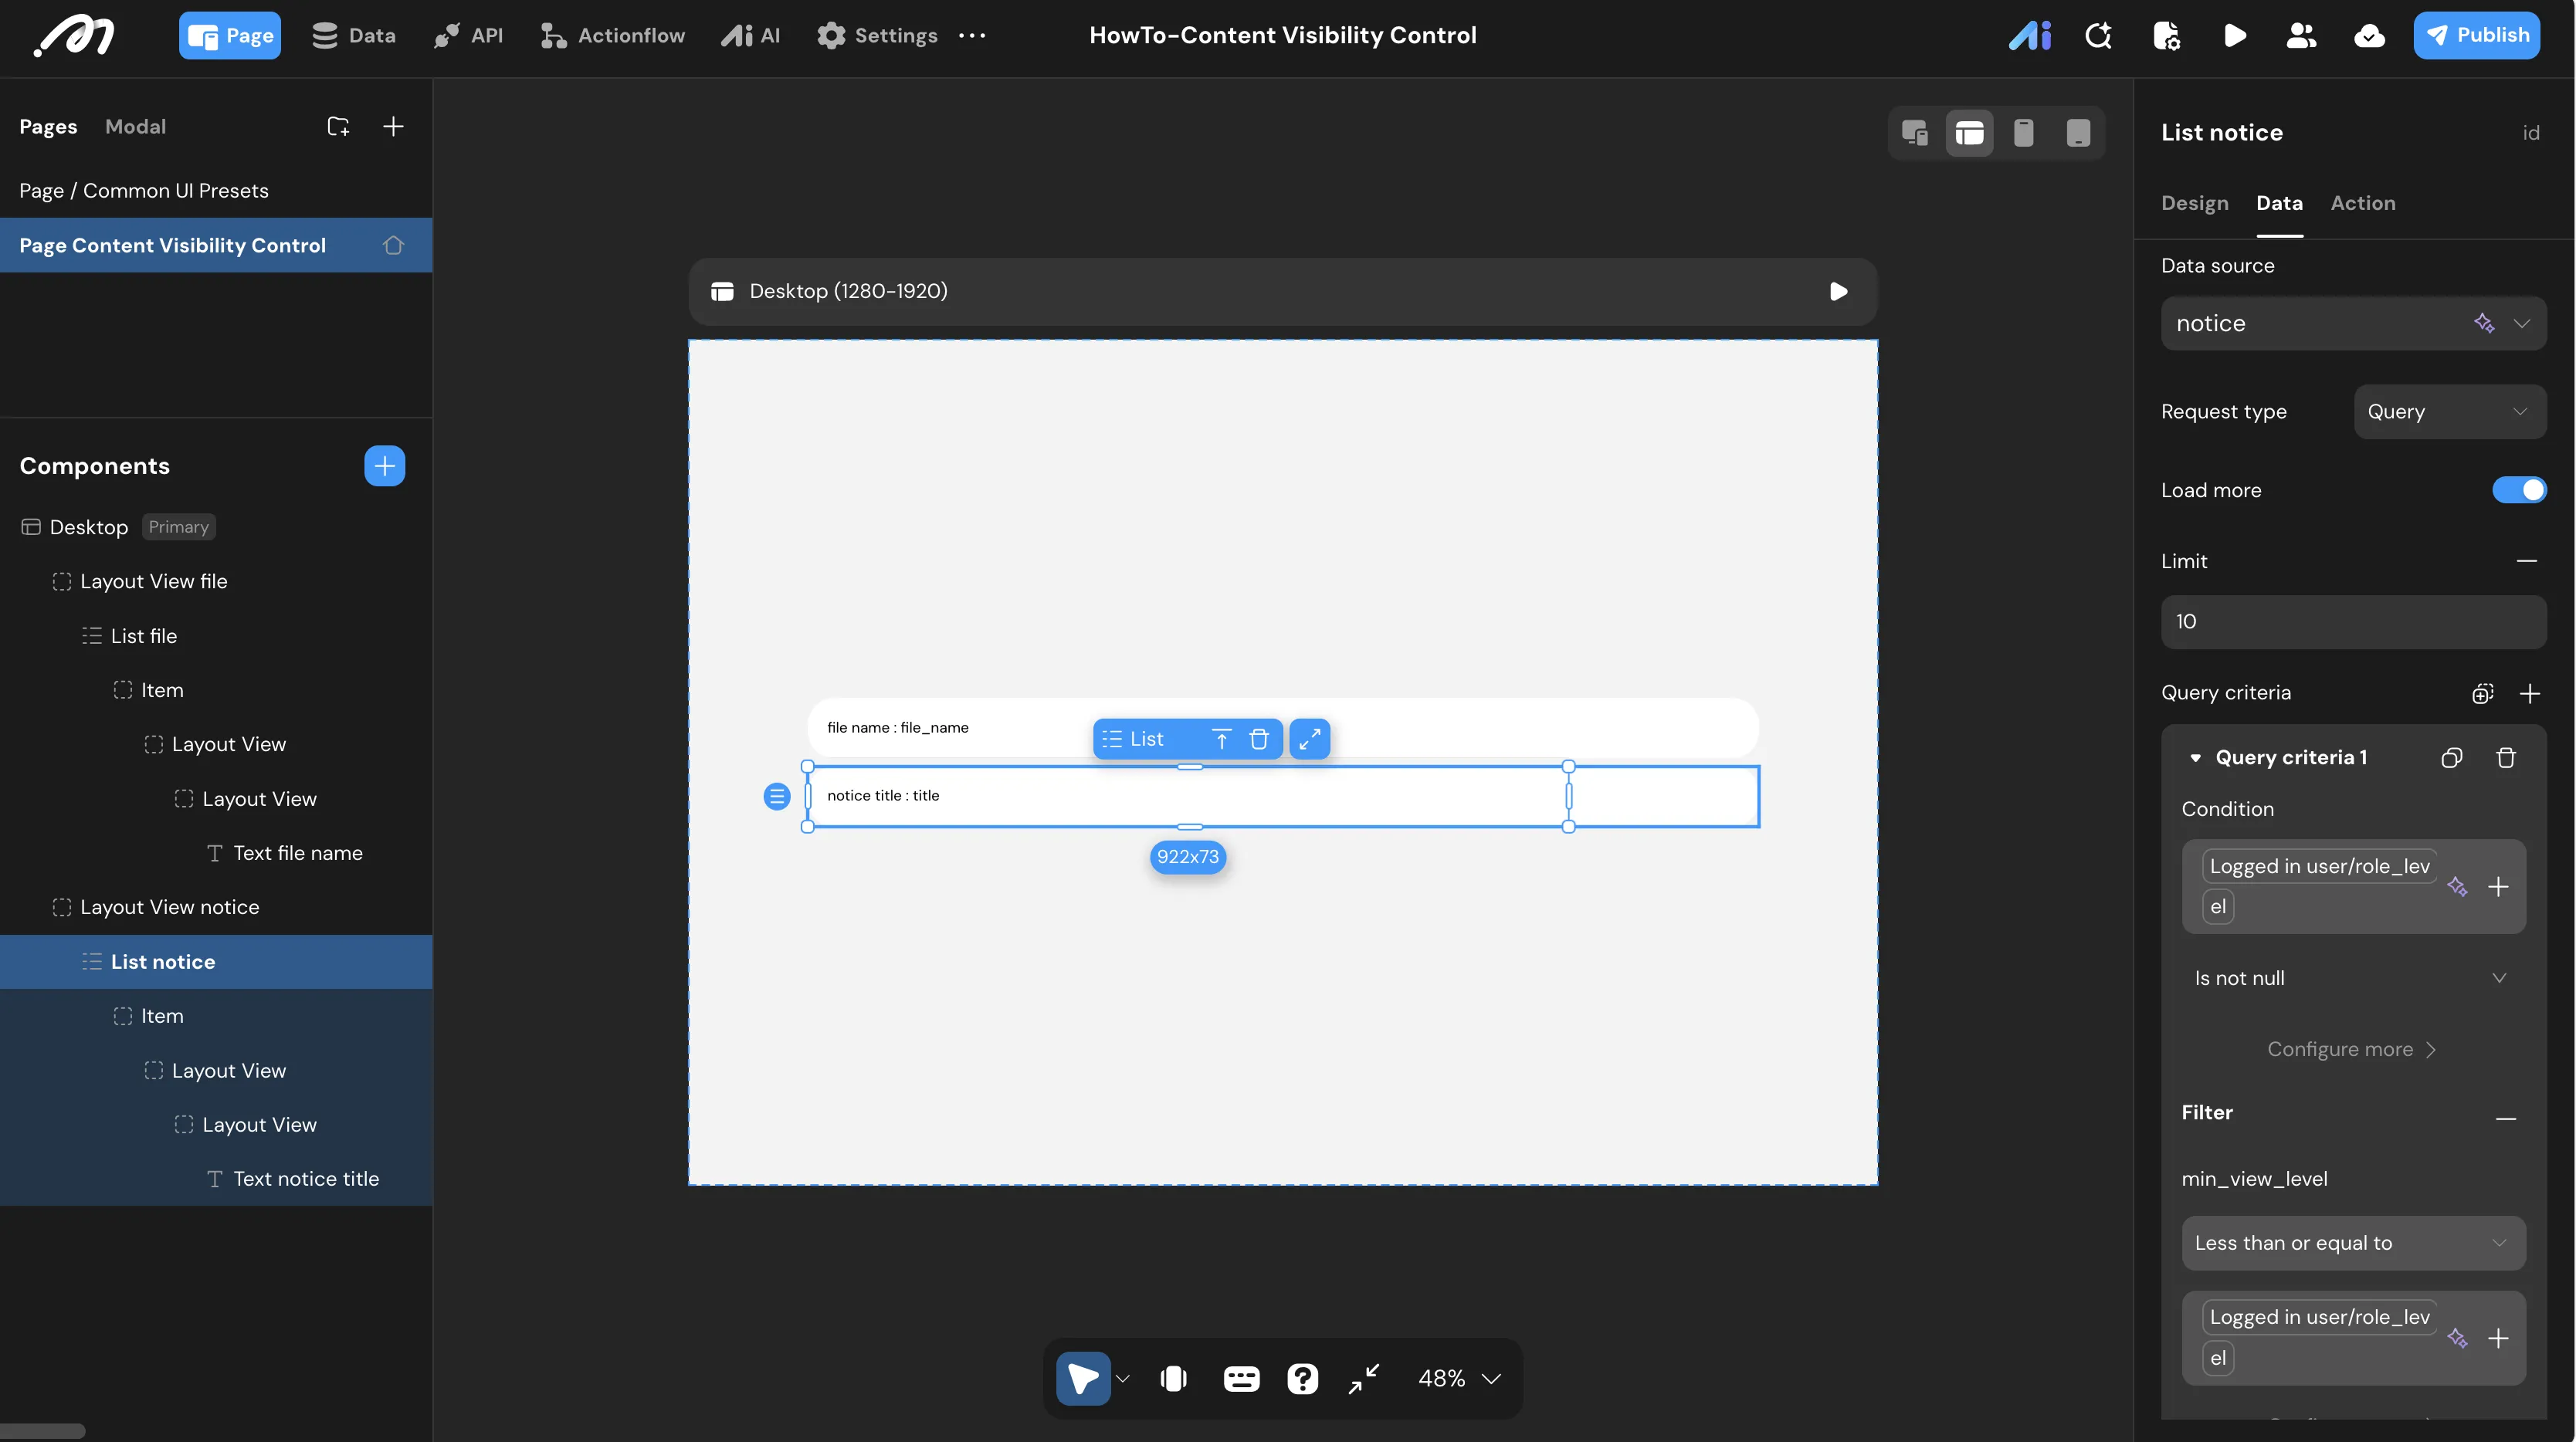
Query criteria works as a set of branches: each Condition decides whether that branch applies, and the Filter underneath it is what actually gets sent with the query. The Default branch runs when no condition matches.
-
Select the
List noticecomponent in the Component Tree. -
In the right sidebar, open the Data tab and set Data source to
notice. -
Click + next to Query criteria to add a branch:
- Condition:
Logged in user/role_level→Is not null— this branch applies to signed-in users who have a tier. - Filter:
min_view_level→Less than or equal to→Logged in user/role_level.
- Condition:
-
Configure the Default branch, which catches anonymous visitors and any user whose
role_levelis null:- Filter:
id→Equal to→0.
Momen has no “skip the request” option, so the way to return nothing is a condition that can never match.
idvalues start at 1, so0guarantees an empty result set — pick any value you are certain no record uses.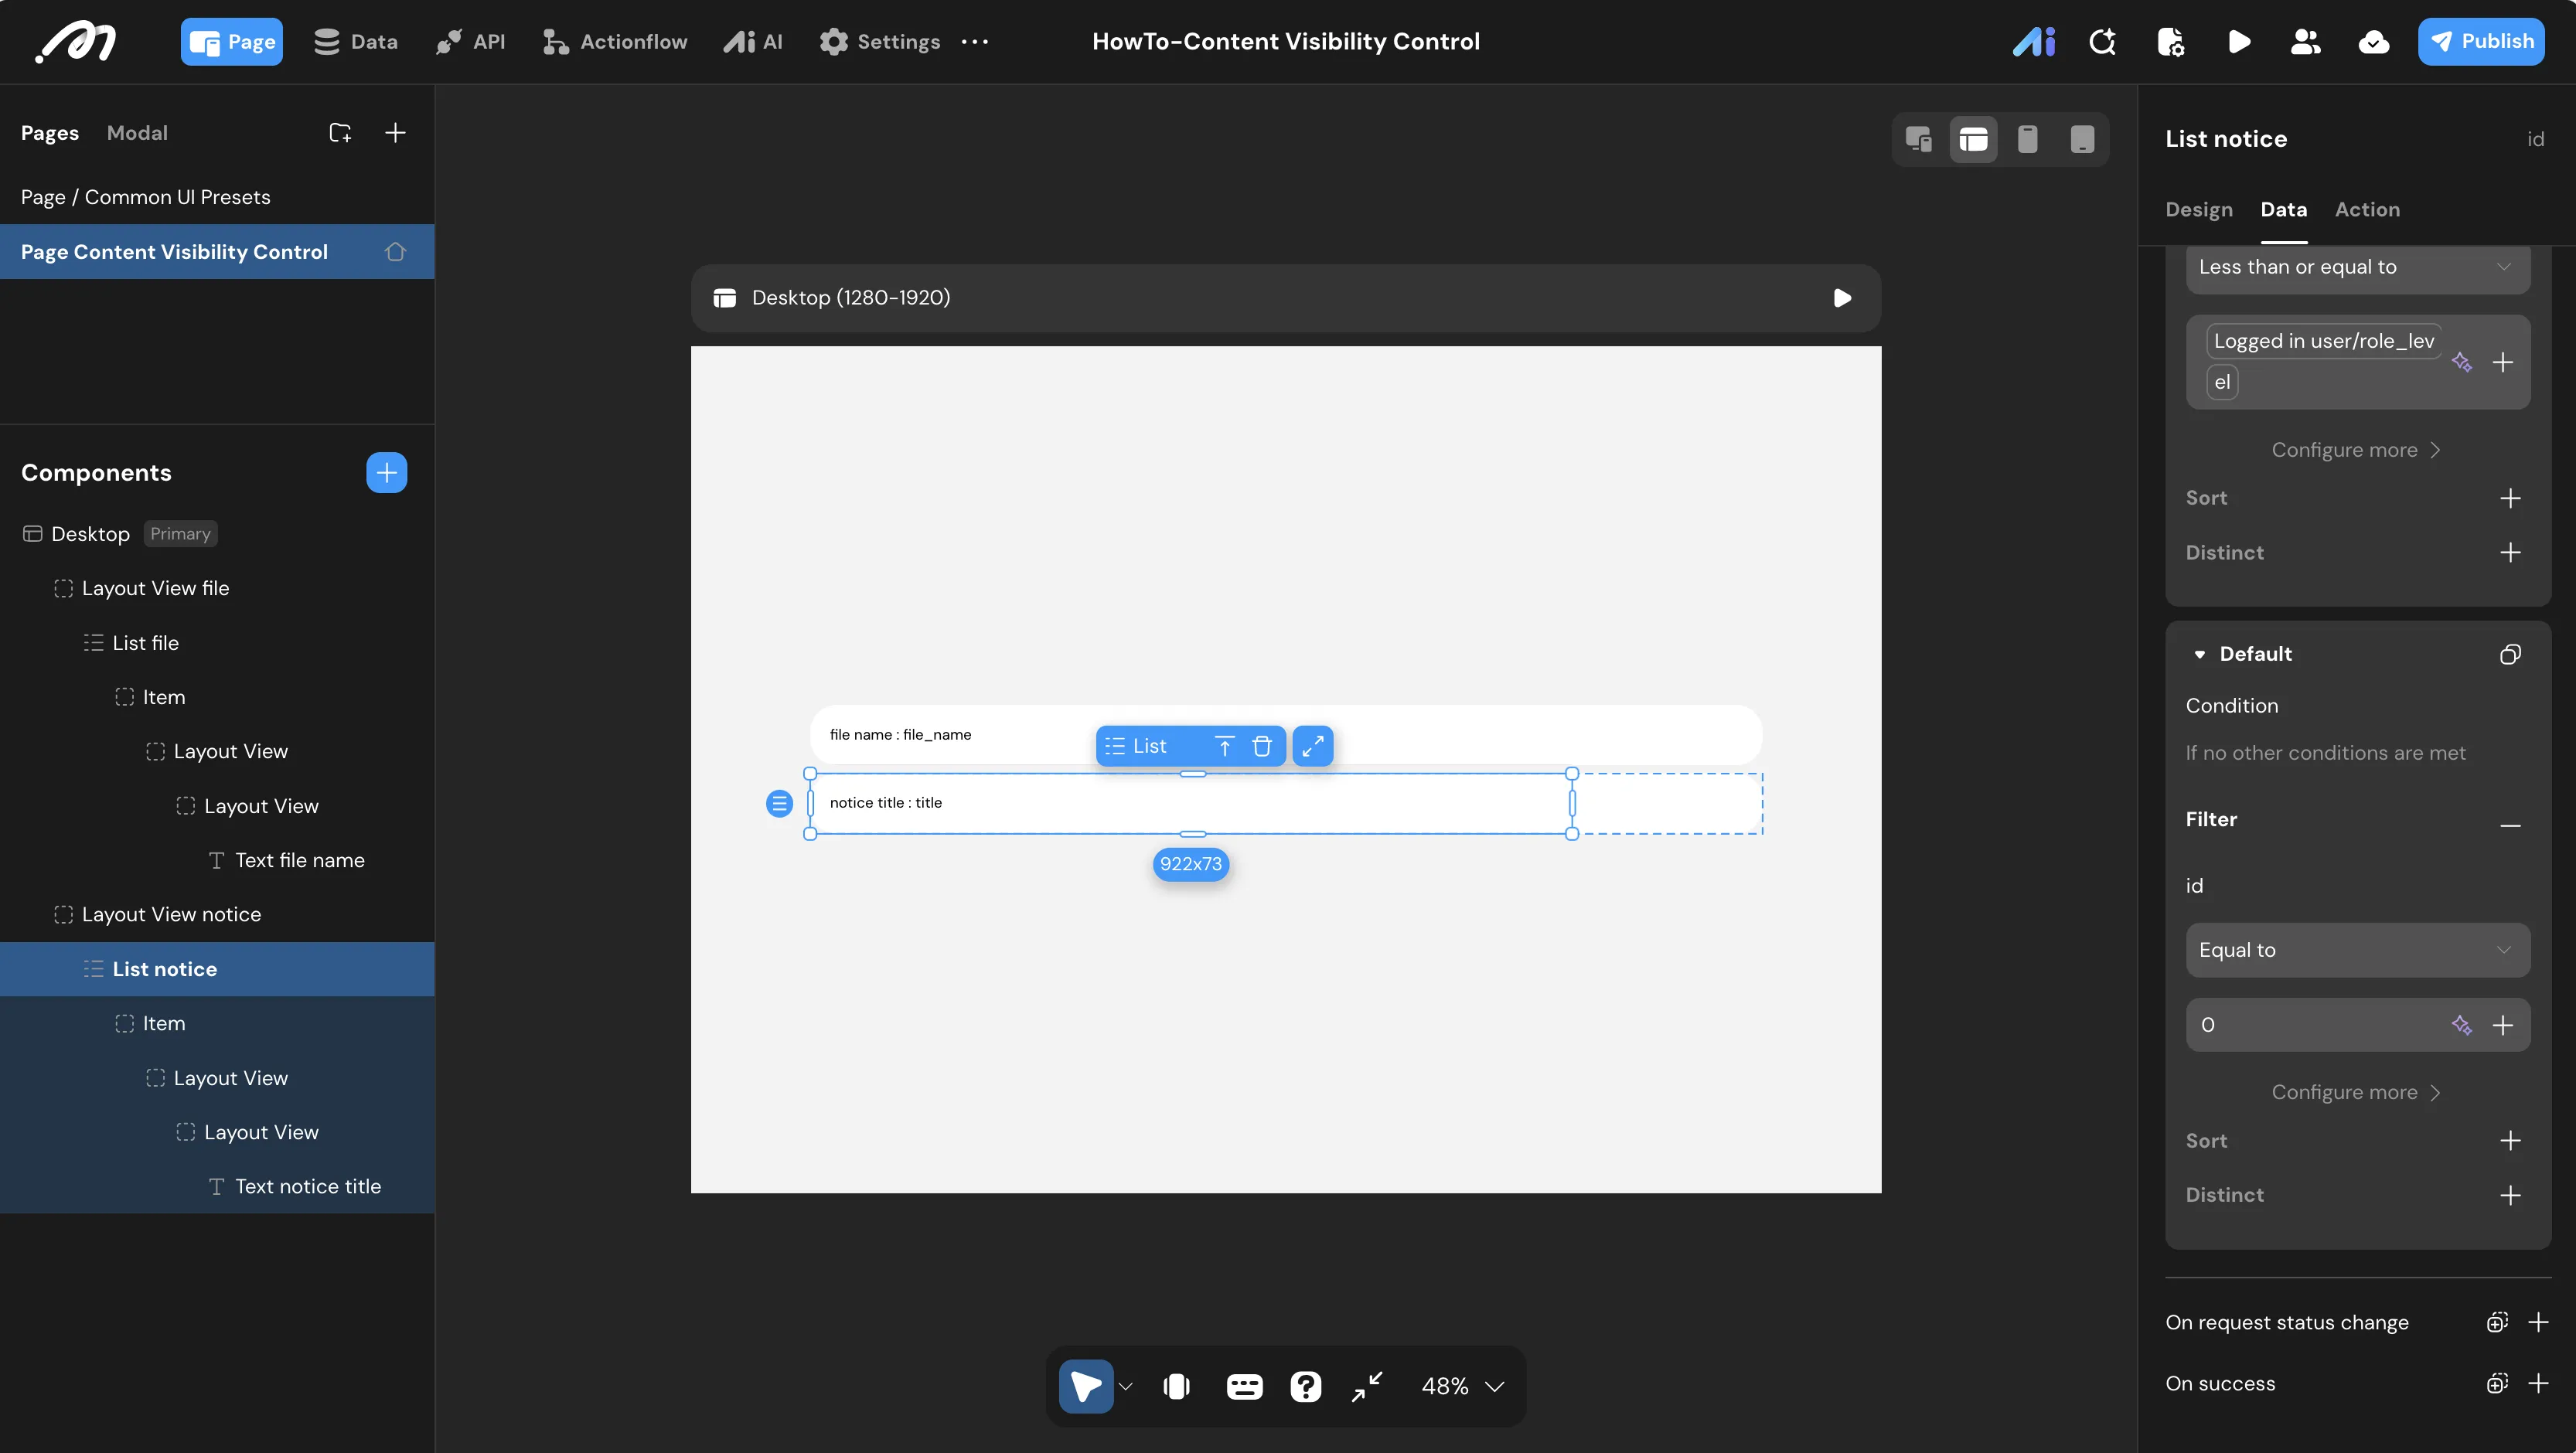
- Filter:
Method 2 — Server-Side Permissions (file table)
This filters rows during query execution, so unauthorized data never reaches the client.
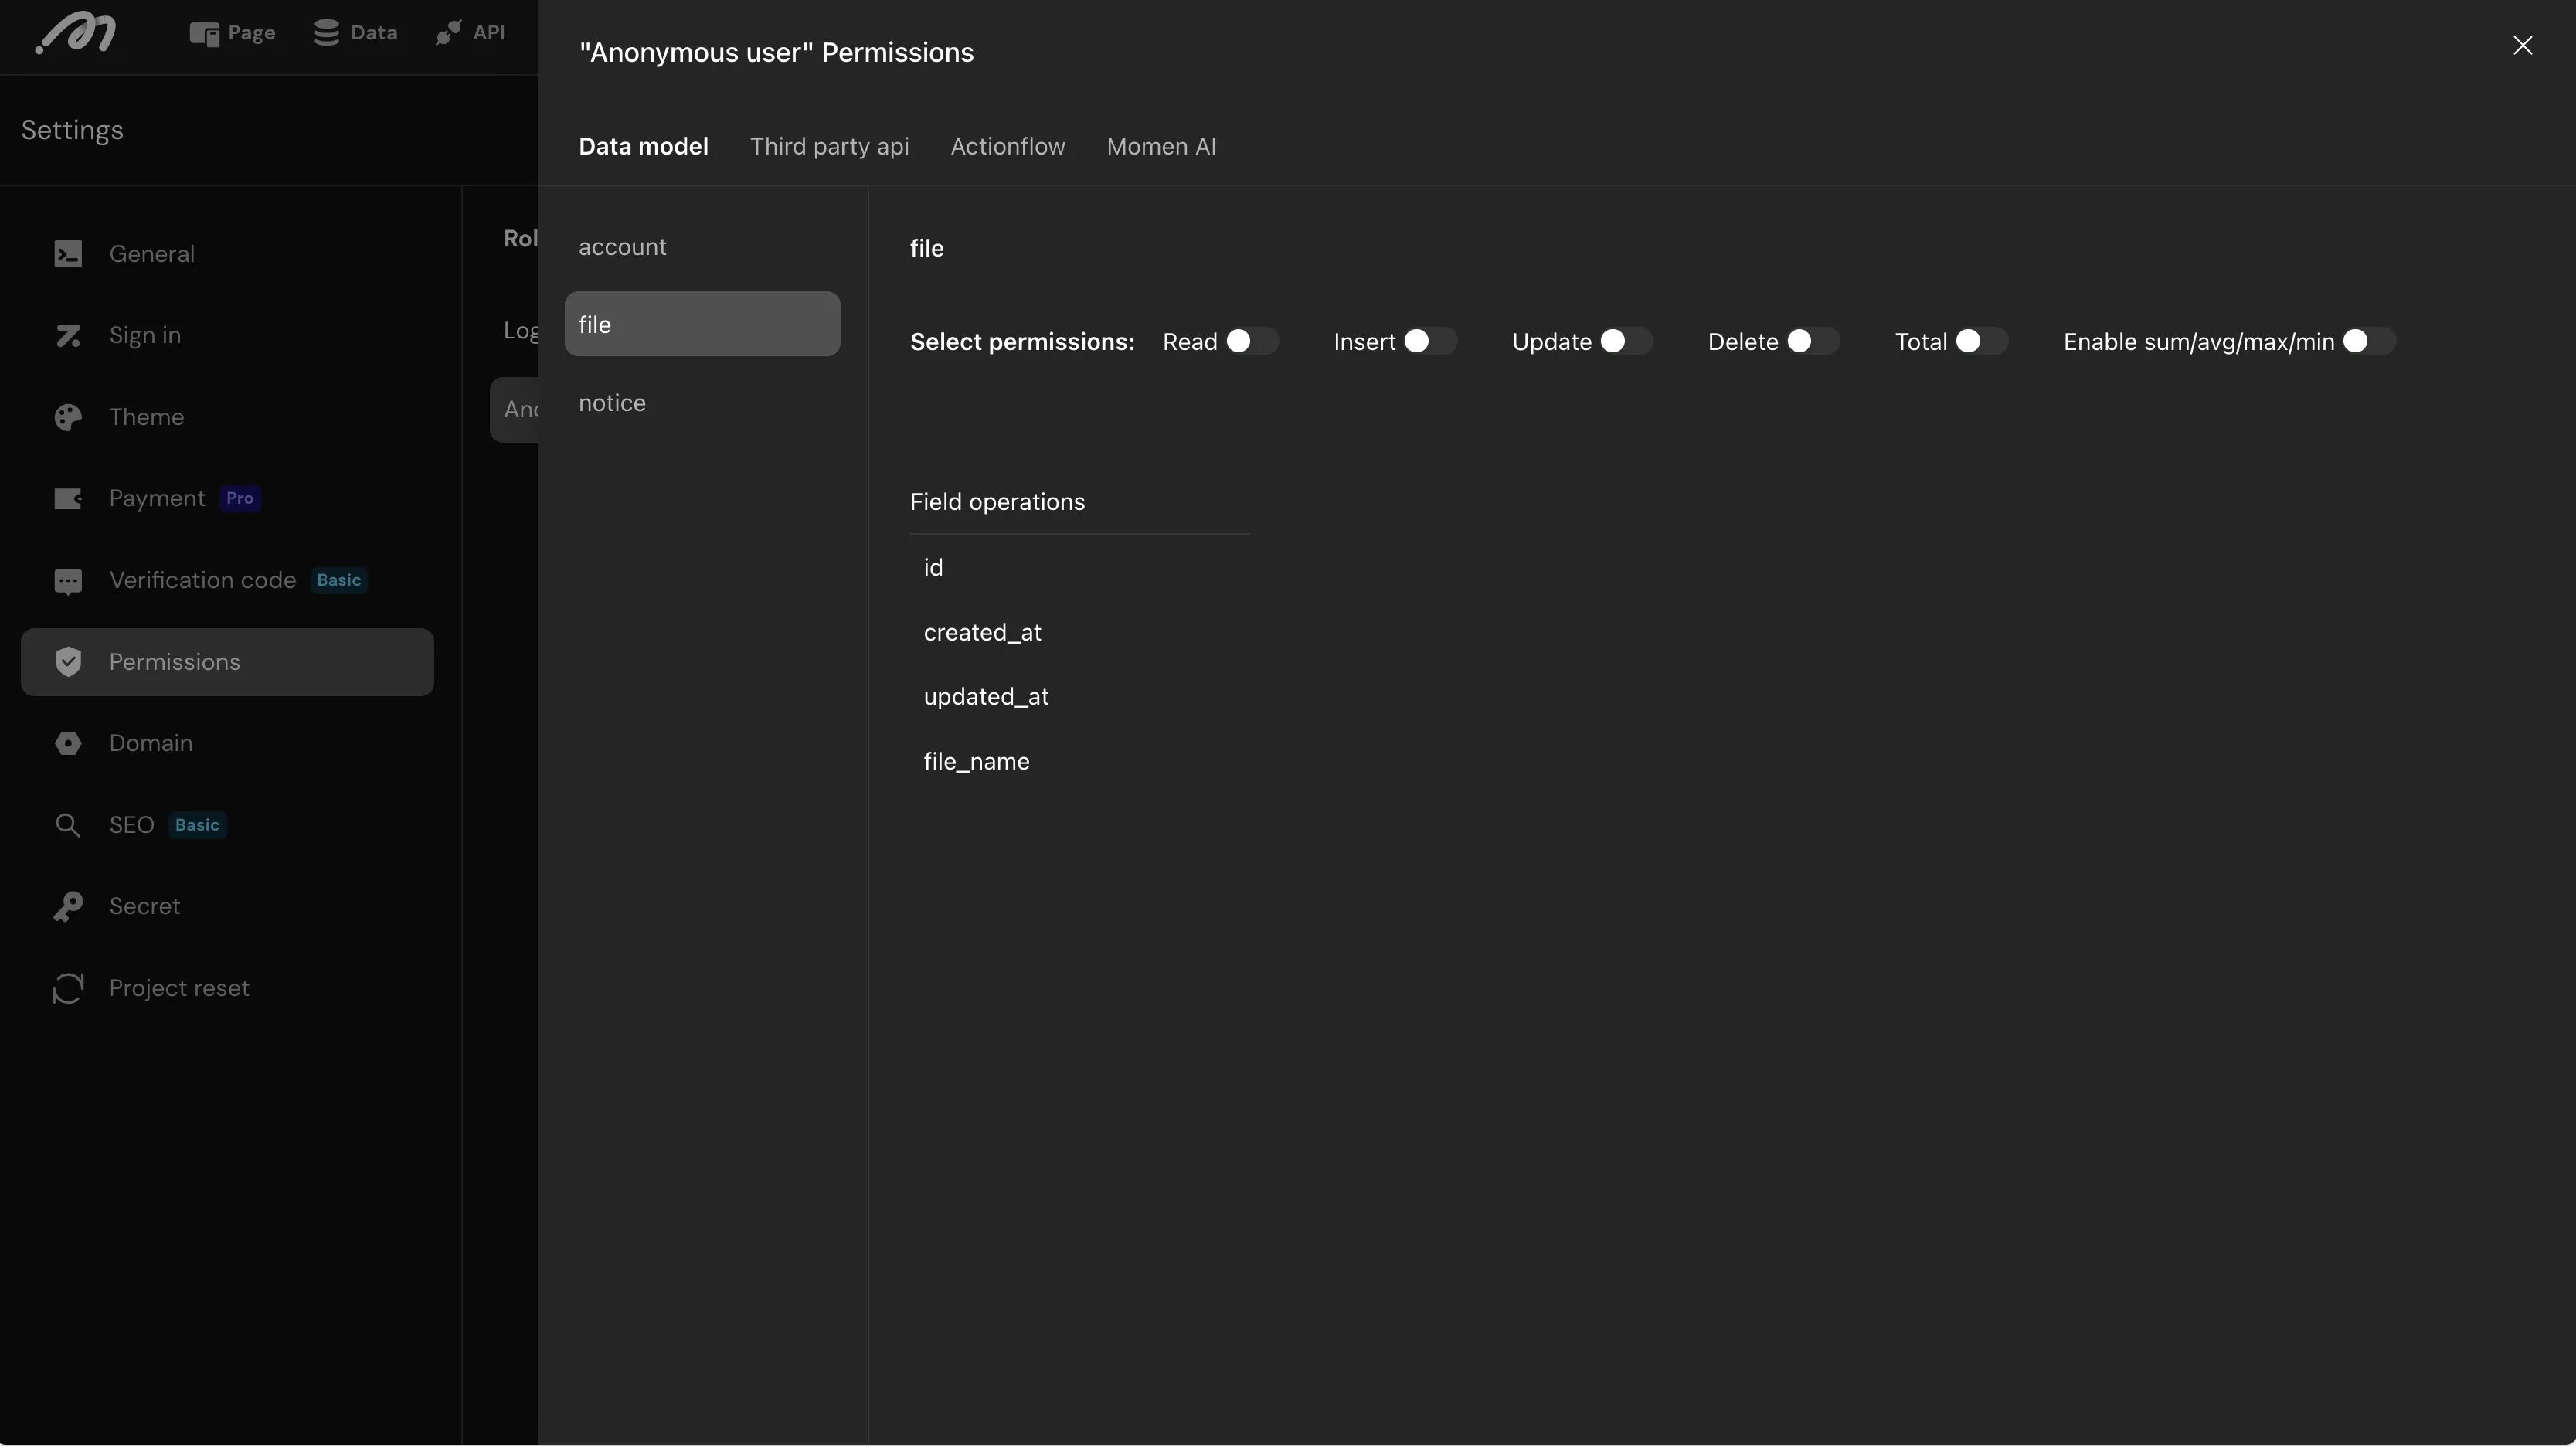
Step 1 — Close the file and notice tables to anonymous users
- Click Settings in the top navigation bar and select Permissions.
- On the Roles tab, select Anonymous user (visitors who are not signed in).
- Select the
filetable in the data model list and toggle Read off. Make sure Create, Update, and Delete are off as well, so the table is fully inaccessible to guests. - Repeat step 3 for the
noticetable — toggle its Read permission off too.
This gives you a defense-in-depth setup: the server rejects the query for guests entirely. The Default branch (id = 0) you set in Method 1 stays in place as a client-side safety net, ready to take effect if you ever open the notice table’s Read permission to guests later.
Step 2 — Add a row-level security rule for signed-in users
- Select the Logged-in user role in the left panel.
- In the
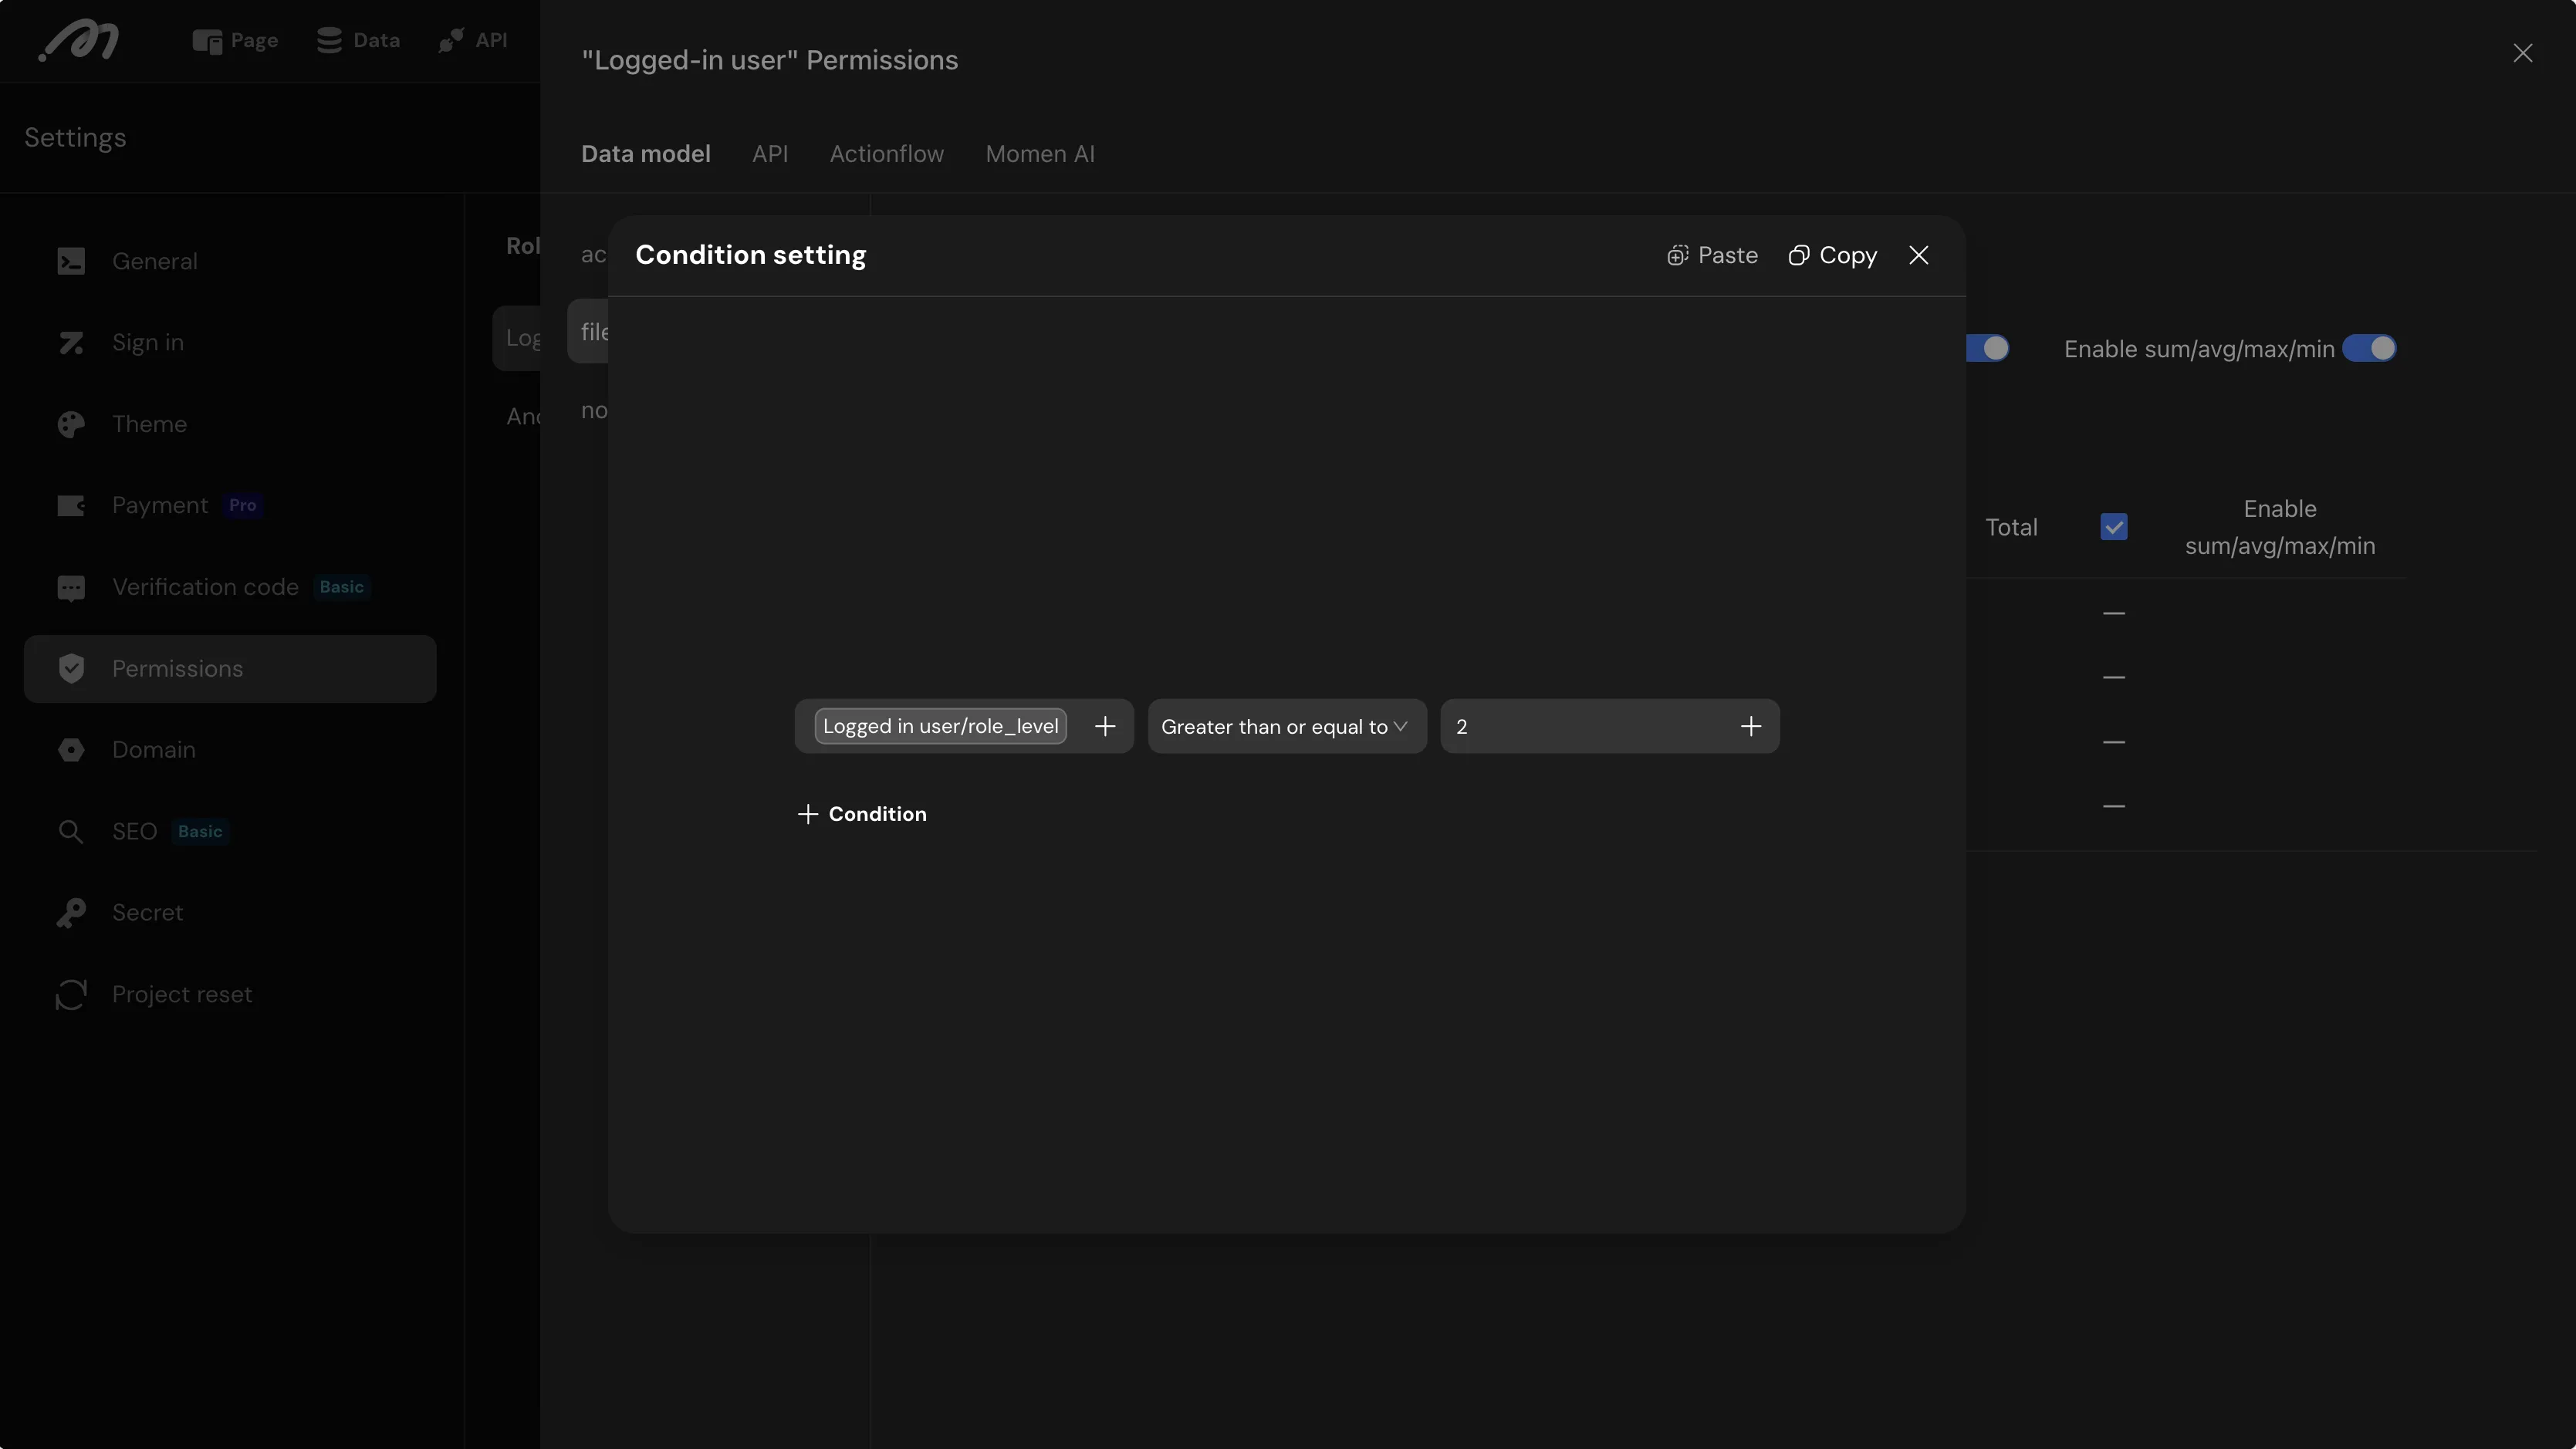
filetable row, keep Read enabled. - Find the Row-level security (RLS) row at the bottom and click Set in the
filecolumn. - In the Condition setting modal, click + Condition and set:
Logged in user/role_level→Greater than or equal to→2. Only users at level 2 or above can now read rows in thefiletable.
Step 3 — Configure the List file component
- Select
List filein the Component Tree. - In the right sidebar, open the Data tab.
- Set Data source to
file. - Set Request type to
Query. - Leave Query criteria as
Unset filter— the component requests all rows, with no frontend filter of its own.
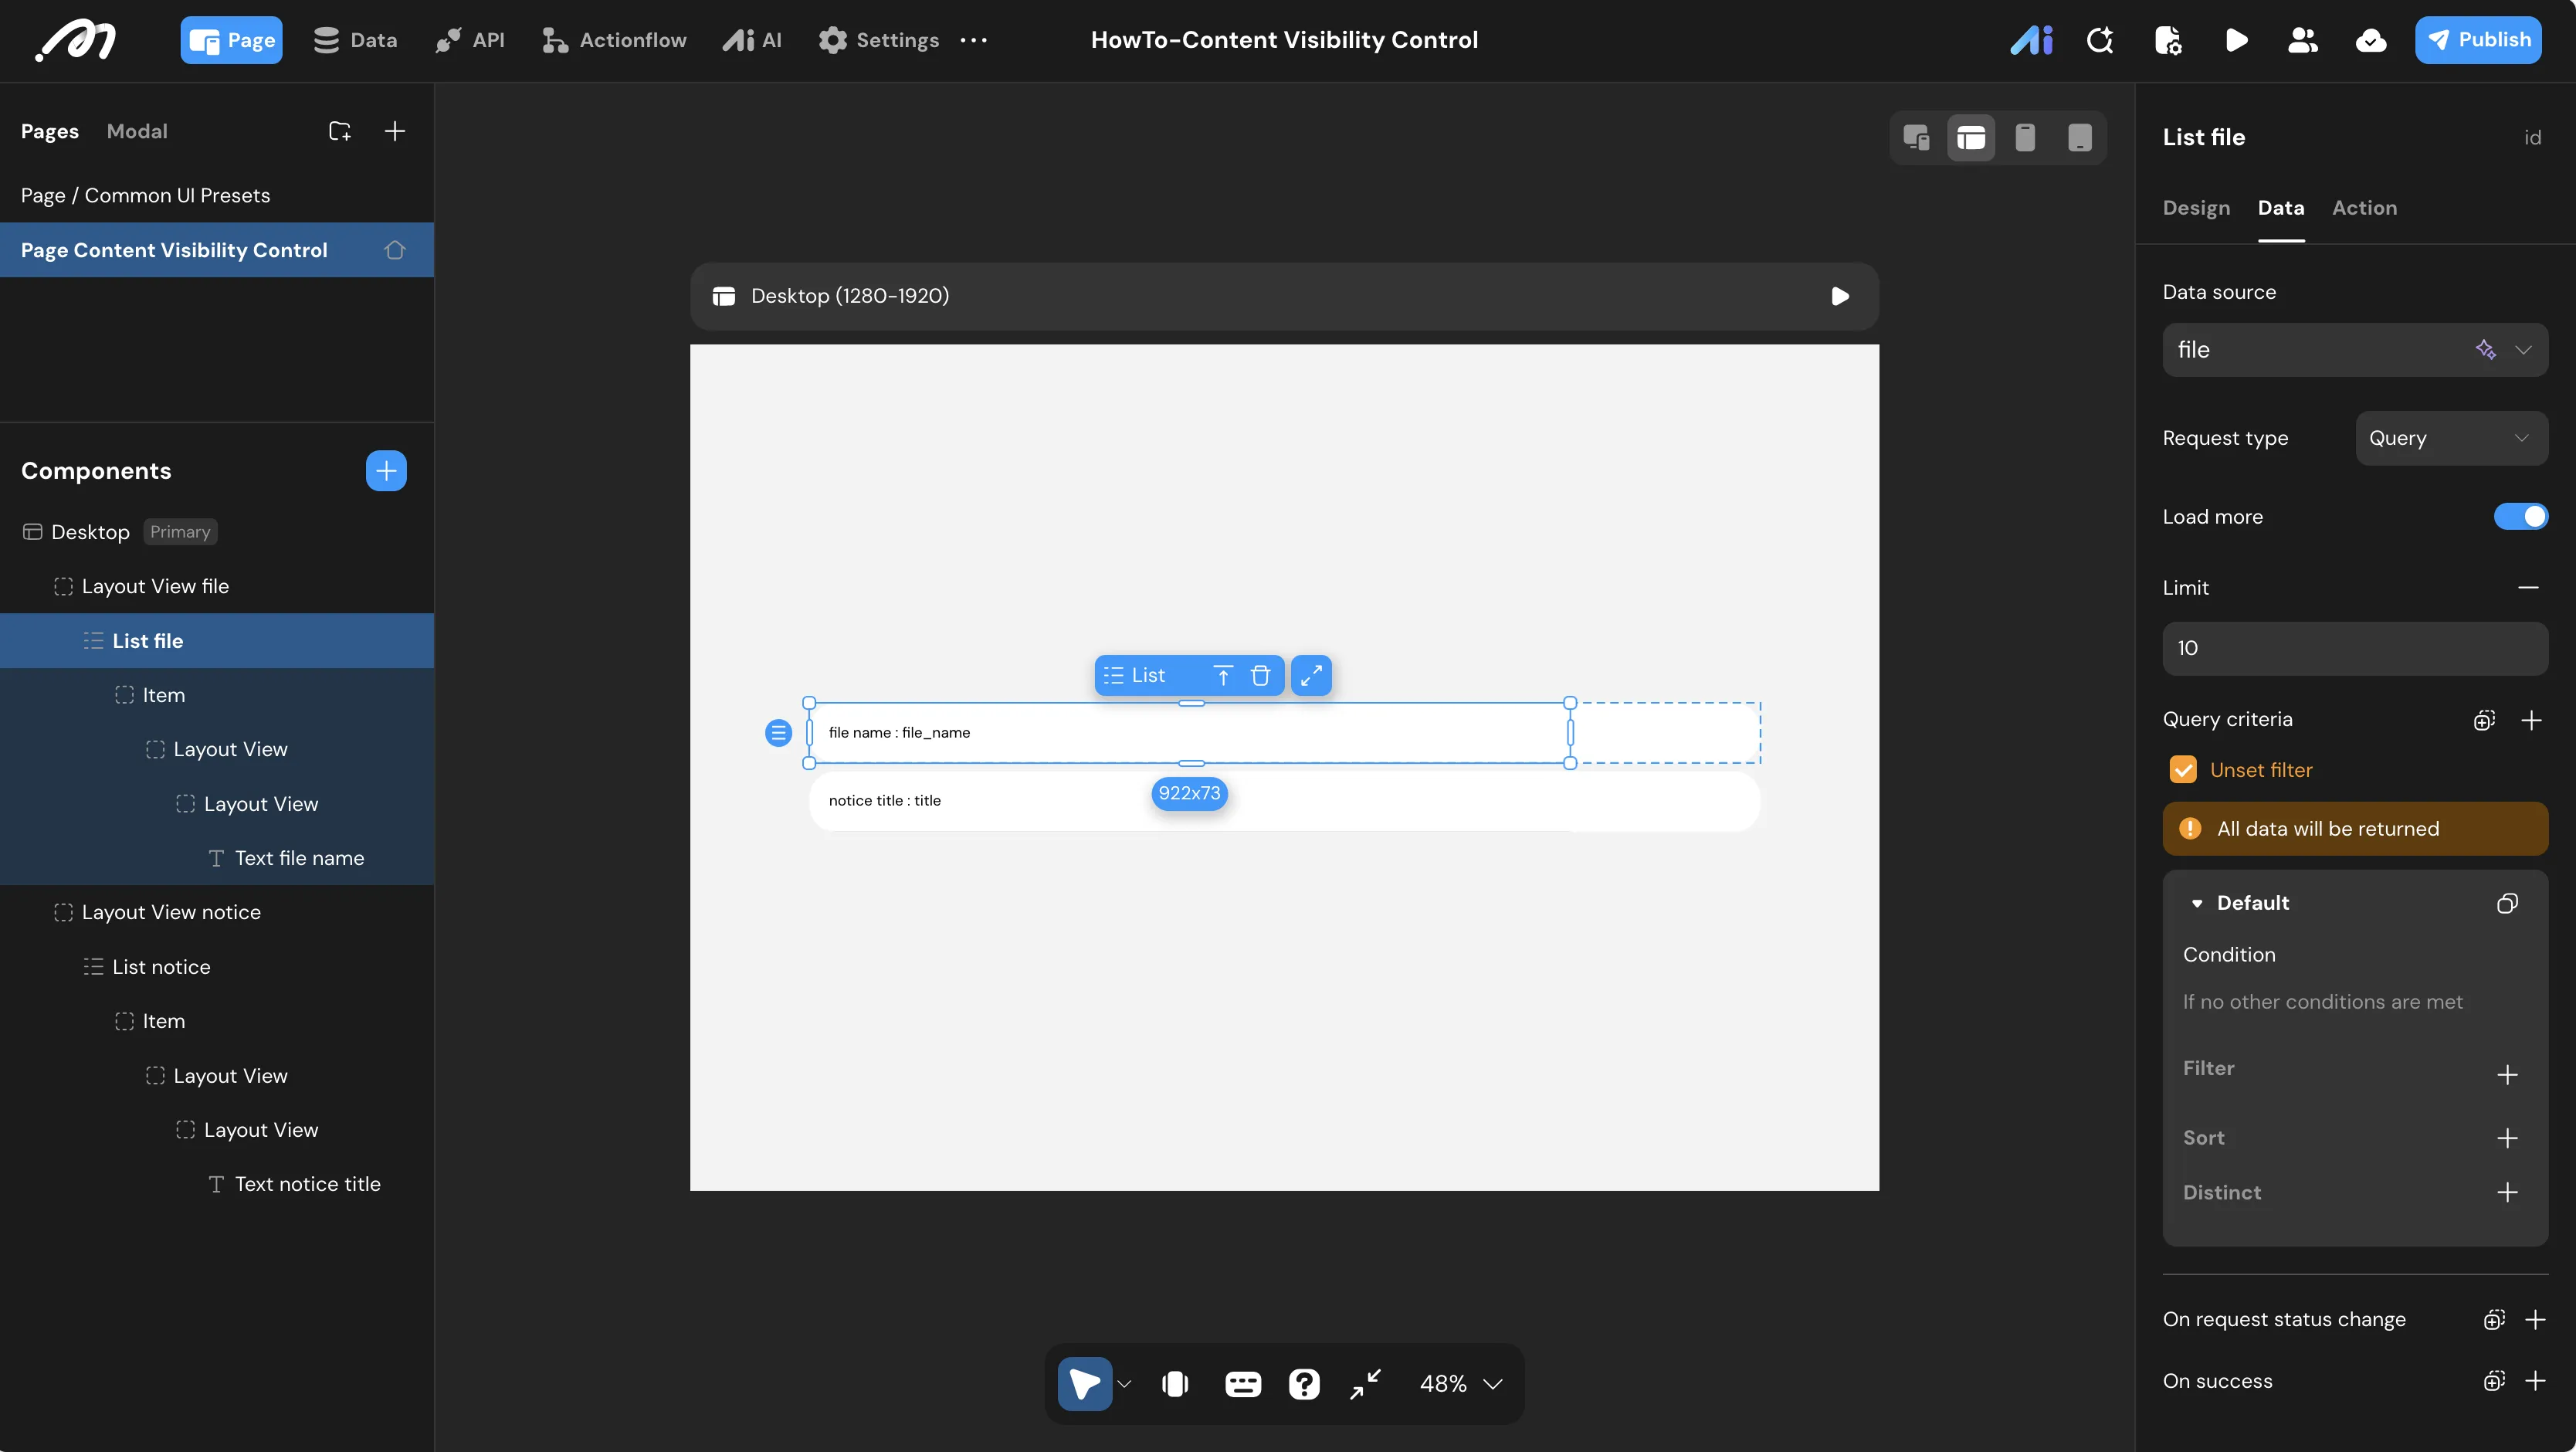
With the RLS rule in place, Momen’s data layer applies it while executing the query and drops unauthorized rows from the result set — even though this component has no filter of its own. That is the whole point: the rule holds no matter what the frontend asks for.
Verification
Use Login simulation in the preview bar to switch between the three states.
Step 1: Anonymous Visitor (signed out)
- Click Preview to open the app.
- In the bottom bar, click Login simulation and select Restore user to logged out state.
- Expected Result: both lists render no rows. The
filelist is empty because anonymous Read is off (Method 2, Step 1); thenoticelist is empty because its anonymous Read is off as well — the server-side permission blocks the query before the client-side Default branch runs. The Default branch (id = 0) remains useful as a fallback if you later decide to grant anonymous Read access to thenoticetable.
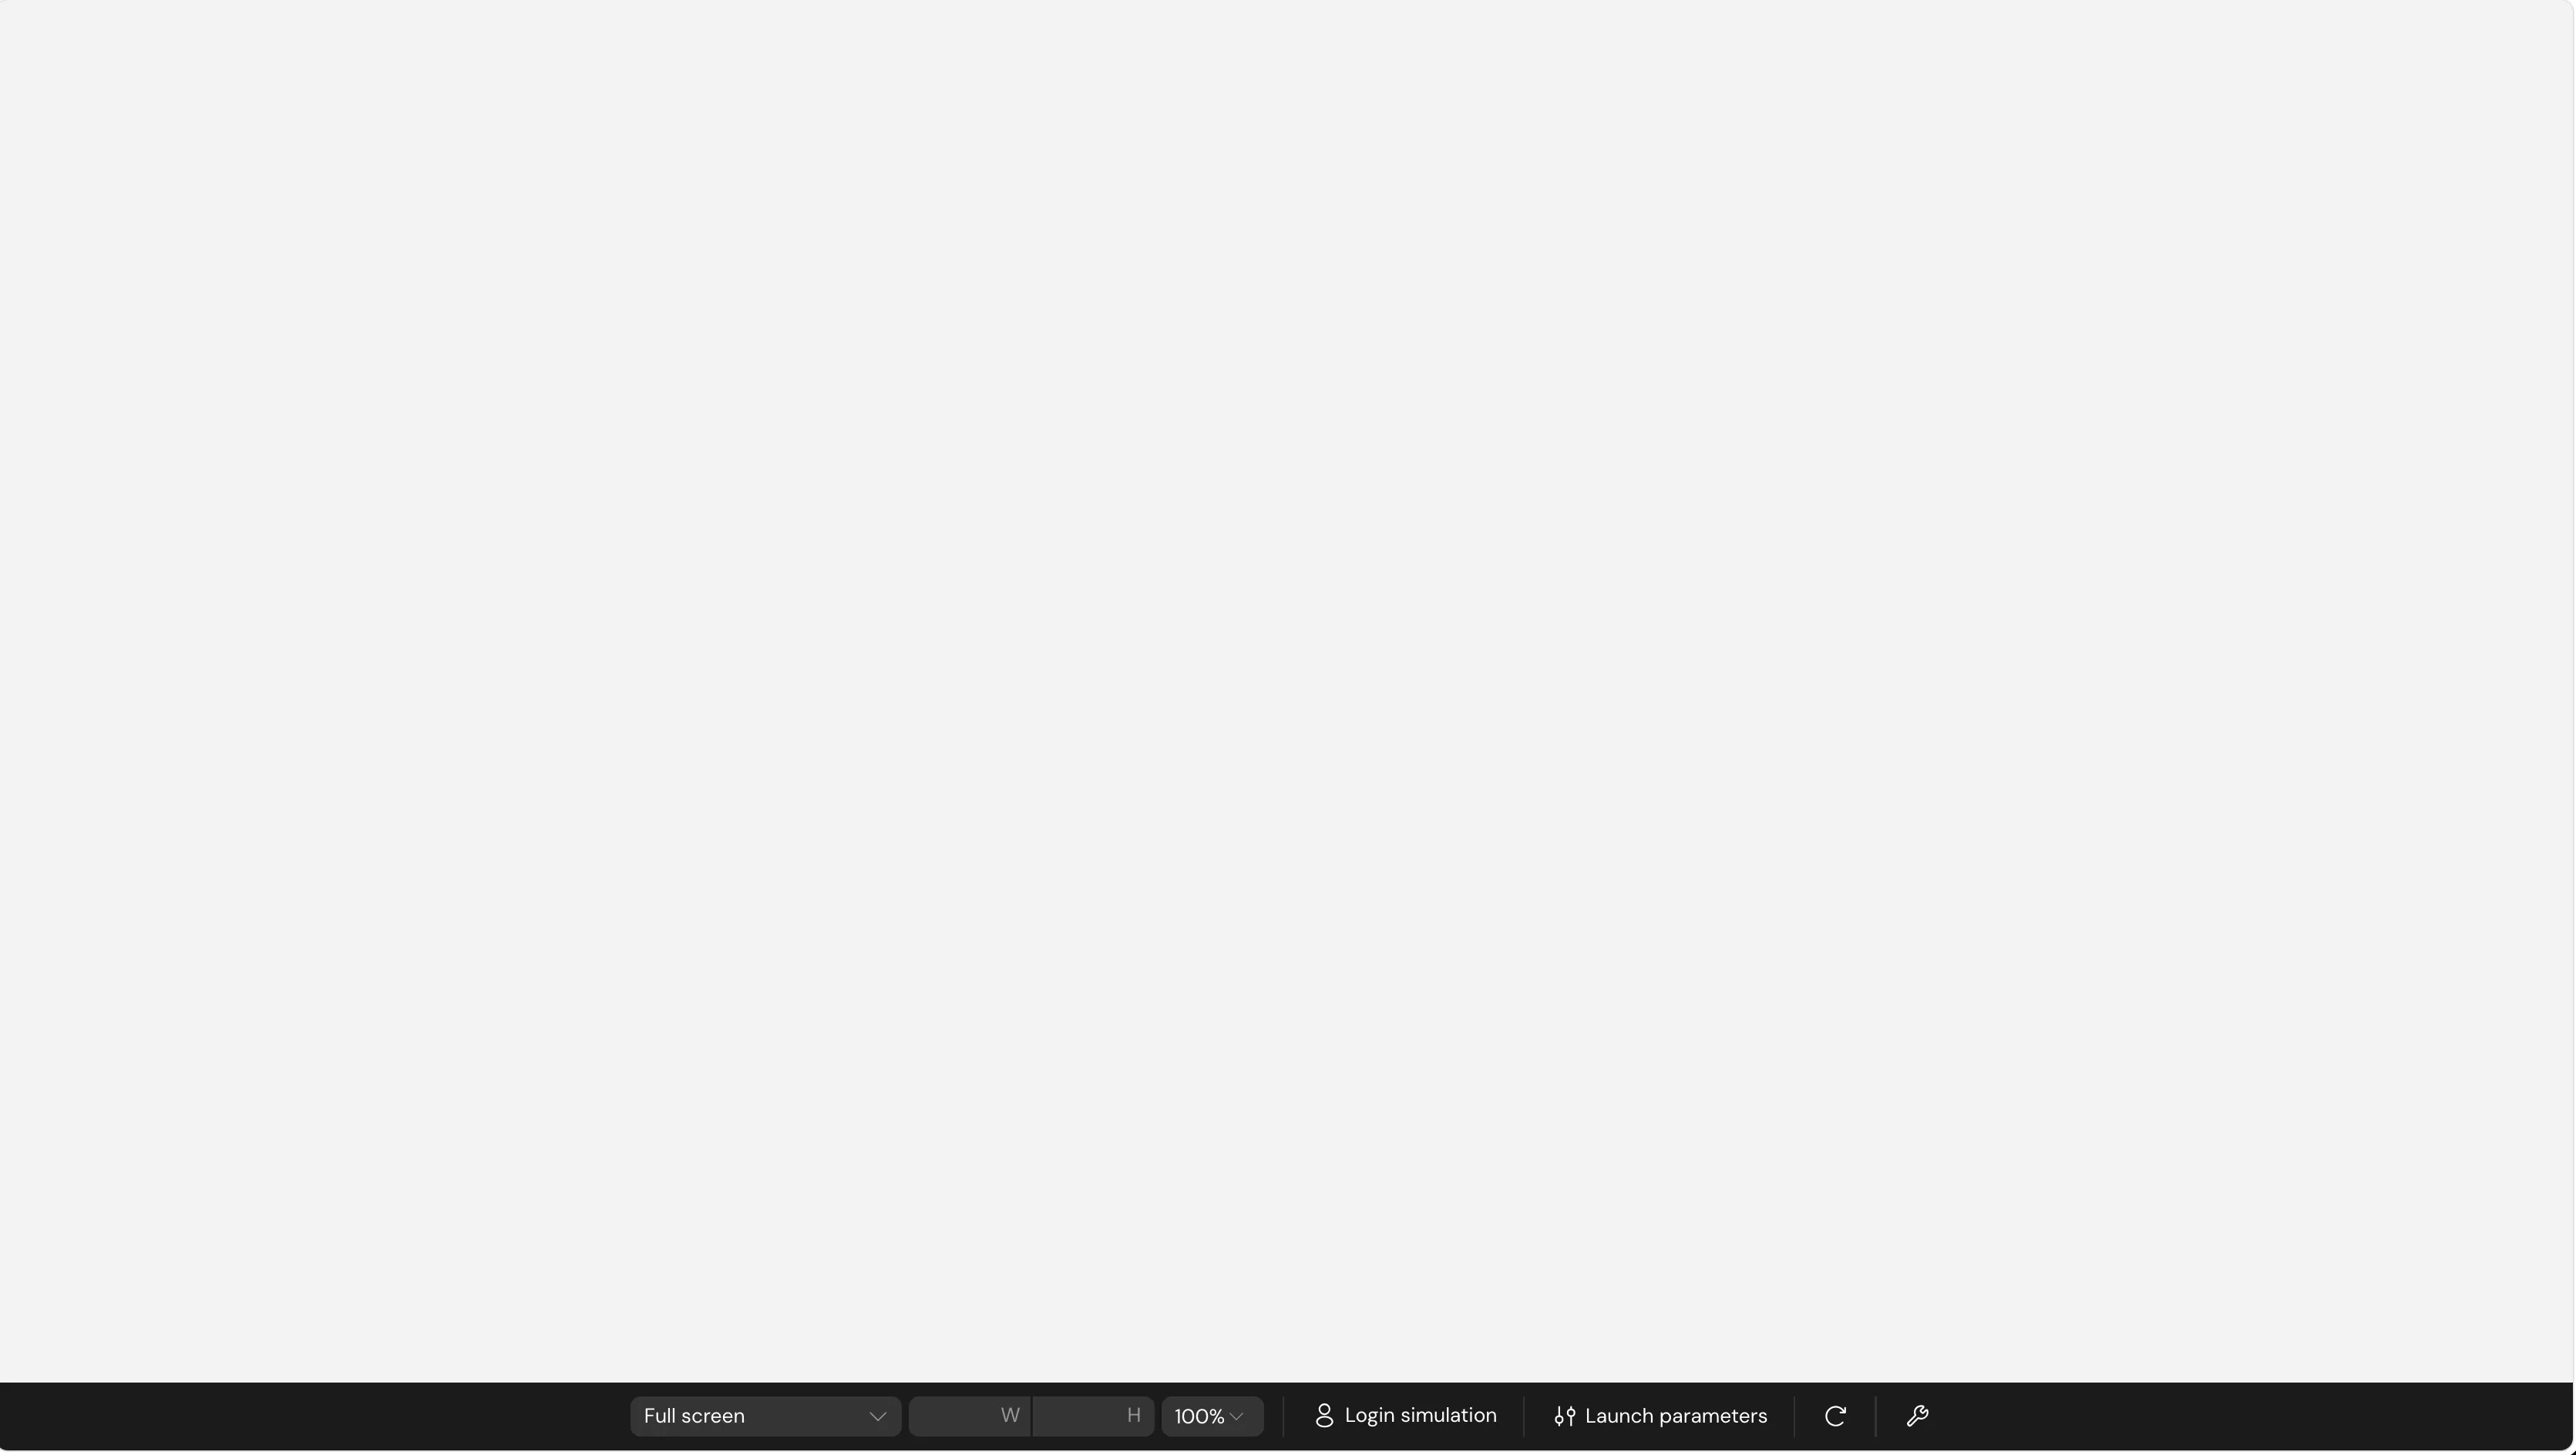
Step 2: Standard Member (role_level = 1)
- In the Login simulation panel, select the user with
id100000000000001. - Expected Result:
- The
filelist stays empty — the user is signed in, but arole_levelof 1 fails the RLS rule requiringrole_level >= 2. - The
noticelist shows onlynotice1, whosemin_view_levelof1satisfies the client-side filter.
- The
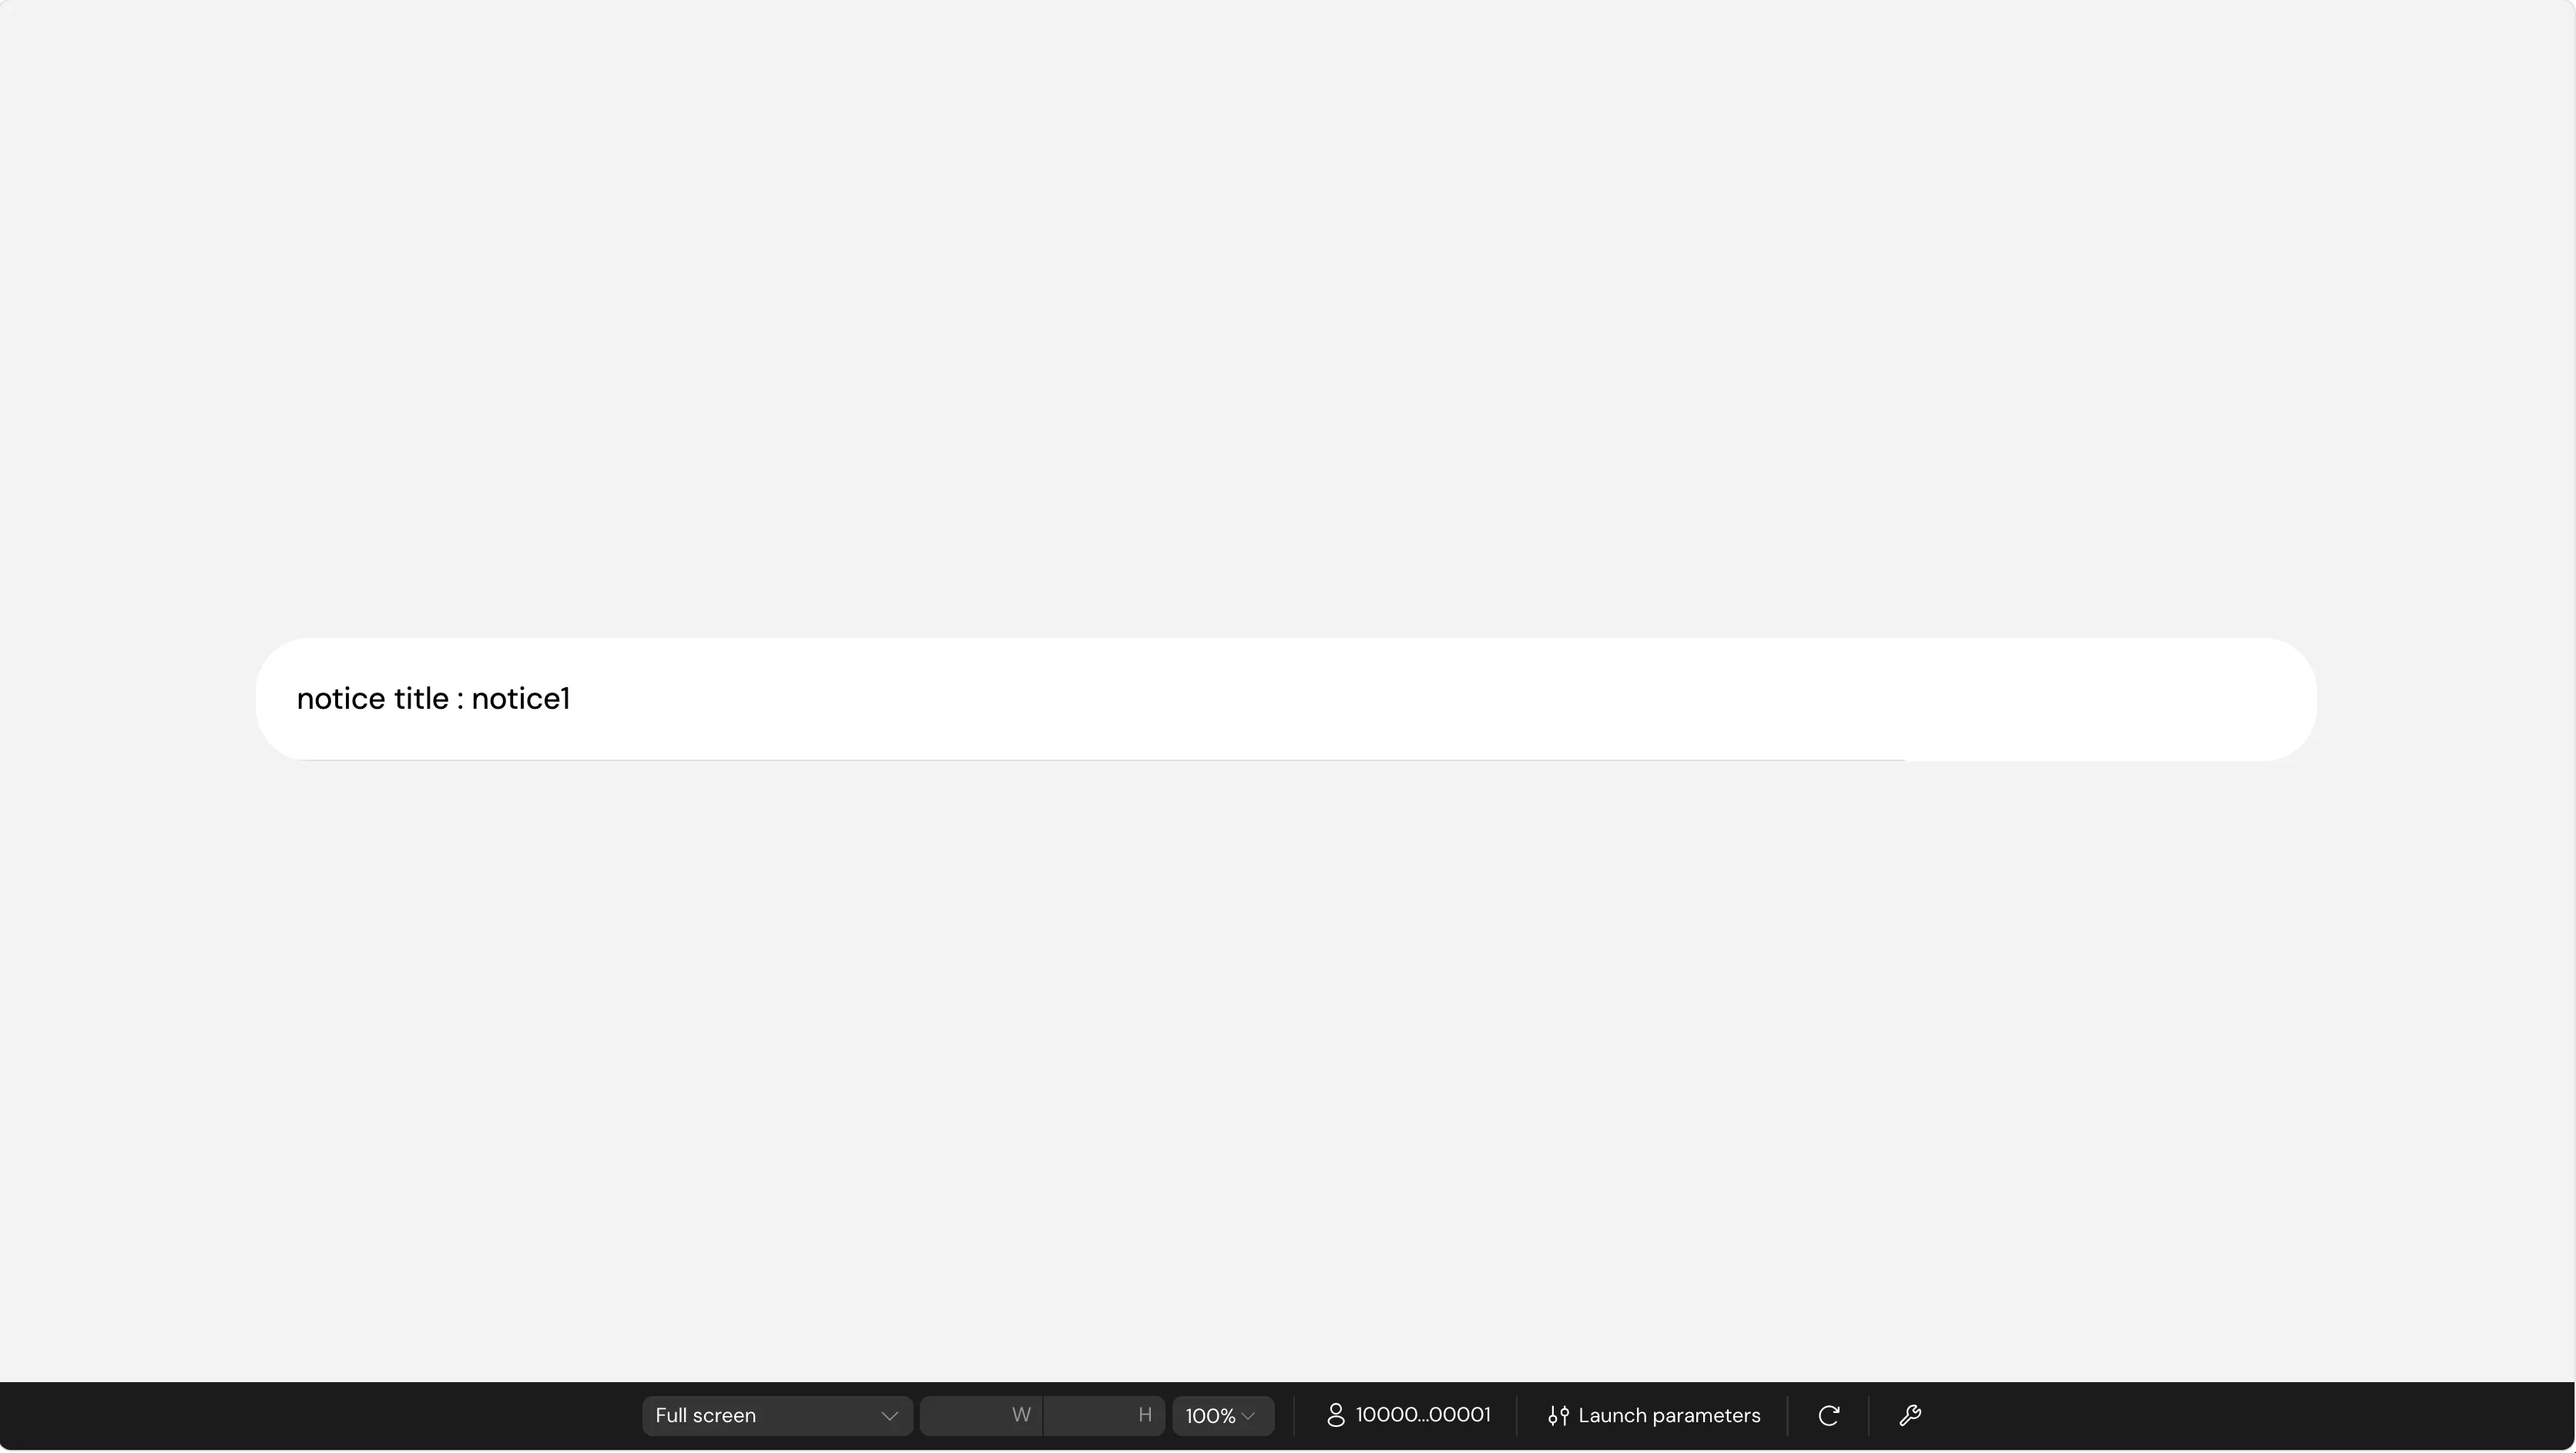
Step 3: Premium Member (role_level = 2)
- In the Login simulation panel, switch to the user with
id100000000000002. - Expected Result:
- The
filelist rendersfile1— arole_levelof 2 satisfies the RLS condition. - The
noticelist shows bothnotice1andnotice2, since both havemin_view_level≤ 2.
- The
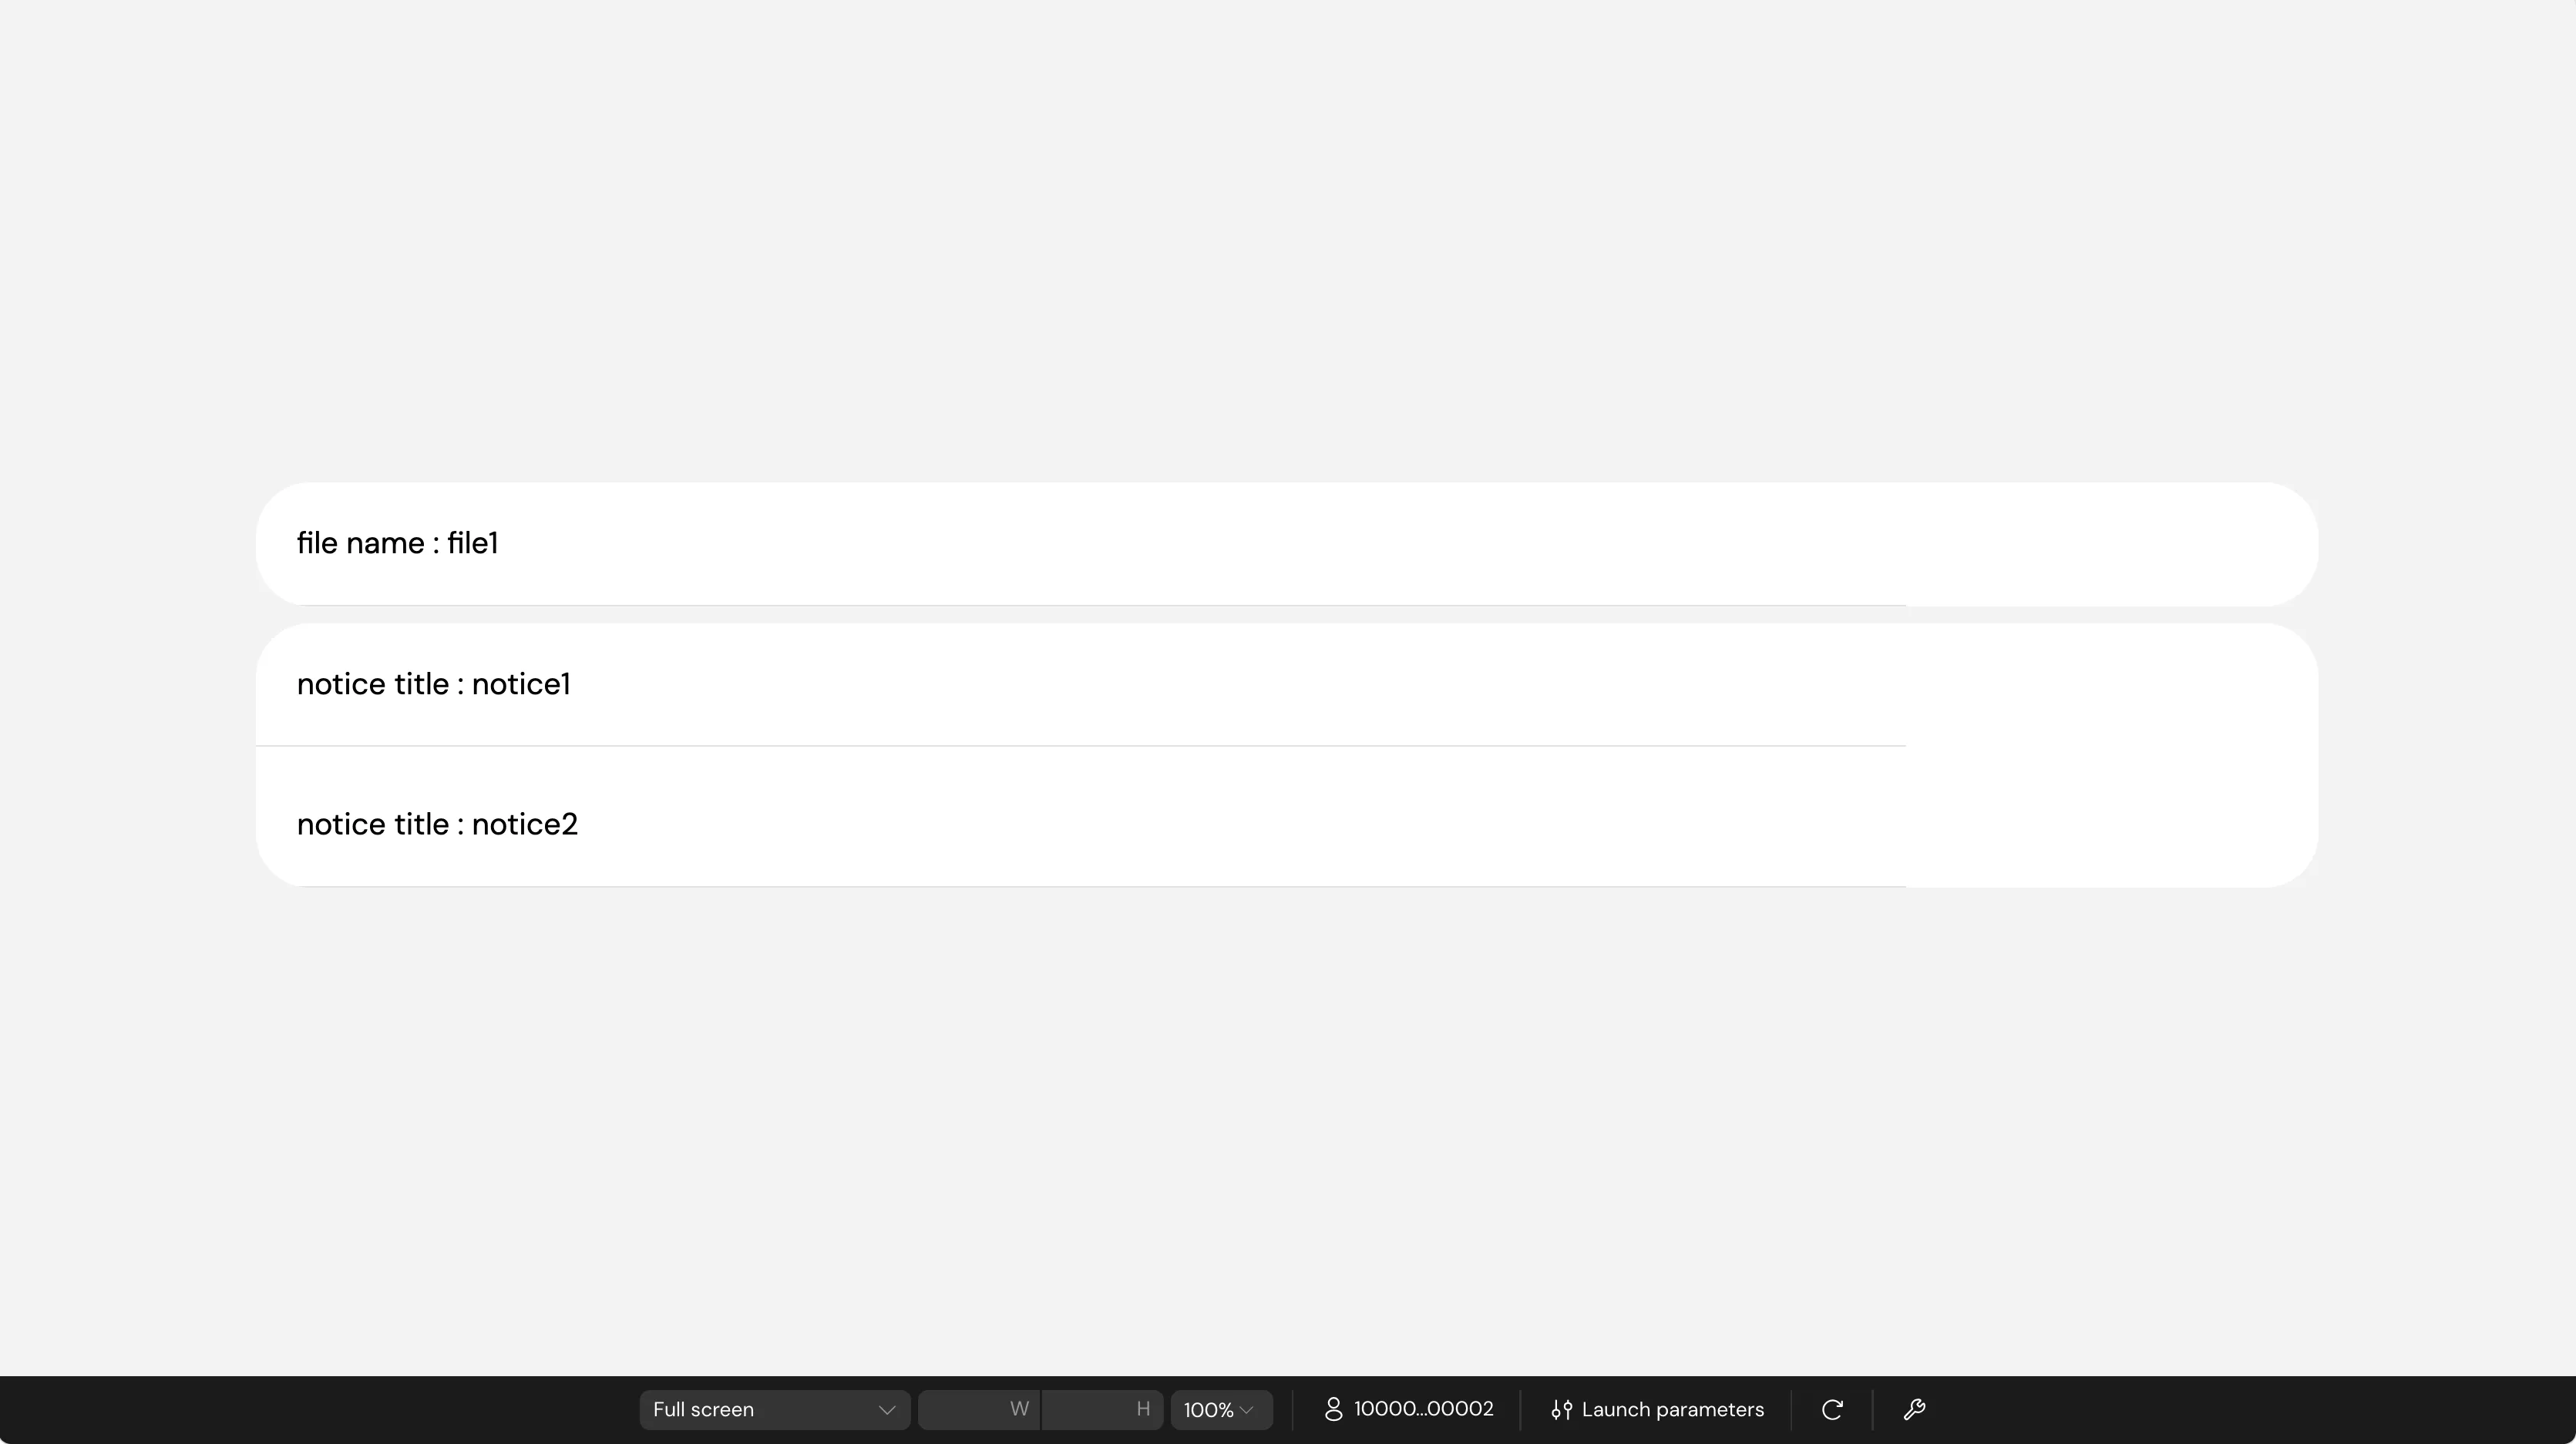
Step 4 (optional): Confirm the rule is a threshold, not an exact match
Set a test user’s role_level to 3 and reload. Both lists should still be fully populated, confirming that Greater than or equal to and Less than or equal to behave as thresholds — so adding higher tiers later needs no permission changes.