Oversell-Proof Inventory Deduction
Demo Project
https://editor.momen.app/tool/k5PBKyGyd64/WEB?code=7WmDFYDoE0GGj&ref=0562398
Introduction
- Goal: To implement a secure inventory deduction process that prevents overselling during high‑concurrency e‑commerce scenarios.
- Use Cases: Flash sales, limited‑time offers, or any high‑traffic checkout process.
- Core Logic: Use an Actionflow to perform a conditional database update. The system only deducts stock if the current inventory is greater than or equal to the requested quantity, ensuring data consistency at the database level.
Steps
This tutorial uses pre‑styled layout blocks from the “Common UI Presets ” template page to streamline the visual setup. These preset elements only contain basic styling and typography; they do not include any conditional logic, database bindings, or Actionflows. When building your own app, you can directly copy elements from this template page to skip manual styling and focus entirely on core frontend logic.
Data Storage
Data Model
Configure the relational database to store products, orders, and user accounts.
1. Table: product Stores product details and the core inventory control field.
| Field Name | Type | Note |
|---|---|---|
| product_name | Text | Name of the item |
| price | Decimal | Unit price |
| stock | Bigint | Available quantity (core control field) |
2. Table: order Acts as a transaction receipt linking users and products.
| Field Name | Type | Note |
|---|---|---|
| account_id | Bigint | Foreign key to the account table |
| product_id | Bigint | Foreign key to the product table |
| quantity | Bigint | Number of items purchased |
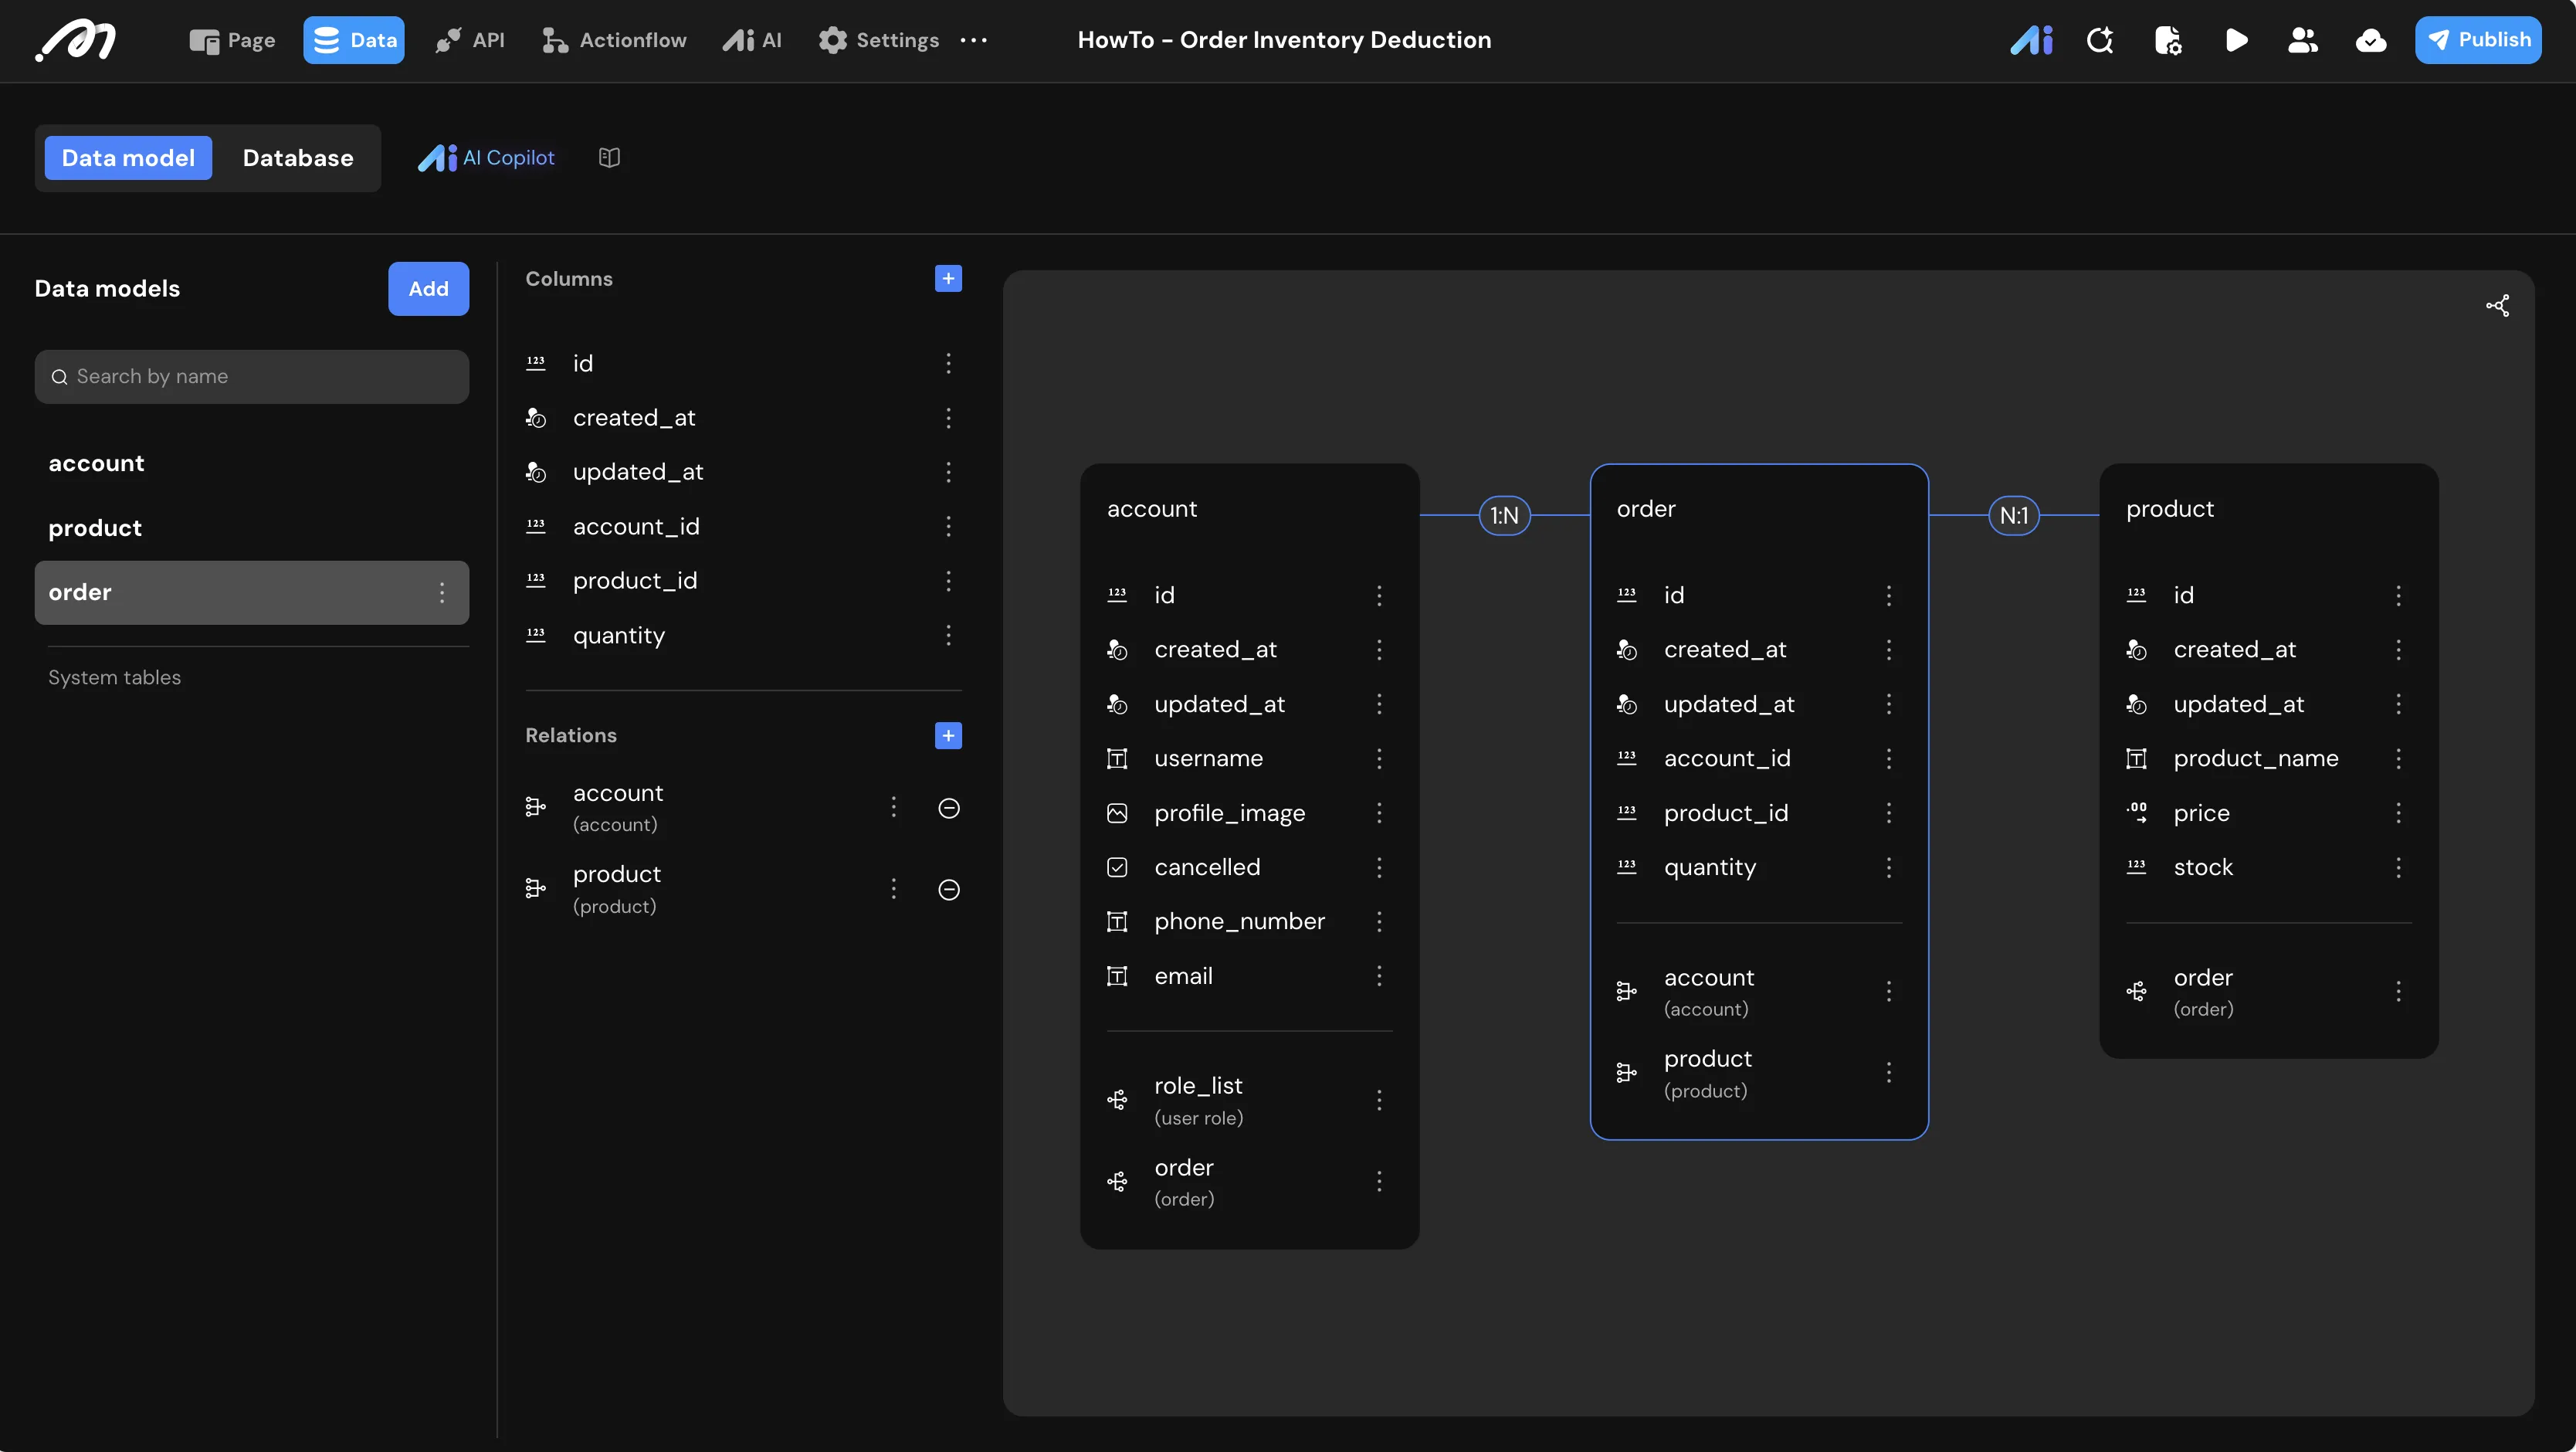
Logic & State Configuration
Actionflow Construction: Place Order
-
Inputs: Define
product_id(Bigint) andquantity(Bigint) as required inputs for the flow.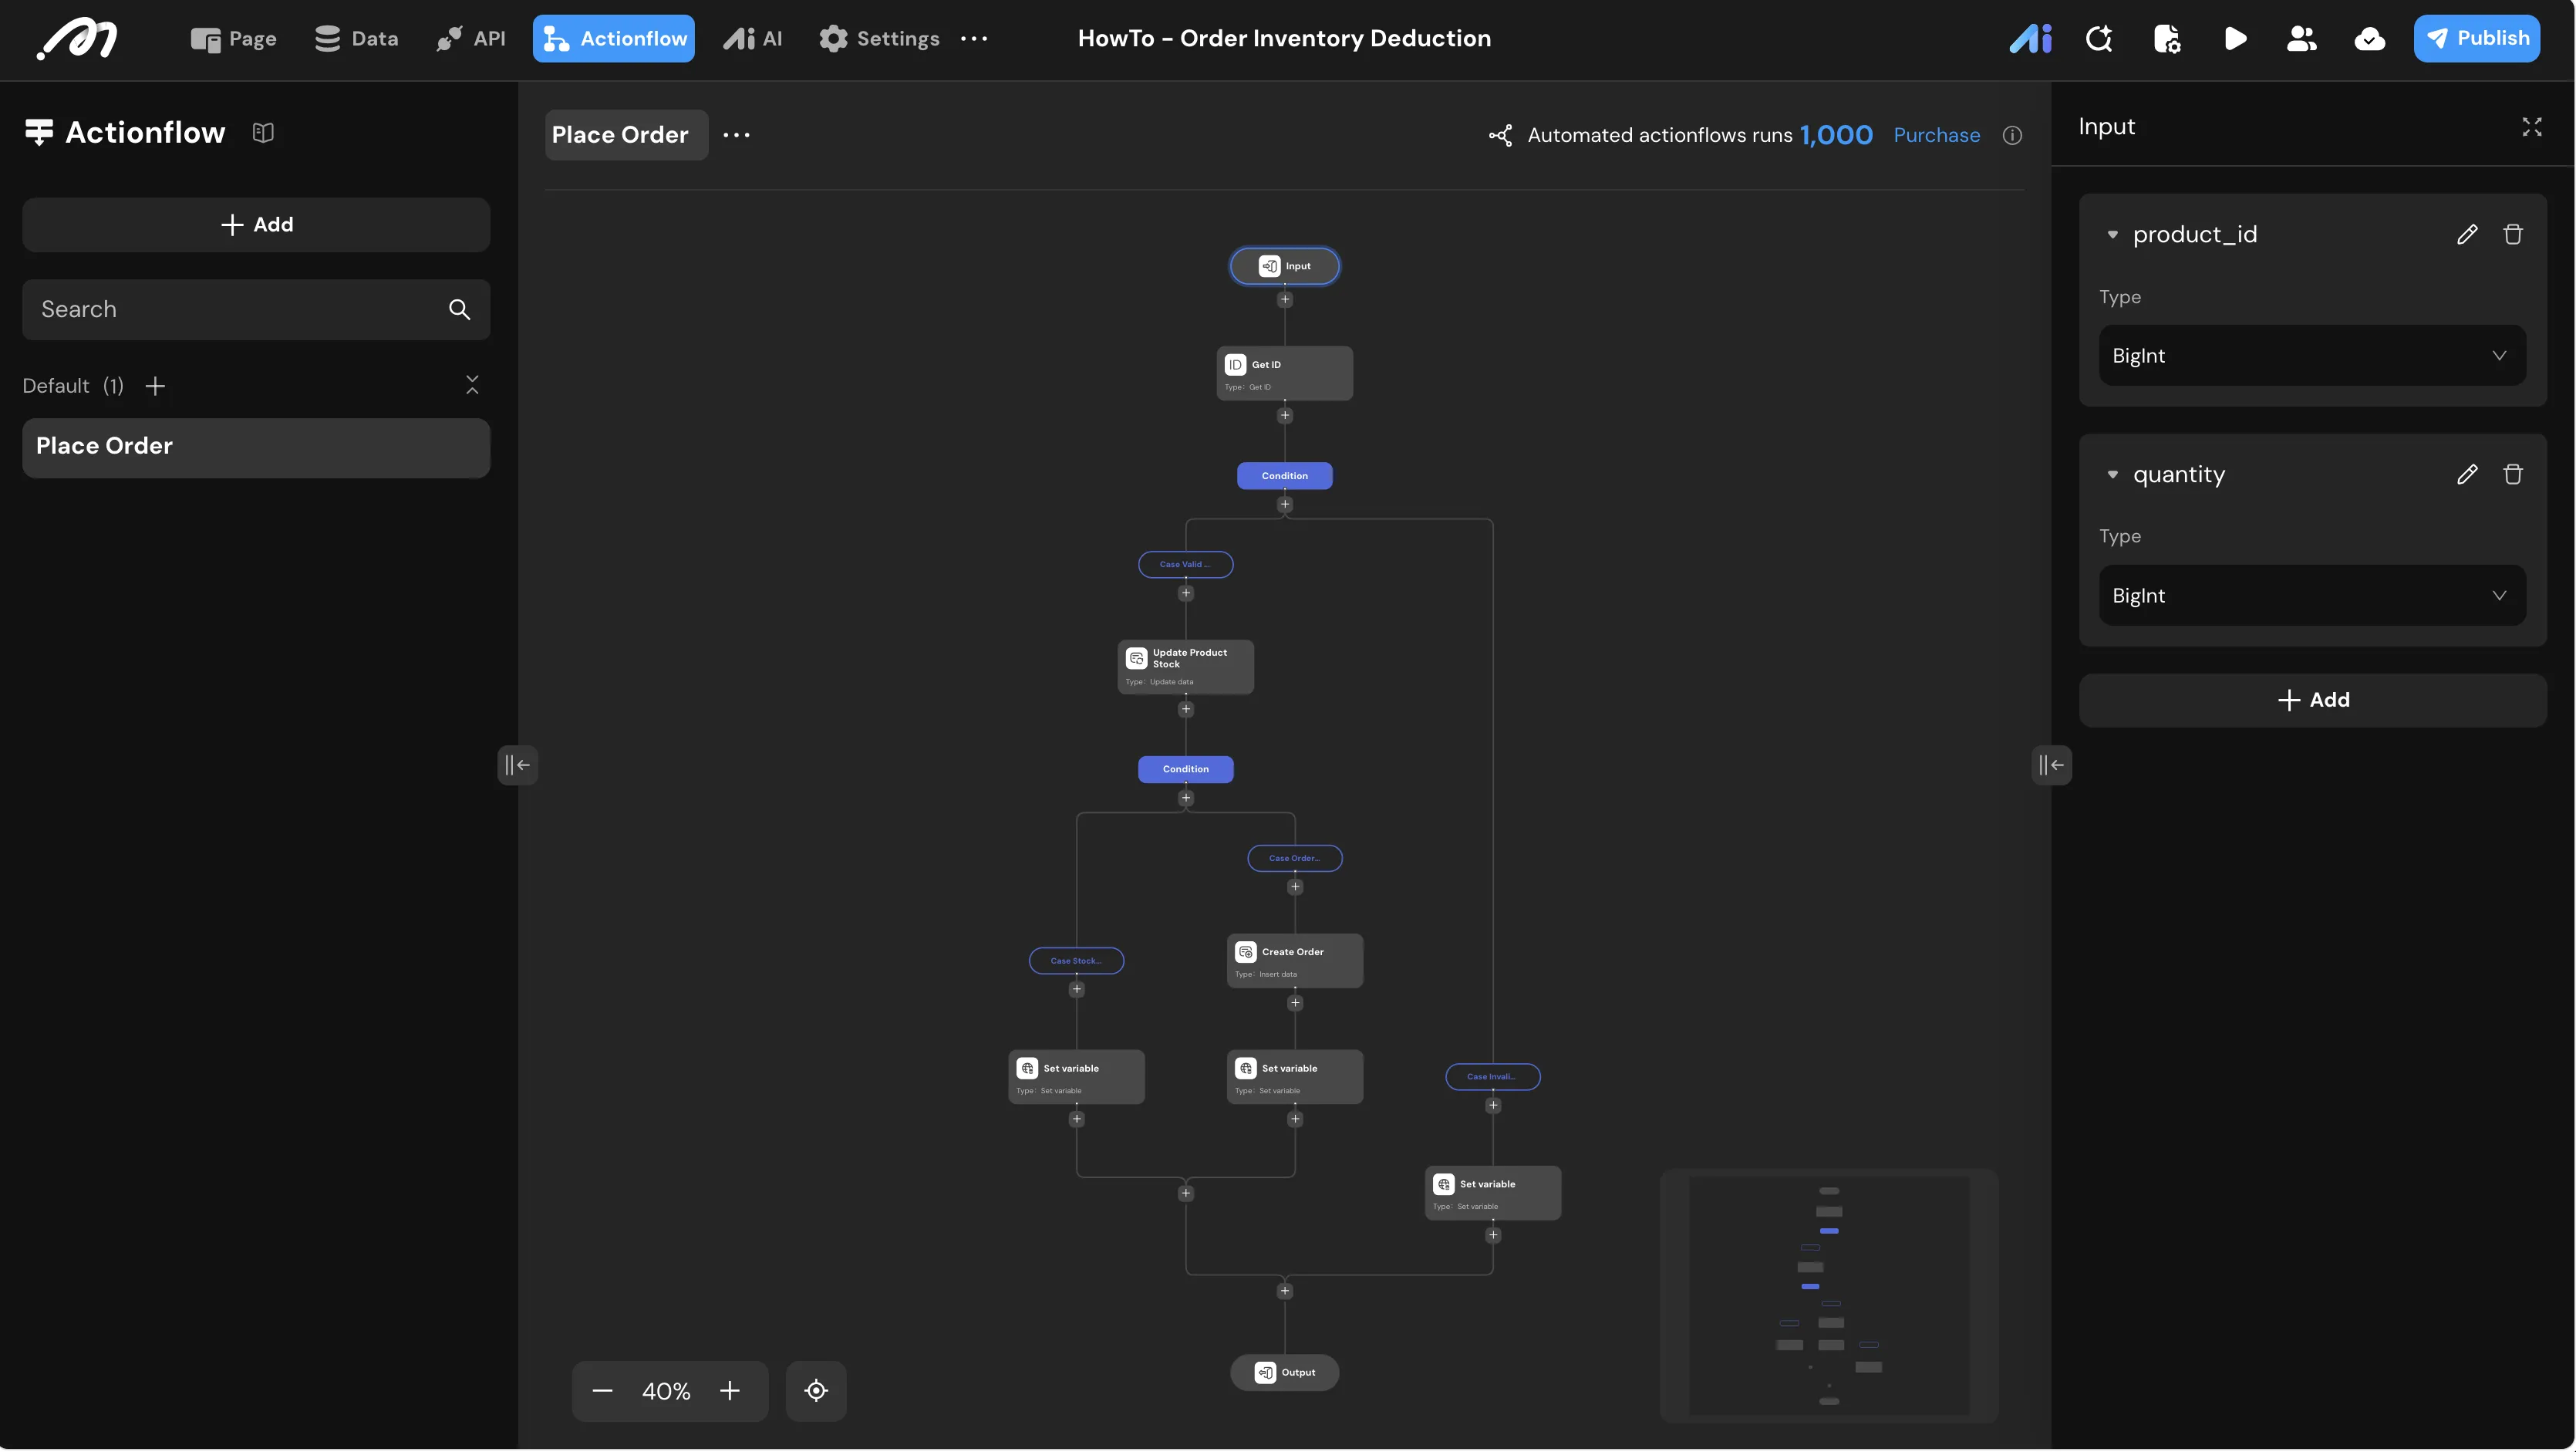
-
Actionflow Variable: Create a
status(Text) variable to return feedback to the UI.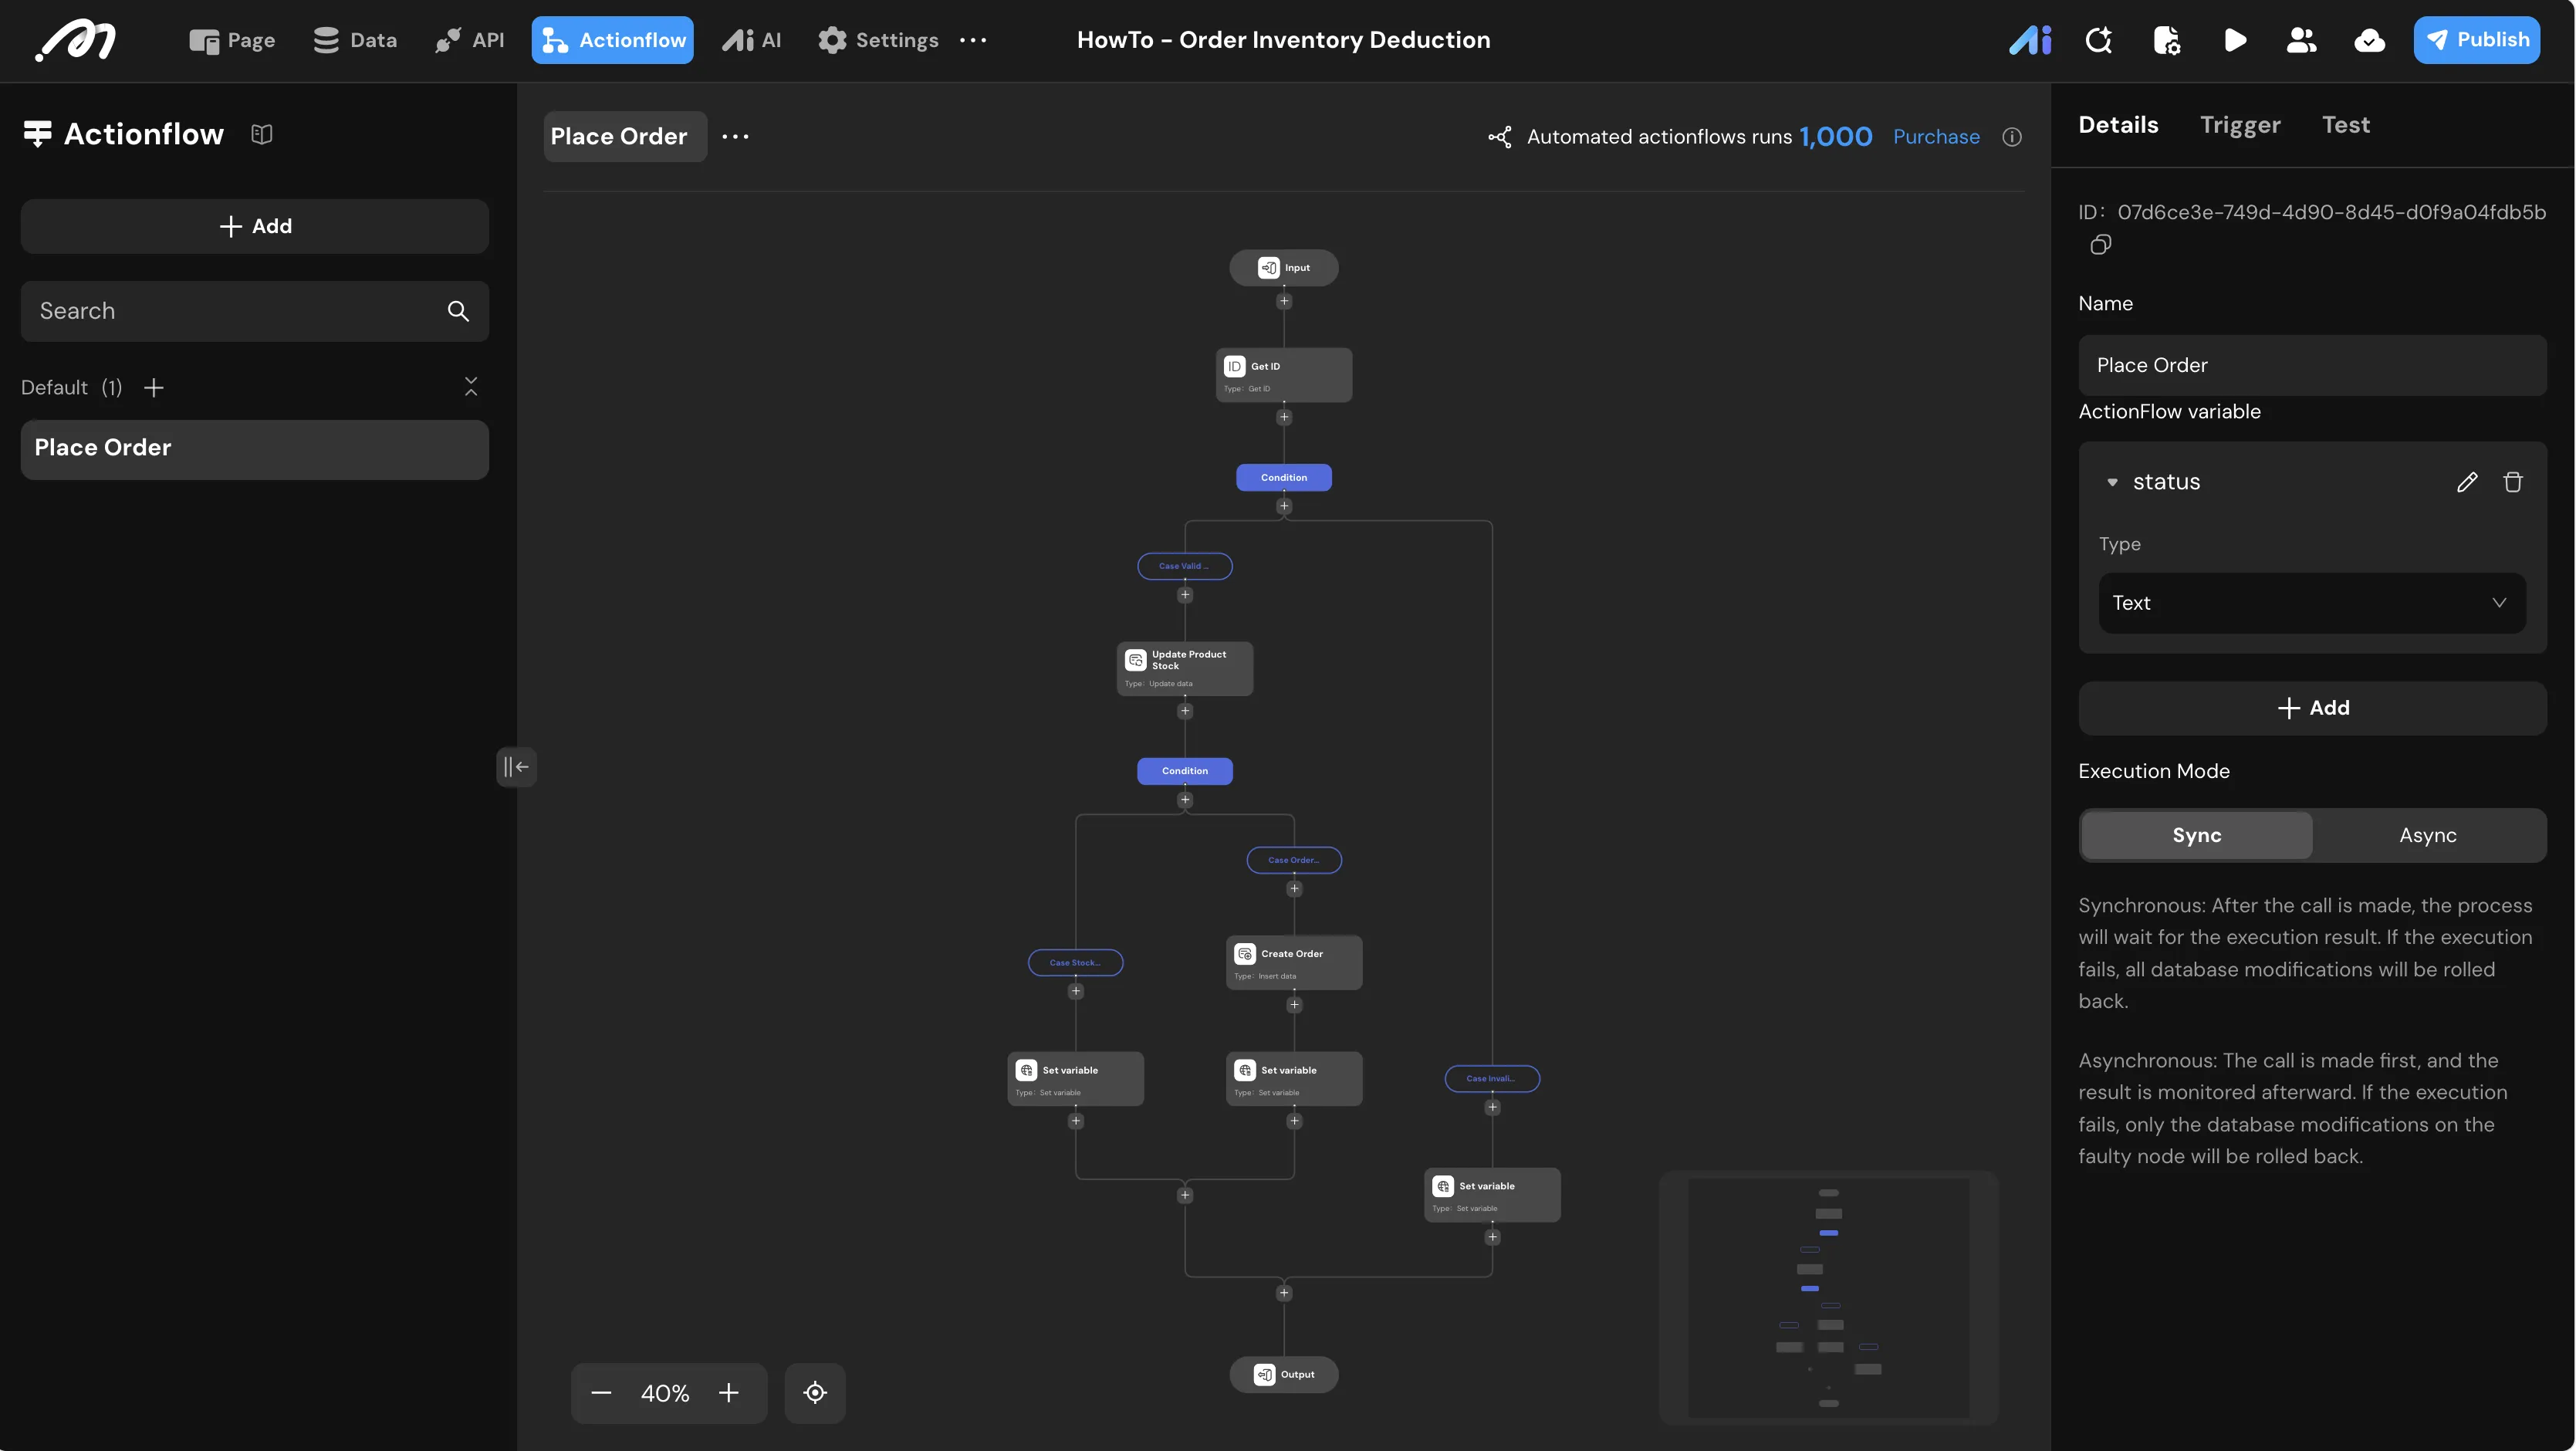
-
Get ID: Use the Get ID node to retrieve the
current_account_id. -
Condition Branch: Validate Quantity
-
Branch: Valid Quantity
-
Condition setting:
Actionflow data/input-data/quantityIs not null AND Greater than0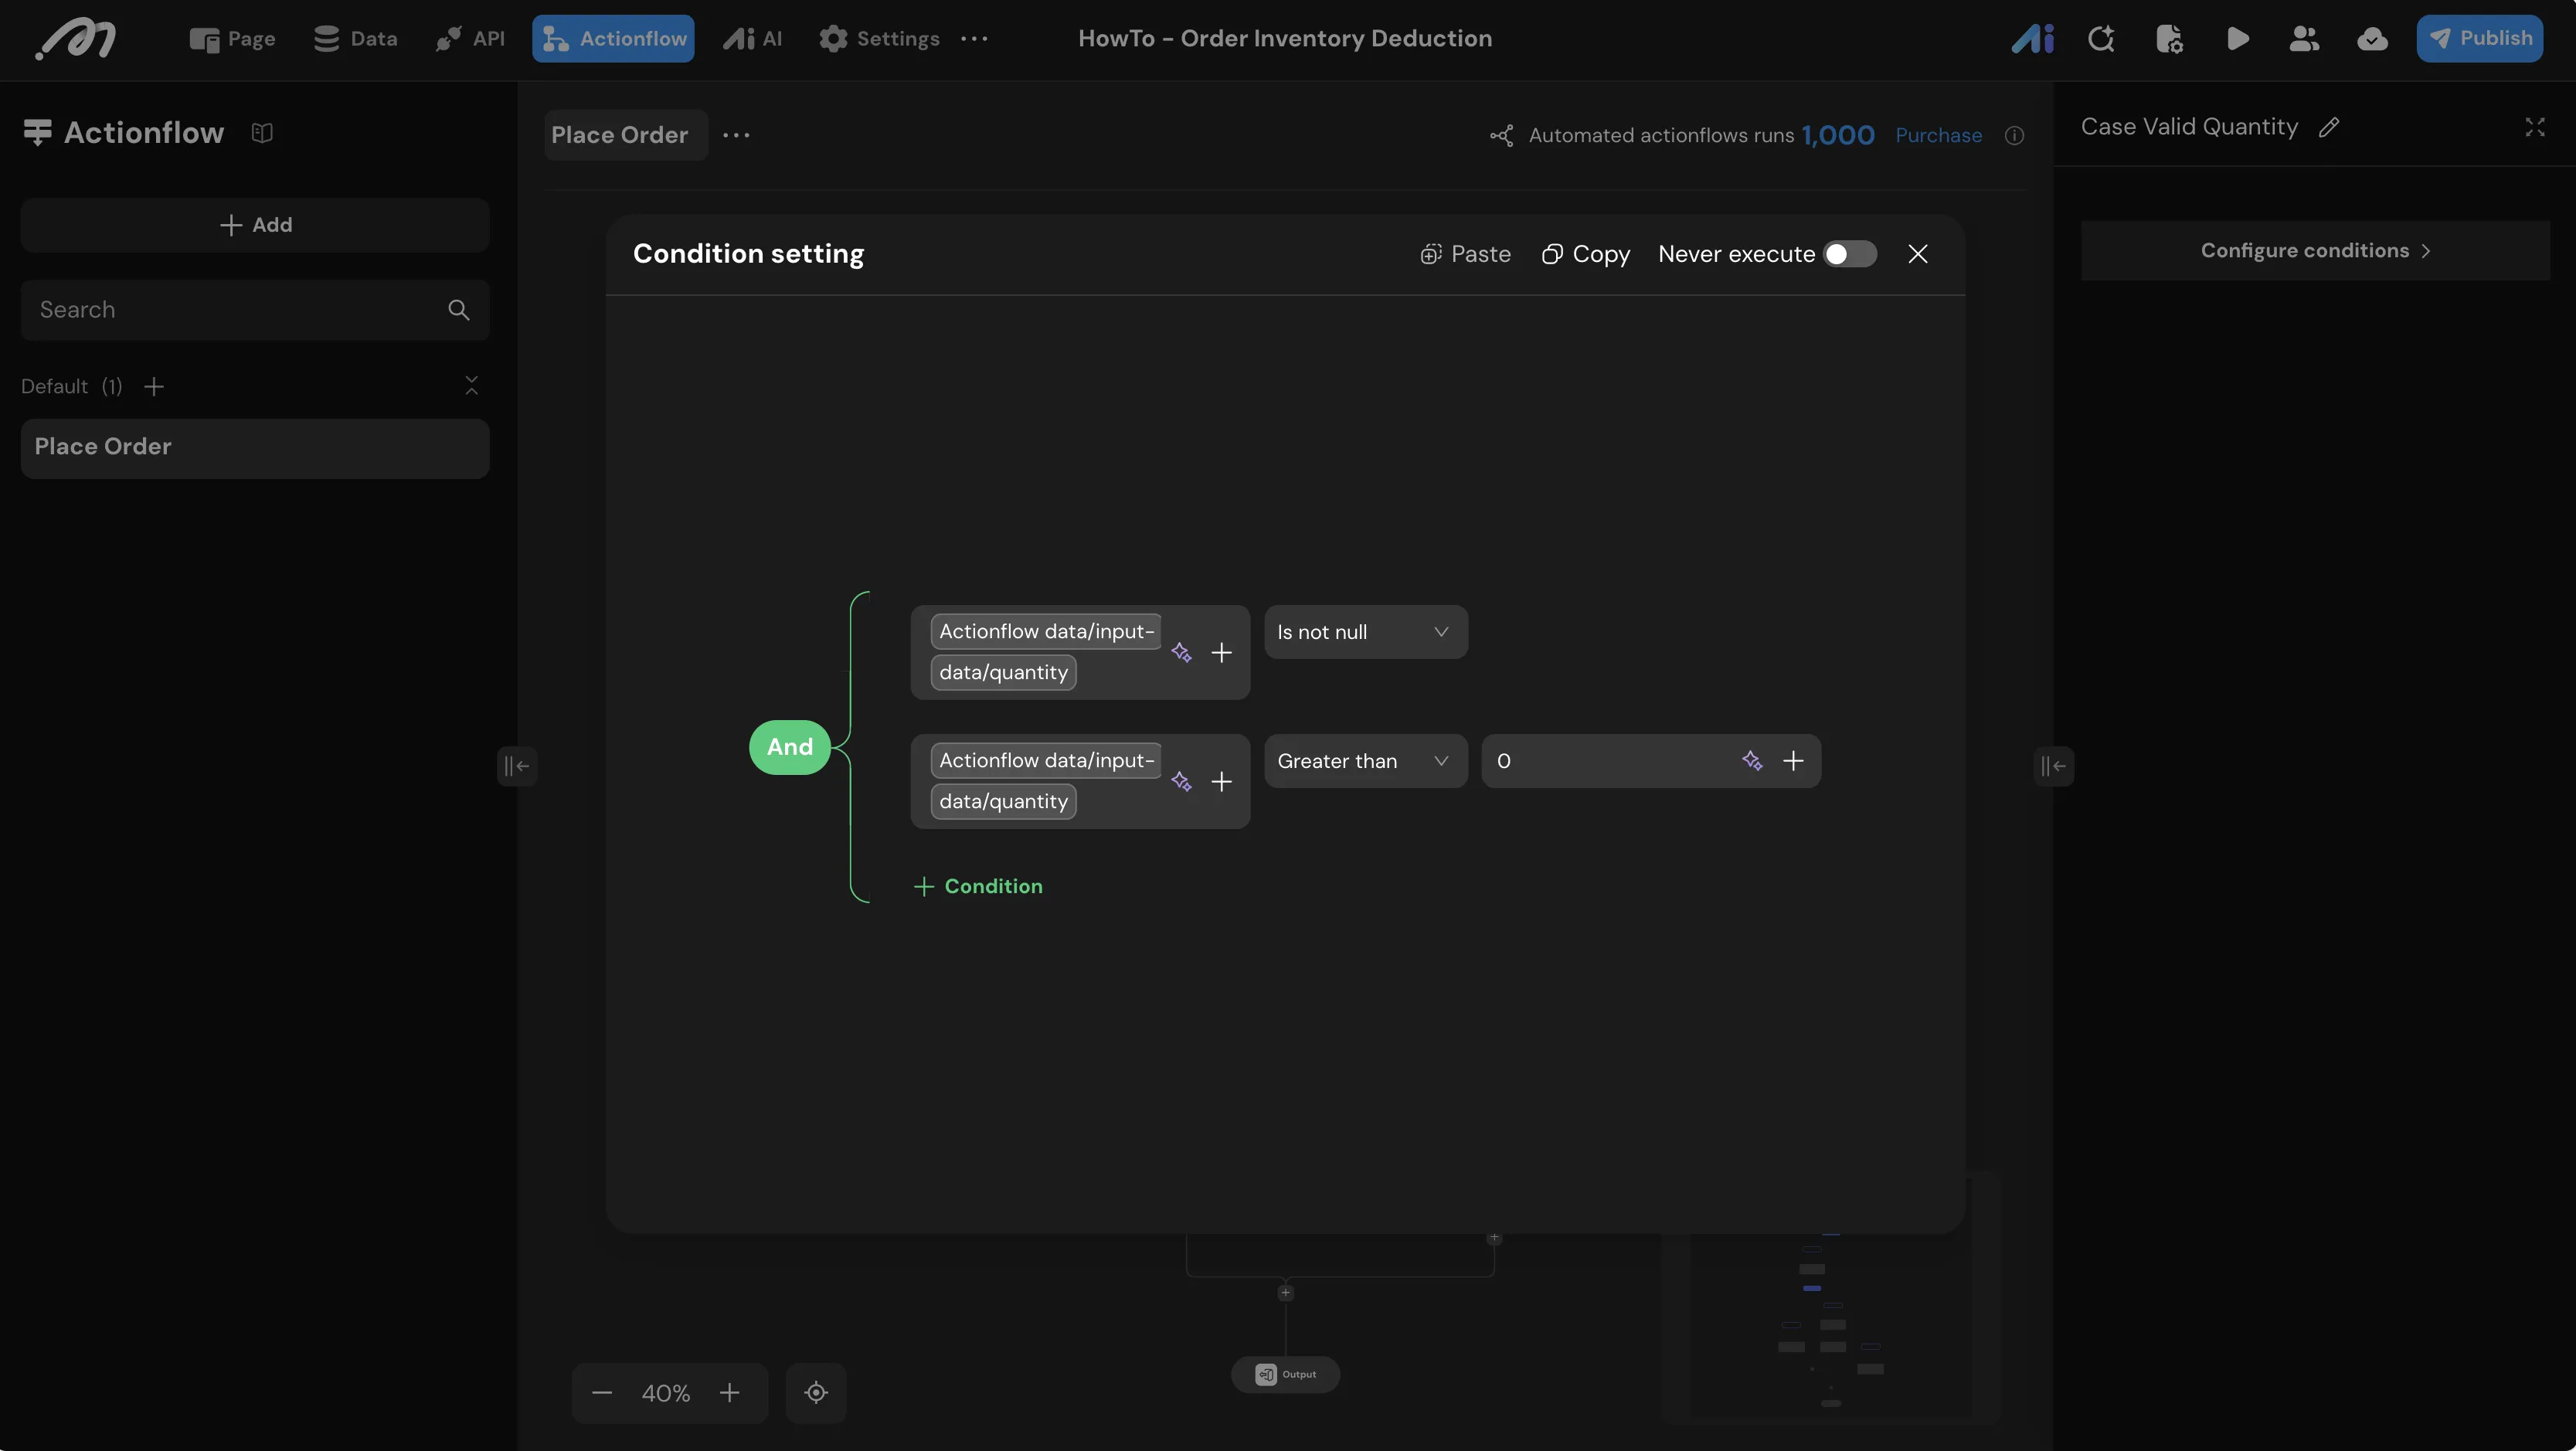
-
-
Branch: Invalid Quantity
- Condition setting:
Otherwise(executed when the above condition is not met) - Under the Invalid Quantity branch, add a Set variable node to set
statusto “Please enter a valid quantity”.
- Condition setting:
-
-
Update Data: Update Product Stock On the Valid Quantity branch, add an Update data node named
Update Product Stock.-
Table: Select
product -
Filter:
idEqual toActionflow data/input-data/product_idstockGreater than or equal toActionflow data/input-data/quantity
-
Parameters: Set
stockto Decrease byActionflow data/input-data/quantity⚠️This step is critical. By including
stock >= quantityin the filter, the database will only perform the update if sufficient stock exists, preventing negative inventory in high‑concurrency scenarios.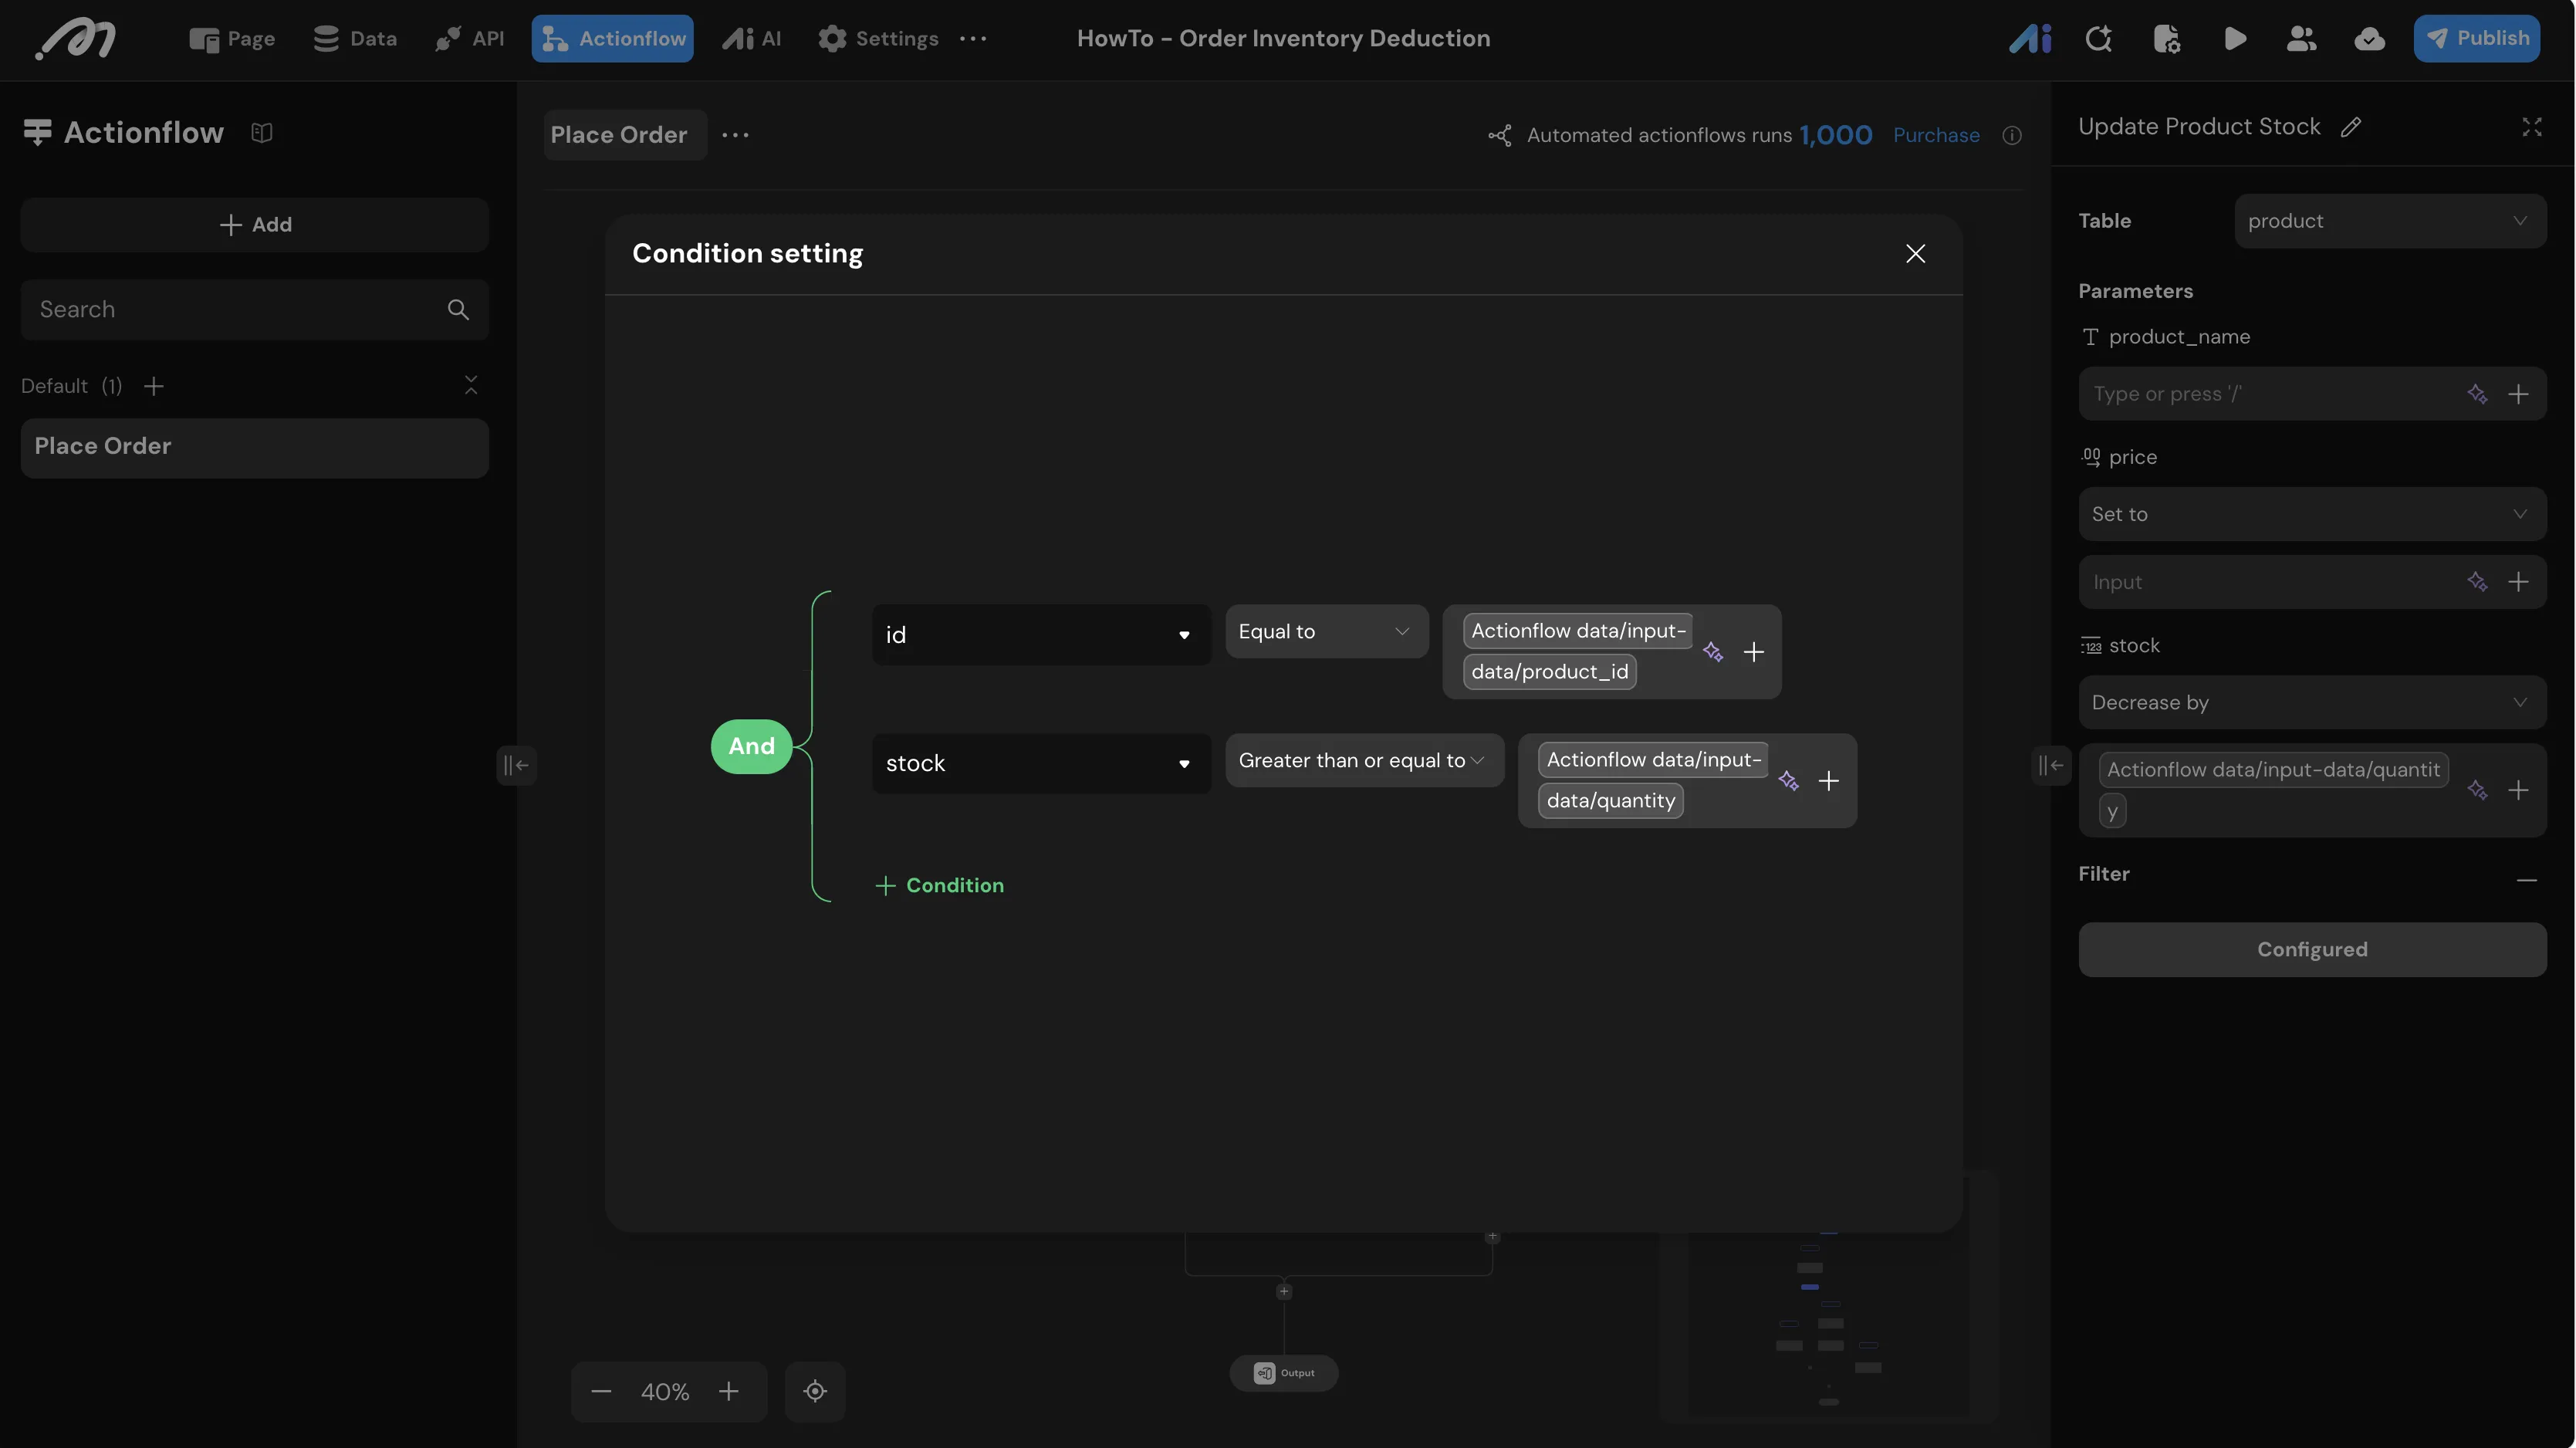
-
-
Condition Branch: Check Stock Deduction Result After the
Update Product Stocknode, add a new condition branch node to check whether the update succeeded, creating two branches:-
Branch: Stock Shortage
-
Condition setting:
Actionflow data/Update Product Stock/idIs null (indicating the update affected no rows, i.e., insufficient stock) -
Under the Stock Shortage branch, add a Set variable node to set
statusto “Stock shortage”.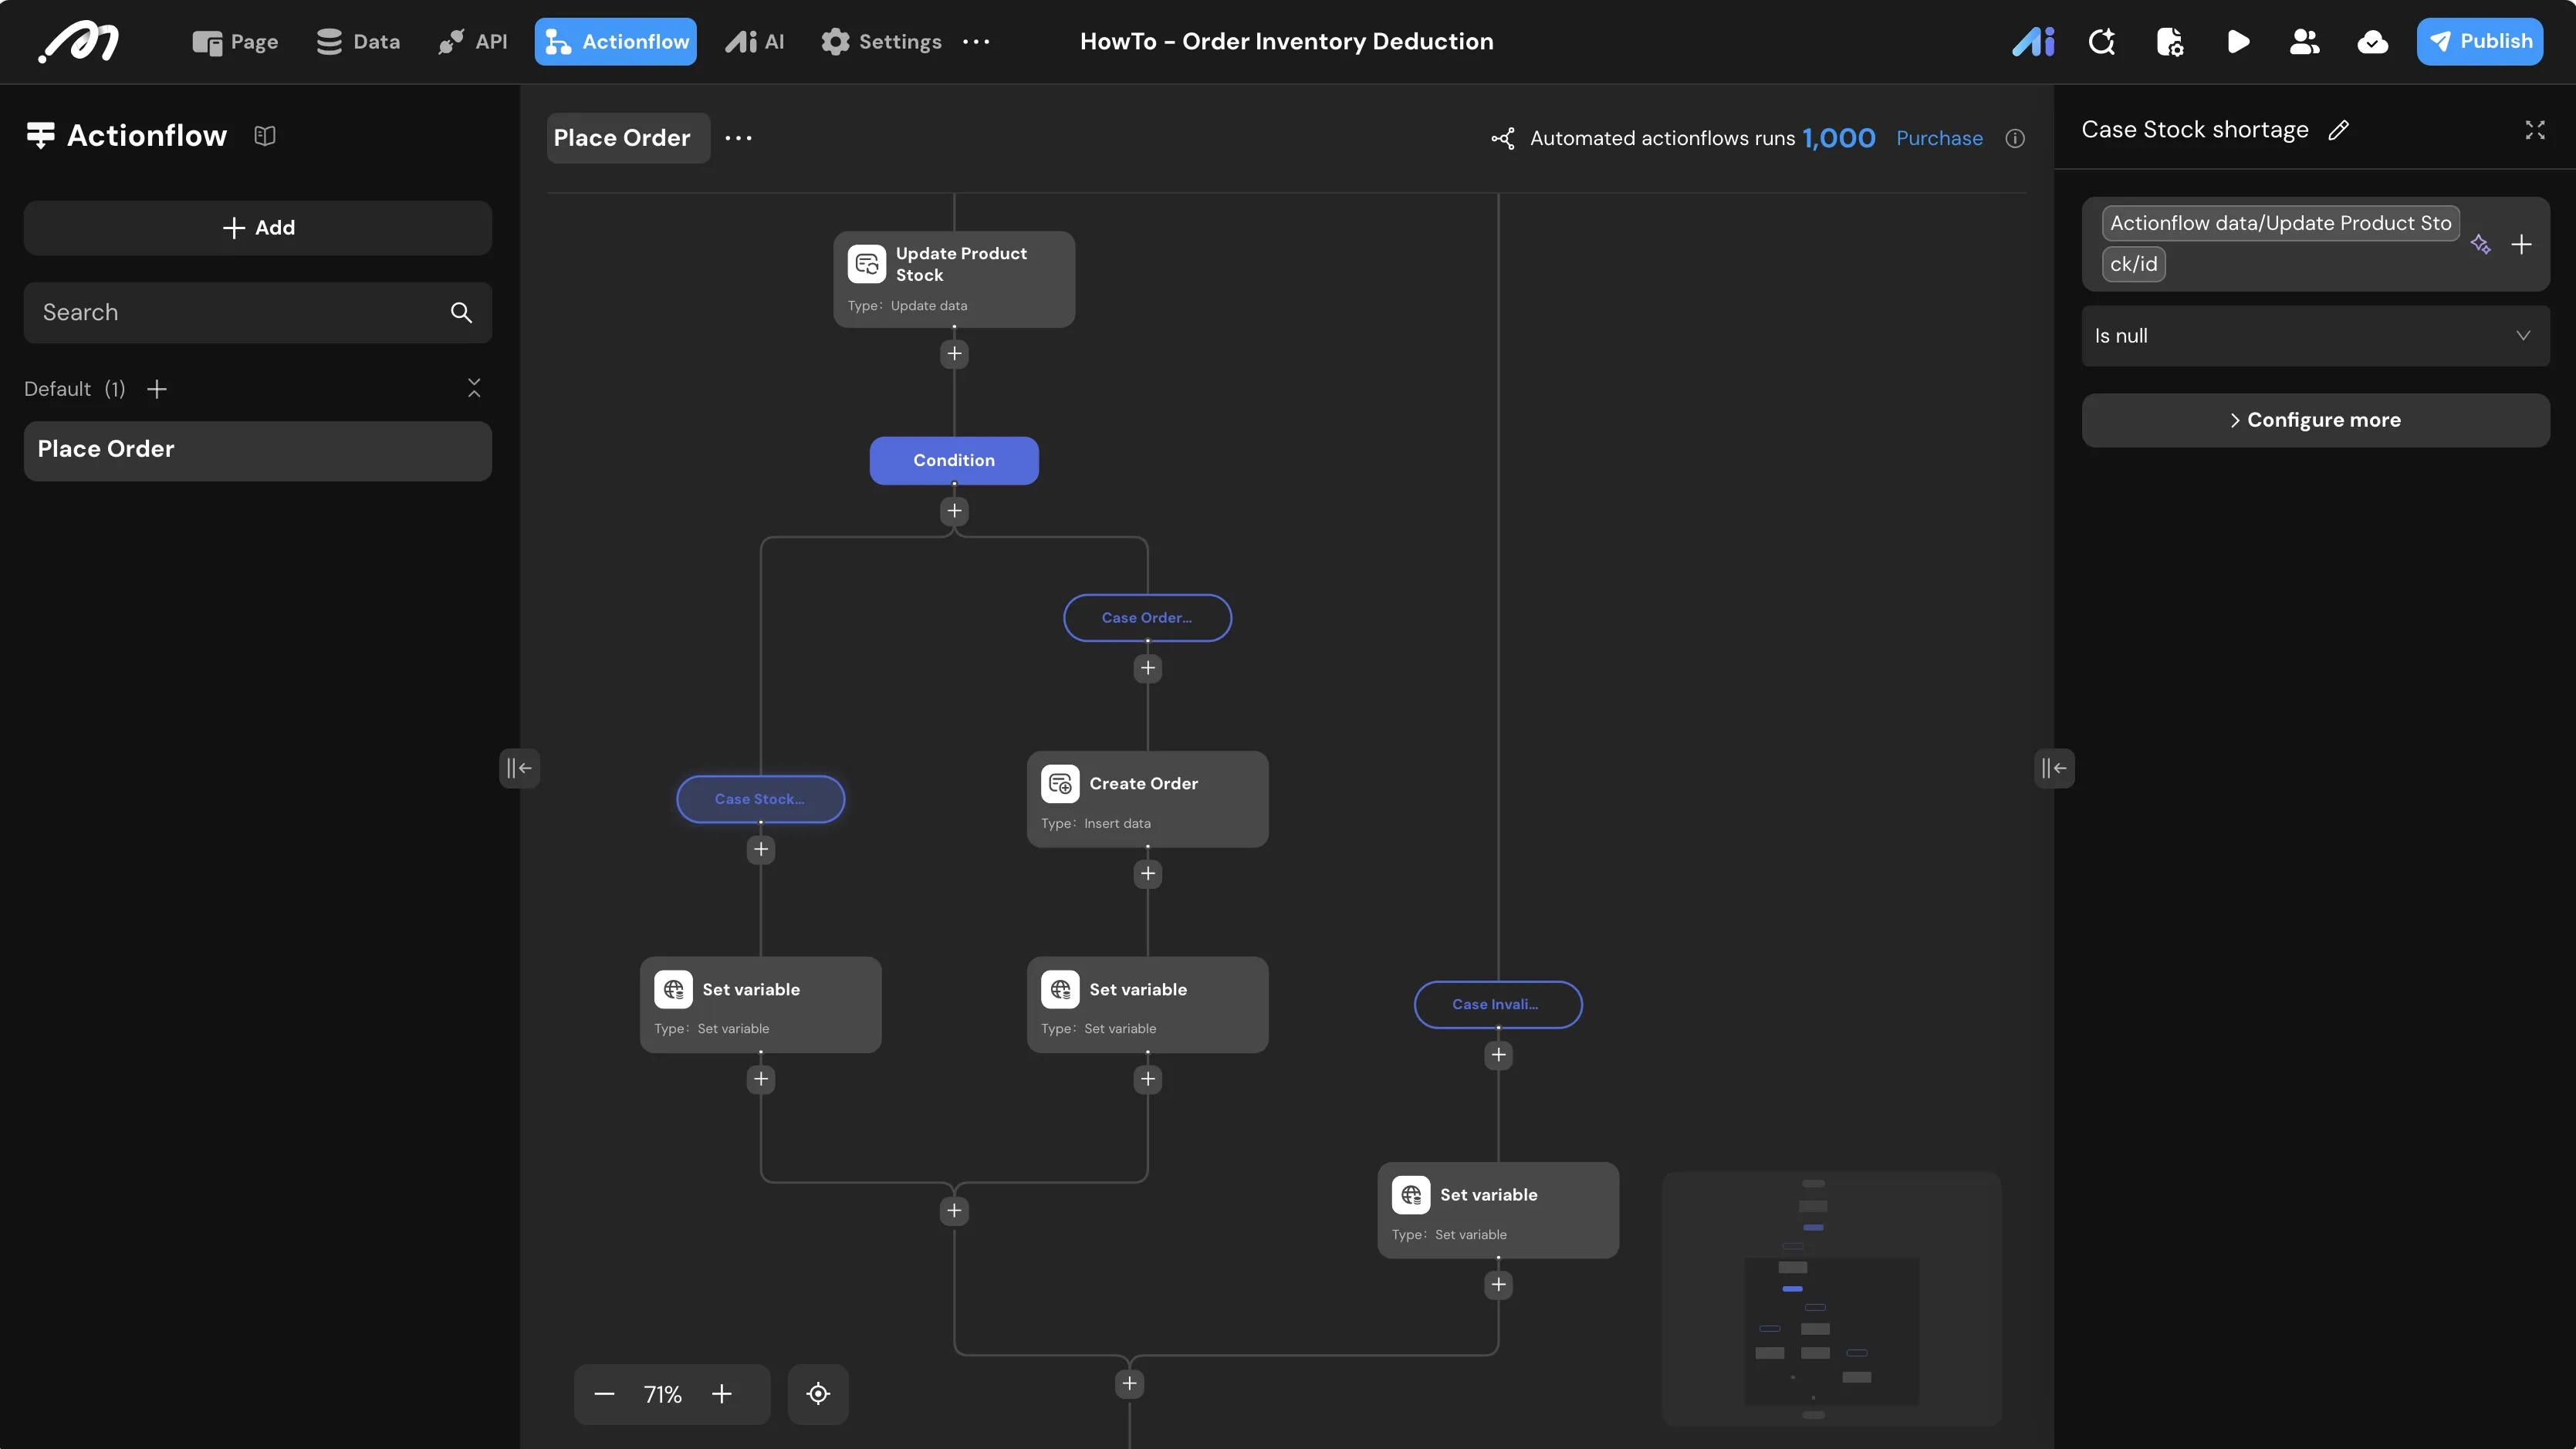
-
-
Branch: Success (Stock Sufficient)
- Condition setting:
Otherwise(indicating the update succeeded, stock has been deducted)
- Condition setting:
-
-
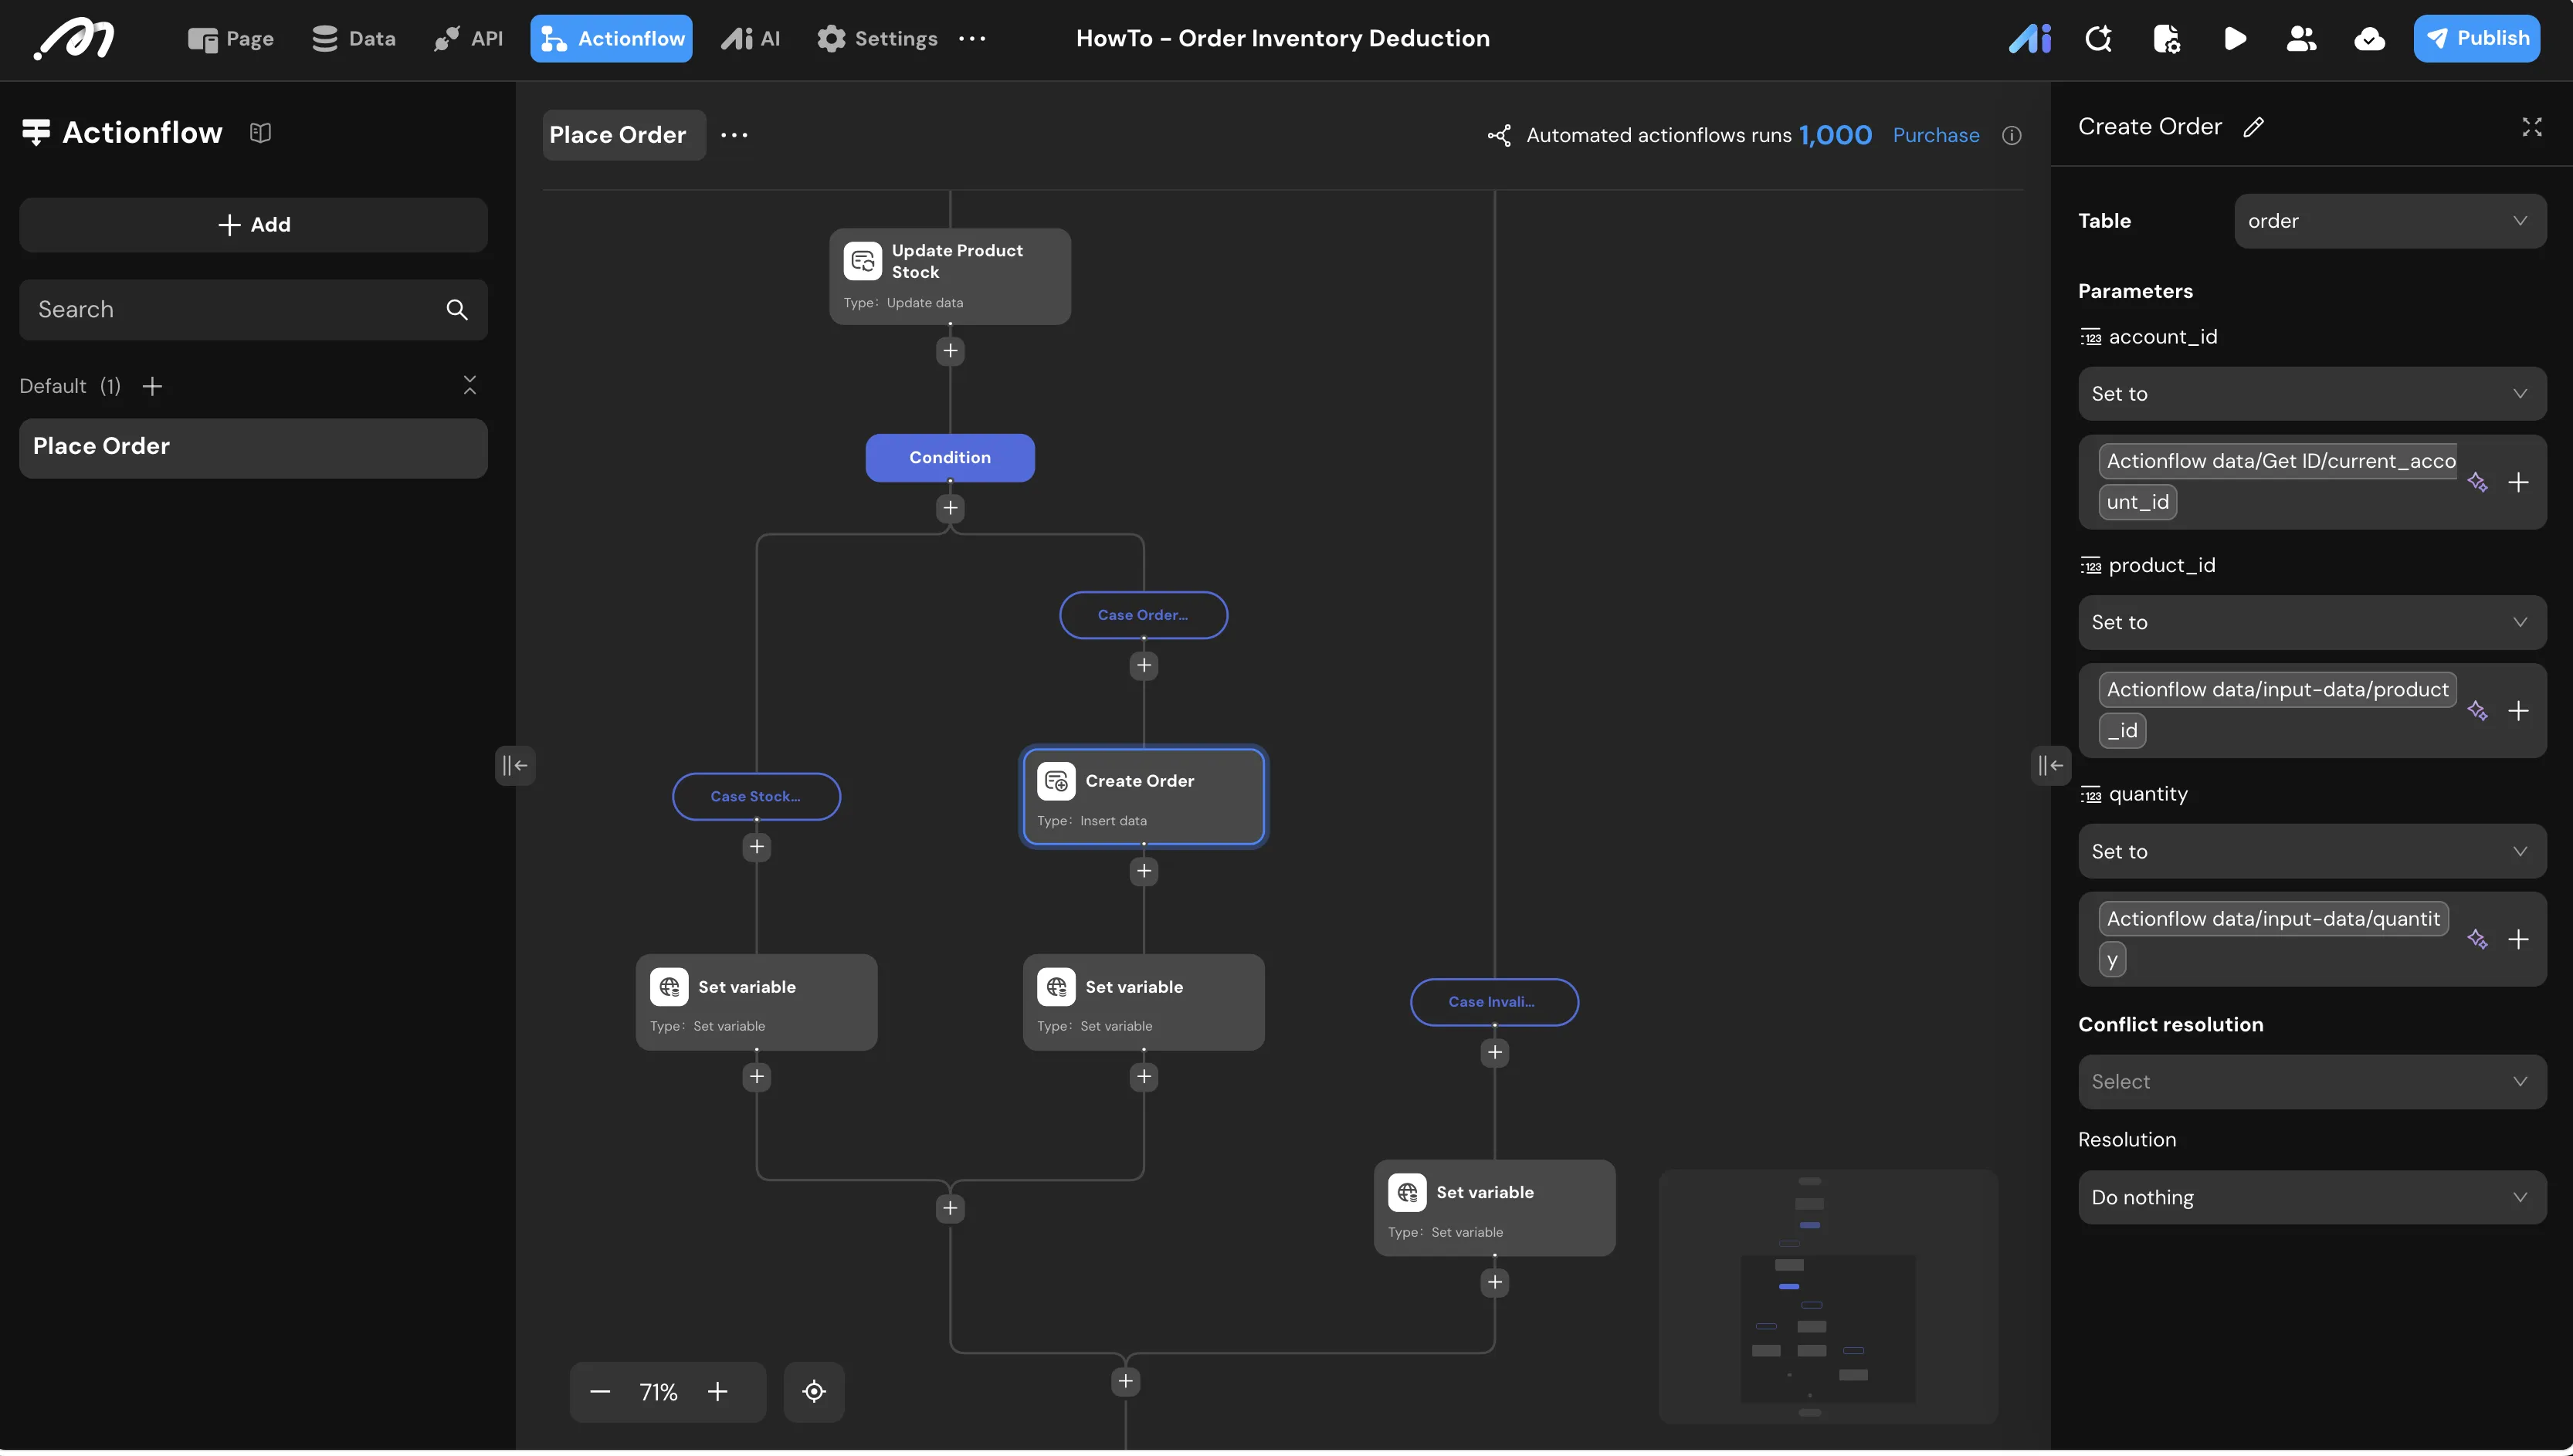
Insert Data (Create Order) Under the Success (Stock Sufficient) branch, add an Insert data node.
-
Table:
order -
Fields:
account_id: Map from the Get ID nodeproduct_id:Actionflow data/input-data/product_idquantity:Actionflow data/input-data/quantity
-
-
Set Variable: After the order is successfully created, add a Set variable node to set
statusto “Order placed successfully”. -
Output: Return the
statusvariable.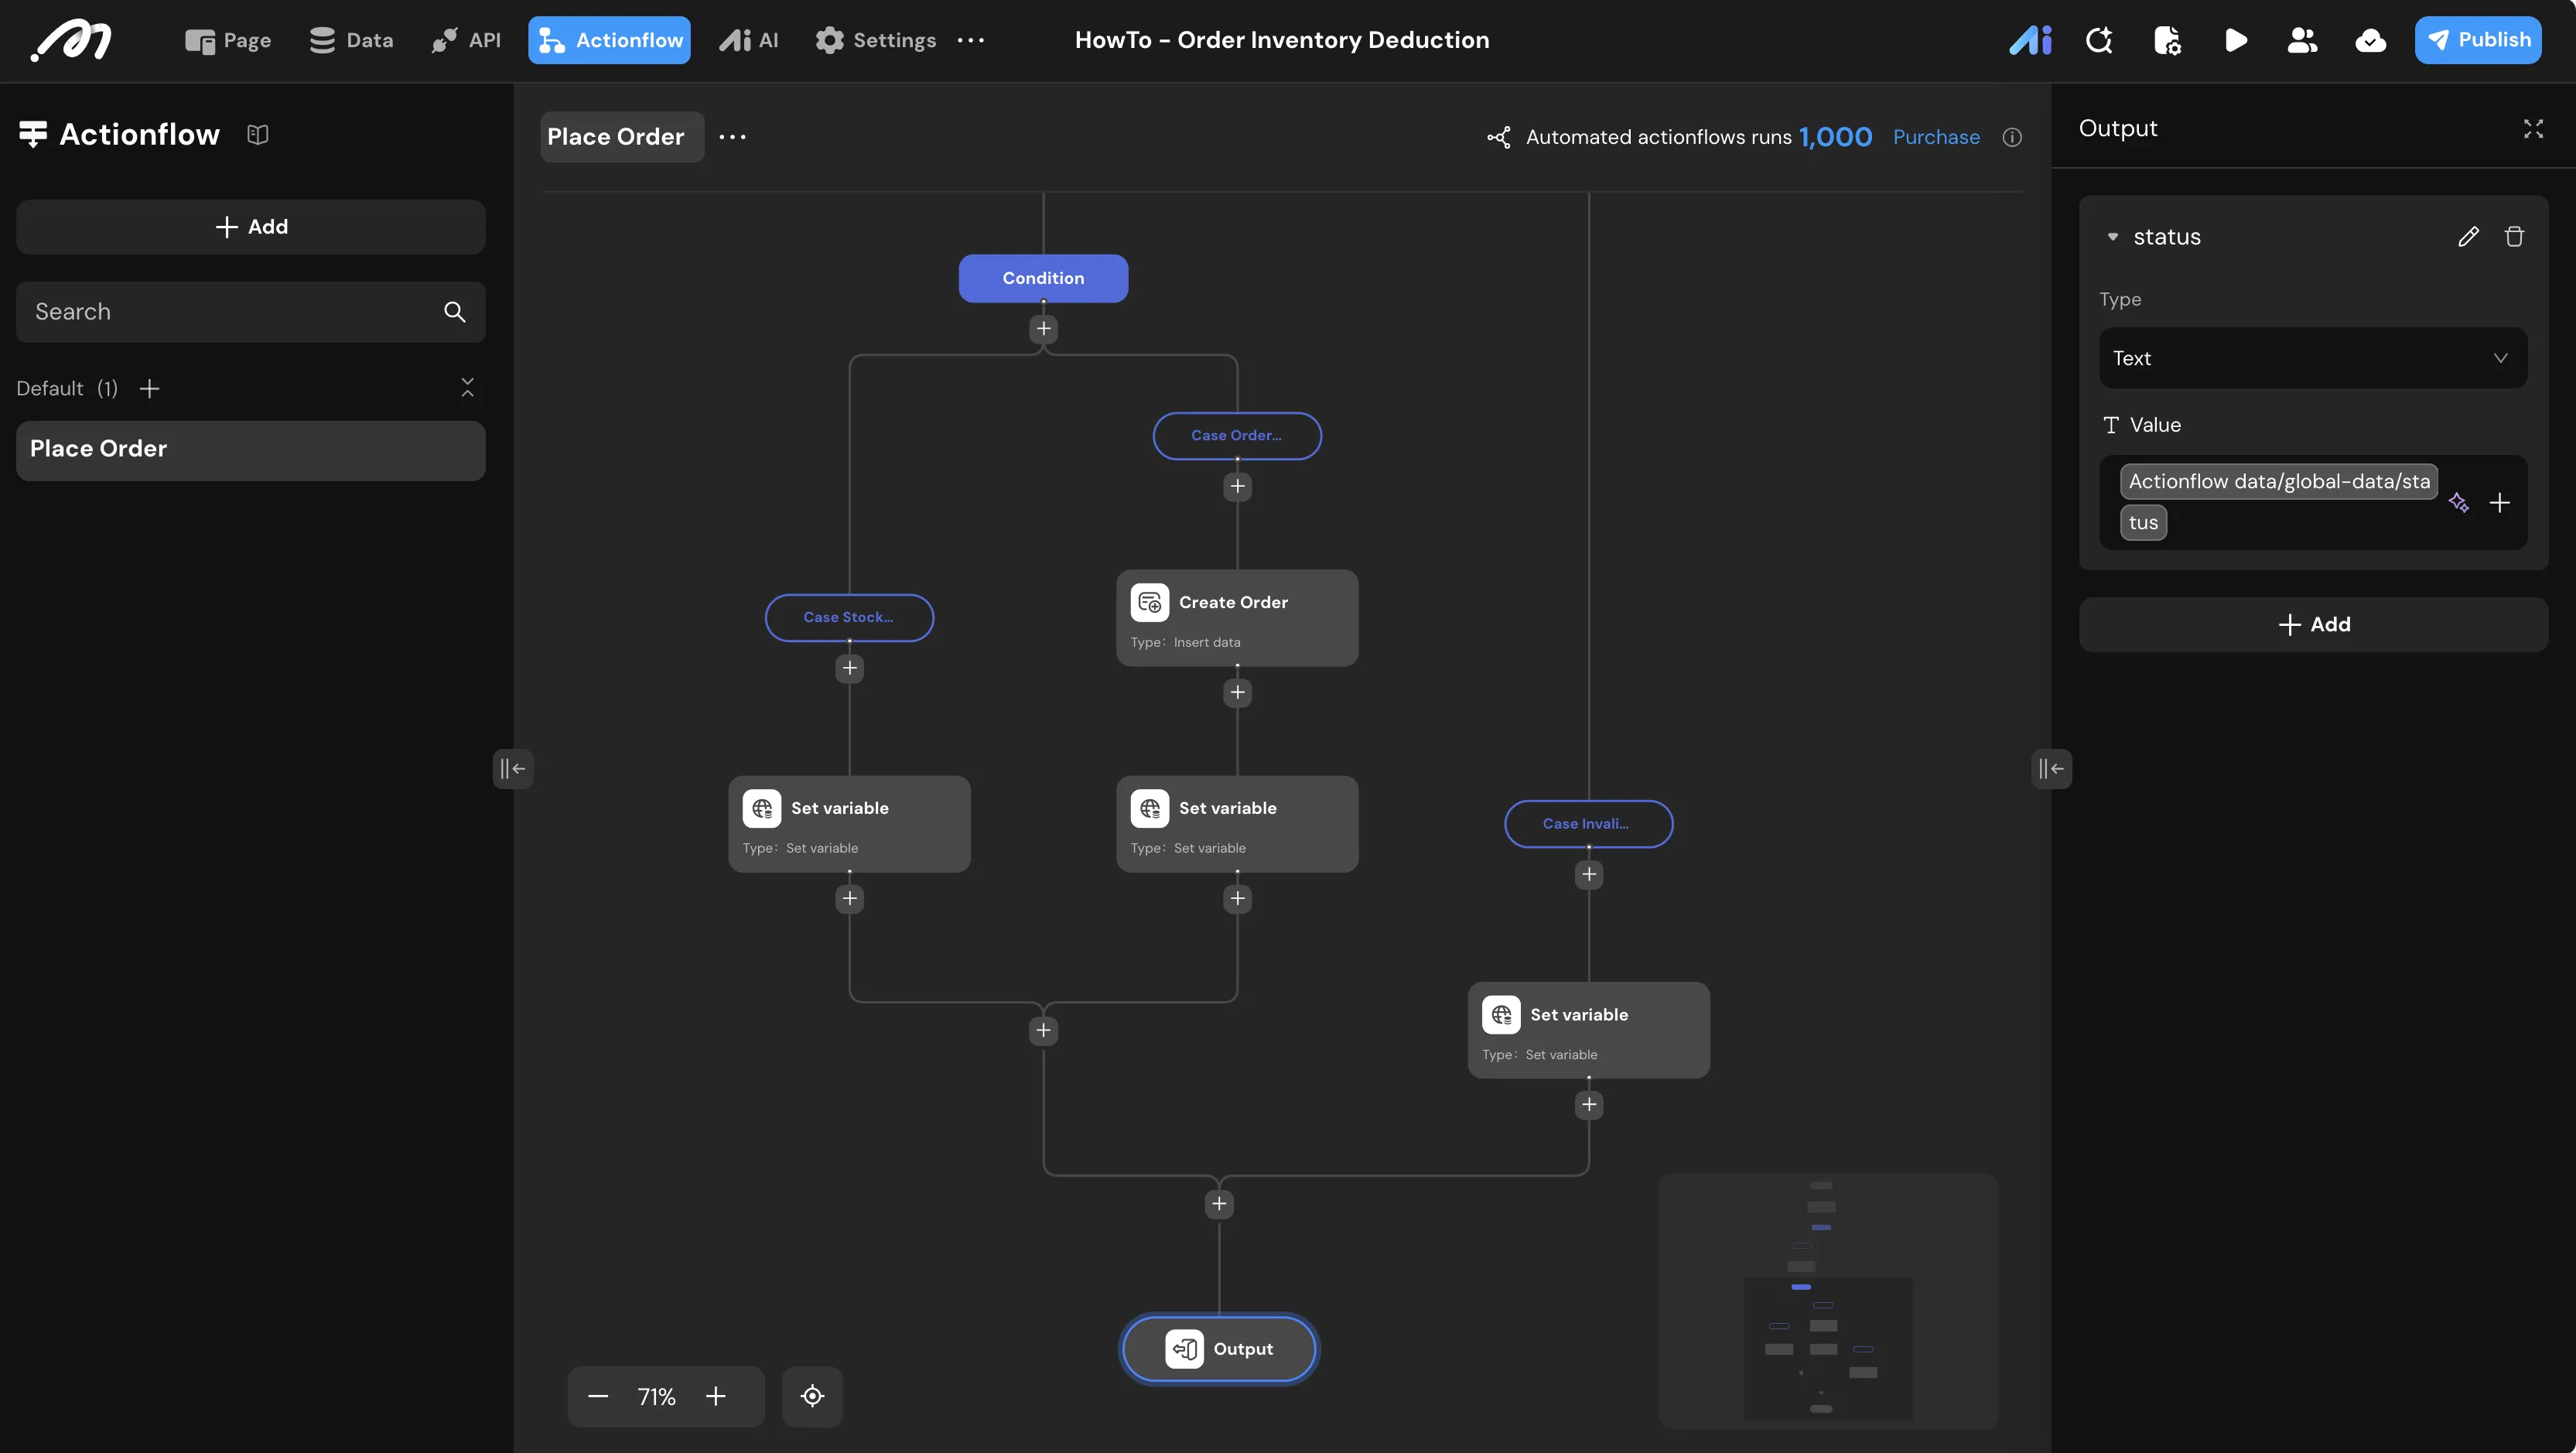
UI Construction & Interaction
Page Layout
-
Create a new page named
Page Order Inventory Deduction. -
Add a List component to the canvas.
-
Data source: Bind to the
producttable. -
Request type:
Subscription(to see real‑time stock updates).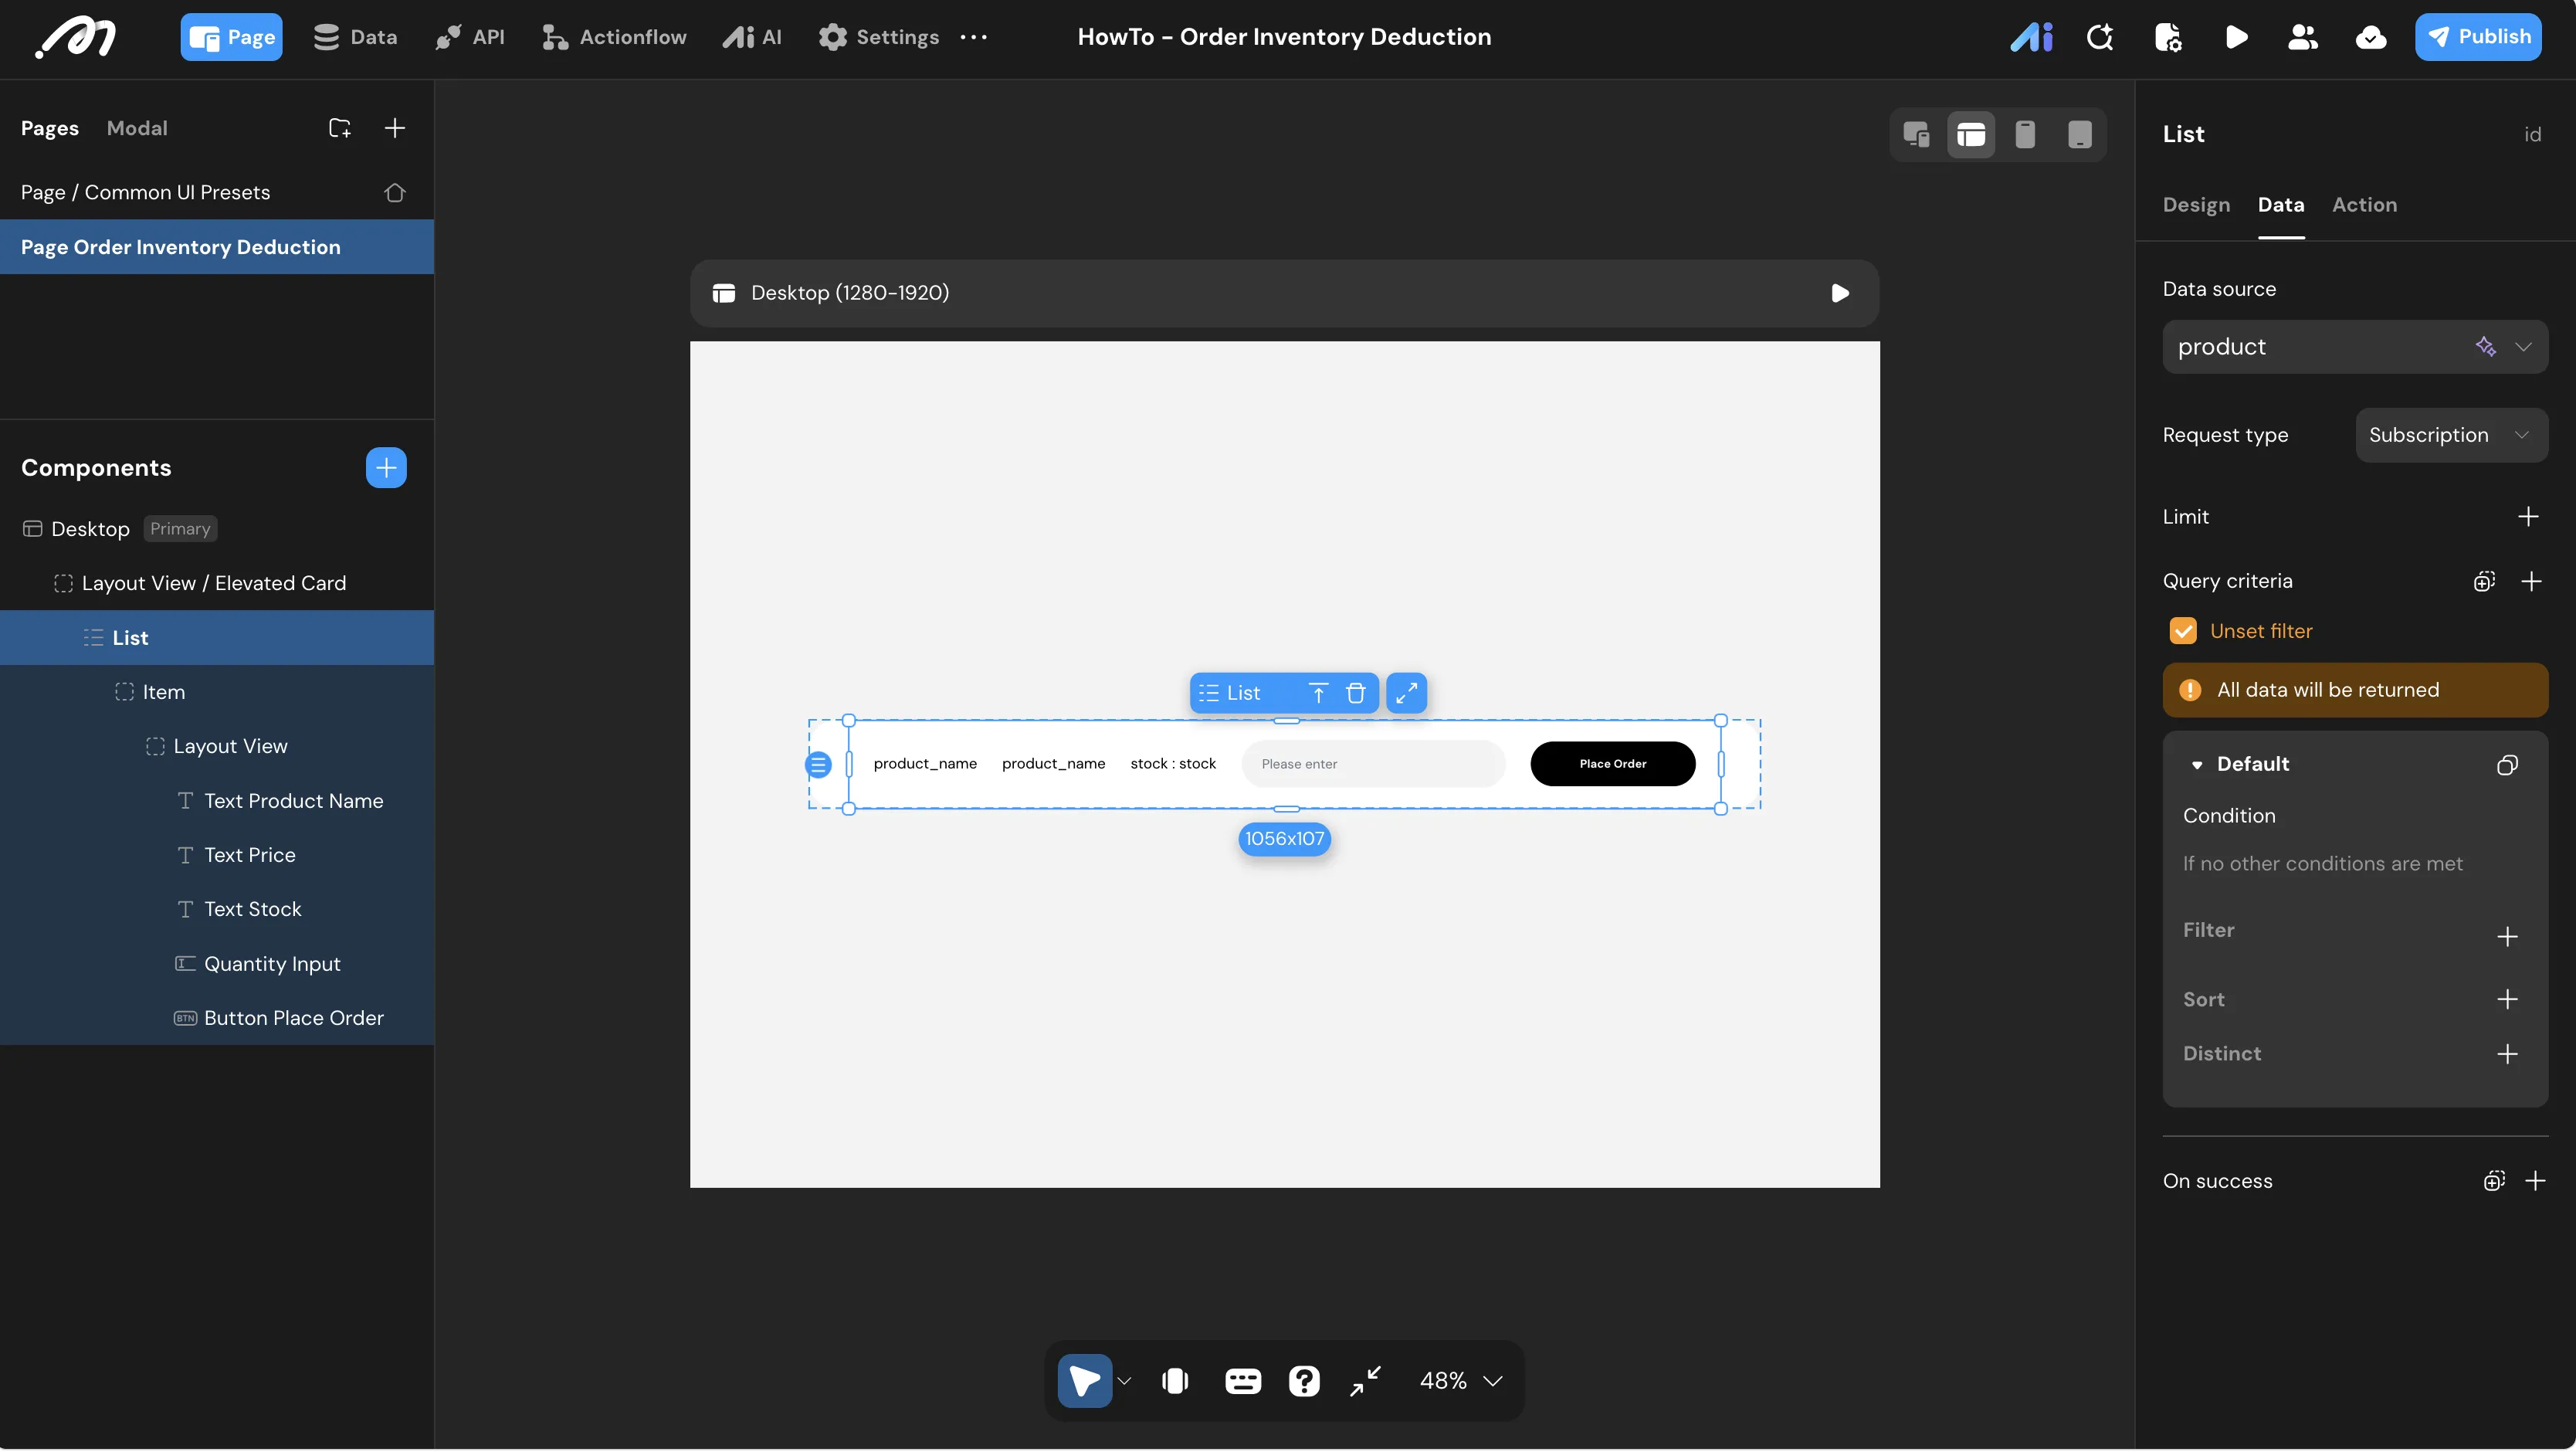
-
-
Inside the List Item, arrange the following components:
- Text: Bind to
List item.product_name - Text: Bind to
List item.price - Text: Bind to
List item.stock(prefixed with “stock: ”) - Text Input: Named
Quantity Input. Set Input value type toBigint - Button: Named
Button Place Order
- Text: Bind to
Interaction Configuration
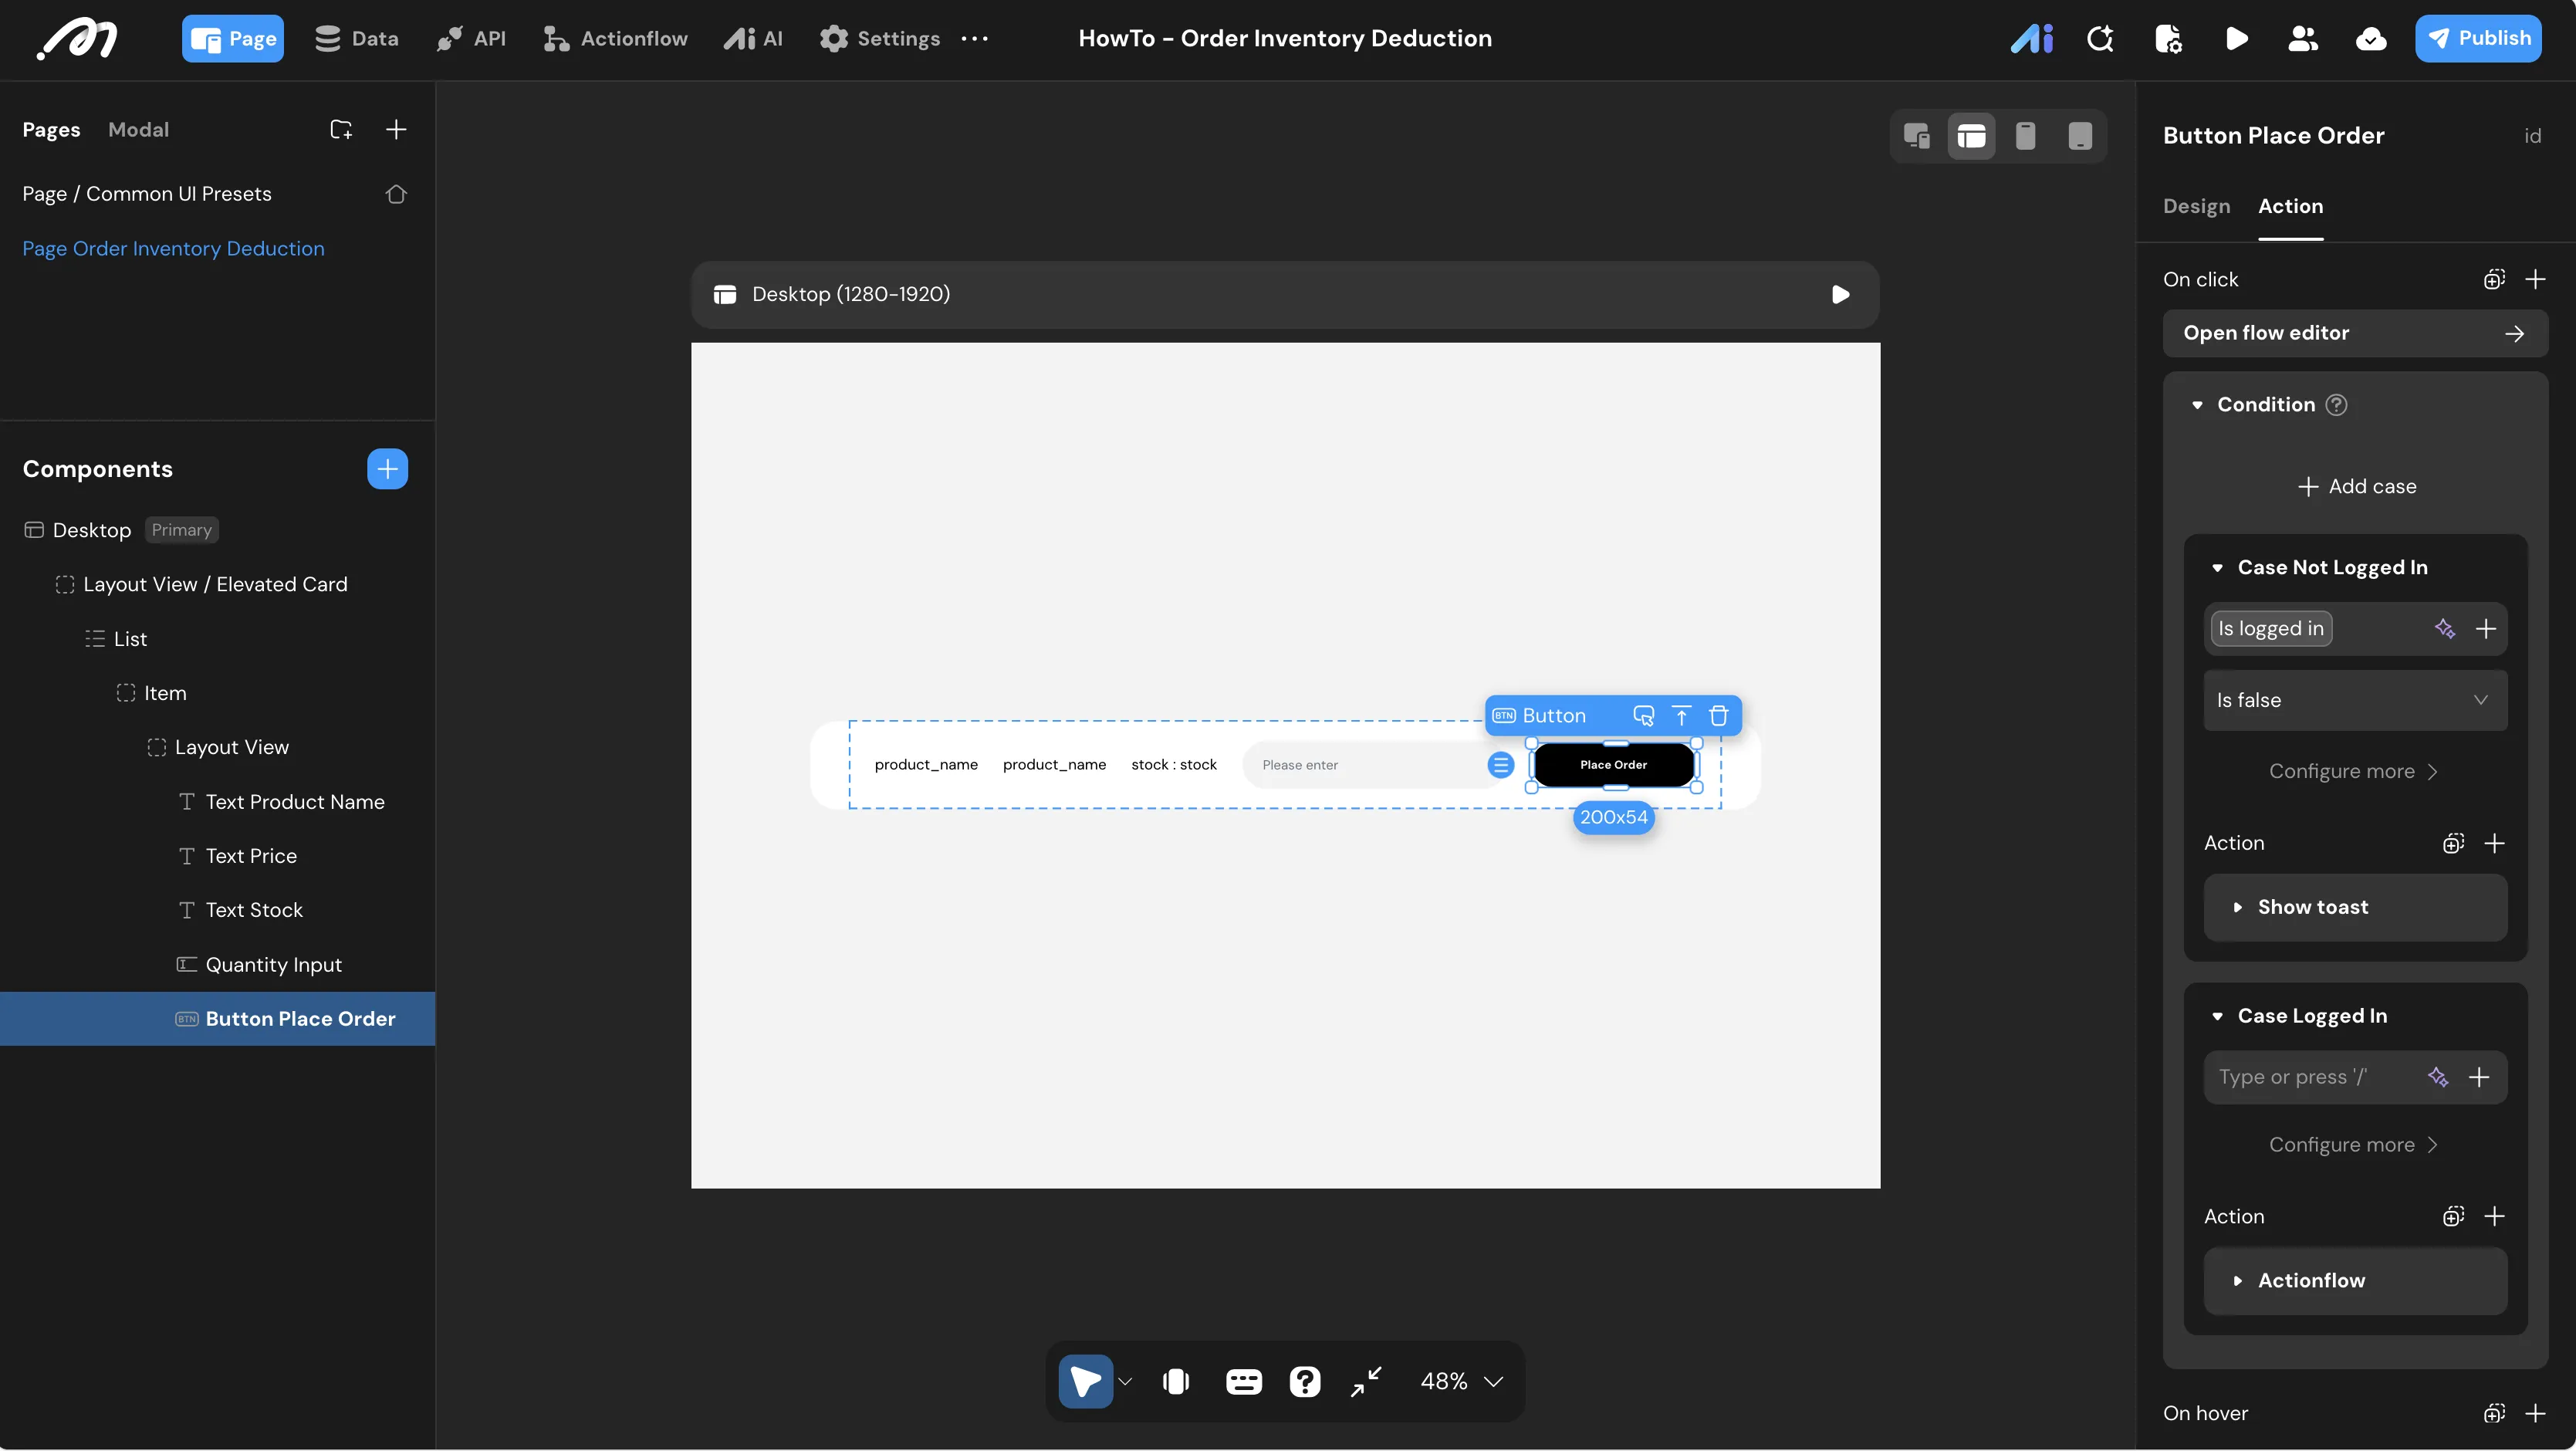
Configure the OnClick event for the Button Place Order:
-
Condition: Check if the user is logged in, creating two branches:
- Branch: Not Logged In
- Condition setting:
Global.is_logged_inIs false
- Condition setting:
- Branch: Logged In
- Condition setting:
Otherwise
- Condition setting:
- Branch: Not Logged In
-
Action (Not Logged In): Show toast with the message “Please log in first”.
-
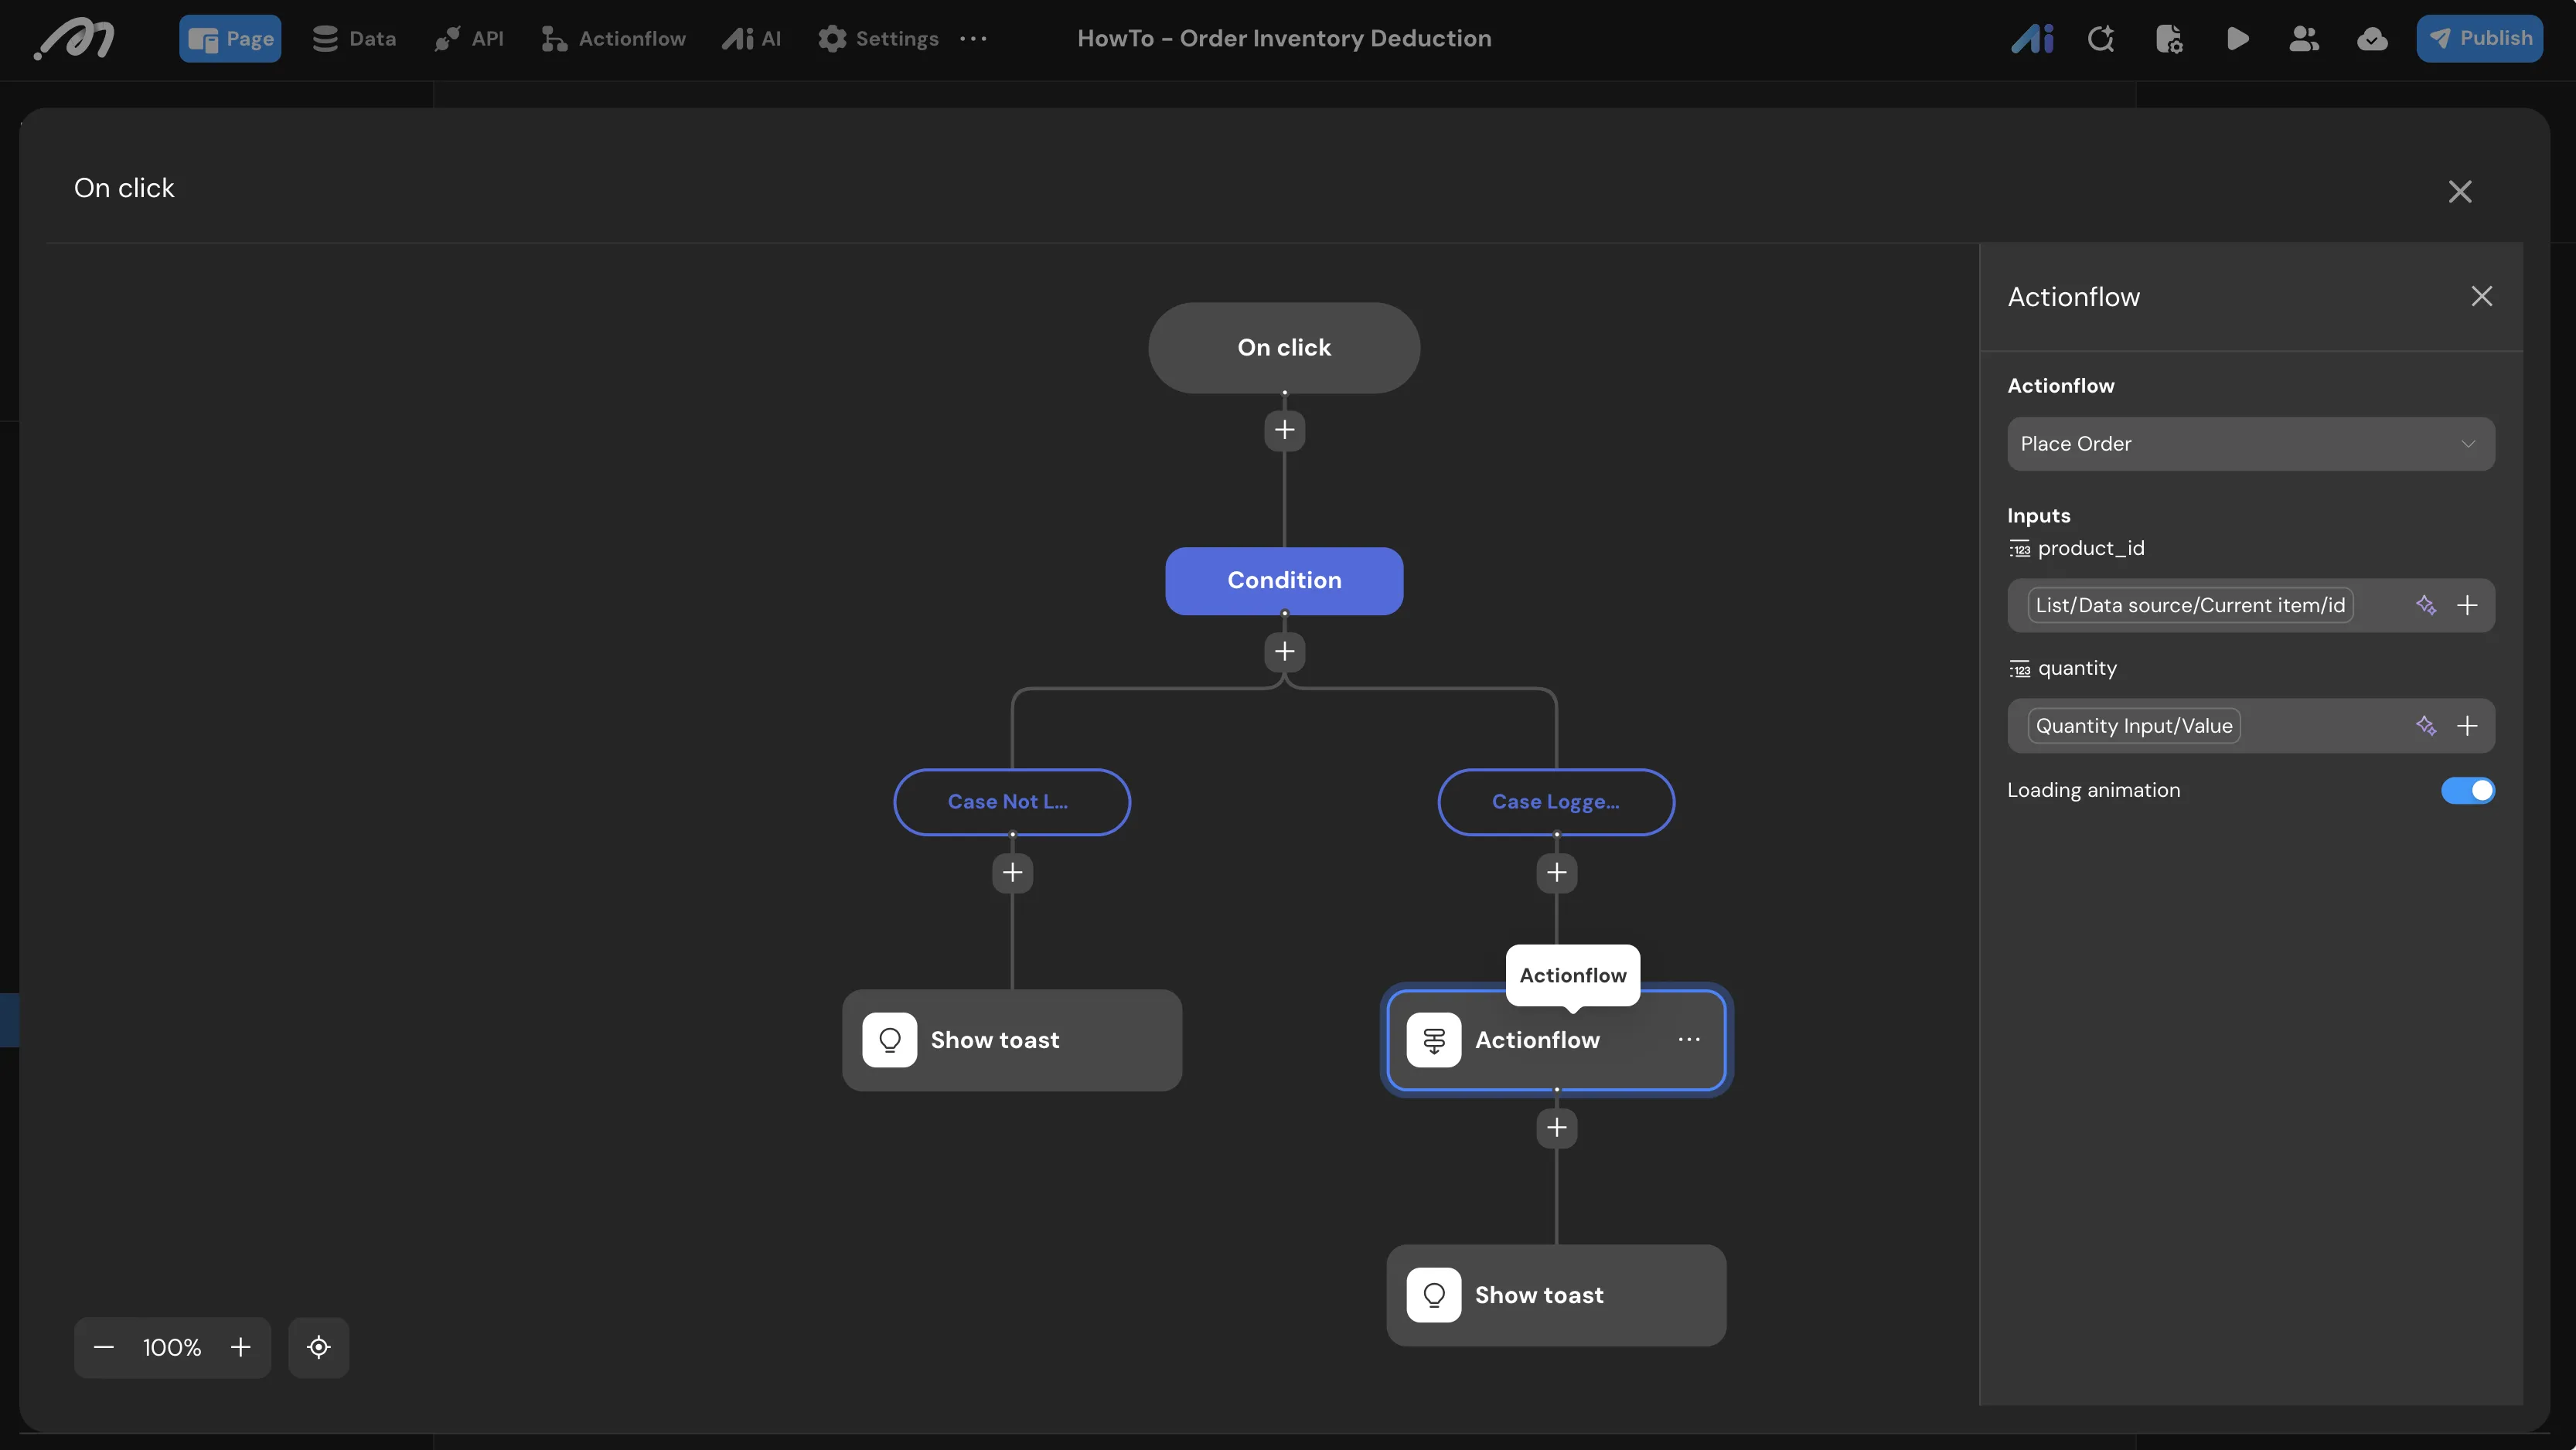
Action (Logged In): Actionflow -> Select
Place Order.-
Inputs:
product_id: Bind toList item.idquantity: Bind toQuantity Input.value
-
On Success: Show toast
- Message: Bind to
Action result.status
- Message: Bind to
-
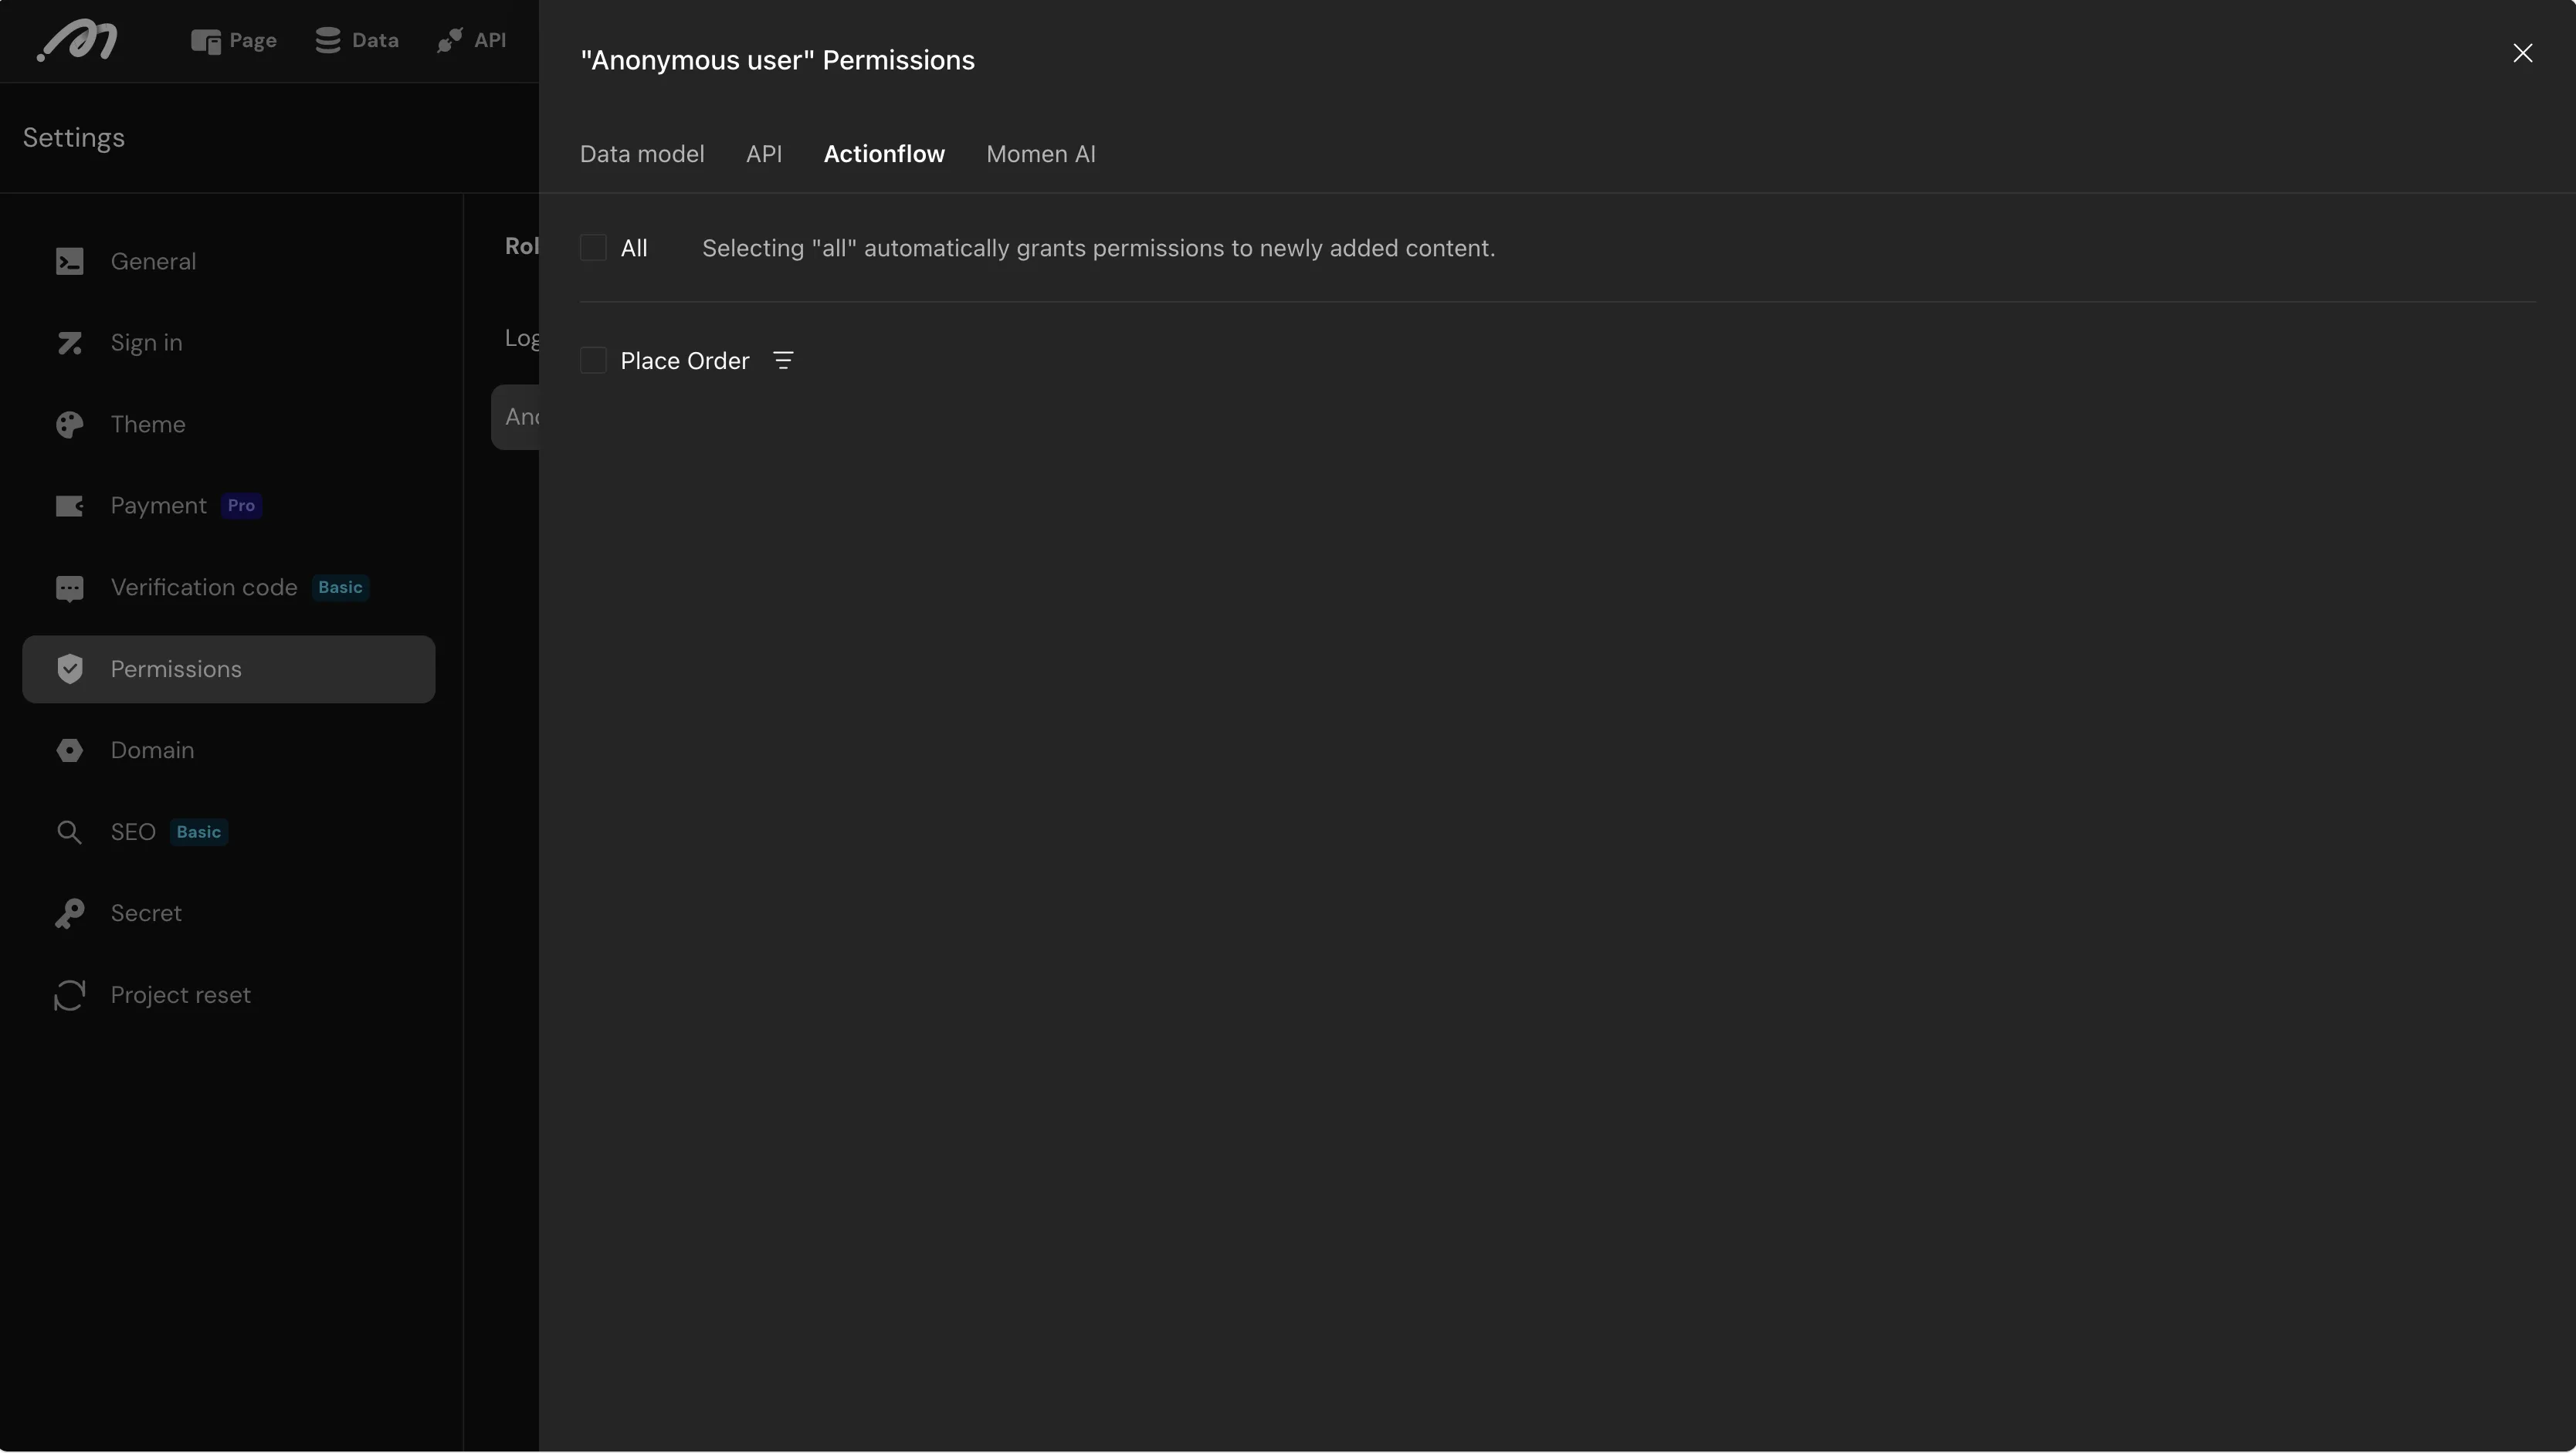
Remember to configure permissions in Settings > Permissions to allow the relevant user roles to execute the “Place Order” Actionflow.
Verification
Step 1: Login Simulation
Use the Login simulation tool in the bottom bar to log in as a test user.
Step 2: Test Invalid Input
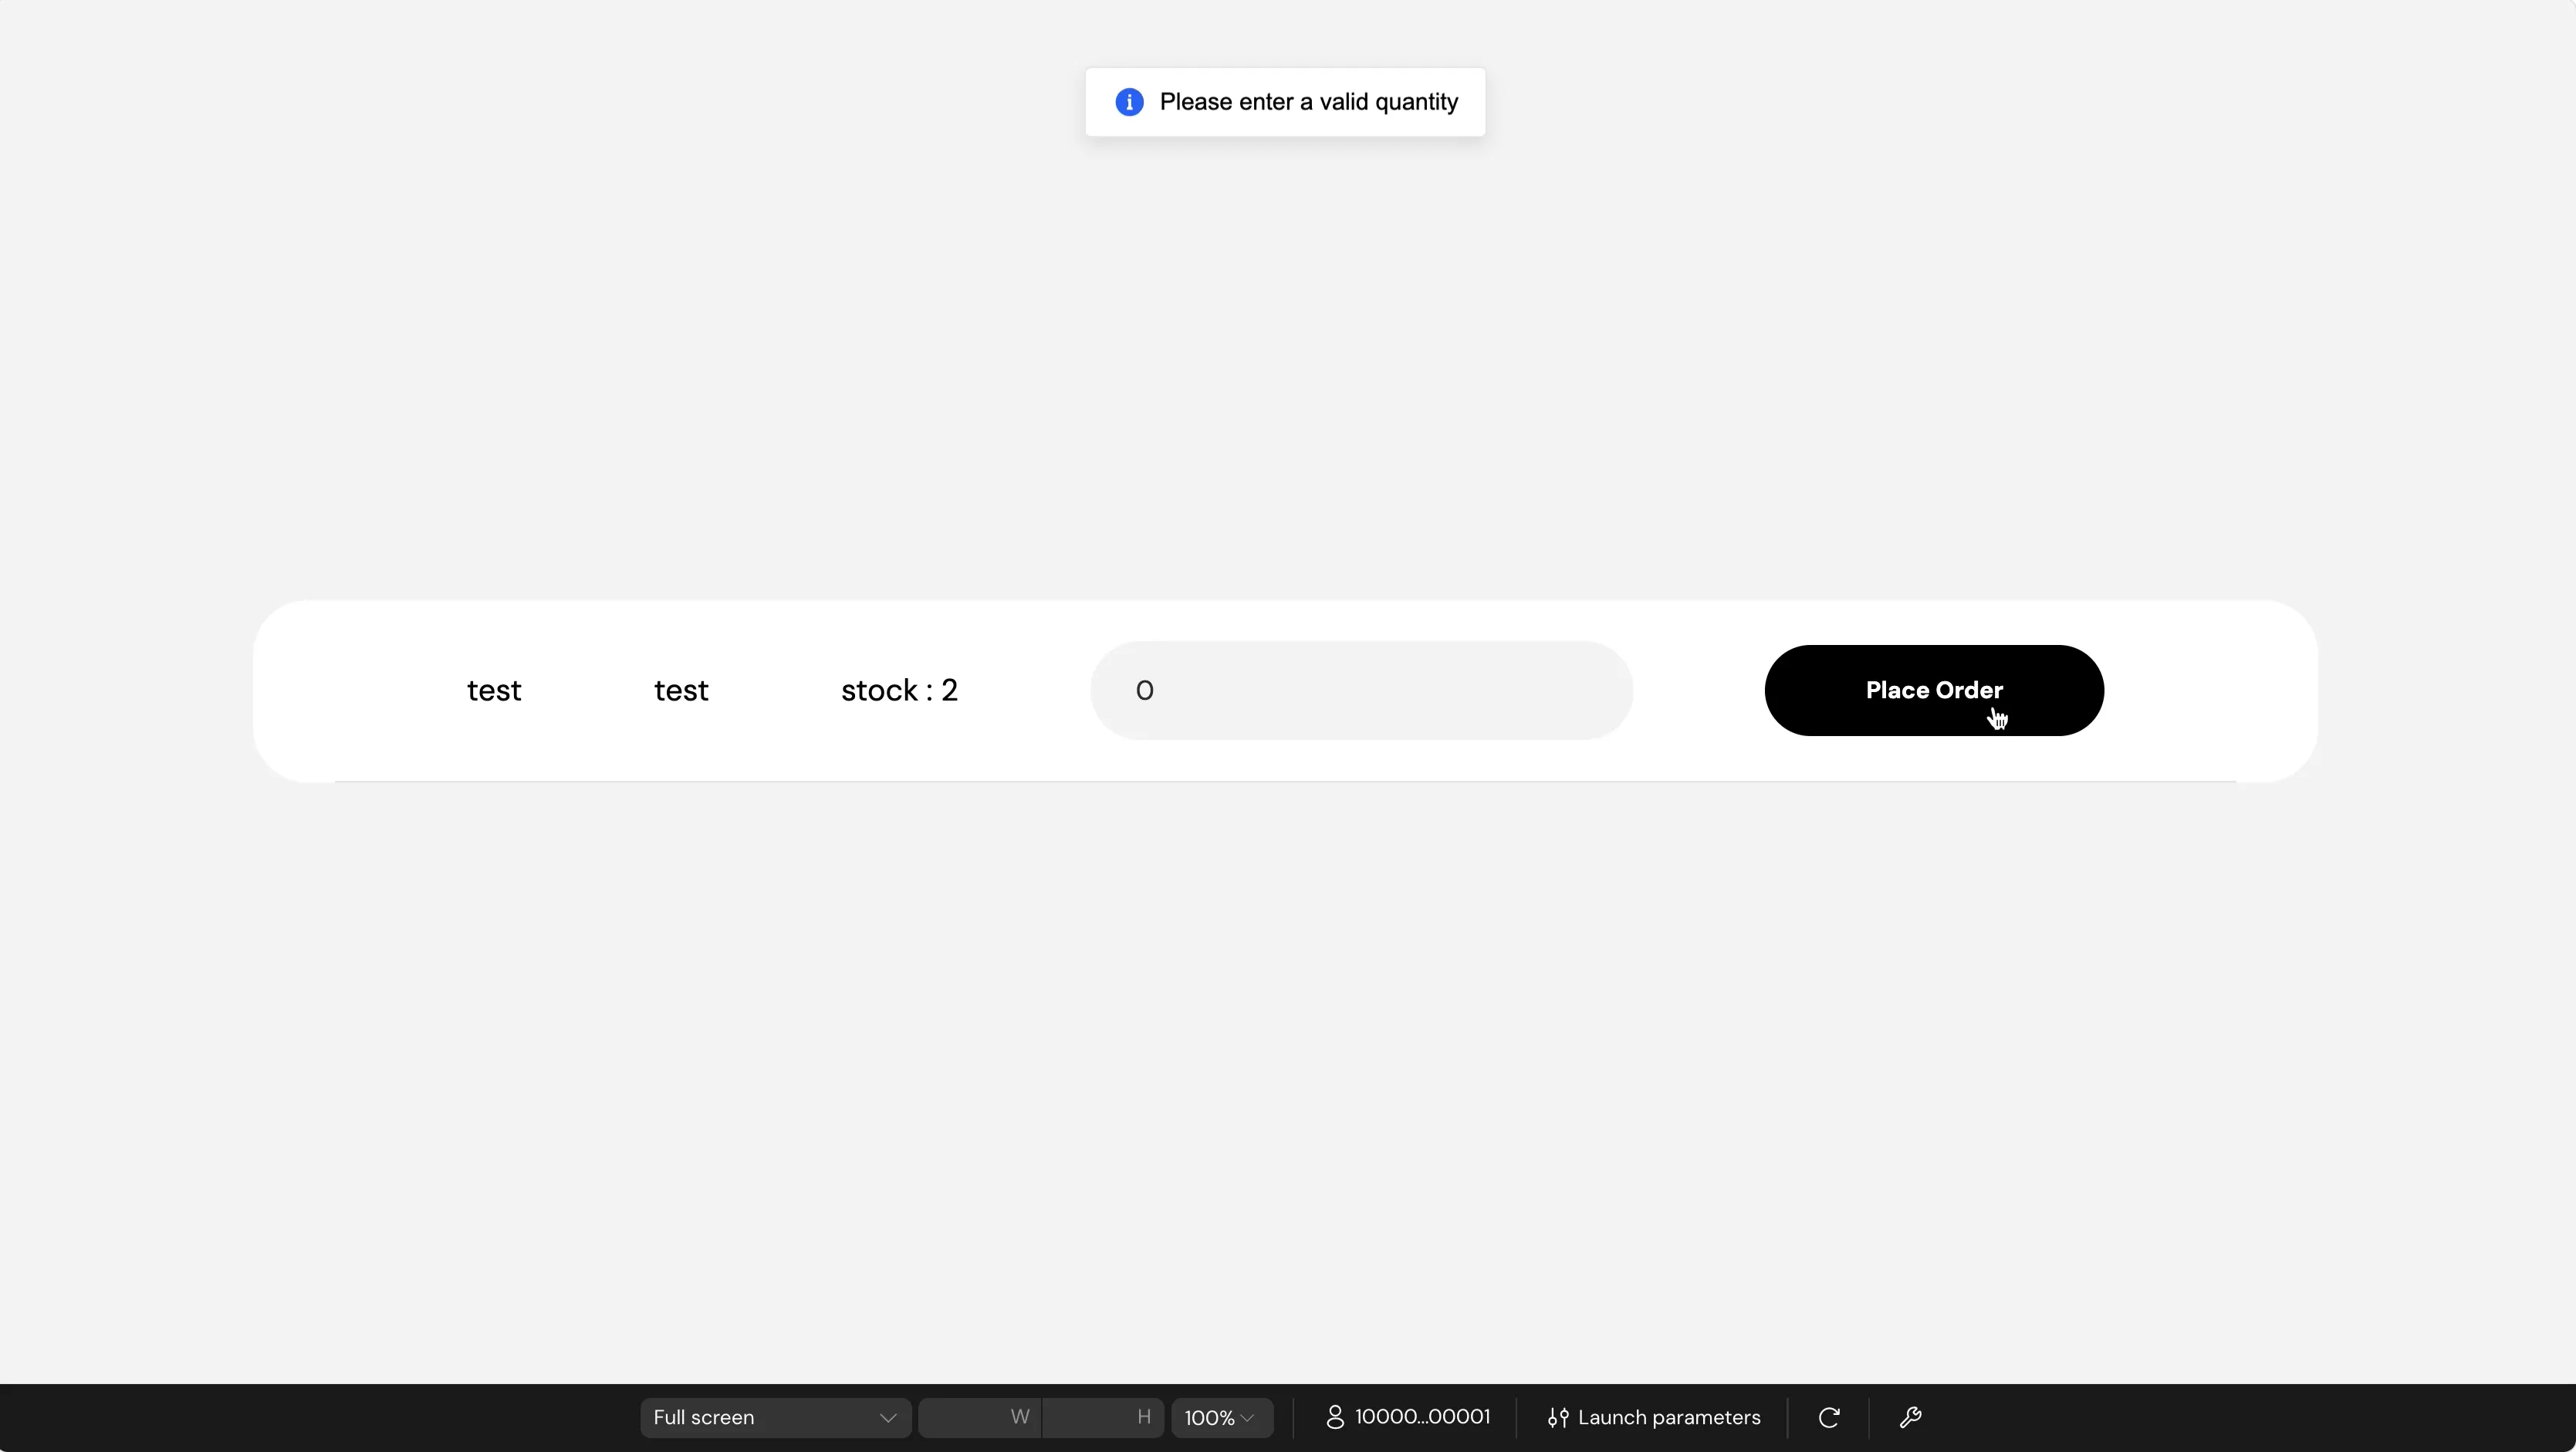
Enter 0 in the quantity input and click Place Order.
Expected Result: A toast message appears saying “Please enter a valid quantity”.
Step 3: Test Stock Shortage
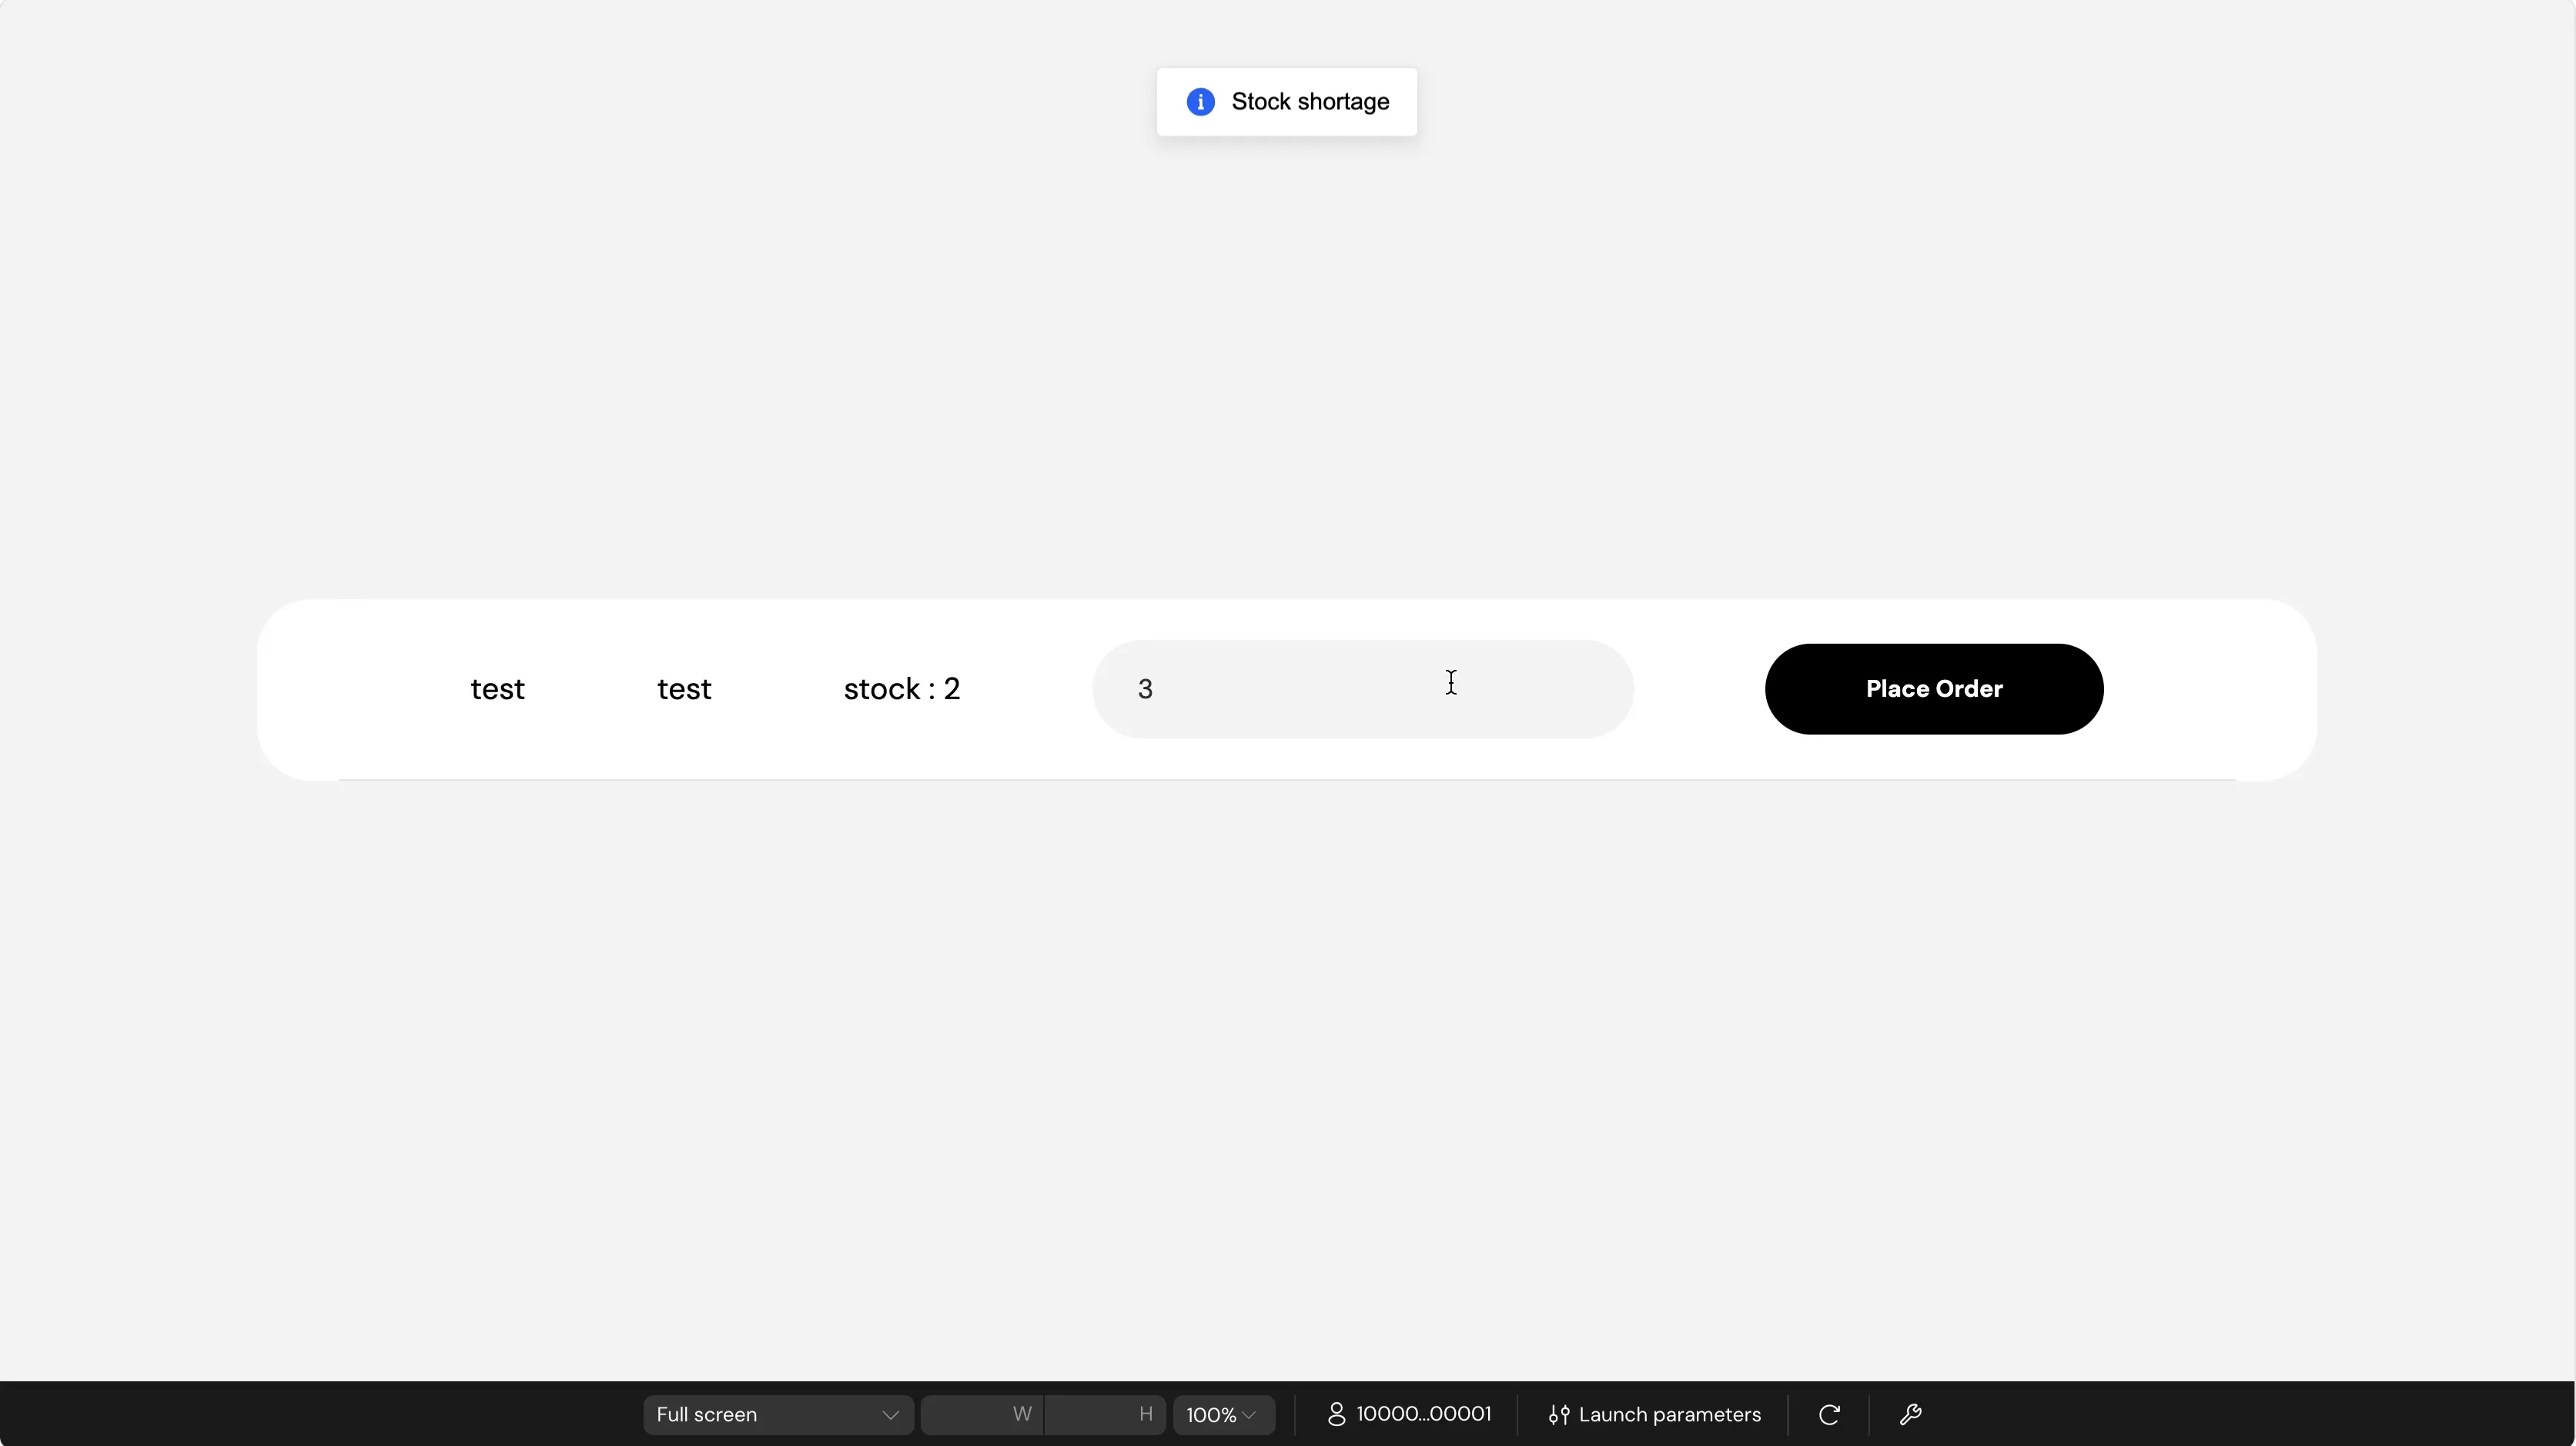
If the current stock is 2, enter 3 in the input and click Place Order.
Expected Result: A toast message appears saying “Stock shortage”. The database stock remains unchanged.
Step 4: Test Successful Purchase
Enter 1 in the input and click Place Order.
Expected Result:
-
A toast message appears saying “Order placed successfully”.
-
The UI stock count automatically updates to
1. -
In the Data -> Database view, a new record appears in the
ordertable with the correctaccount_id,product_id, andquantity.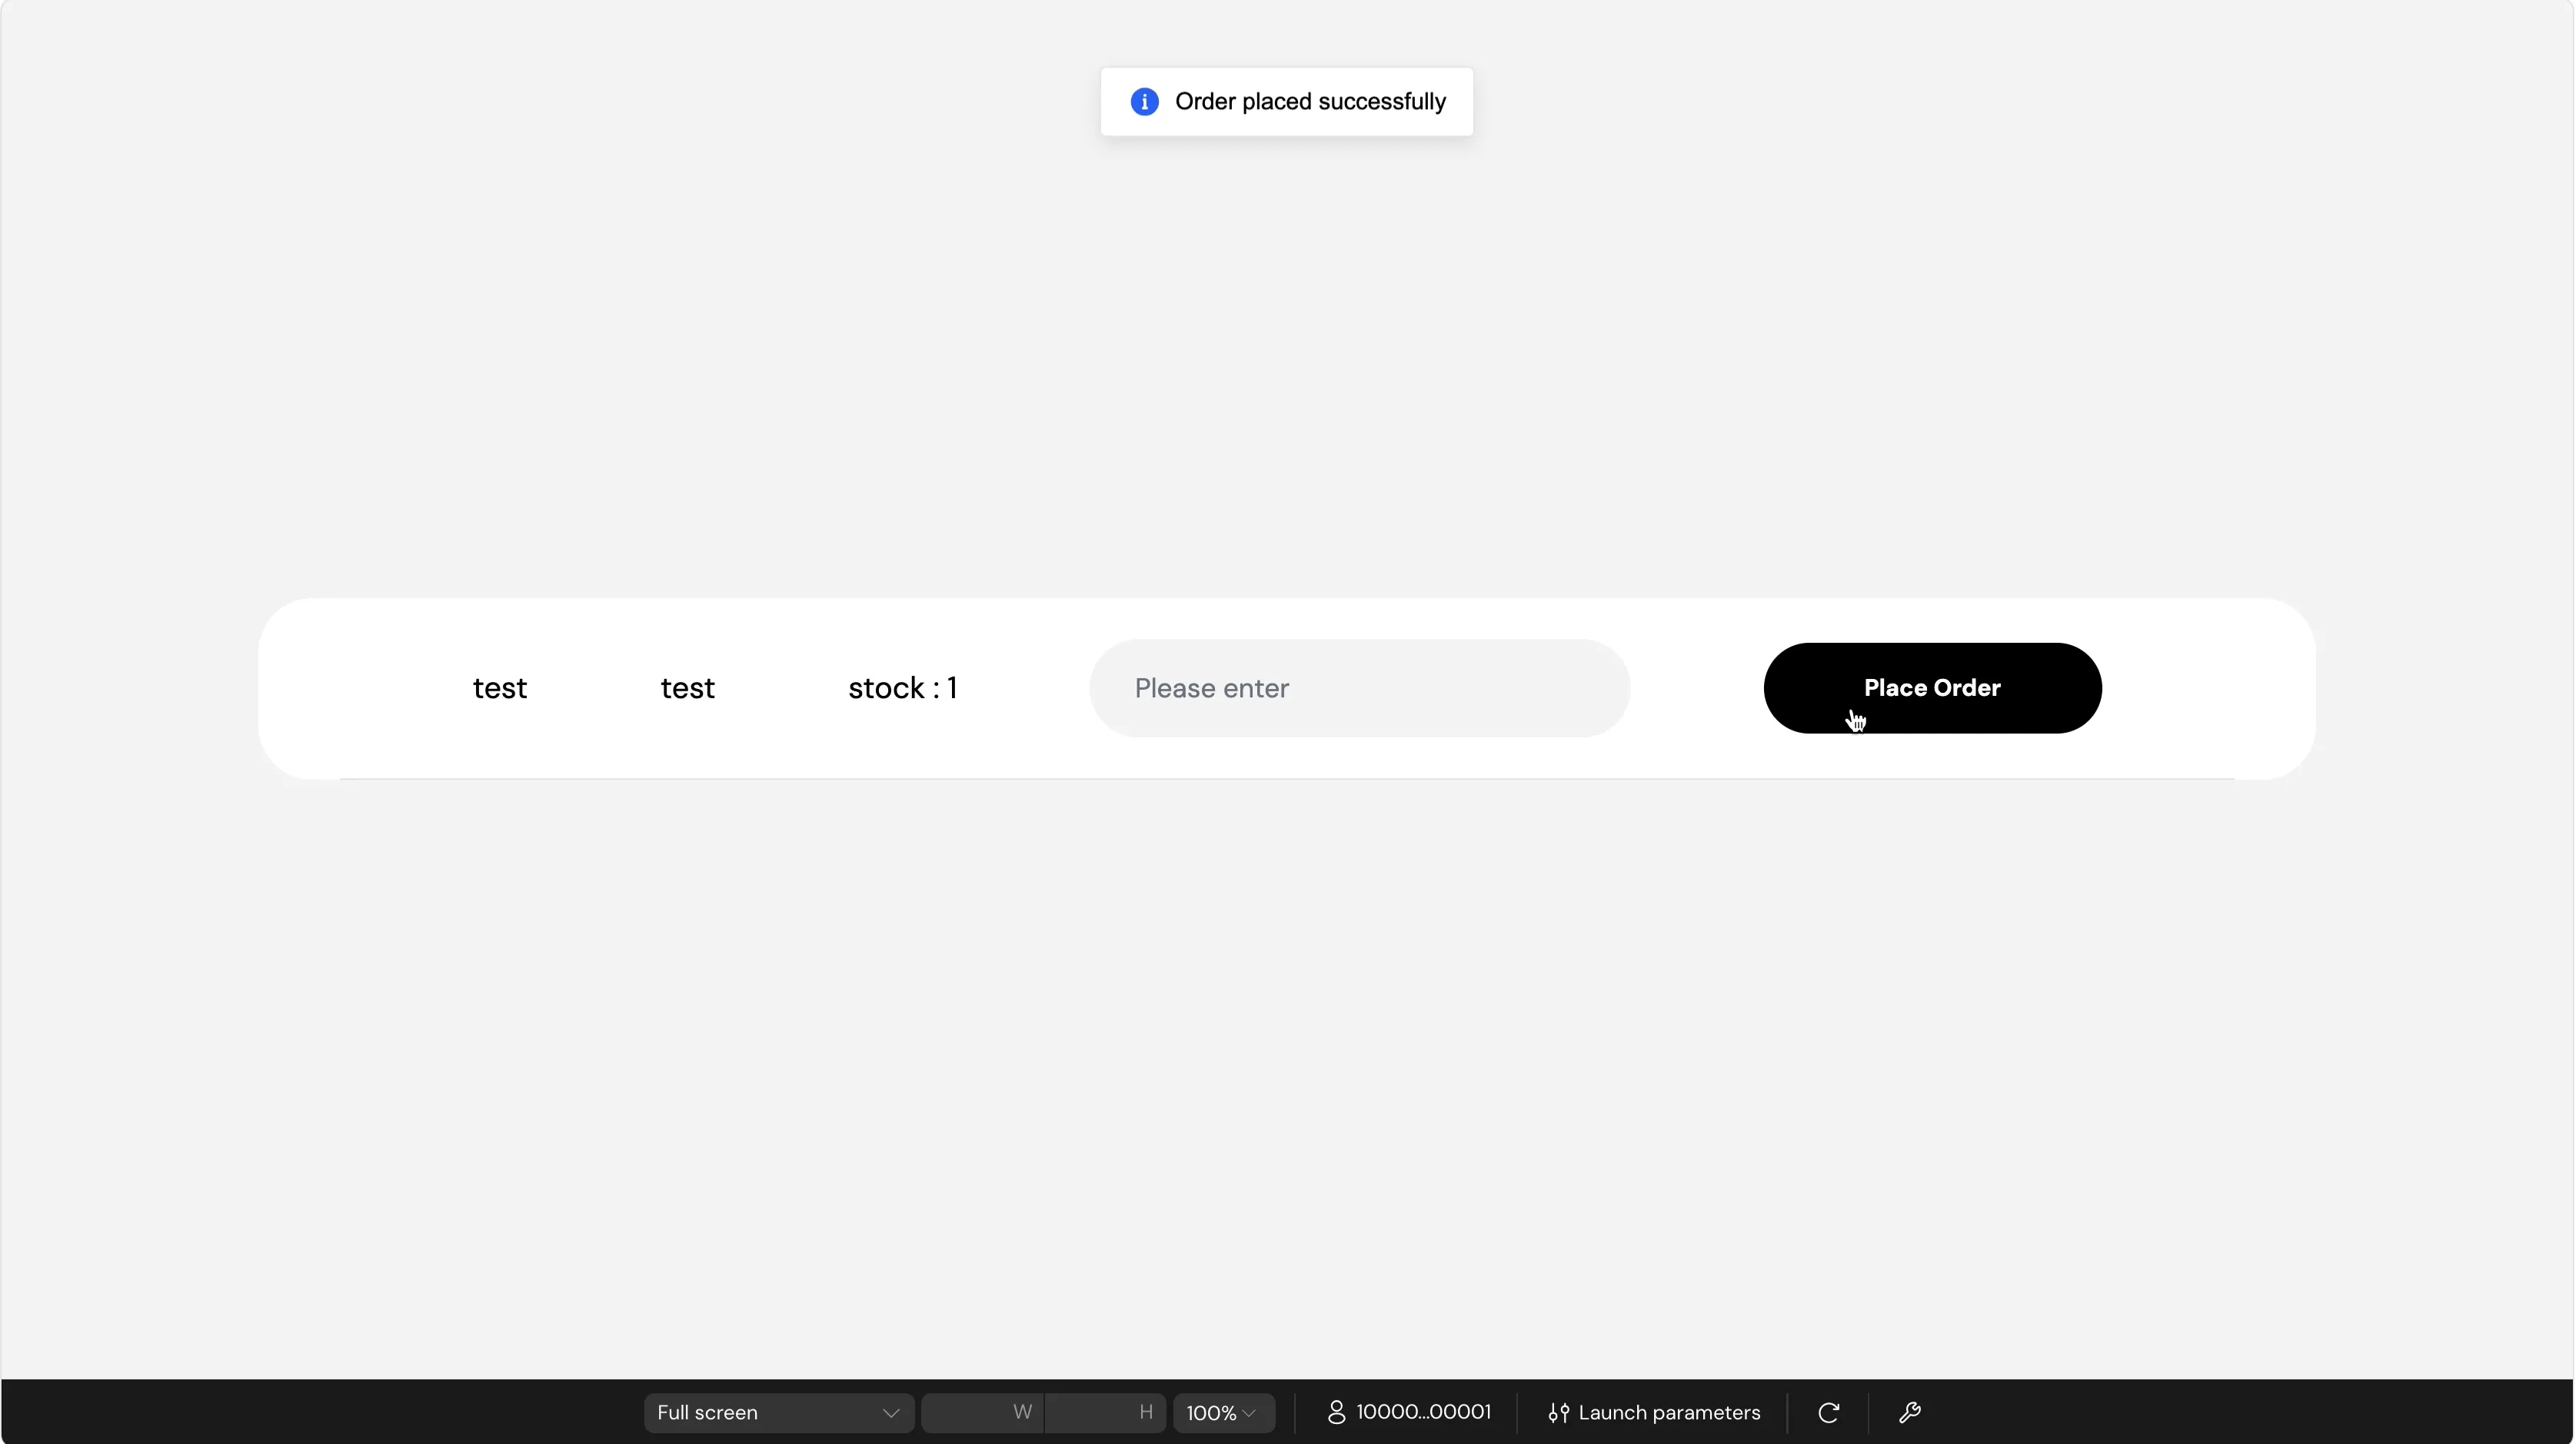
Because the List component uses a Subscription, the stock count on the page will update instantly for all users whenever a purchase is made.