Domain, SEO & Integration
After your application goes live, binding a custom domain, optimizing for search engines, and uploading platform verification files help you grow traffic and integrate with third-party services.
Reference guides:
- Rendering Modes — CSR, SSR, and SSG performance and SEO trade-offs.
- SEO Reference — TDK, Open Graph, robots.txt, Alt attributes, and more.
Custom Domain Configuration
Bind a domain you own to your Momen Web client for a more professional and memorable URL.
Benefits and Use Cases
- Brand identity: Corporate websites and user portals look more credible with your own domain.
- SEO: Custom domains can improve search engine trust and rankings.
Custom domains are supported on Basic Plan and above.
Setup Steps
Enter Your Domain
Enter a domain you own. Ensure it is not used elsewhere.
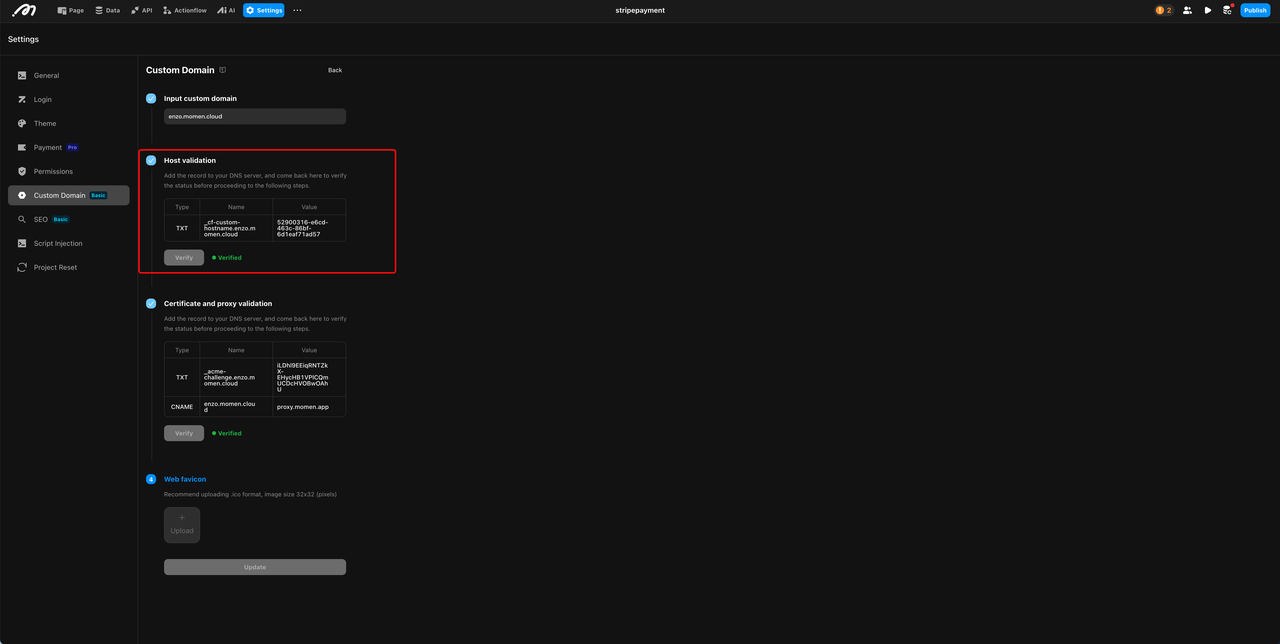
Domain Verification (TXT Record)
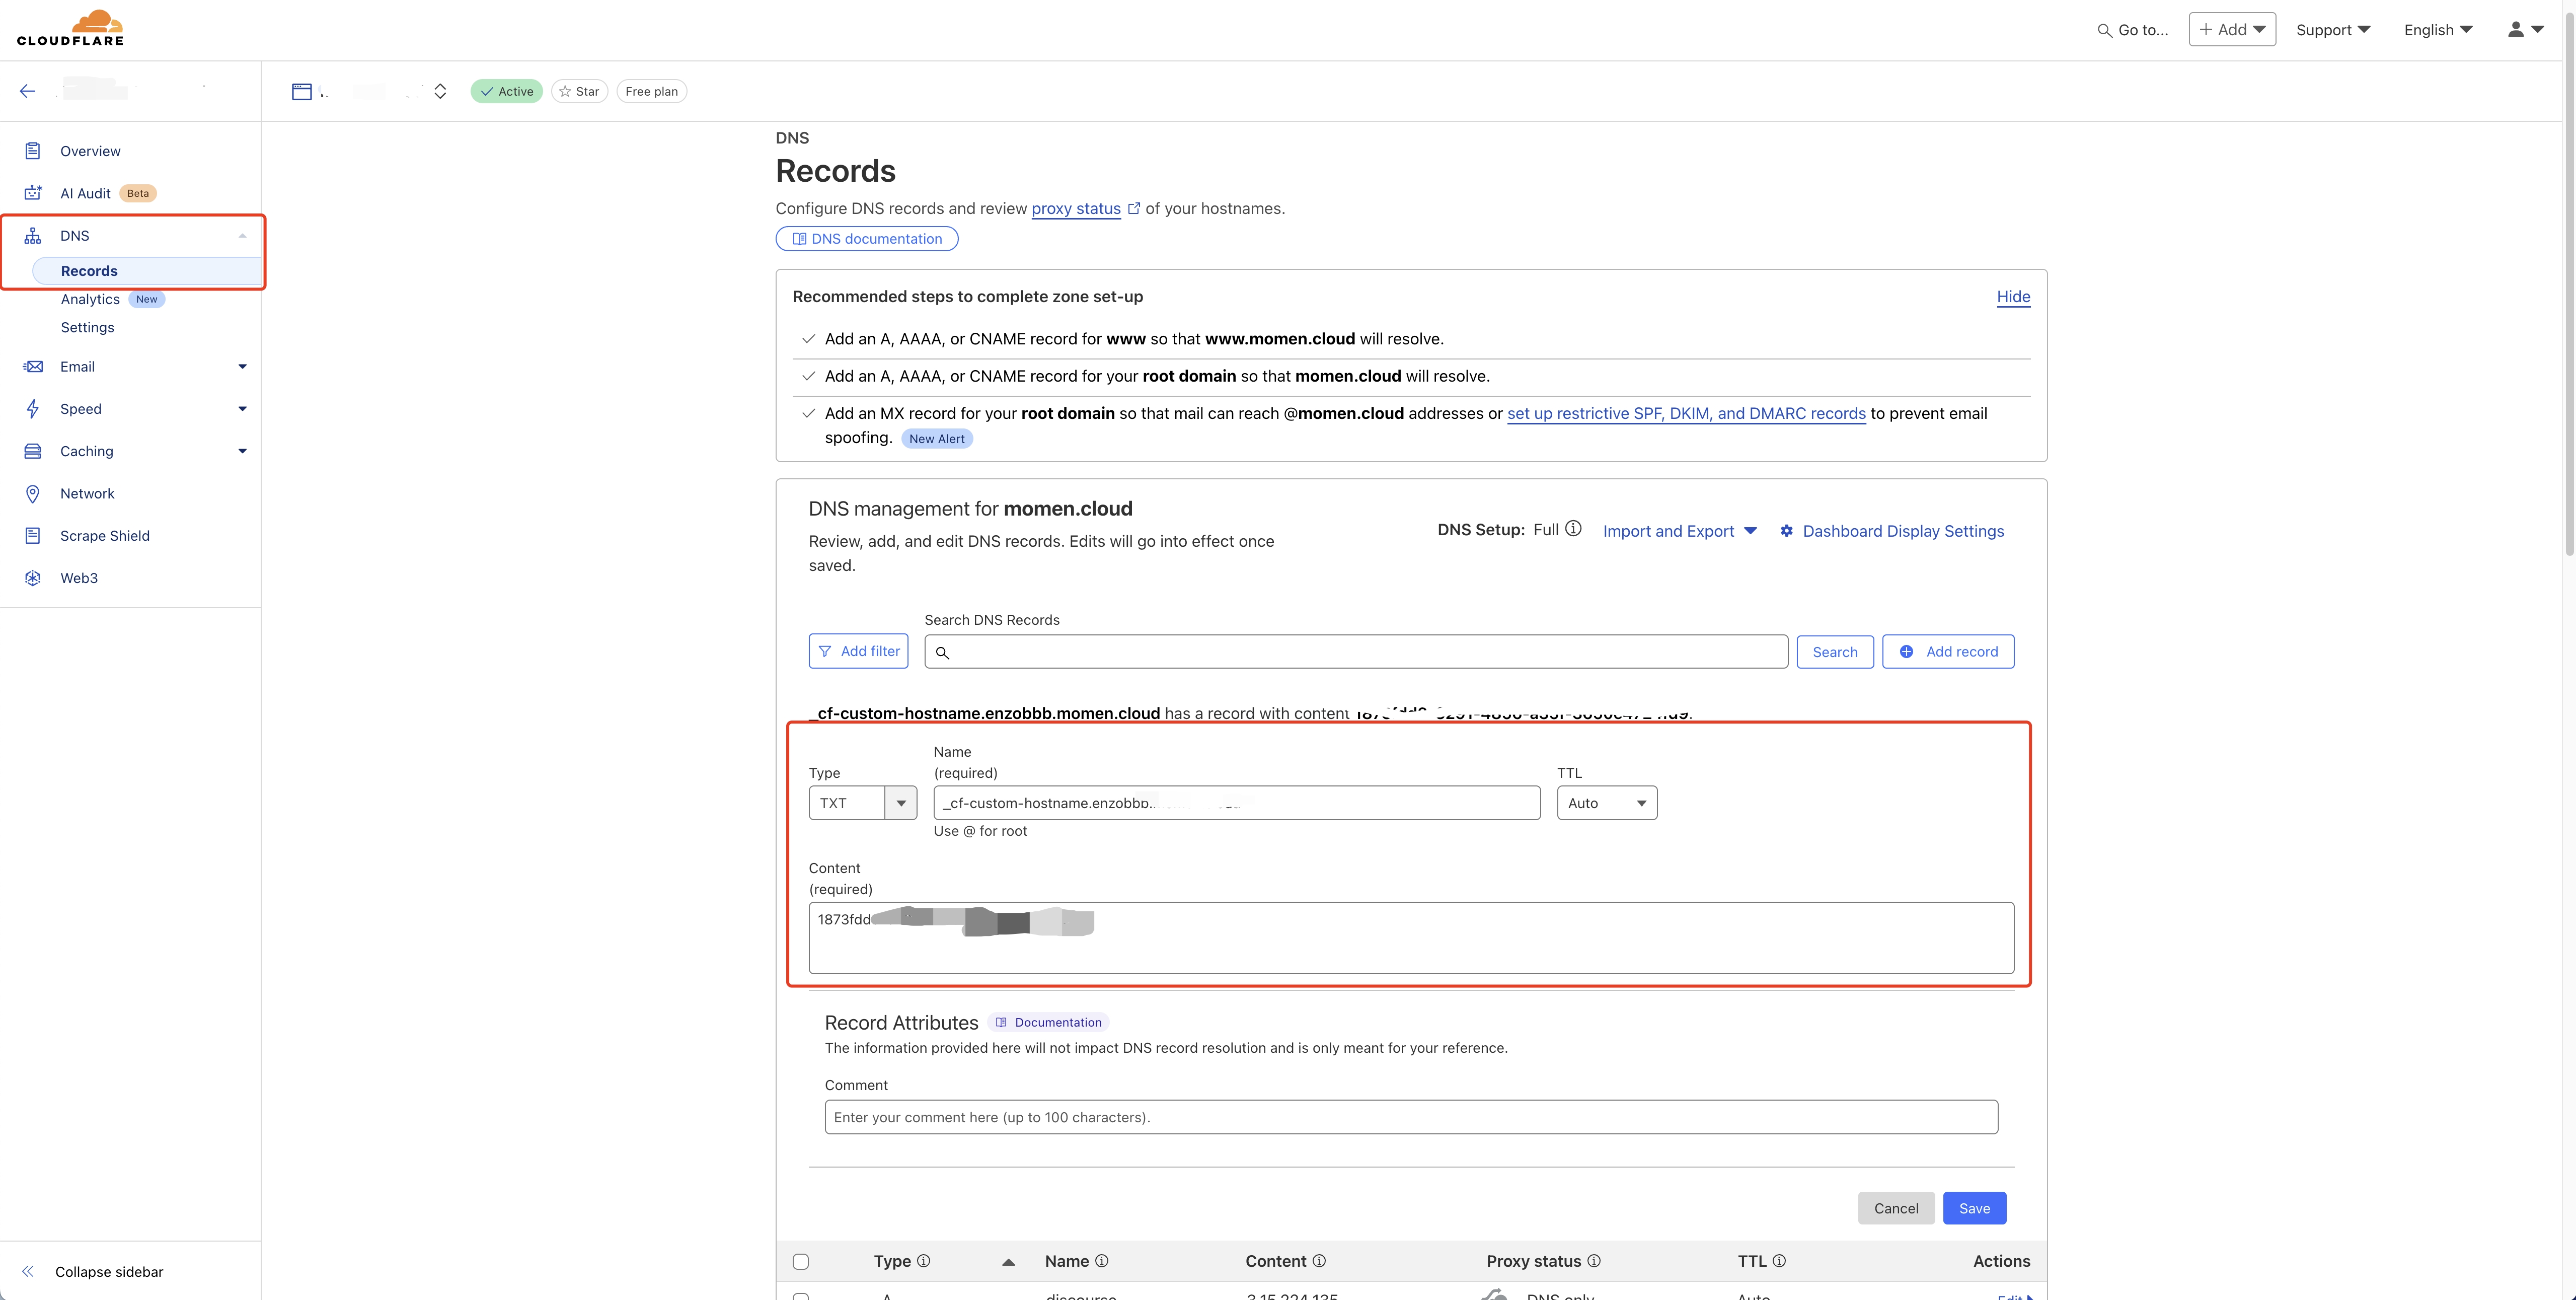
Momen generates records based on your domain. Add these to your DNS provider (e.g., Cloudflare):
- Add a TXT record as instructed.
- After adding, return to the custom domain page and verify. If successful, proceed.
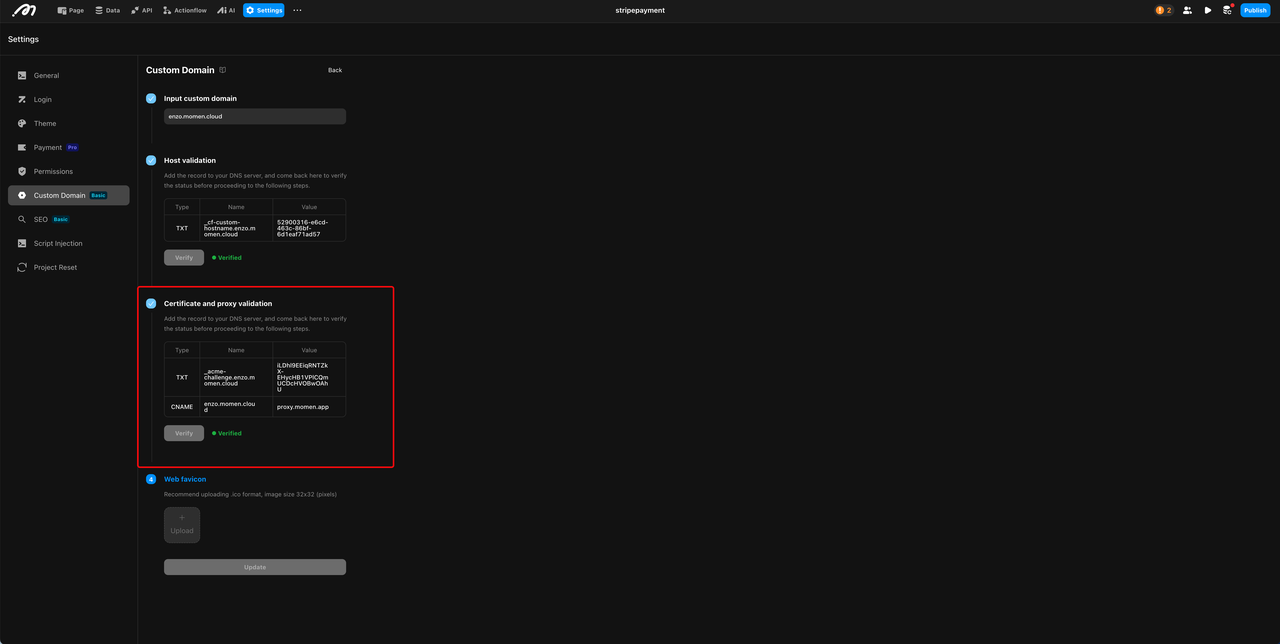
Certificate and Proxy Verification (CNAME)
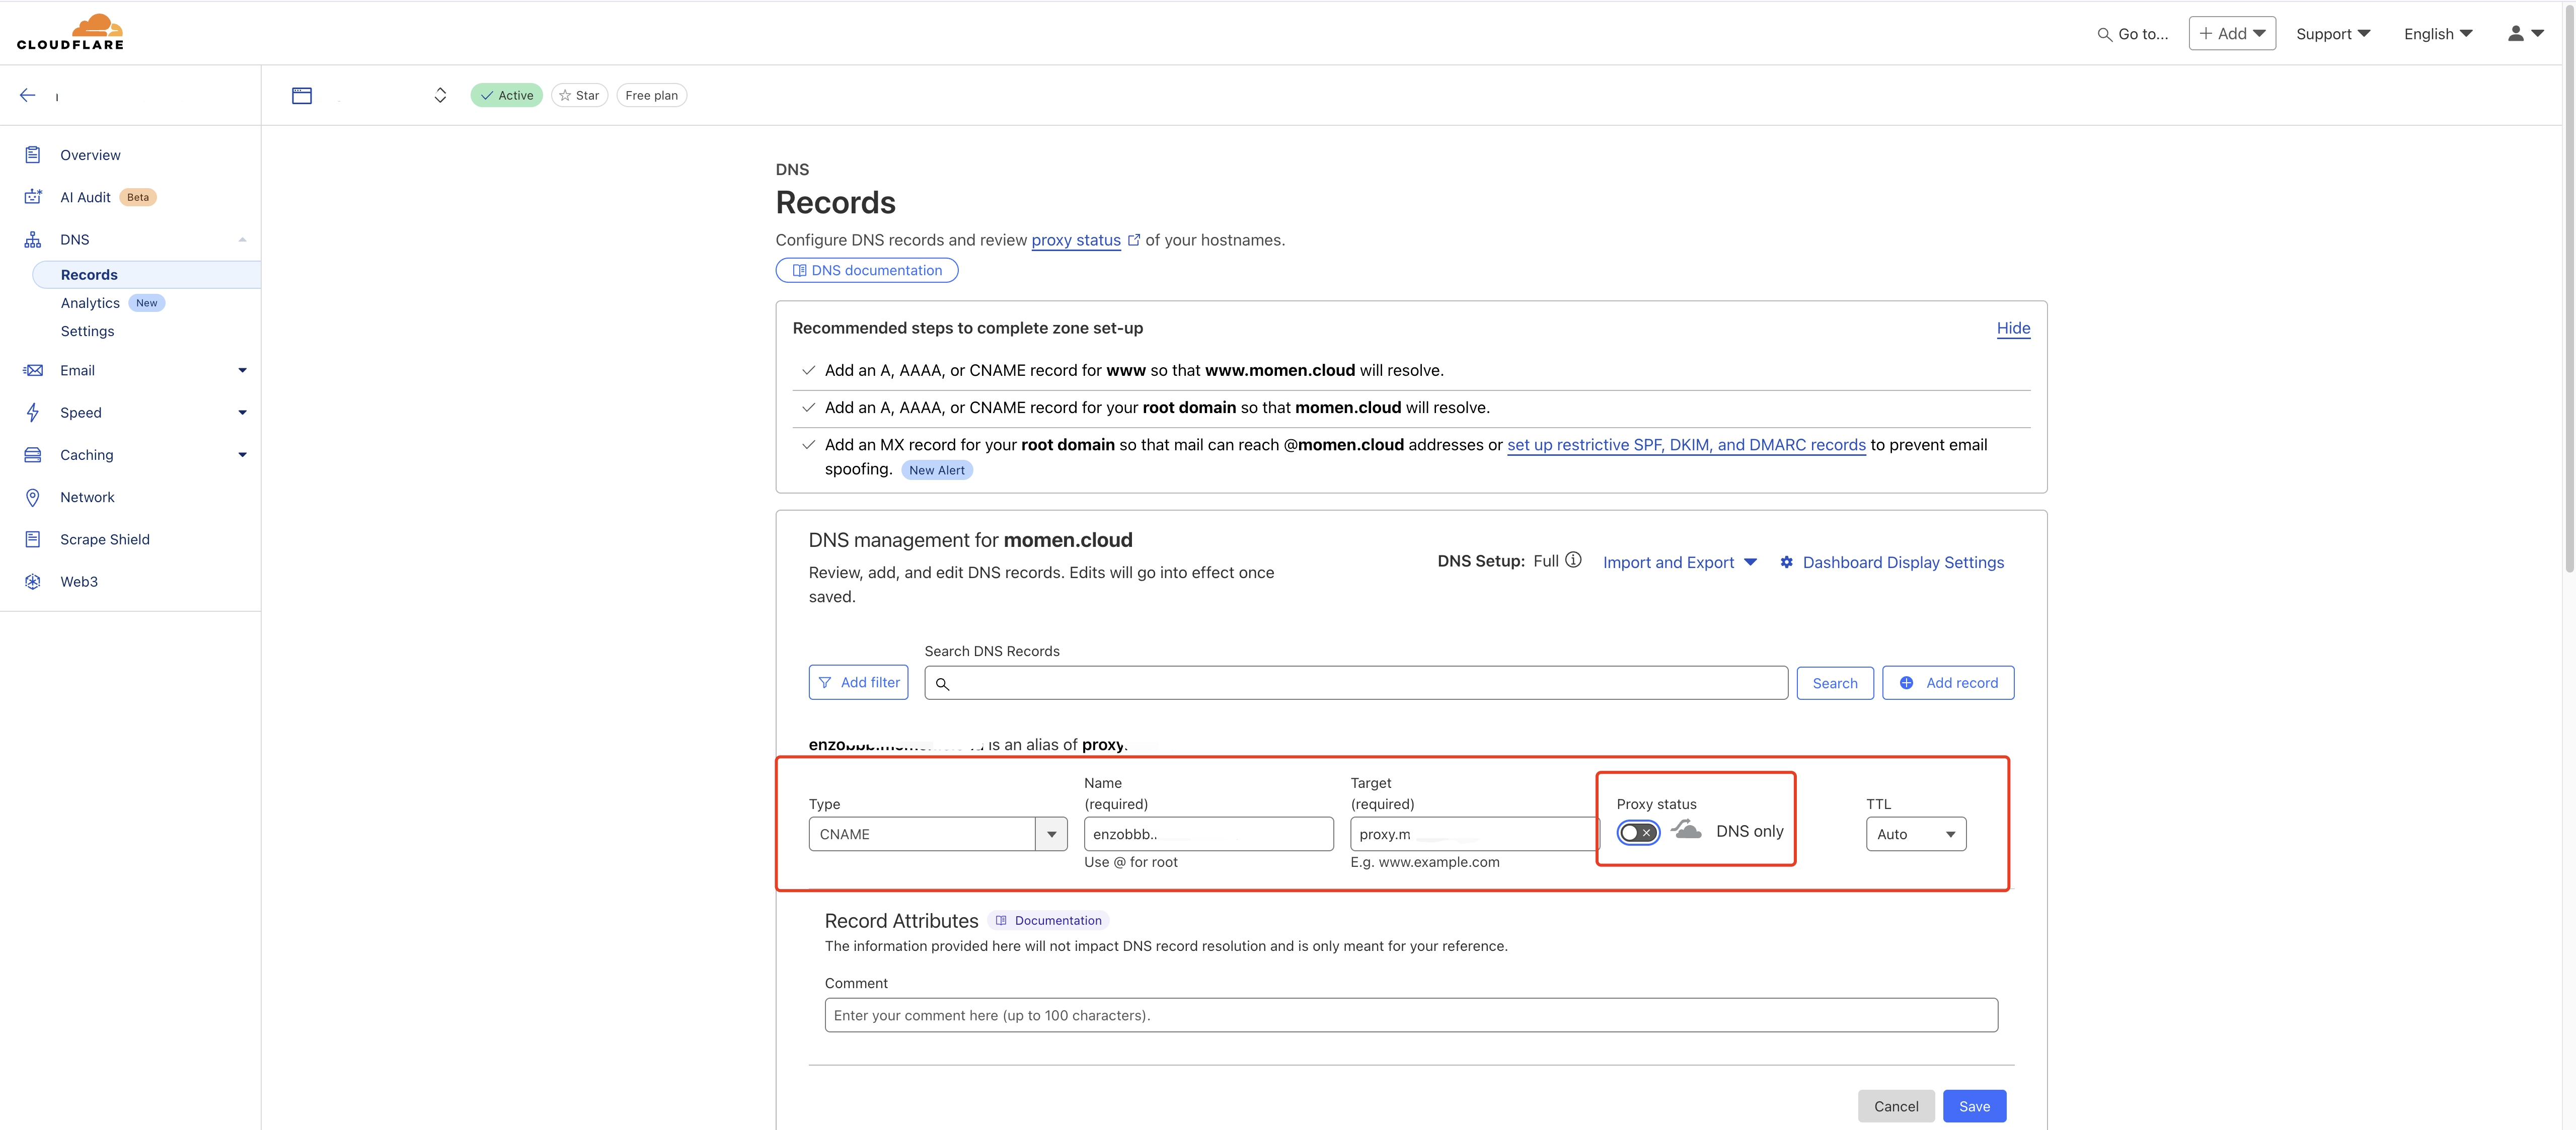
Configure TXT and CNAME records to validate the certificate and point your domain to Momen’s proxy. For some DNS providers (e.g., Cloudflare), disable proxy and use DNS only for the CNAME record.
- Return to the settings page and verify. Upon success, proceed.
Web Favicon
Upload a custom favicon. Save and publish the project again for the custom domain to take effect.
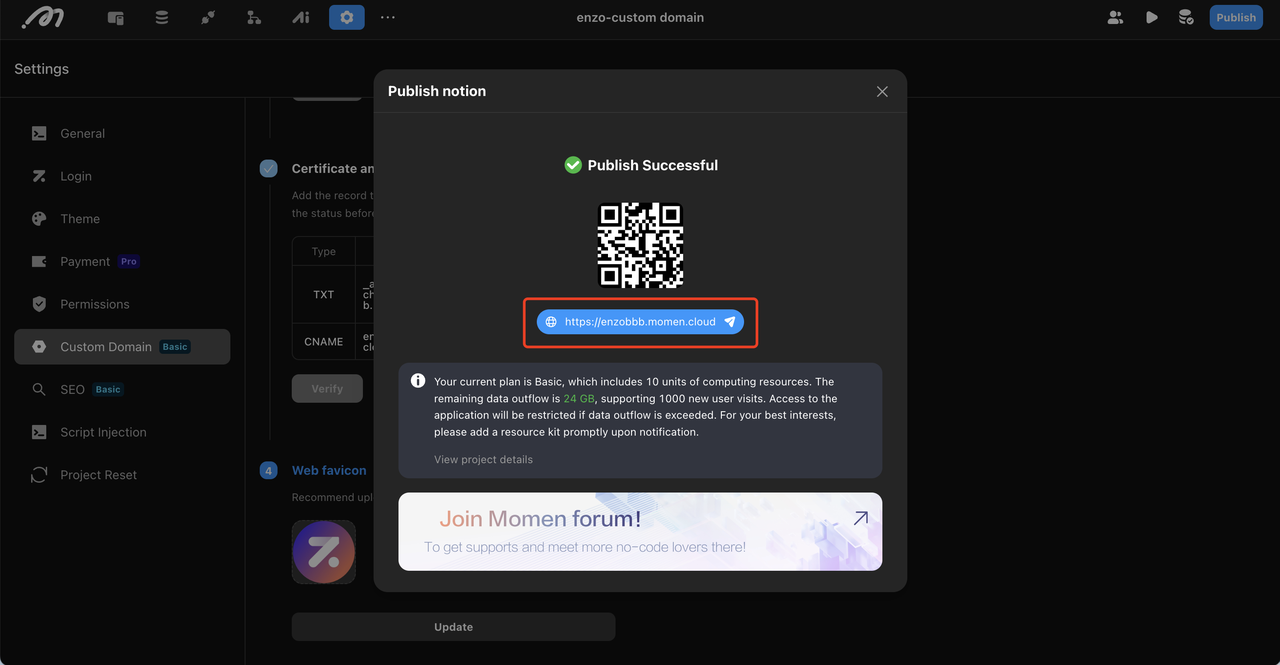
Avoiding CNAME Conflicts
CNAME records are exclusive. According to DNS standard protocols, a single host record cannot simultaneously coexist as both a CNAME and another record type (such as A, MX, or TXT).
Common Errors
If you encounter errors such as “Record conflict, please pause or delete existing conflicting records,” “Record already exists,” or “Conflict” while saving, it is typically due to:
- Default A Record Conflict: Many registrars (e.g., GoDaddy) preset a
wwwA record pointing to their default parking page. - Email (MX) Record Conflict: If you have configured MX records on your root domain (@) to receive emails, you cannot add a CNAME to that same root domain.
Solutions
- Delete Conflicting Records: Before adding a CNAME, manually delete any existing A records or TXT records associated with that specific host.
- Use Subdomains: We strongly recommend using a subdomain (e.g.,
app.yourdomain.com) for CNAME configurations to avoid root domain limitations. - Wait for Propagation: After deleting old records, it may take a few minutes for the DNS cache to refresh. You should then be able to add the CNAME record successfully.
Domain Configuration Notes
- Default Custom Domain: If multiple domains exist, set one as default. Others will redirect to it.
- Editing a Custom Domain: Unsaved configurations are retained for 24 hours. Once saved, only the icon can be modified.
- Deleting a Custom Domain: If all are deleted, the app reverts to the Momen domain.
- Adding Records: For some DNS providers, disable proxy and use DNS only for the CNAME record.
- Reconfigure Custom Domain: Projects configured before January 17, 2025, must delete and reconfigure the domain, then republish for changes to take effect.
SEO Configuration
SEO (Search Engine Optimization) improves keyword rankings in search engines, attracts more users, and increases inbound traffic.
SEO is an ongoing process. Momen provides a comprehensive set of configuration tools, including rendering patterns, sitemap, robots.txt, custom header/body, H tags, and more.
Note: Before using SEO features, ensure you have a basic understanding of SEO. Refer to online resources for more information.
All SEO configurations take effect only after the project is published.
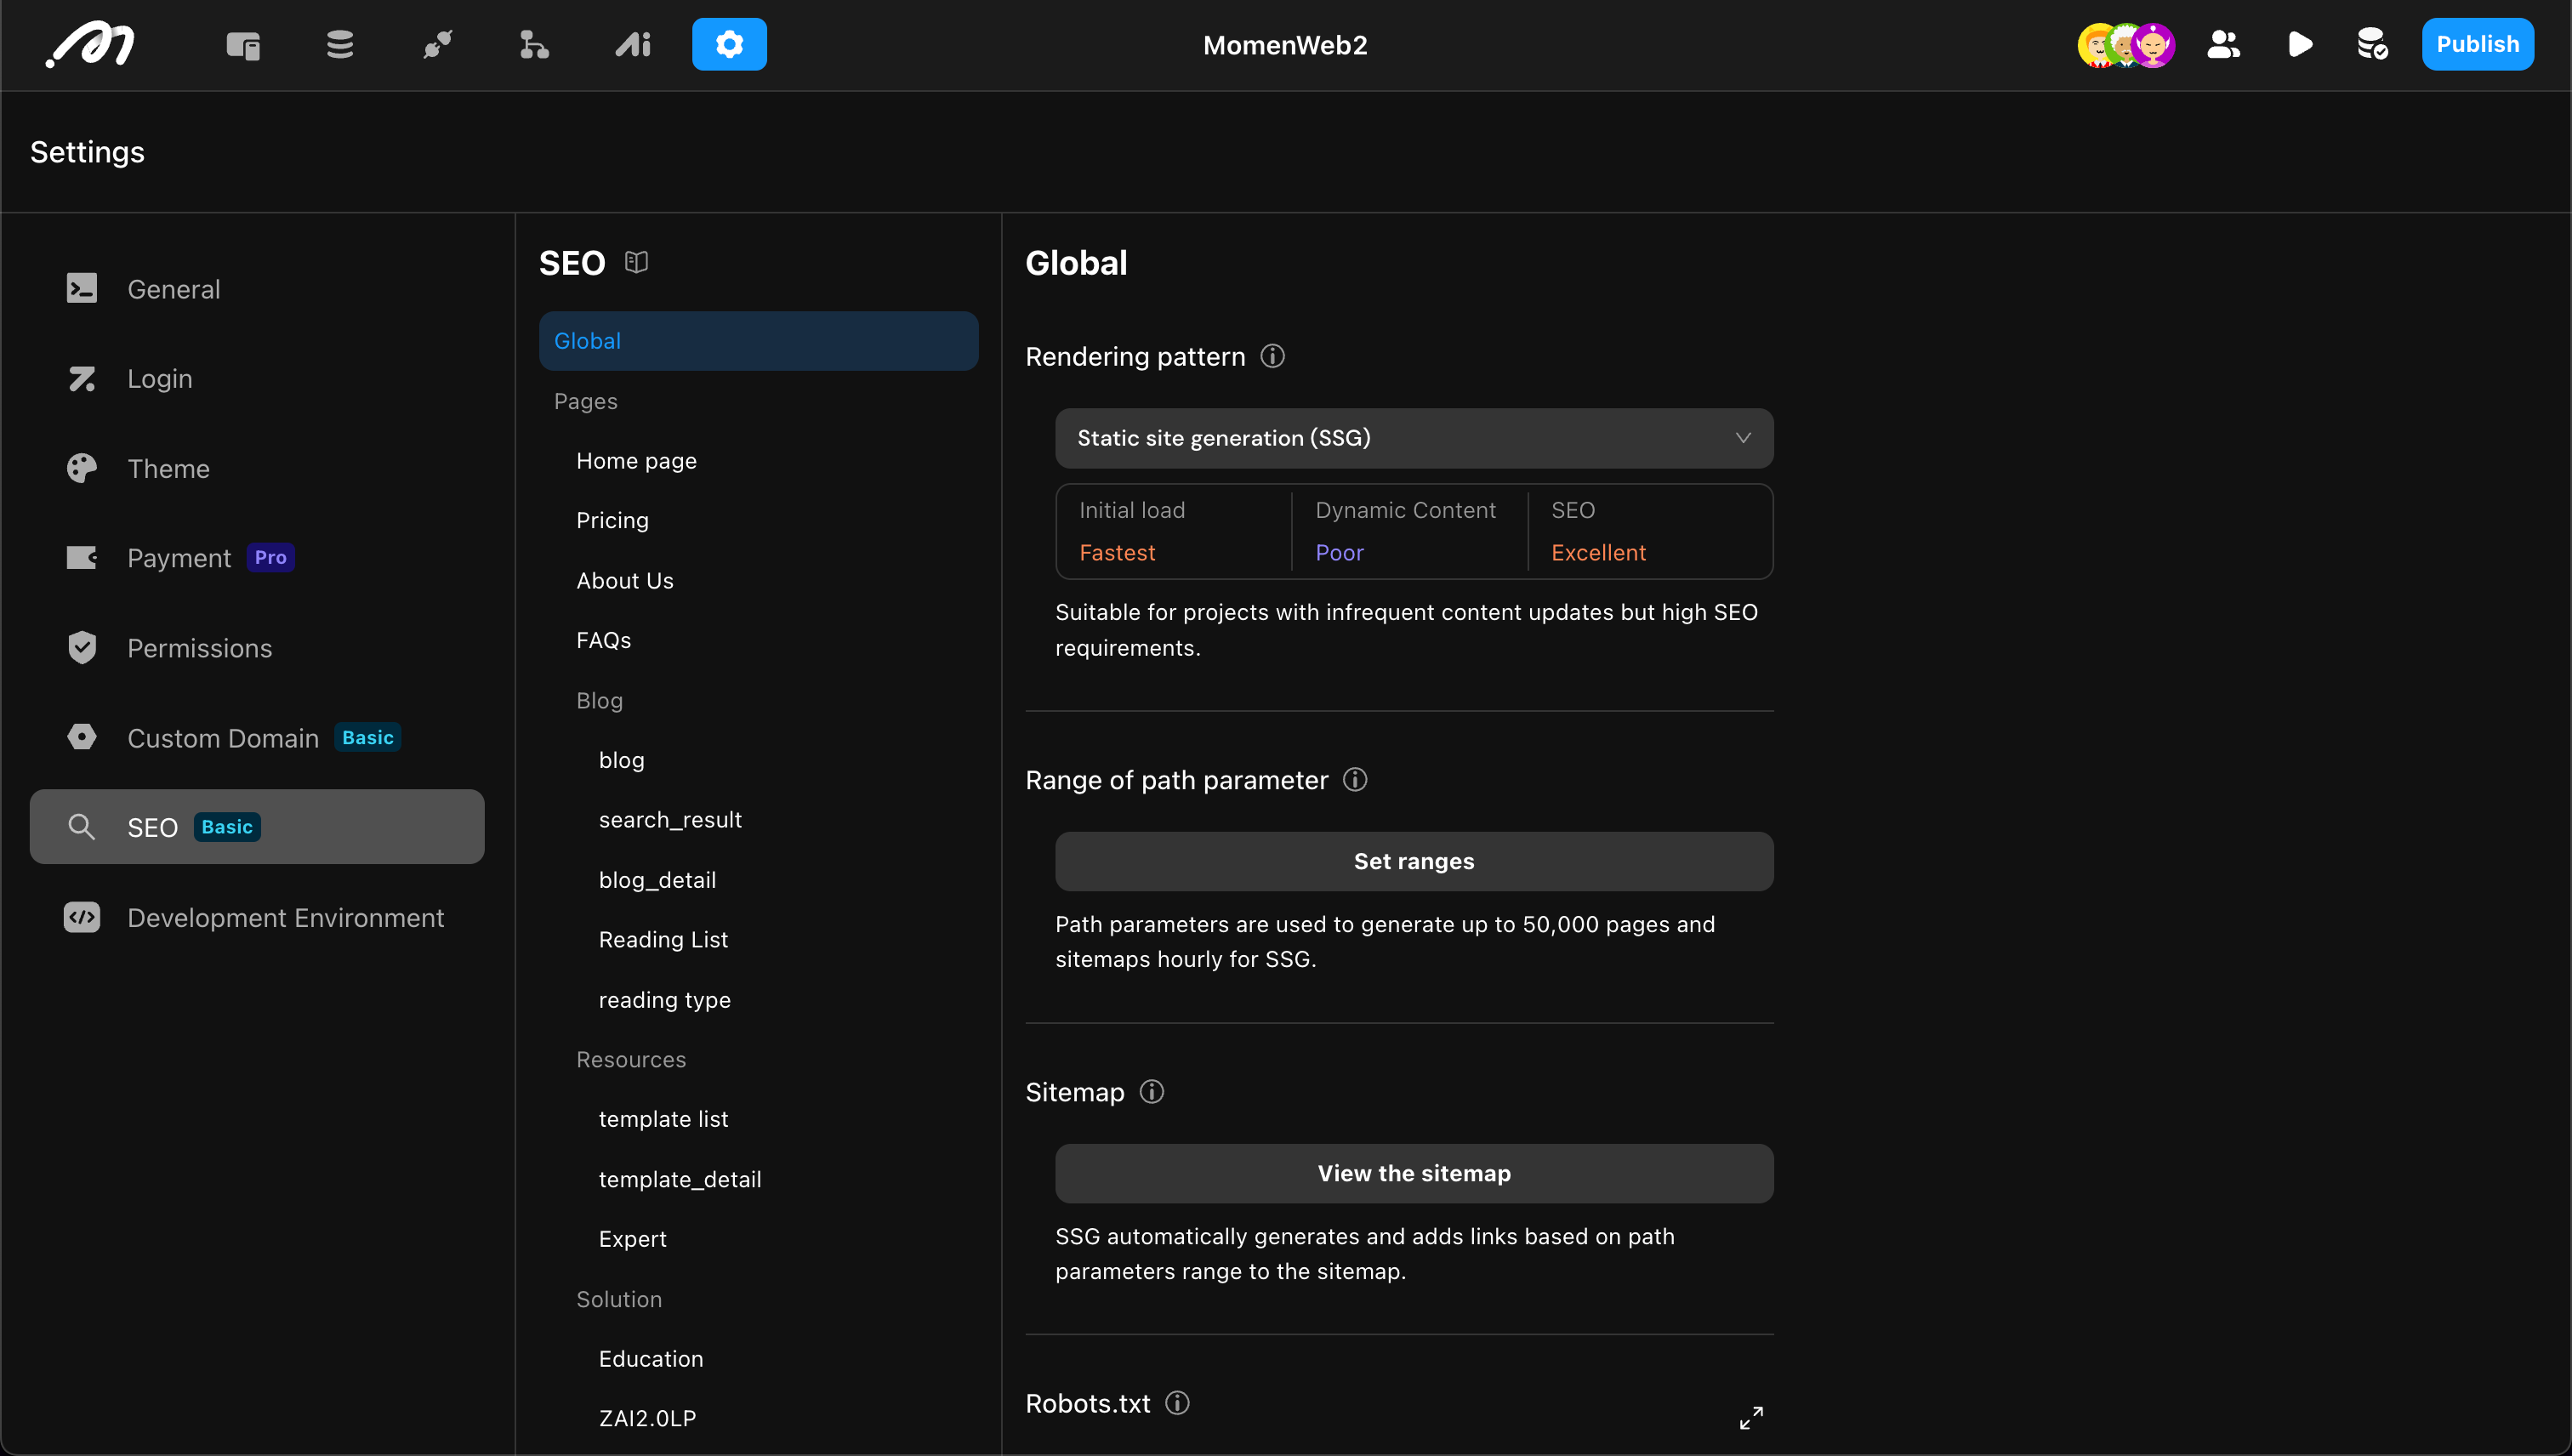
Global Settings
These settings affect all pages in the project. Open Settings → SEO.
Rendering Pattern
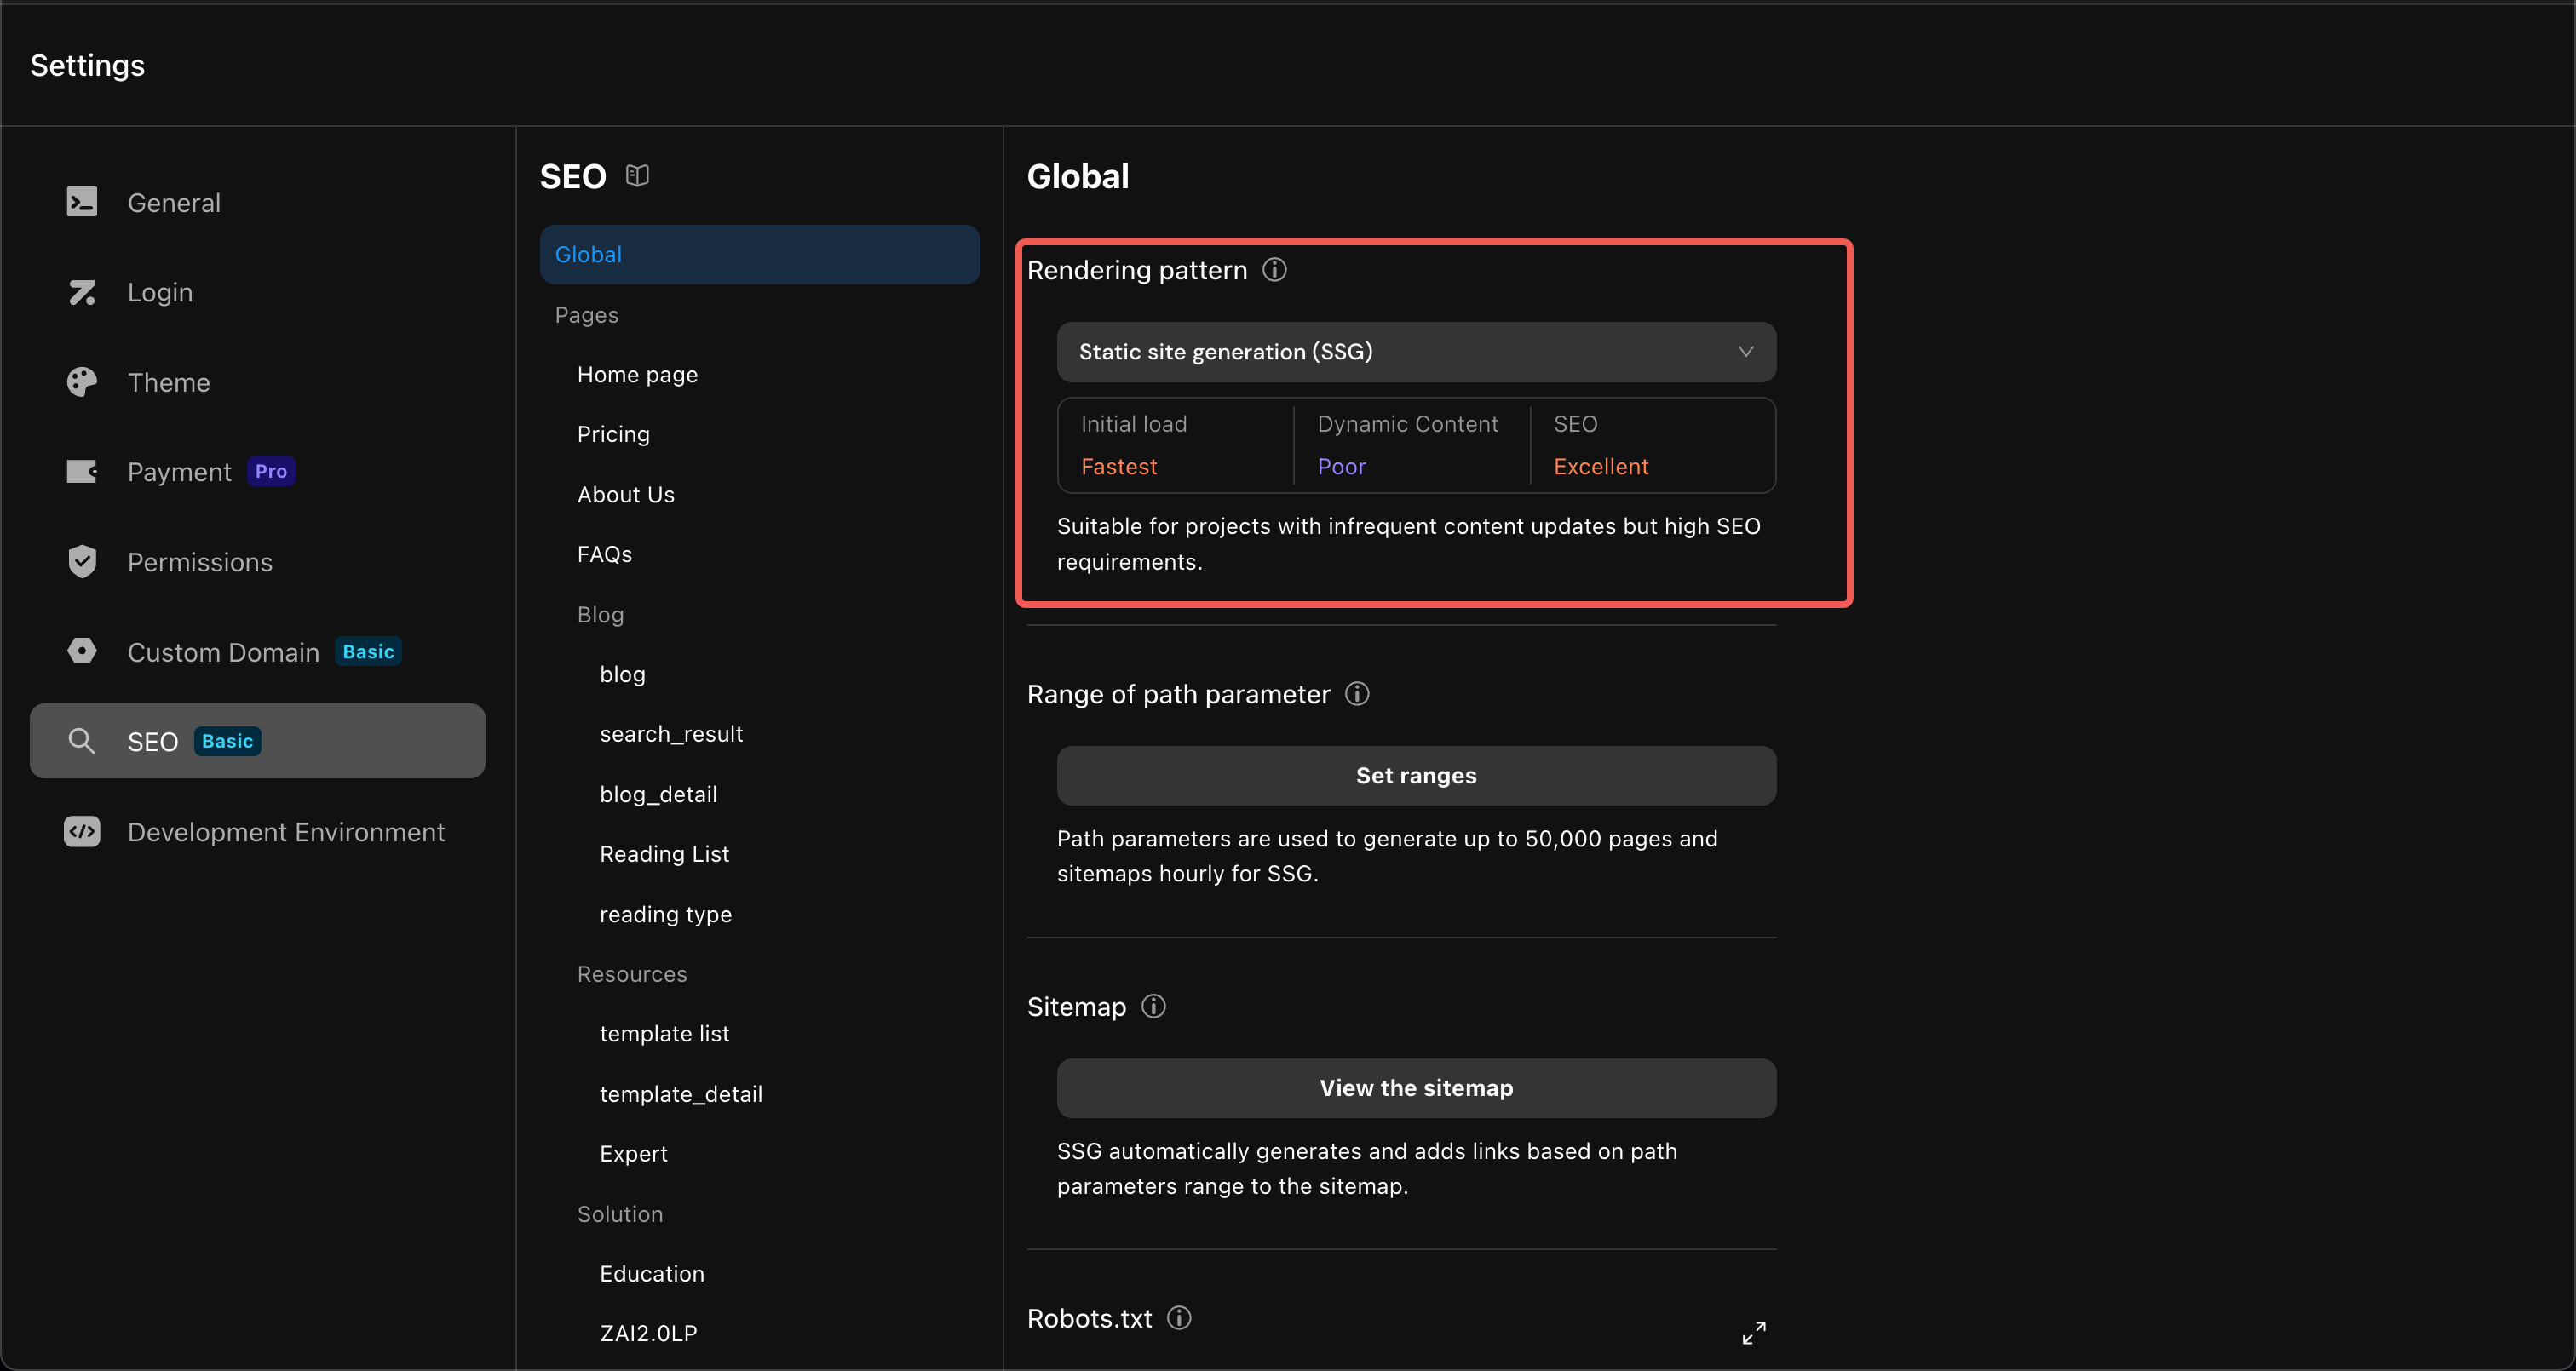
Rendering patterns determine when and how pages are rendered, directly impacting performance and SEO. See Rendering Modes for a full comparison.
| CSR | SSR | SSG | |
|---|---|---|---|
| When rendered | Browser | Server | At publish time, stored on CDN |
| Initial load speed | Slow | Fast | Very fast |
| Content dynamism | High | High | Low |
| SEO performance | Poor | Strong | Excellent |
| Suitable scenarios | Internal tools, low SEO | E-commerce, news, high SEO | Blogs, docs, landing pages, high SEO |
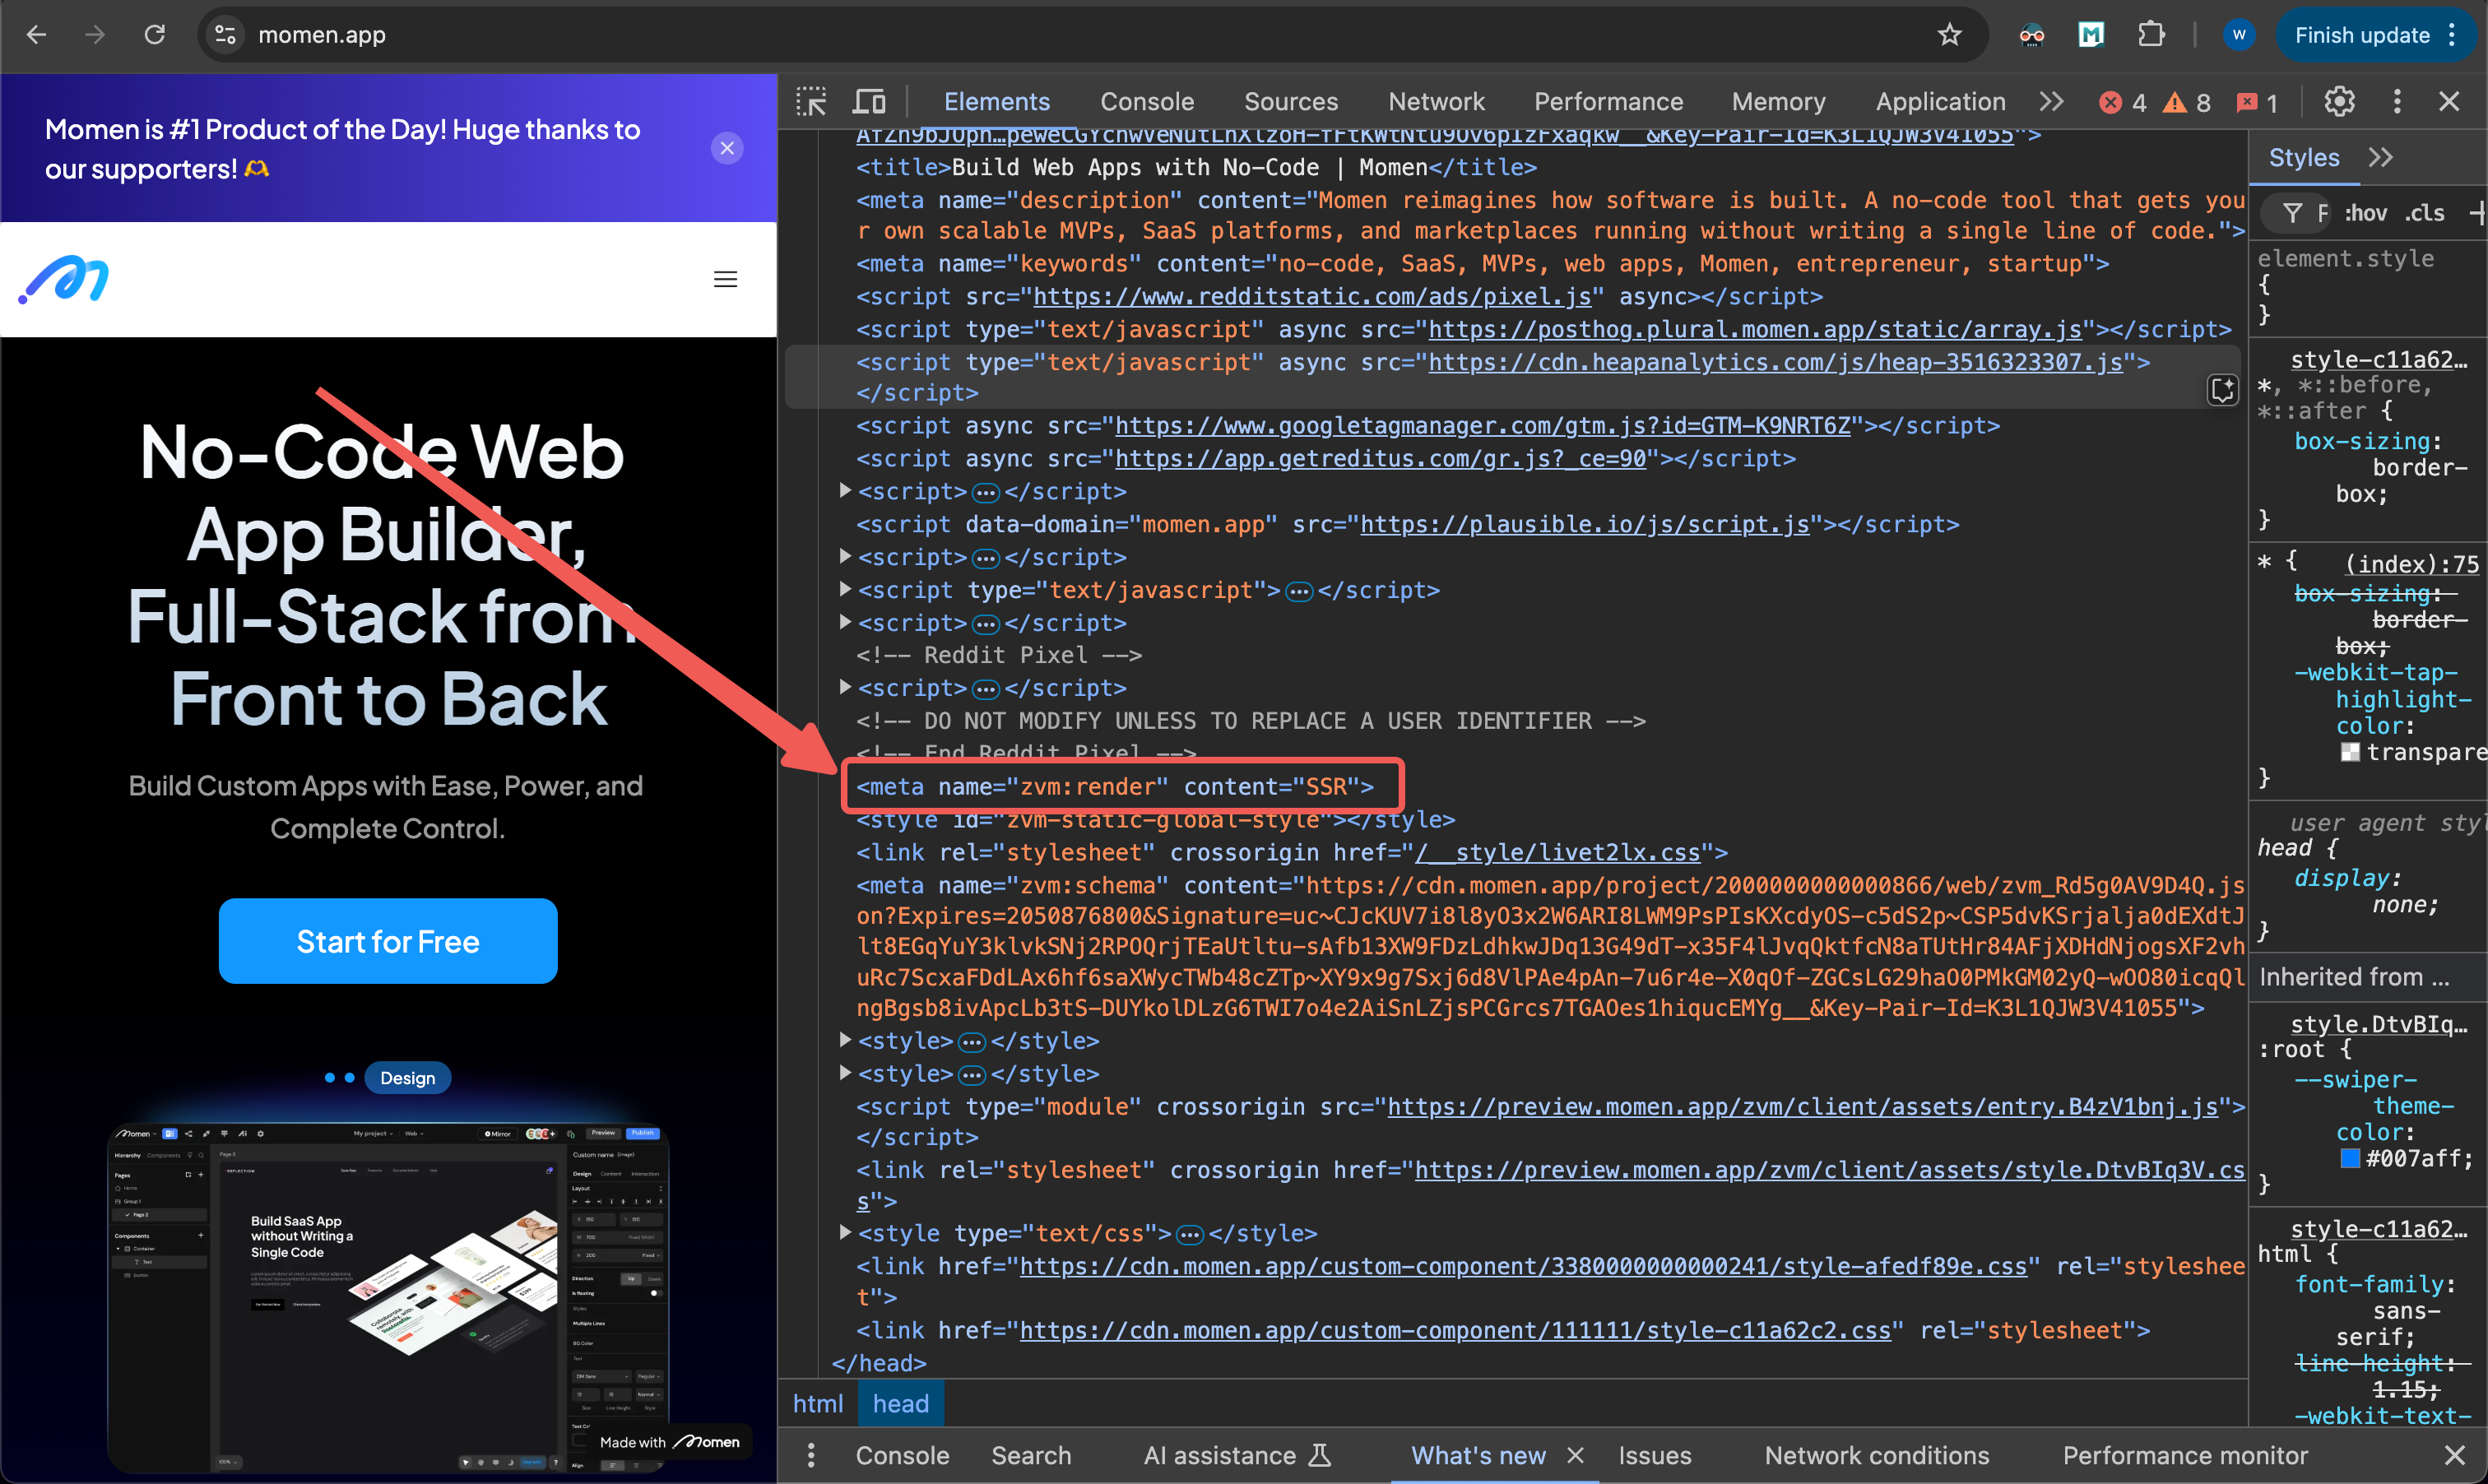
You can check the rendering method in the HTML <head>.
Range of Path Parameters
Why define the range of path parameters?
When a page is configured with path parameters, its URL becomes dynamic, effectively serving as a template with variable segments.
For example, a blog page URL pattern might be momen.app/blogs/${slug}, where ${slug} is a path parameter. You must specify all possible values so that the system can:
- Generate all corresponding page URLs and include them in
sitemap.xml. - In SSG mode, pre-render and build static HTML pages for each URL.
In SSG mode, if a URL is not covered by the parameter values you provide (e.g., a newly published article that has not been pre-built), users visiting that page will receive it via CSR.
How to configure parameter ranges
You can provide parameter values using either of the following methods. The system will automatically merge and deduplicate these values:
- Static Data: Manually enter fixed values, suitable for pages with a predetermined set of URLs.
- Database: Dynamically retrieve parameter values from a specified data table. You can apply filter conditions to precisely control which pages are generated.
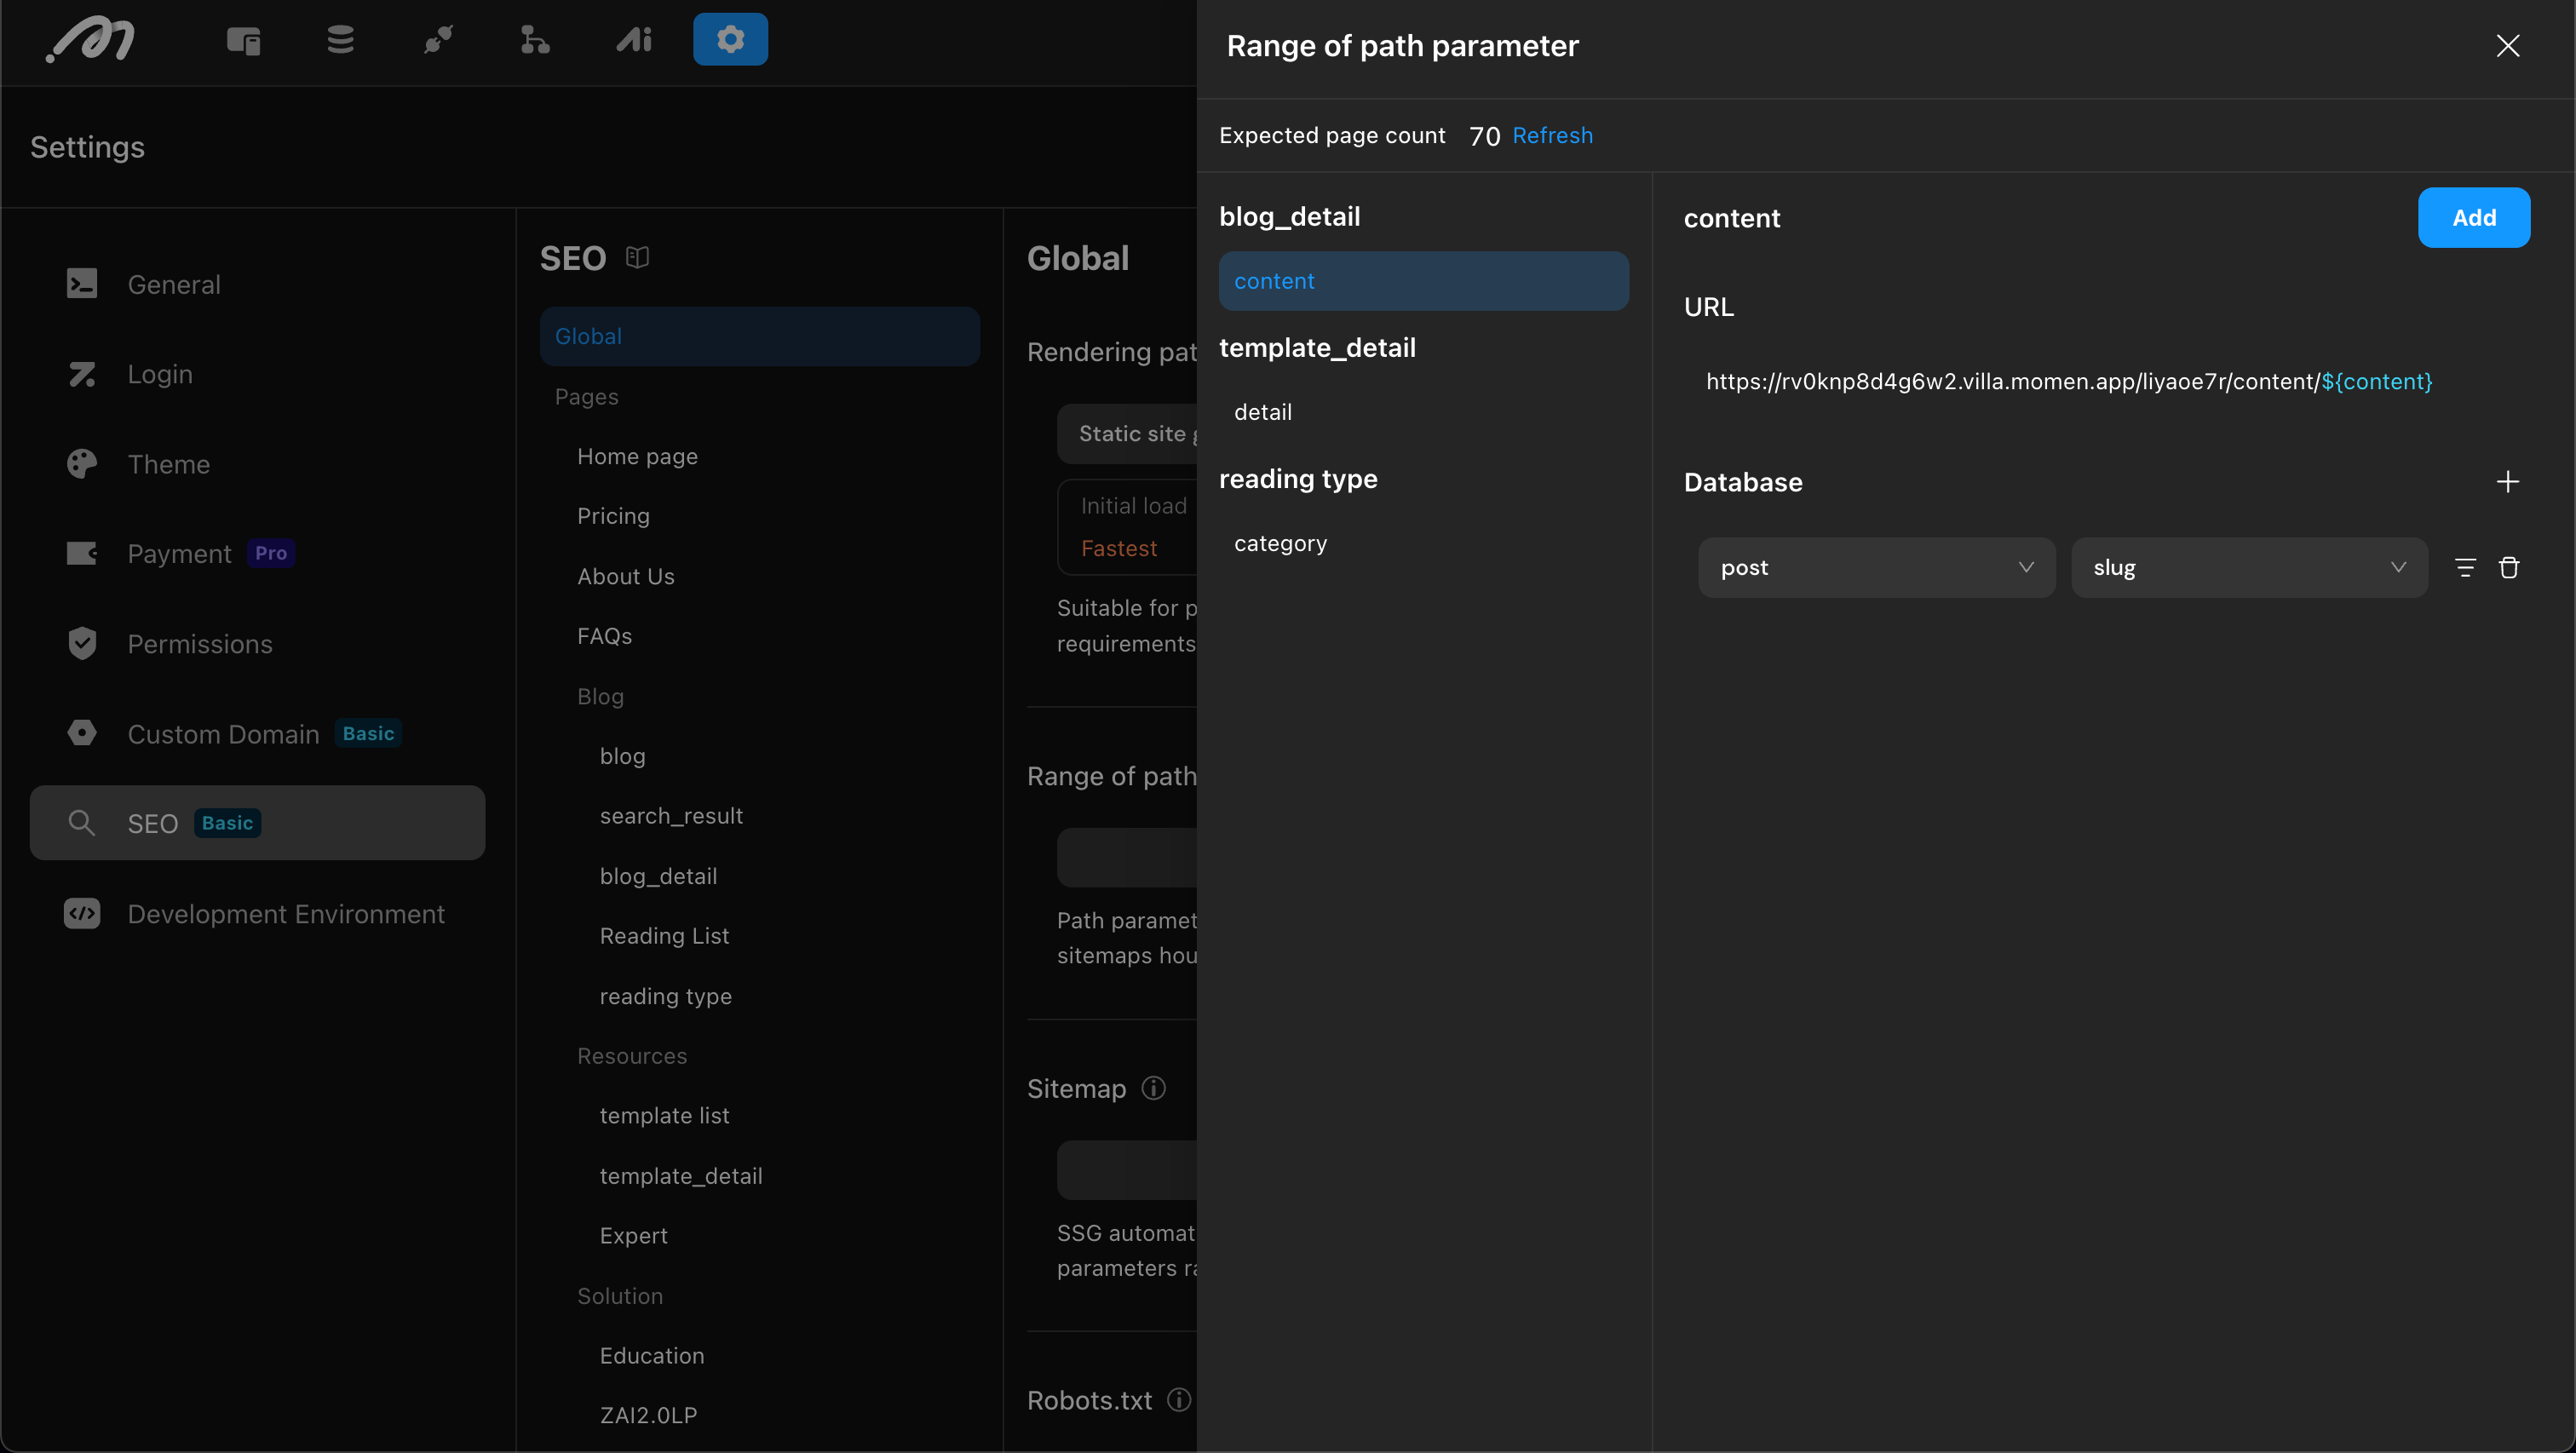
Configuration example
Continuing with the blog article page example:
- Data table:
blog - Field:
slug - Filter condition:
published == true
Suppose the blog table contains the following five records:
| id | slug | published |
|---|---|---|
| 1 | integrate-gpt5-momen-no-code-ai | true |
| 2 | build-legal-assistant-with-momen | true |
| 3 | ai-legal-document-analysis-built-with-momen | true |
| 4 | momen-product-update-version-1.0.8 | false |
| 5 | nocode-erp-success-how-this-company-transformed-a-legacy-business-with-momen | false |
The following three URLs and their corresponding pages will be generated:
| URL |
|---|
| momen.app/blogs/integrate-gpt5-momen-no-code-ai |
| momen.app/blogs/build-legal-assistant-with-momen |
| momen.app/blogs/ai-legal-document-analysis-built-with-momen |
Sitemap
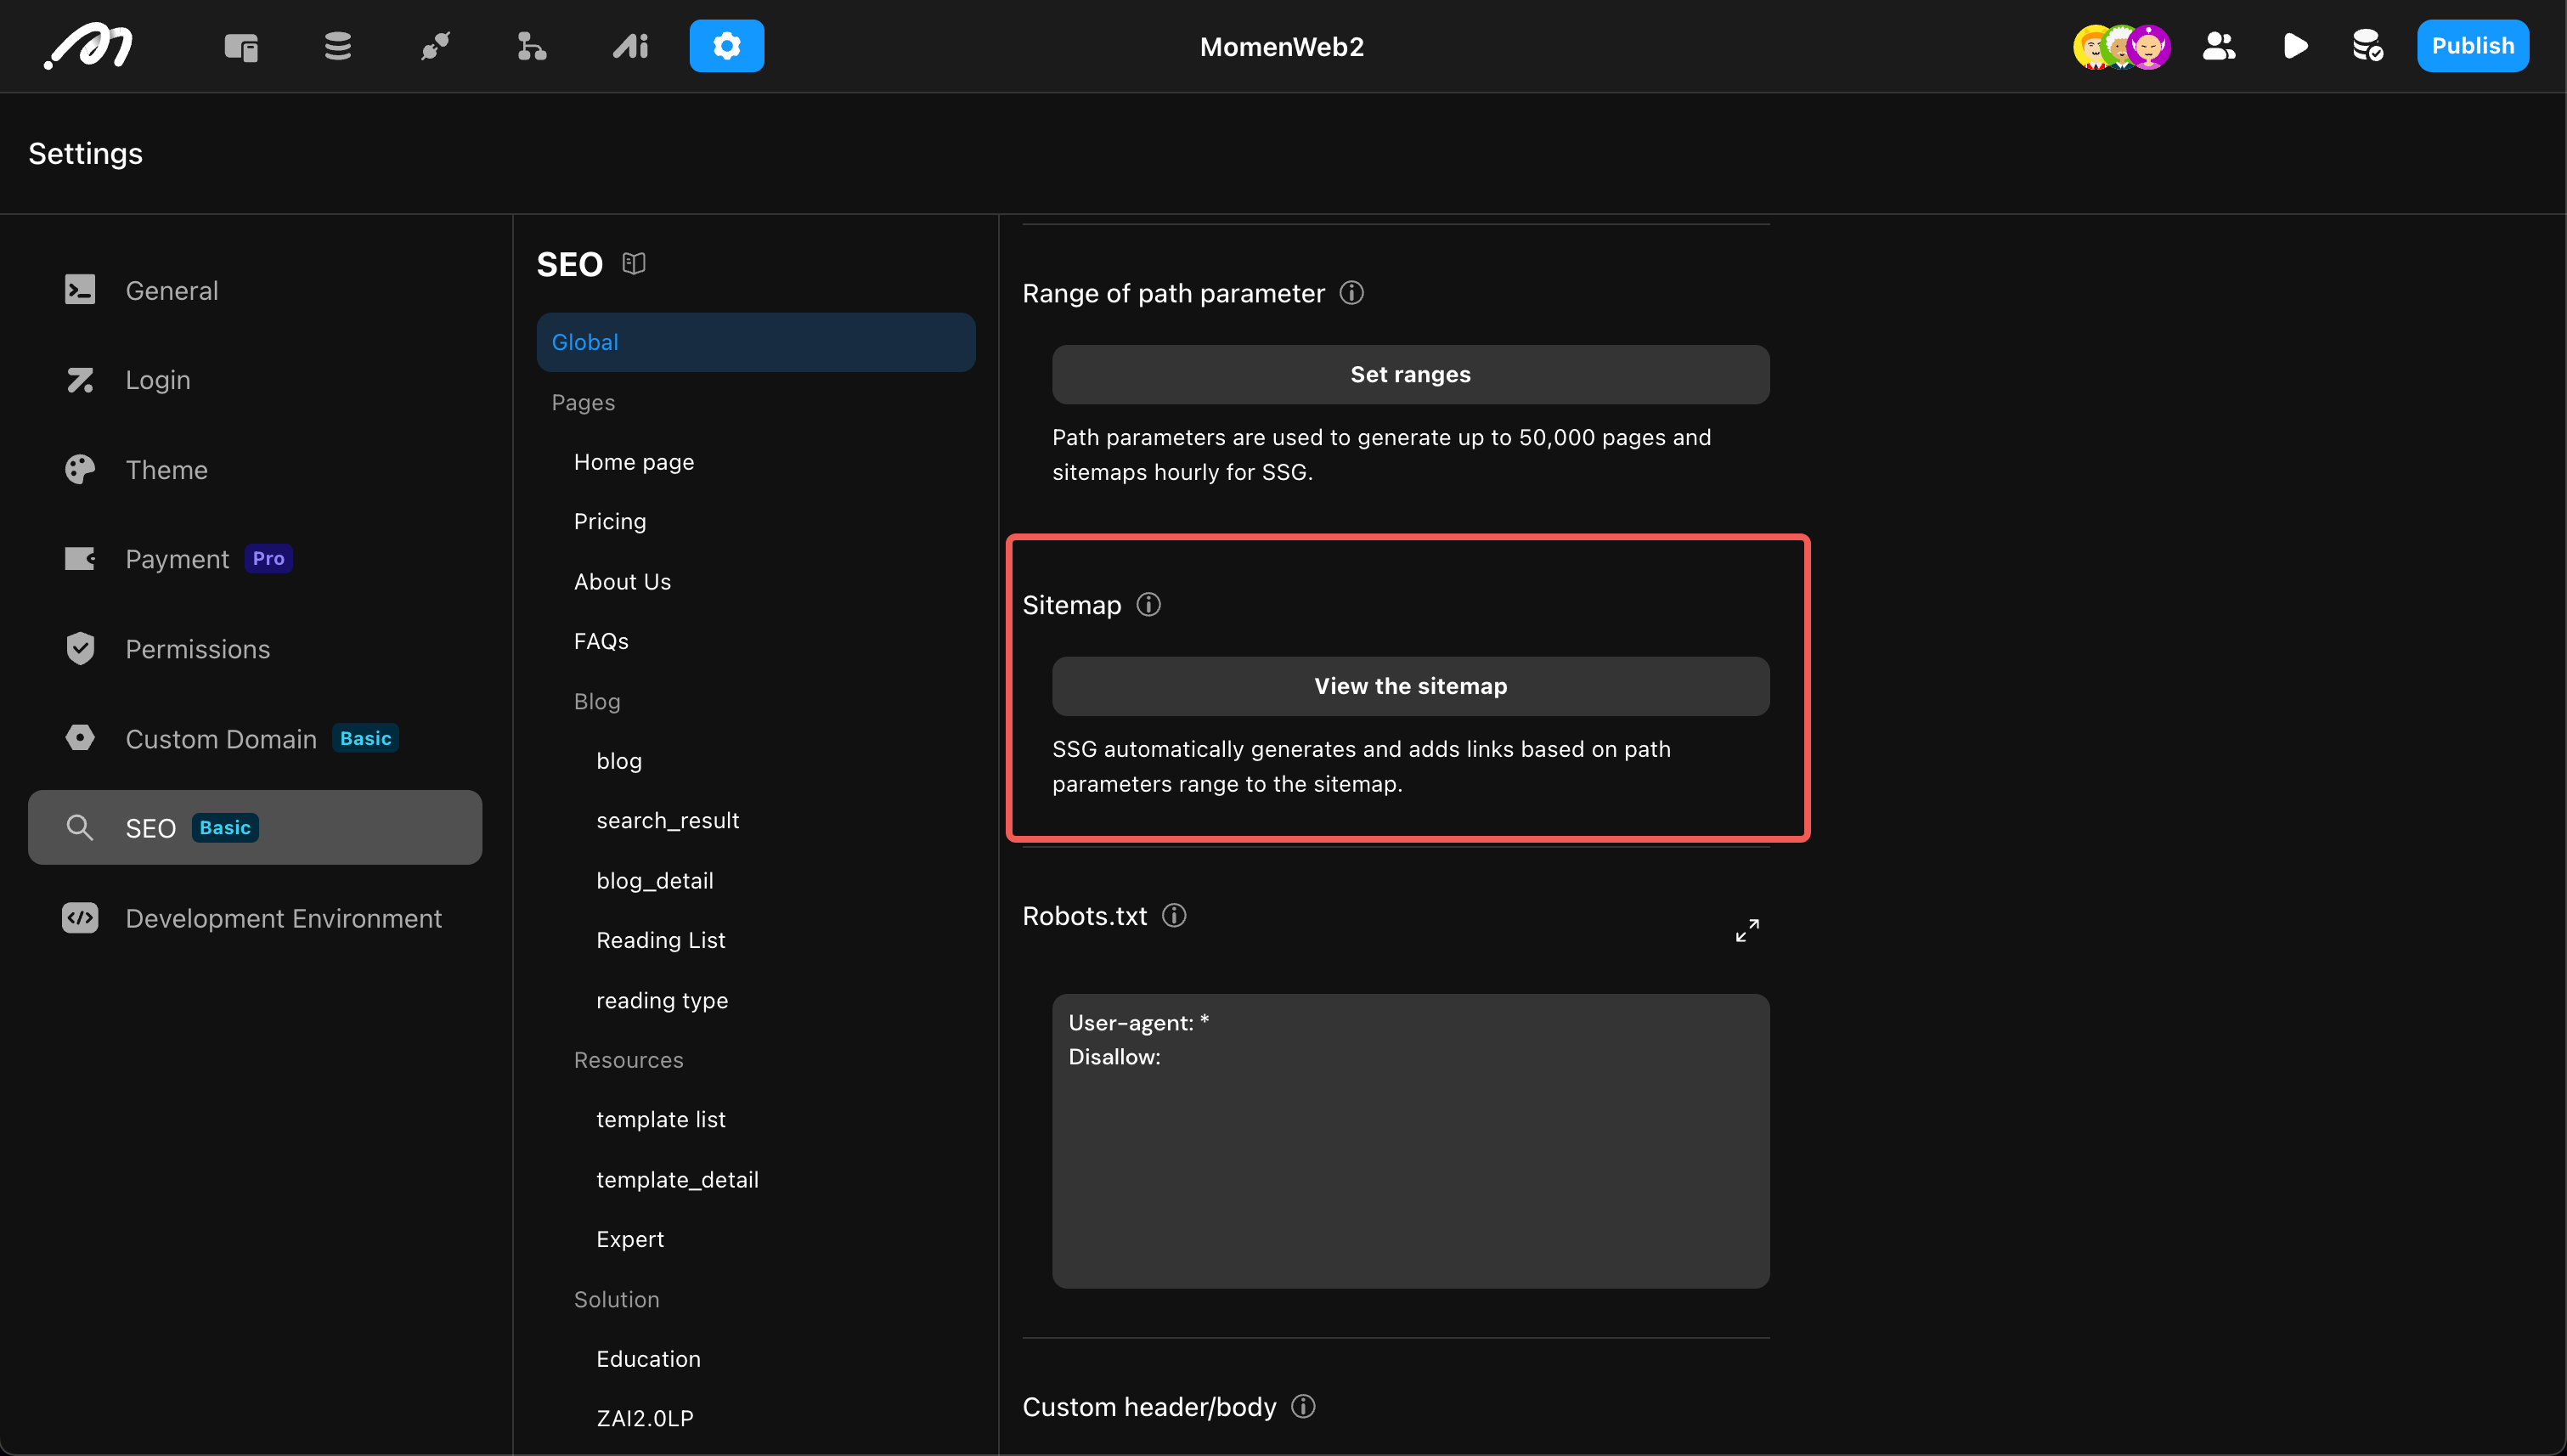
A sitemap helps search engines understand your site structure.
- Real-time update: URLs are added after user visits.
- Advantage: Dynamic.
- Disadvantage: May miss unvisited pages.
- Pre-generation: Fixed sitemap generated at publication.
- Advantage: Complete if parameters are set correctly.
- Disadvantage: Requires re-publication after data changes.
robots.txt
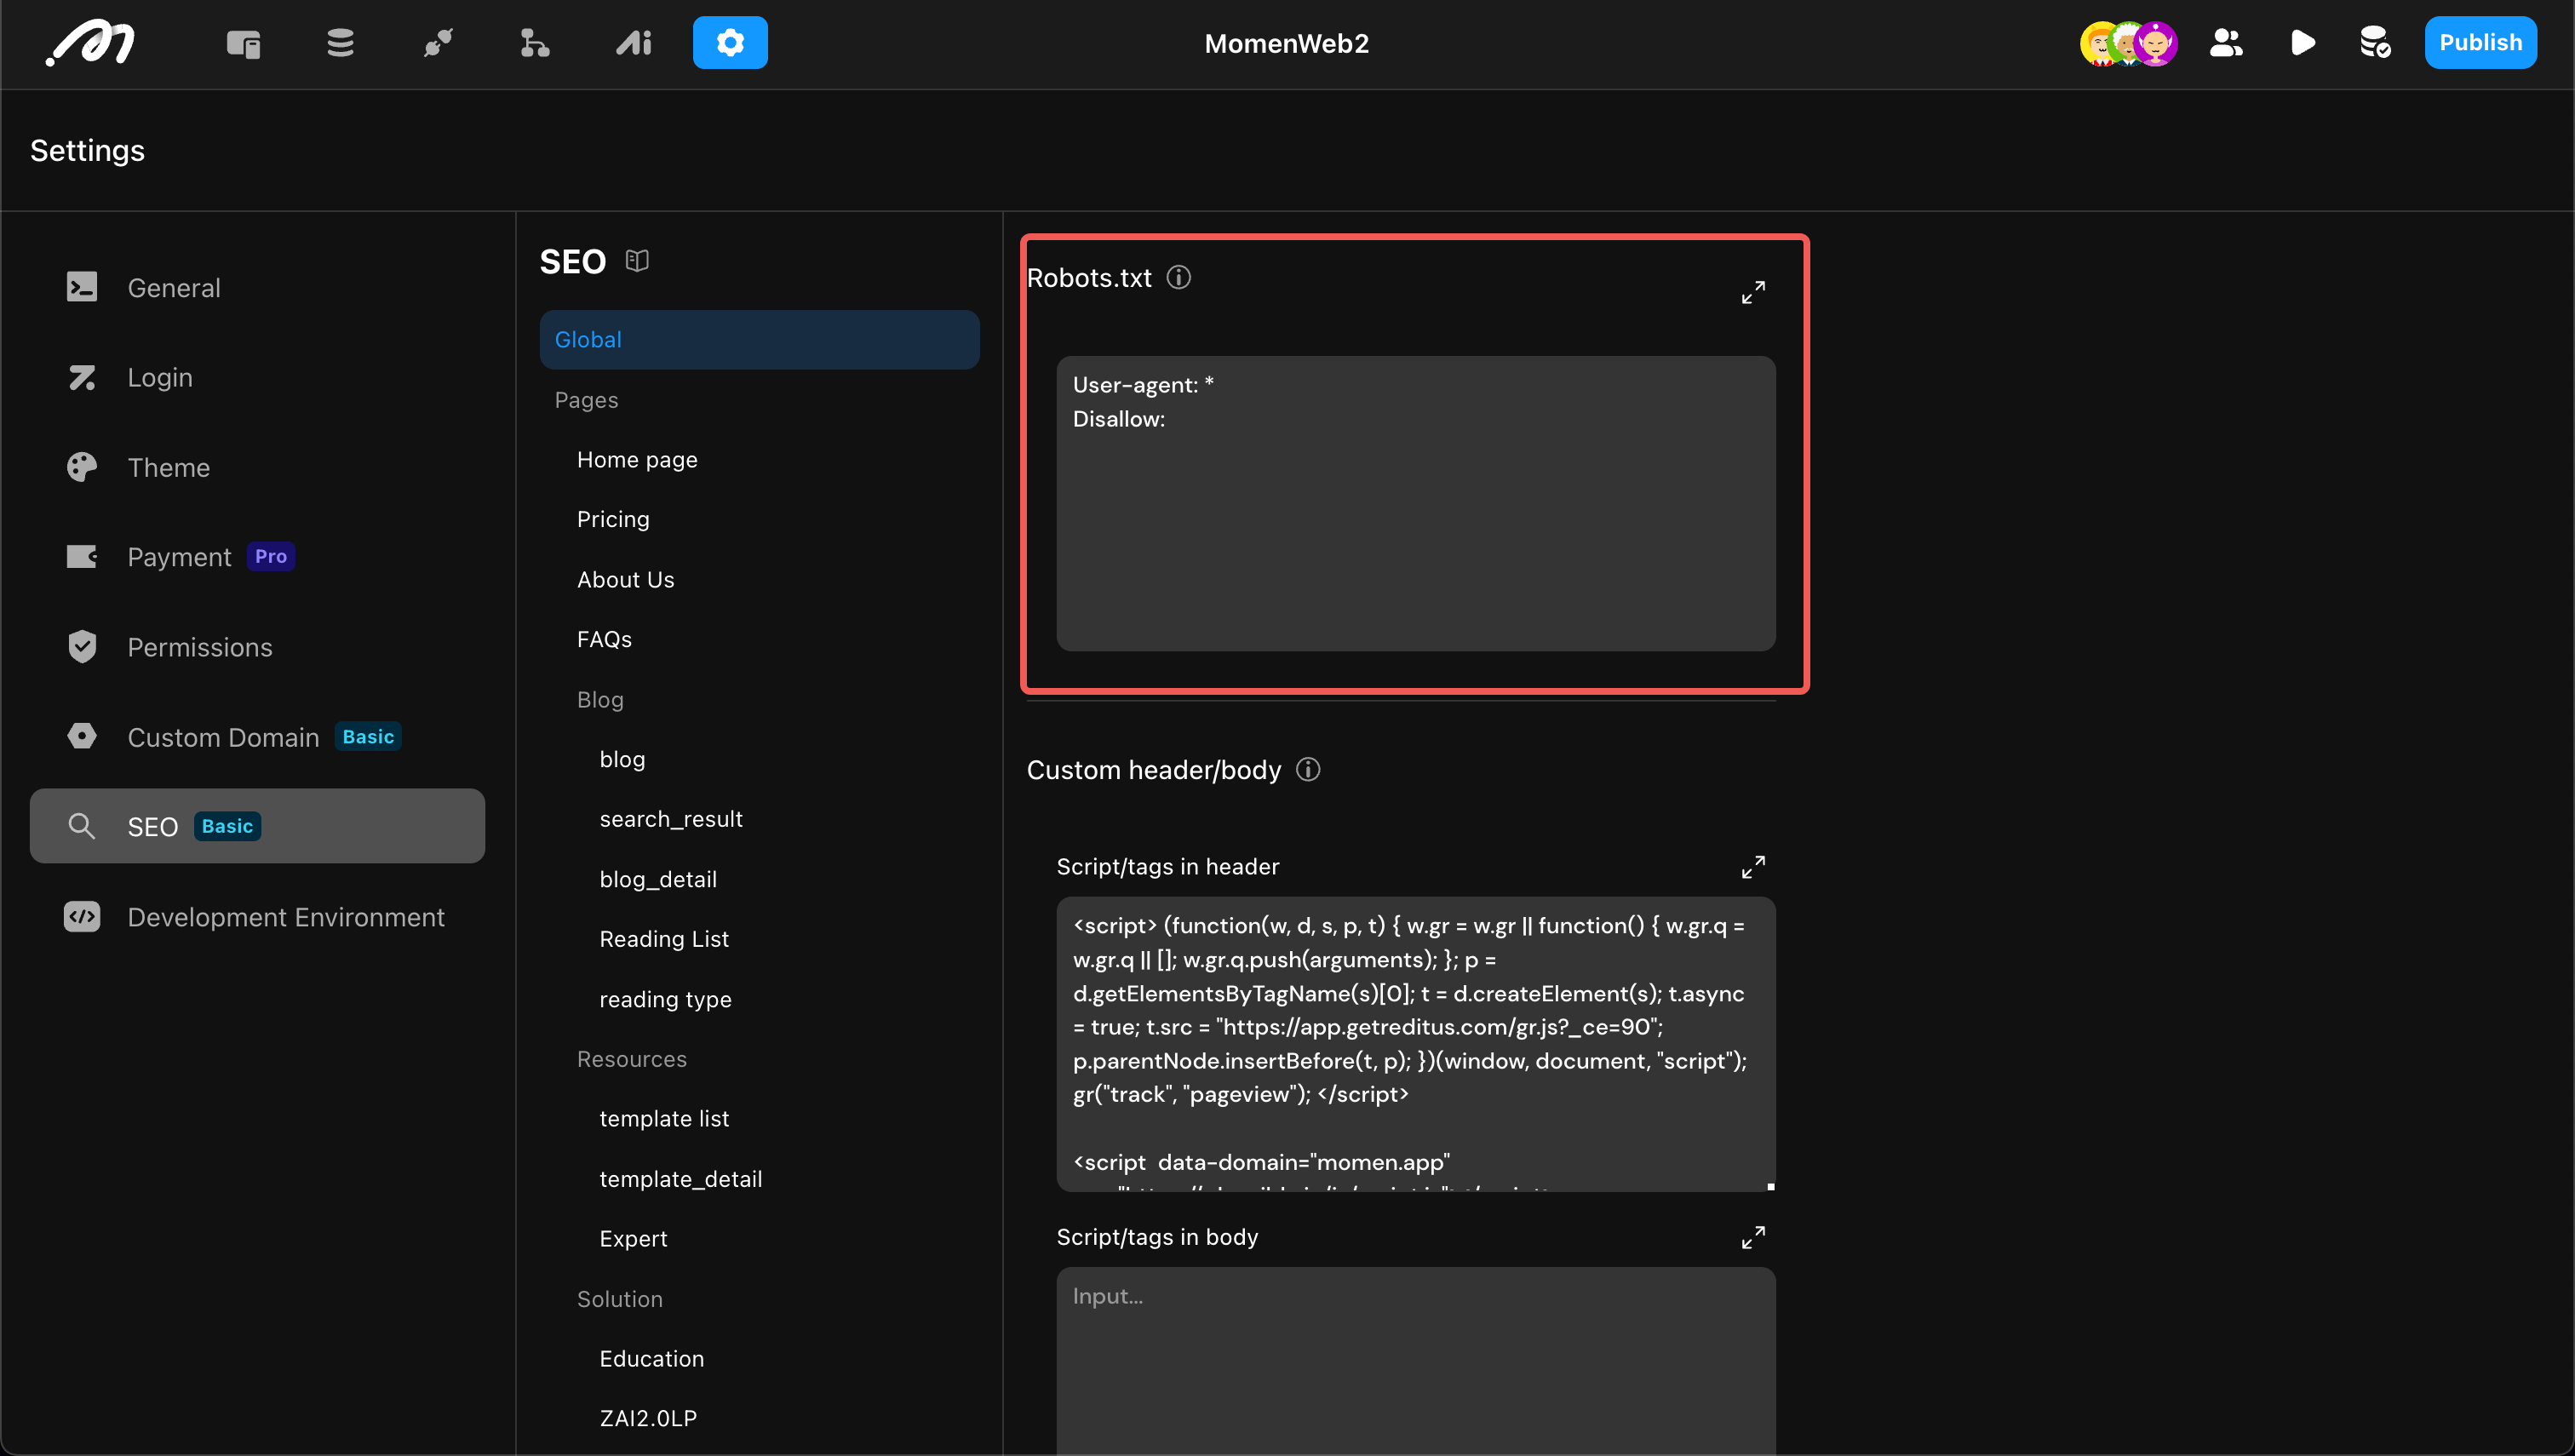
The robots.txt file controls which pages search engines can crawl.
Custom Header/Body
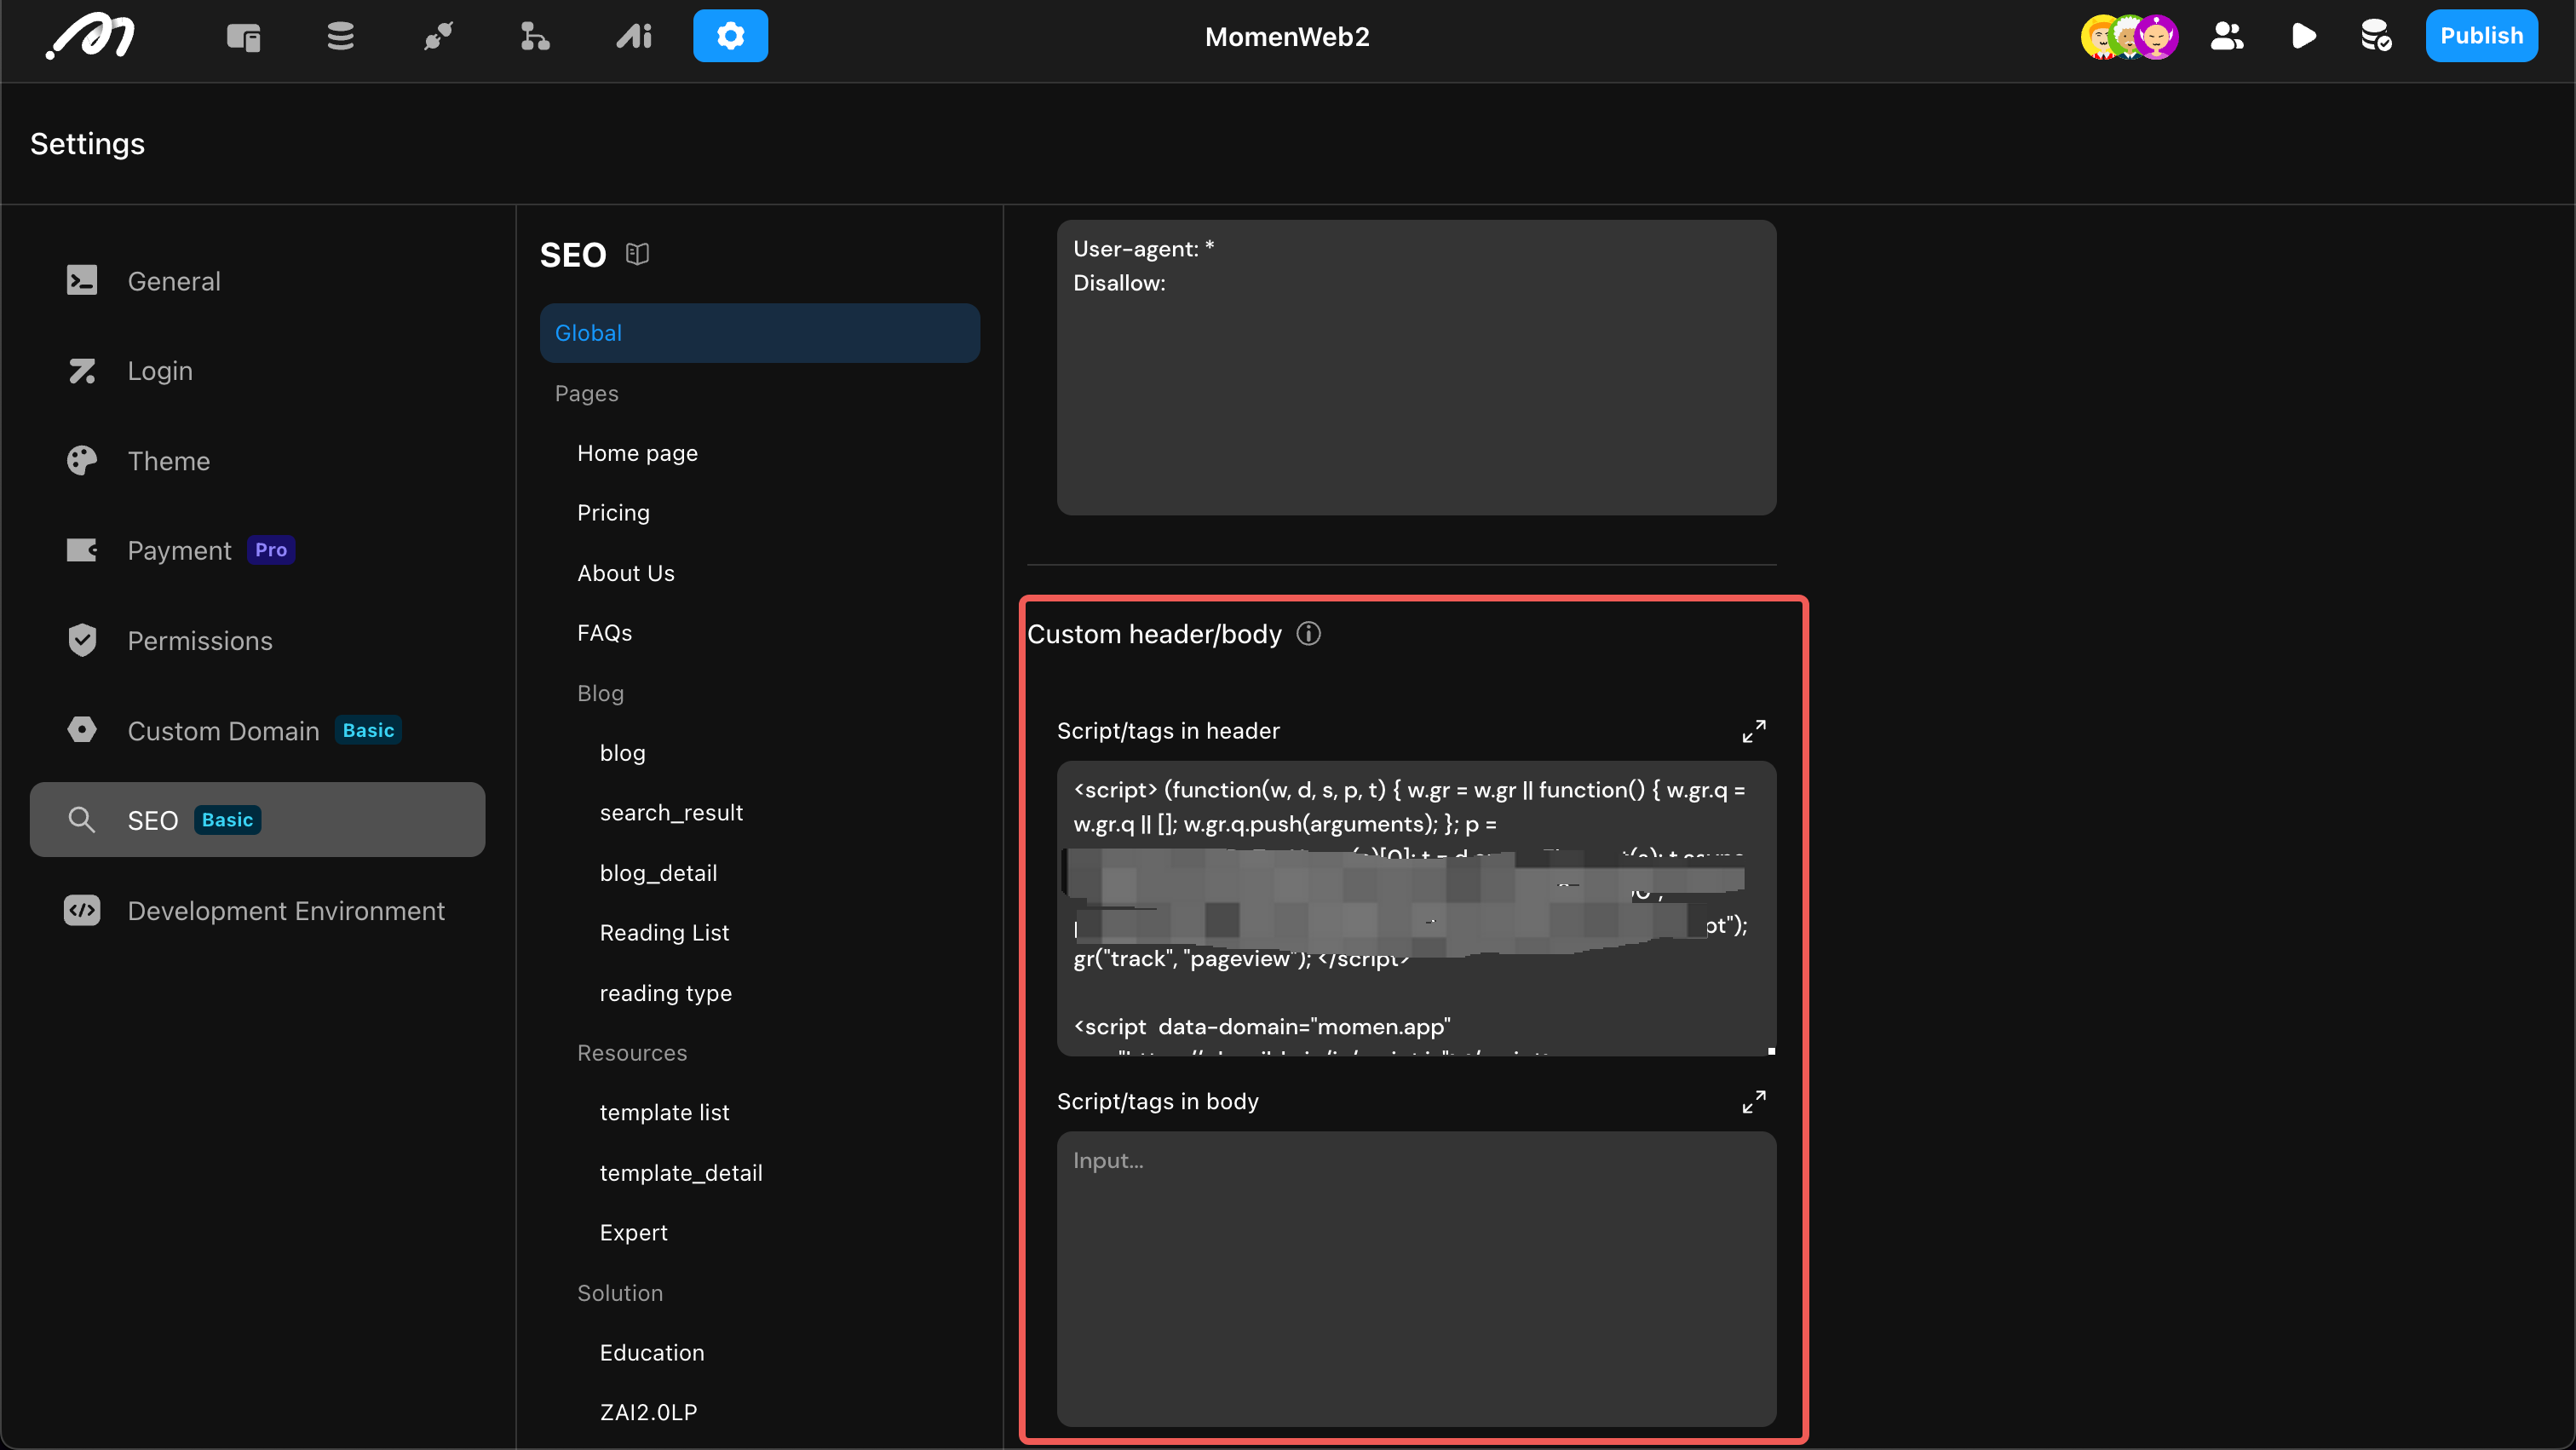
Add extra tags (<meta />, <canonical />, etc.) to the HTML header/body for SEO or code injection (e.g., analytics).
Page Settings
These settings apply to individual pages.
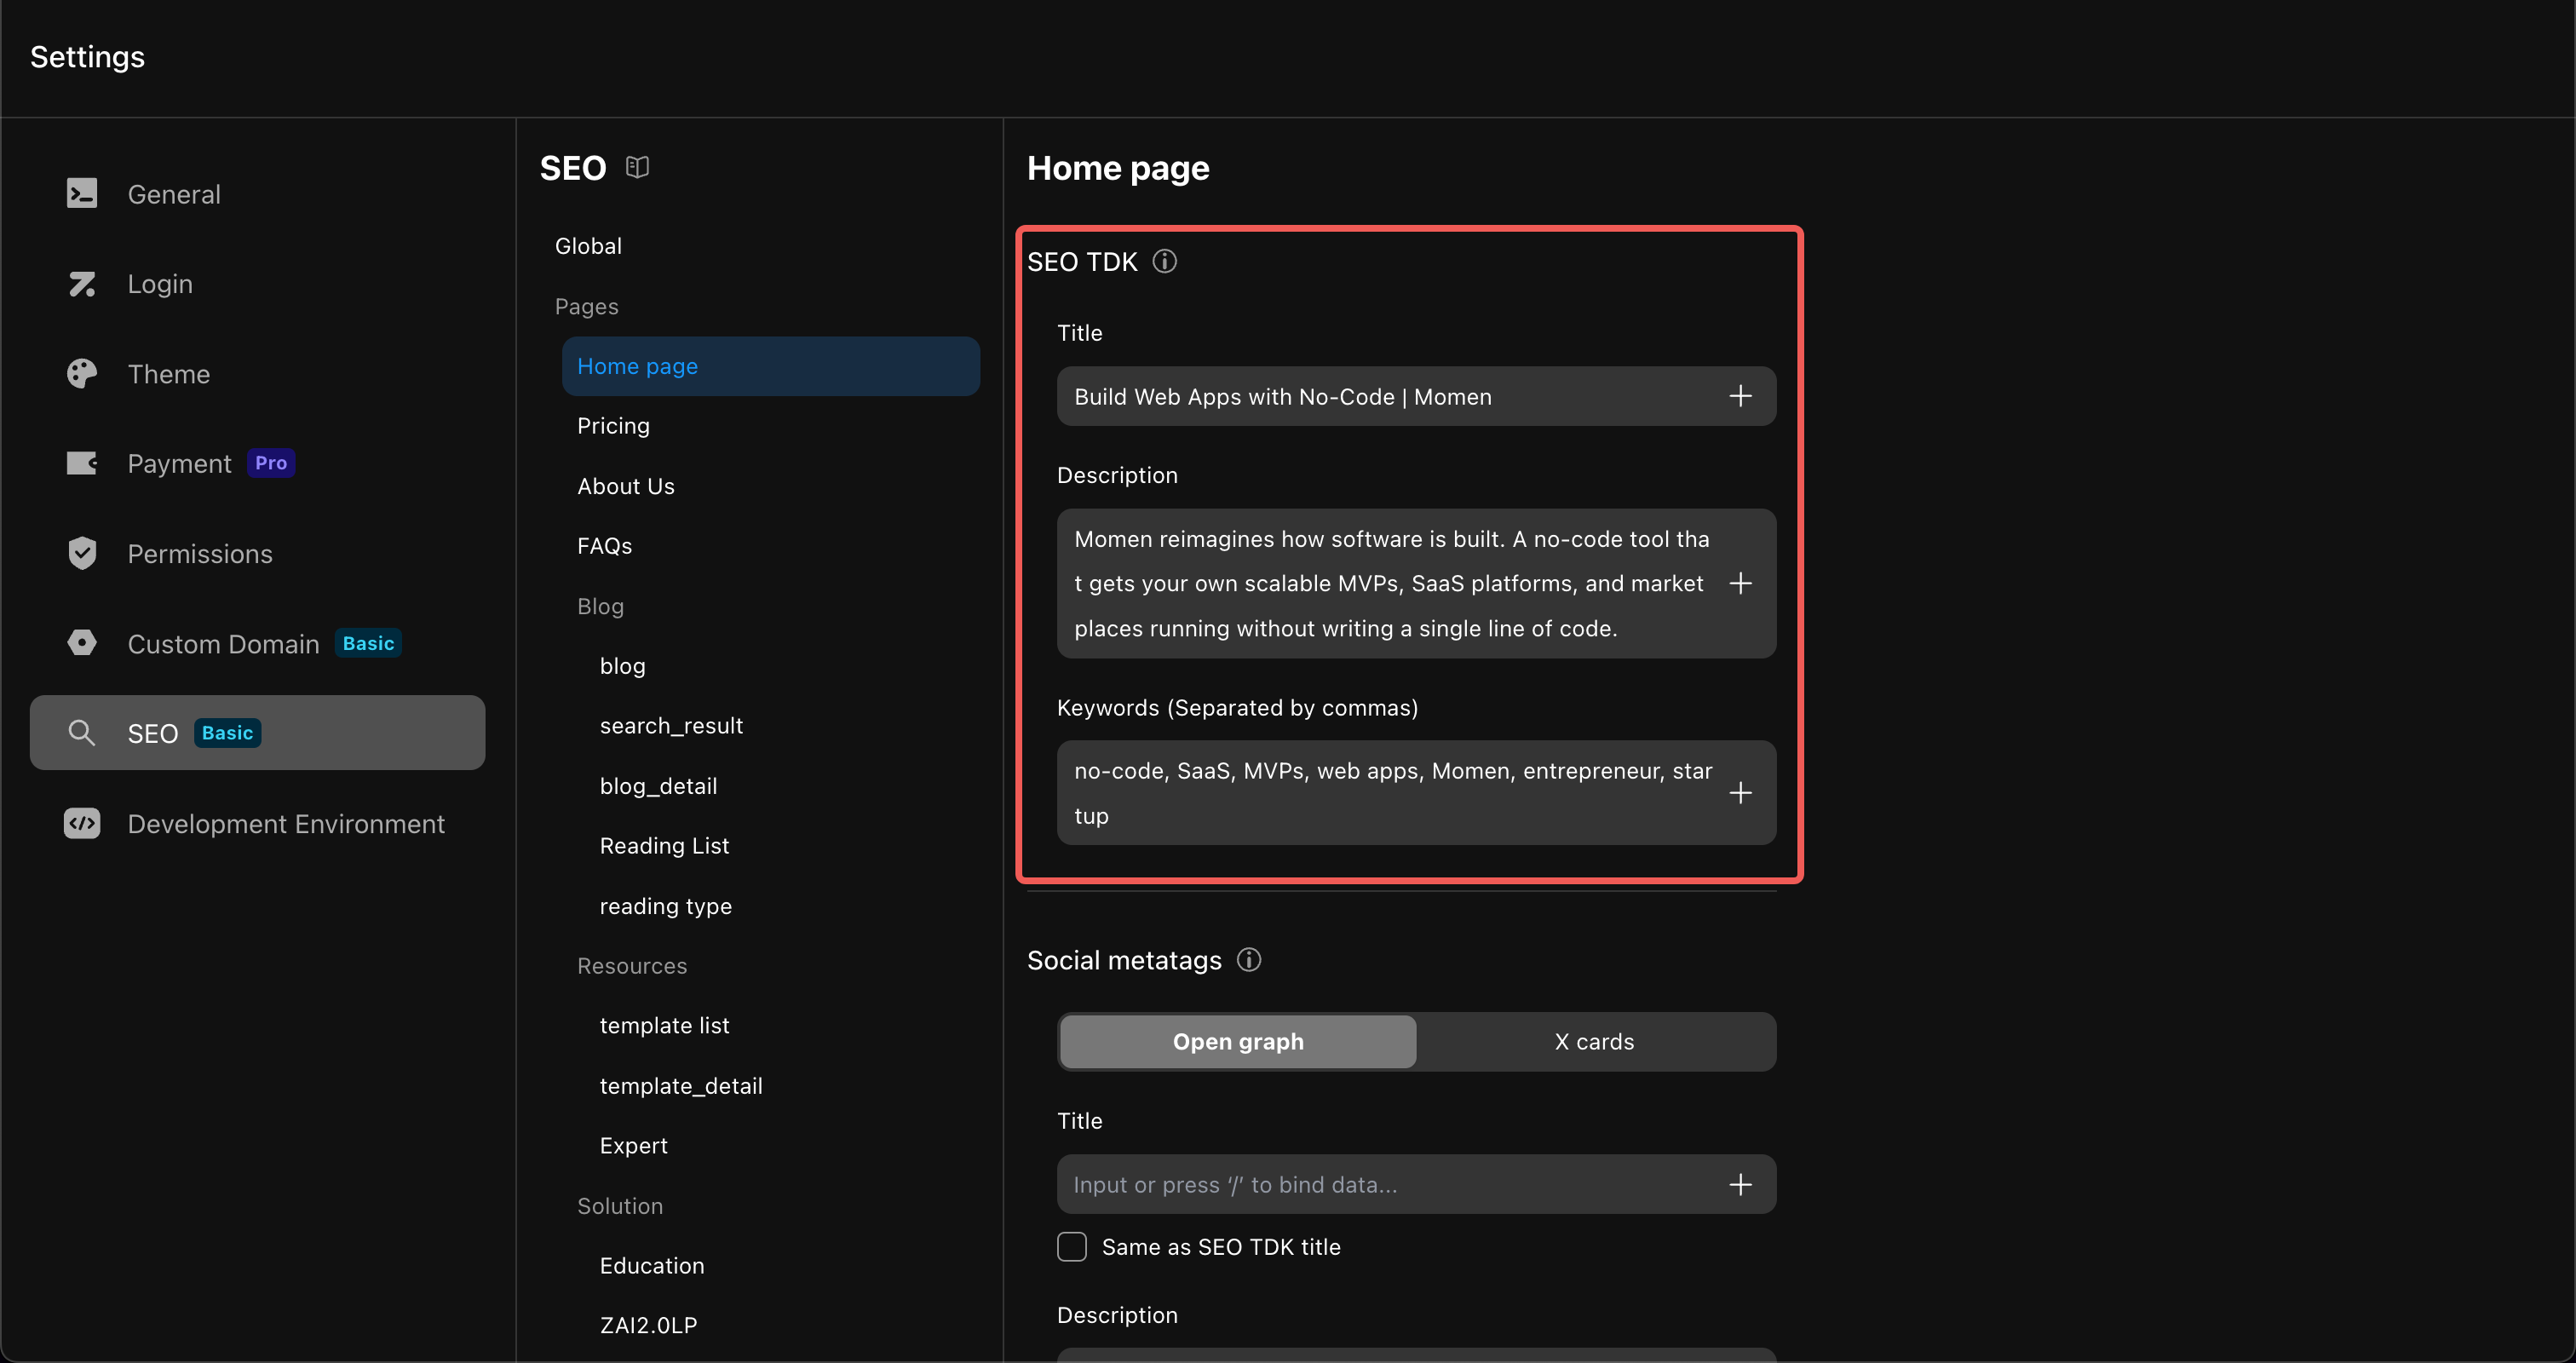
SEO TDK
Set the Title, Description, and Keywords for a page.
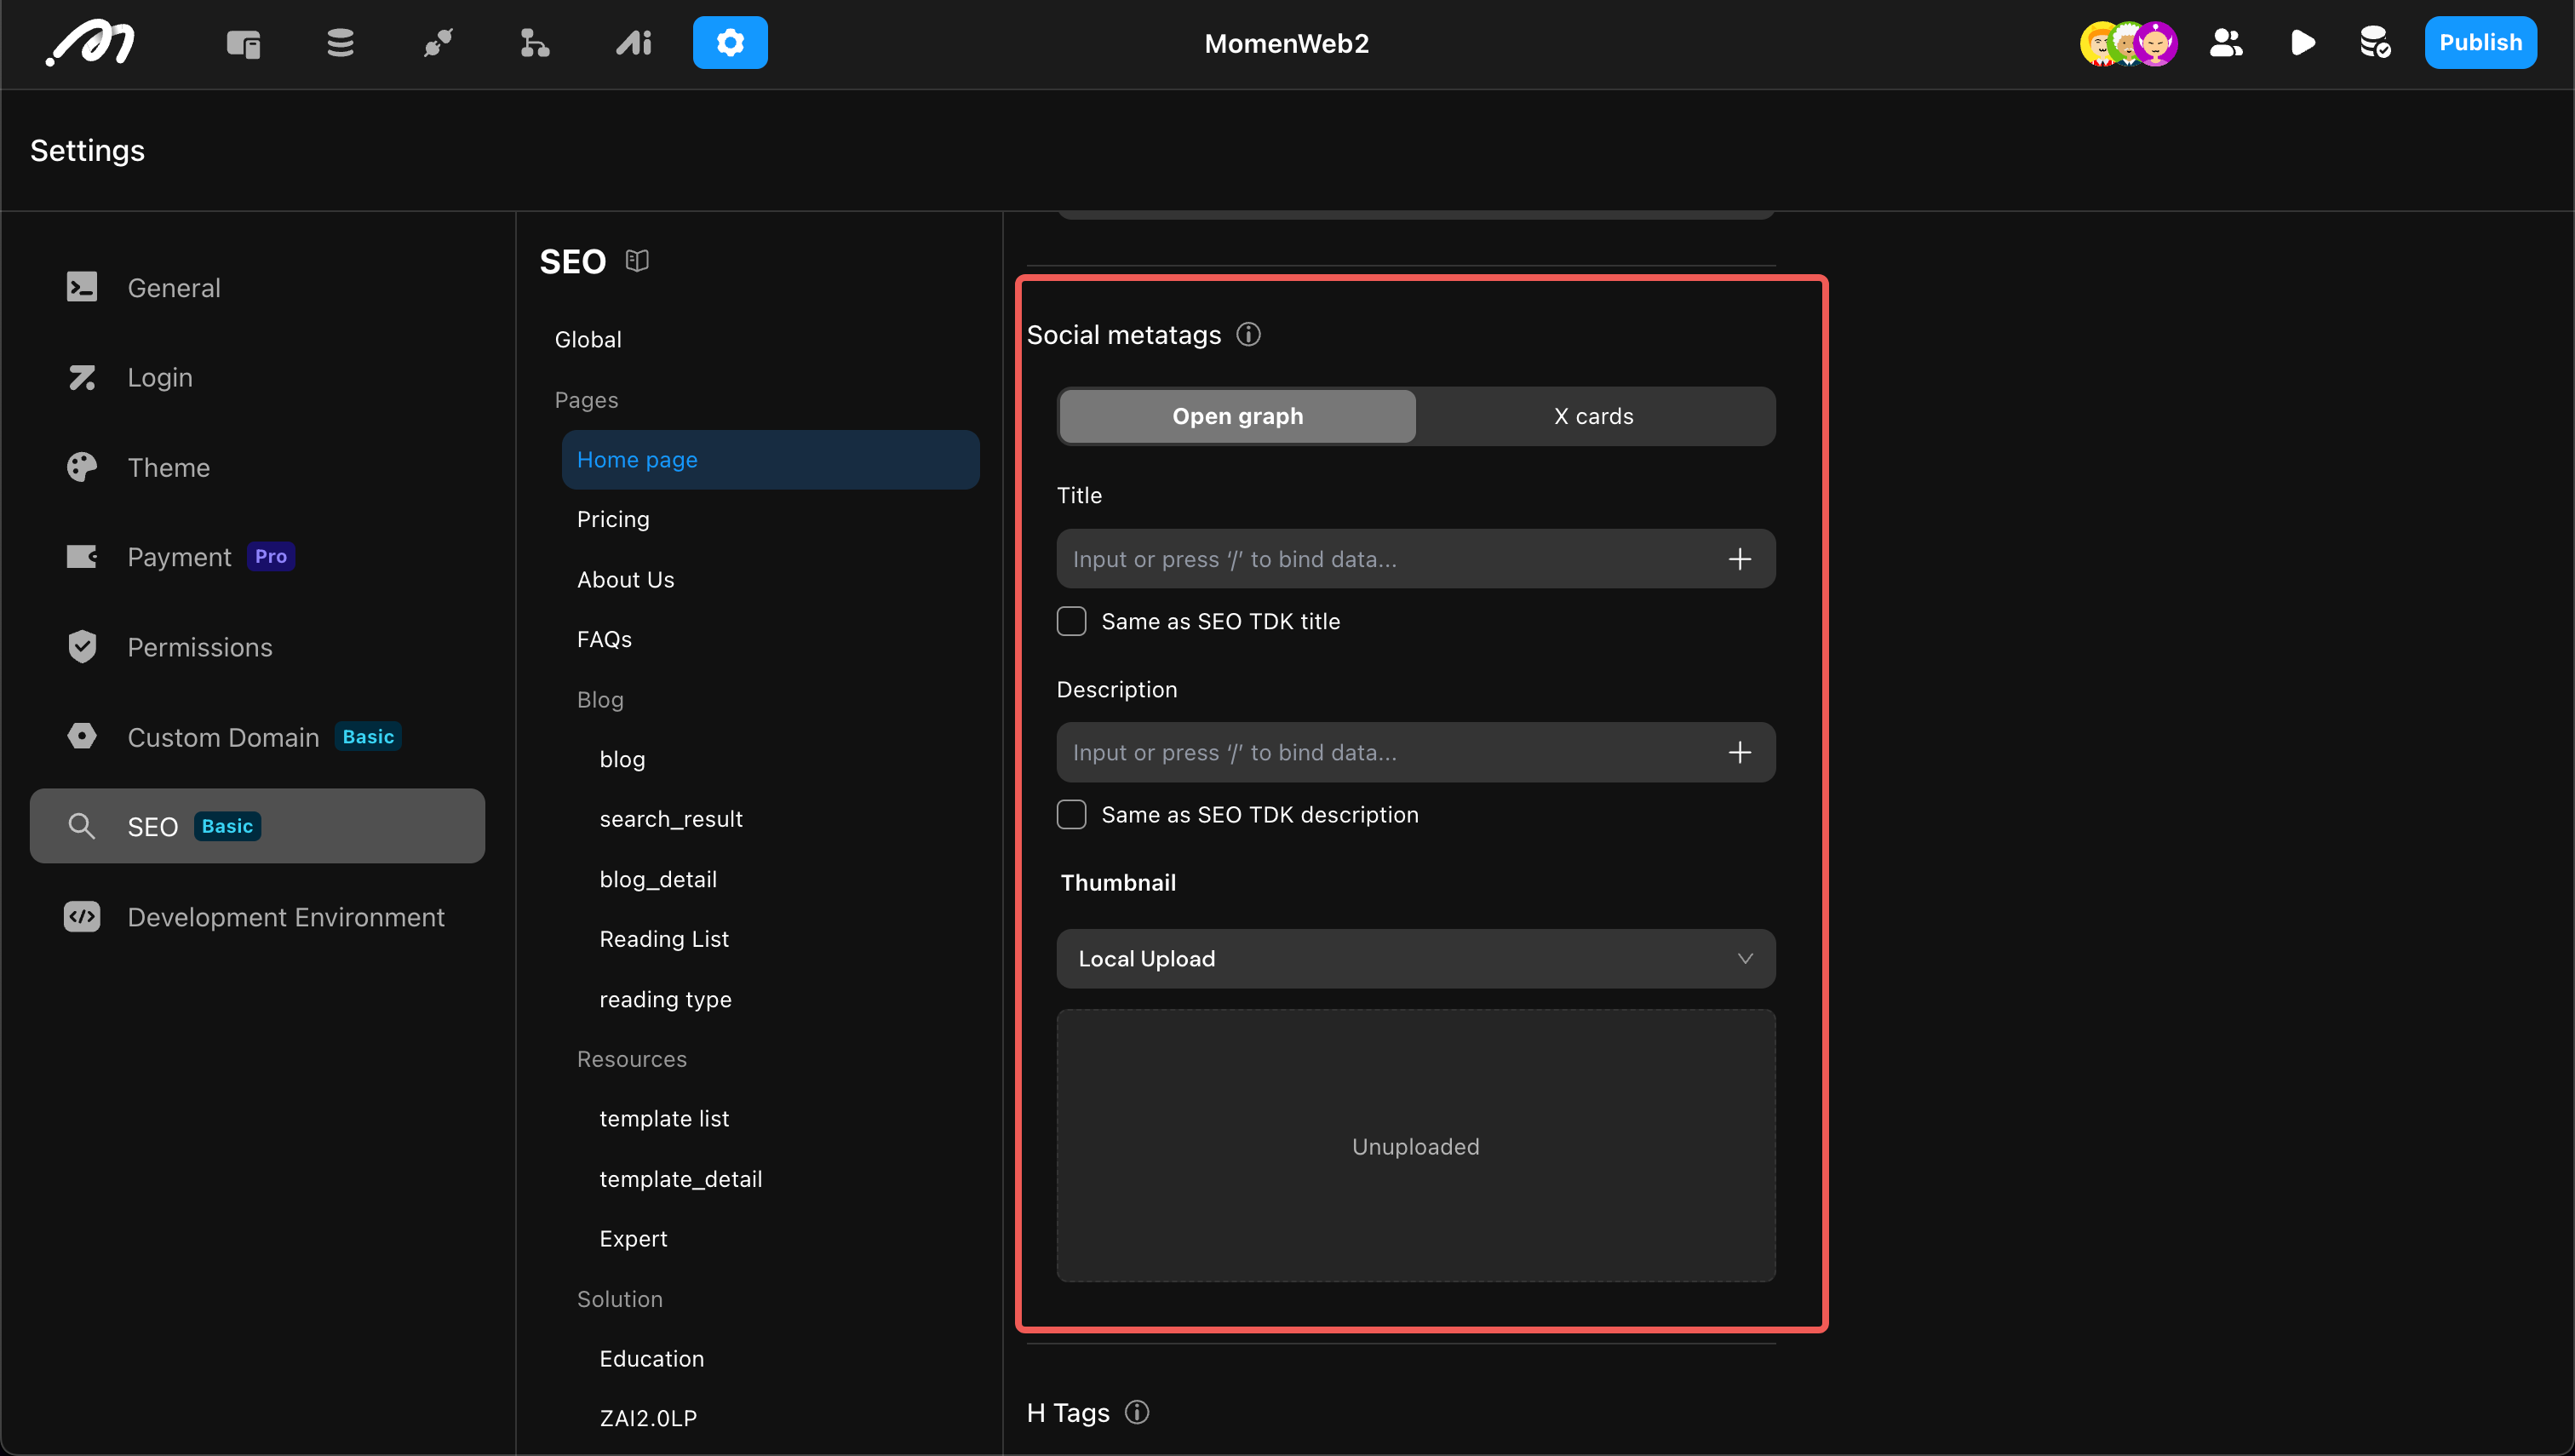
Social Media Content
Configure how your page appears when shared on social media. Momen supports:
- Open Graph: For most platforms.
- X Cards: For the X platform.
Both can be enabled.
H Tags
H tags define page structure and hierarchy for search engines.
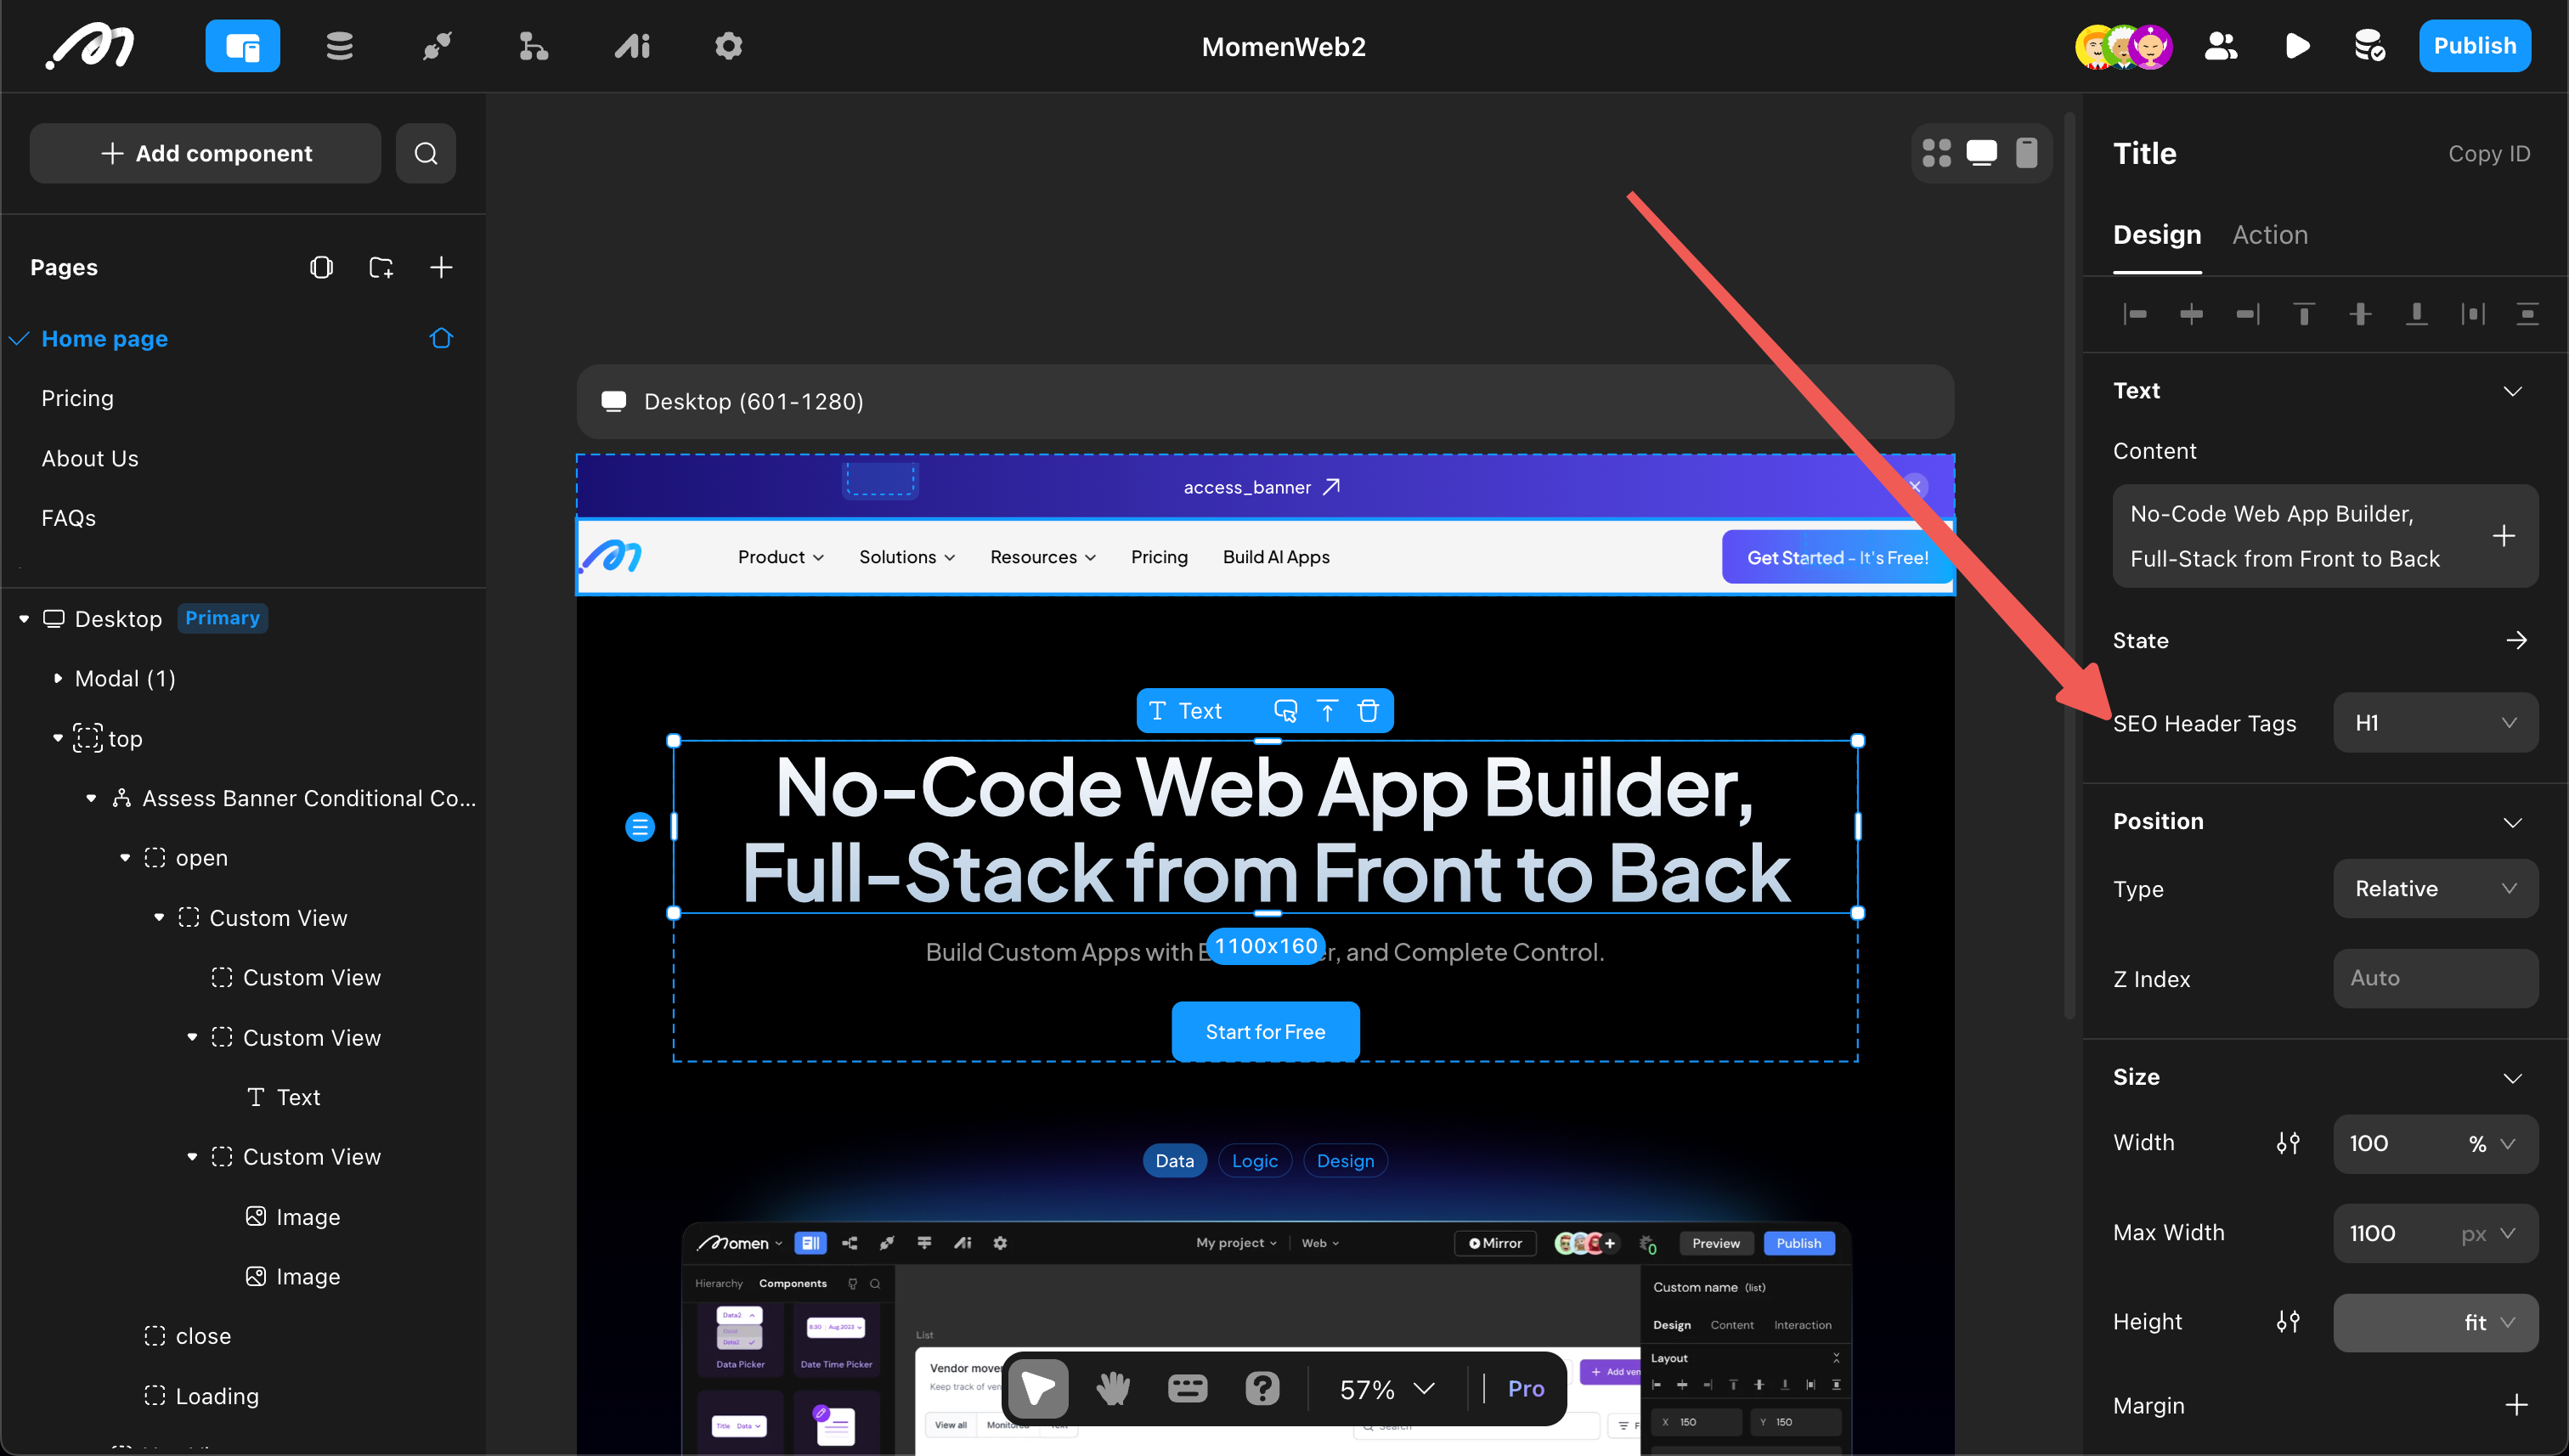
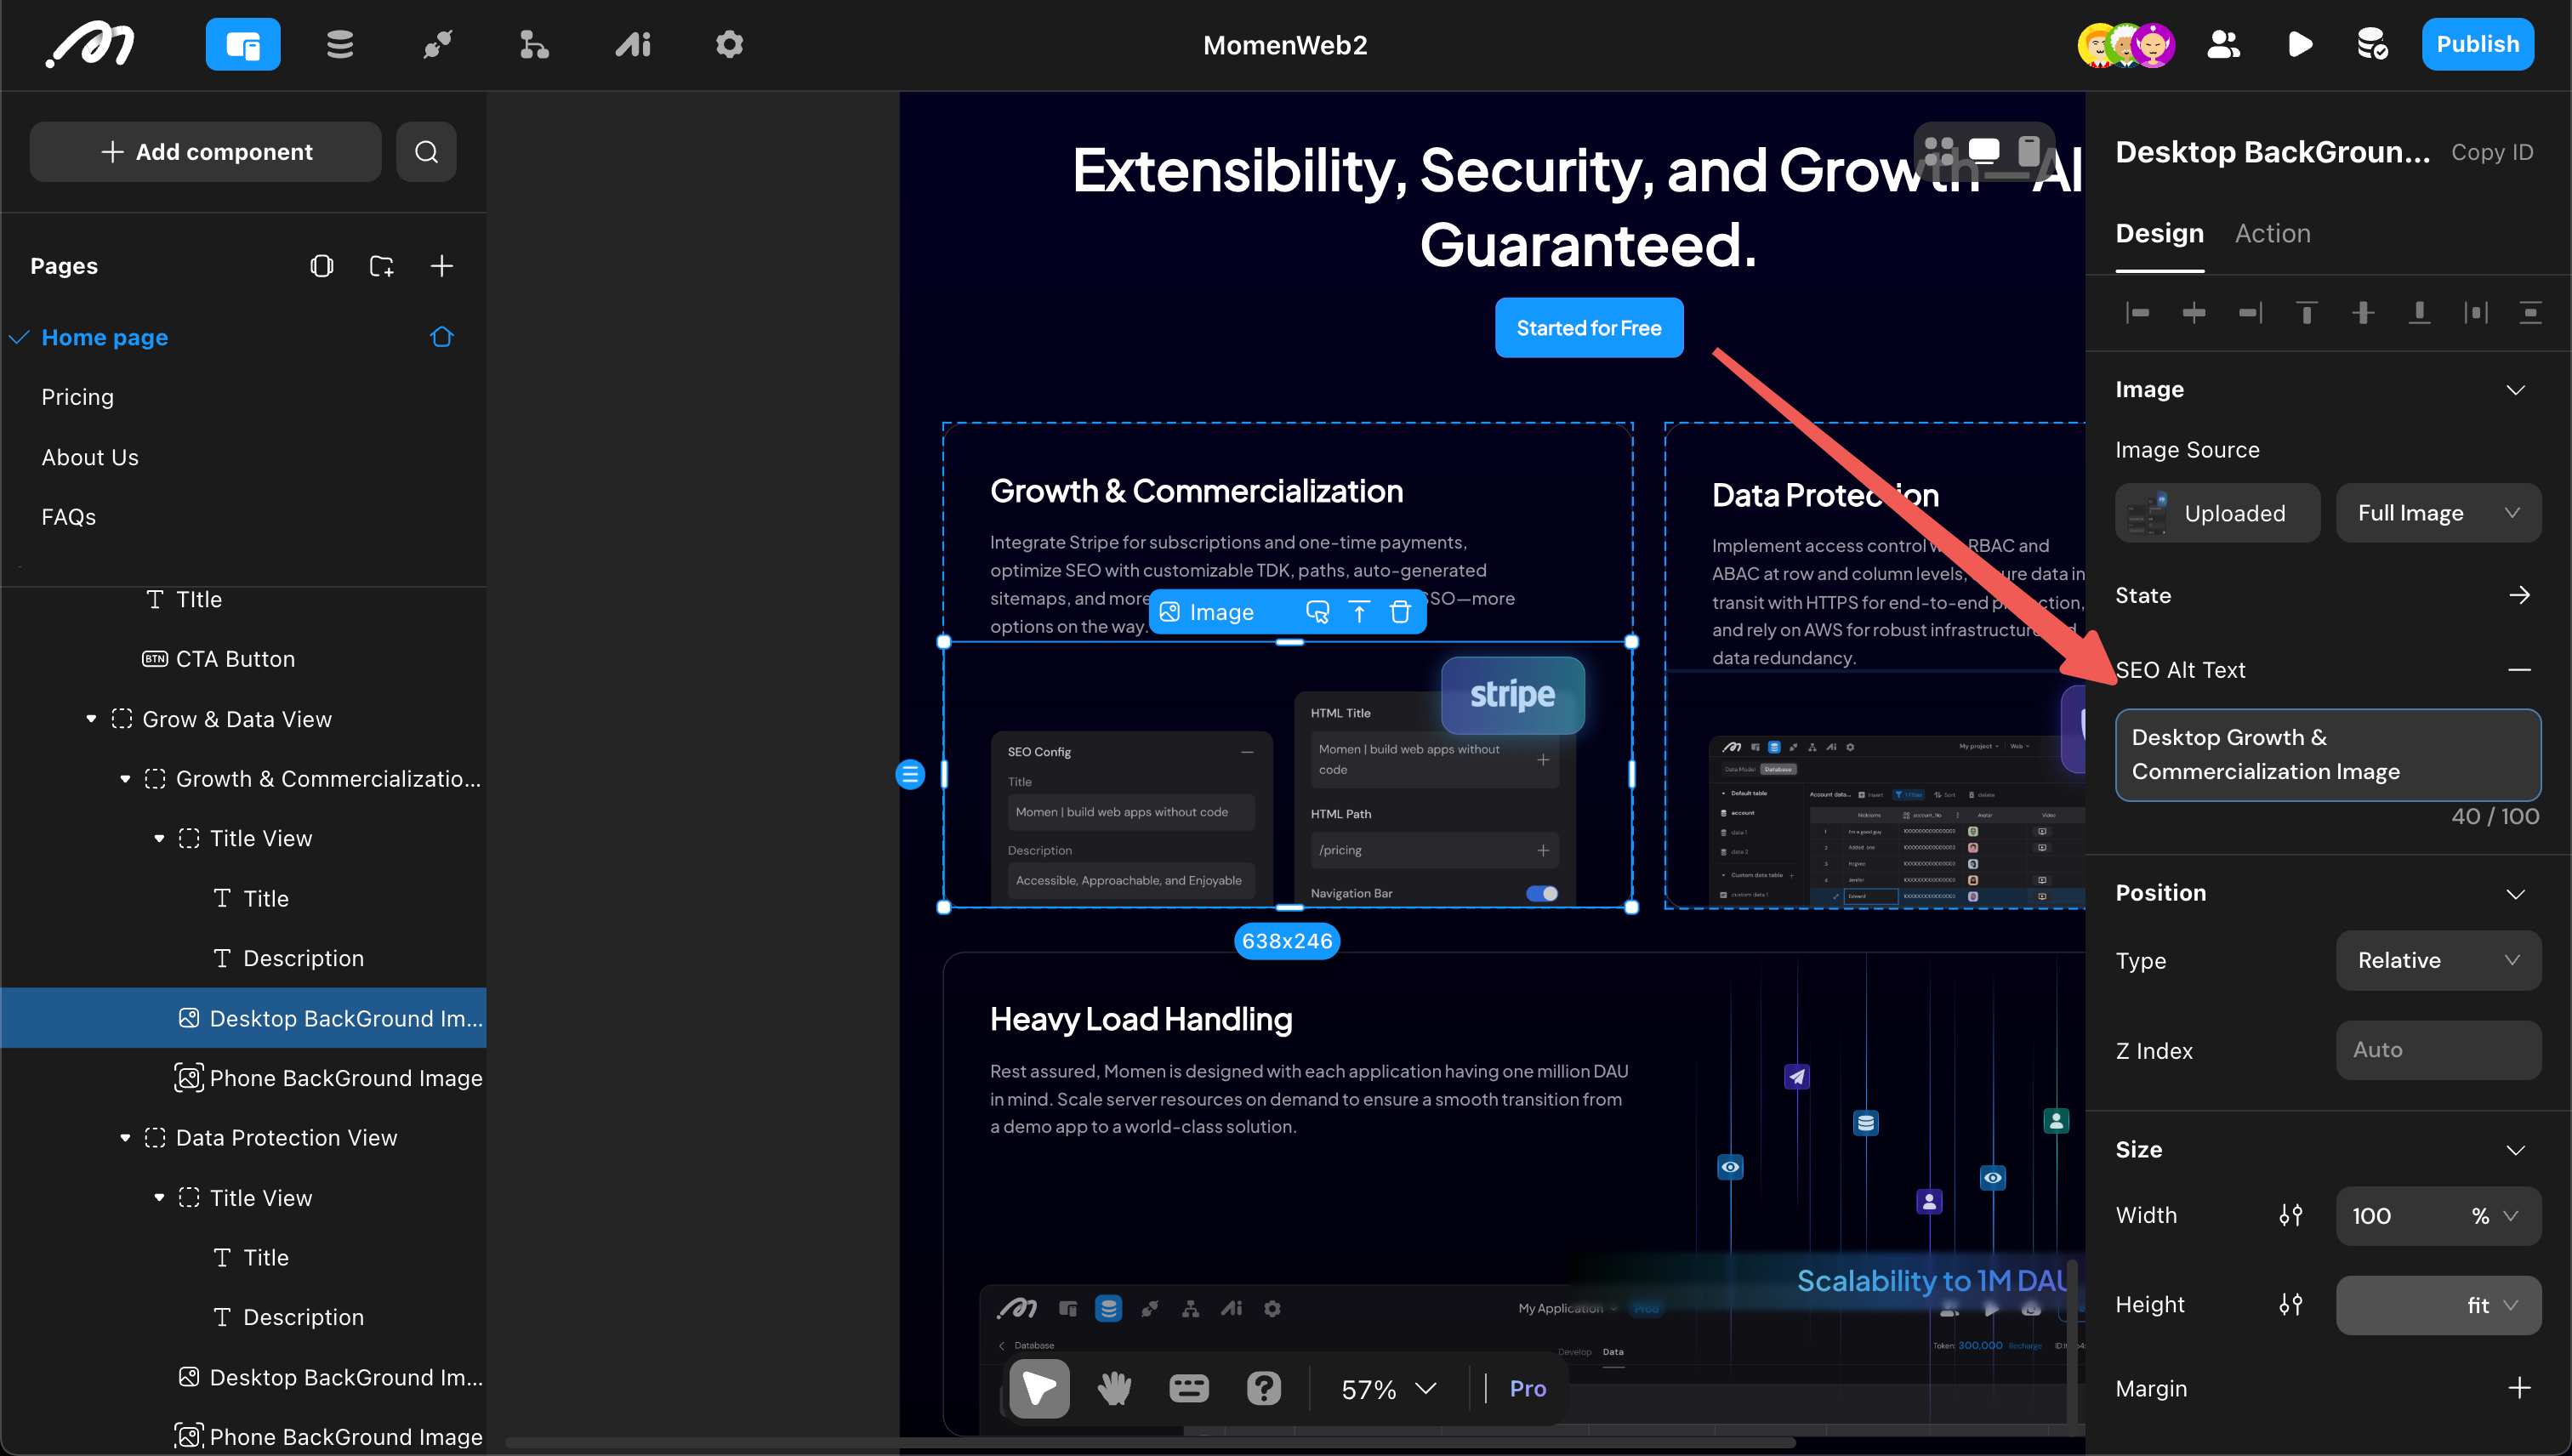
Image ALT Attributes
The alt attribute helps search engines understand images.
Publishing
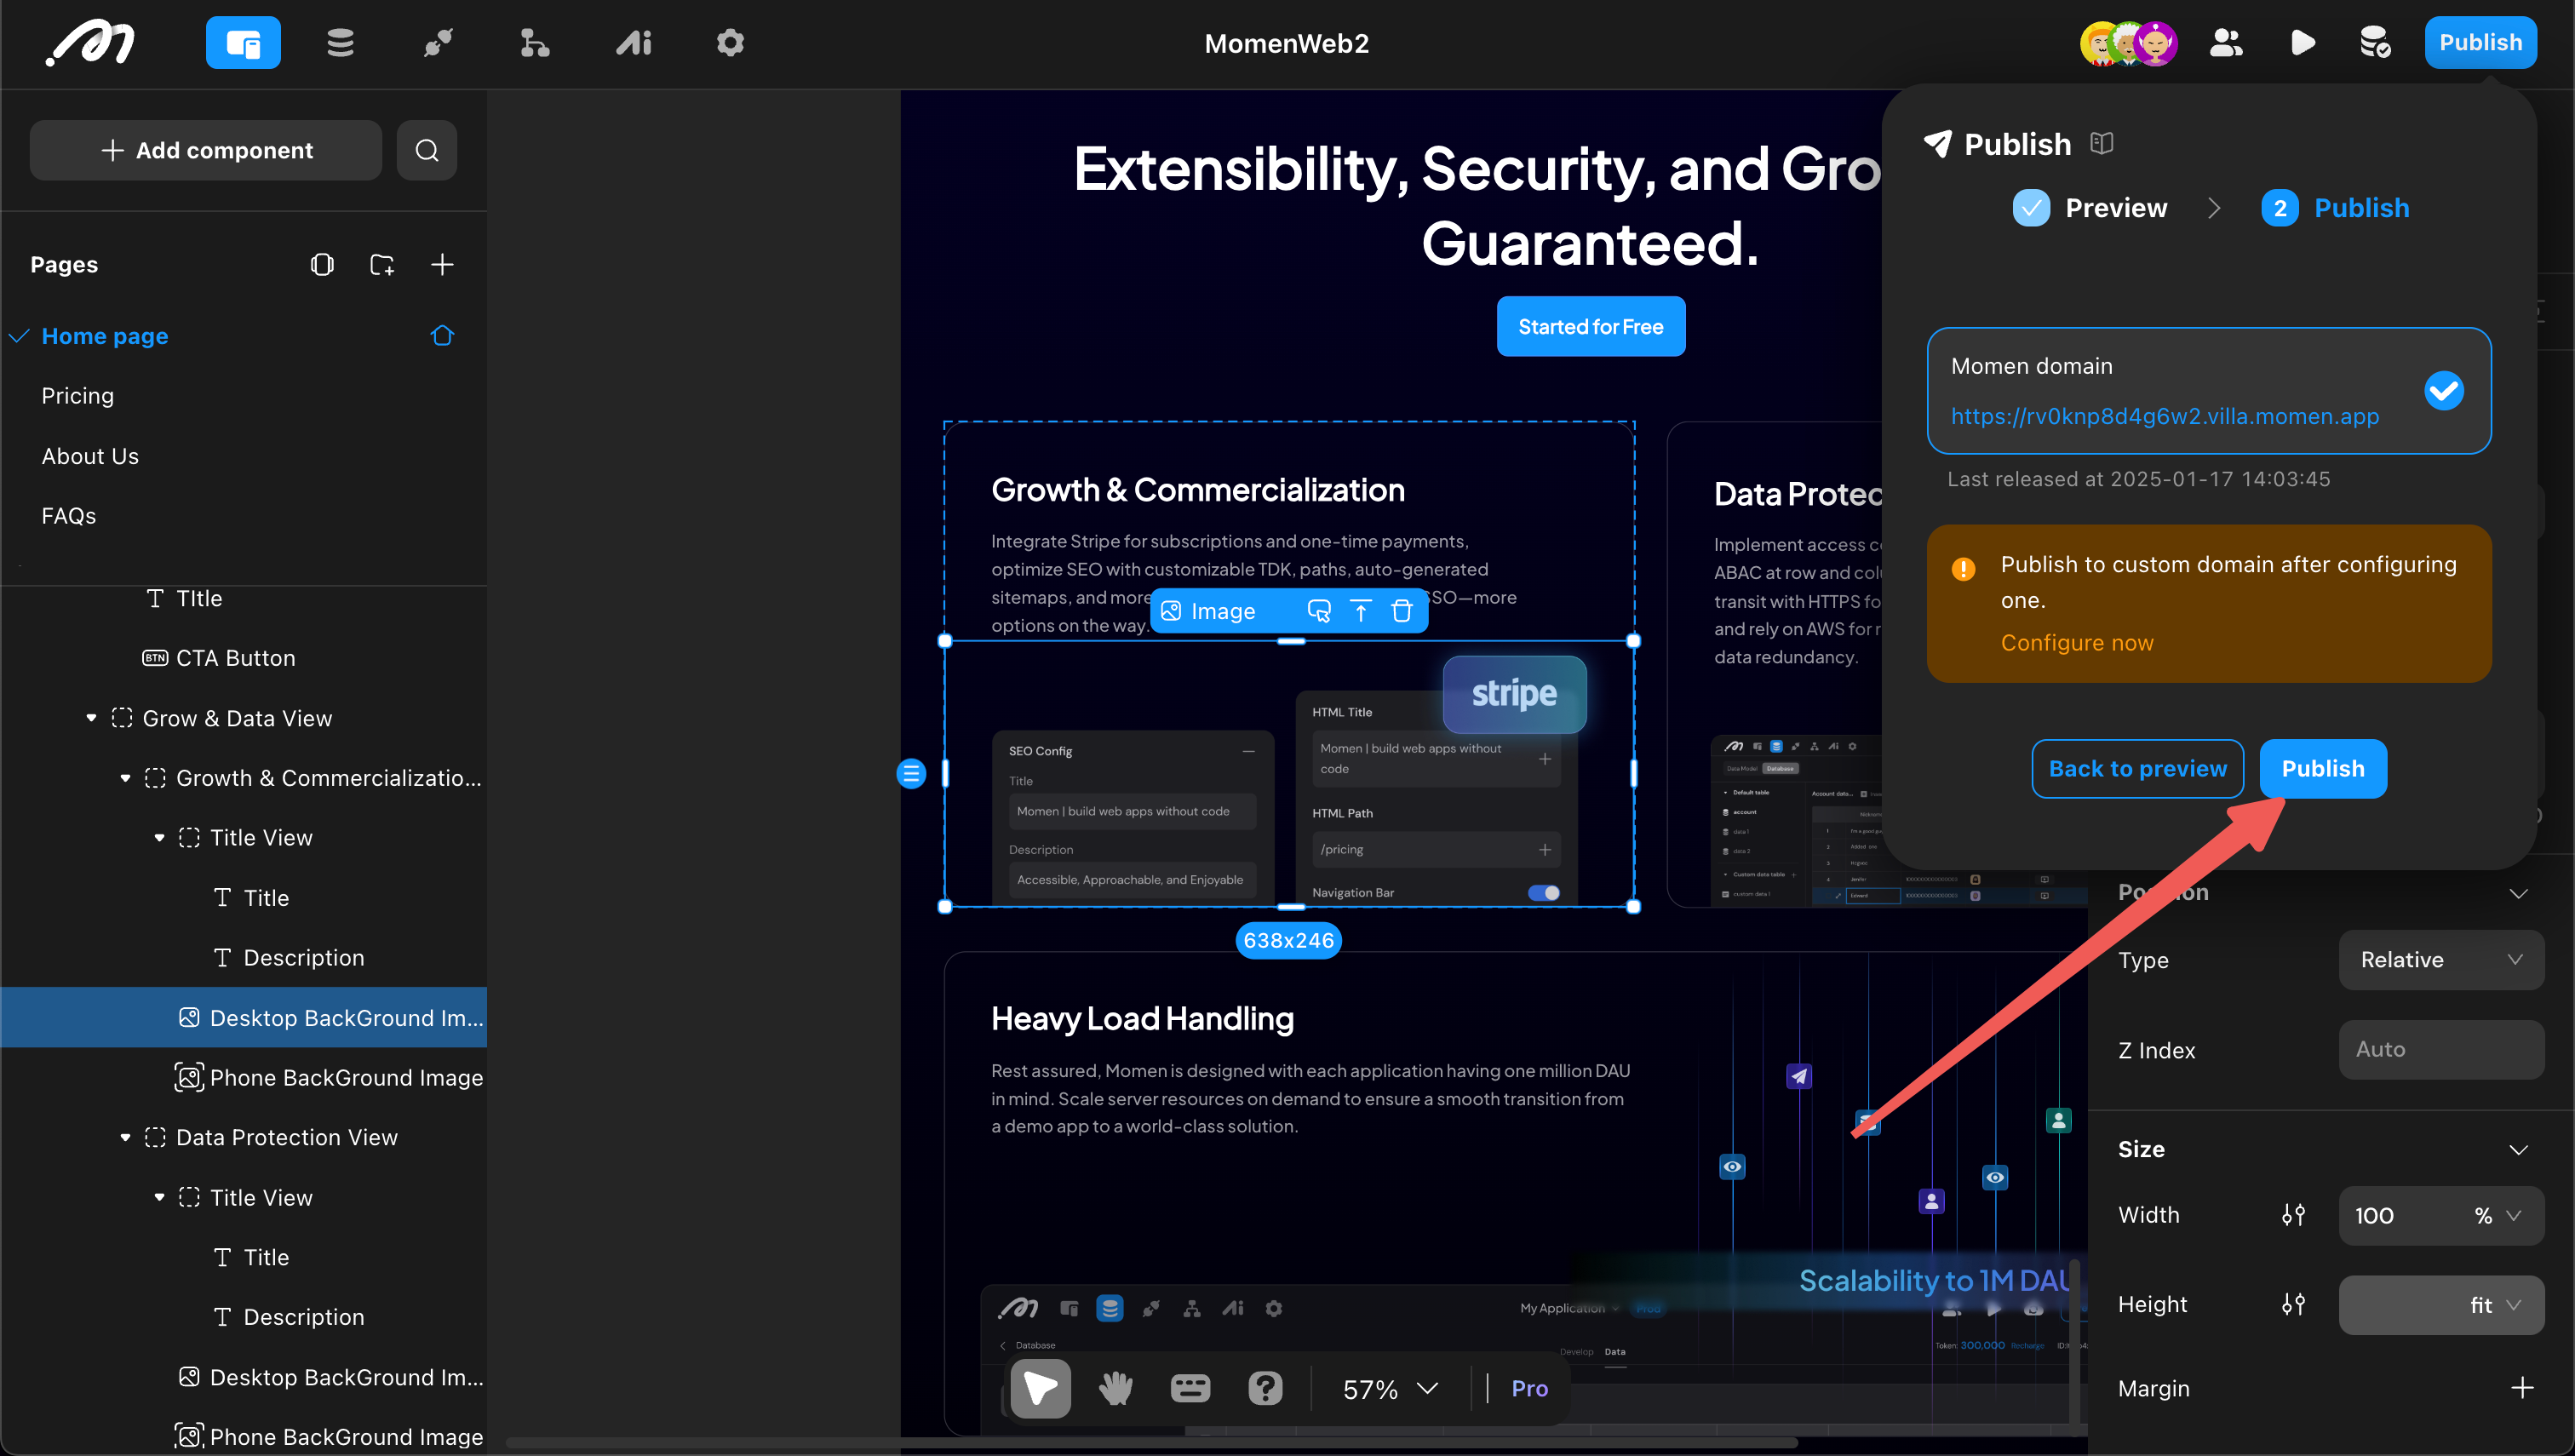
All SEO configurations take effect only after the project is published.
Feature Availability
SEO features depend on the rendering mode supported by your plan:
| Plan | Supported Rendering Patterns |
|---|---|
| Free plan | CSR |
| Basic Plan | CSR, SSG |
| Pro Plan | CSR, SSG |
| Single Tenant Server | CSR, SSR, SSG |
In CSR mode, page-level configurations (TDK, social media, etc.) are not available.
Platform Verification Files
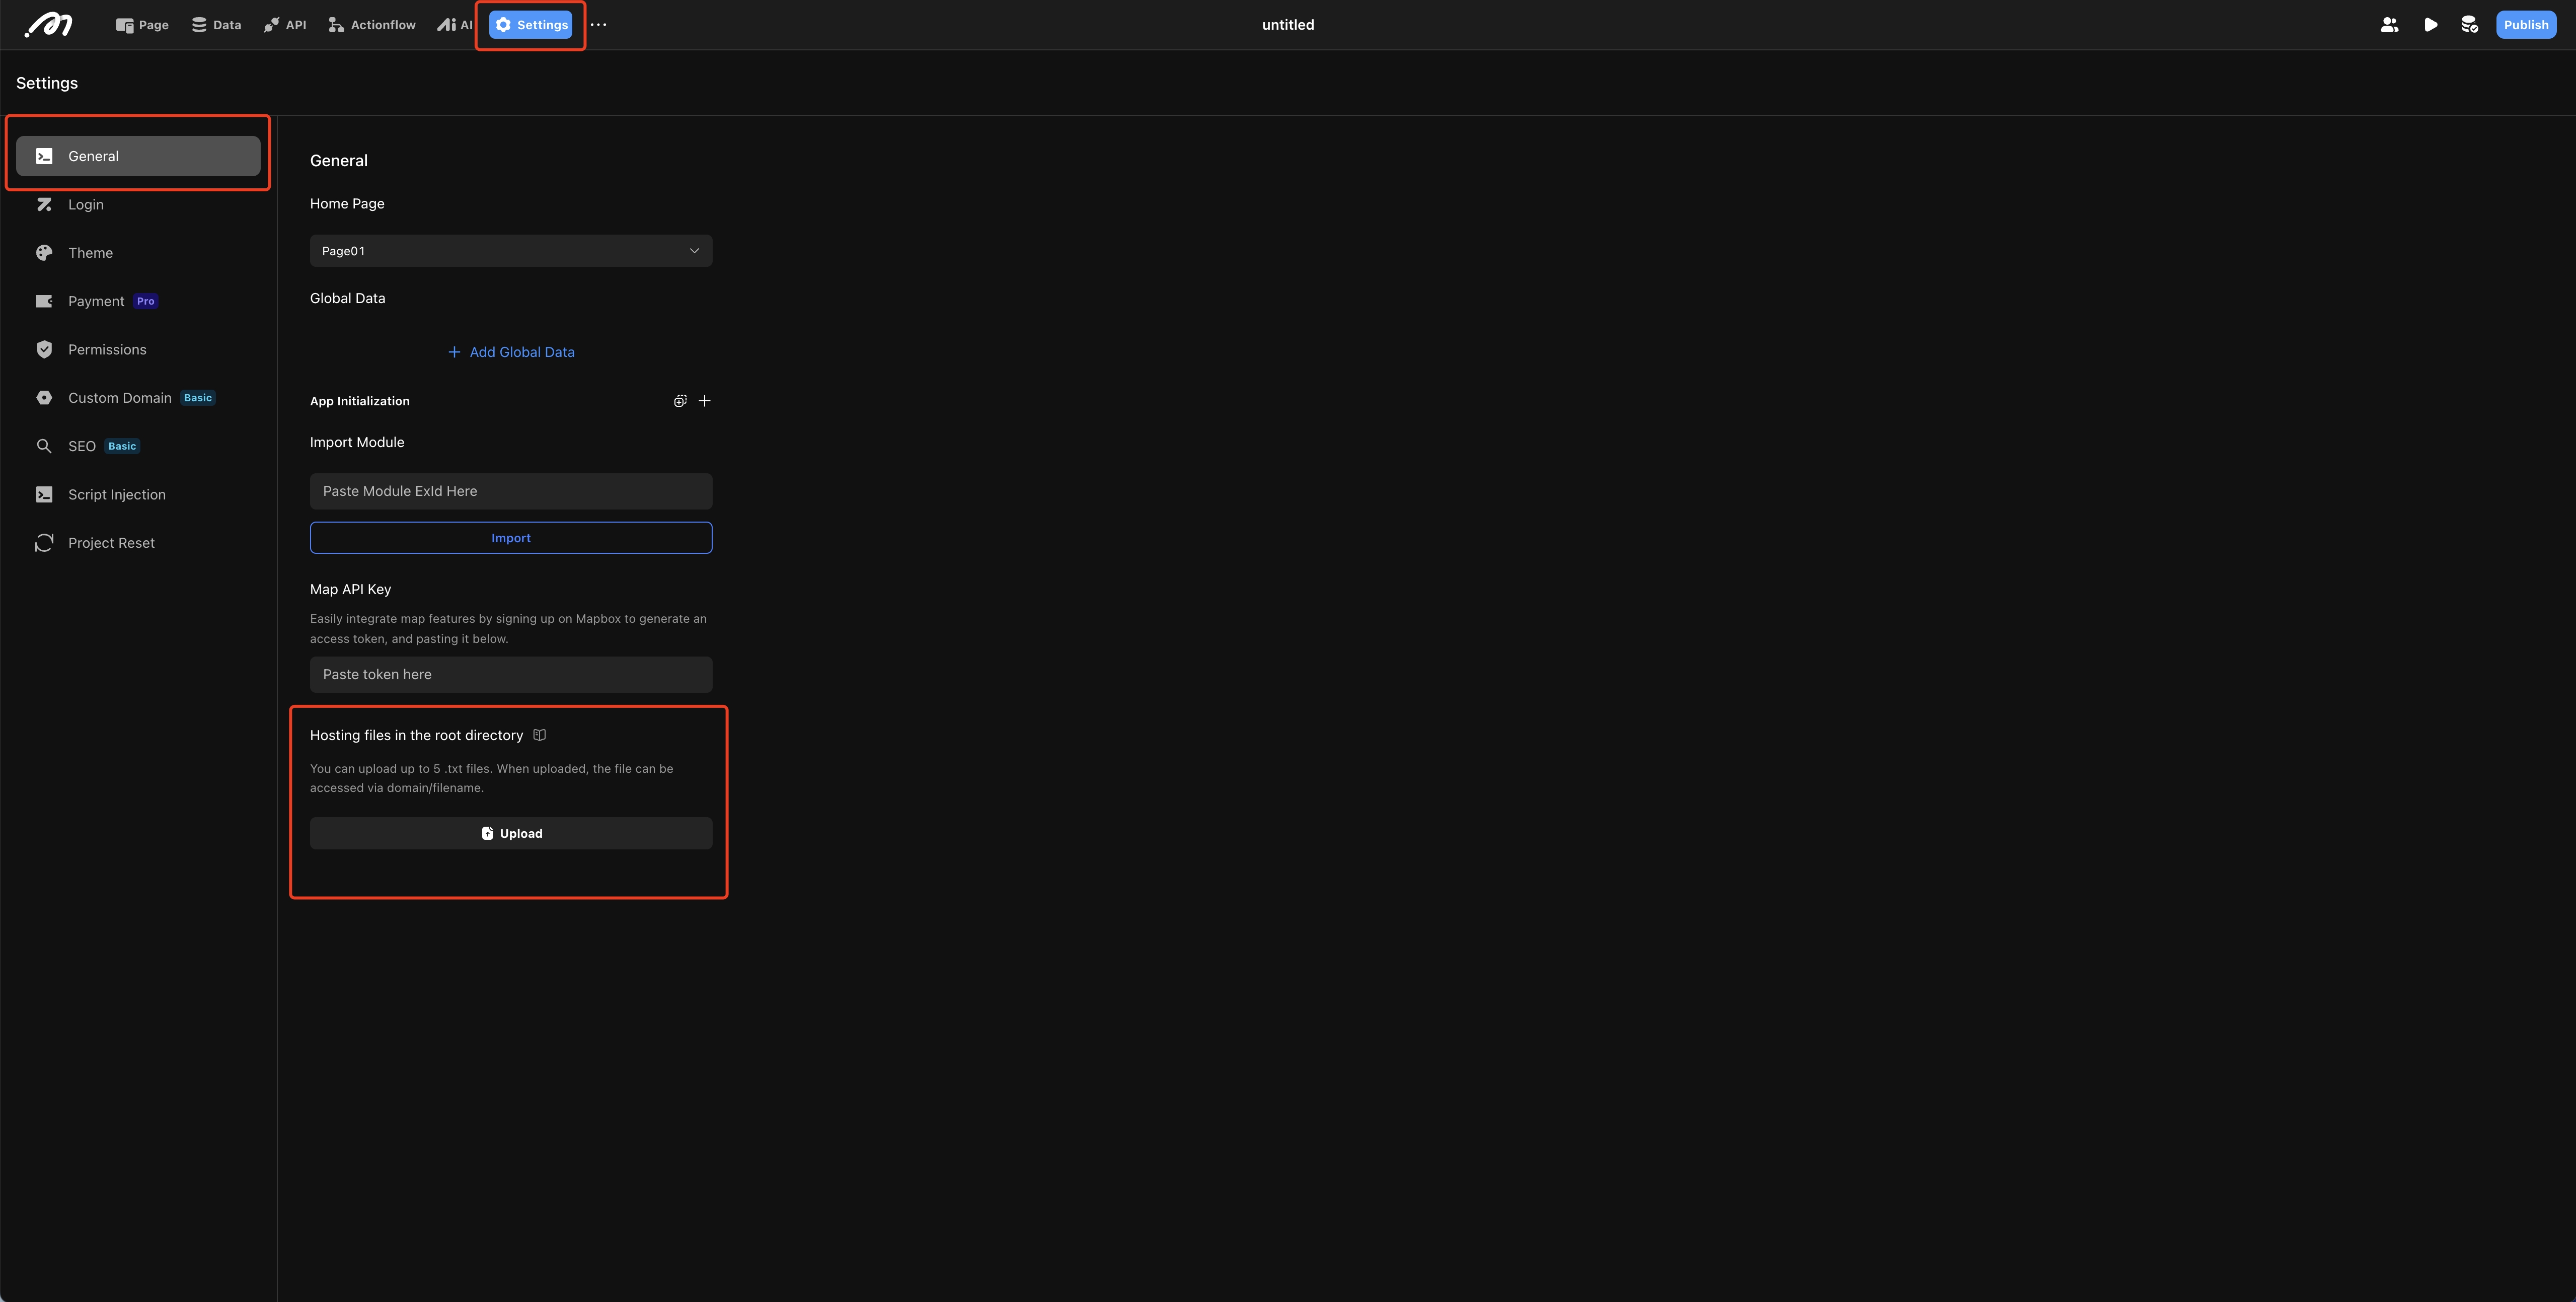
Some services (such as Google Search Console or website hosting providers) require you to upload a specific .txt file to your website’s root directory to verify domain or site ownership.
Upload Steps
Obtain the Verification File
Download the verification file from the third-party platform (typically a .txt file with a unique token).
Upload to Momen Root Directory
Go to Project Settings → Global → Upload File to Root Directory and upload the .txt file.
Republish the Project
After uploading, return to the editor, click Preview, and publish the project again so the file is deployed to the live root directory.
Confirm on the Third-Party Platform
Return to the third-party platform and click Verify.
Upload Notes
- The verification file size must not exceed 1 KB.
- Only
.txtformat is supported. - You can upload up to 5 verification files. Typically, these files are used for one-time verification; after verification, you may delete the uploaded file.
- For newly created projects, upload the verification file after the project has been published at least once.