Nested List Seat Booking
Project Access Link
https://editor.momen.app/tool/dK5wjNzNOPr/WEB?code=J7UZZat2LVnrK&ref=0562398
Introduction
- Goal: Implement a conflict-resistant seat booking feature using nested lists and unique constraints.
- Applicable Scenario: Cinema seat selection, stadium ticketing, restaurant reservations, or any grid-based resource scheduling scenario.
- Core Logic: Render a 2D seat layout using a “List in List” structure (Rows -> Seats). Leverage Database Composite Unique Constraints to guarantee absolute data consistency and prevent duplicate bookings at the database level.
Steps
Data Storage
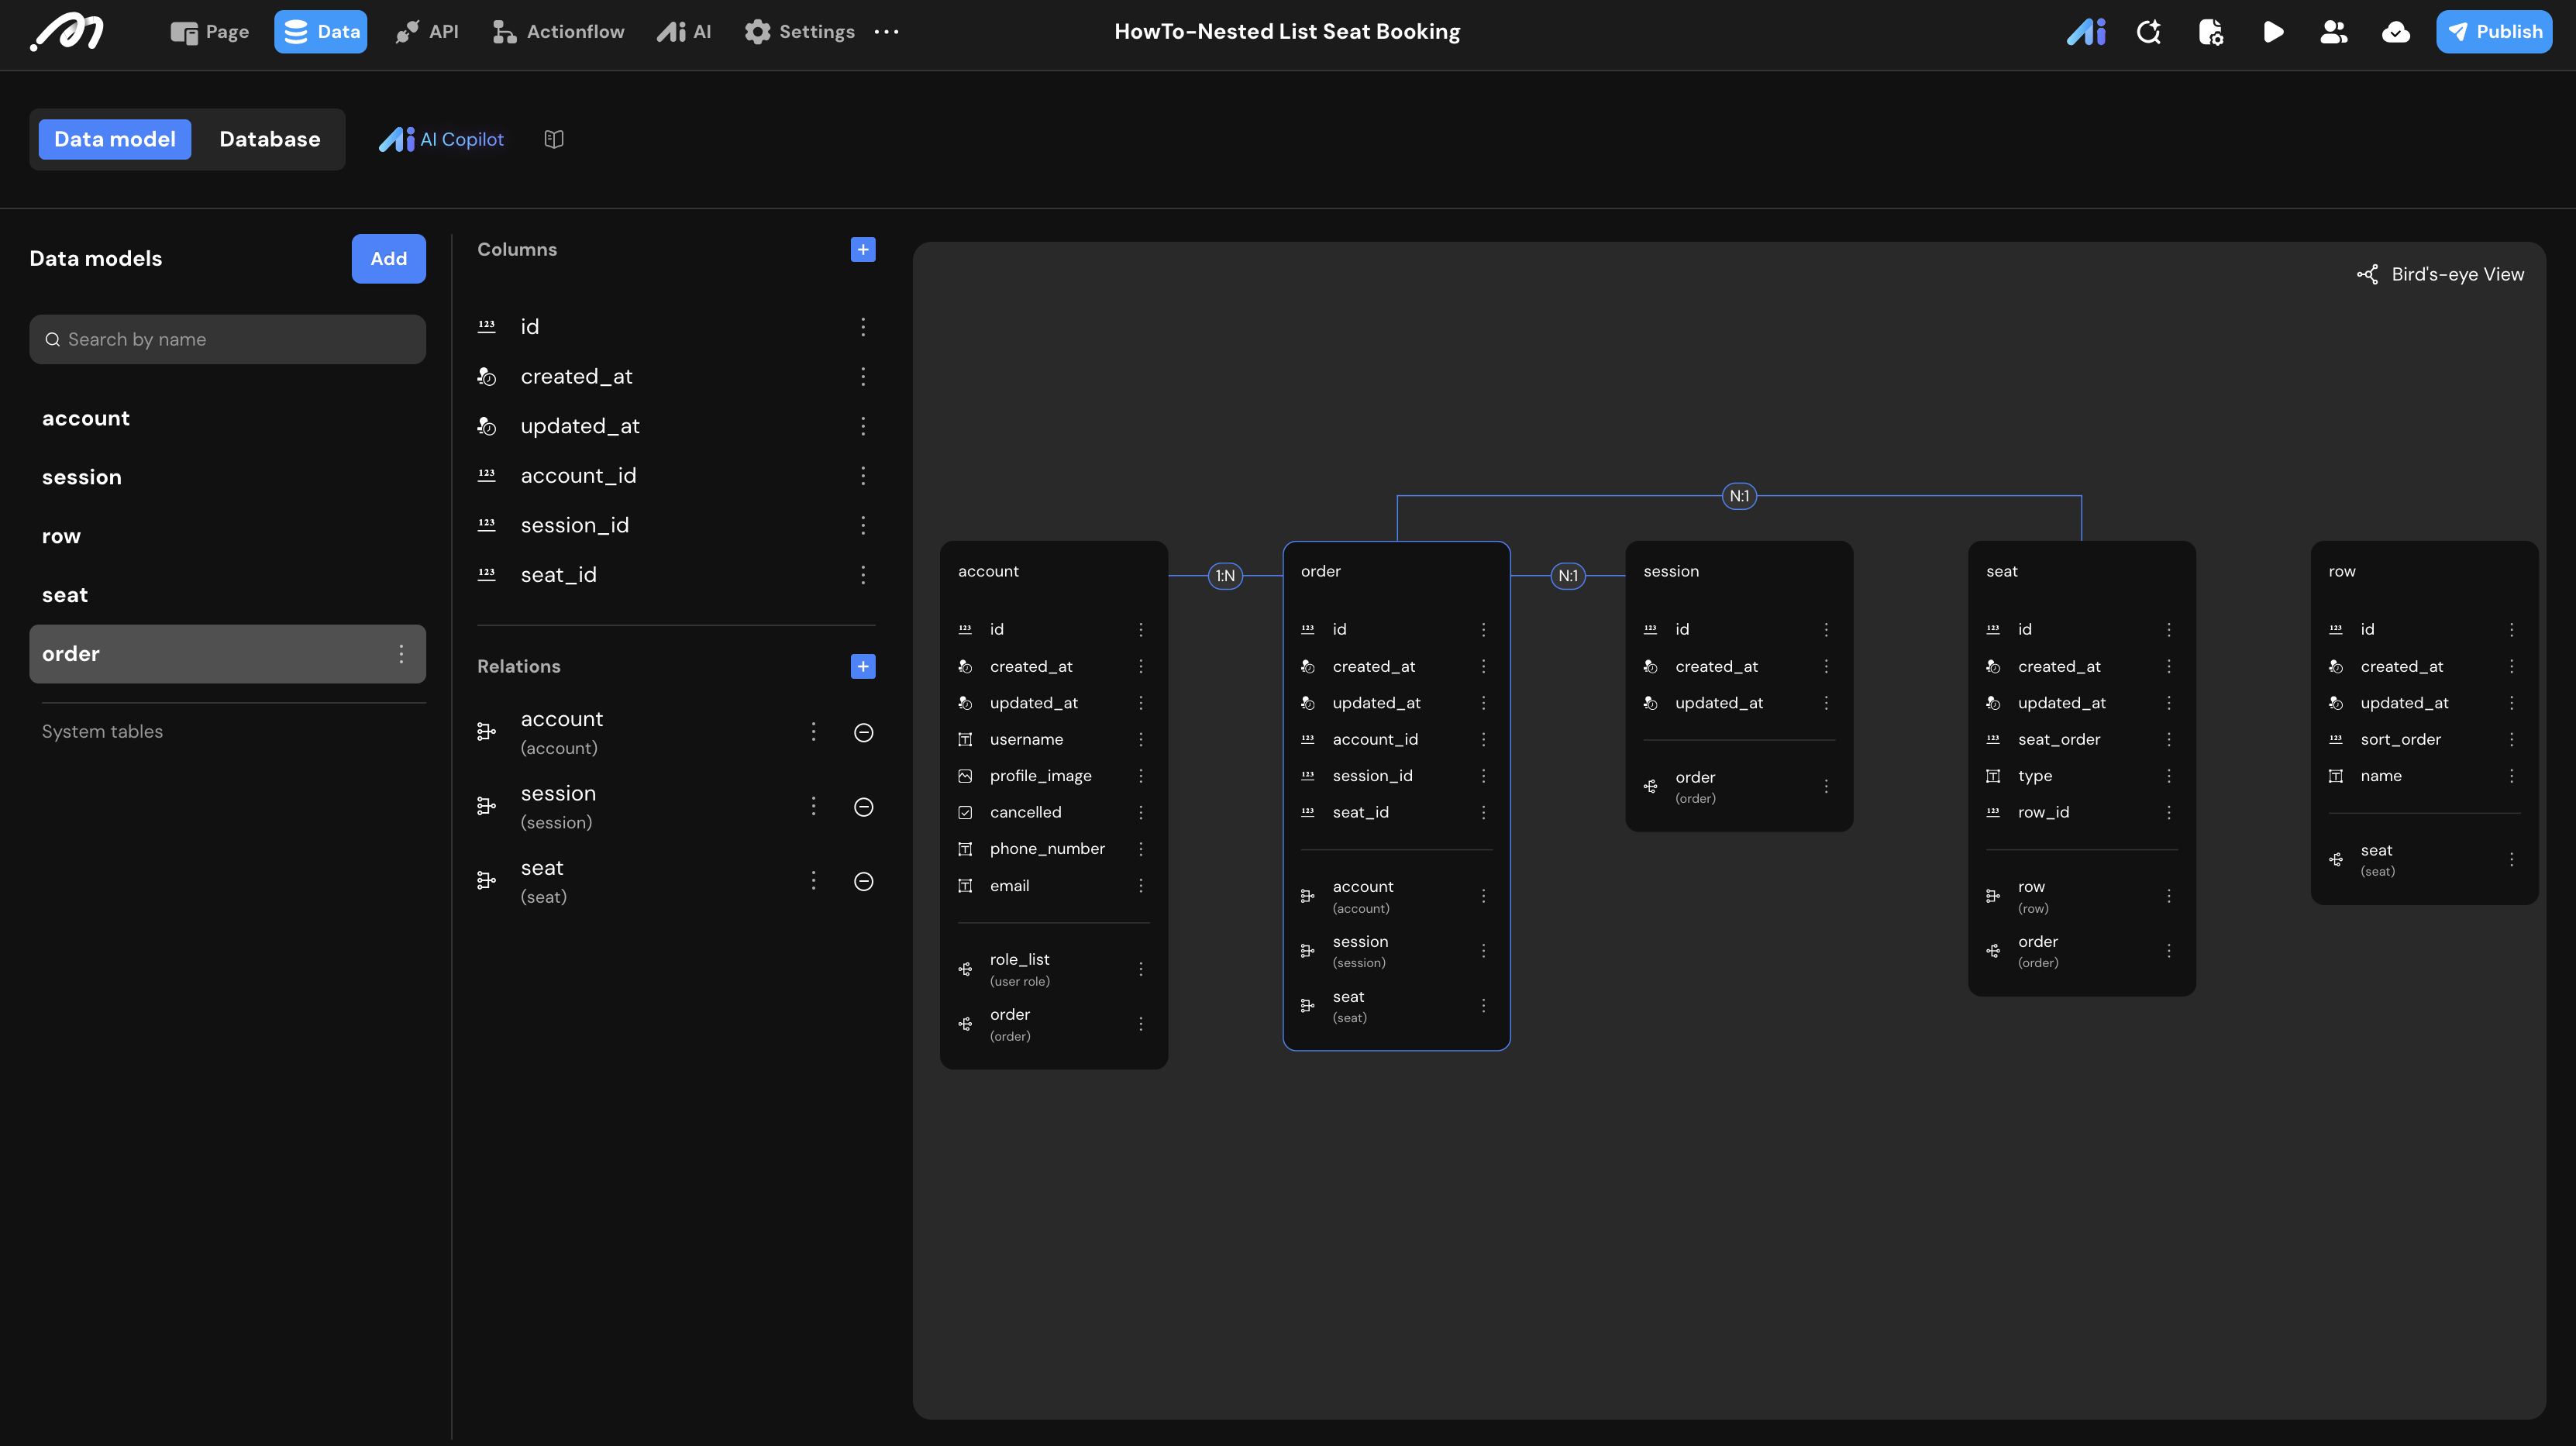
To build this architecture, we need five distinct tables to manage users, sessions, physical layout, and transaction records.
Data Model
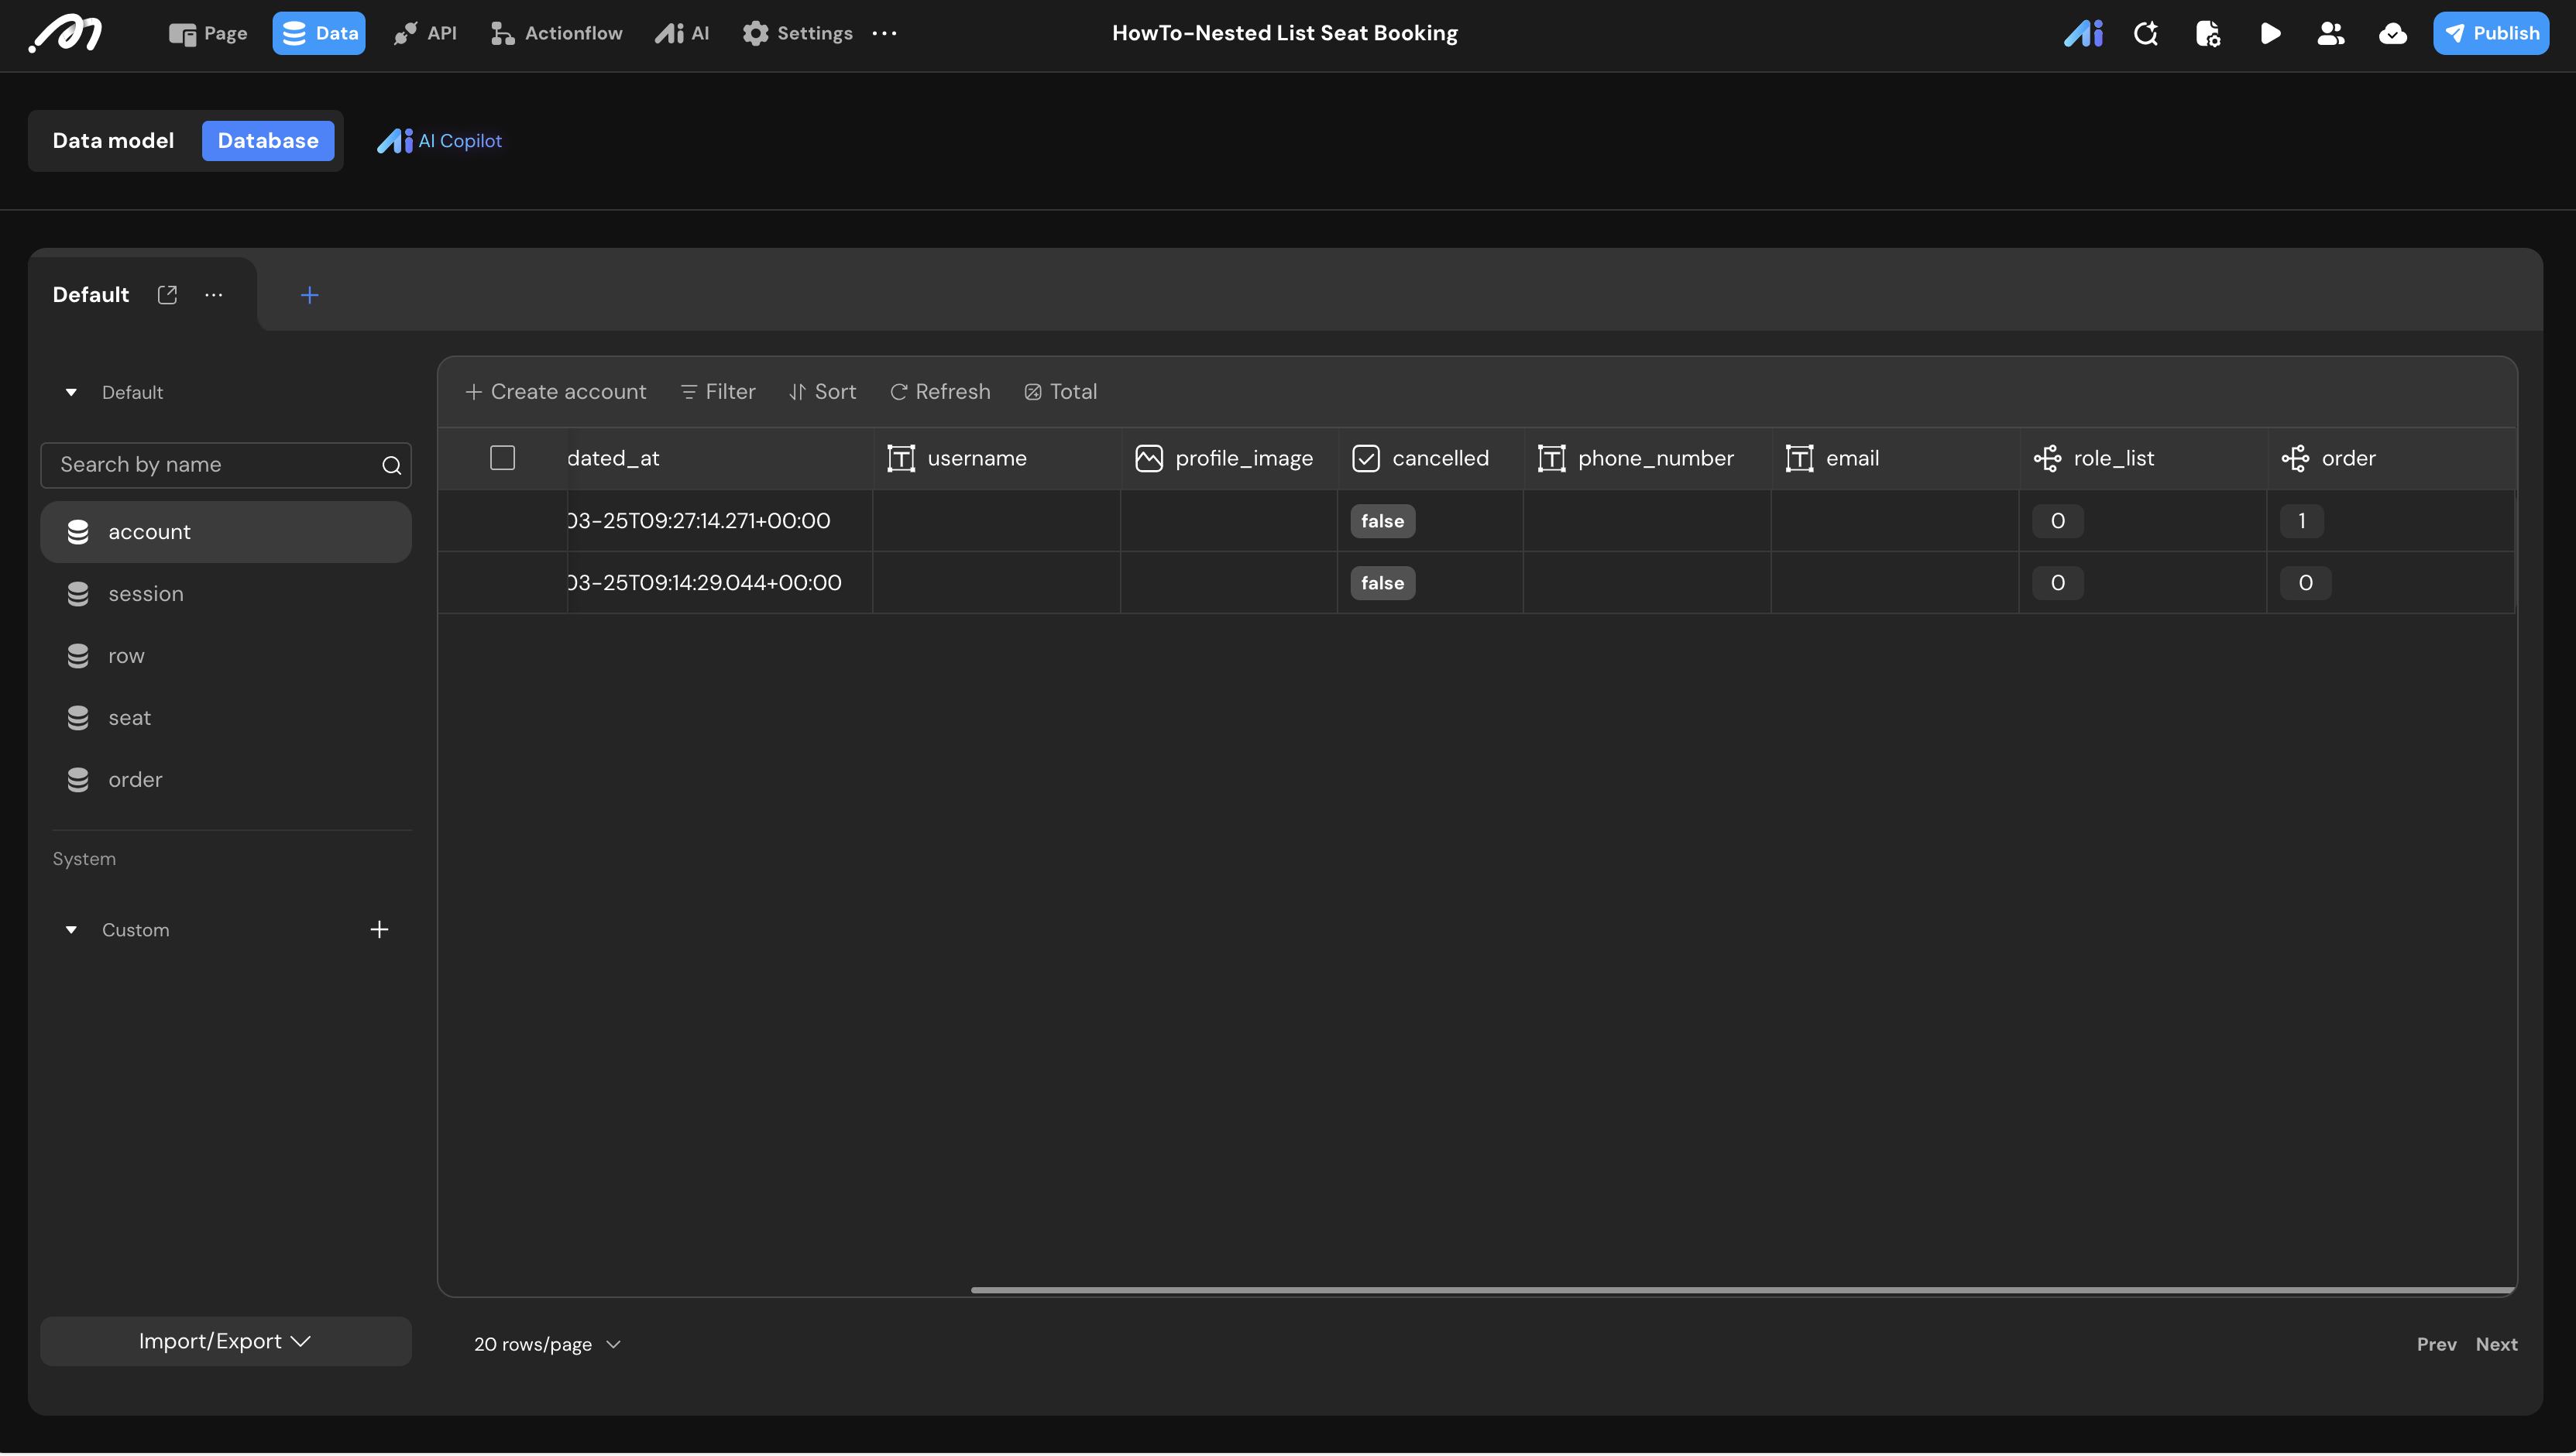
1. Table: account System-generated table used to track order ownership.
| Field Name | Type | Note |
|---|---|---|
id | Bigint | Auto-generated, unique user identifier |
2. Table: session Used to enable resource reuse across different times or events.
| Field Name | Type | Note |
|---|---|---|
id | Bigint | Auto-generated, distinguishes different events/screenings |
3. Table: row The data source for the outer list, defining vertical tiers.
| Field Name | Type | Note |
|---|---|---|
name | Text | e.g., “Row B”, “Row 1” |
sort_order | Bigint | Determines the vertical display order on the screen |
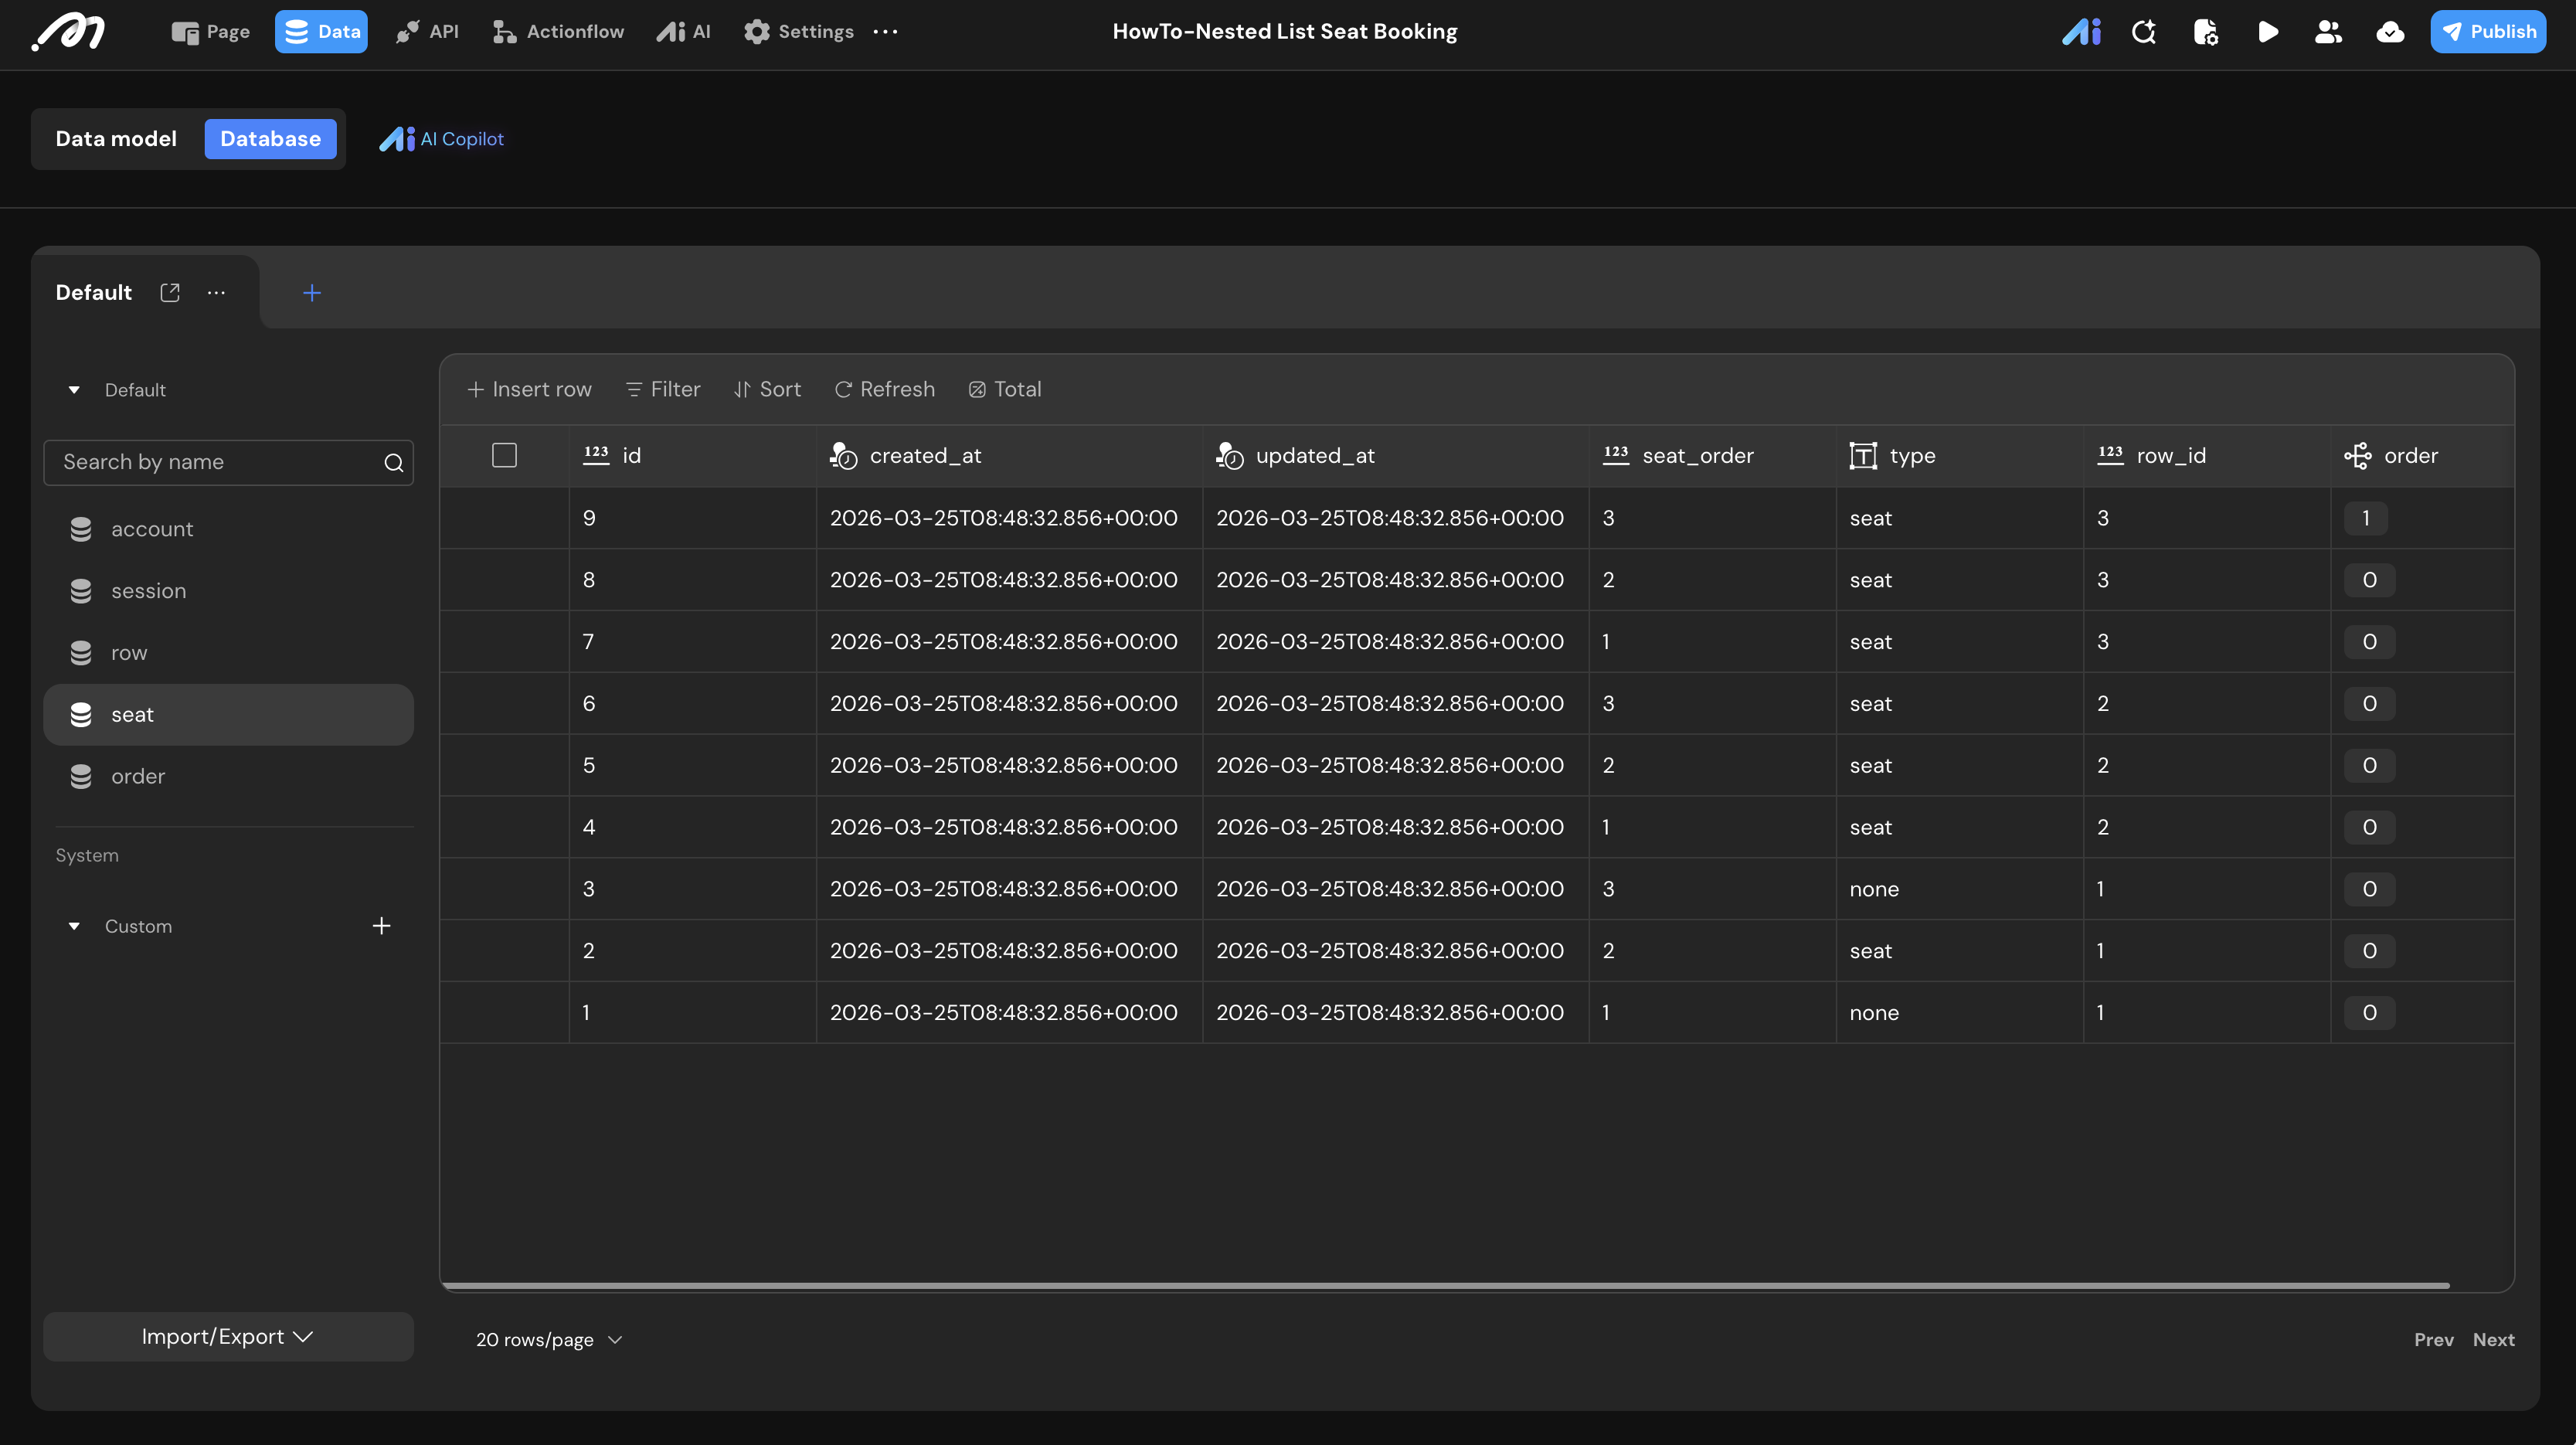
4. Table: seat The data source for the inner list, defining physical locations.
| Field Name | Type | Note |
|---|---|---|
seat_order | Bigint | Determines the horizontal order within a row |
type | Text | seat (Valid seat) or none (Aisle/Gap) |
row_id | Bigint | Relation: Many-to-One to row |
5. Table: order The core transaction table. Uses unique constraints to prevent booking conflicts.
| Field Name | Type | Note |
|---|---|---|
account_id | Bigint | Relation: Many-to-One to account. Records the buyer. |
session_id | Bigint | Relation: Many-to-One to session. |
seat_id | Bigint | Relation: Many-to-One to seat. |
Configuring Unique Constraints
To prevent data duplication and physical overlap, we configure two constraints:
- Seat Physics Constraint: In the
seattable, add a Composite Unique Constraint nameduk_row_seatusing the fieldsrow_idandseat_order. This ensures two seats cannot occupy the same physical coordinates.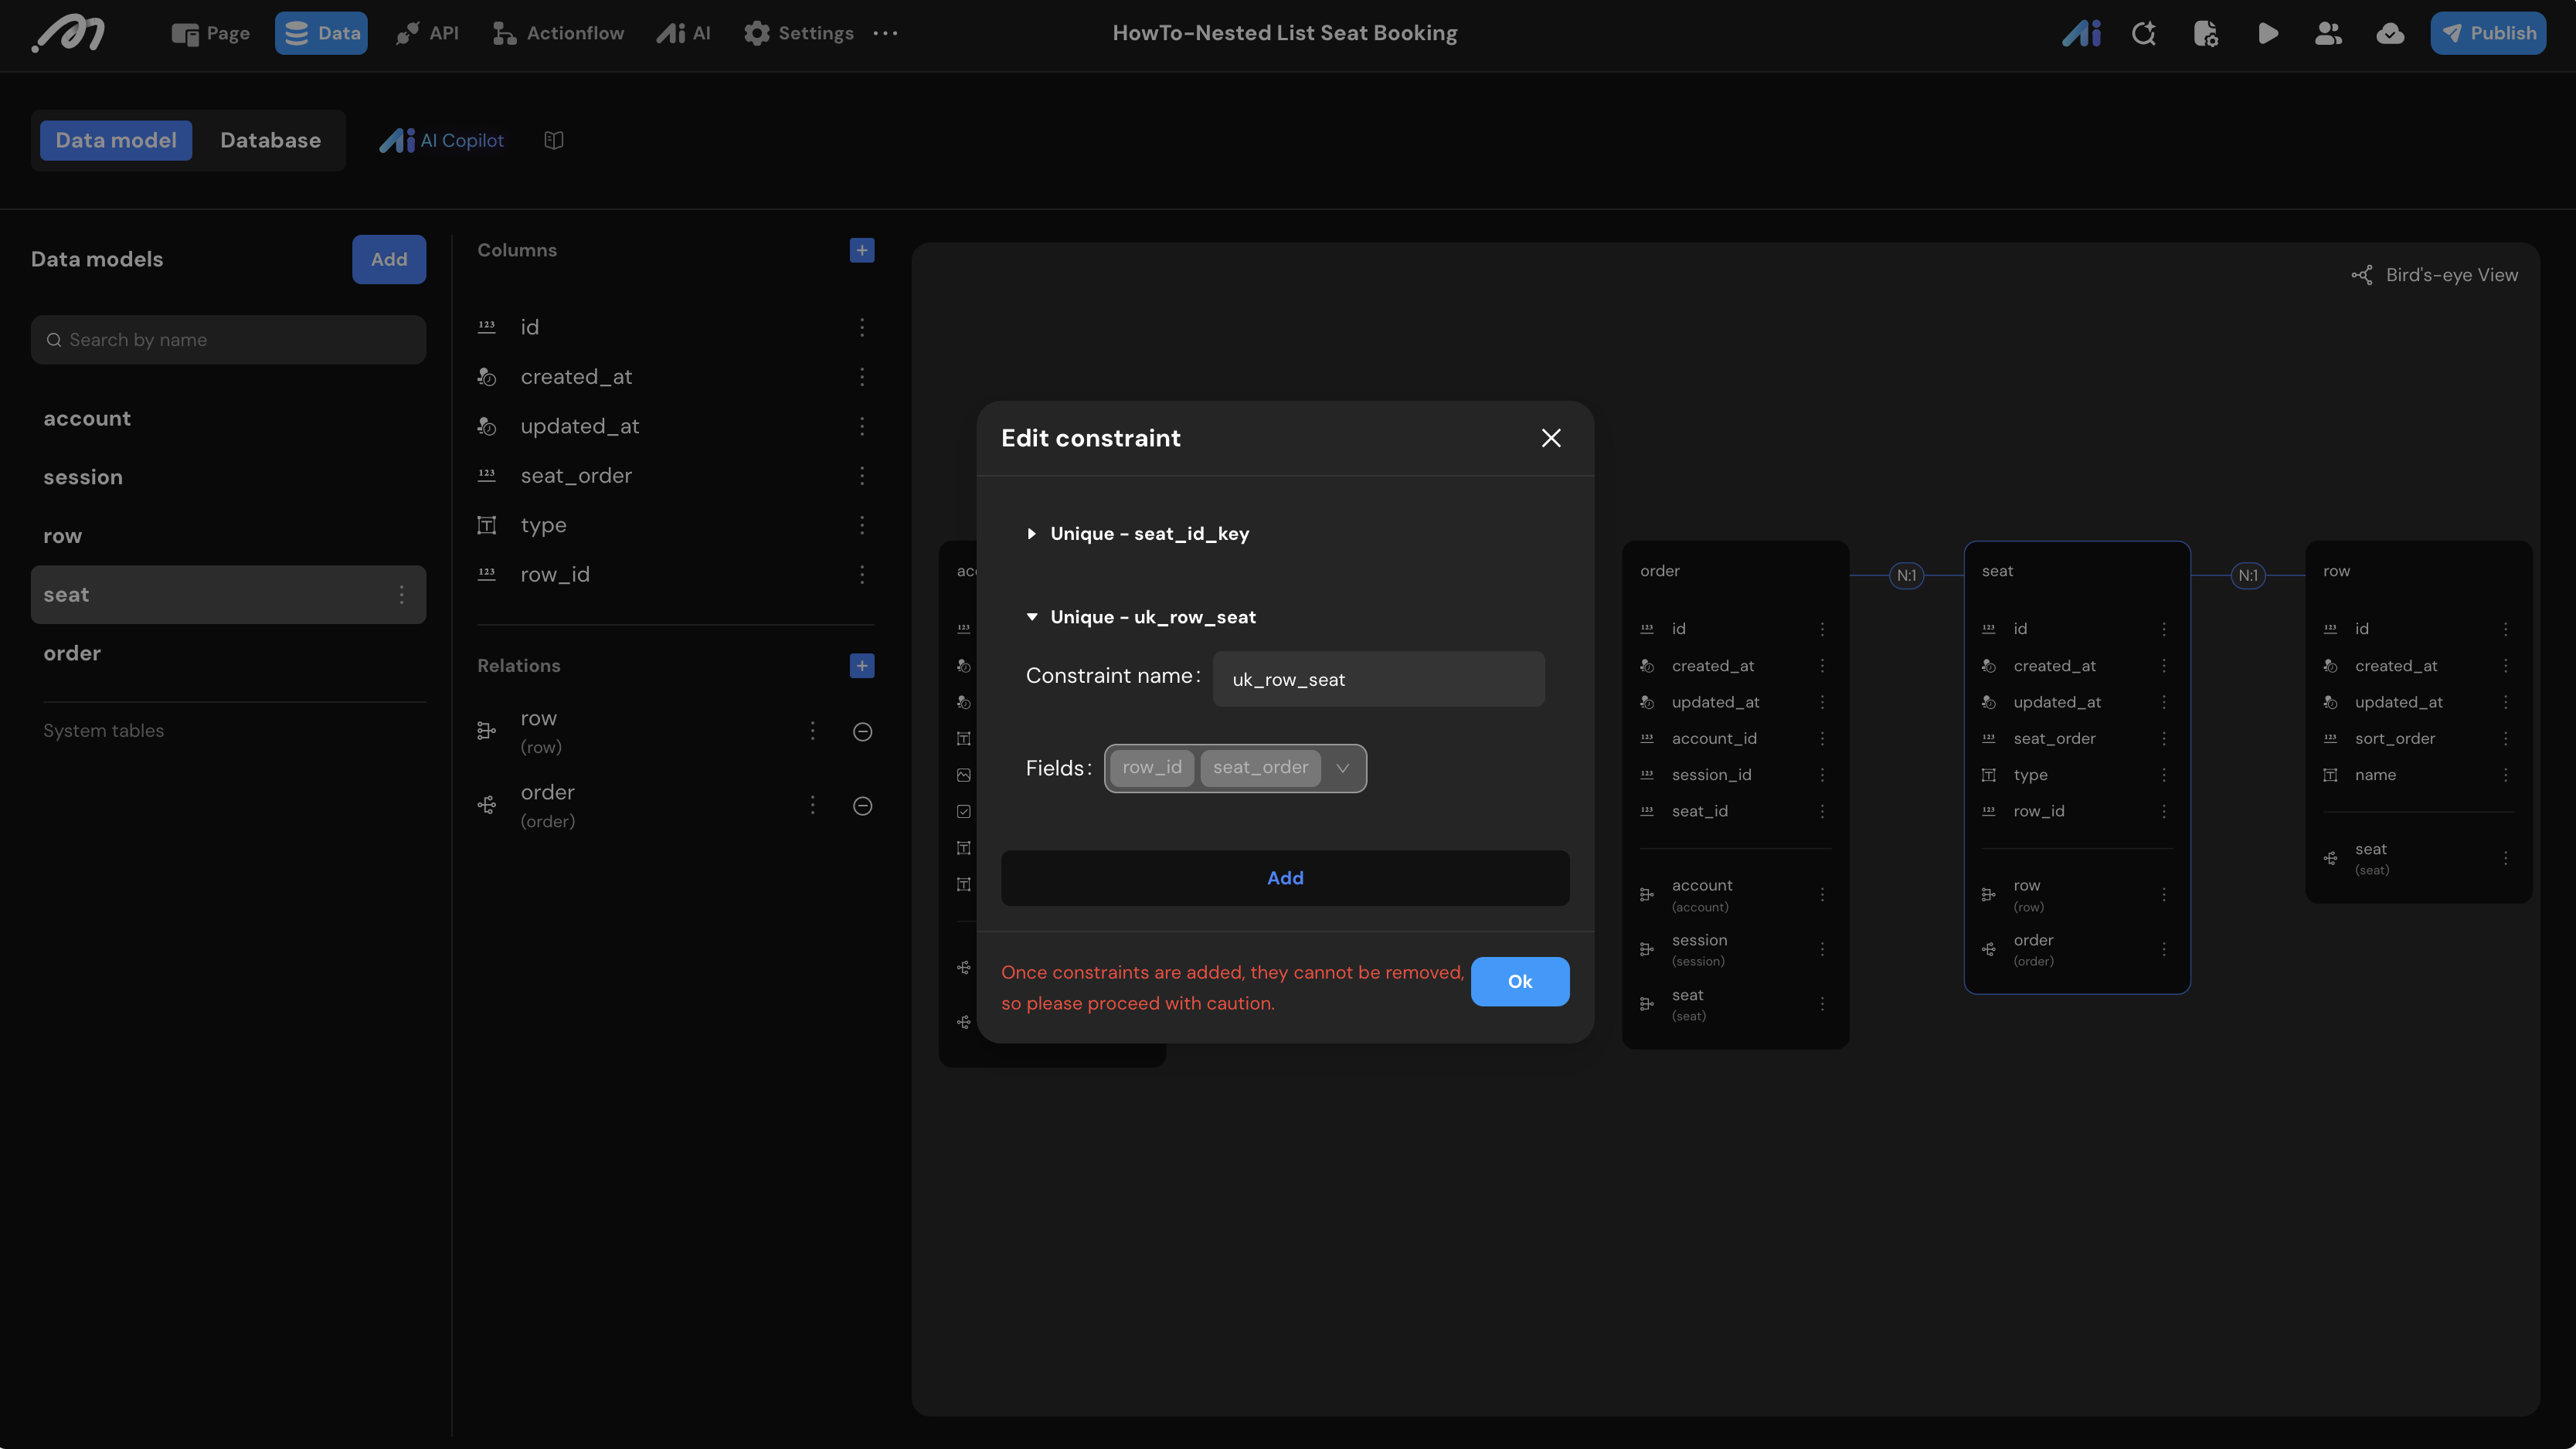
- Order Logic Constraint: In the
ordertable, add a Composite Unique Constraint nameduk_session_seatusingsession_idandseat_id. This guarantees a specific seat can only be booked once per session.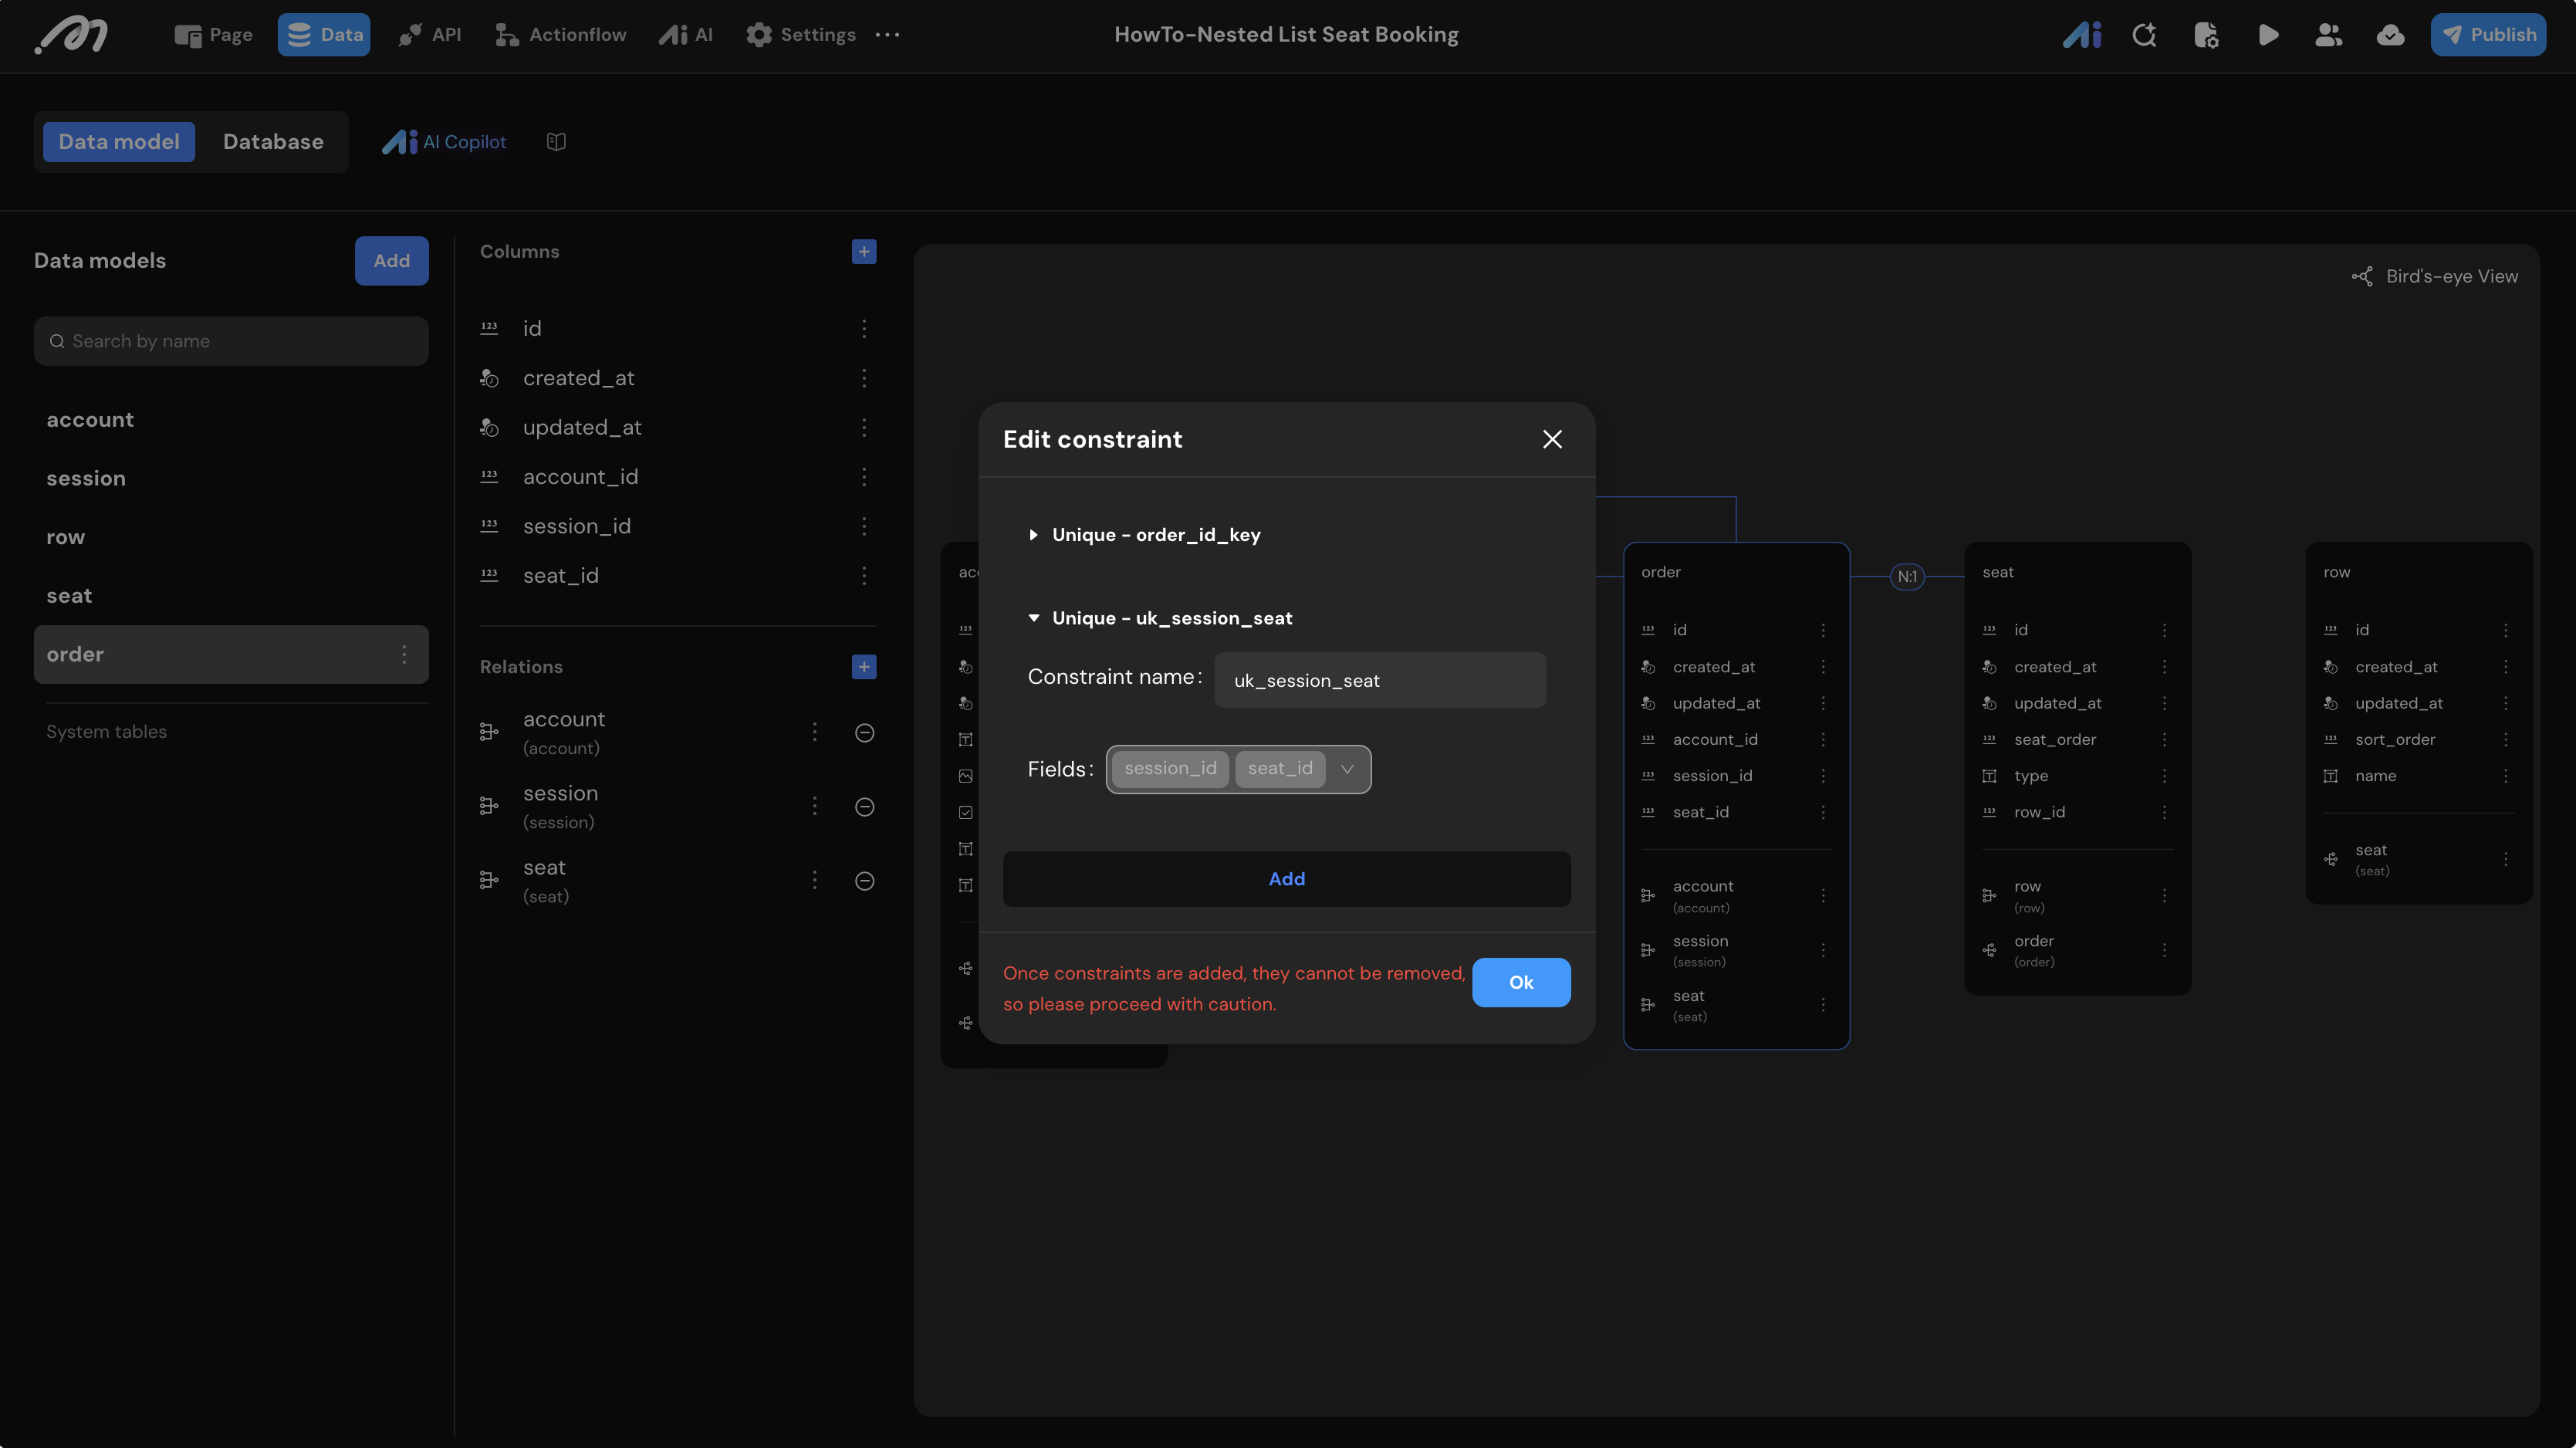
Data for rows and seats can be rapidly populated using Momen’s “Import” function with an Excel/CSV file.
UI Construction & Interaction
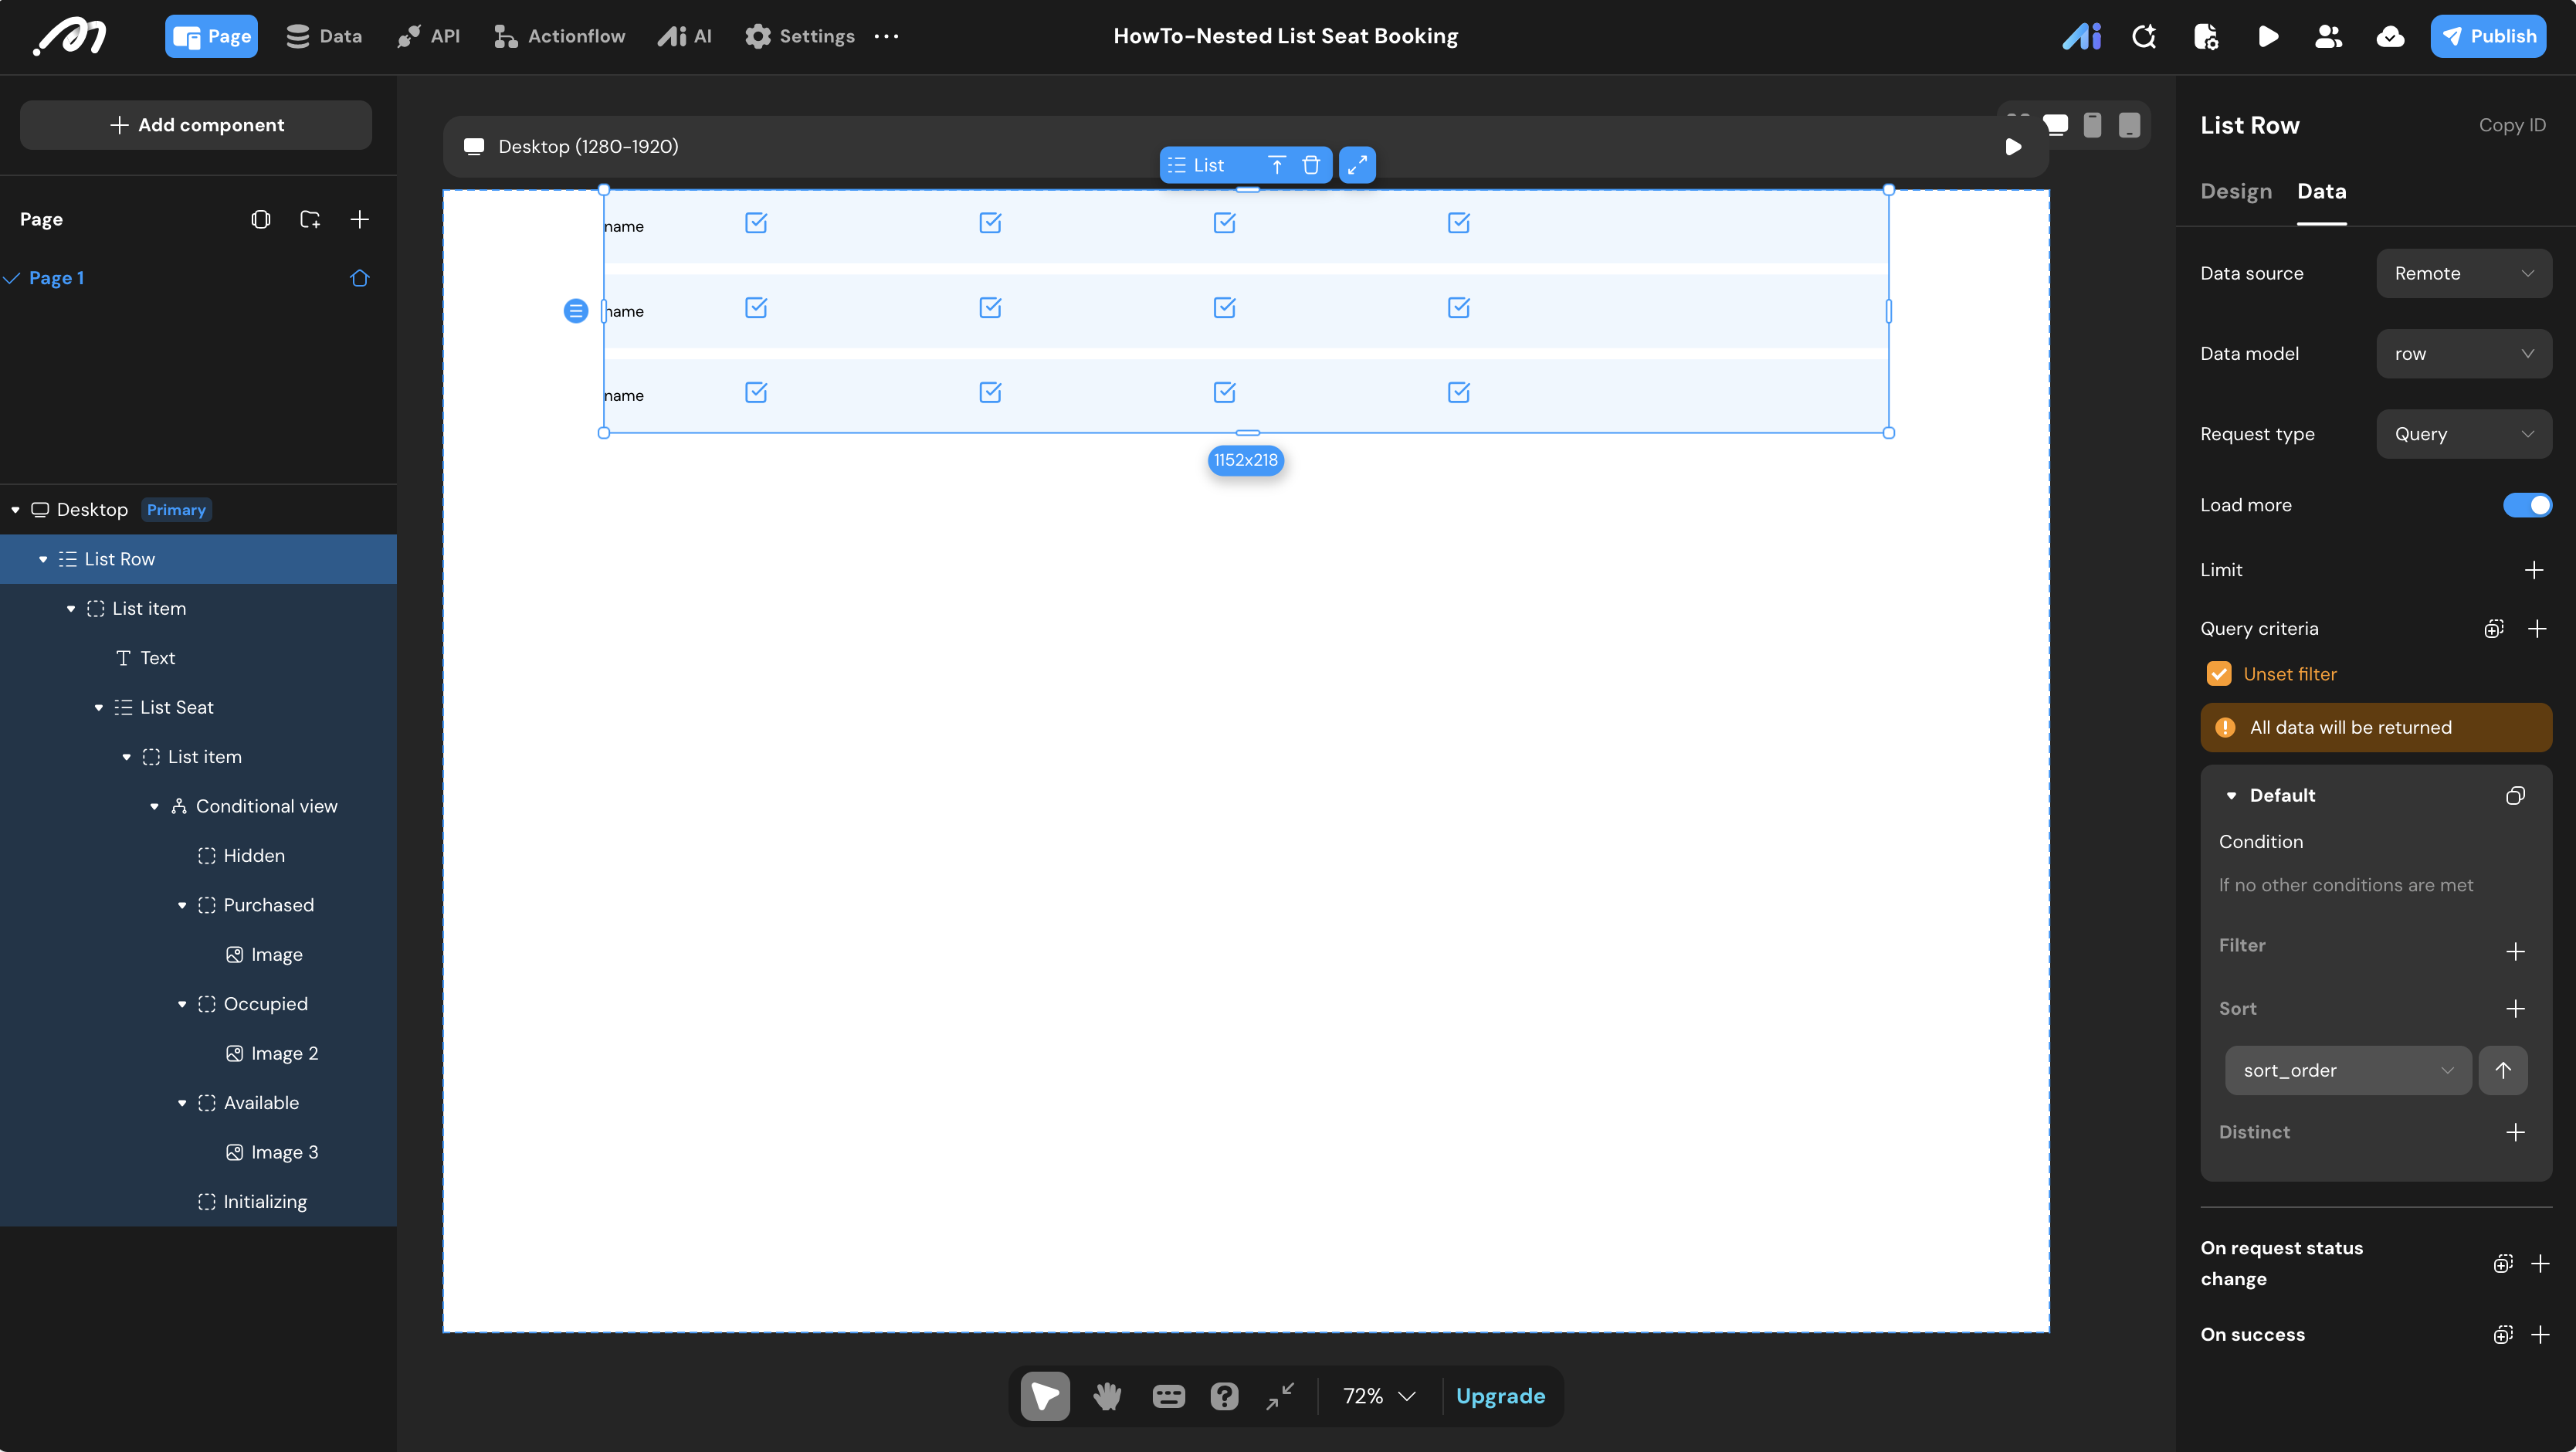
Outer List: Rows
- Add a List component to the canvas.
- In the right Data panel:
- Data source: Remote
- Data model:
row - Sort: Add a sort by
sort_orderAscending.
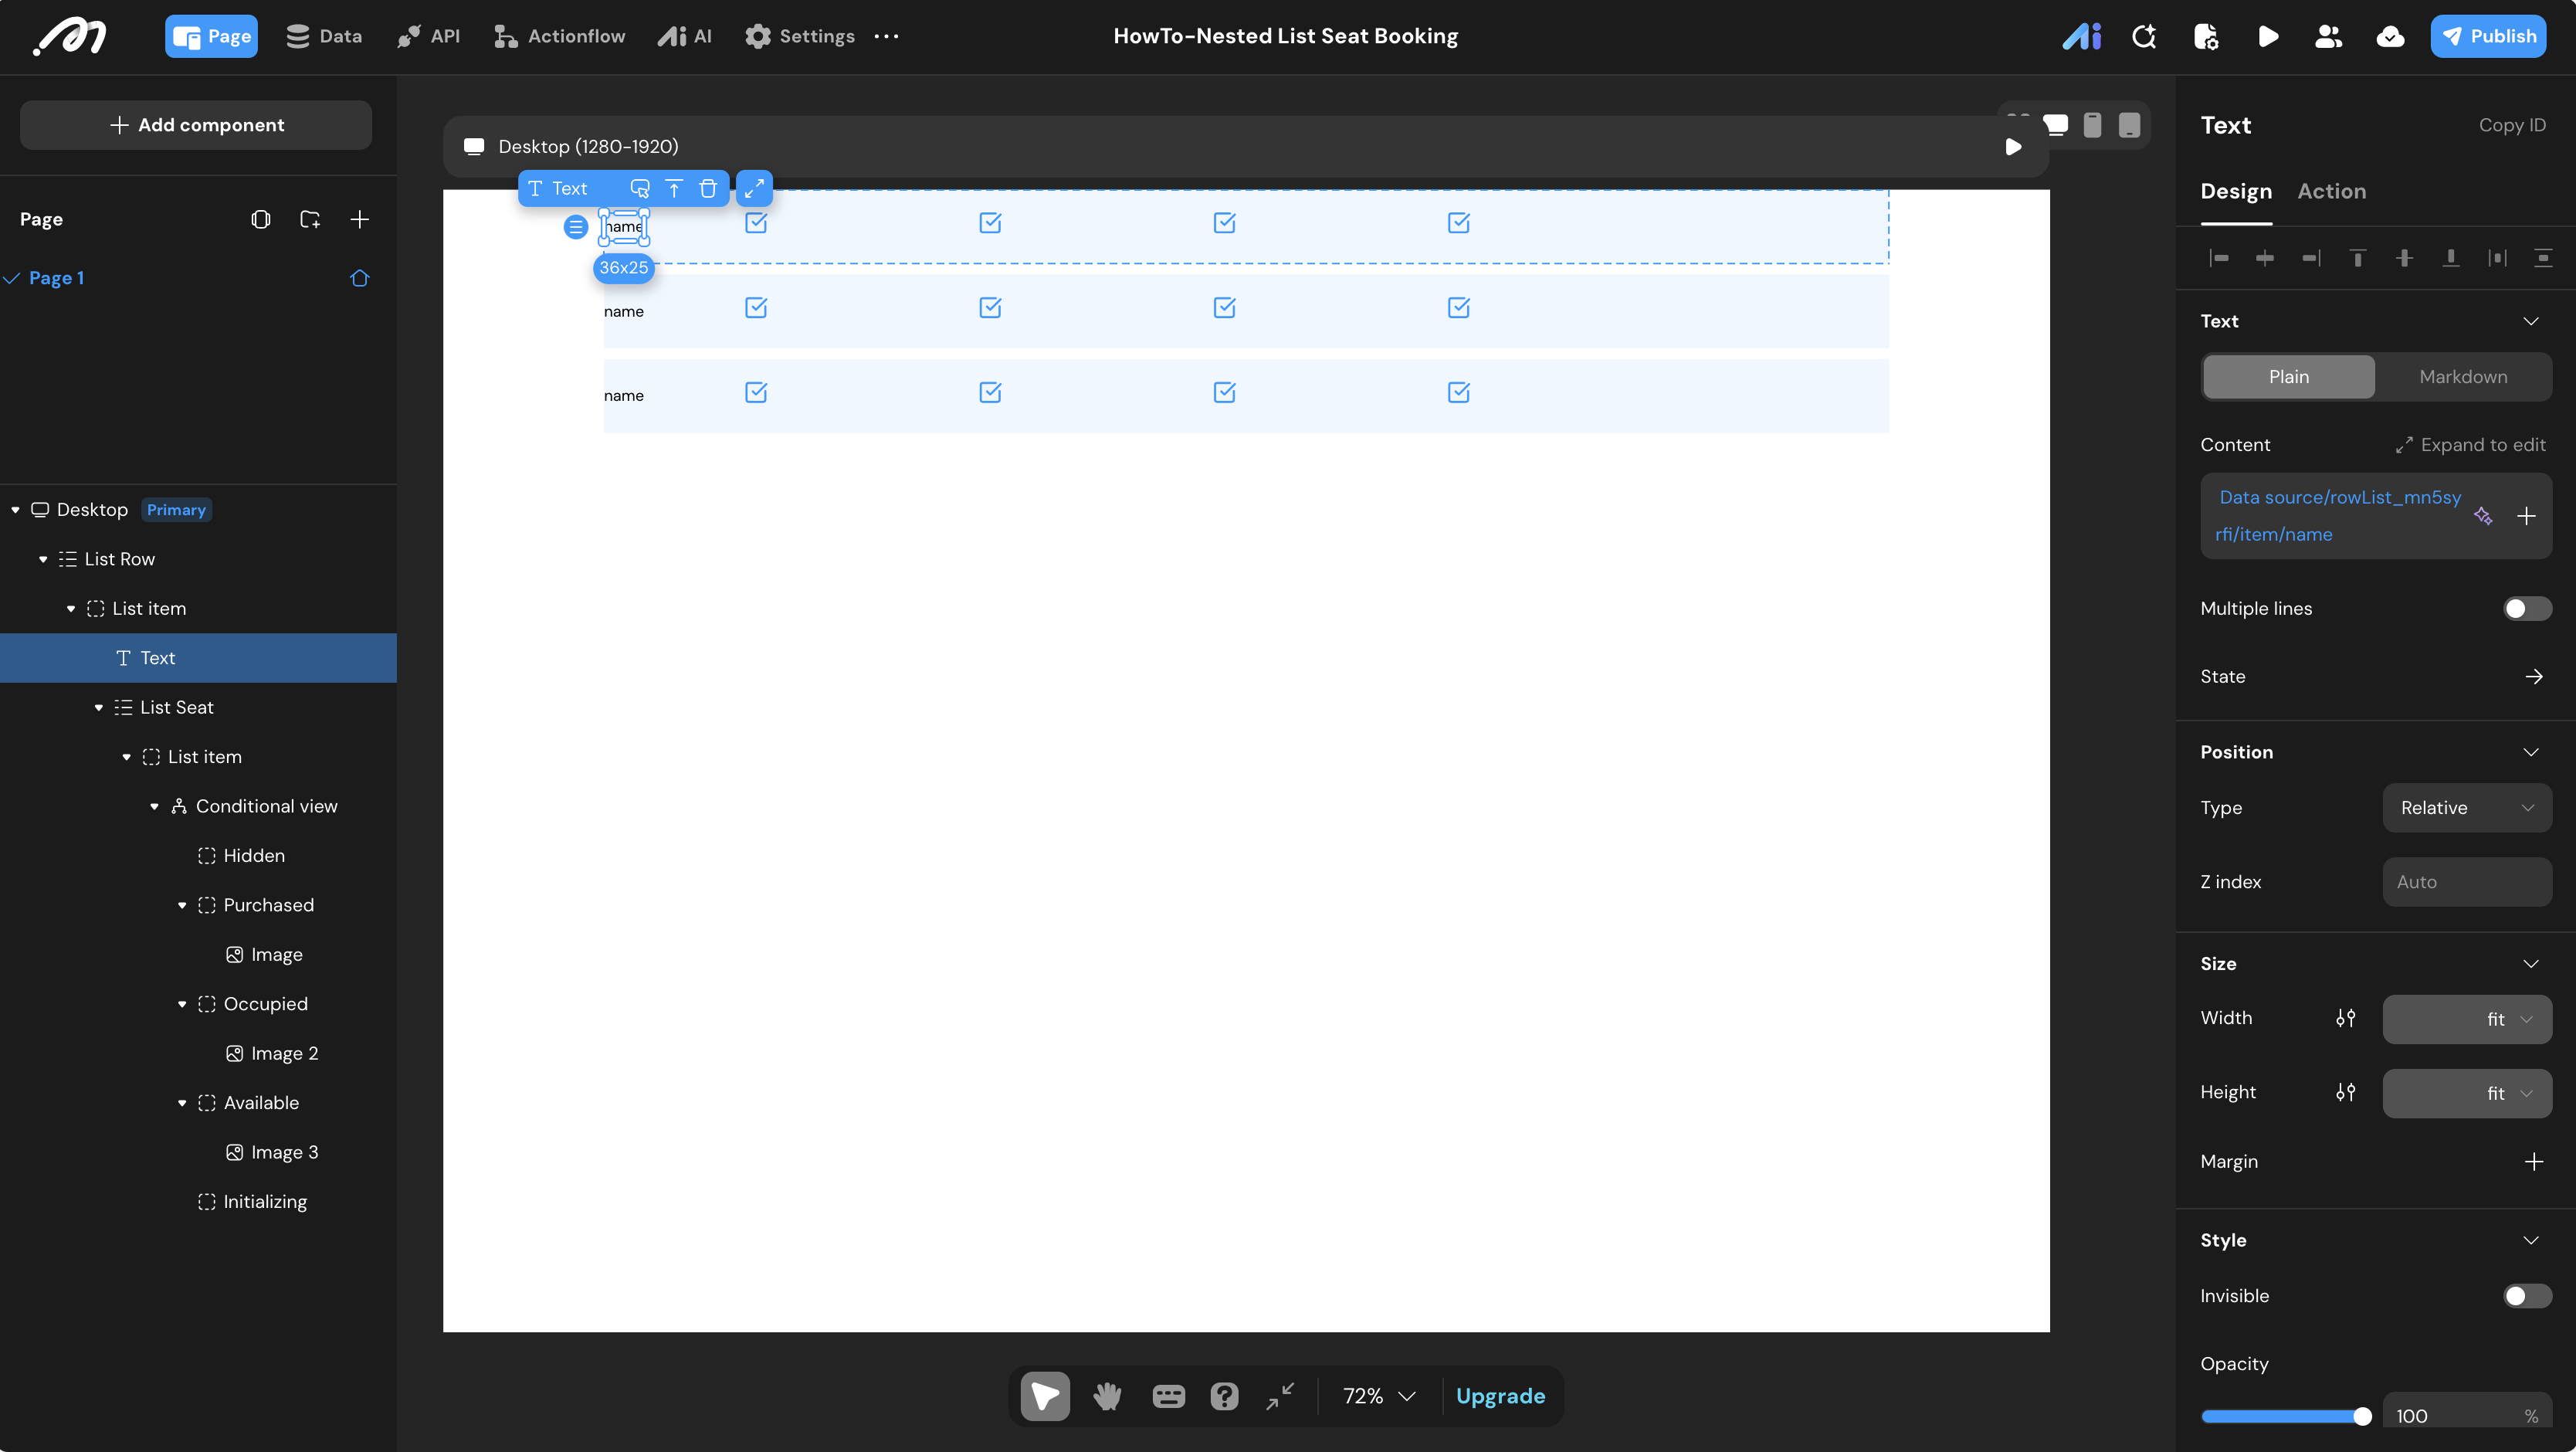
- Inside this List, place a Text component to display the row name. Bind its content to
{Data source/rowList.../item/name}.
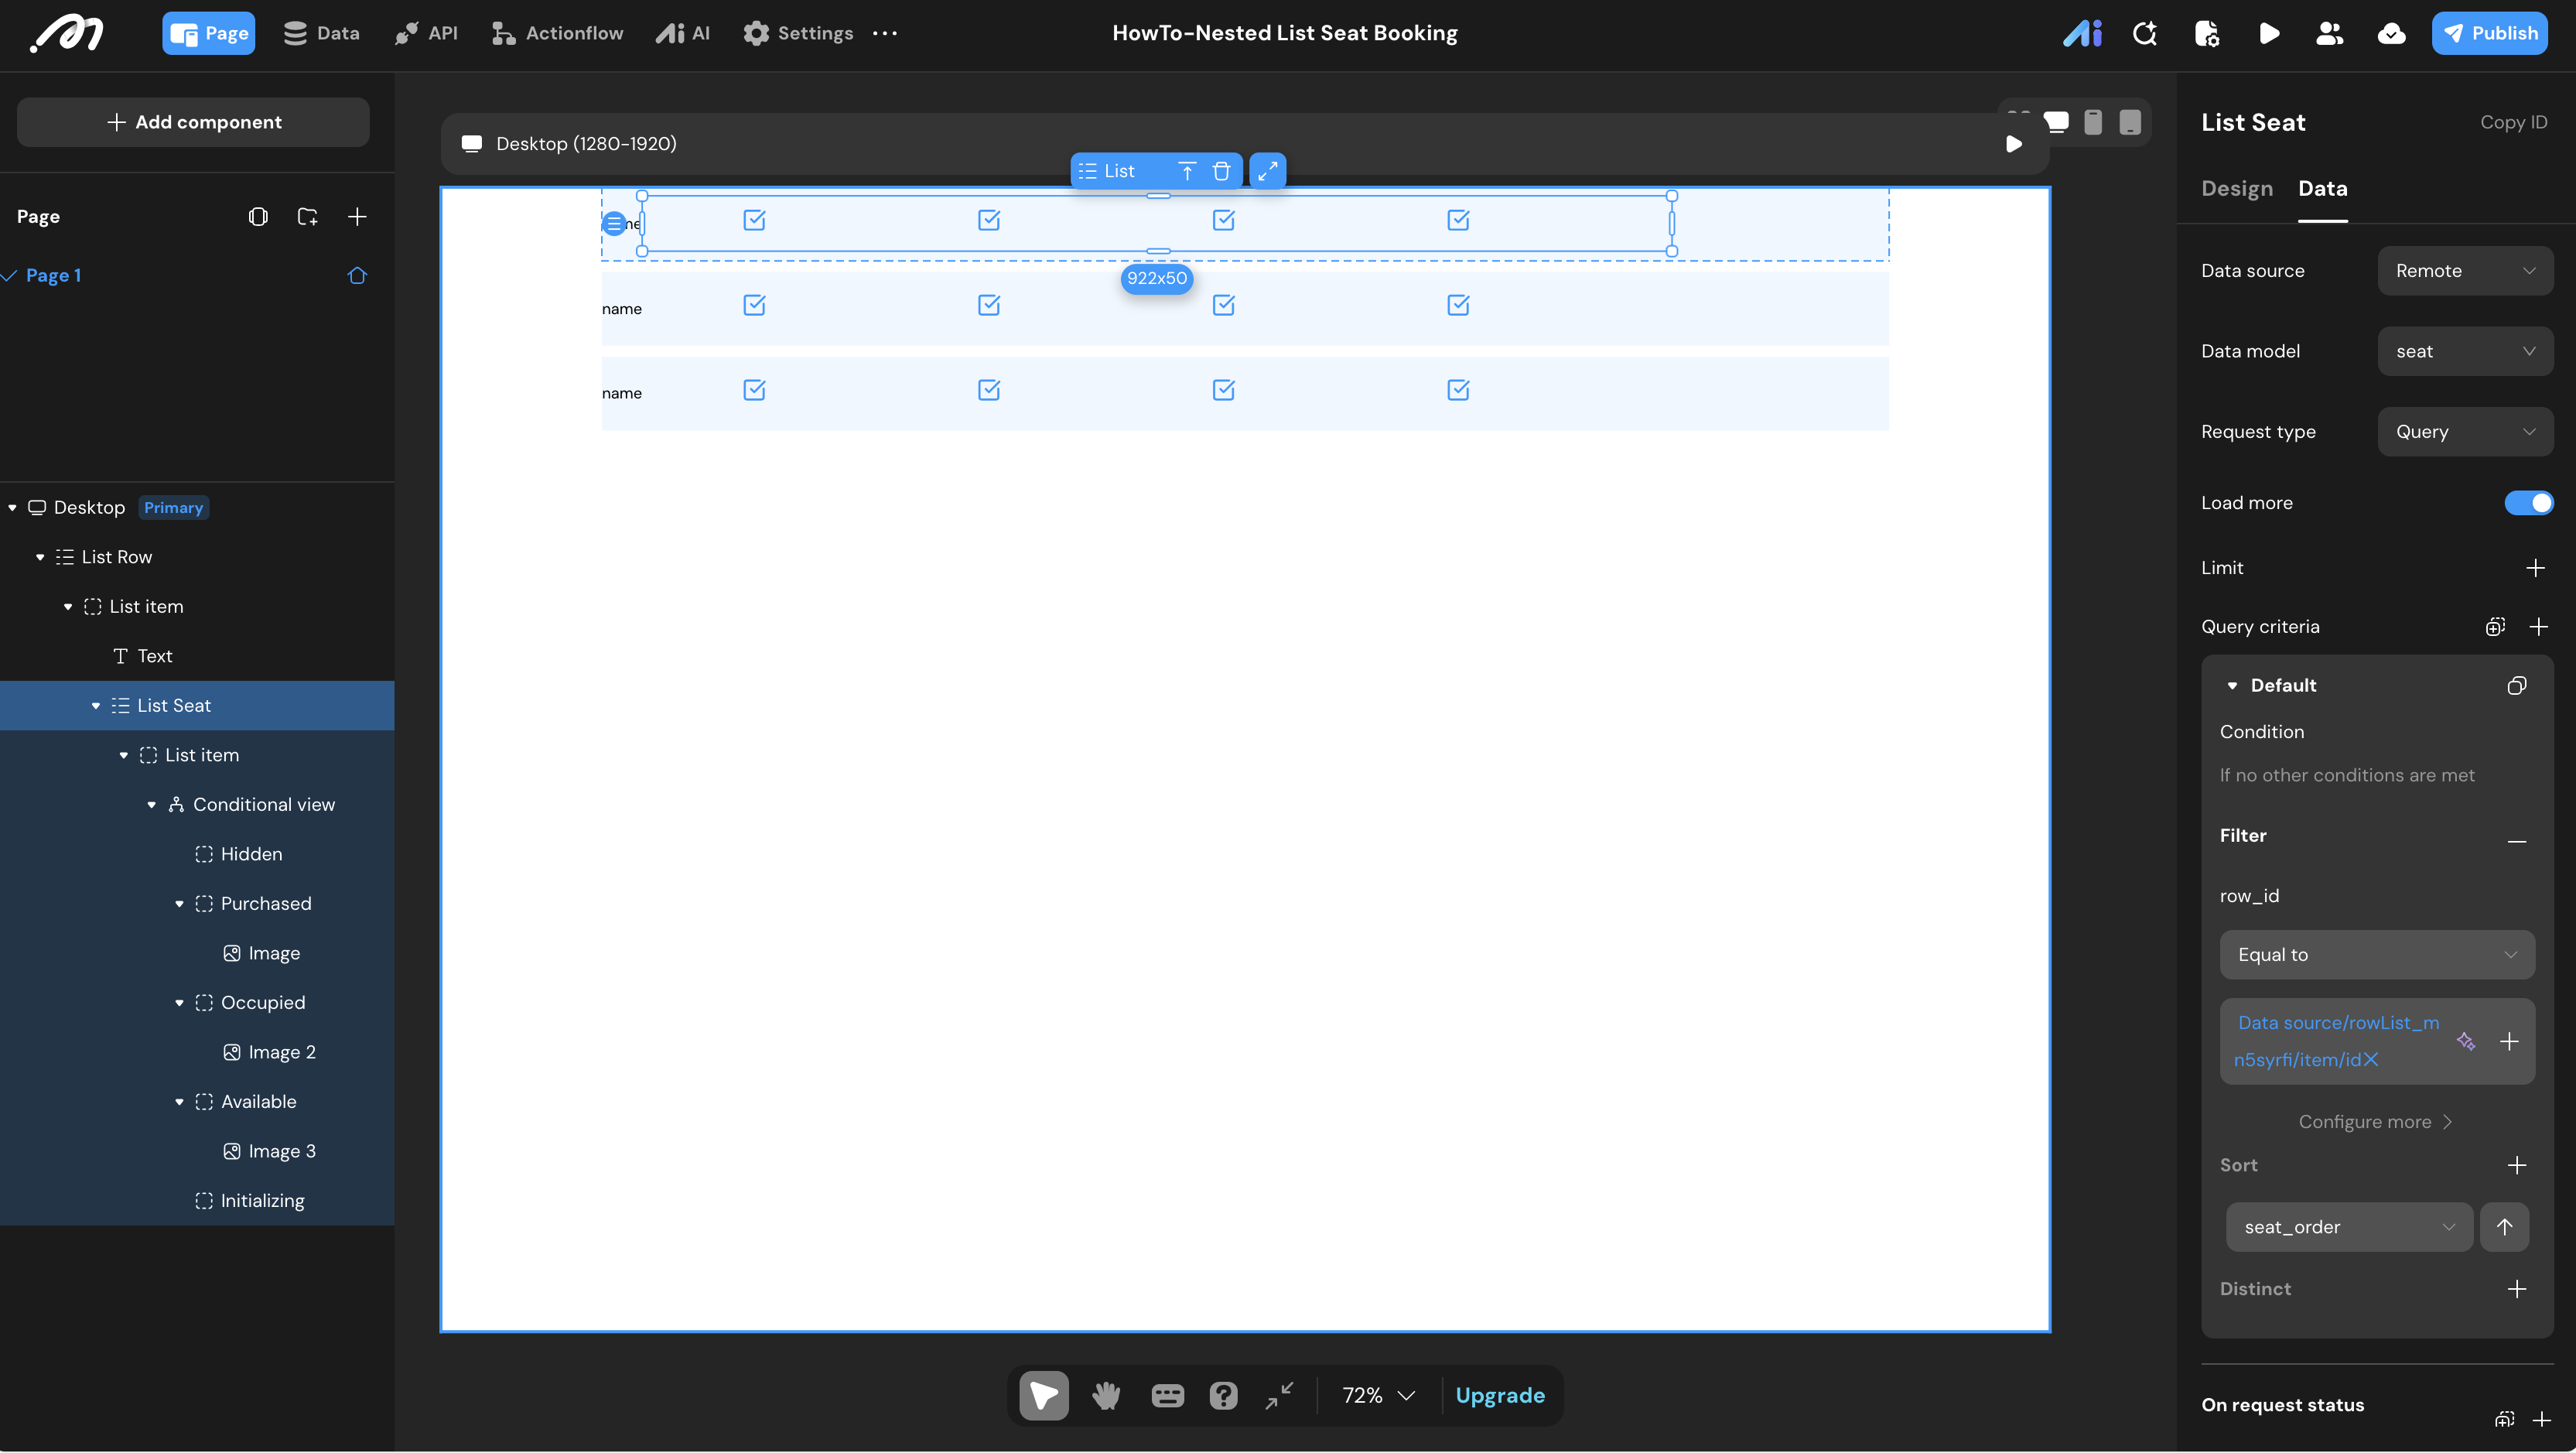
Inner List: Seats
- Add another List component inside the
List Row. - Configure the Layout to be horizontal so seats line up side-by-side.
- In the right Data panel:
- Data source: Remote
- Data model:
seat - Filter: Add a condition where
row_idis Equal to{Data source/rowList.../item/id}. This is the crucial step that nests the seats within their respective rows. - Sort: By
seat_orderAscending.
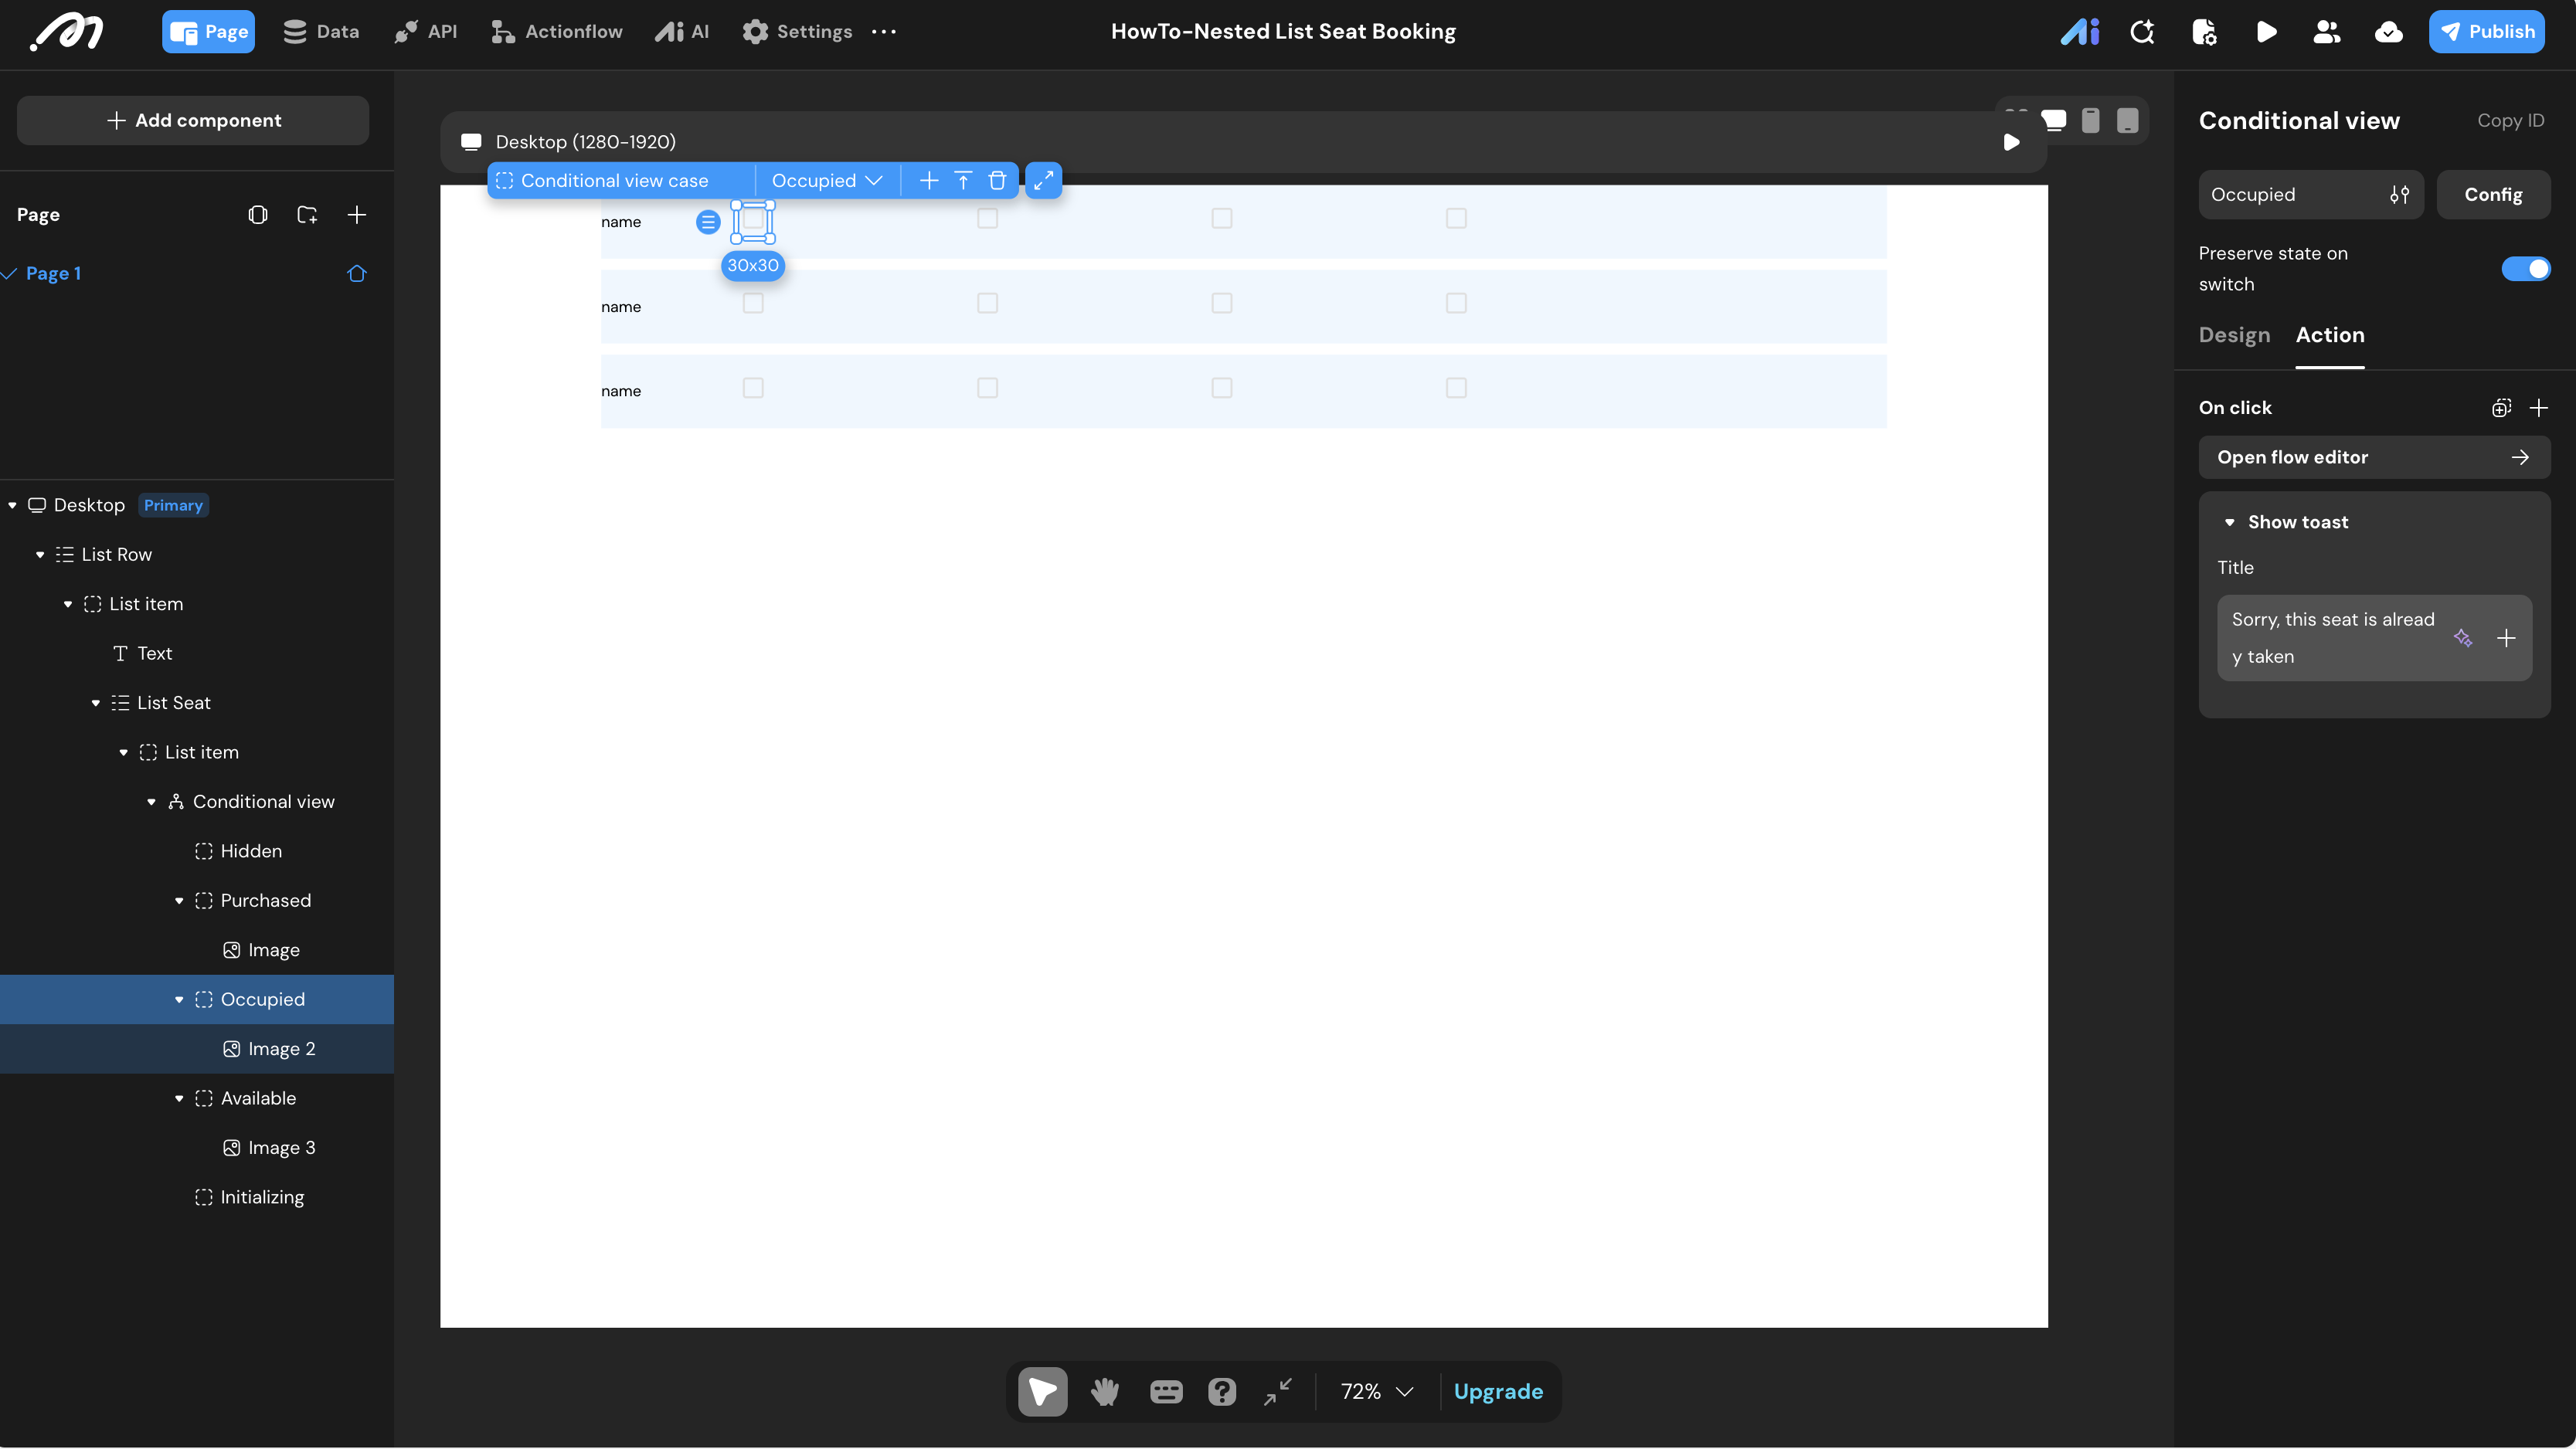
Logic & State Configuration
Inside the inner List Seat, drop a Conditional view component. We will define multiple states for each seat based on the database context.
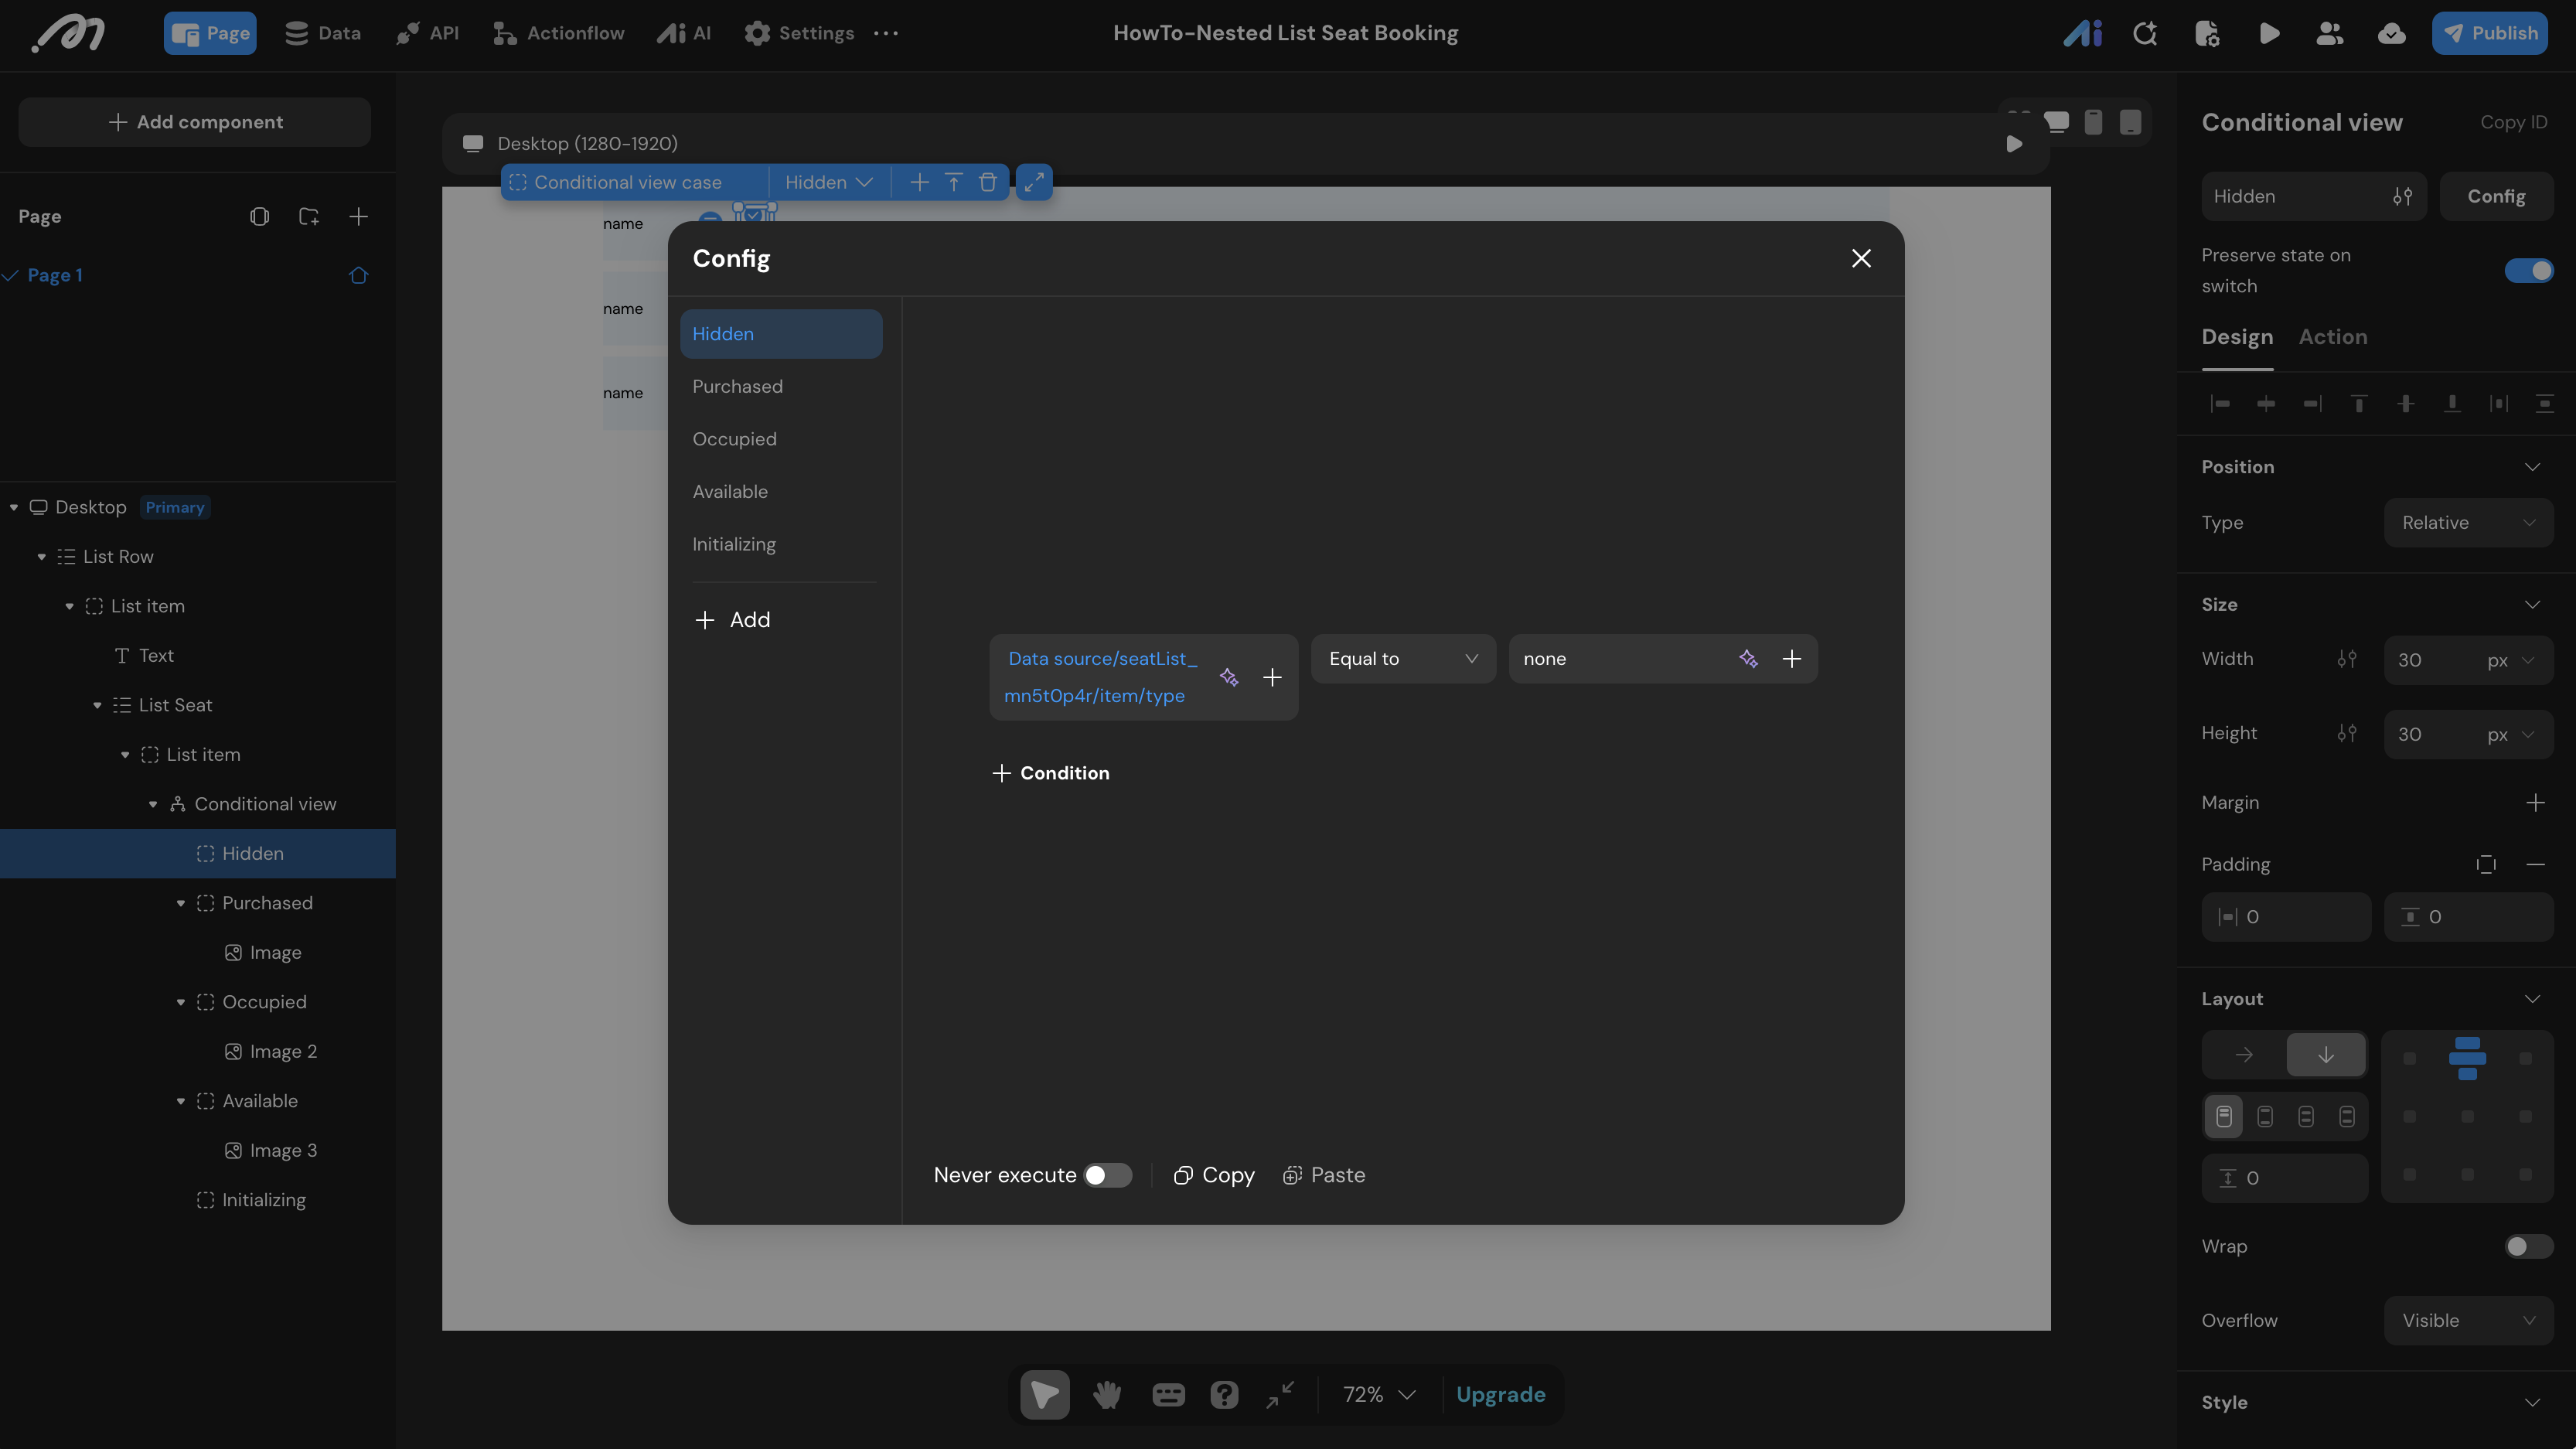
1. Hidden State (Aisles/Gaps)
Create a case named Hidden.
- Condition: Check if the seat’s
typeis equal tonone. - UI: Leave the container empty or invisible to act as a walkway gap in your grid.
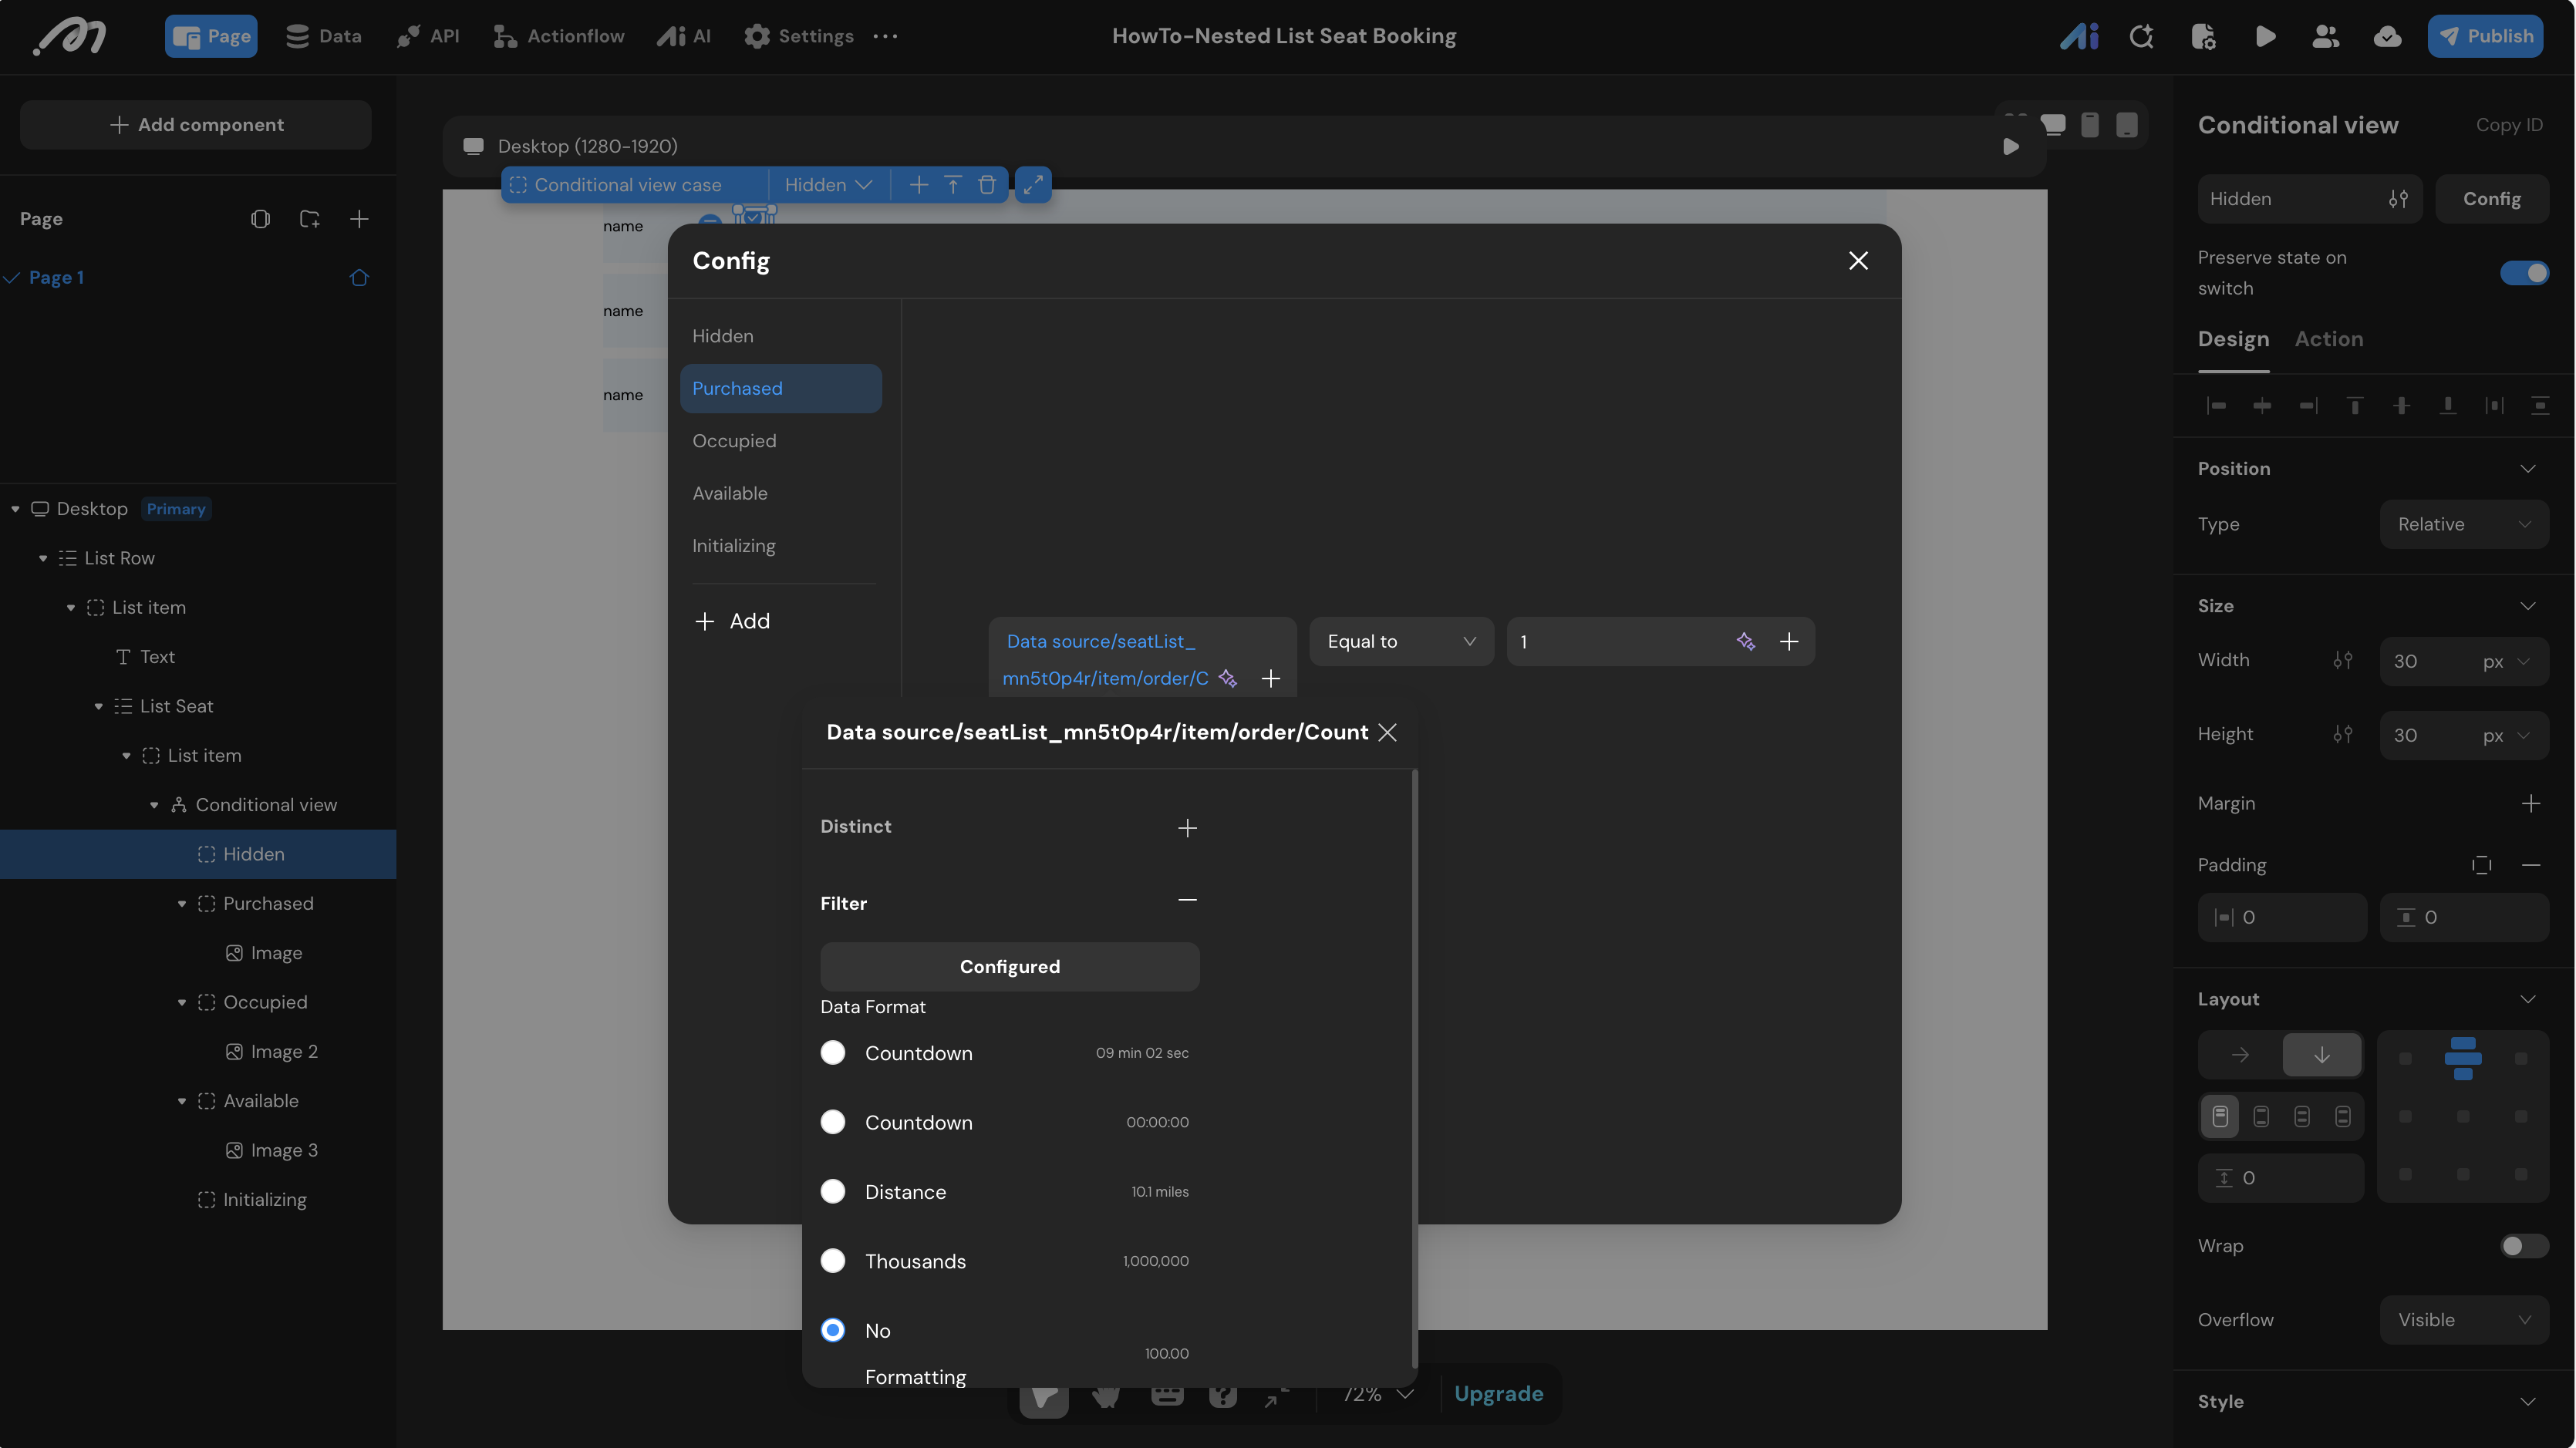
2. Purchased State (Logged-in User’s Booking)
Create a case named Purchased.
- Condition: Filter the
ordertable whereseat_idequals the current seat’s ID,session_idequals the current session (e.g., 1), ANDaccount_idequals the{Logged in user/id}. If the Count is Equal to1, the current user owns this seat. - UI: Display an icon or image indicating the user’s reserved seat.
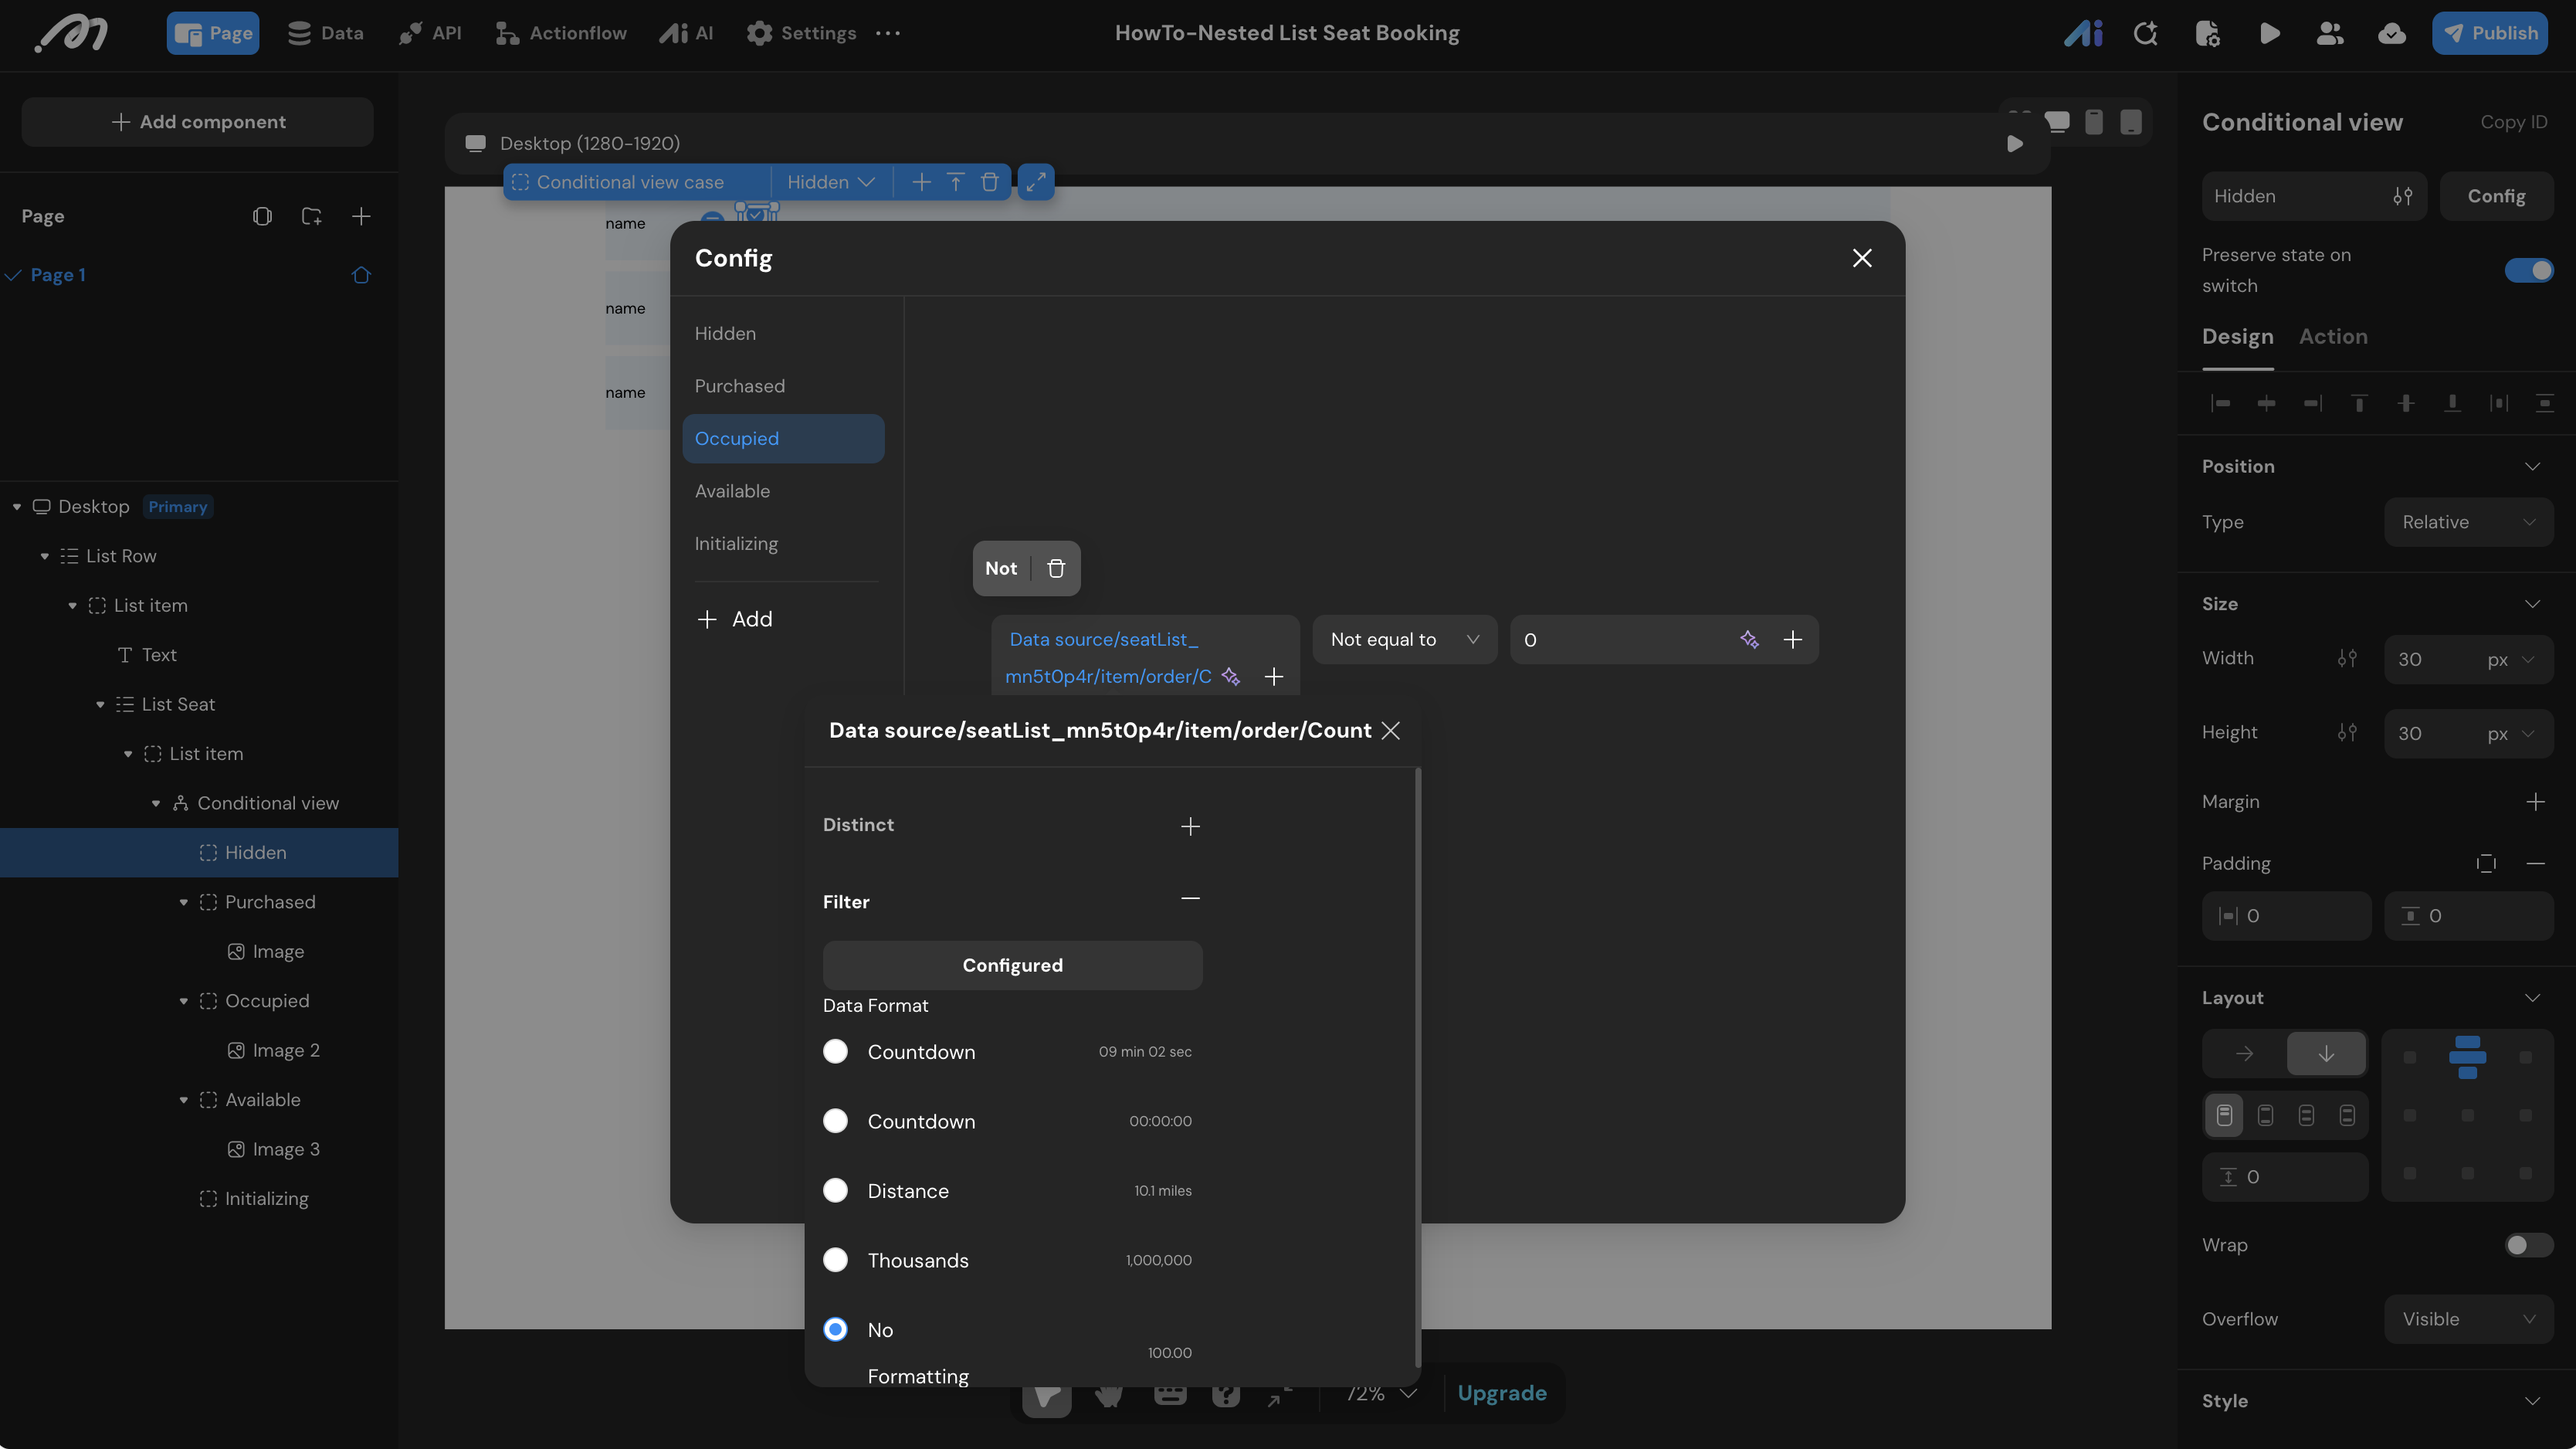
3. Occupied State (Booked by Others)
Create a case named Occupied.
- Condition: Filter the
ordertable whereseat_idequals the current seat’s ID,session_idequals the current session, ANDaccount_idis Not equal to{Logged in user/id}. If the Count is Not equal to0, someone else owns it. - UI: Display a grayed-out or locked icon.
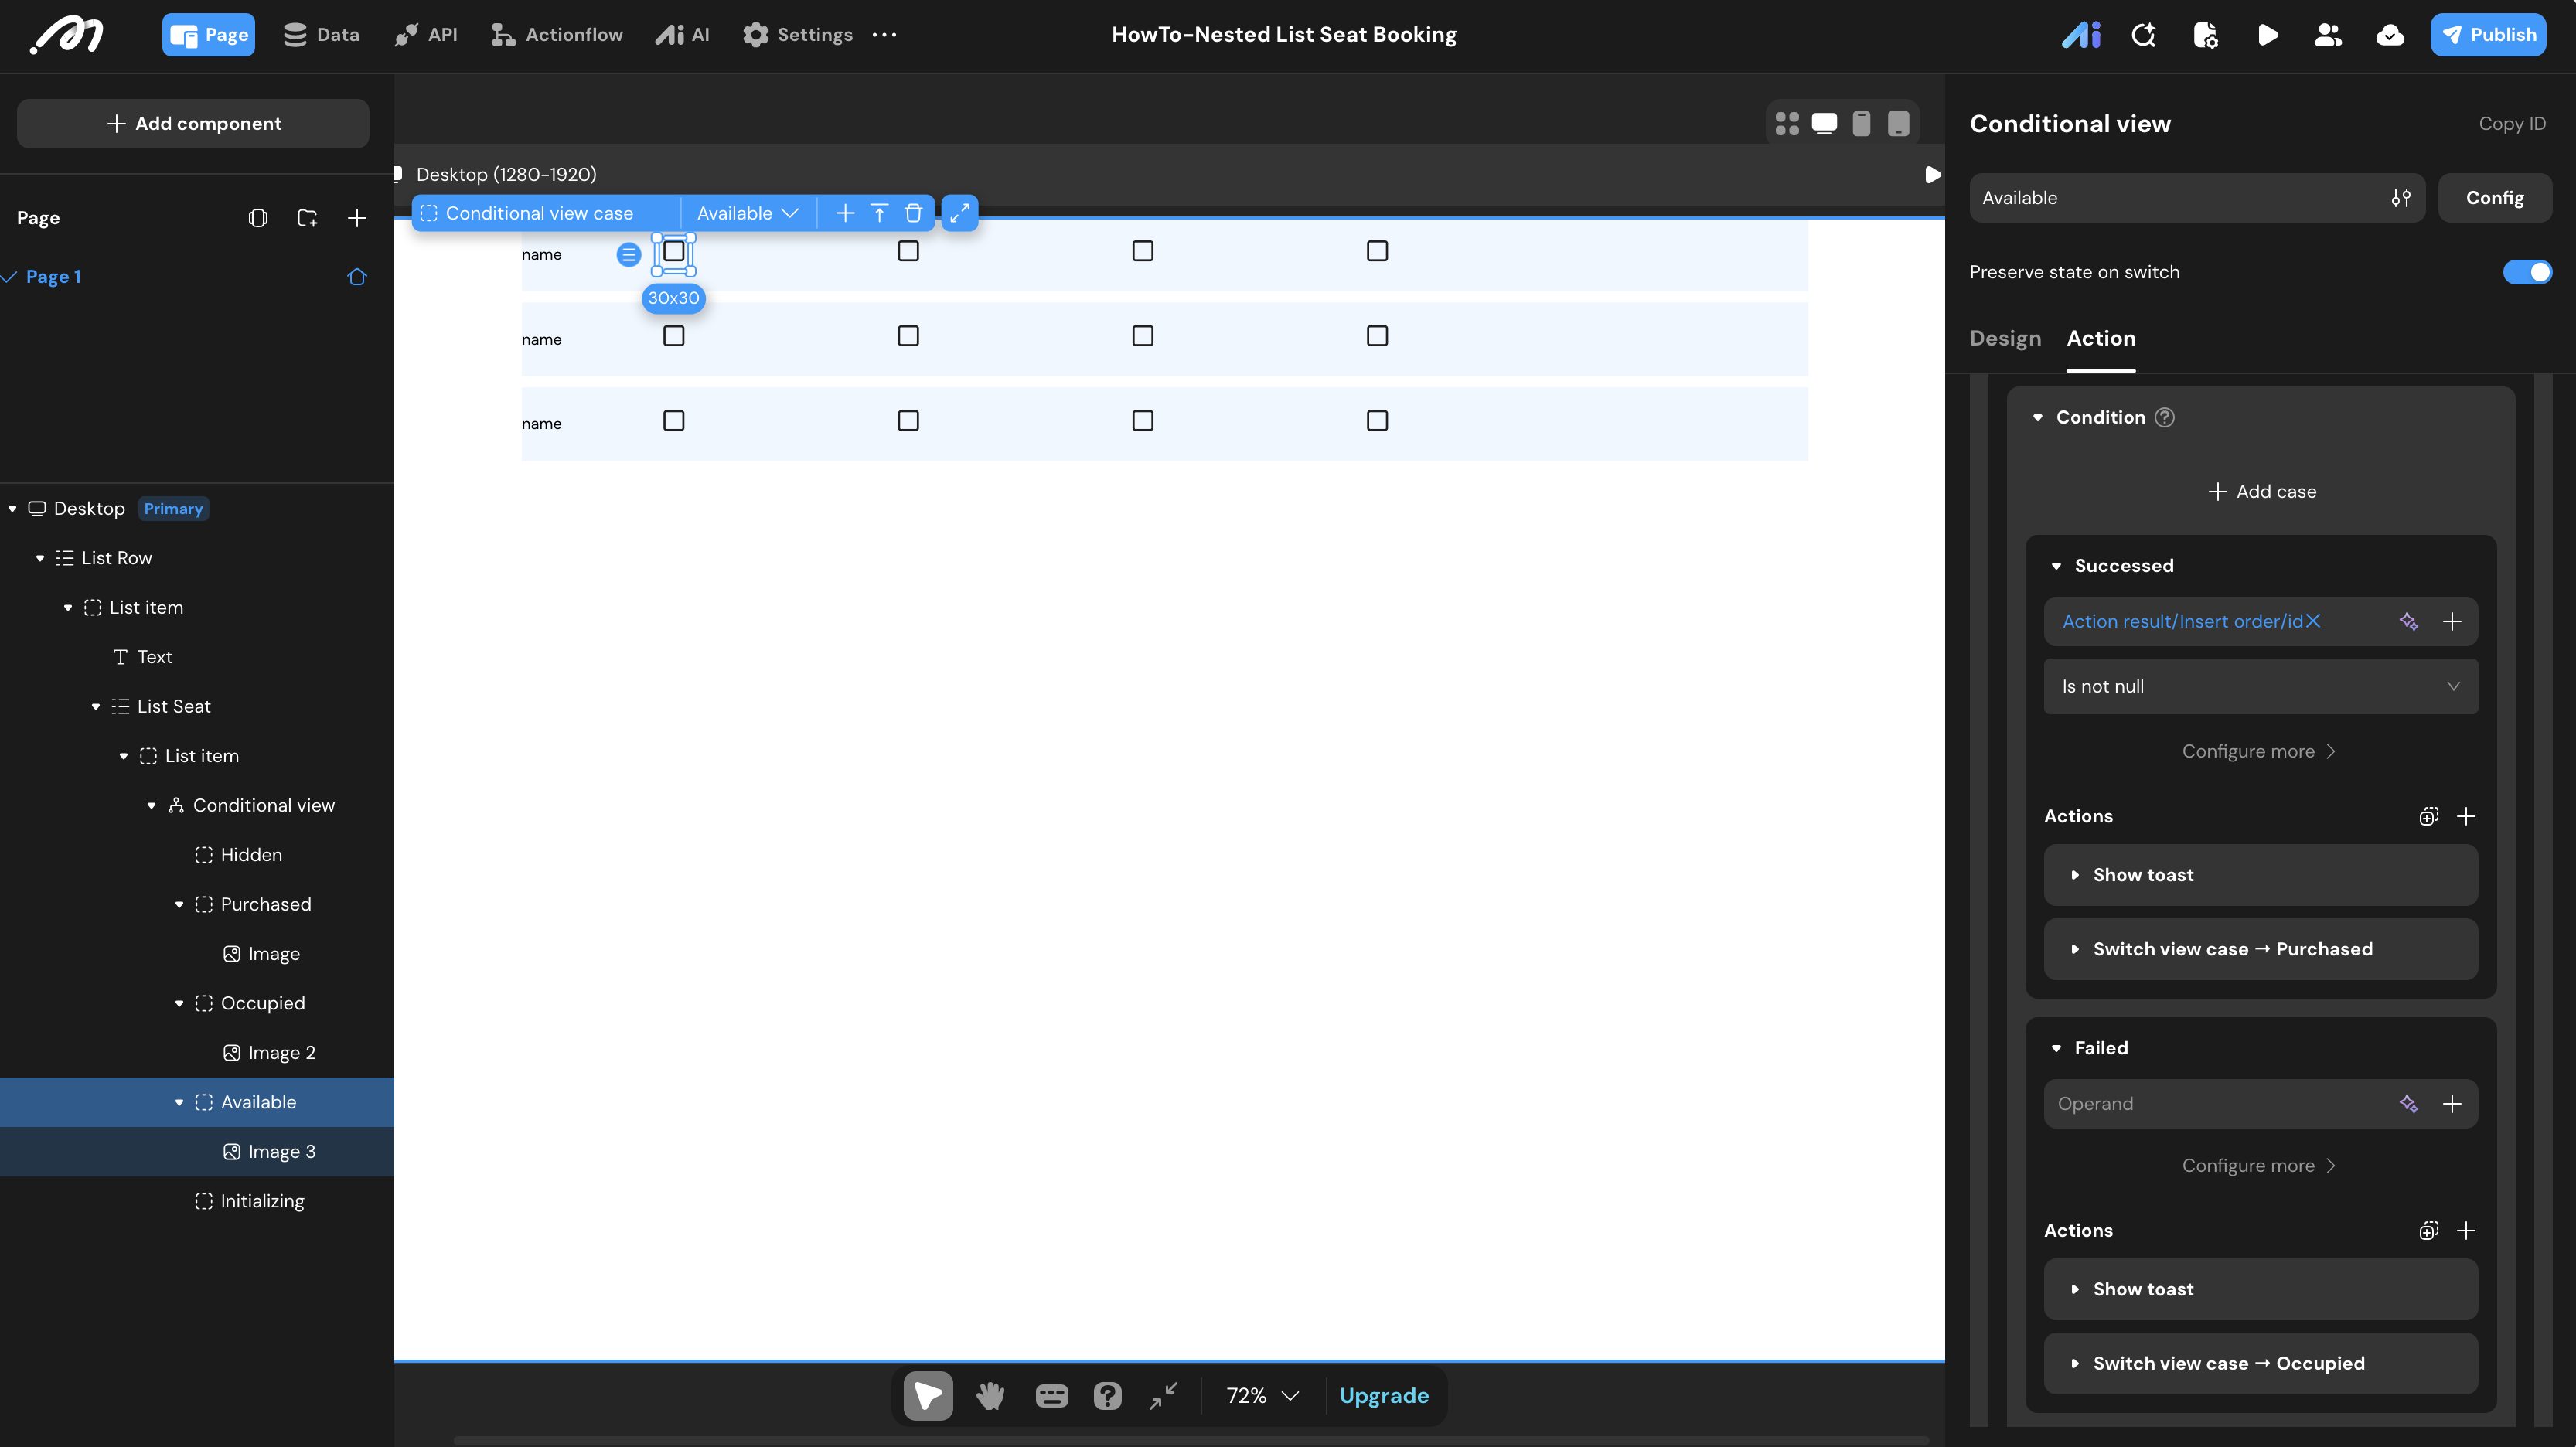
4. Available State (Default)
Create a case named Available.
- Condition: Set this as the default fallback branch.
- UI: Display an empty checkbox or selectable seat icon.
Actionflow Construction
Now we attach logic to the On click events of the corresponding states in the Conditional view.
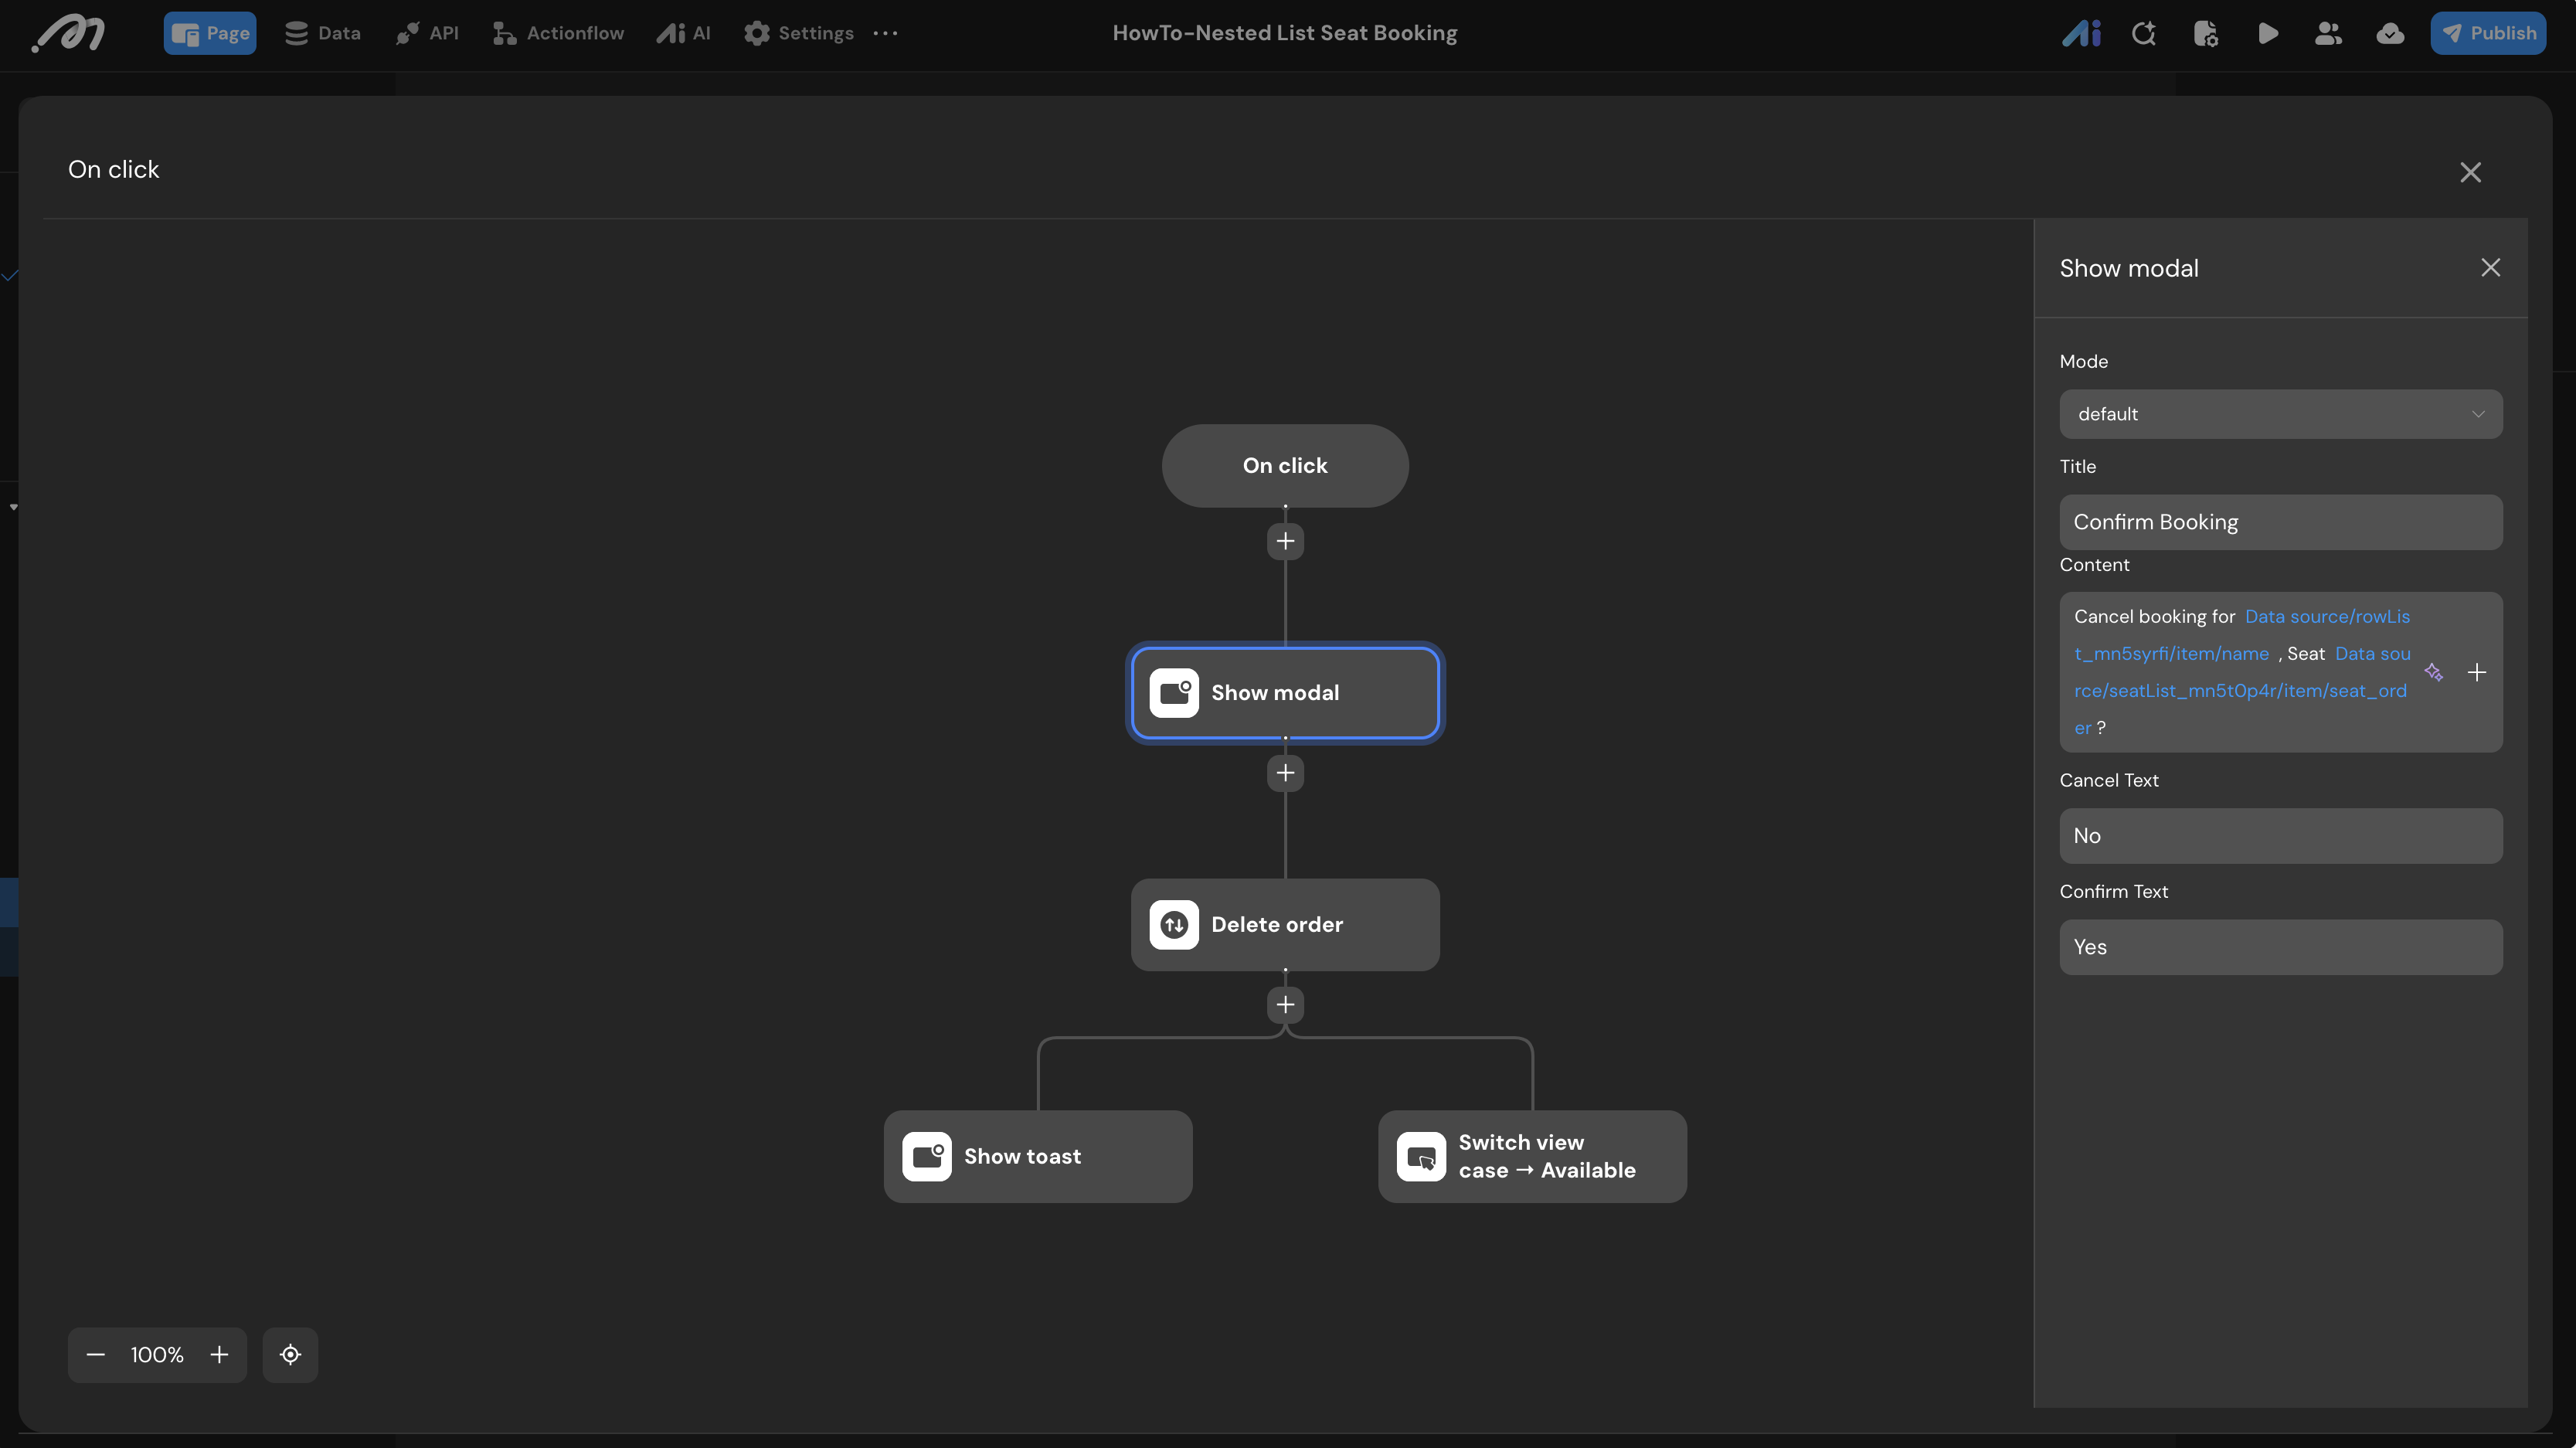
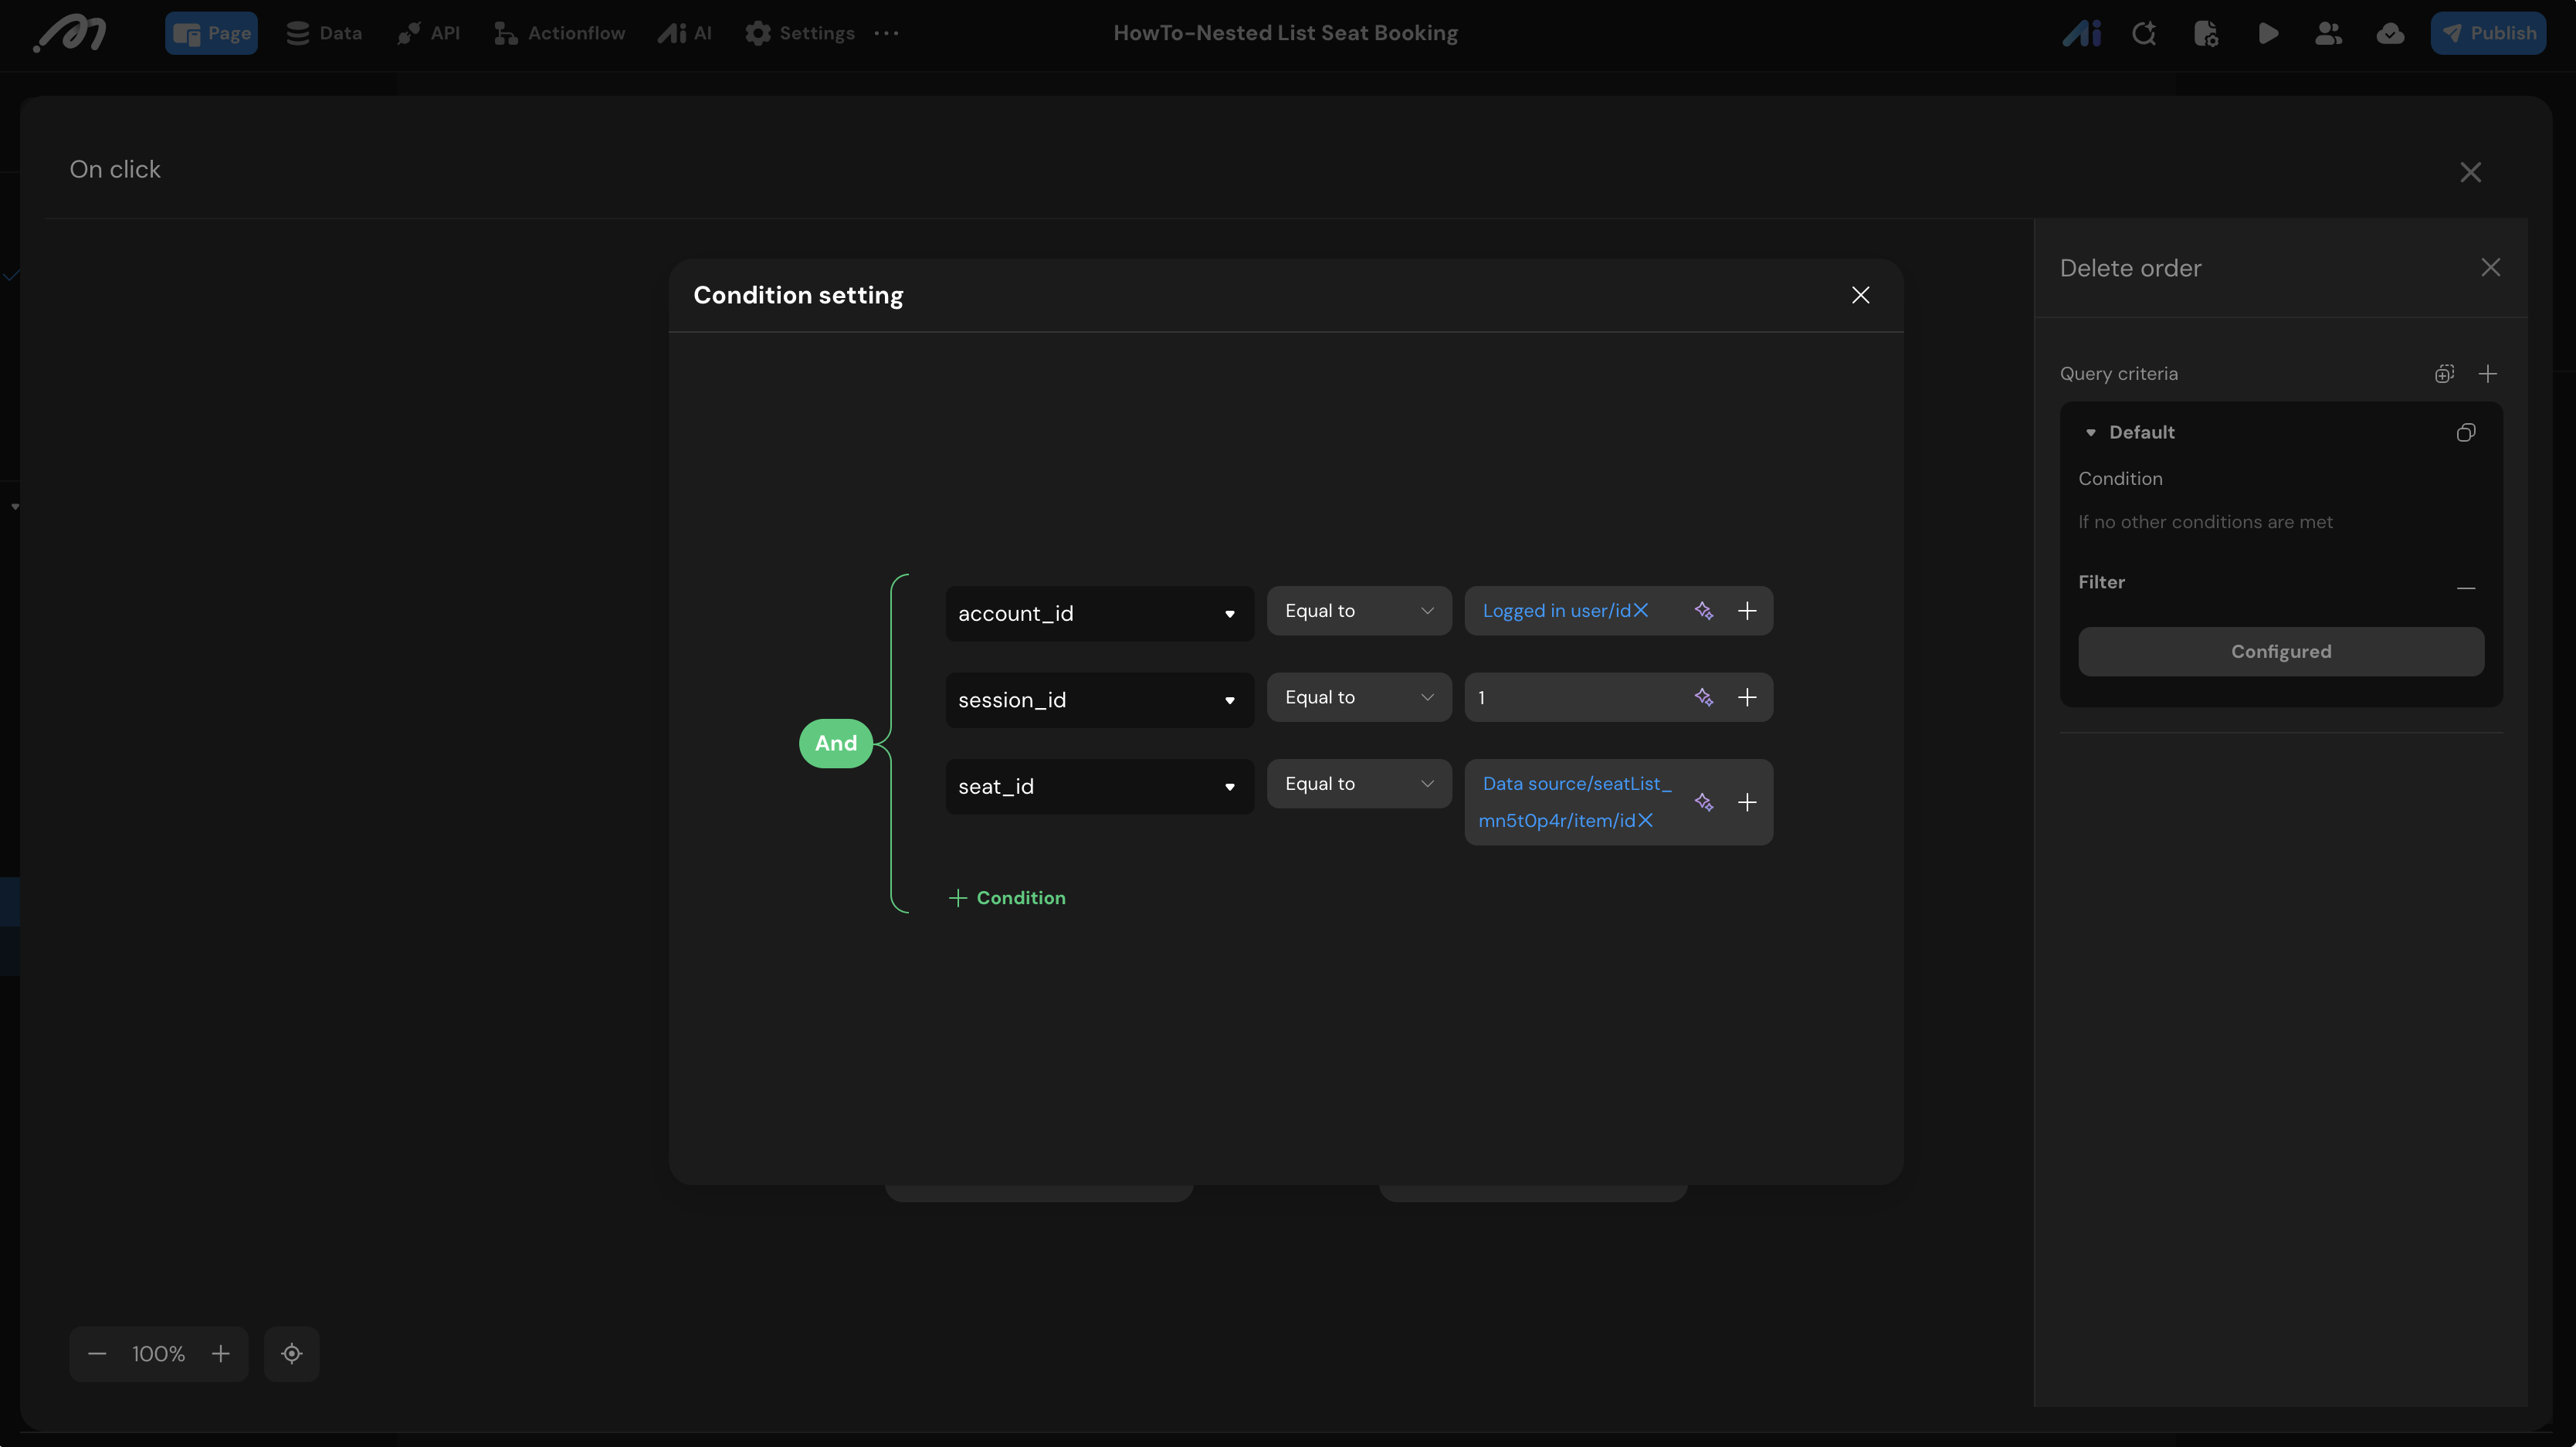
Canceling an Order (Purchased State)
When a user clicks their own purchased seat, allow them to cancel.
- Add a Show modal node asking “Confirm Booking Cancelation?”.
- Add a Delete order node. Filter where
account_idequals{Logged in user/id}andseat_idequals the current seat ID. - Add a Switch view case node pointing back to
Available.
Handling Unavailable Seats (Occupied State)
When a user clicks a seat someone else booked.
- Add a simple Show toast node displaying: “Sorry, this seat is already taken”.
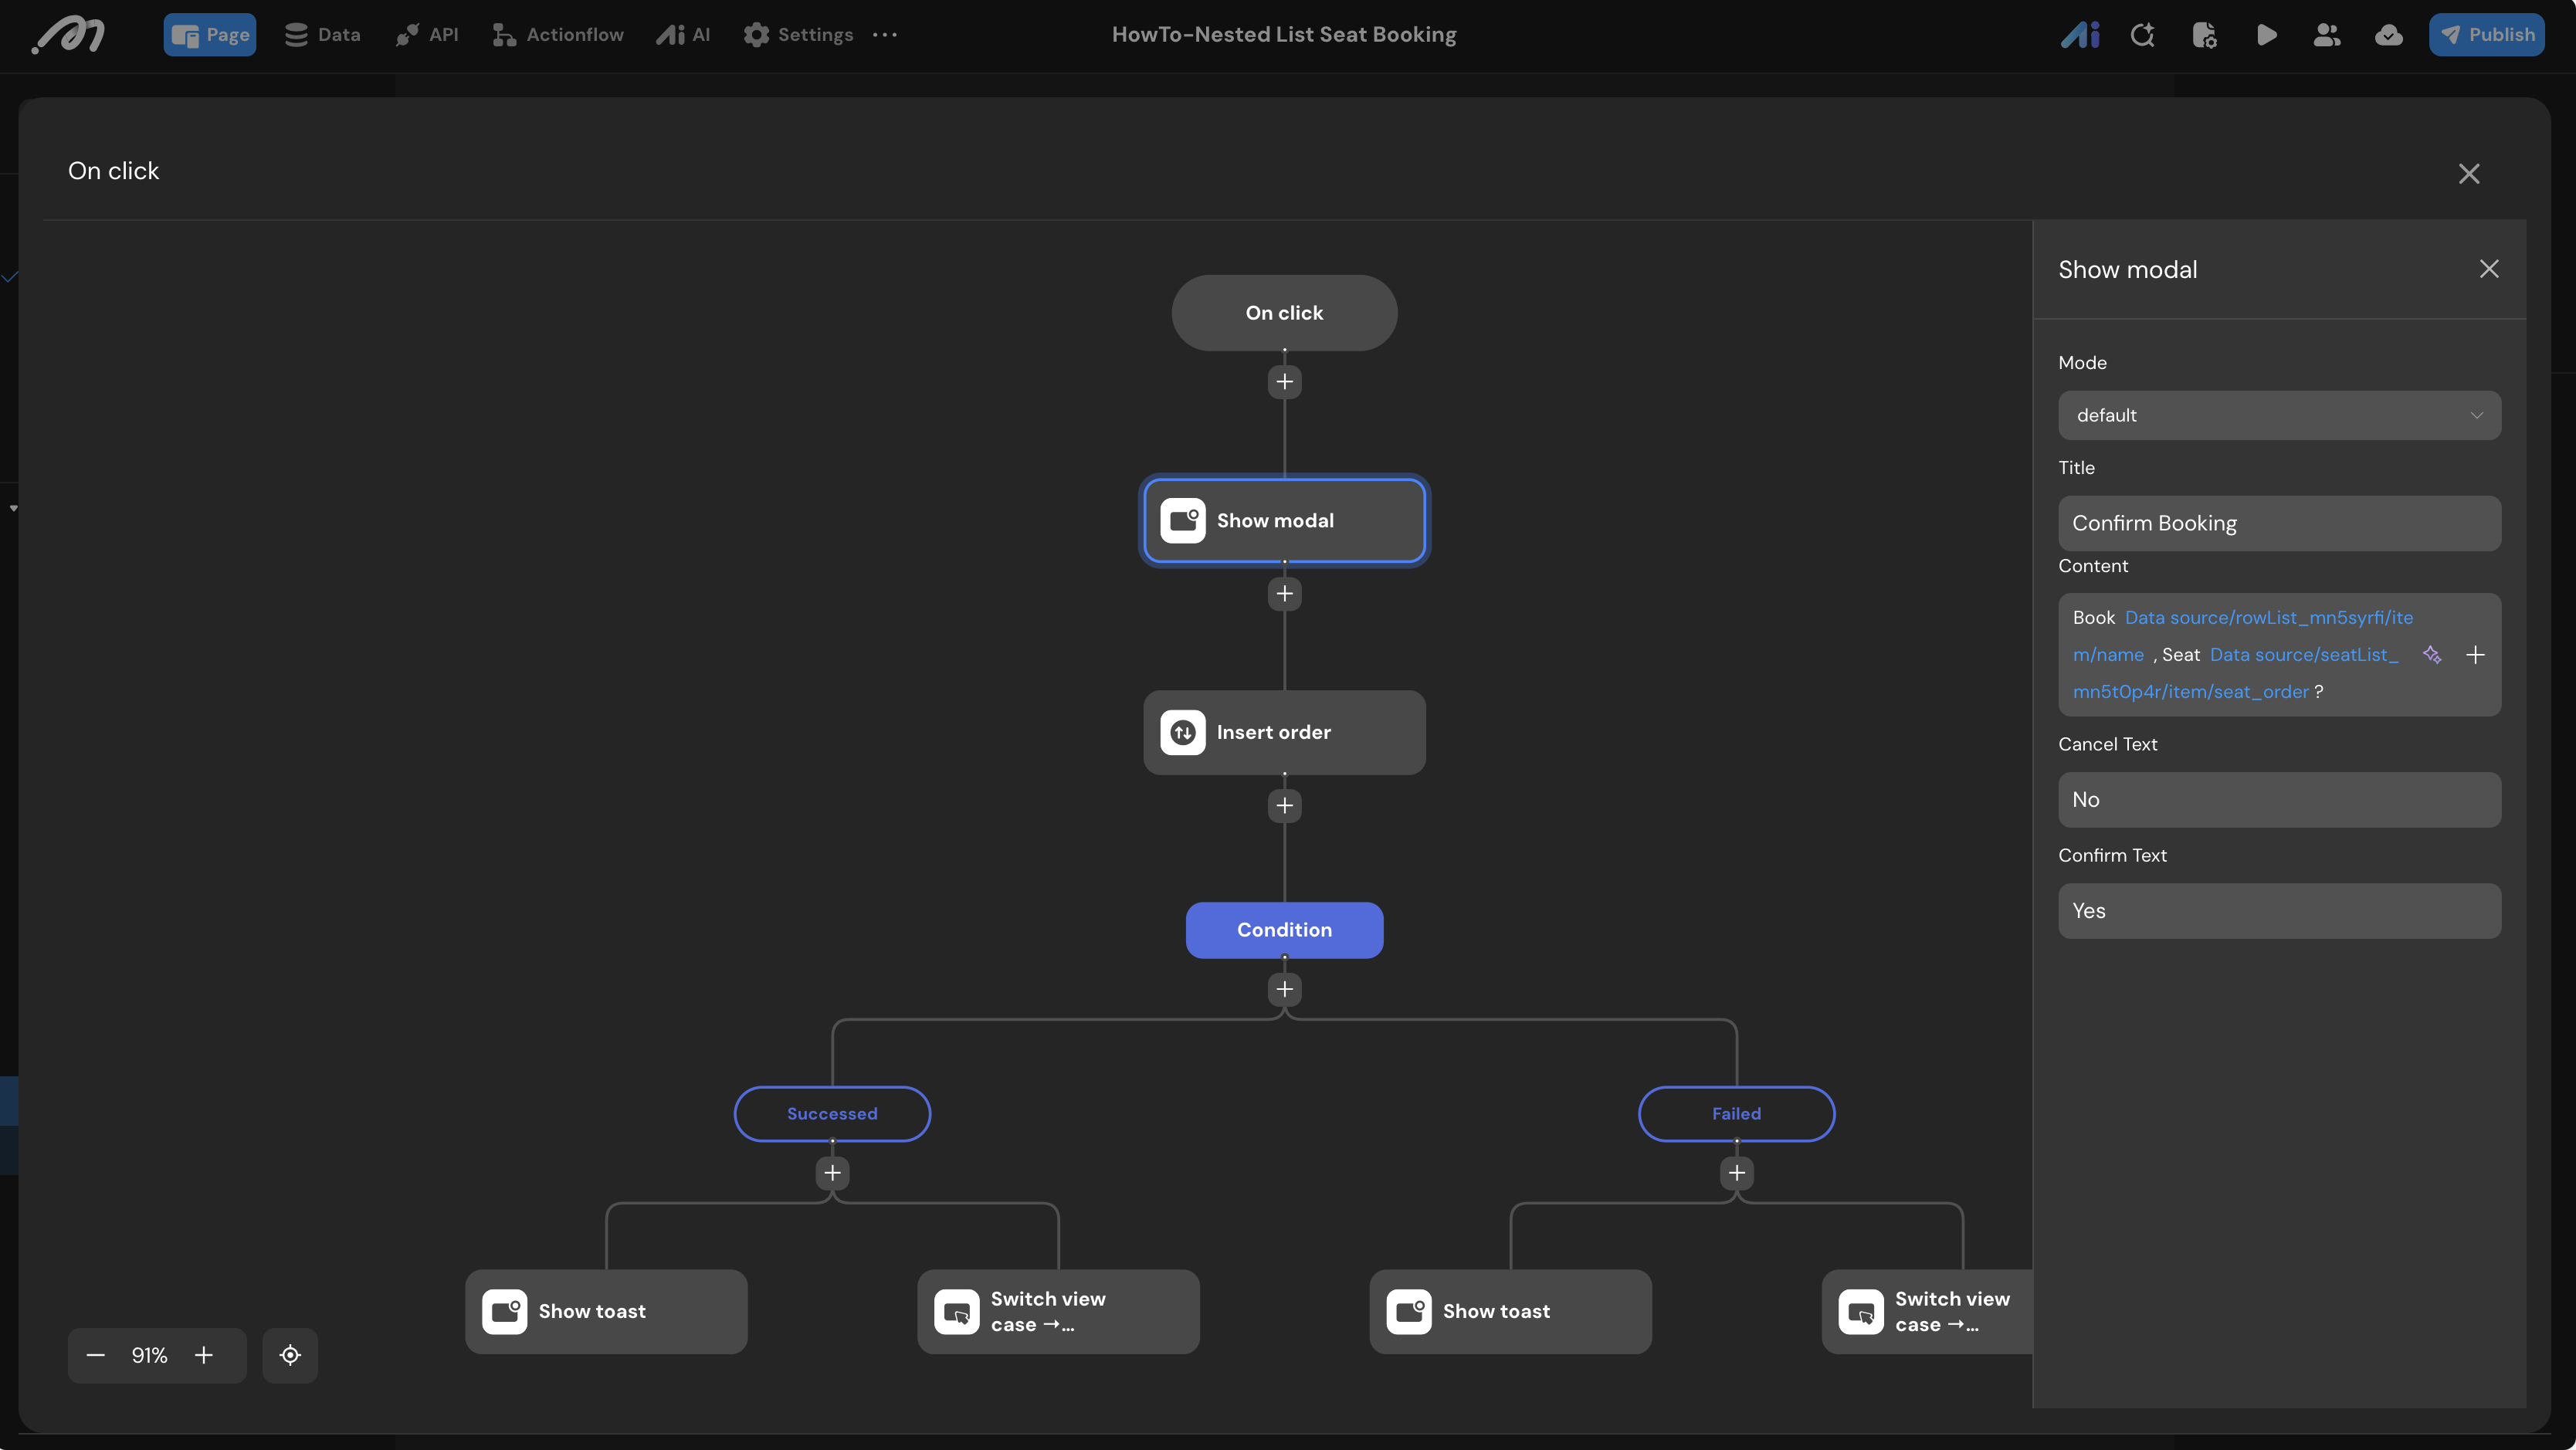
Booking a Seat (Available State)
This is where we handle the high-concurrency conflict checks.
- Add a Show modal node: “Confirm Booking?”.
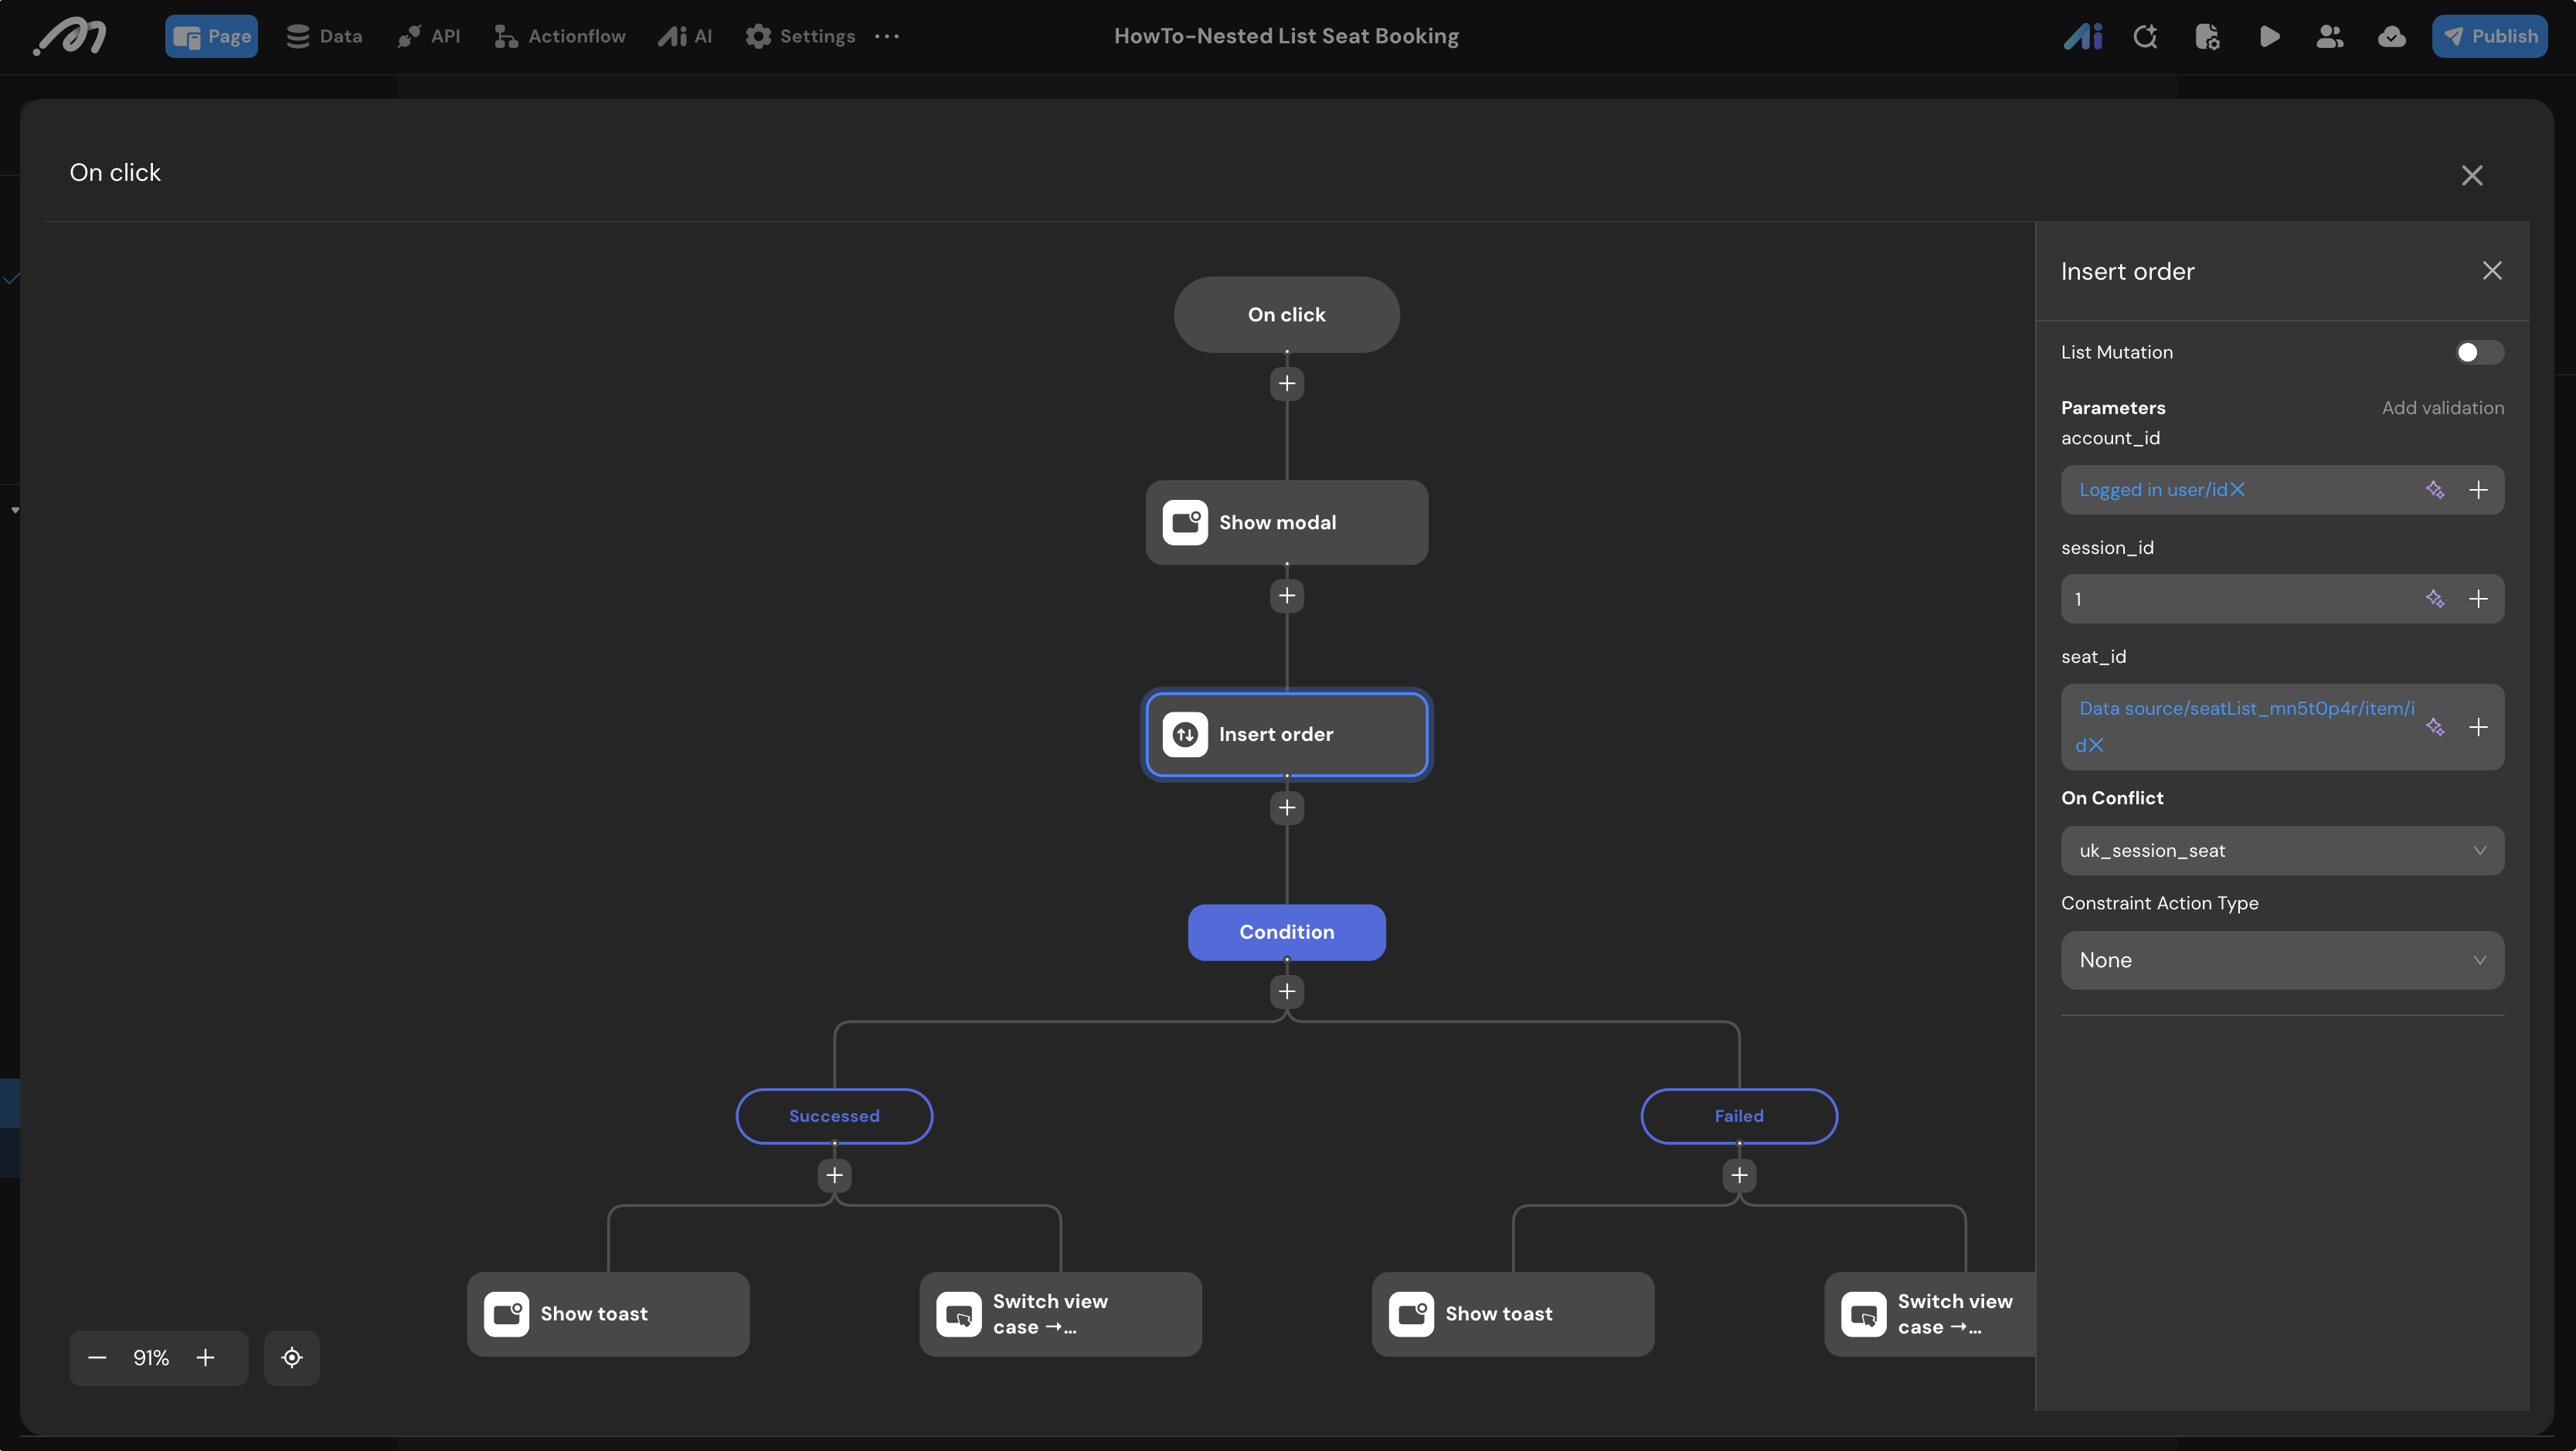
- Add an Insert order node. Map
account_idto{Logged in user/id},session_idto1(or your active session variable), andseat_idto the current seat’s ID.- Crucial Step: In the On Conflict settings, select the uk_session_seat constraint and set the Action Type to None.
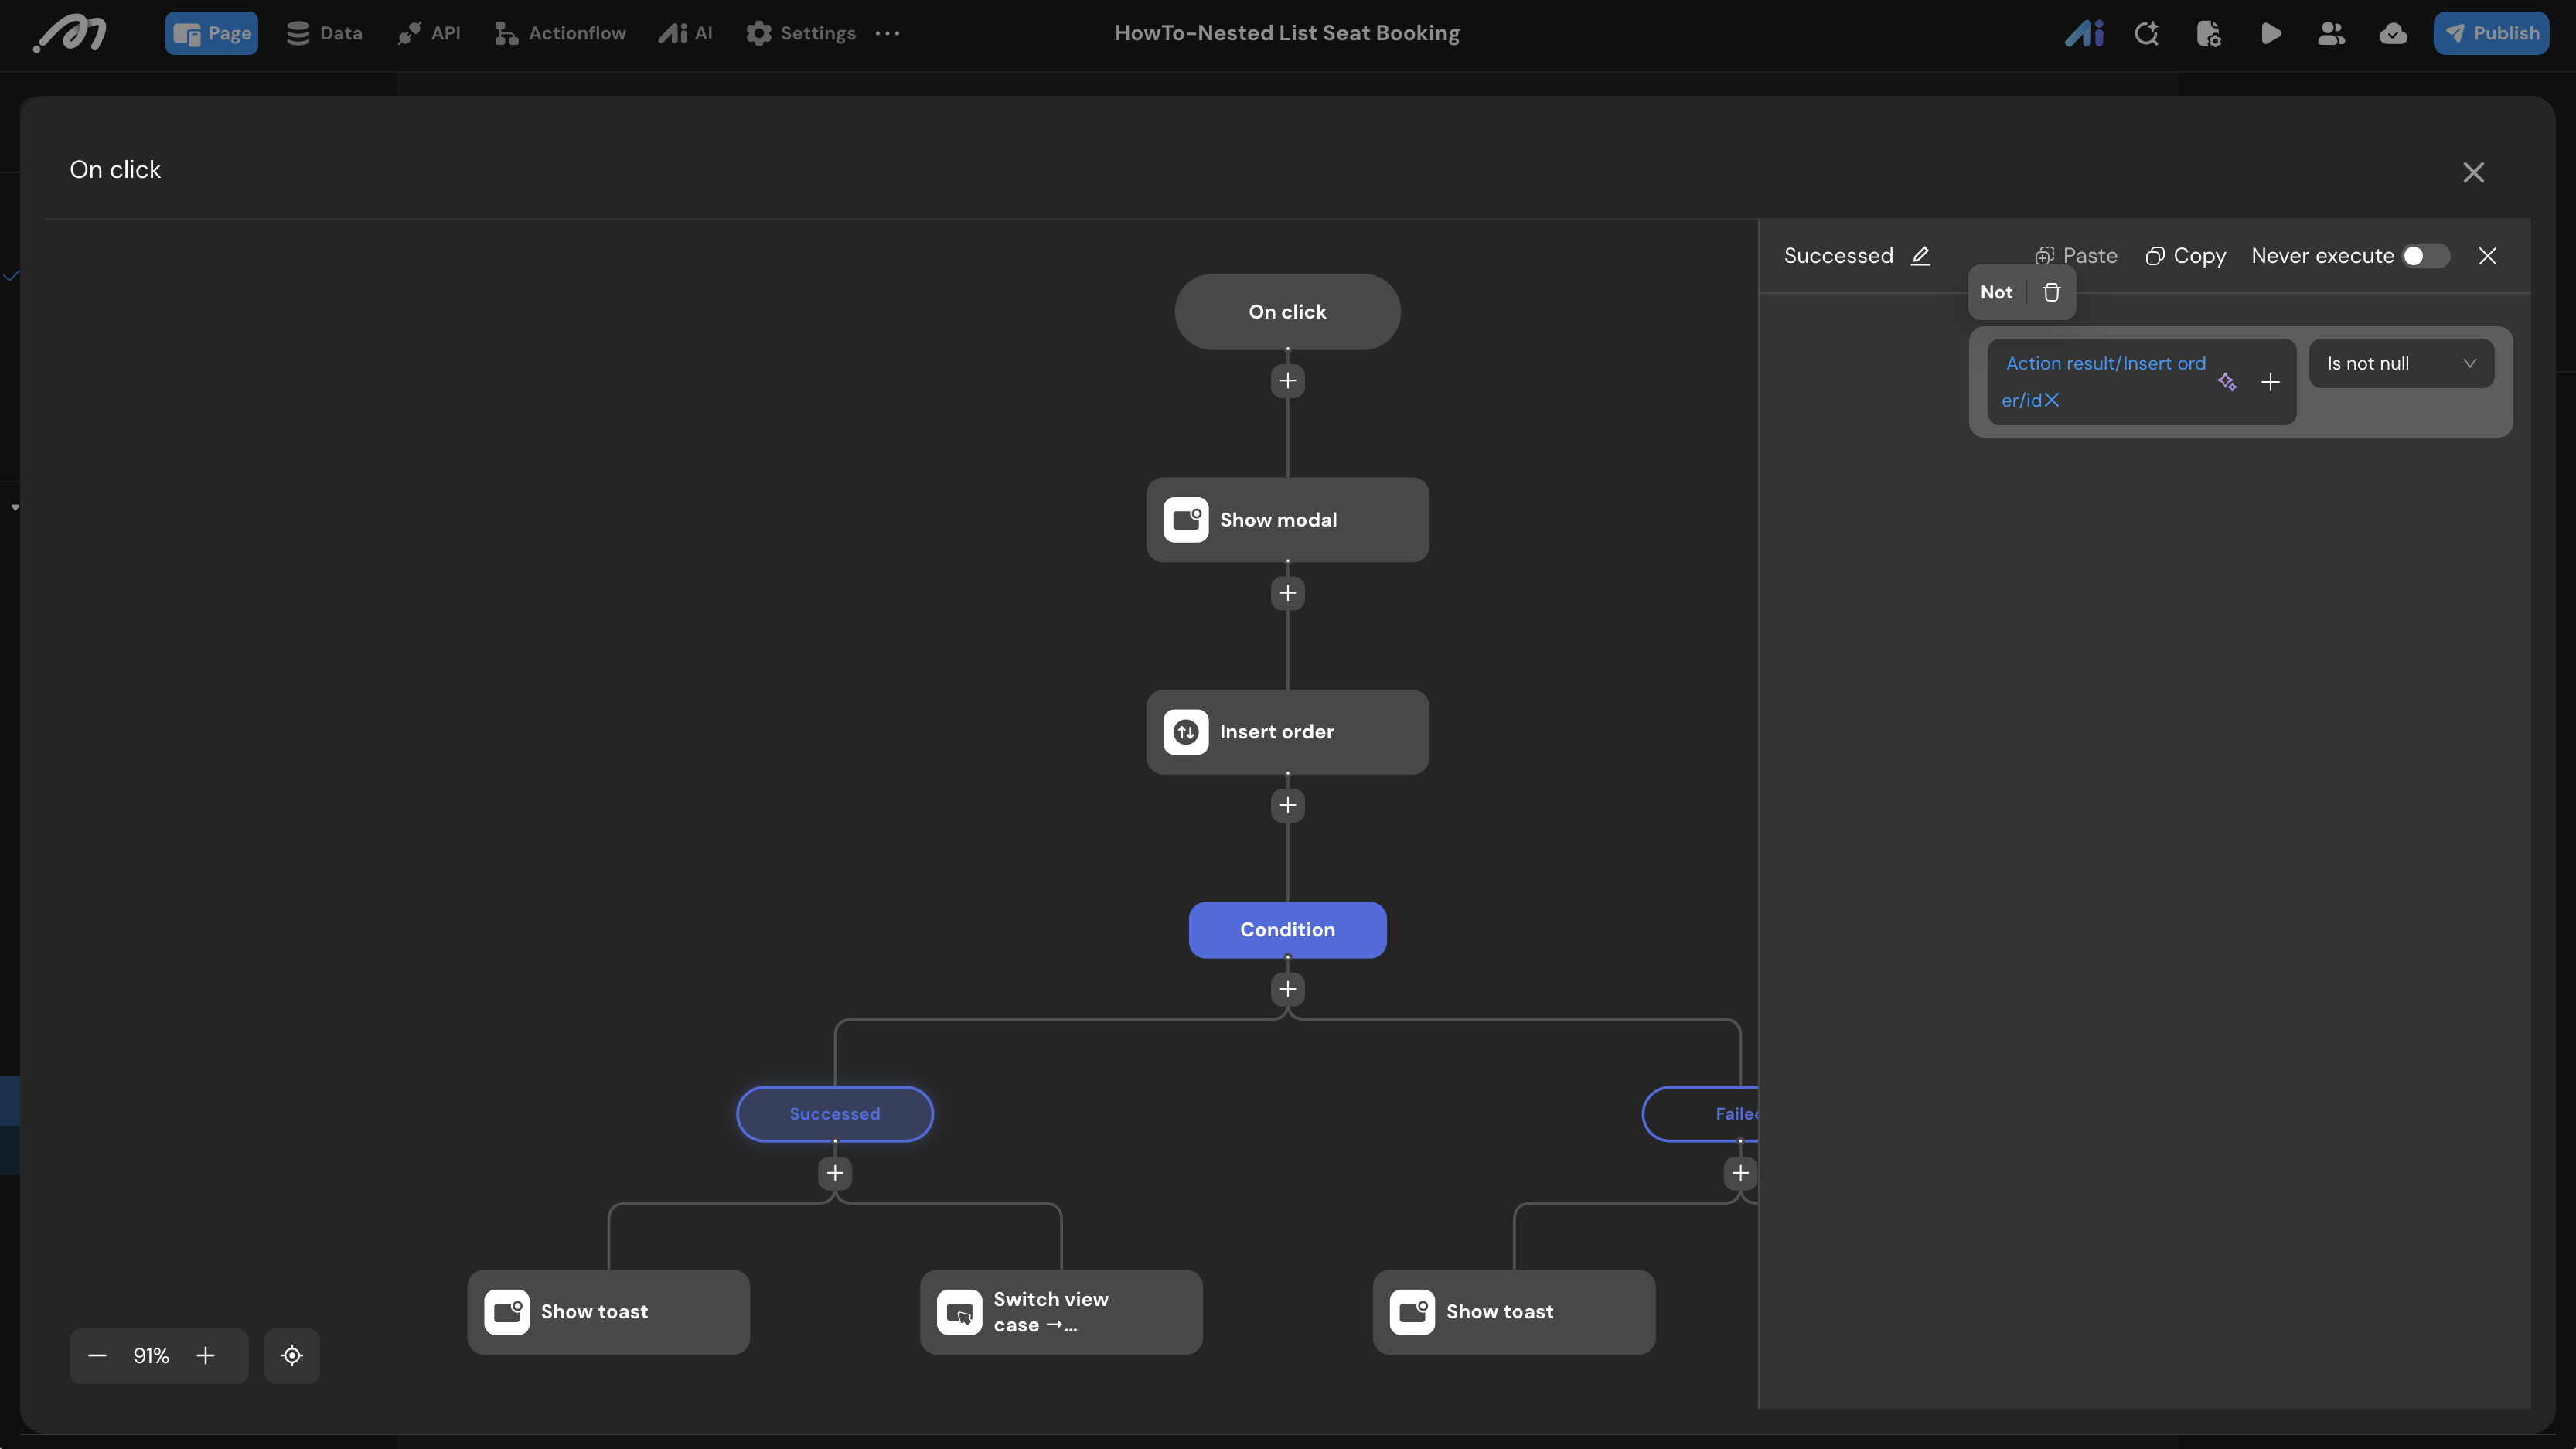
- Add a Condition node to evaluate the result of the Insert action.
- Success Branch: Check if
{Action result/Insert order/id}is Not null. If true, show a success Toast and use Switch view case toPurchased. - Failed Branch: Check if
{Action result/Insert order/id}is Is null (meaning the unique constraint blocked the insertion because someone else just booked it). Show a failure Toast (“Seat already booked”) and use Switch view case toOccupied.
- Success Branch: Check if
Verification
To test the conflict-resolution architecture:
Step 1: Initial Booking (User 1)
- Open the preview and log in as User 1.
- Select Row B, Seat 2. A confirmation modal appears: *“Book Row B, Seat 2?”*.
- Click Yes. The seat icon immediately turns blue (the
Purchasedstate).
Step 2: Concurrent Session (User 2)
- Open a new Incognito window and log in as User 2.
- Notice that Row B, Seat 2 is already grayed out (
Occupied), proving the conditional container is working. - User 2 then successfully books Row C, Seat 3.
Step 3: The “Ghost” Selection & Conflict Interception (User 1)
- Switch back to User 1’s window. Since the page hasn’t refreshed, Row C, Seat 3 still appears black (
Available). - User 1 attempts to book Row C, Seat 3.
- Upon clicking Yes, the database interceptor kicks in:
- The
uk_session_seatconstraint blocks the insertion. - The Actionflow detects the null ID result and triggers the Failed Branch.
- A Toast notification appears: “Sorry, this seat is no longer available.”
- State Rollback: The seat icon instantly switches from black to gray (
Occupied) without a page reload.
- The
Step 4: Cancellation & Release
- User 1 clicks their blue seat (Row B, Seat 2).
- Confirm the cancellation. The
Deleteaction removes the record from the Order table. - The unique constraint is released, and the seat returns to the
Availablestate for all users.
Check your Database order table to ensure only one record was successfully created for that specific seat and session.