AI Smart Tagger
Project Access Link
https://editor.momen.app/tool/z7Bx4APAo7X/WEB?code=81JnApgflB1w2&ref=0562398
Tutorial Video
https://www.youtube.com/watch?v=a5XvuI-eSL8
Introduction
- Goal: Automatically analyze an article’s title and content to extract 3–5 relevant keywords and save them as associated tags in the database.
- Applicable Scenario: Content management systems (CMS), blog platforms, or automated SEO tagging tools.
- Core Logic: UI Input -> Actionflow (AI Agent Analysis -> Insert Article -> Loop Insert Tags) -> Database Storage.
Steps
Data Storage
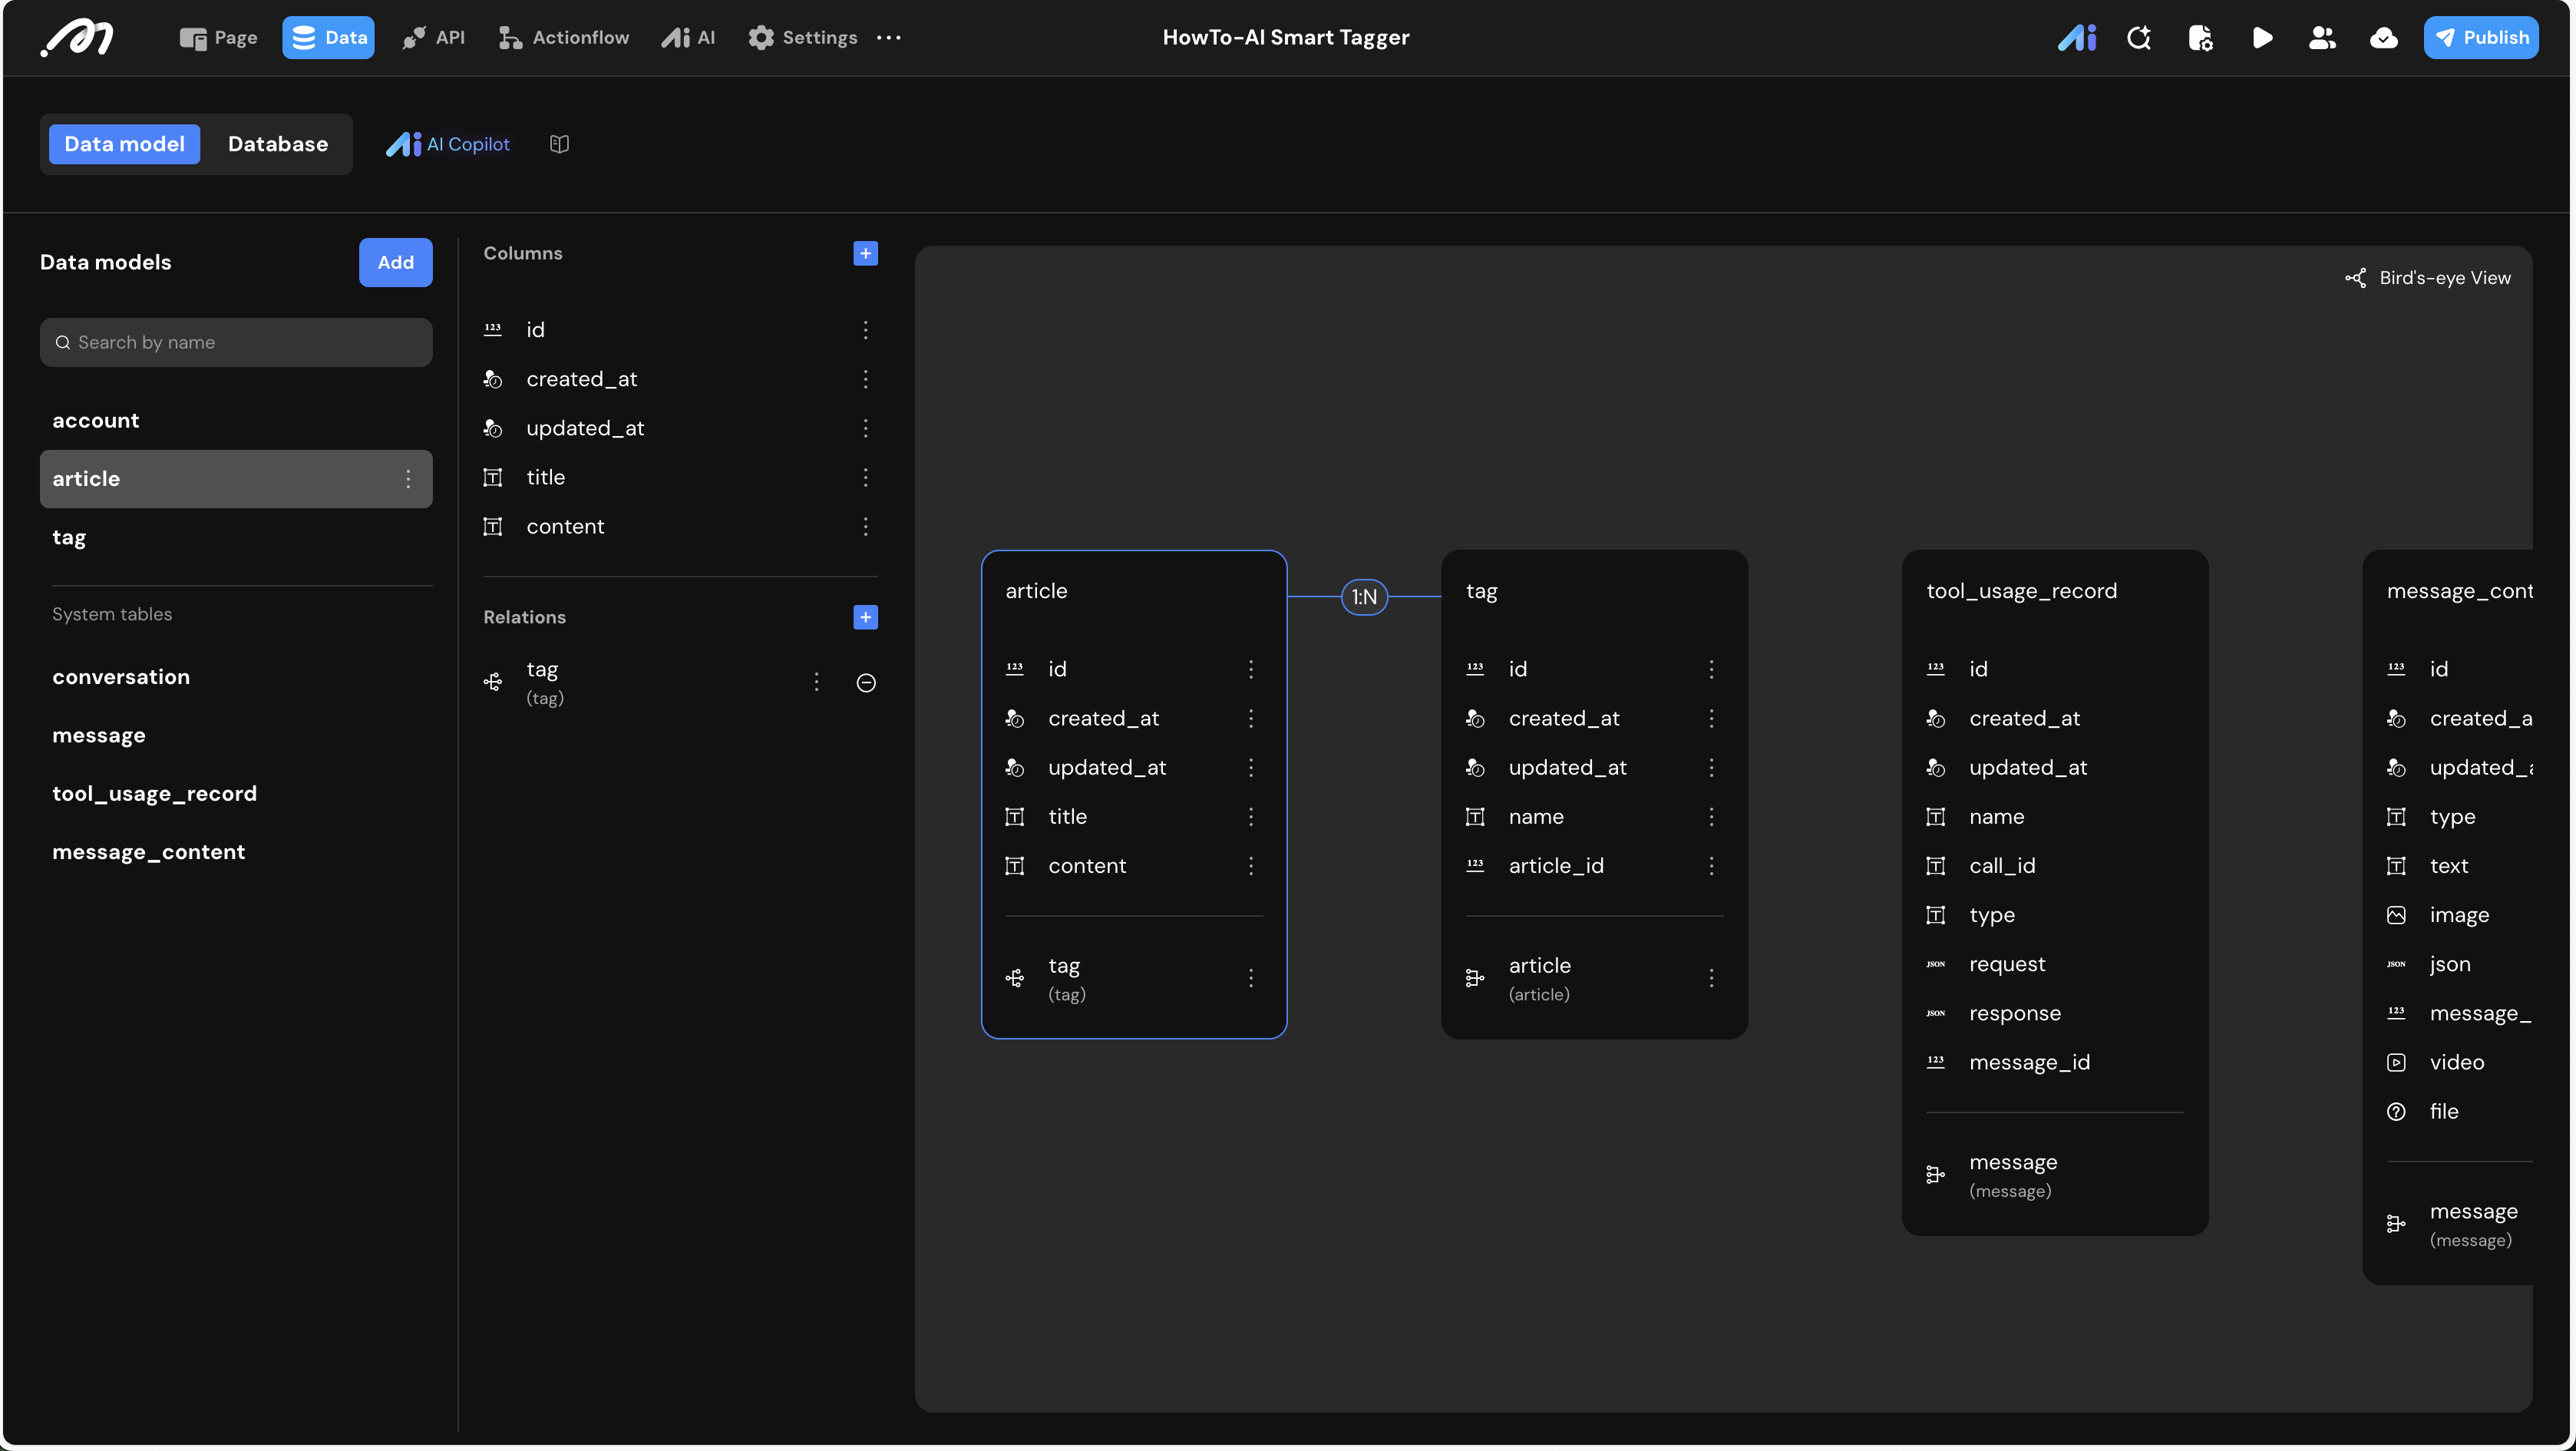
First, define the relational structure to store articles and their corresponding tags.
-
Data Model:
Table Name Field Name Type Note article titleText The headline of the article. contentText The main body of the article. tag nameText The keyword extracted by AI. -
Relationship: Create a One-to-Many (1:N) relationship from
articletotag. One article can have multiple tags, and each tag belongs to one specific article.
Logic & State Configuration
AI Agent Configuration
Switch to the AI tab to create an agent that handles the natural language processing.
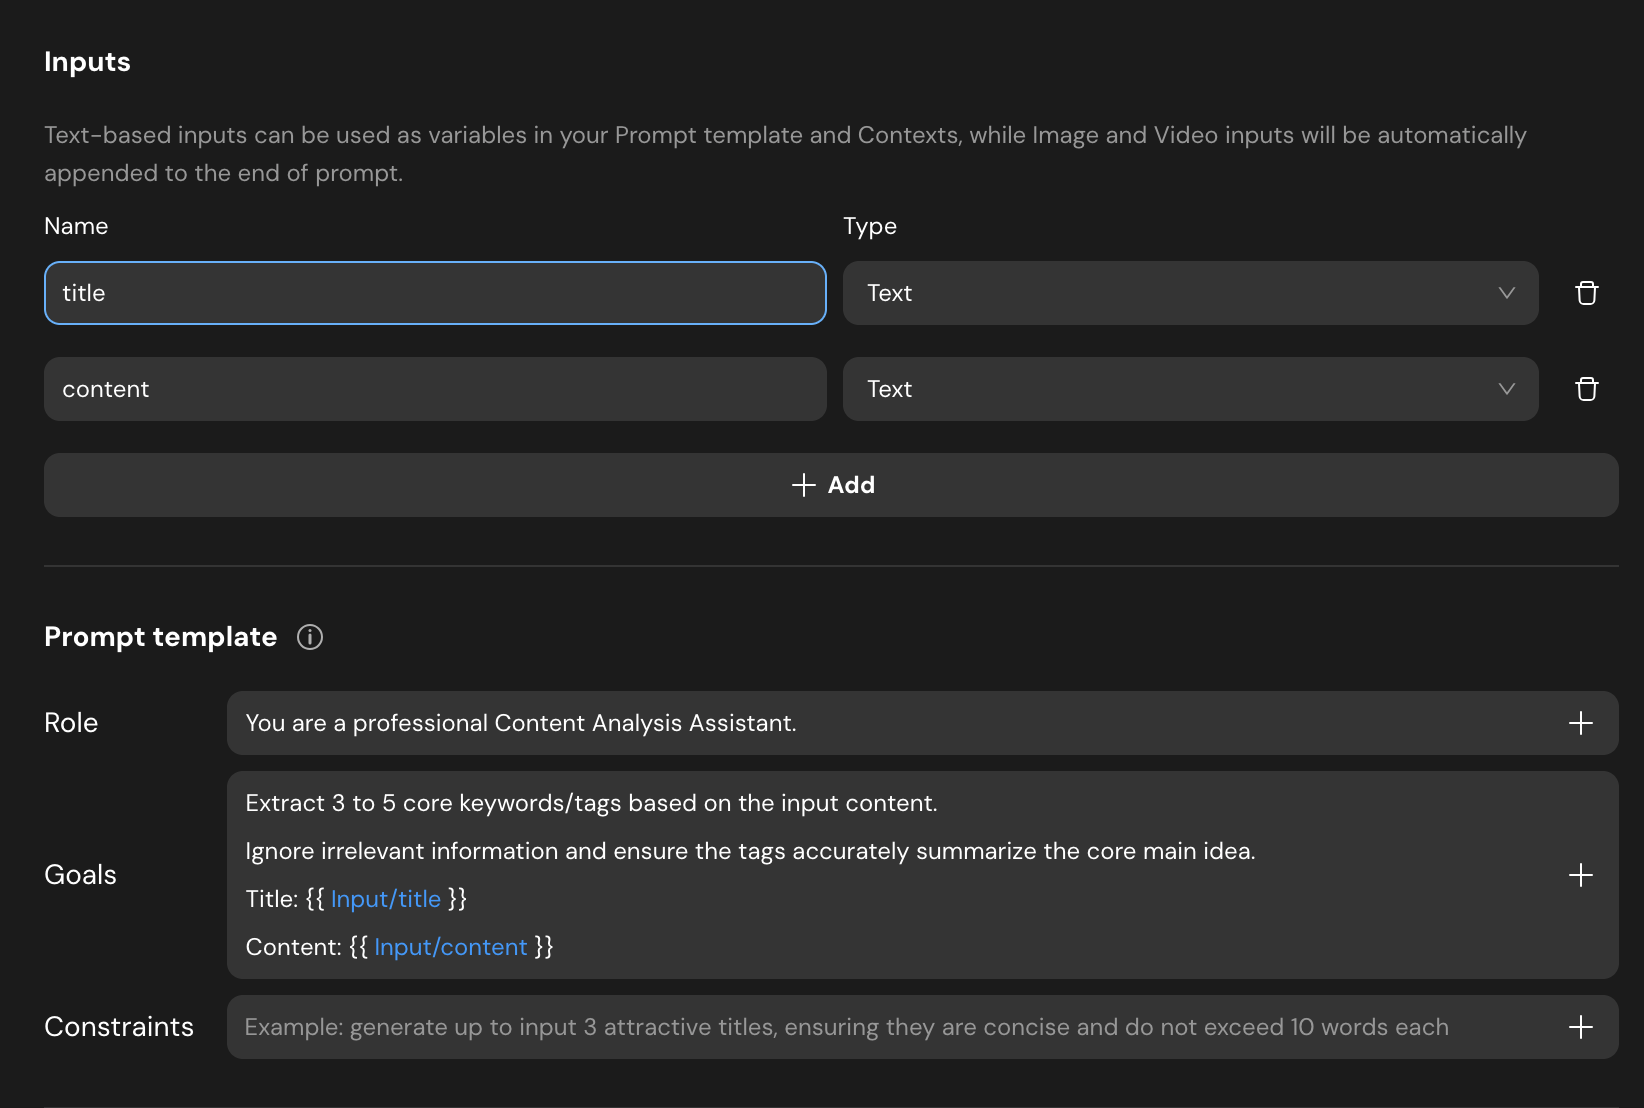
- Inputs: Add two Text variables:
titleandcontent. - Prompt template:
- Role:
You are a professional Content Analysis Assistant. - Goals:
Extract 3 to 5 core keywords/tags based on the input content. Ignore irrelevant information and ensure the tags accurately summarize the core main idea. - Context Reference: Reference the inputs using
{{Input/title}}and{{Input/content}}.
- Role:
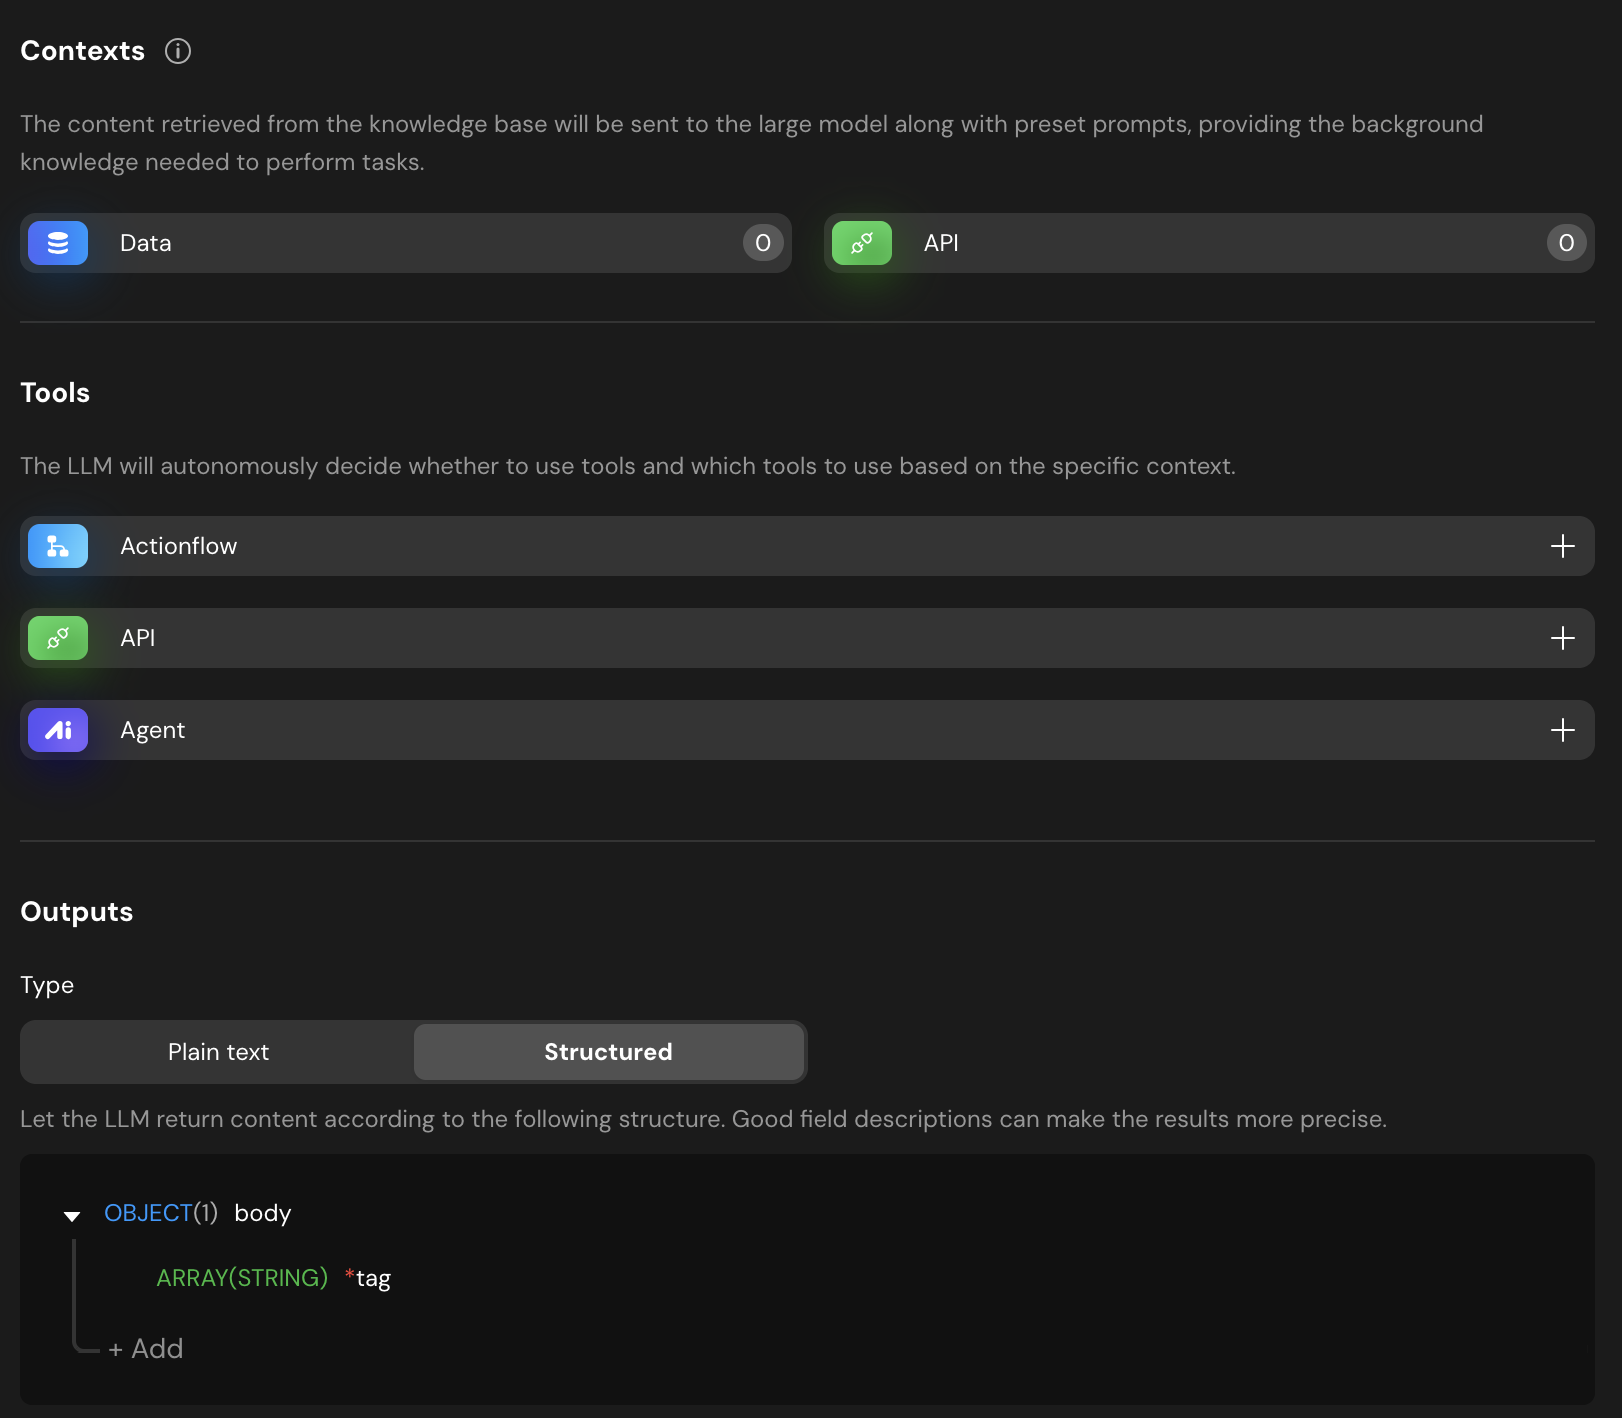
- Outputs: Set the type to Structured.
- Define an object
bodycontaining anARRAY(STRING)namedtag. This ensures the AI returns a list of strings that the system can iterate through.
- Define an object
Actionflow Construction
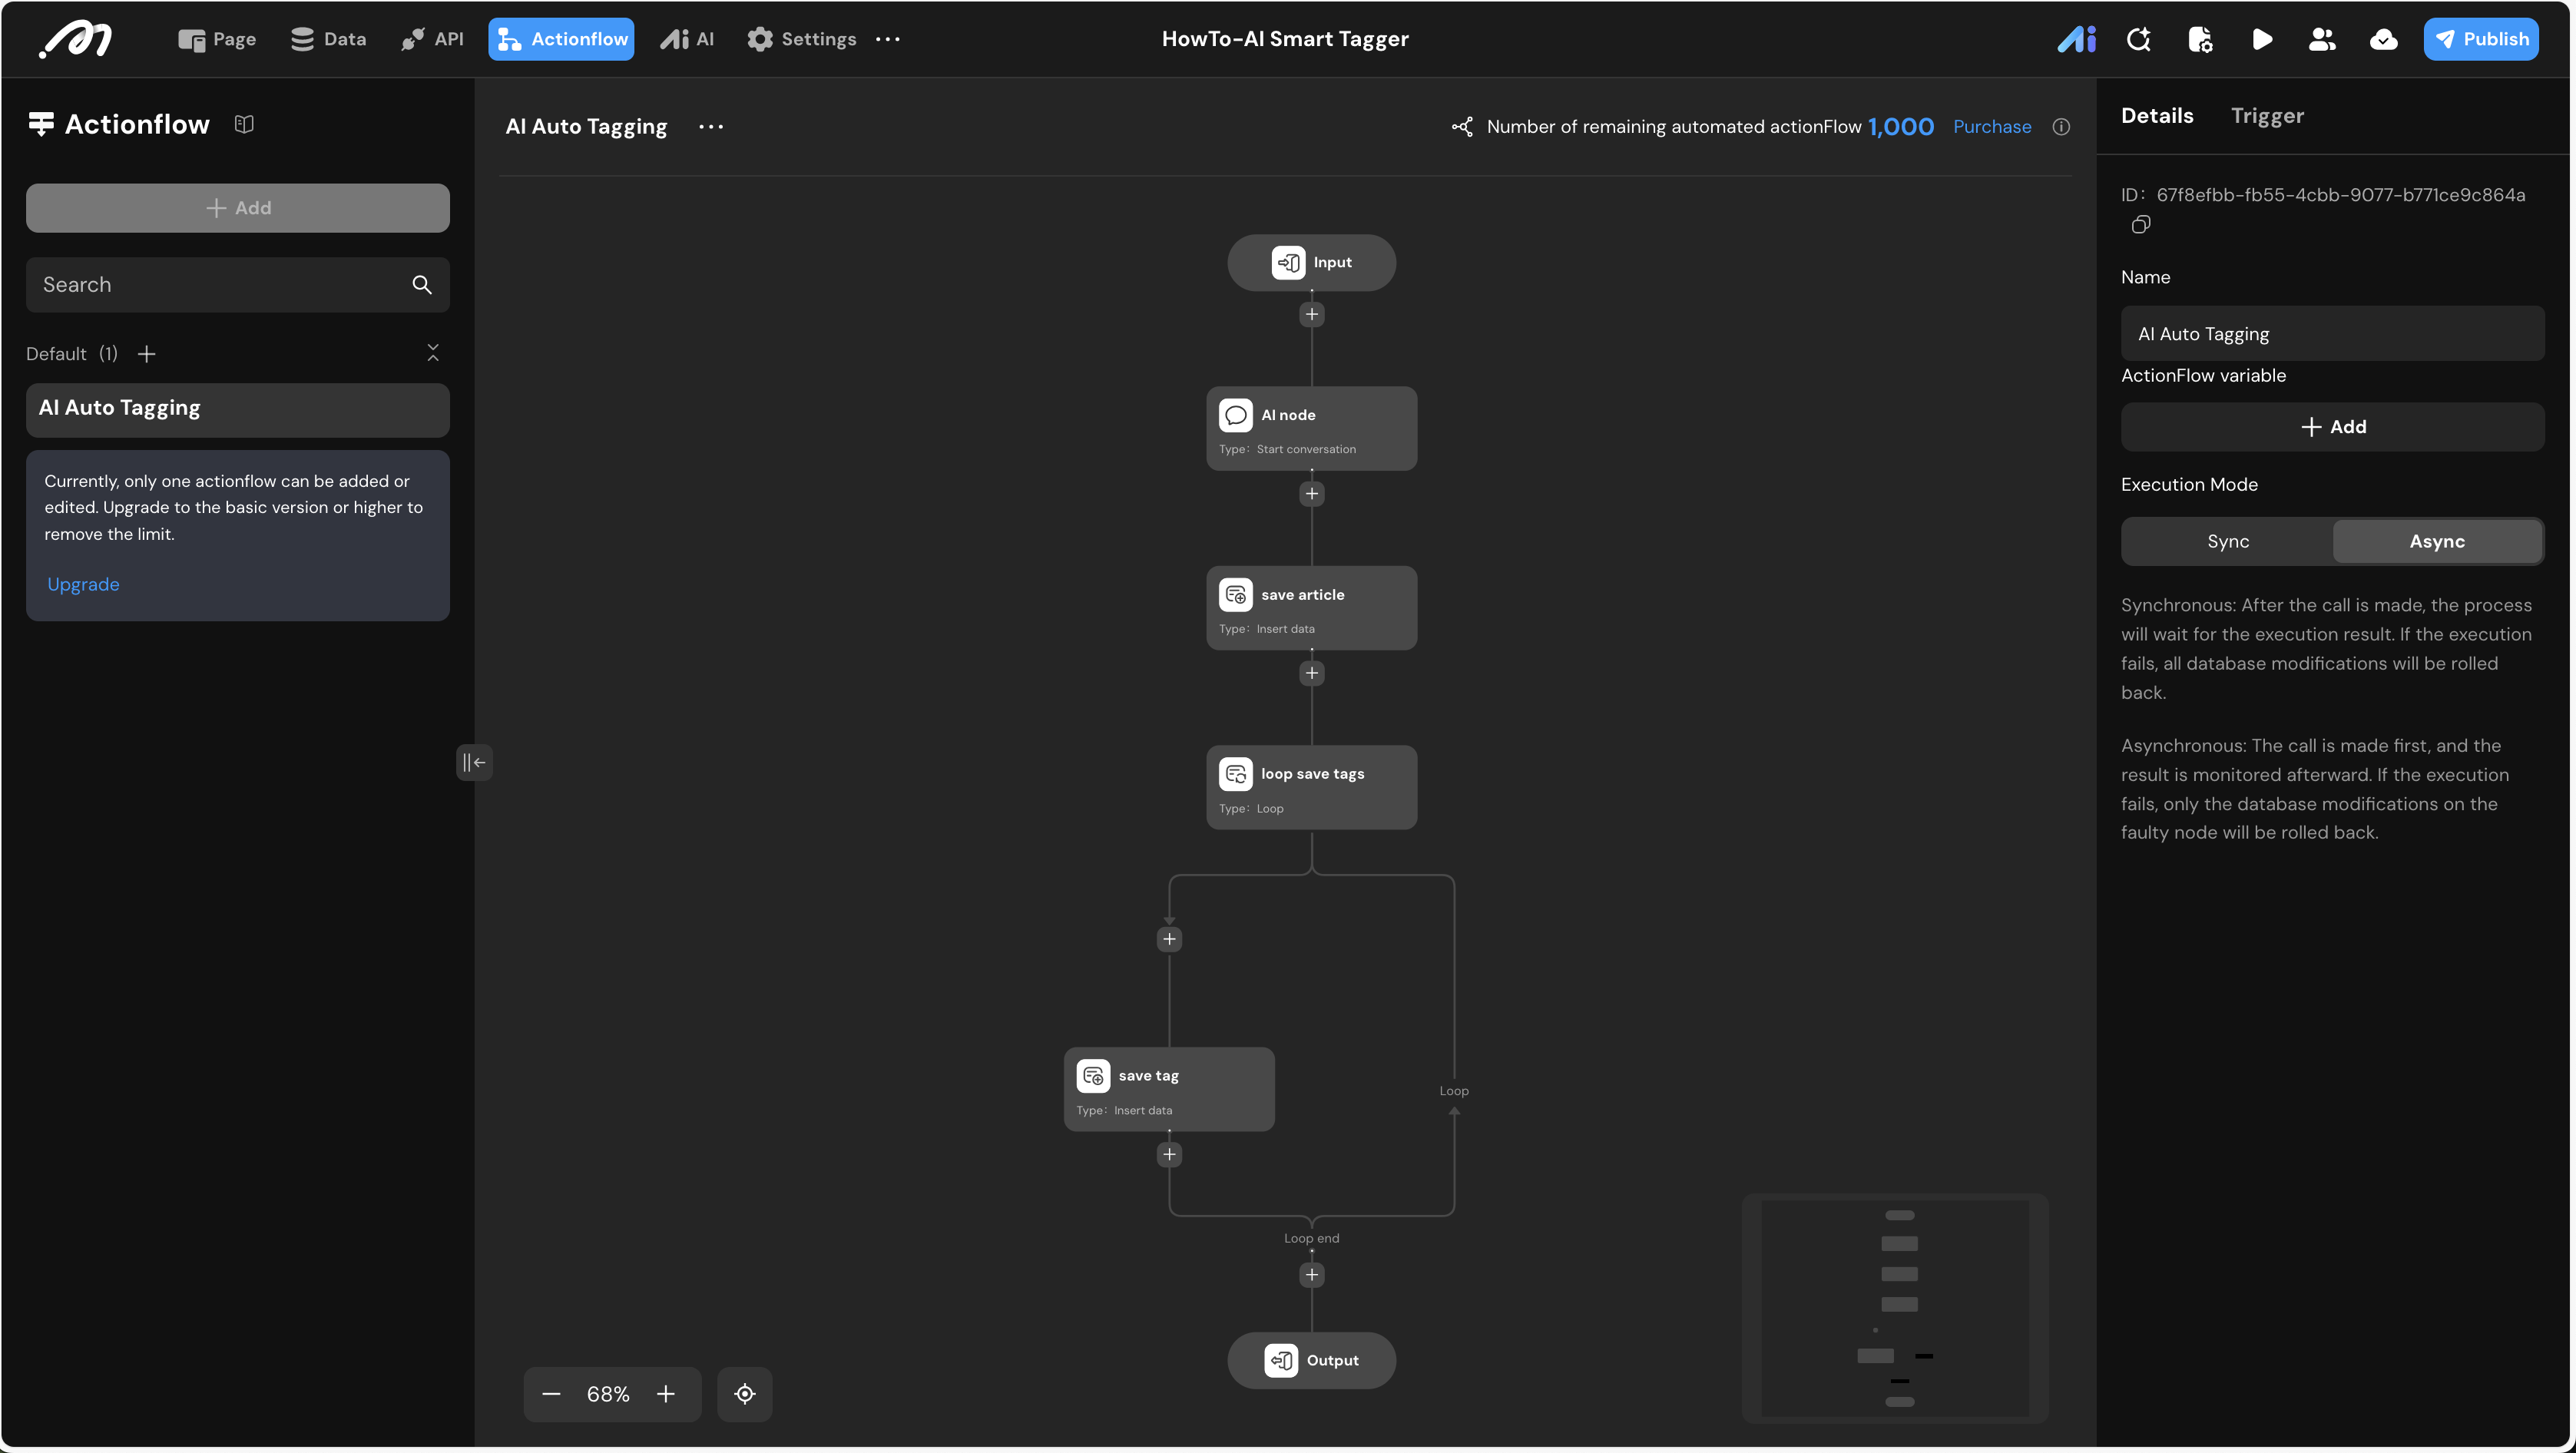
Navigate to the Actionflow tab to build the backend logic.
- Name:
AI Auto Tagging - Execution Mode: Set to Async.
- Nodes:
- Input Node: Define
titleandcontentas input parameters. - AI Node: Select the
agent_smart_tagging. Bind its inputs to the Actionflow’s input parameters. - Insert Data (save article): Insert a record into the
articletable using the inputs. - Loop (loop save tags):
- Datasource: Select the
tagarray returned by the AI node (AI node.body.tag).
- Datasource: Select the
- Insert Data (save tag): Inside the loop, insert a record into the
tagtable.- name: Bind to
item(the current tag in the loop). - article_id: Bind to the
idgenerated by the previous “save article” node.
- name: Bind to
- Input Node: Define
Because the AI returns multiple tags, a Loop node is necessary to insert individual database records for each keyword while linking them to the parent article ID.
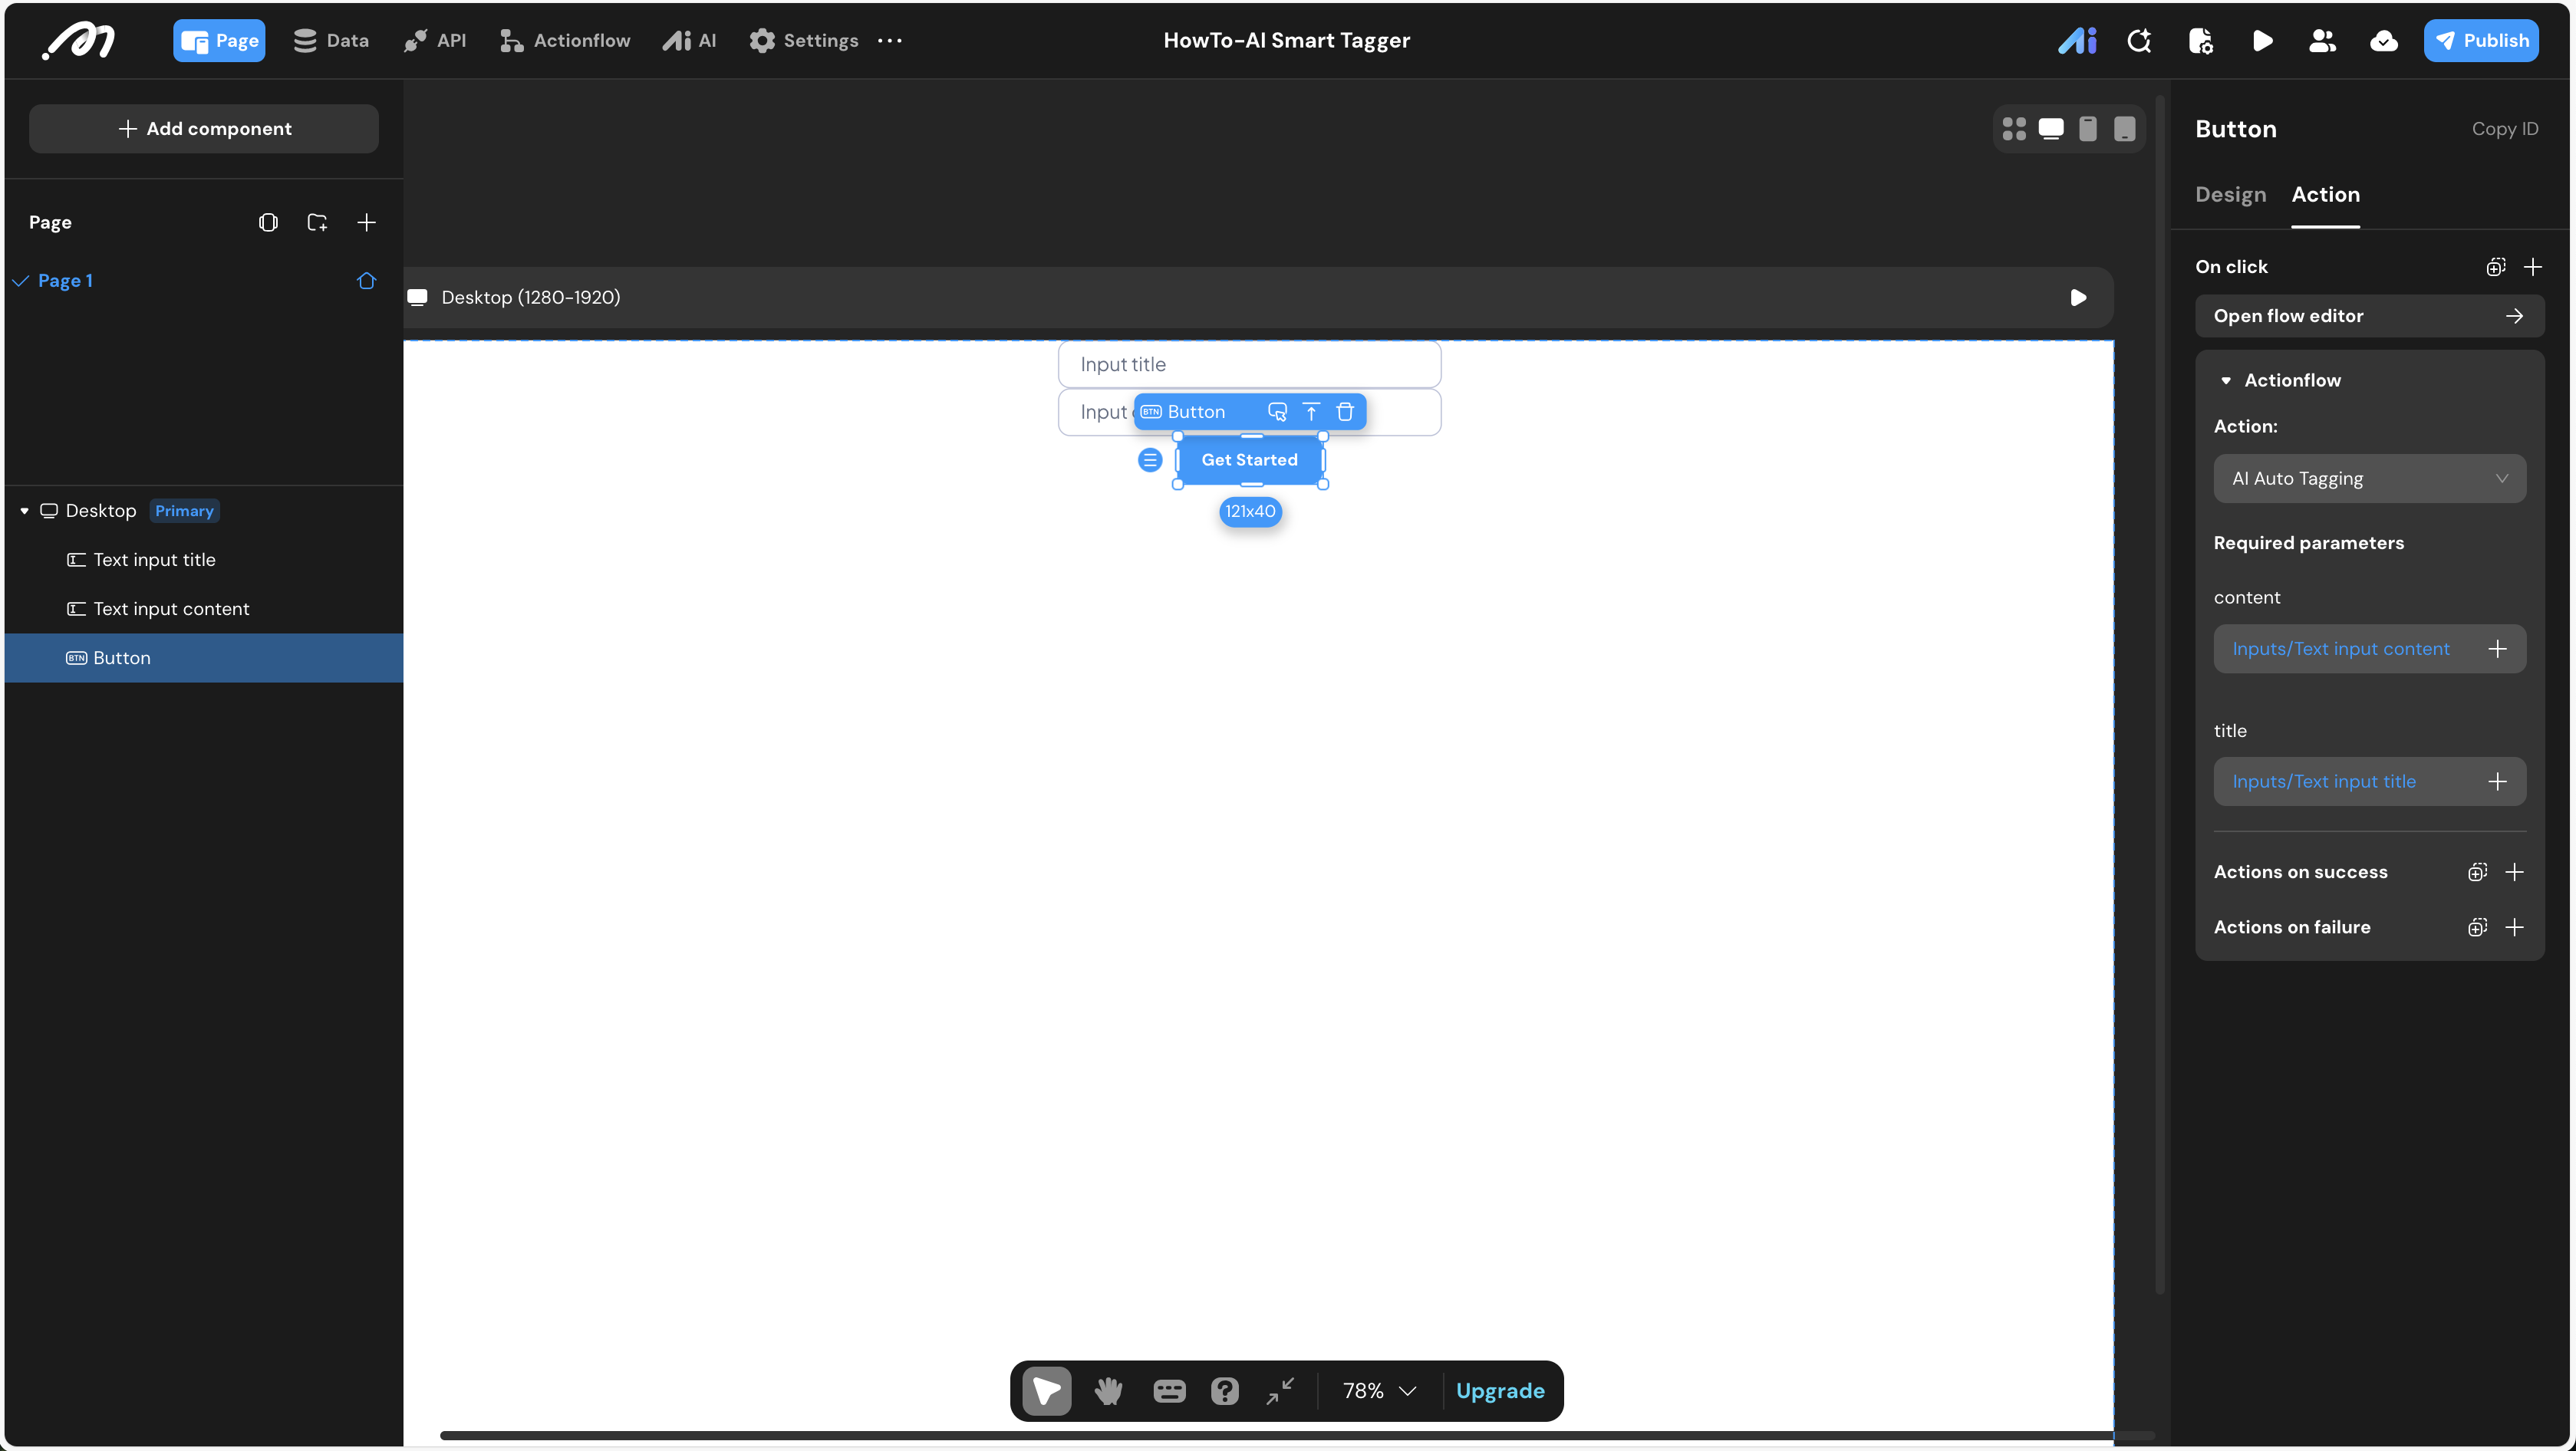
UI Construction & Interaction
- Component Tree:
Text Input (title)Text Input (content)Button (Get Started)
- Interaction:
- Select the Button.
- Go to the Action panel -> On click -> Actionflow.
- Choose
AI Auto Tagging. - Data Binding:
title->Text input title.valuecontent->Text input content.value
Verification
- Enter Preview Mode.
- Paste a sample article title and body into the inputs.
- Click the Get Started button.
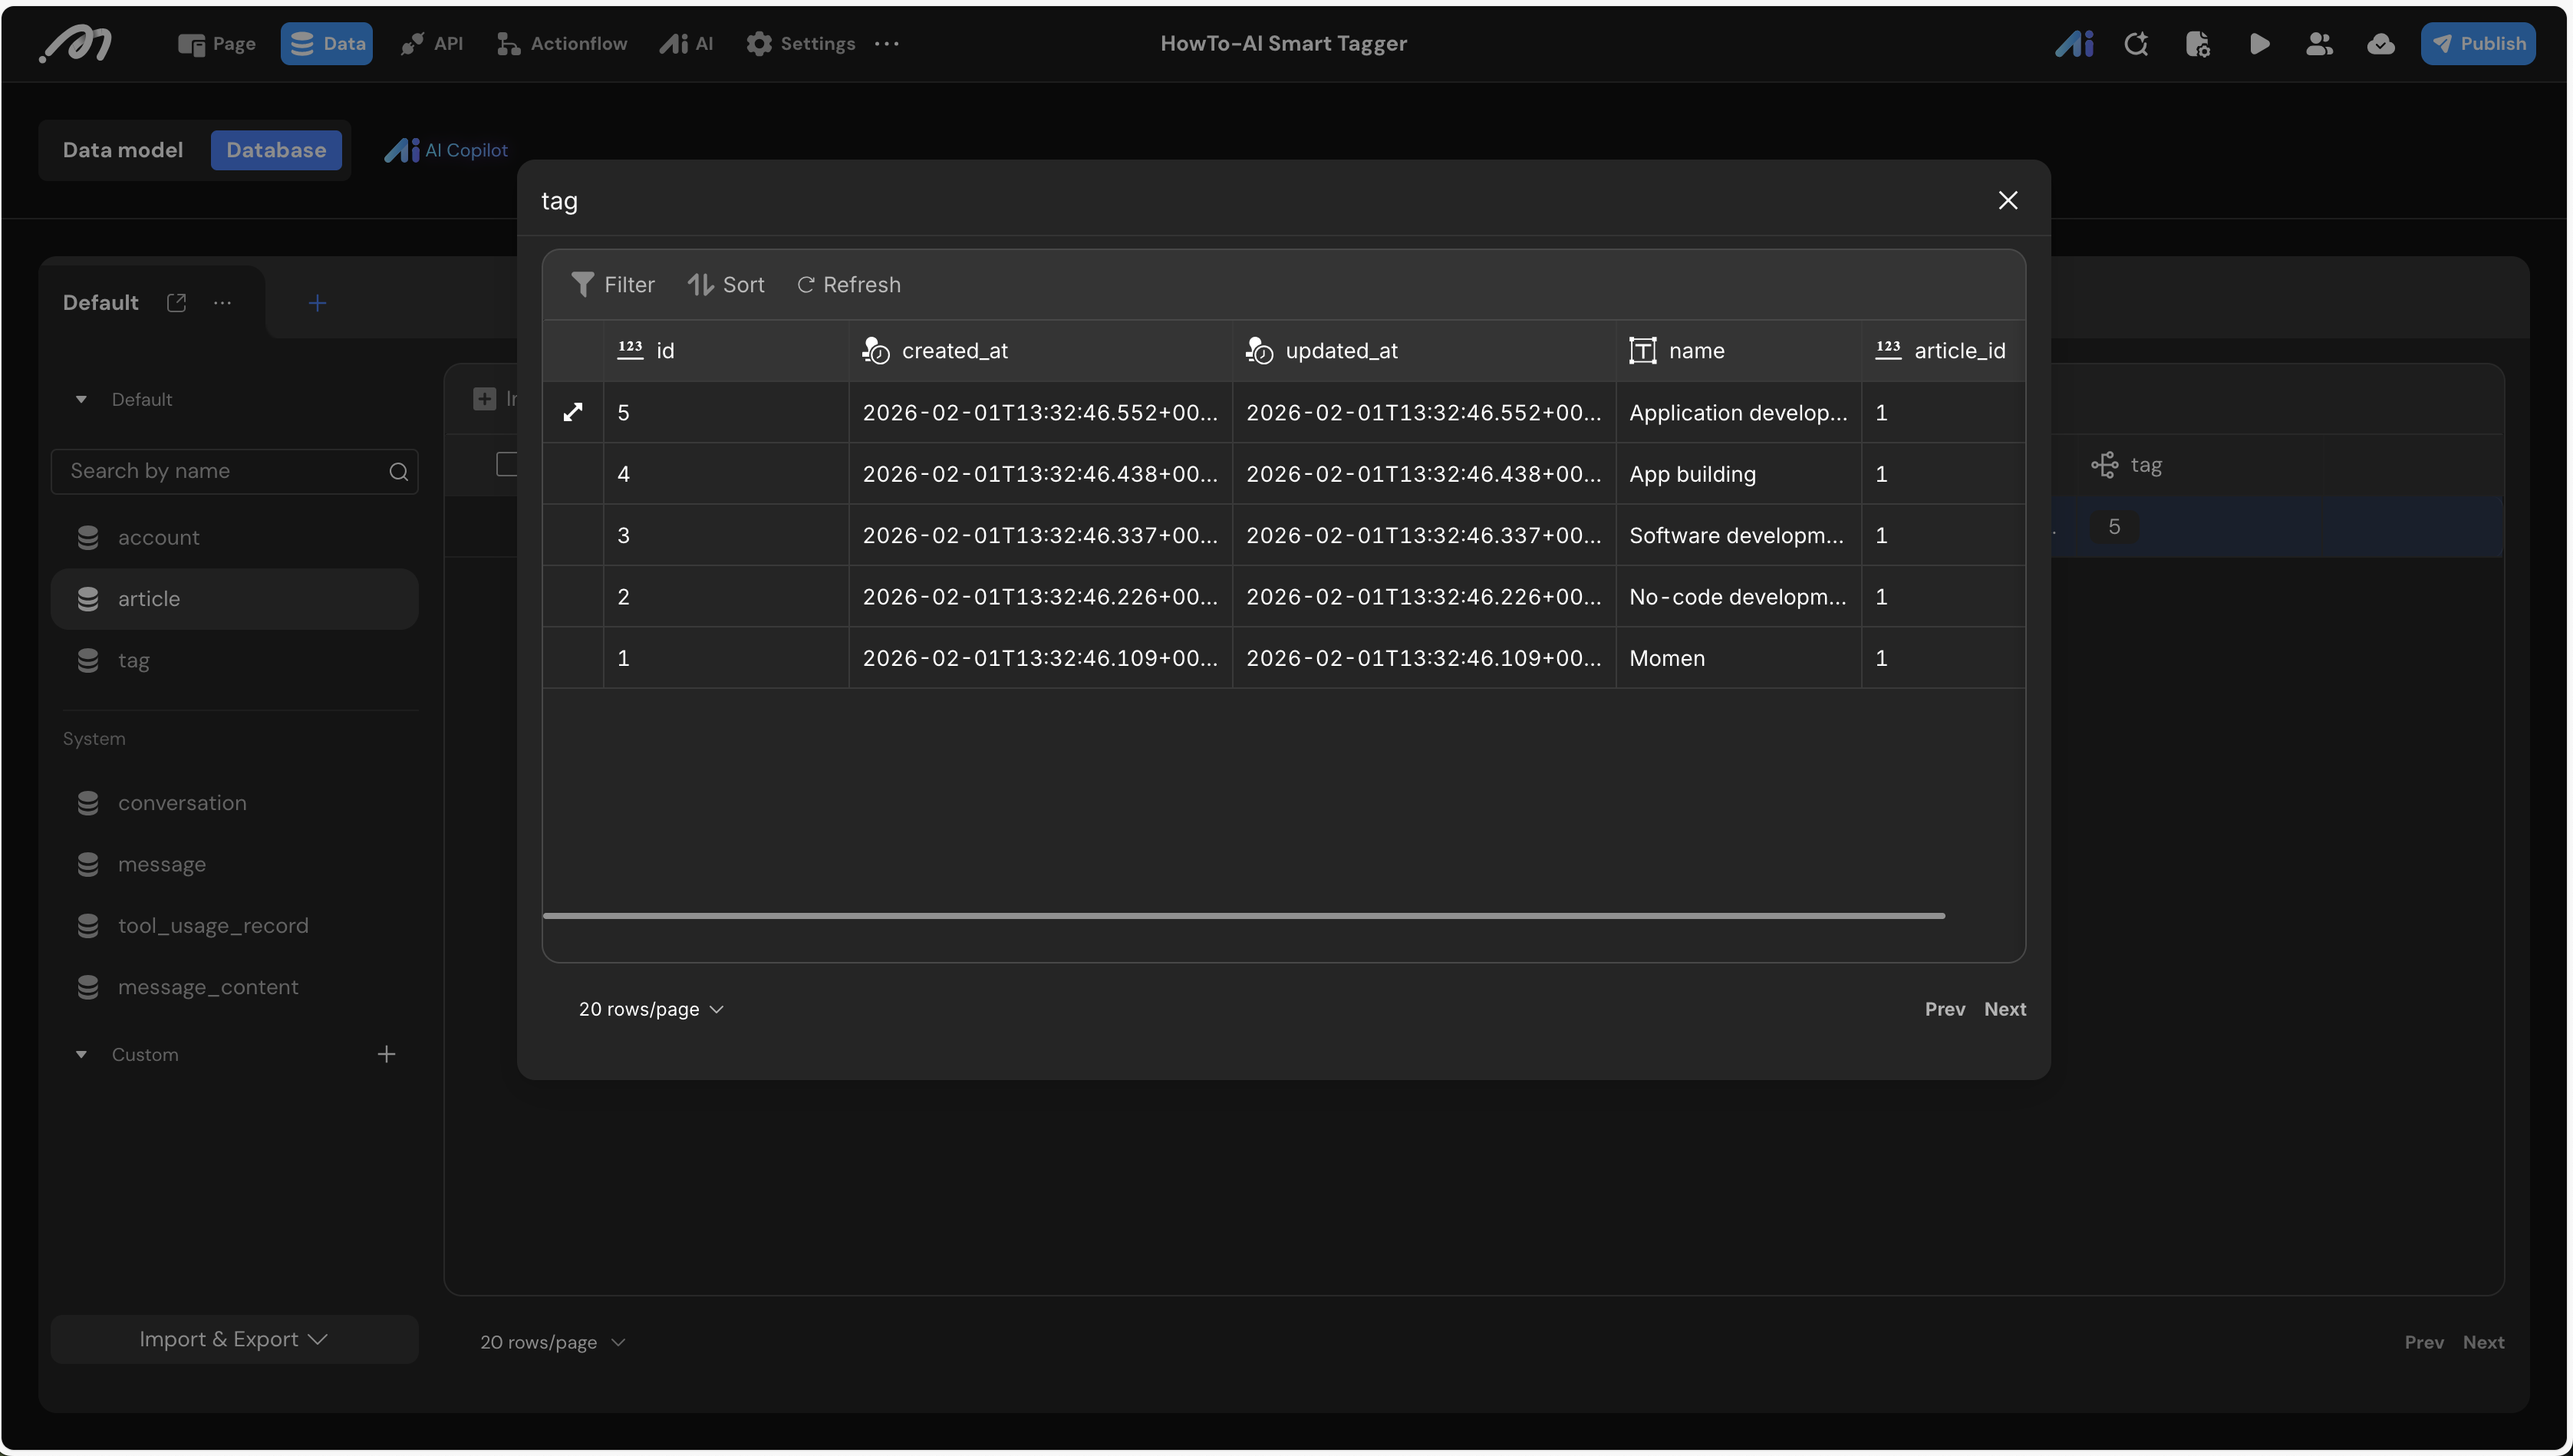
- Check the Data (Database) tab:
- Verify a new record exists in the
articletable. - Open the
tagtable to see the keywords extracted by the AI, all correctly linked to the article’s ID.
- Verify a new record exists in the
Last updated on