AI Resume Parser
Project Access Link
https://editor.momen.app/tool/wxjD4gygY2o/WEB?code=GPkT22stYMnJB&ref=0562398
Tutorial Video
https://www.youtube.com/watch?v=Y2iTcVQX1zM
Introduction
- Goal: Automatically extract key candidate information from uploaded resume files using AI.
- Applicable Scenario: Recruitment platforms, HR management systems, or automated candidate screening tools.
- Core Logic: User uploads a file to a Page Variable -> Button click triggers an Actionflow -> Actionflow saves the file, invokes the AI Agent, and updates the record with parsed data.
Steps
Data Storage
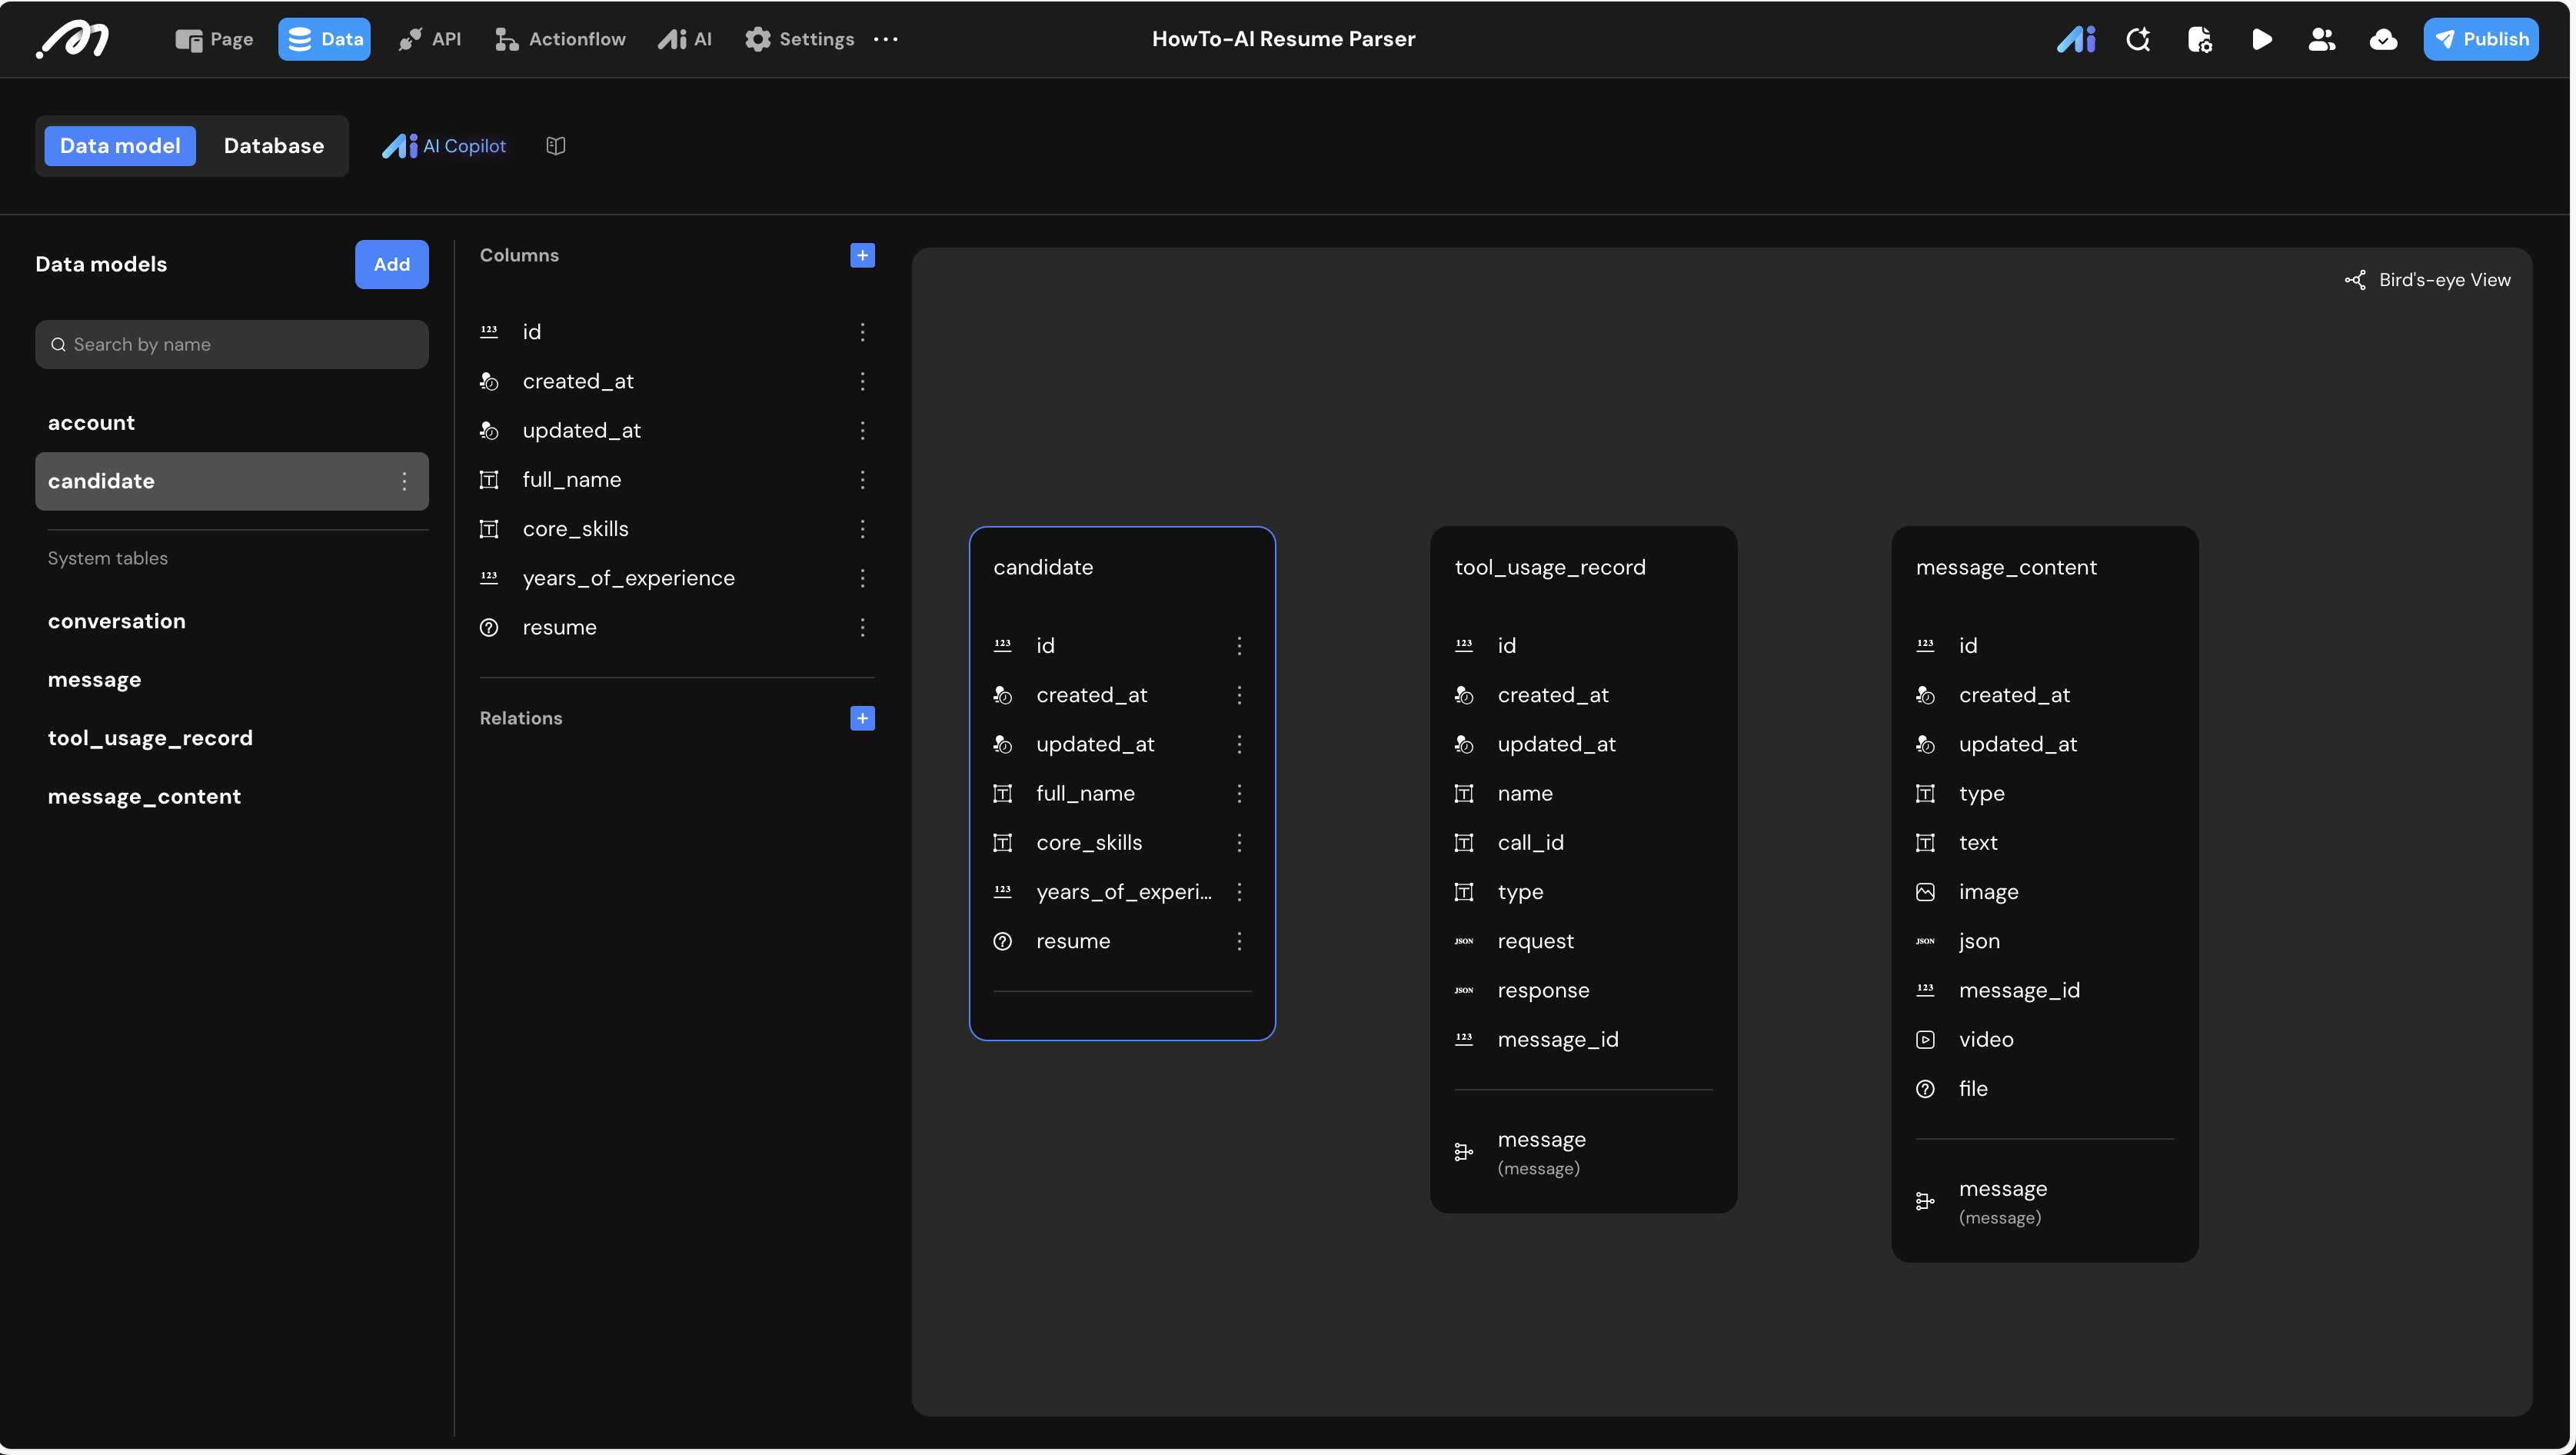
First, we need a table to store both the original resume files and the parsed information.
- Data Model: Create a table named
candidatewith the following fields:
| Field Name | Type | Note |
|---|---|---|
| resume | File | Stores the original uploaded PDF resume |
| full_name | Text | Stores the candidate’s name extracted by AI |
| core_skills | Text | Stores technical skills and certifications |
| years_of_experience | Bigint | Stores total years of work experience |
Logic & State Configuration
AI Agent Configuration
- Navigate to the AI tab and create a new agent named
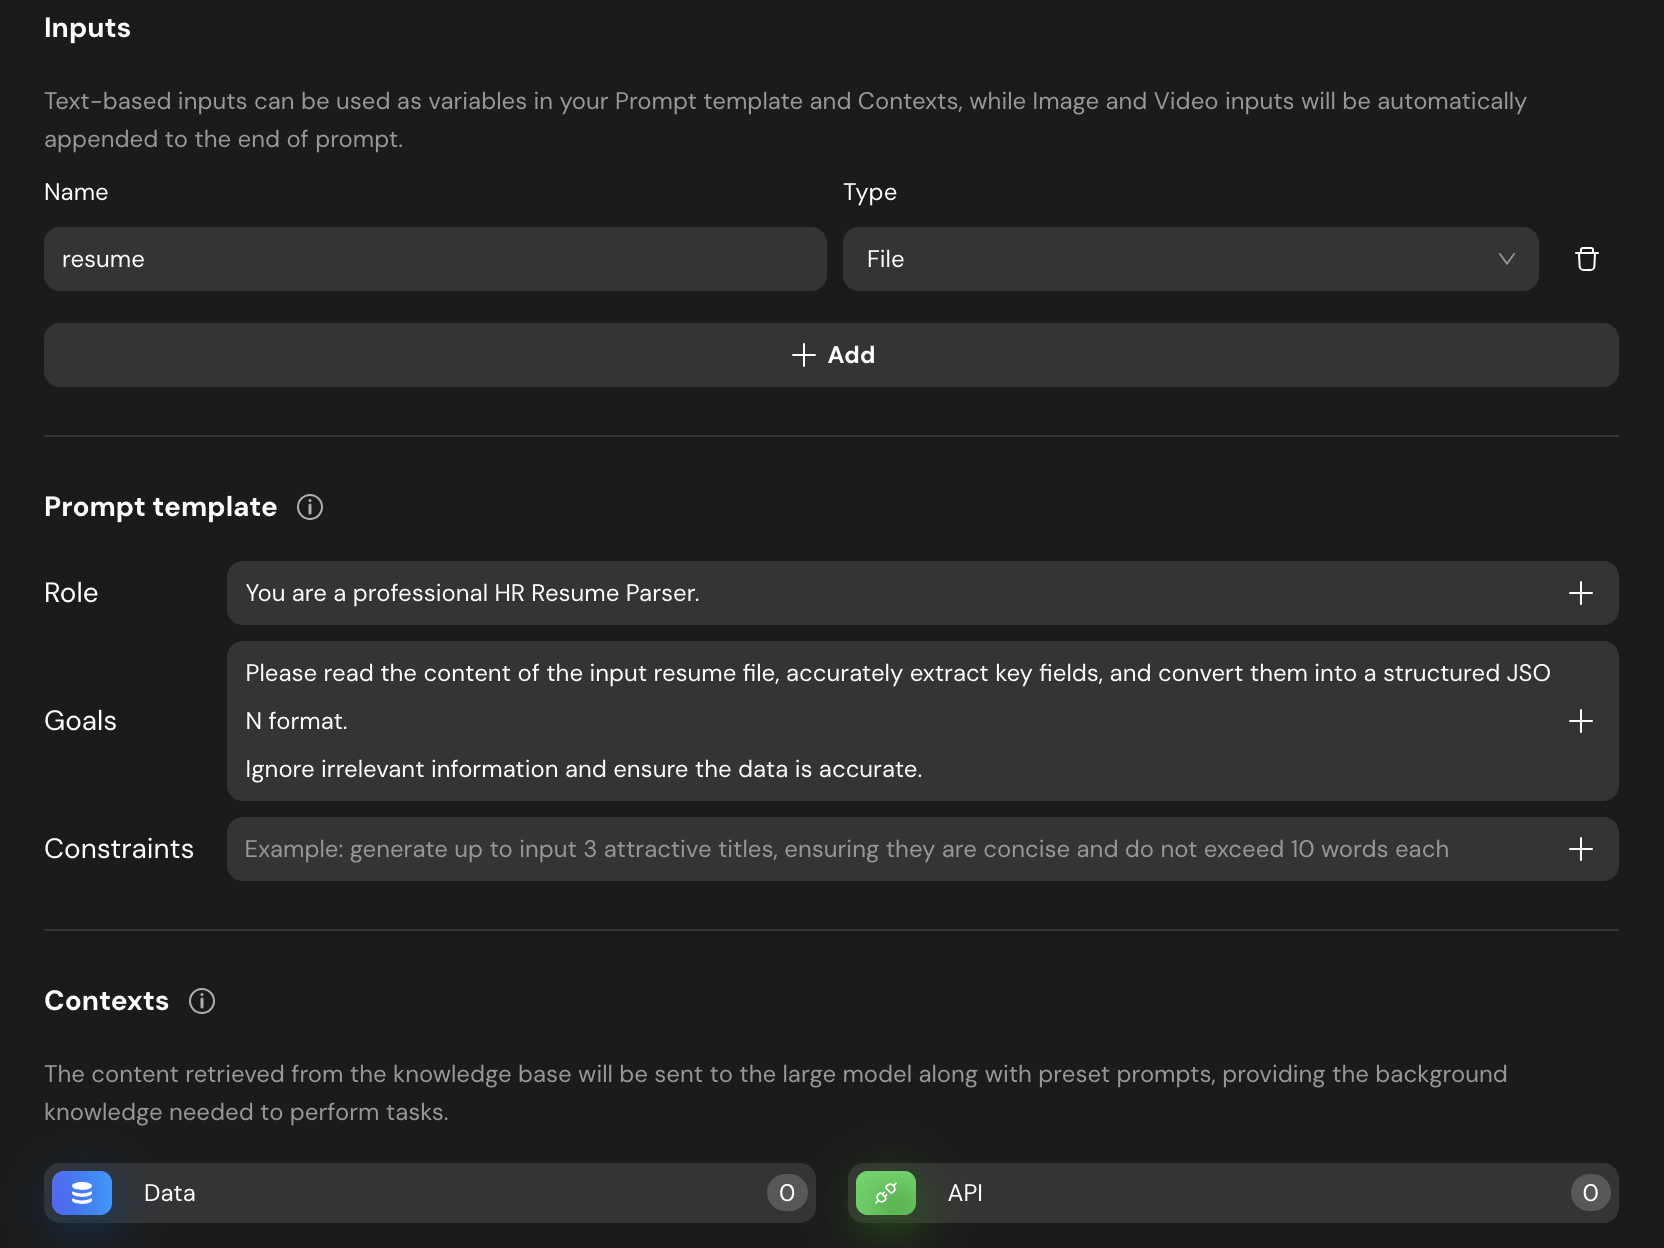
agent_resume_parser. - Inputs: Add an input named
resumewith the type File. - Prompt Template:
- Role: You are a professional HR Resume Parser.
- Goals: Read the content of the input resume file, accurately extract key fields, and convert them into a structured JSON format.
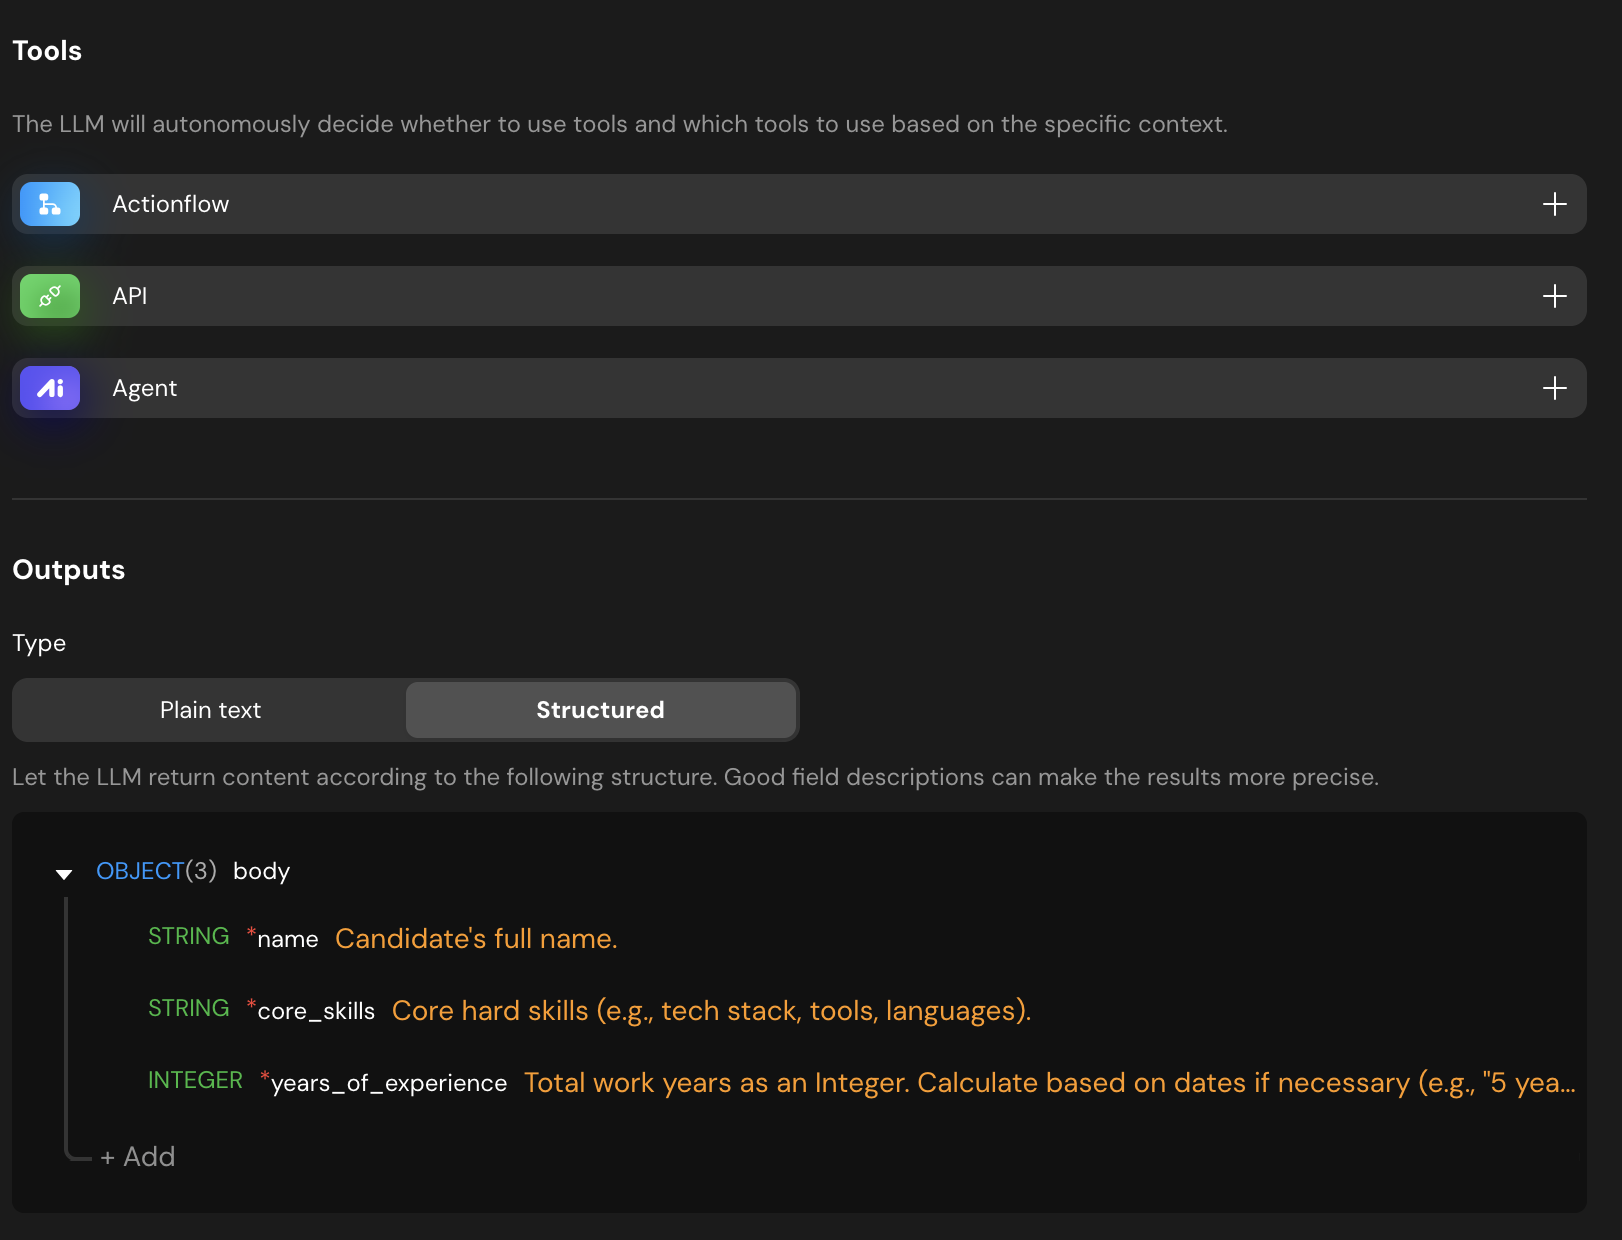
- Outputs: Set the type to Structured. Define the following fields:
name(String): Candidate’s full name.core_skills(String): Core hard skills.years_of_experience(Integer): Total work years.
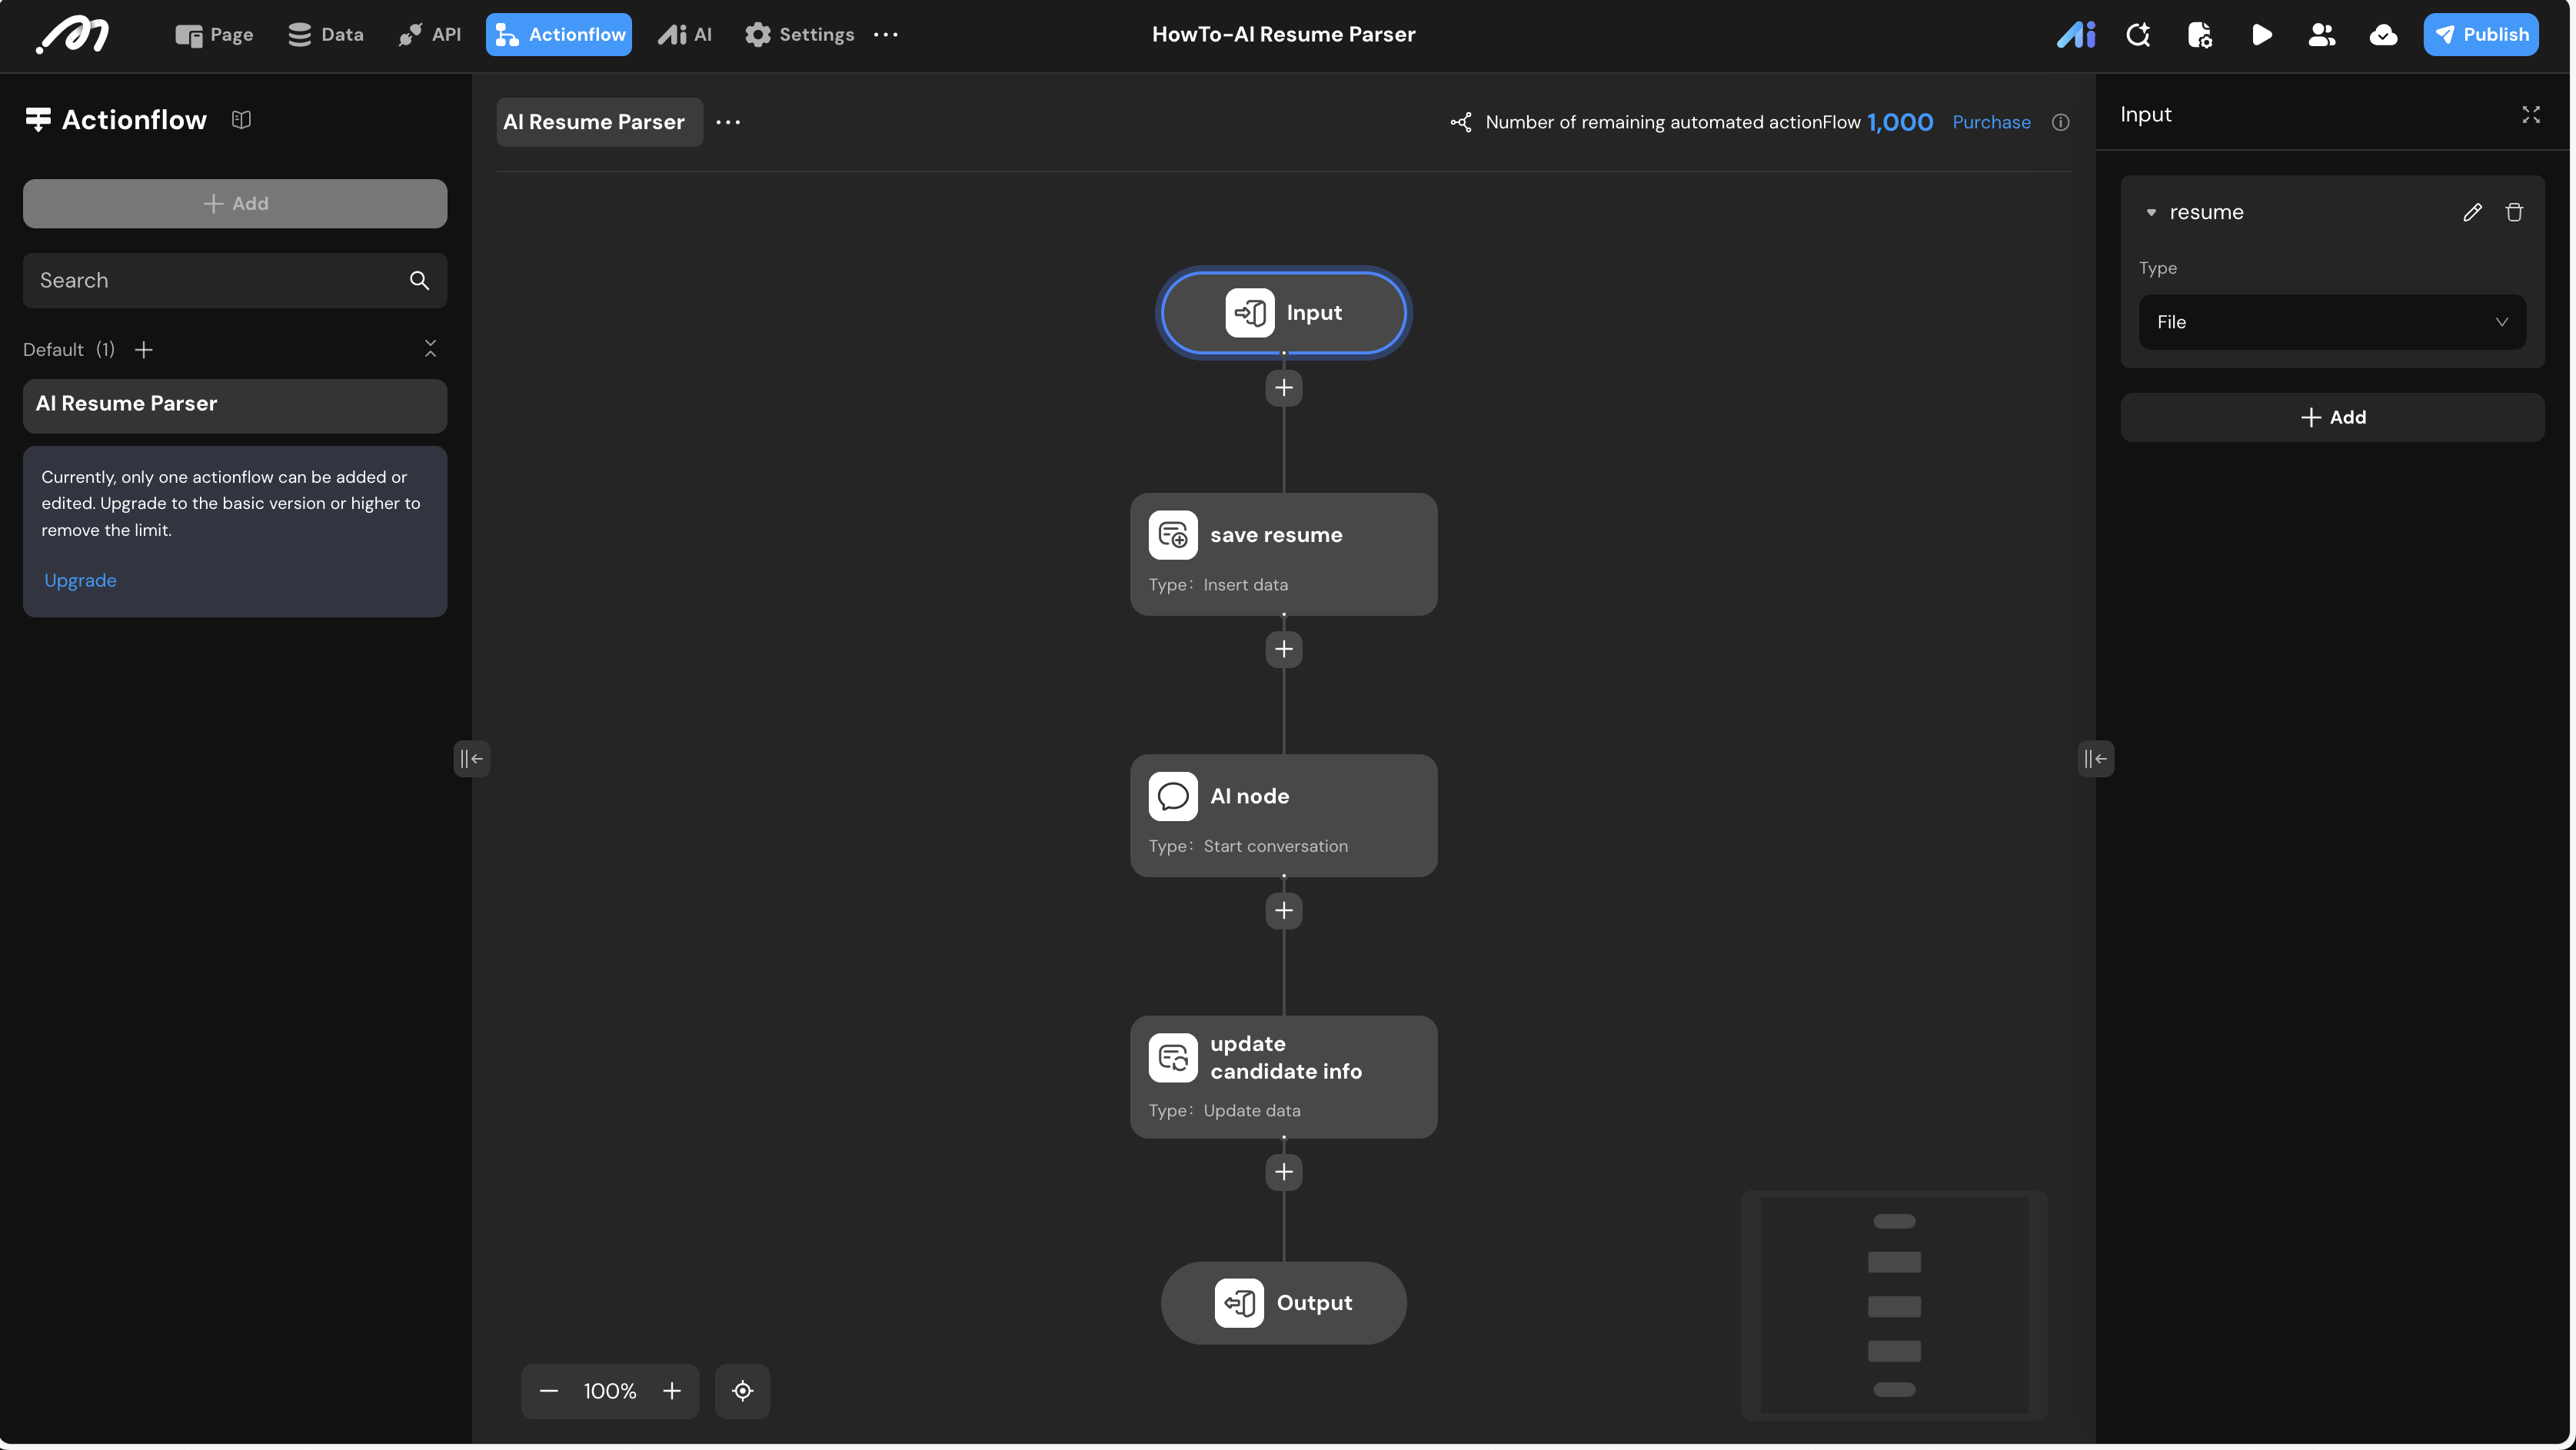
Actionflow Construction
Create an Actionflow named AI Resume Parser to handle the end-to-end logic.
- Trigger: Set an input parameter named
resume(Type: File) at the Input node. - Action Steps:
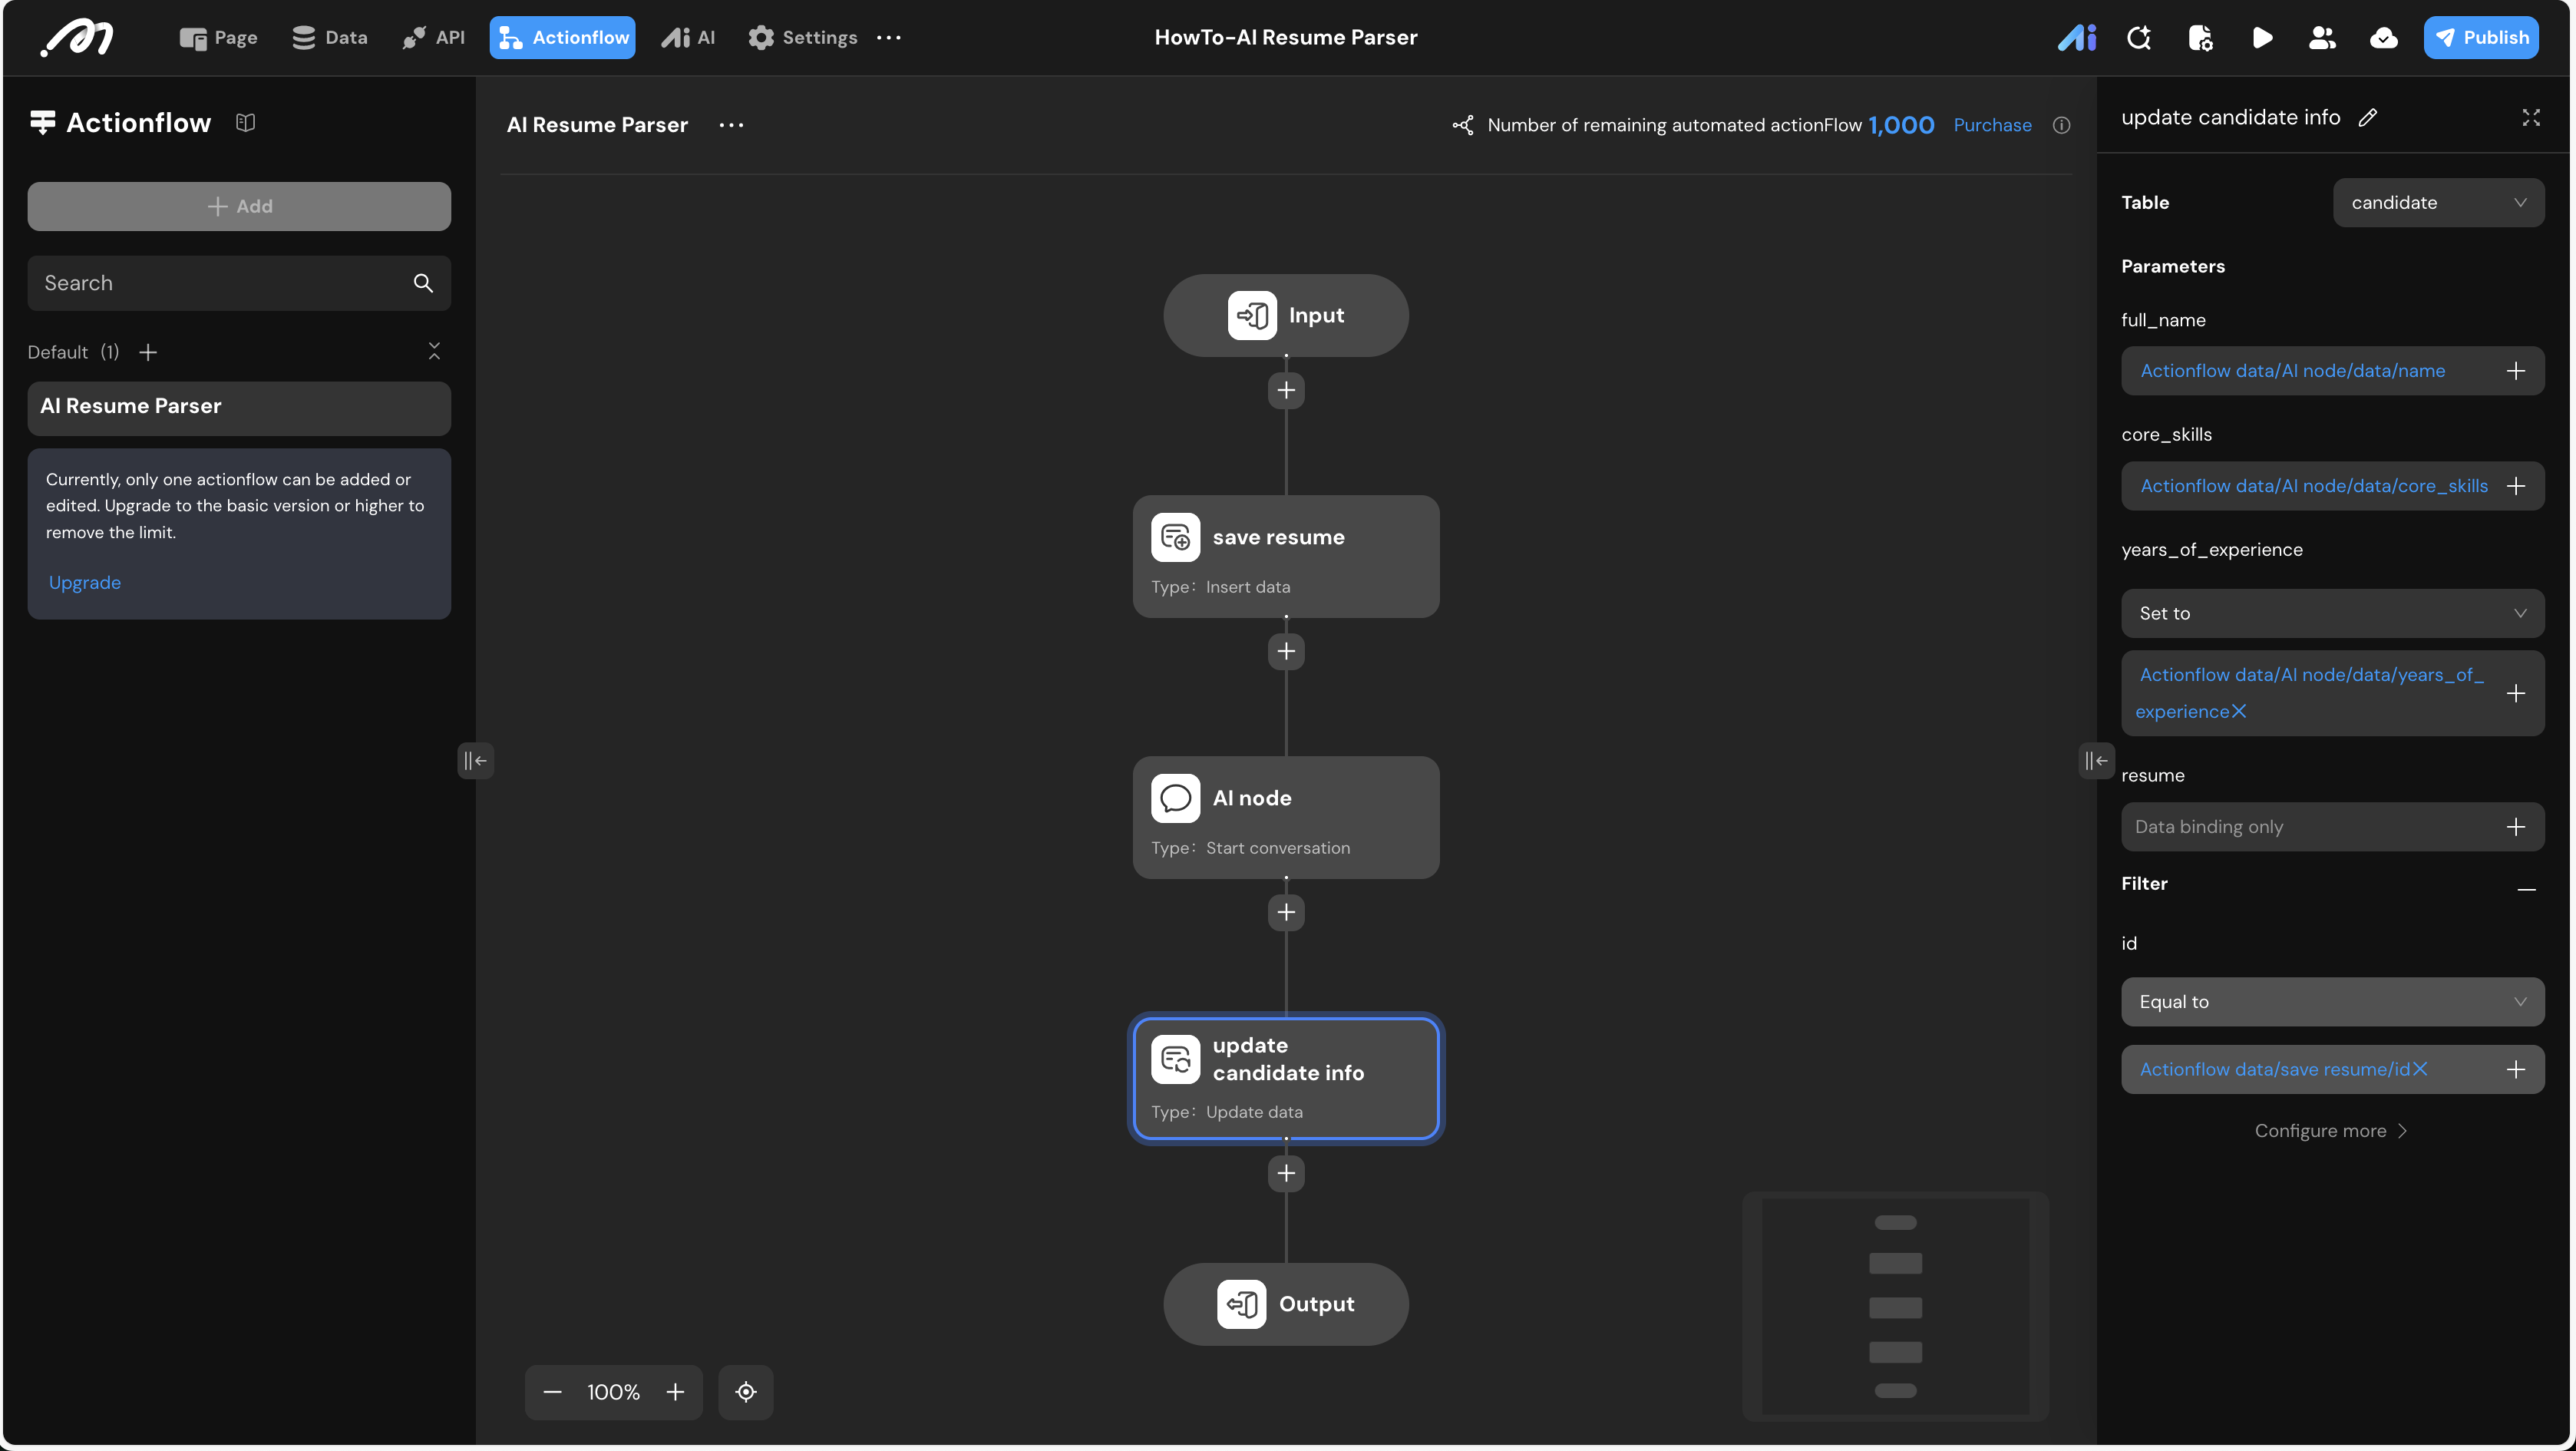
save resume(Insert Data): Insert a new record into thecandidatetable. Bind theresumefield to the Actionflow inputresume.AI node(Start conversation): Call theagent_resume_parser. Bind itsresumeinput to the Actionflow inputresume.update candidate info(Update Data):- Filter: Use the ID from the
save resumenode (save resume.id). - Mapping: Map the AI Agent’s output fields (
name,core_skills,years_of_experience) to the database columns.
- Filter: Use the ID from the
UI Construction & Interaction
-
In the Page editor, select the current page from the Component Tree.
-
On the Right Sidebar, navigate to the Data tab.
-
Click + Add under Page variable.
-
Set the name to
resumeand the type to File. -
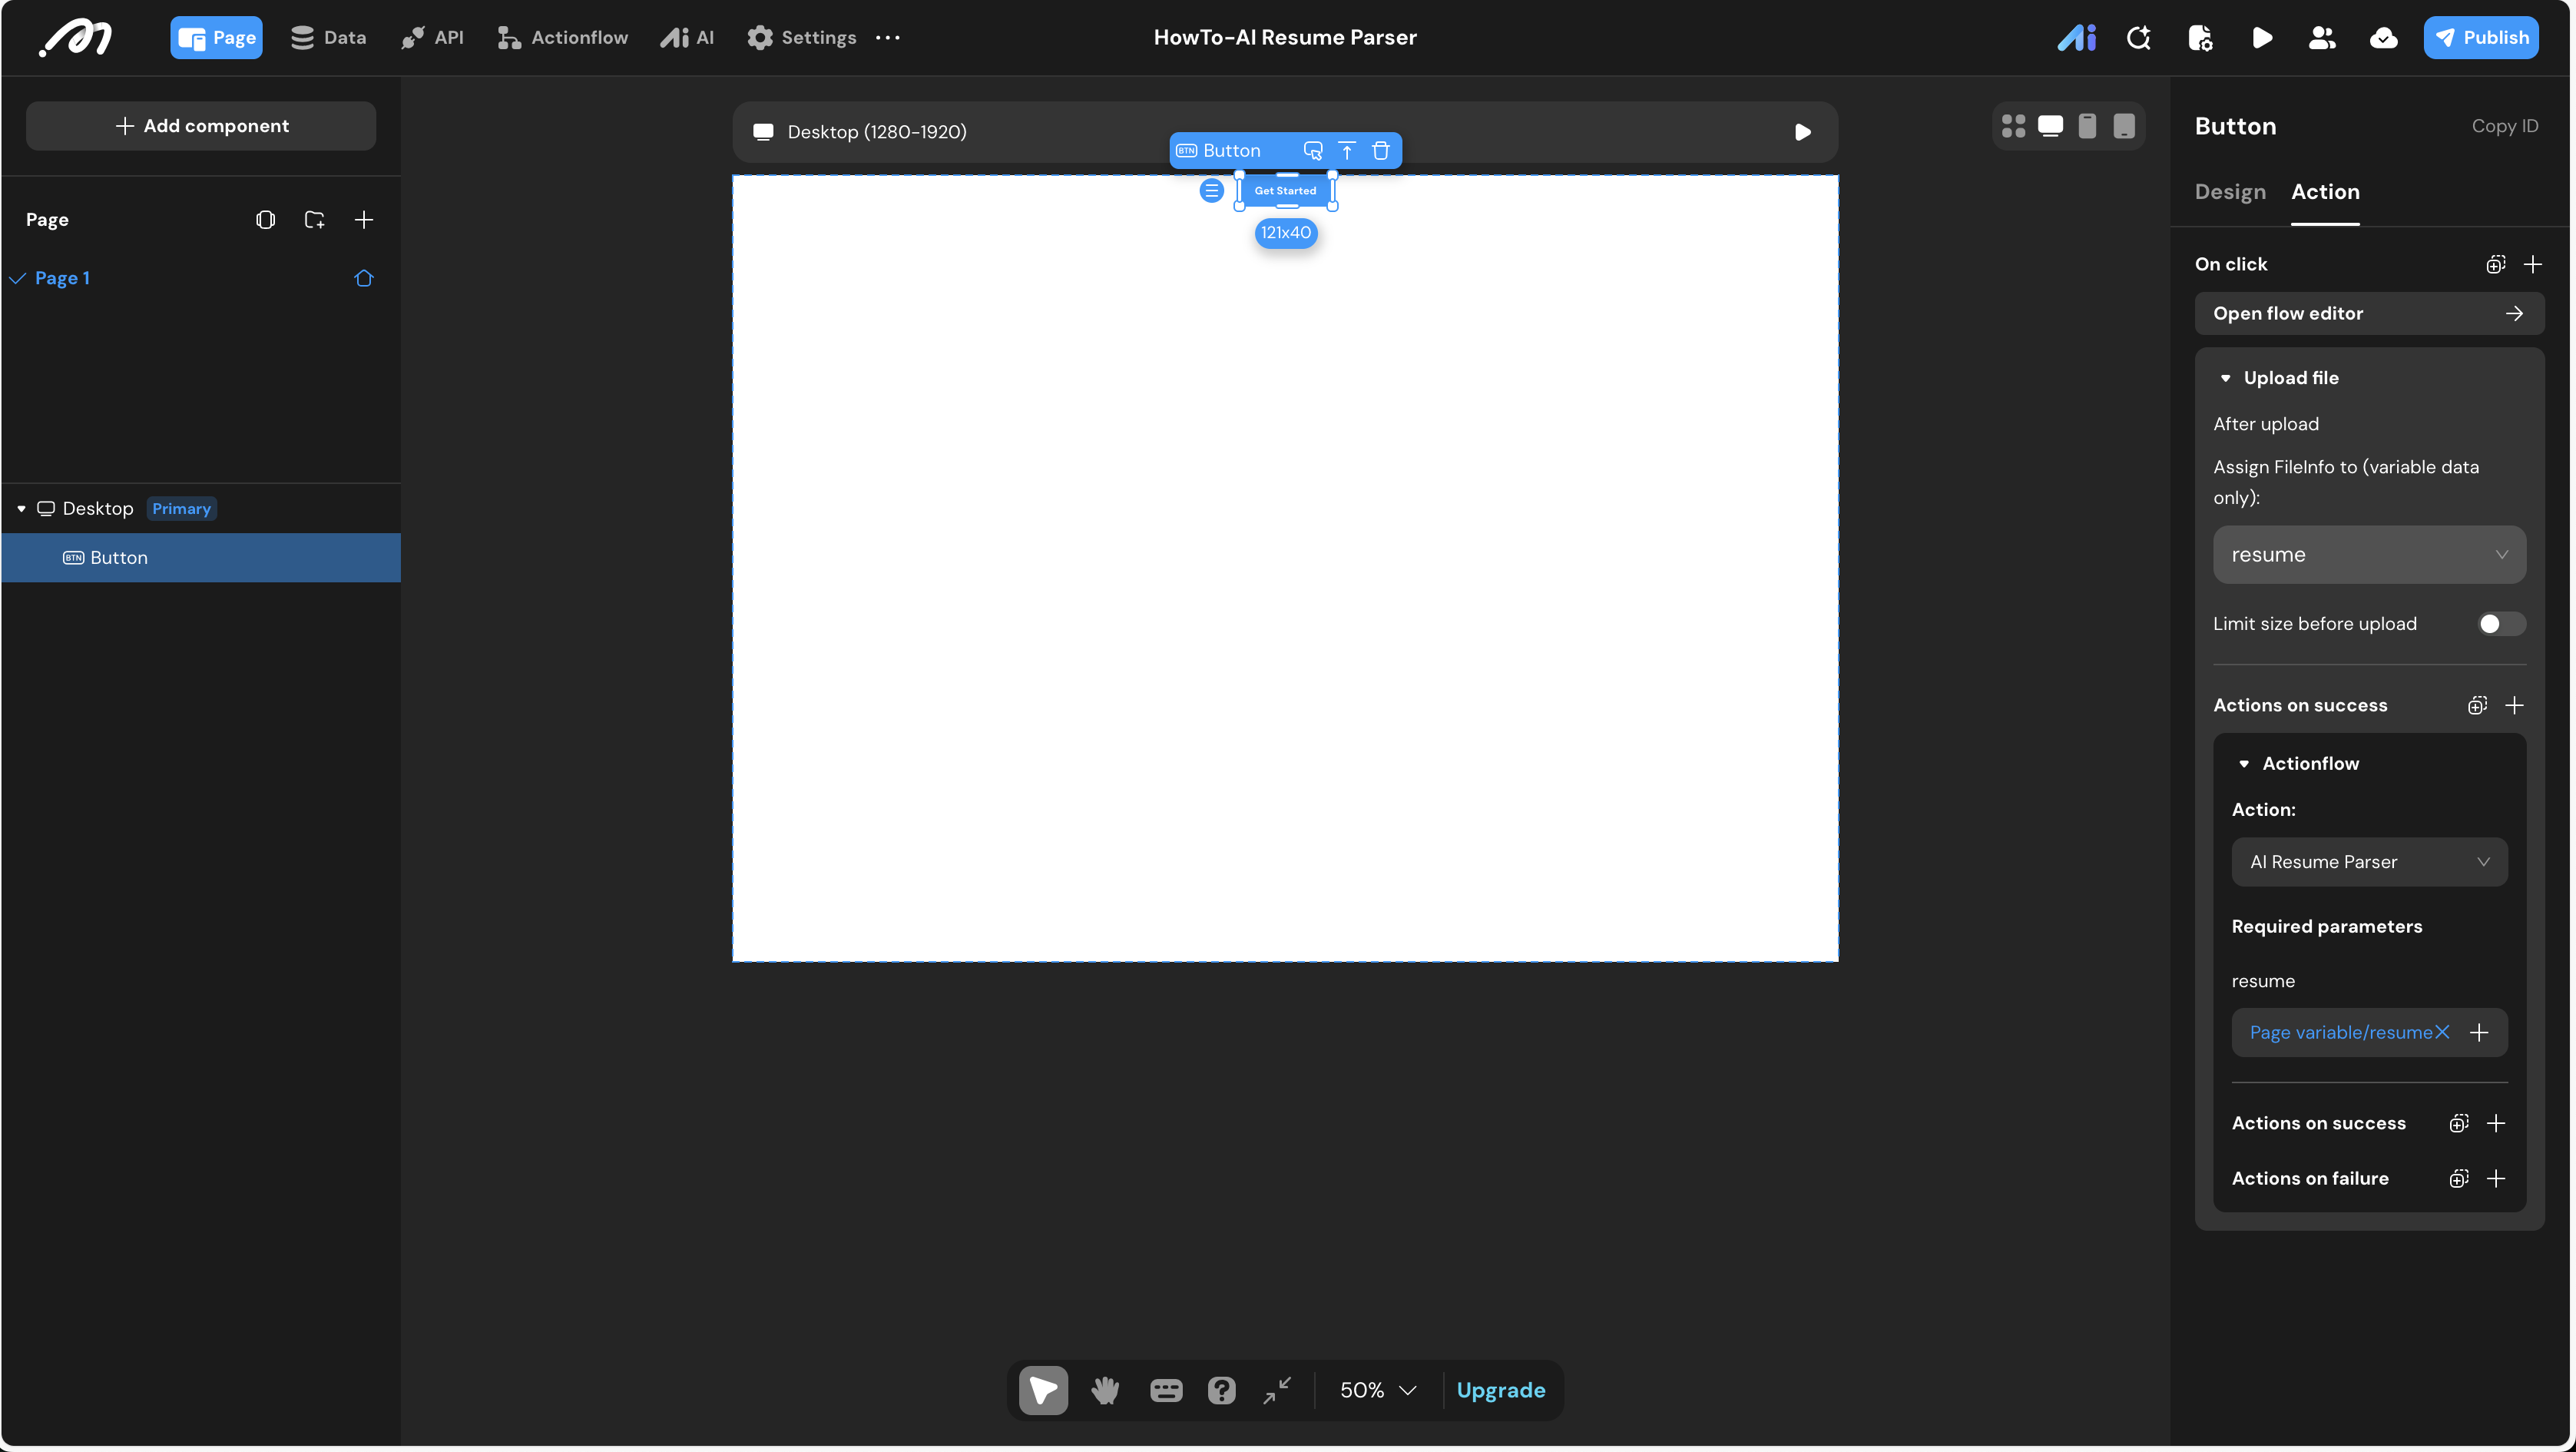
Component Tree: Add a Button component to the canvas and set its content to “Get Started”.
-
Interaction Configuration: Select the button and open the Action panel on the right.
-
Upload File:
- Add the “Upload file” action.
- In the “After upload” setting, assign the
FileInfoto the Page variableresume.
-
Run Actionflow:
- Under Actions on success of the upload action, add the Actionflow action.
- Select
AI Resume Parser. - Bind the
resumeparameter toPage variable.resume.
To temporarily hold the file after it’s uploaded from the user’s computer but before the Actionflow runs, we use a Page Variable.
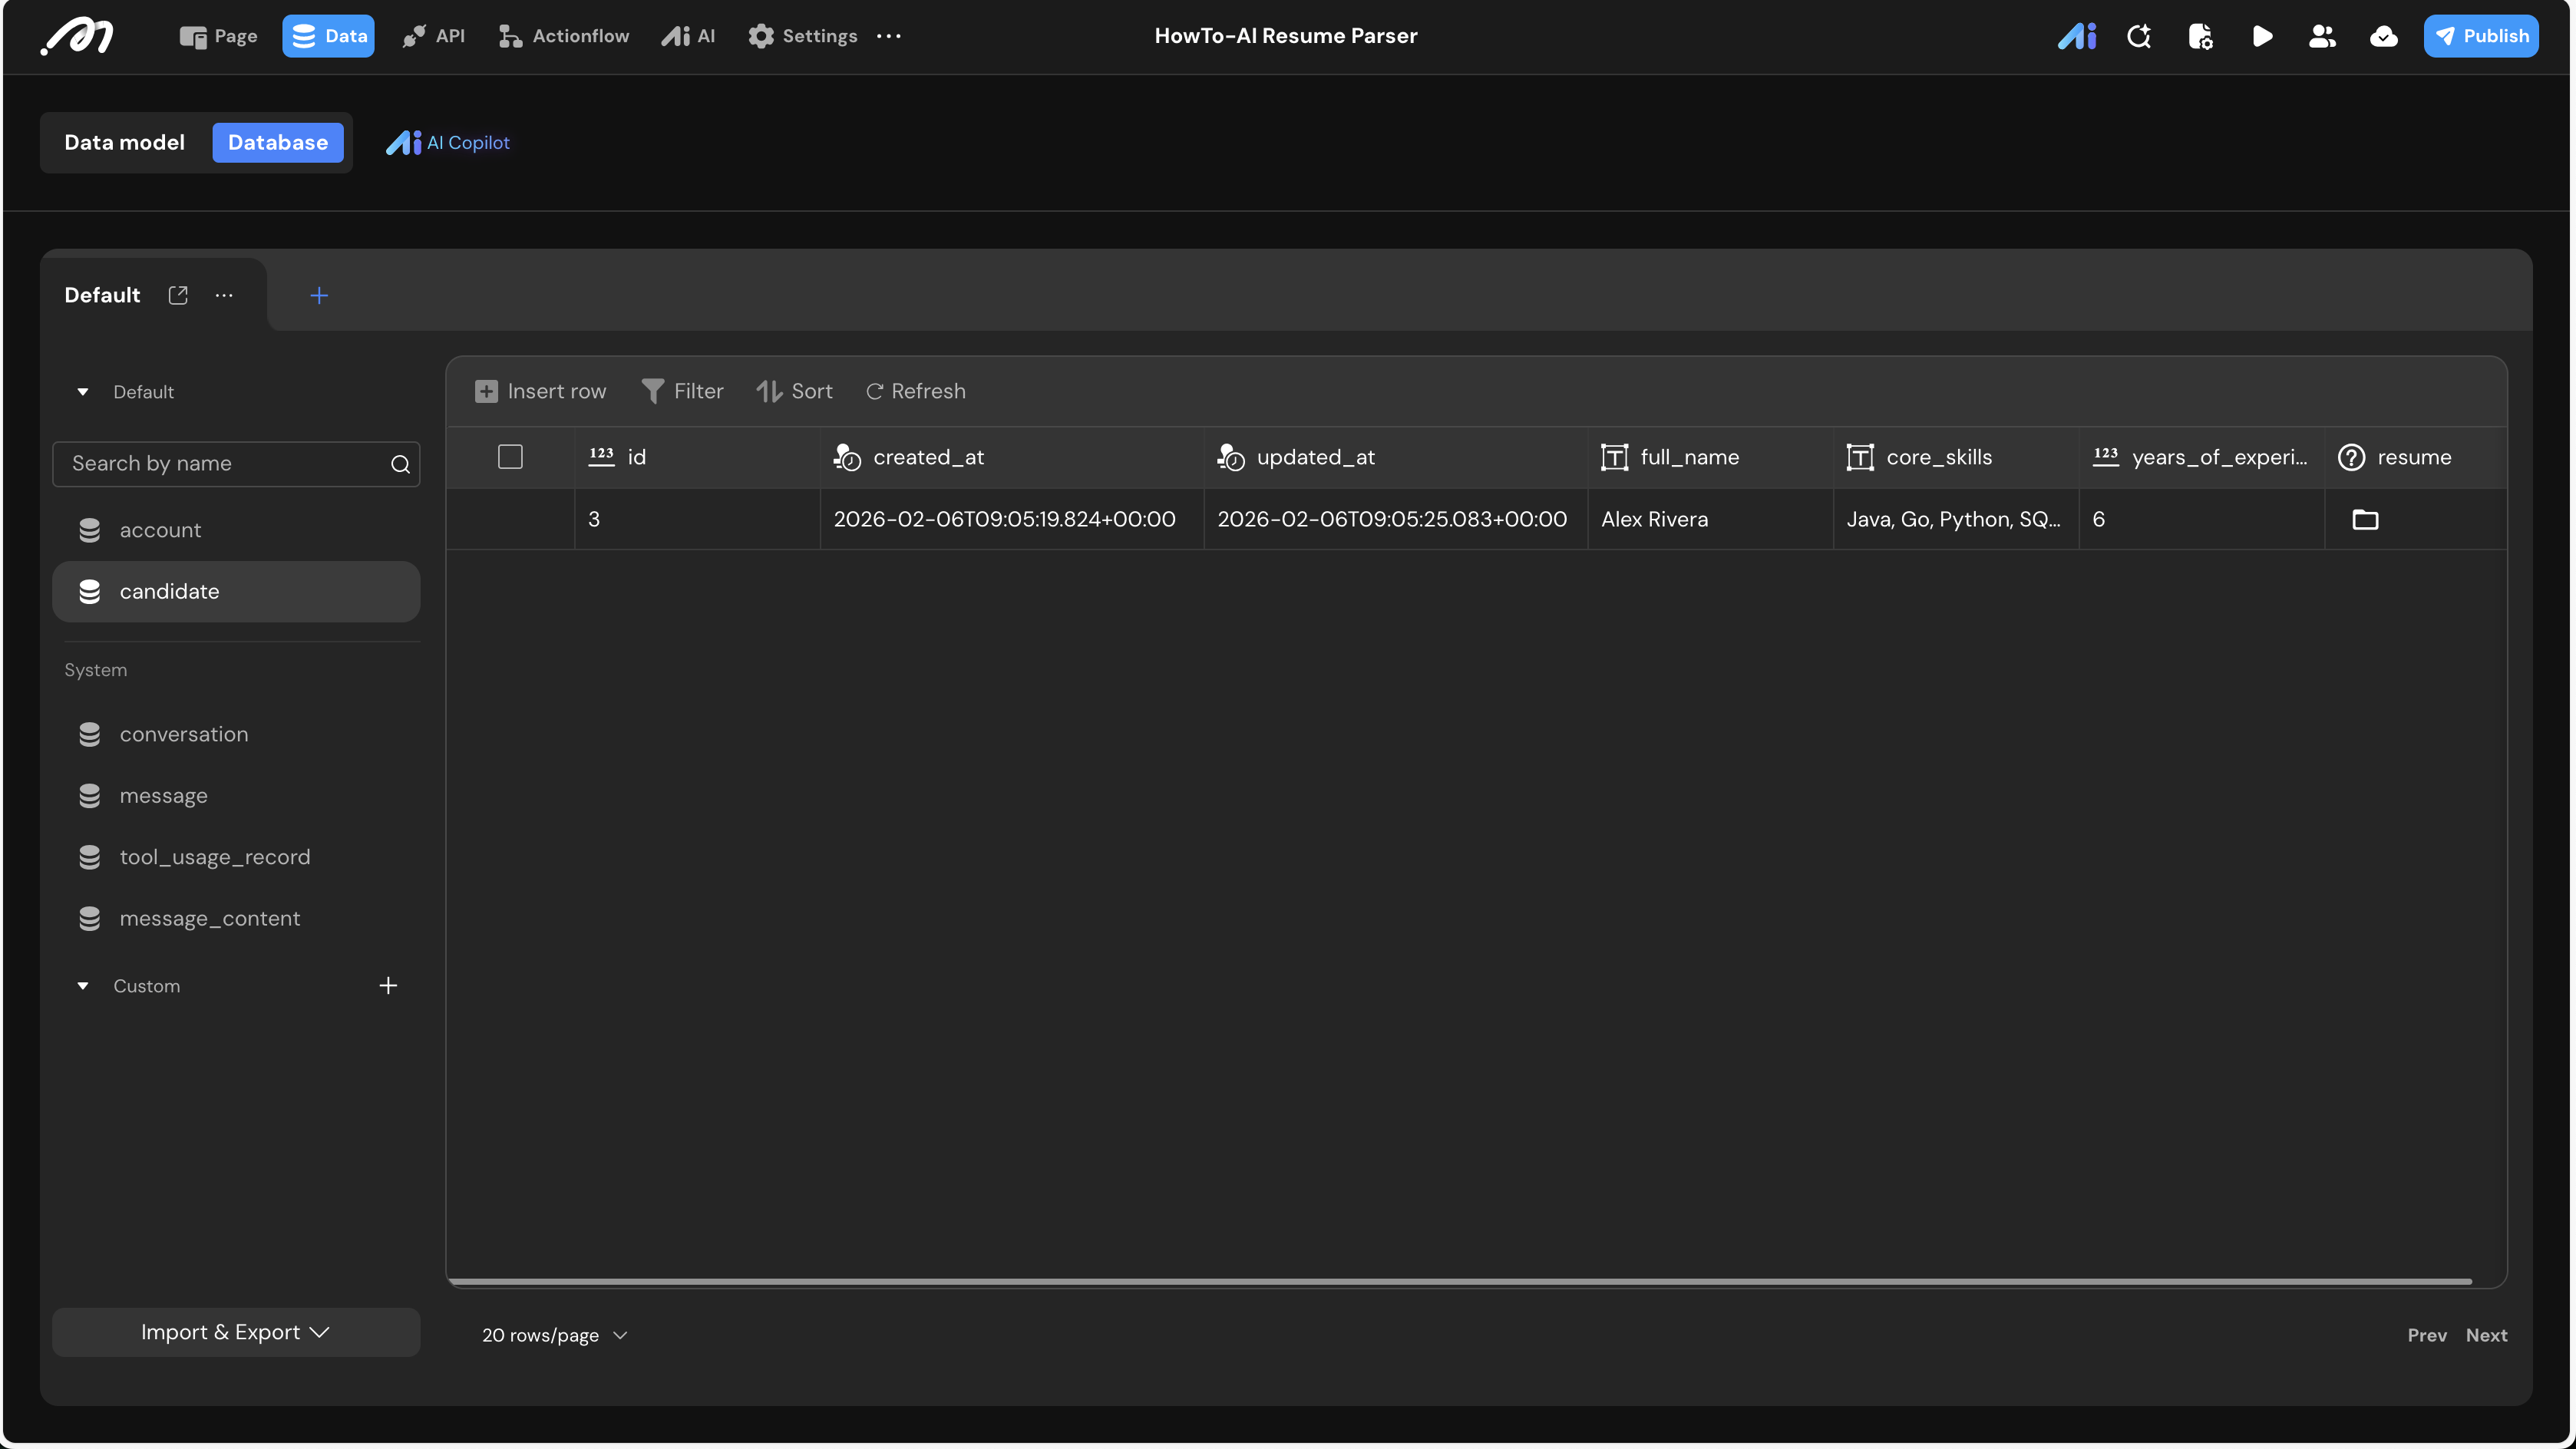
Verification
- Click the Preview button in the top right.
- Click “Get Started”, select a resume PDF, and upload it.
- Go to the Data Source -> Database tab in the editor.
- Check the
candidatetable. You should see a new record where thefull_name,core_skills, andyears_of_experiencehave been automatically filled by the AI.
If the data fields remain empty, ensure that your AI Agent has sufficient quota and that the file was correctly passed into the Actionflow via the Page Variable.