Automated Image Description Workflow
Project Access Link
https://editor.momen.app/tool/KrABb5M5Jn4/WEB?code=ZlJOE7CSqs4eg&ref=0562398
Introduction
- Goal: Create a feature that allows users to upload a product image and automatically receive a professional title and marketing description generated by AI.
- Applicable Scenario: E-commerce platforms, CMS content management, or social media marketing tools.
- Core Logic: UI (Image Picker) -> Actionflow (Input) -> AI Agent (Vision Analysis) -> Database (Insert Record).
Steps
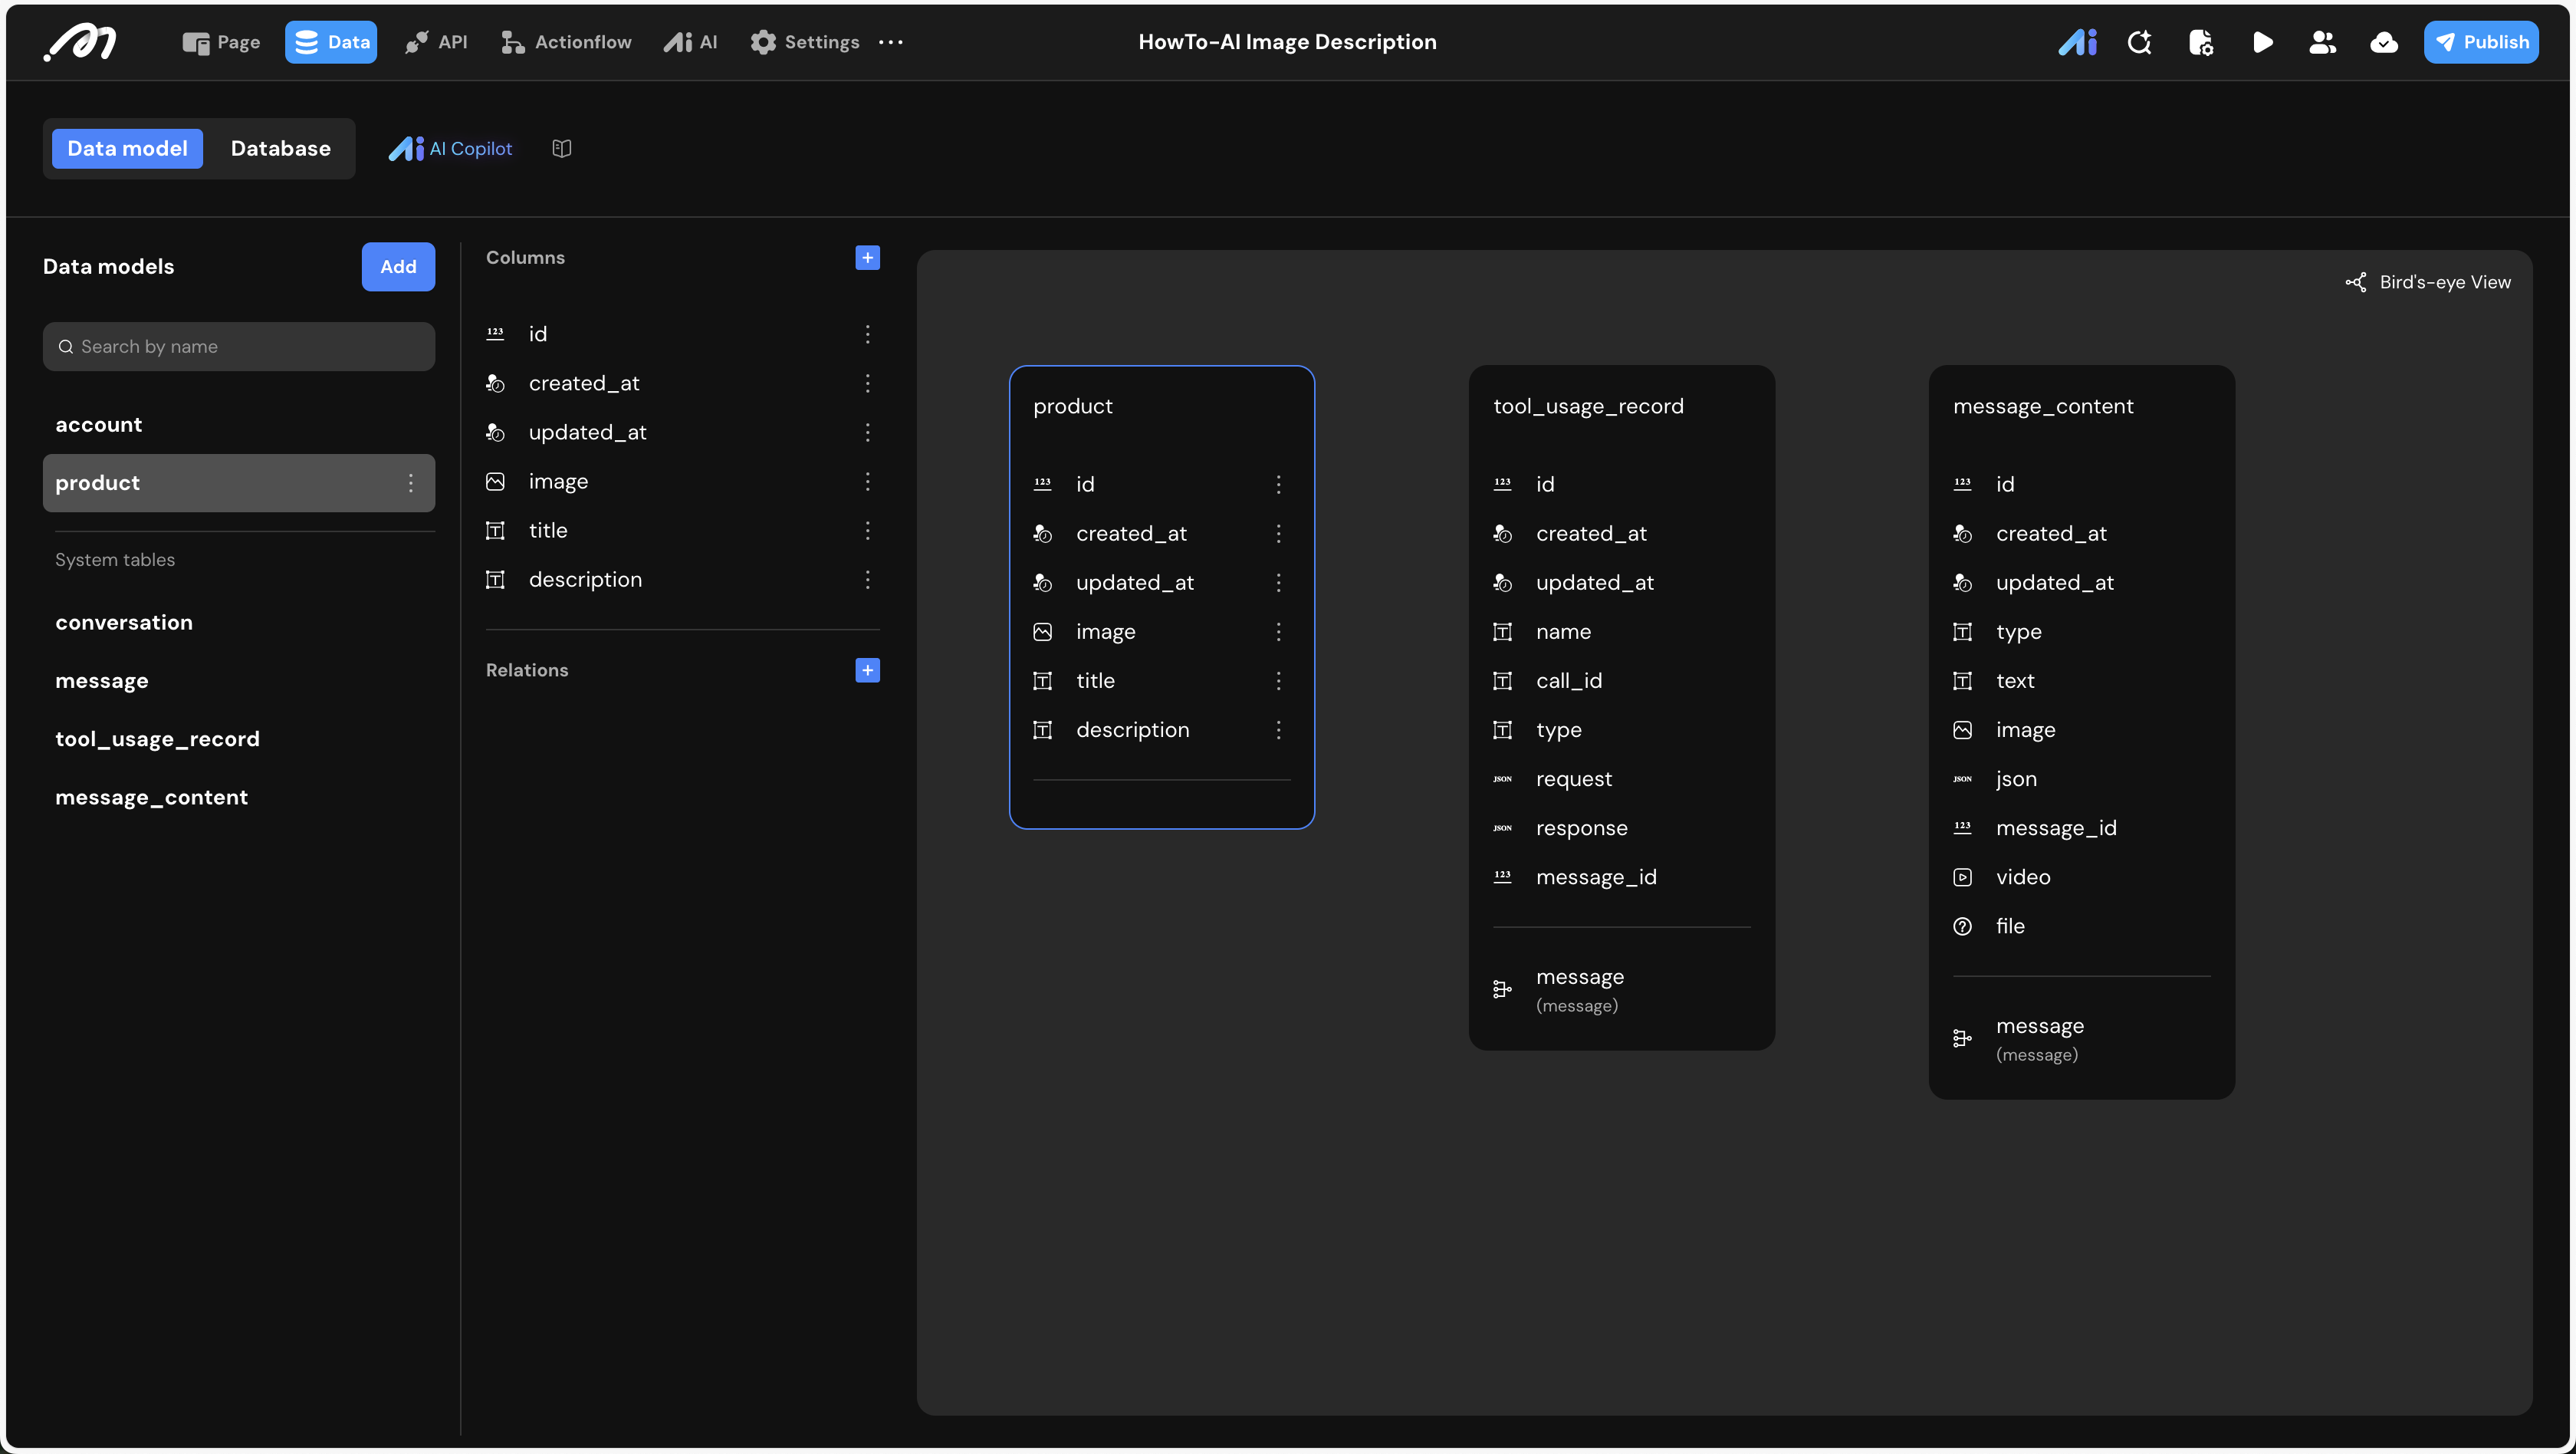
Data Storage
First, we need a table to store the original images and the metadata generated by the AI.
- Data Model: Go to the Data tab and create a table named
product.
| Field Name | Type | Note |
|---|---|---|
| image | Image | The original product photo uploaded by the user. |
| title | Text | A short, catchy title generated by AI based on visual features. |
| description | Text | Detailed marketing copy including material, style, and tone. |
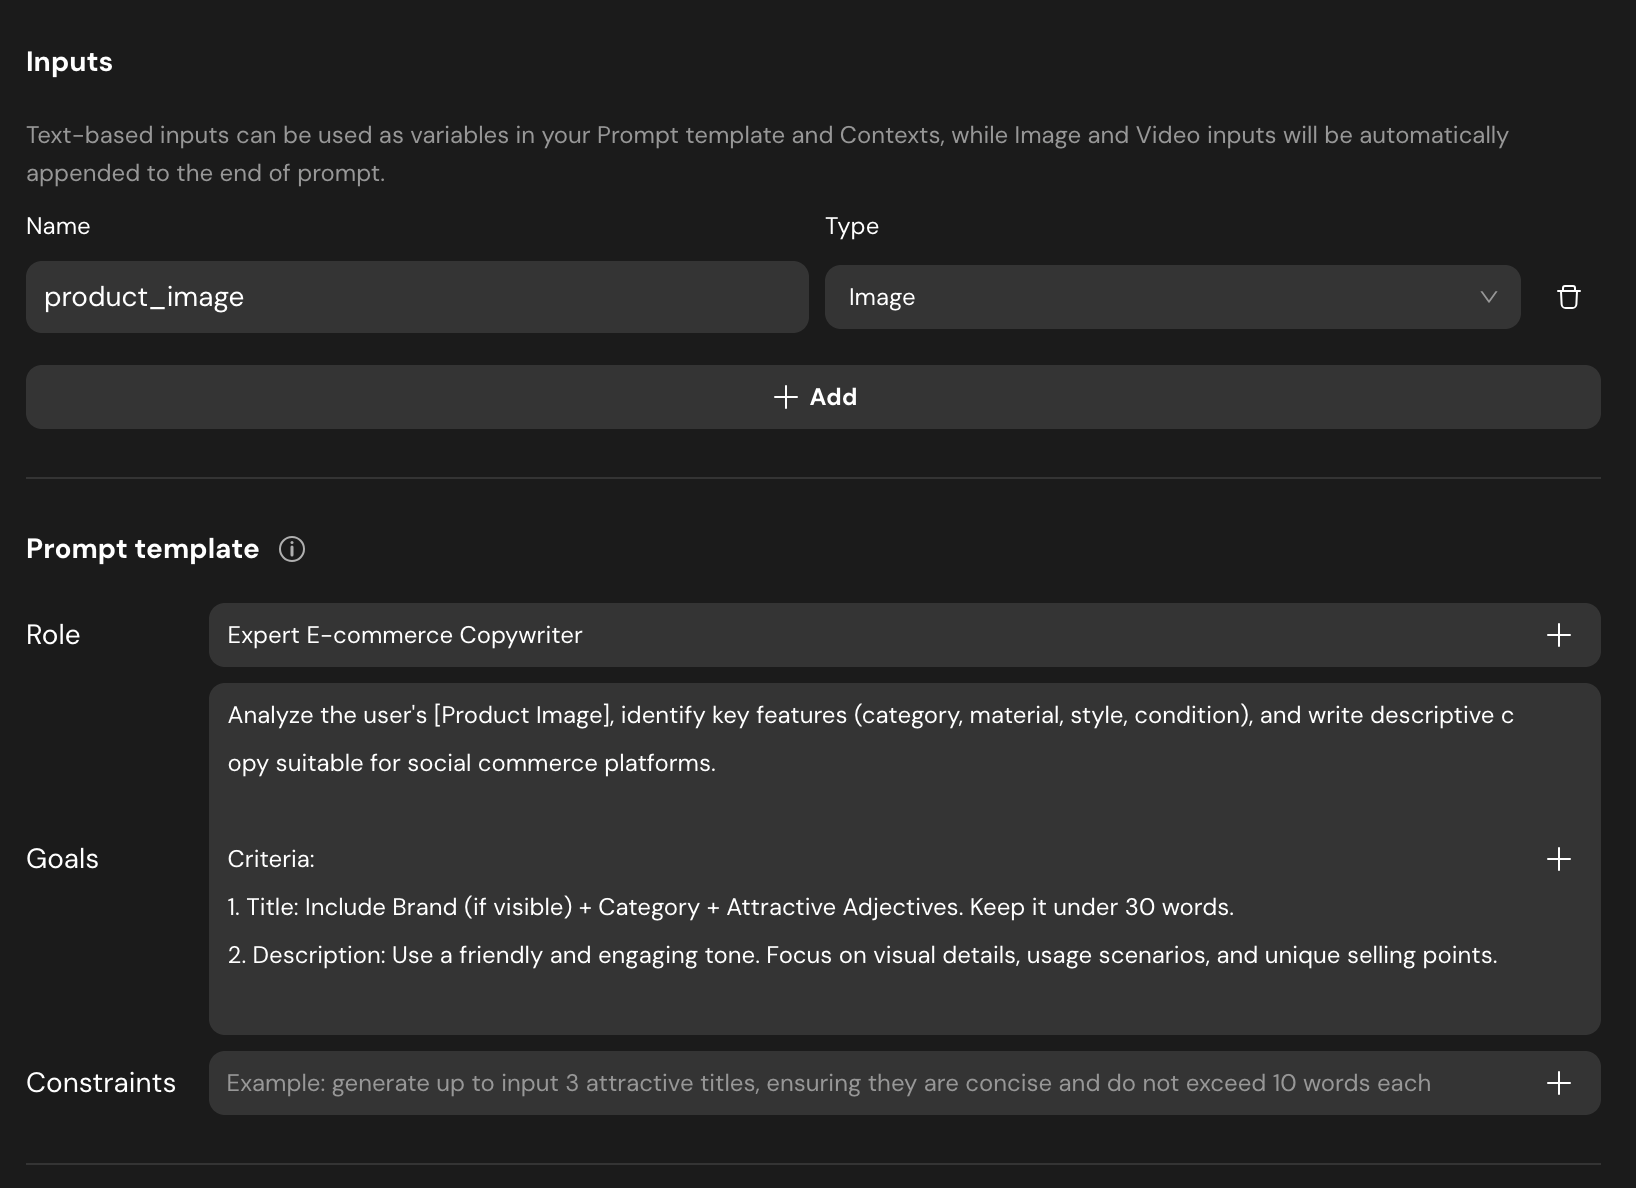
AI Agent Configuration
We need to configure an AI Agent capable of “seeing” the image and returning structured data.
- Inputs: Add an input named
product_imageand set its type to Image. - Prompt Template:
- Role: Expert E-commerce Copywriter.
- Goals: Analyze the user’s
product_image, identify key features (category, material, style, condition), and write descriptive copy.
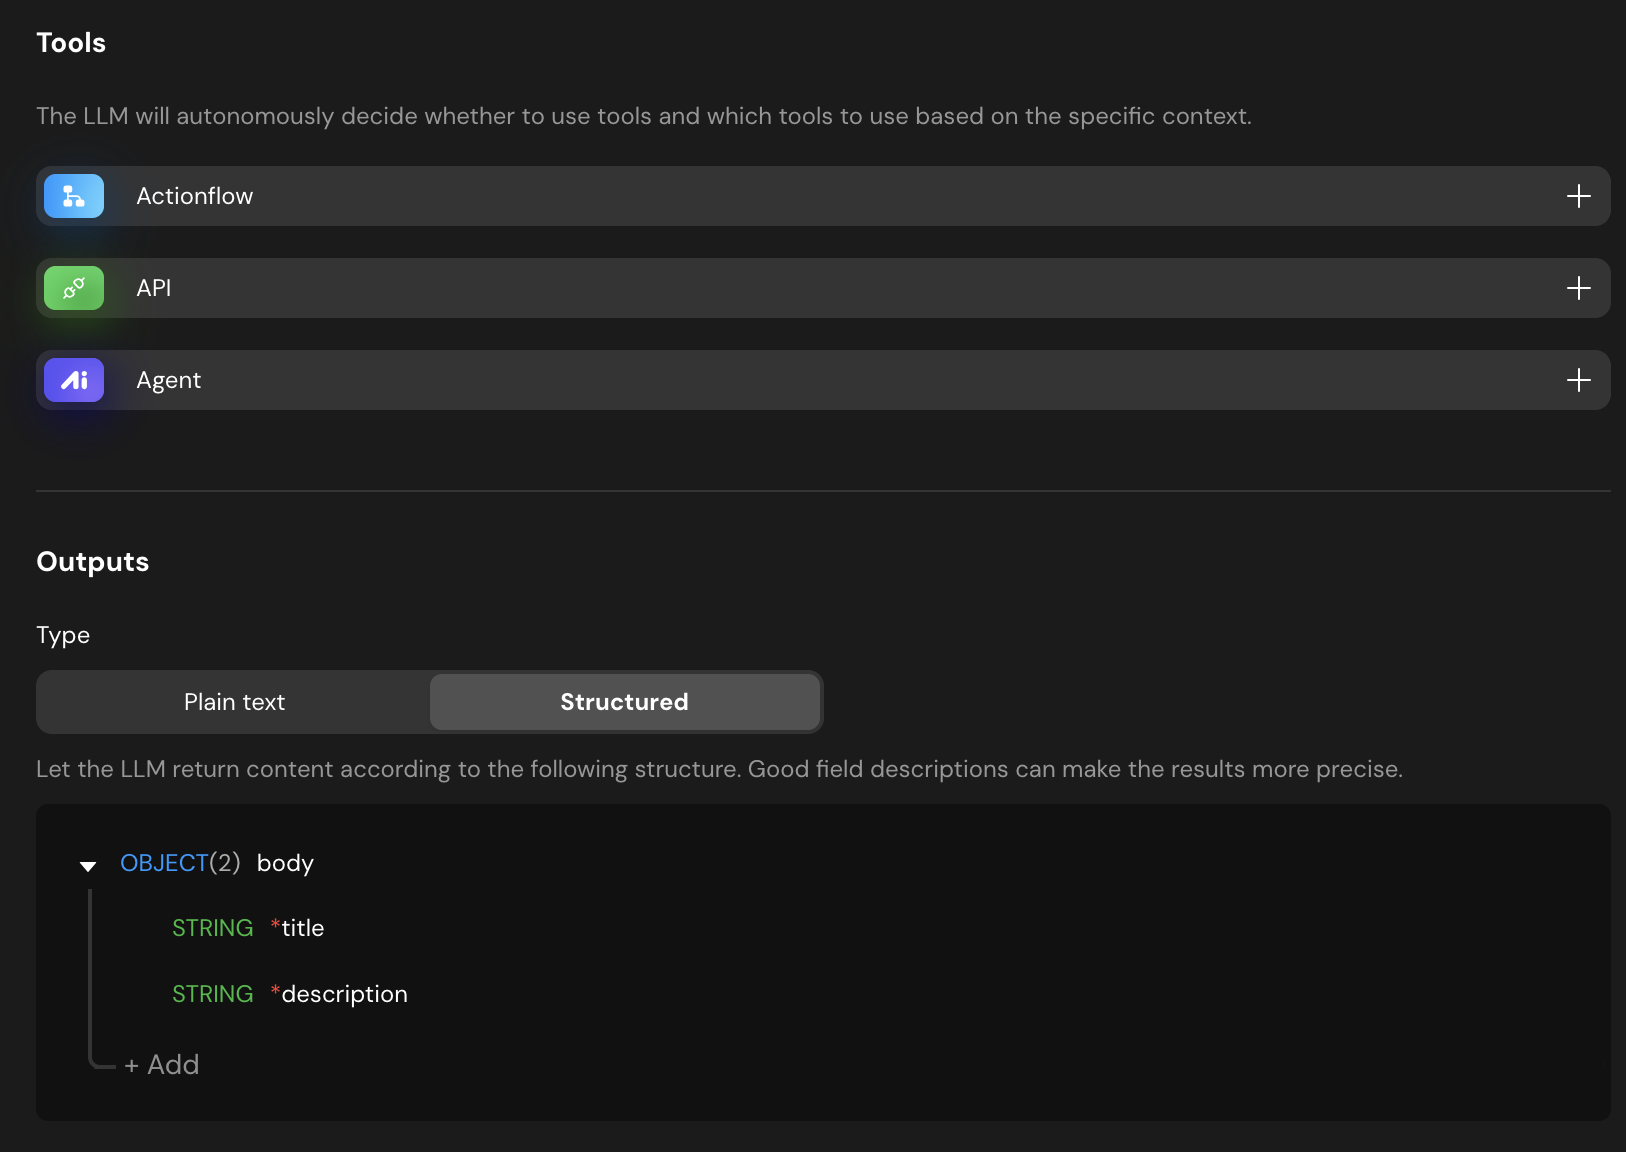
- Structured Output: To ensure the backend can save the data easily, set the output type to Structured. Define an object
bodycontaining:title(String)description(String)
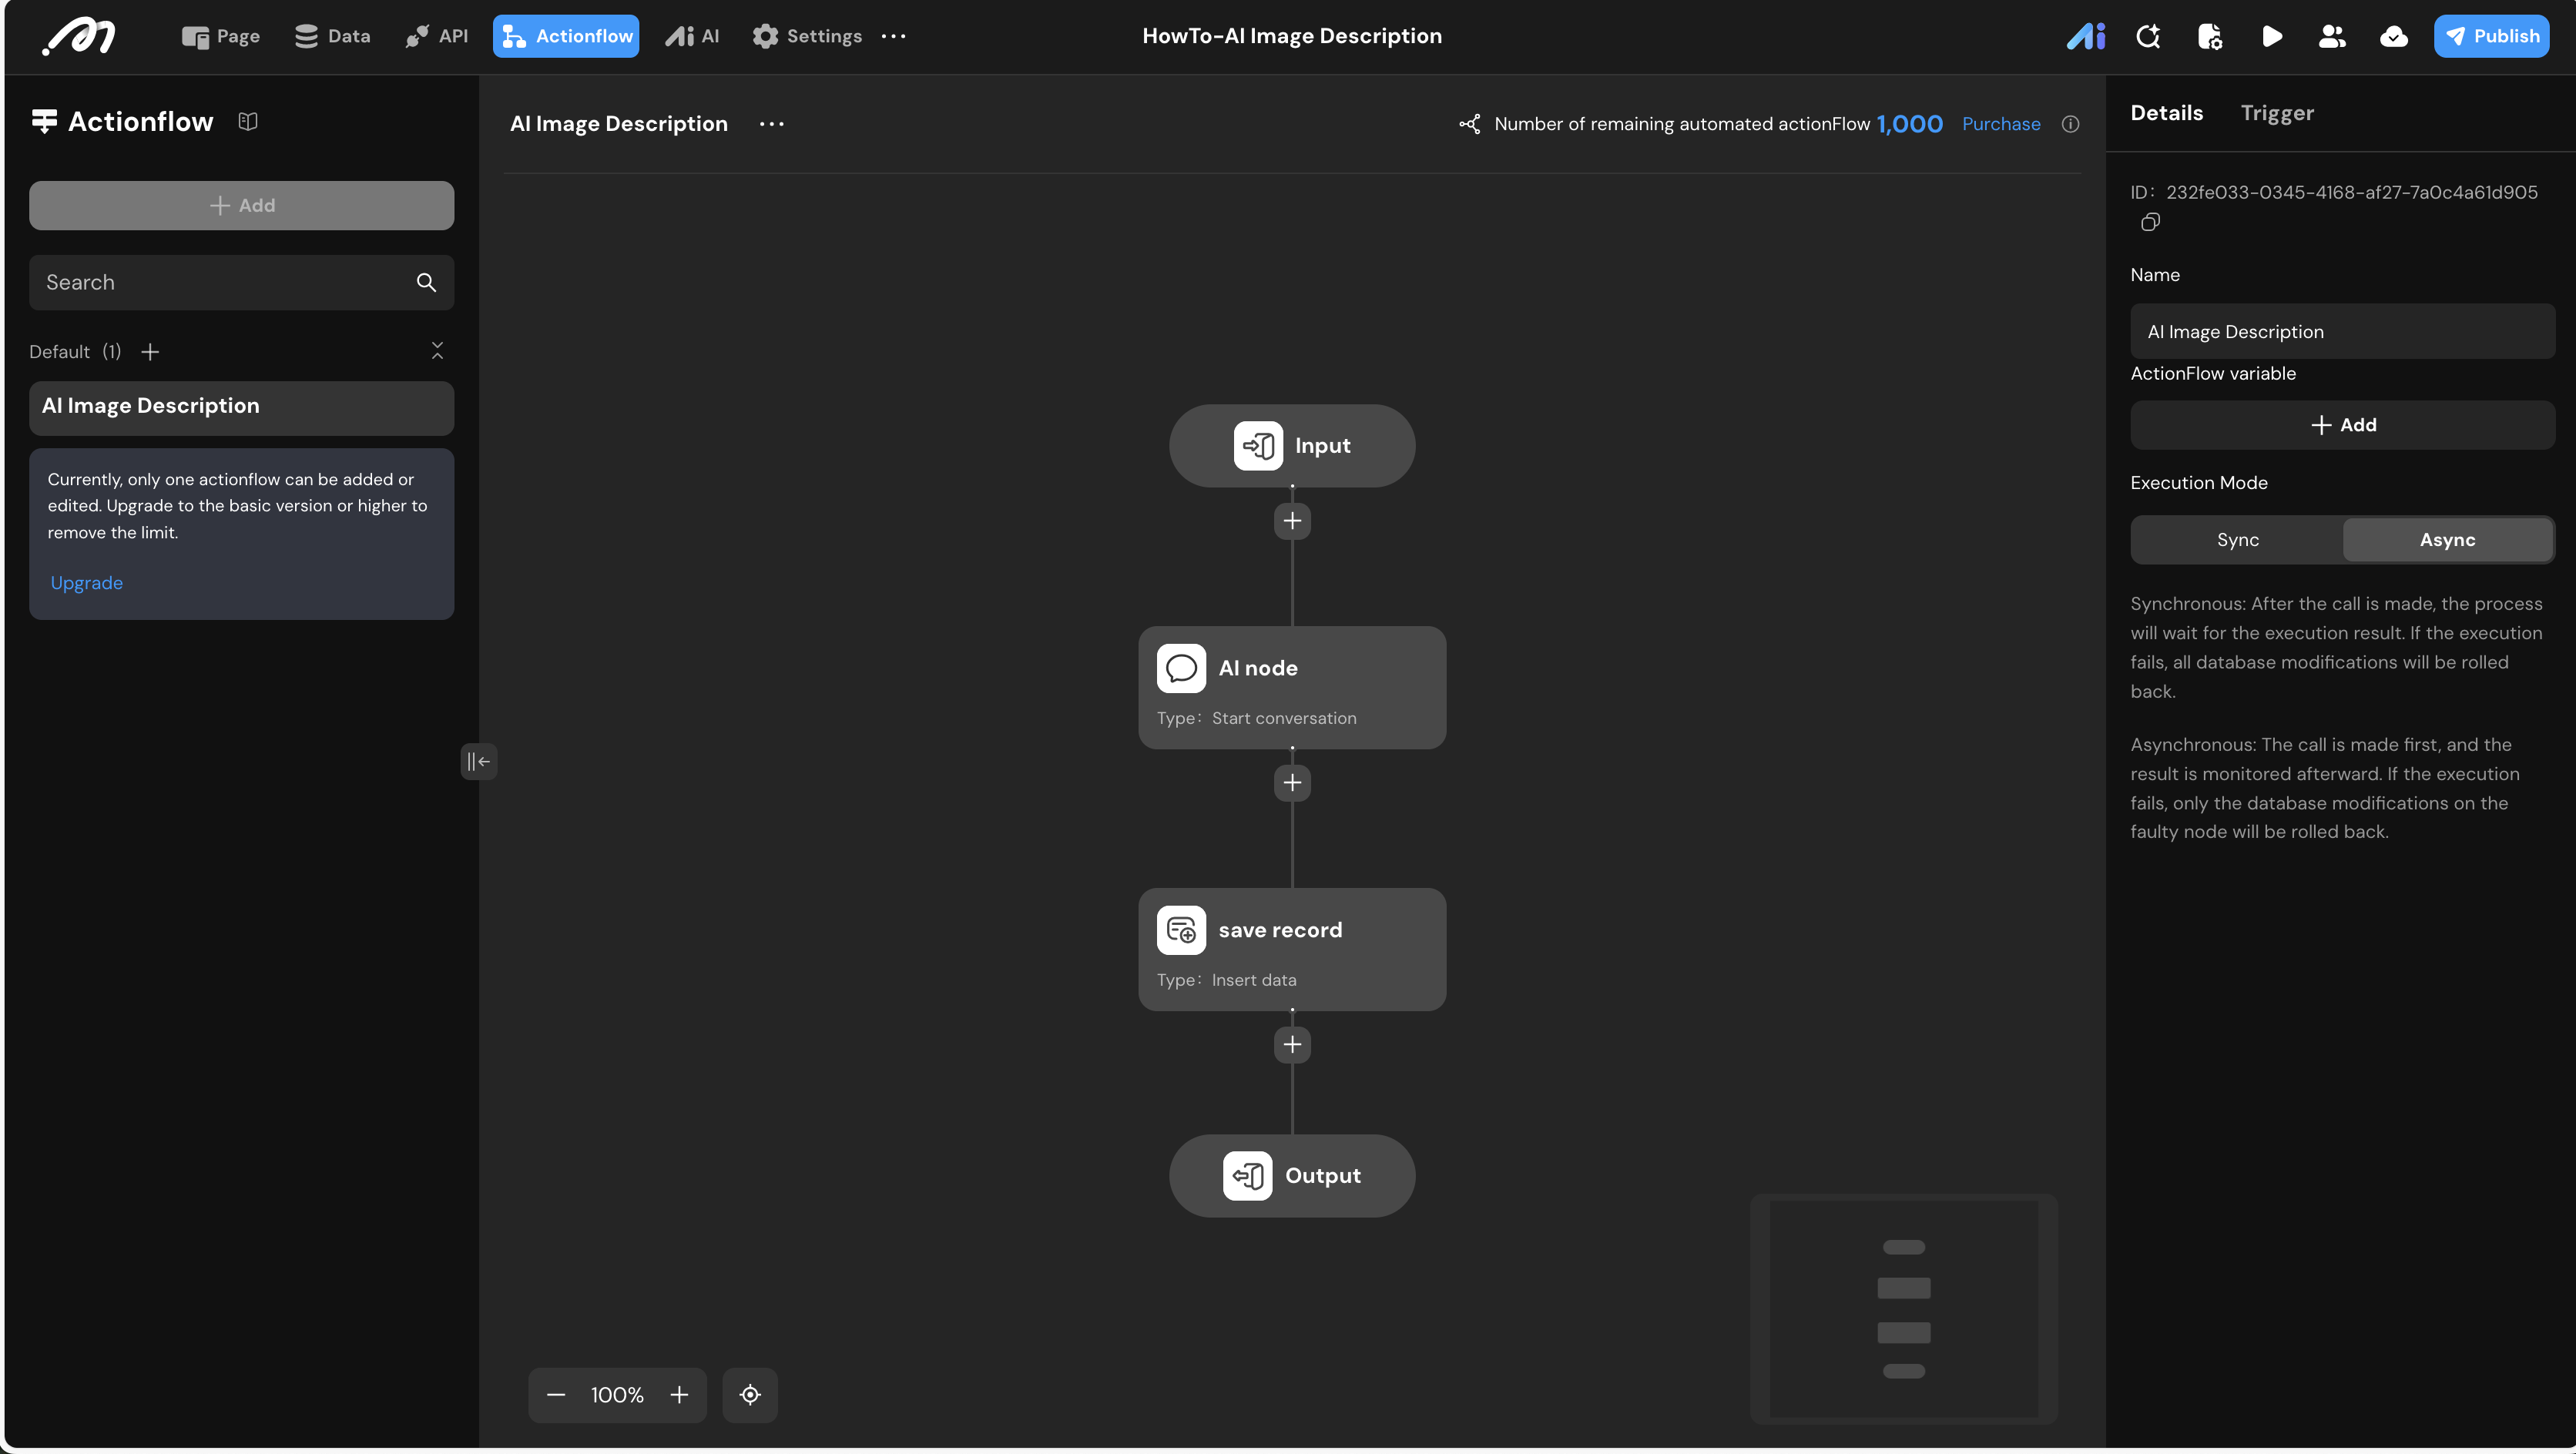
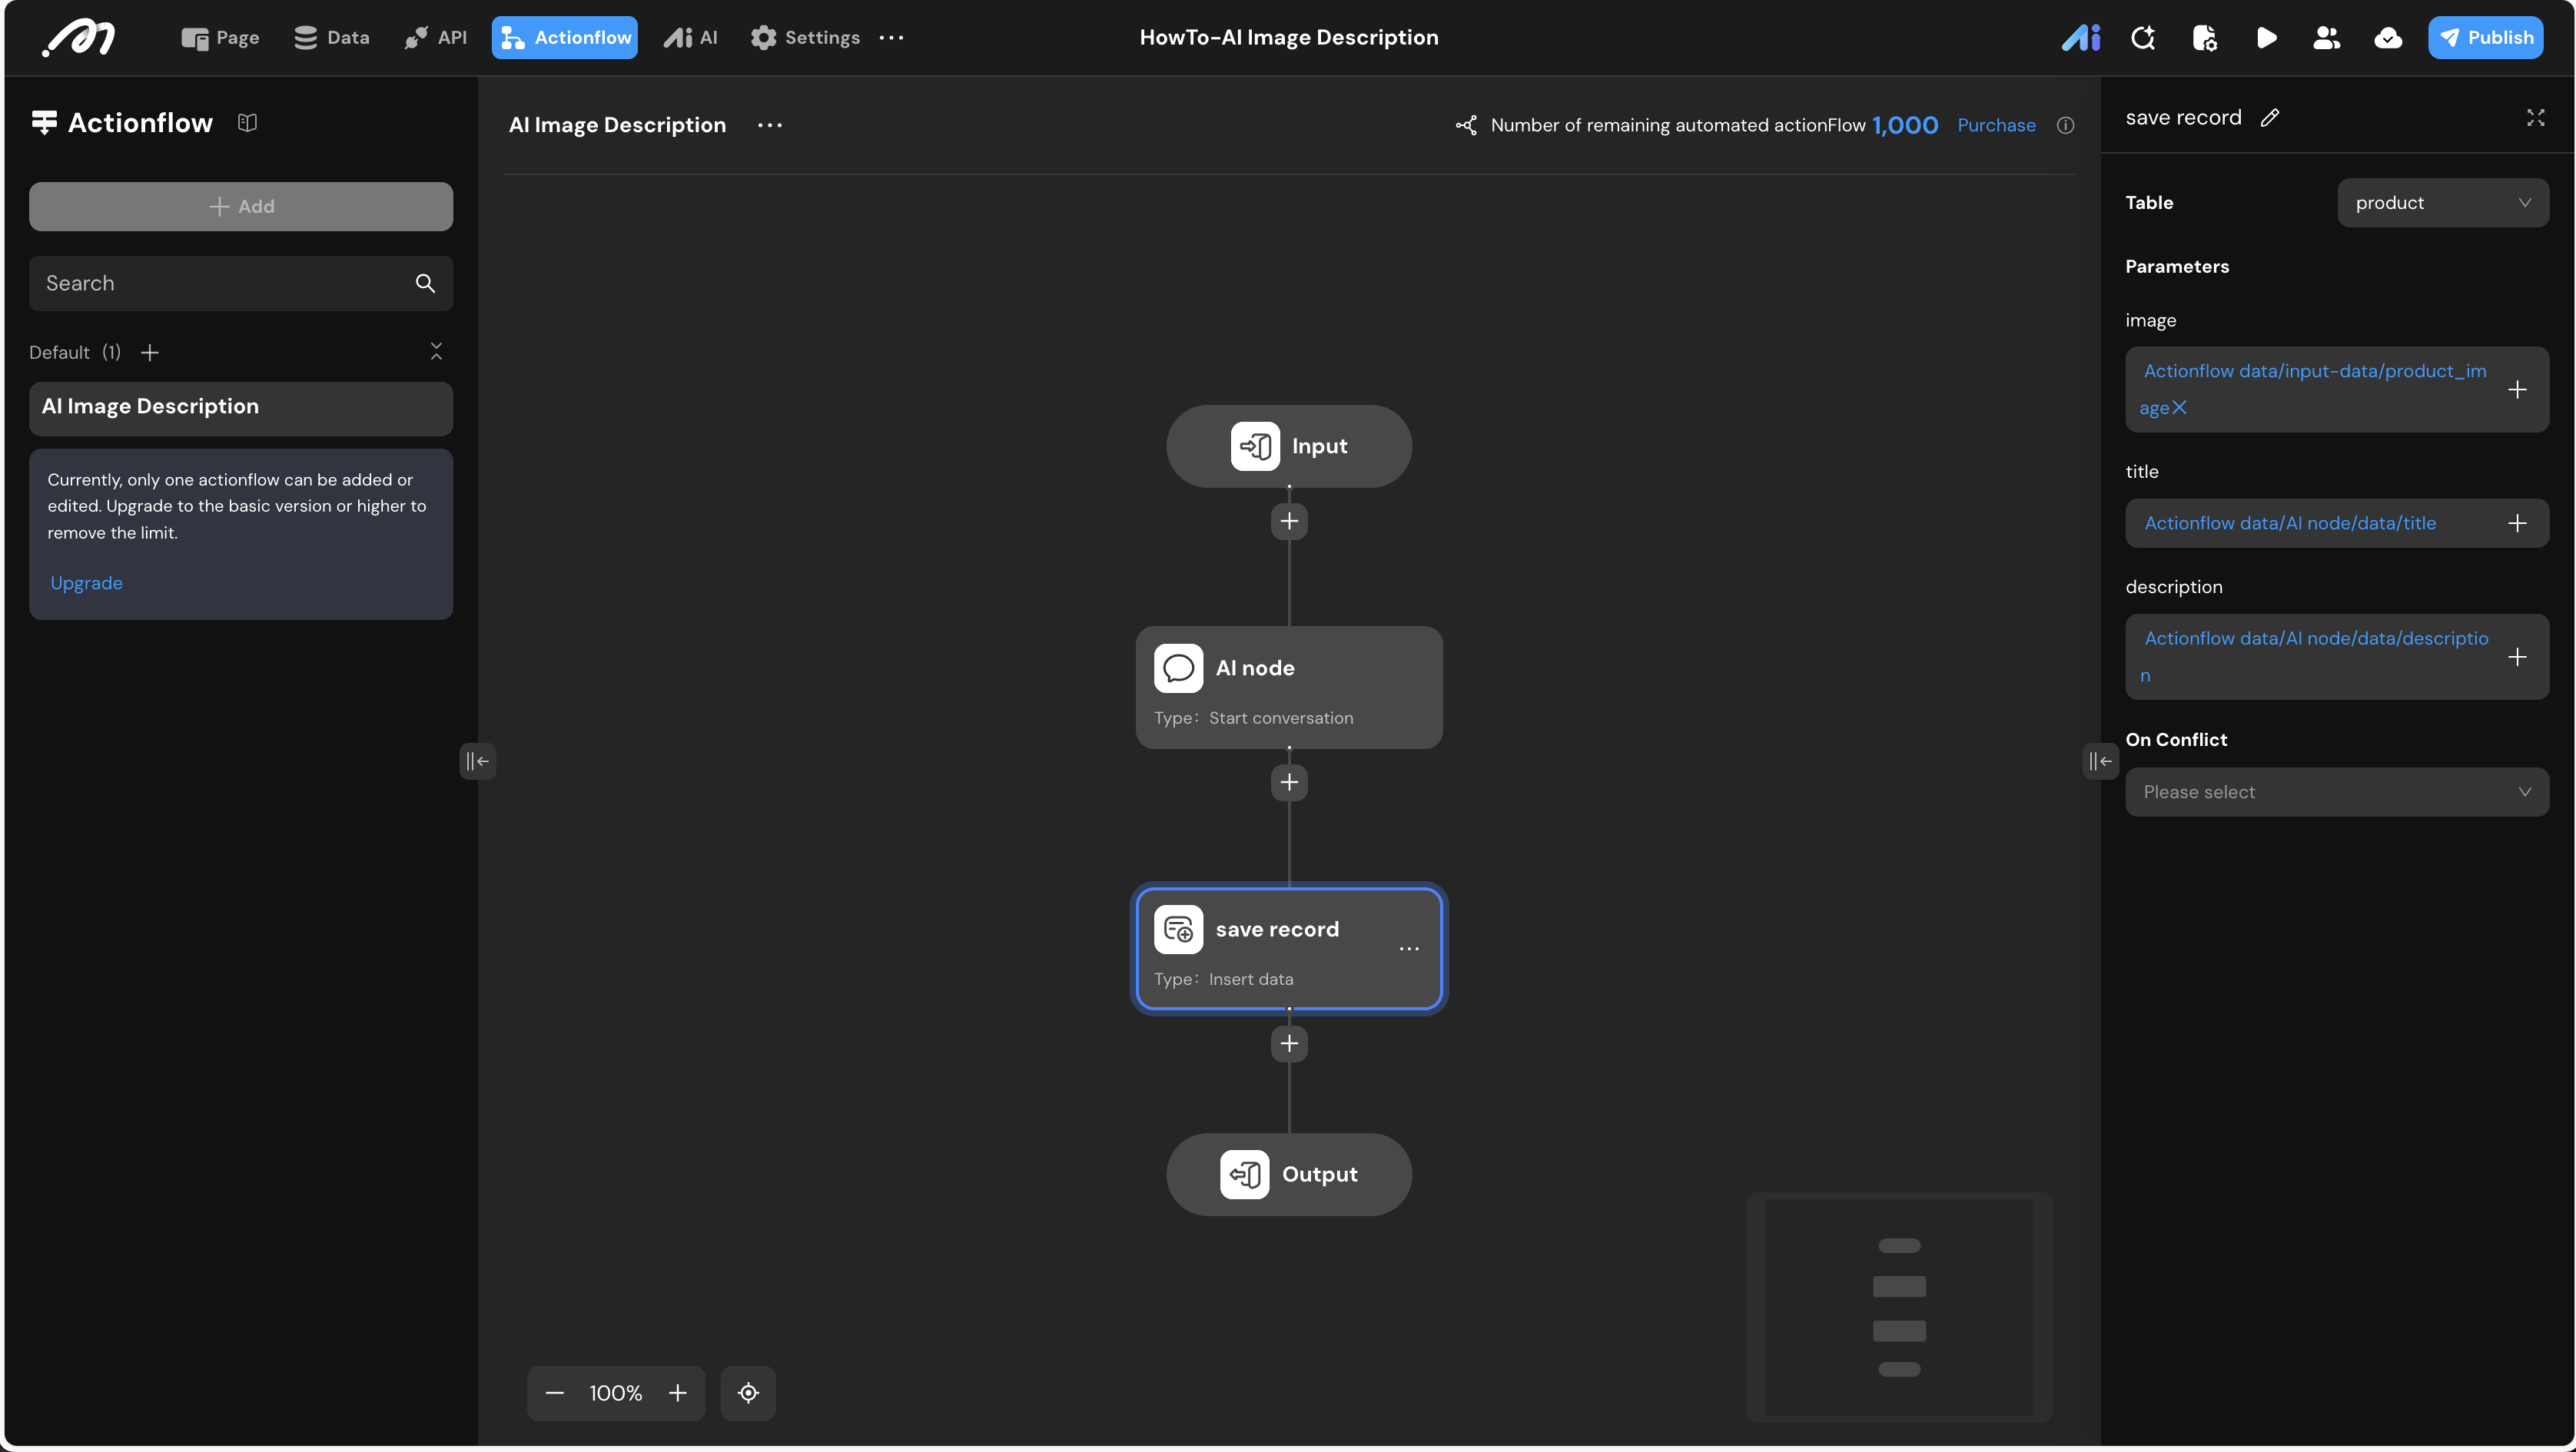
Actionflow Construction
The Actionflow handles the logic of passing the image to the AI and saving the result. Set the Execution Mode to Async (Asynchronous) in the right panel.
- Input Node: Define a parameter
product_image(Type: Image). - .AI Node: Select the Start conversation action.
- Select AI: Choose the agent configured in the previous step.
- Inputs: Bind
product_imageto the Actionflow’s input data.
- Database Node: Select Insert data for the
producttable.- image: Map to
Actionflow data / input-data / product_image. - title: Map to
Actionflow data / AI node / data / title. - description: Map to
Actionflow data / AI node / data / description.
- image: Map to
UI Construction & Interaction
Now, build the interface to trigger the process.
- Component Tree:
- Image picker: For the user to upload the photo.
- Button: To trigger the AI analysis.
- Interaction Configuration:
- Select the Button and go to the Interaction panel.
- Event:
OnClick-> Actionflow. - Action: Select
AI Image Description. - Parameters: Bind
product_imageto the value of theImage pickercomponent.

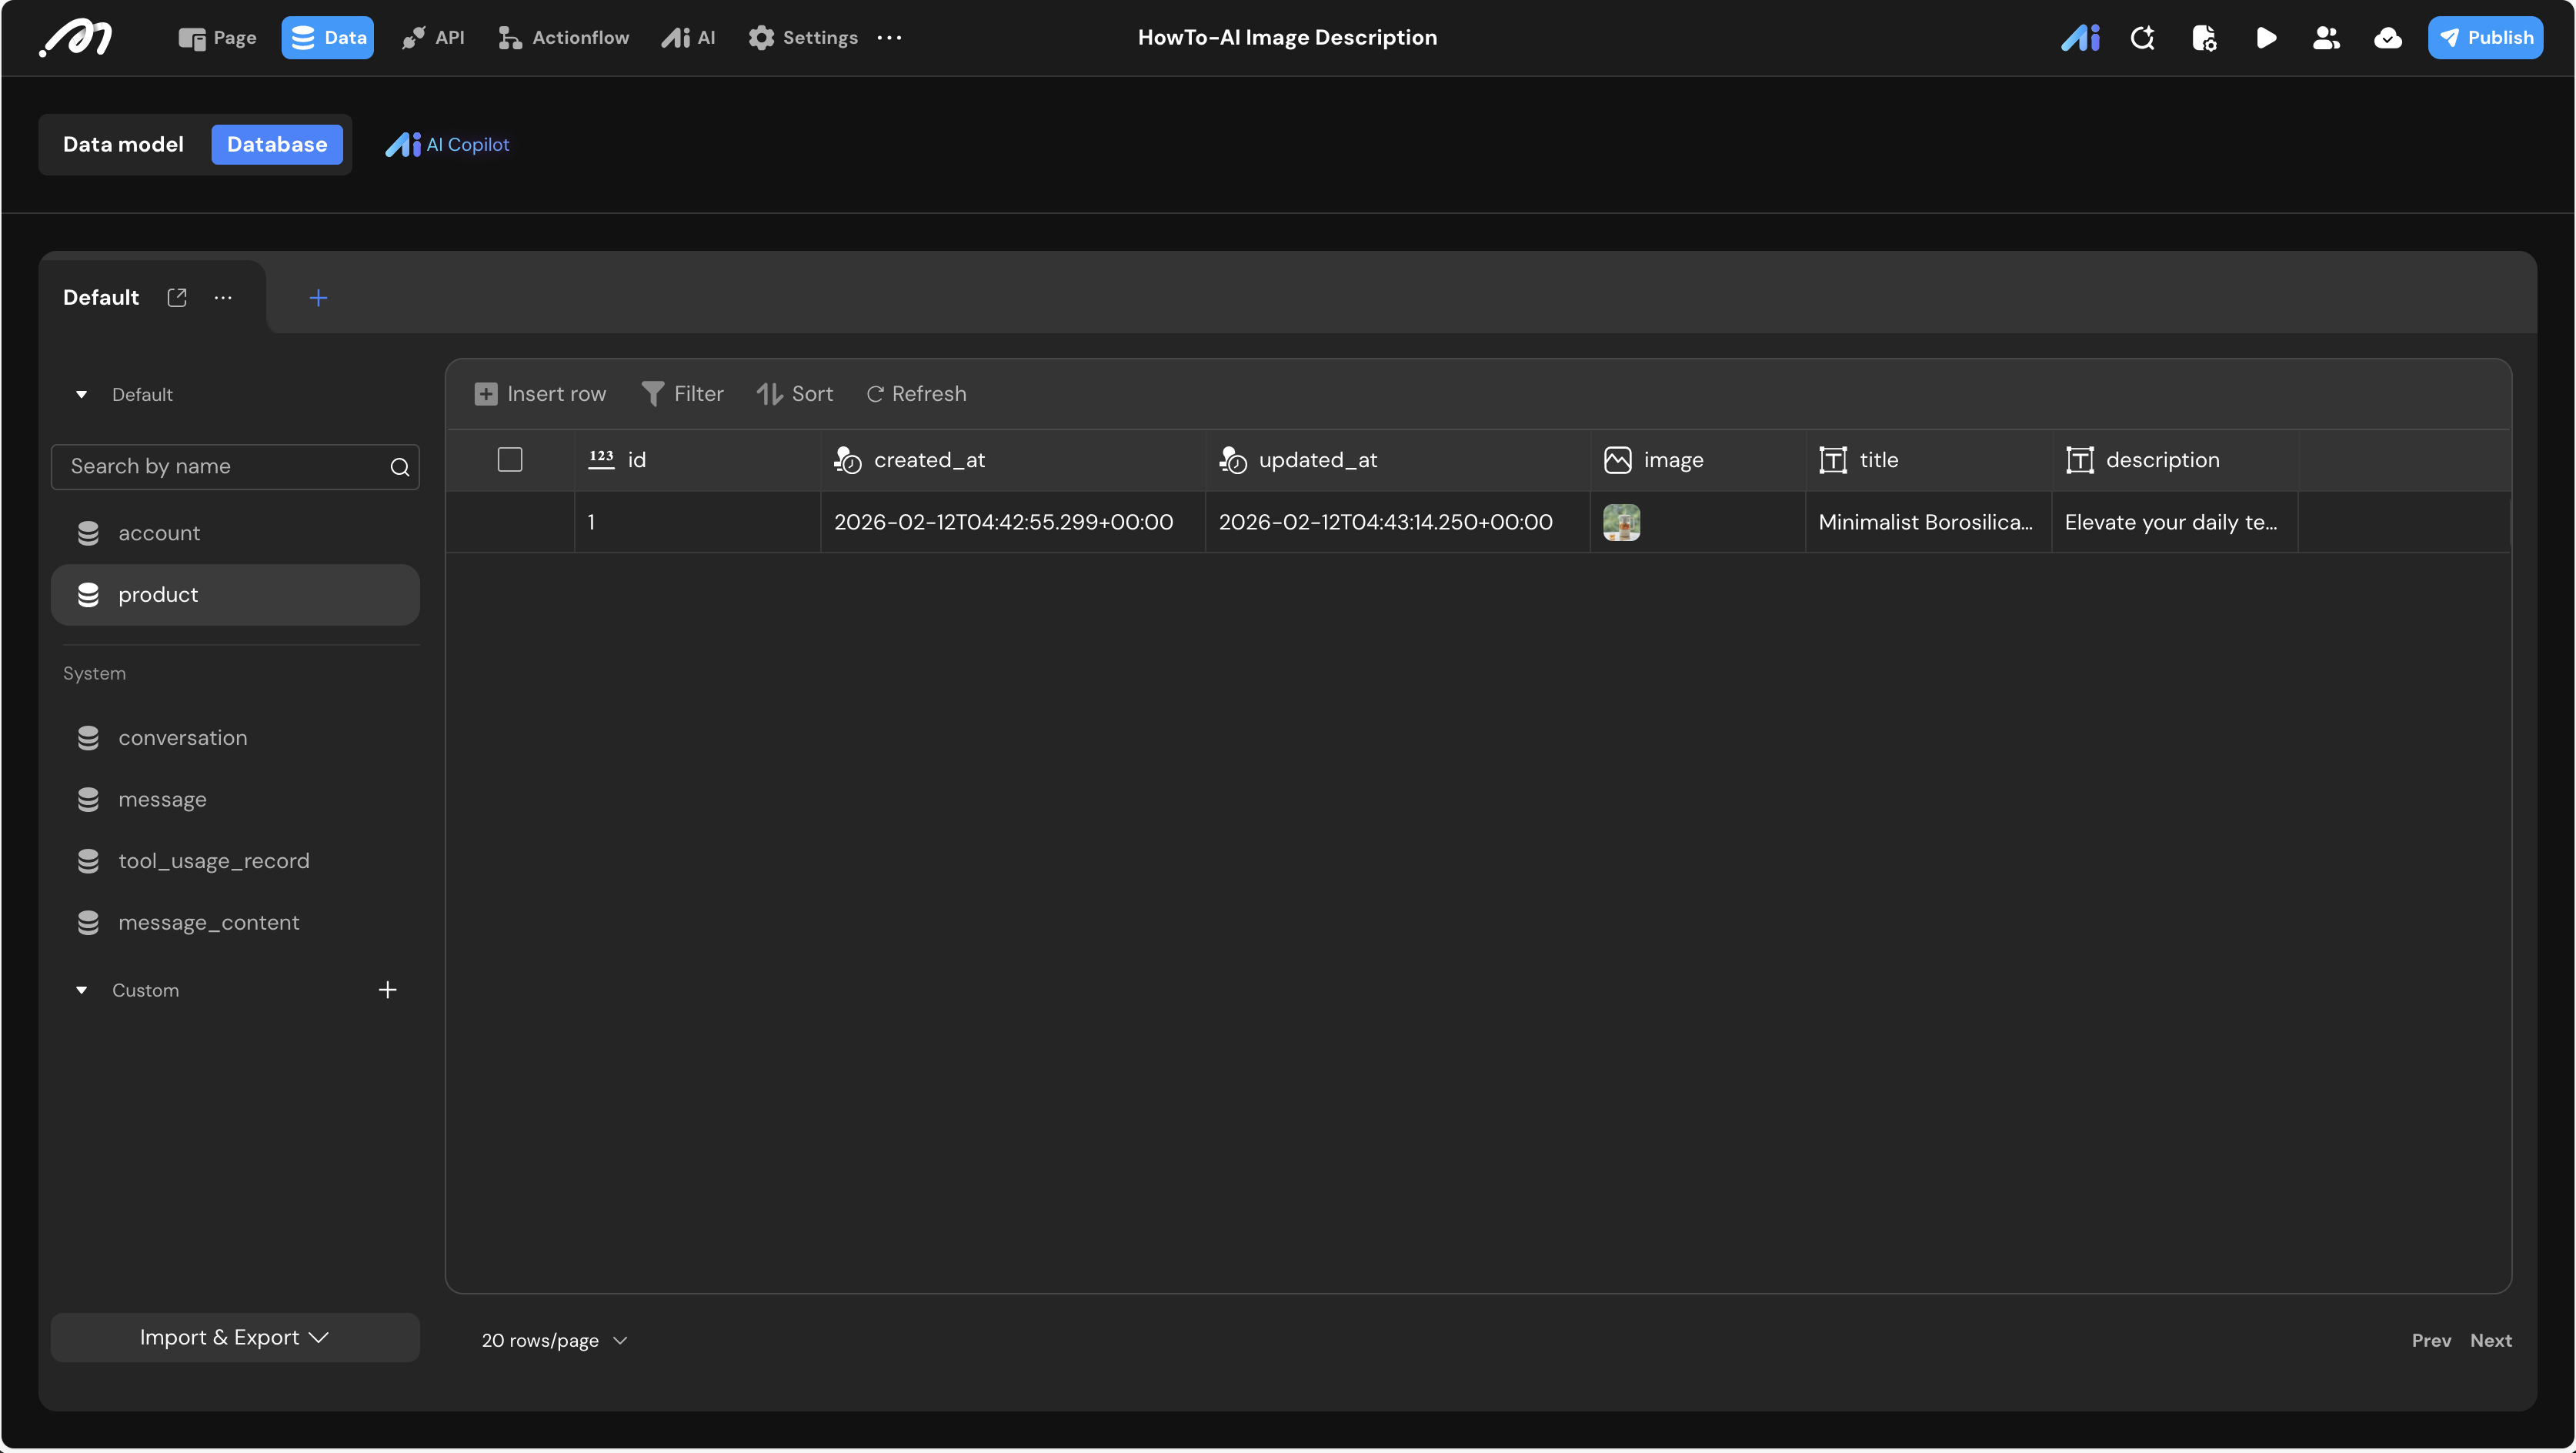
Verification
- Click Preview in the top right corner.
- Upload a clear product image (e.g., a glass teapot) using the Image Picker.
- Click the “Get Started” (Button).
- Navigate to Data Source -> Database and check the
producttable. You should see a new record with the uploaded image and AI-generated text.
Last updated on