AI Copy Reviewer
Project Access Link
https://editor.momen.app/tool/k5PBKyGyrrO/WEB?code=rXTGj1LygW8AV&ref=0562398
Introduction
- Goal: Automatically analyze user-submitted marketing copy to ensure it aligns with brand guidelines (tone, punctuation, and language).
- Applicable Scenario: Marketing workflows, brand compliance auditing, and content generation pipelines.
- Core Logic: A user submits text via a UI input -> An asynchronous Actionflow triggers an AI Agent -> The AI returns structured data -> The result is saved to the Database.
Steps
Data Storage
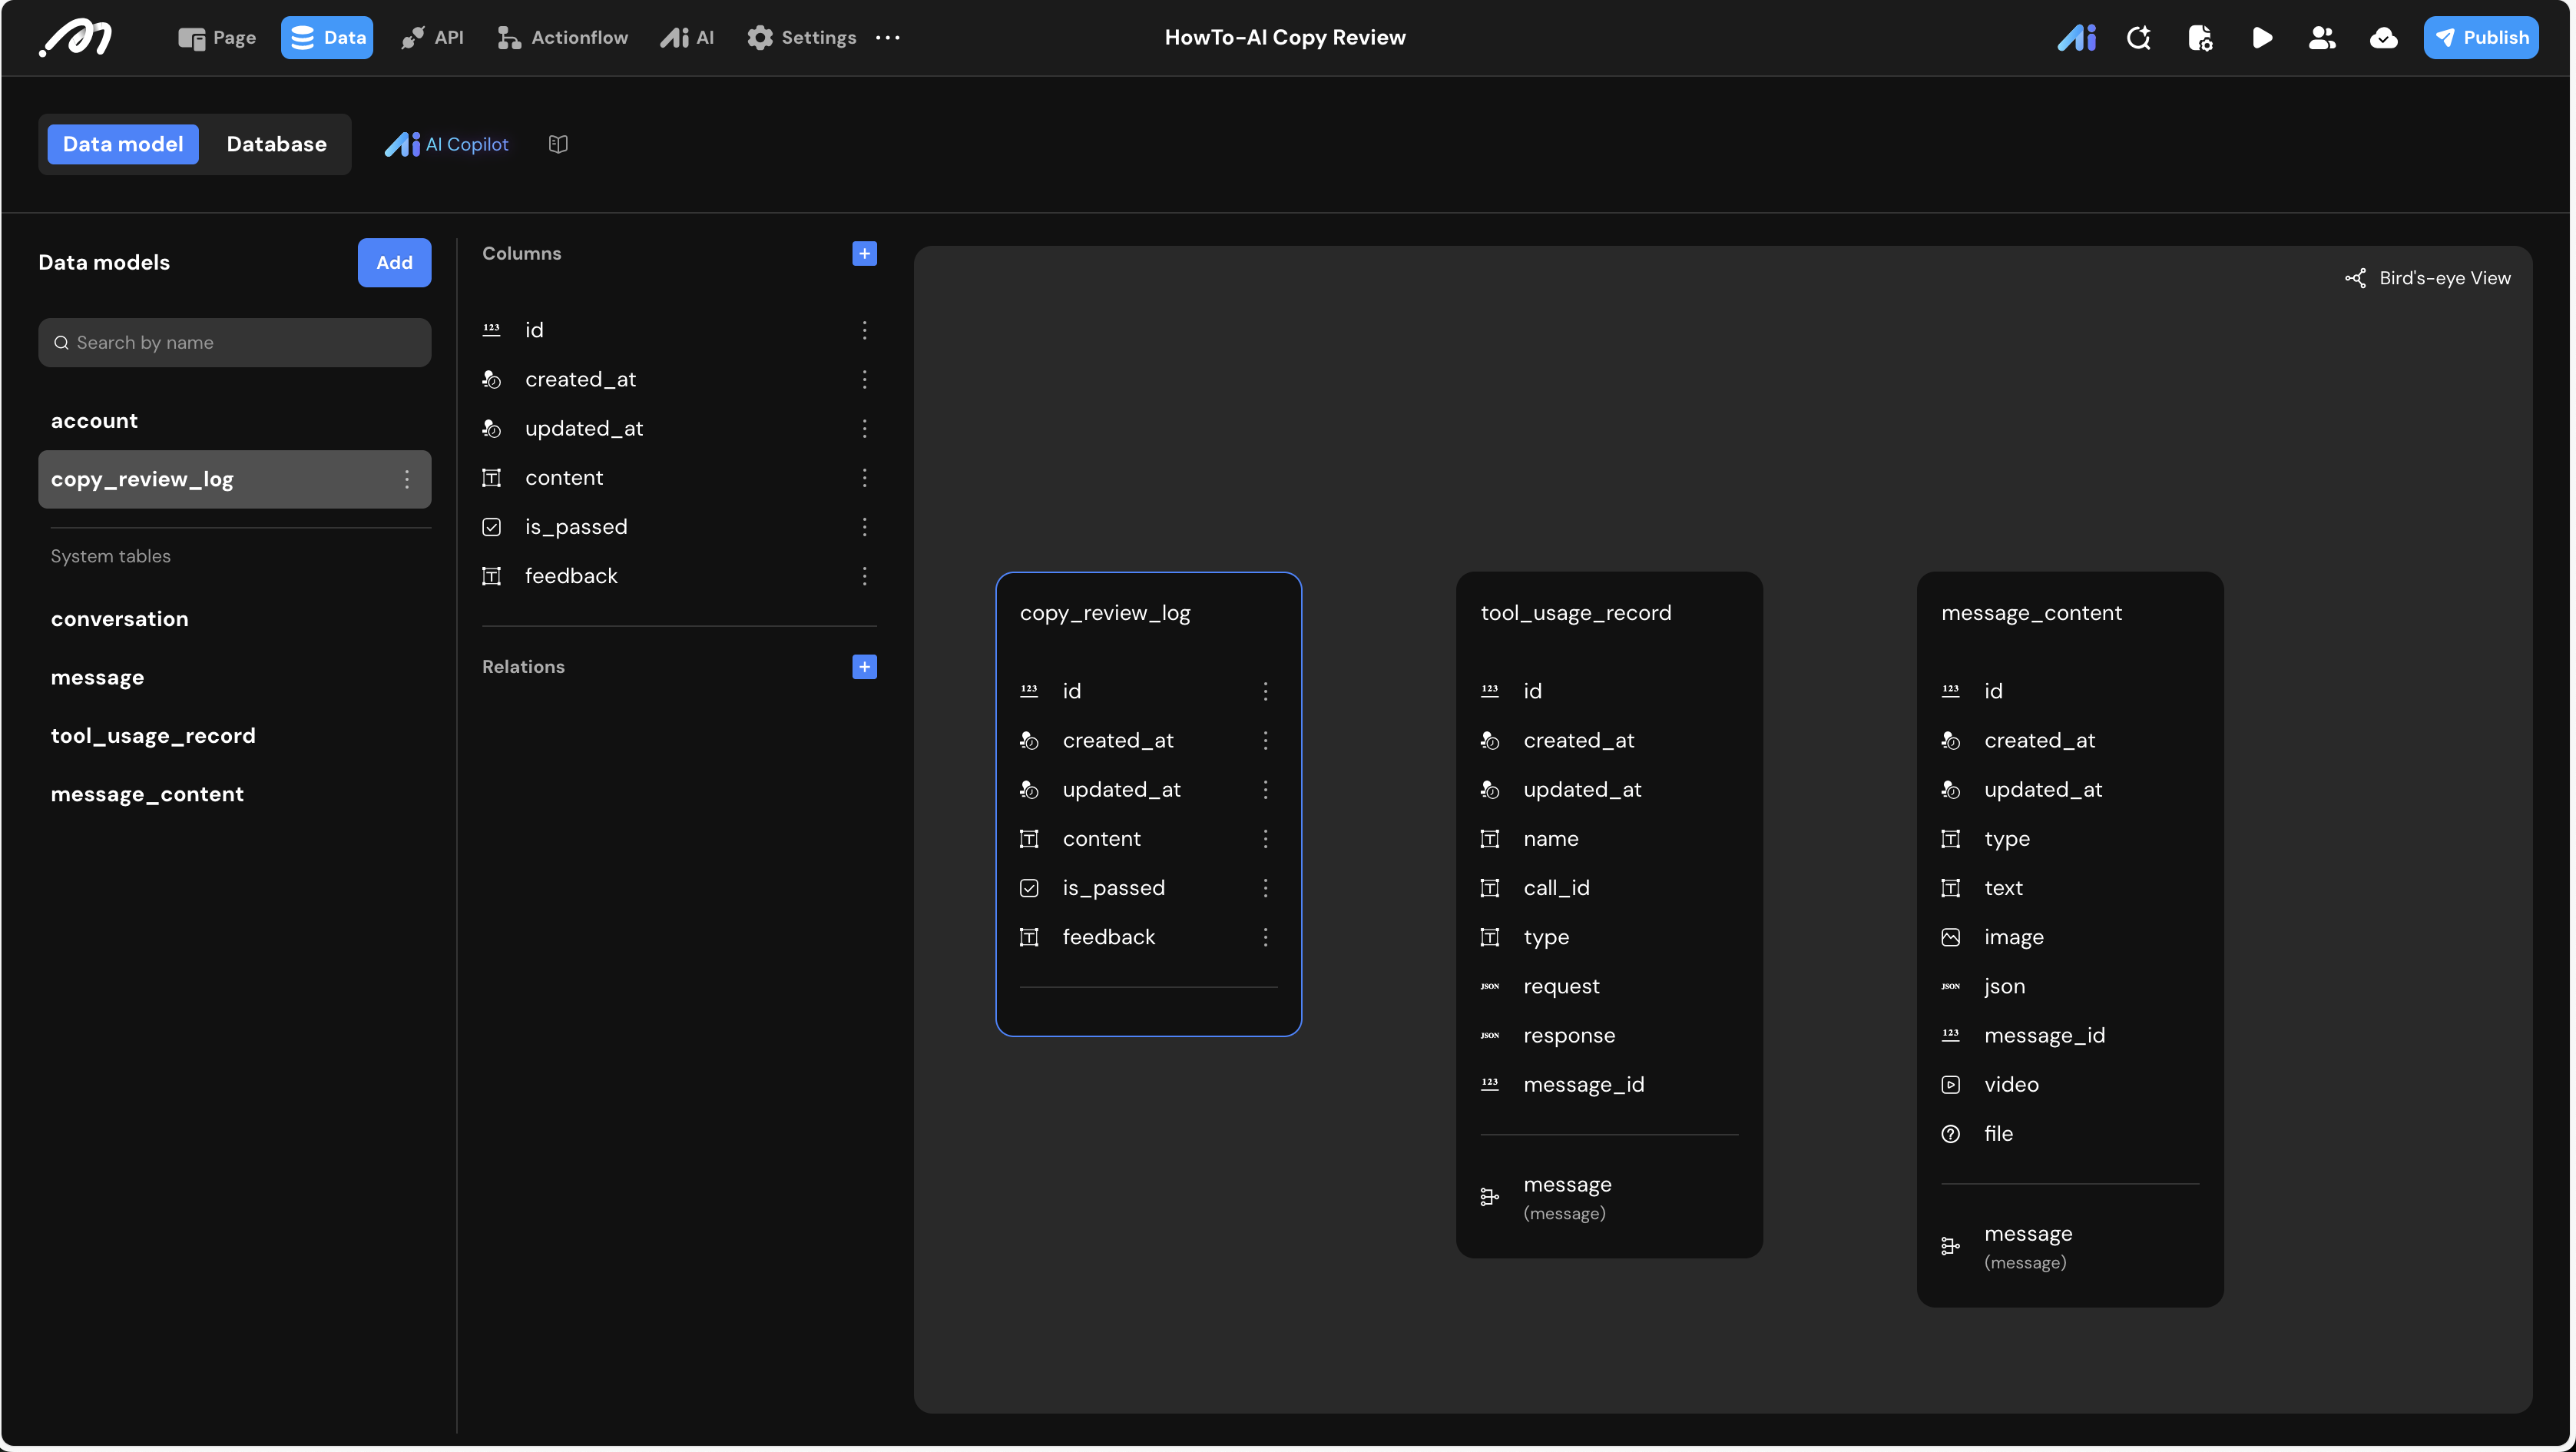
First, we need to create a table to store the history of submitted copy and the AI’s evaluation.
- Data Model: Navigate to Data and create a table named
copy_review_log.
| Field Name | Type | Description |
|---|---|---|
content | Text | Stores the original user input. |
is_passed | Boolean | true: Compliant; false: Violation. |
feedback | Text | AI-generated critique and the revised copy. |
AI Agent Configuration
The AI Agent acts as the “Brand Expert.” We must define its identity and ensure it returns data in a format the system can understand.
- Create Agent: Go to the AI tab and add a new agent named
Agent_copy_review. - Define Inputs: Add a Text input named
content. - Prompt Template:
- Role: Brand Copy Review Expert.
- Goals: Analyze the
\{{Input/content}}and determine if it adheres to brand guidelines. - Audit Standards: Include specific constraints like “No Slang,” “No excessive exclamation marks,” and “Rational tone.”
- Structured Output: Set the output type to Structured.
is_passed(Boolean): Does it meet the standards?feedback(String): If failed, explain the violation and provide a [Revised Draft]. If passed, return “Copy is compliant.”
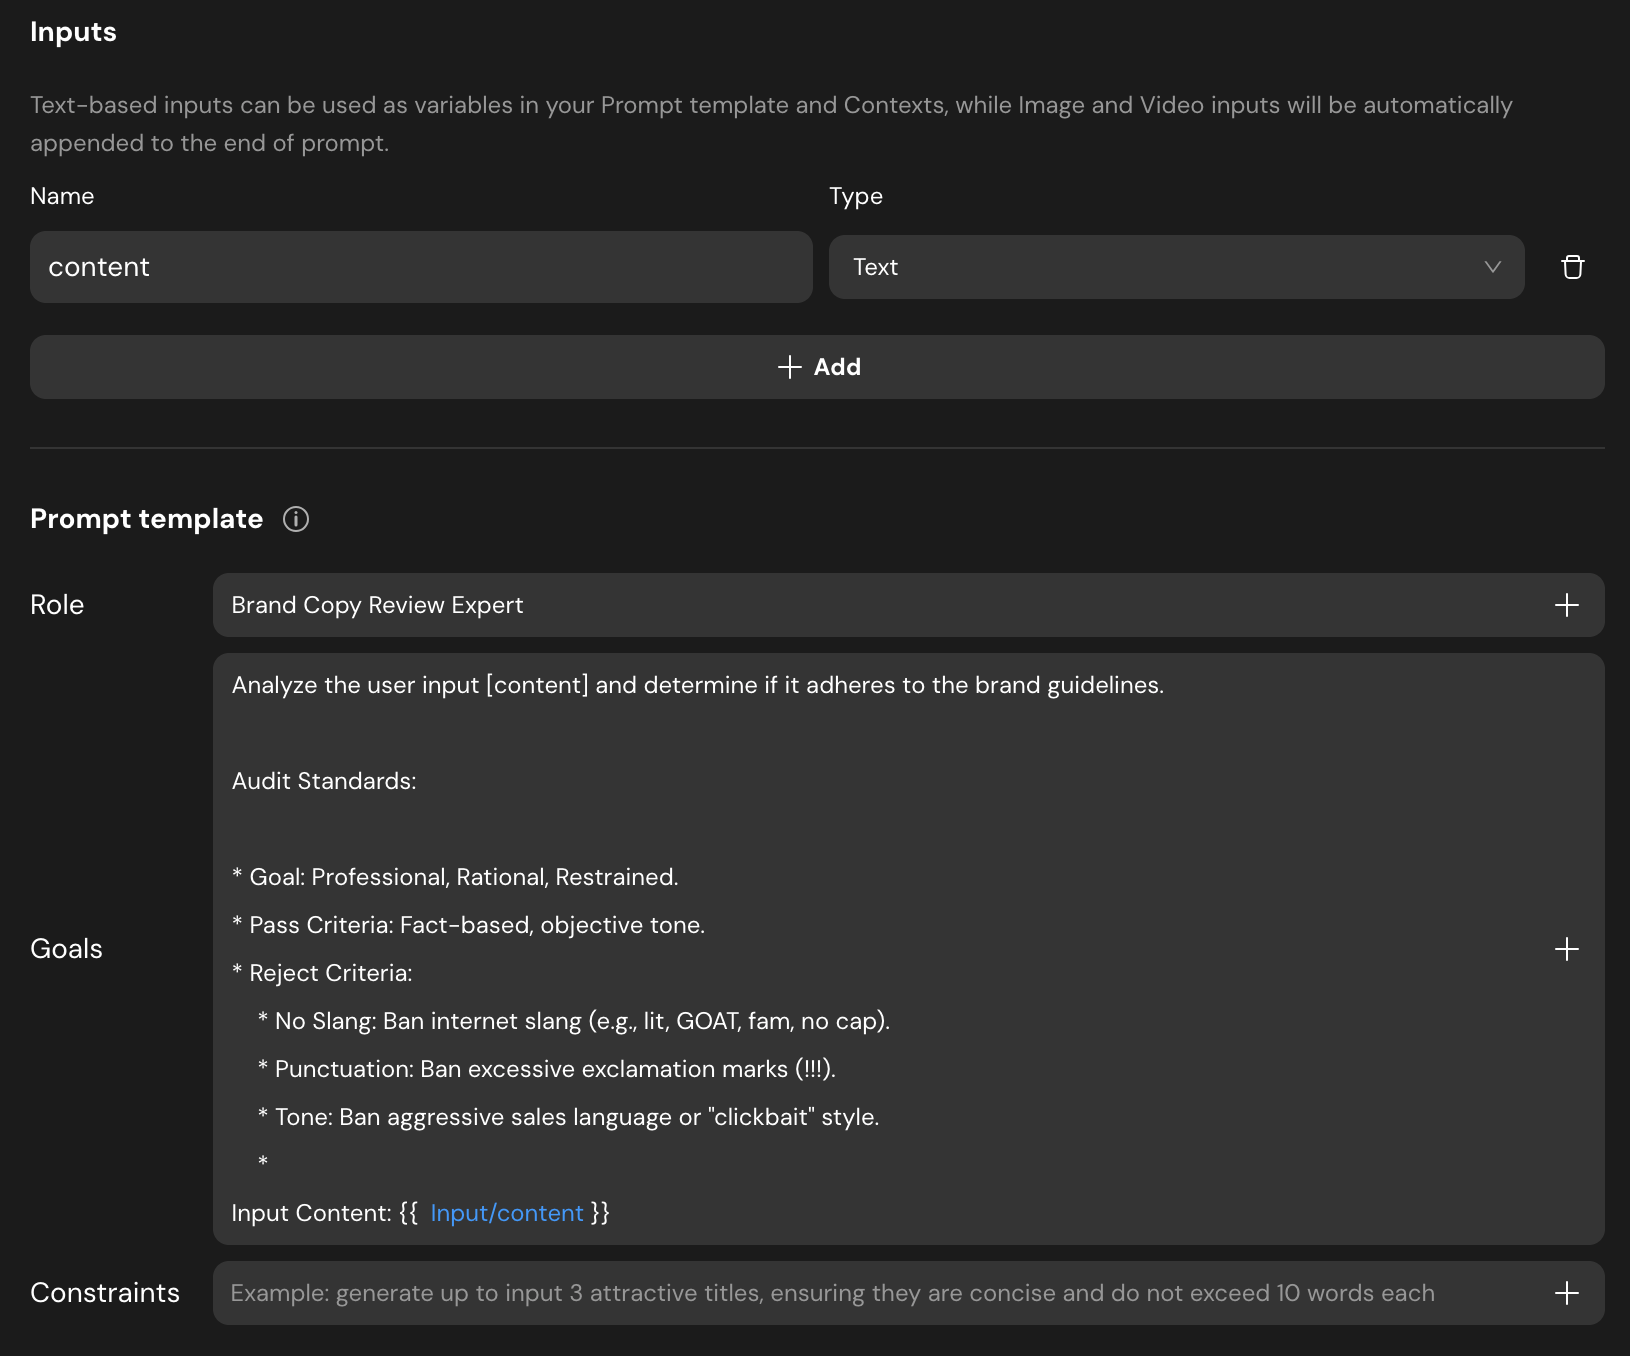
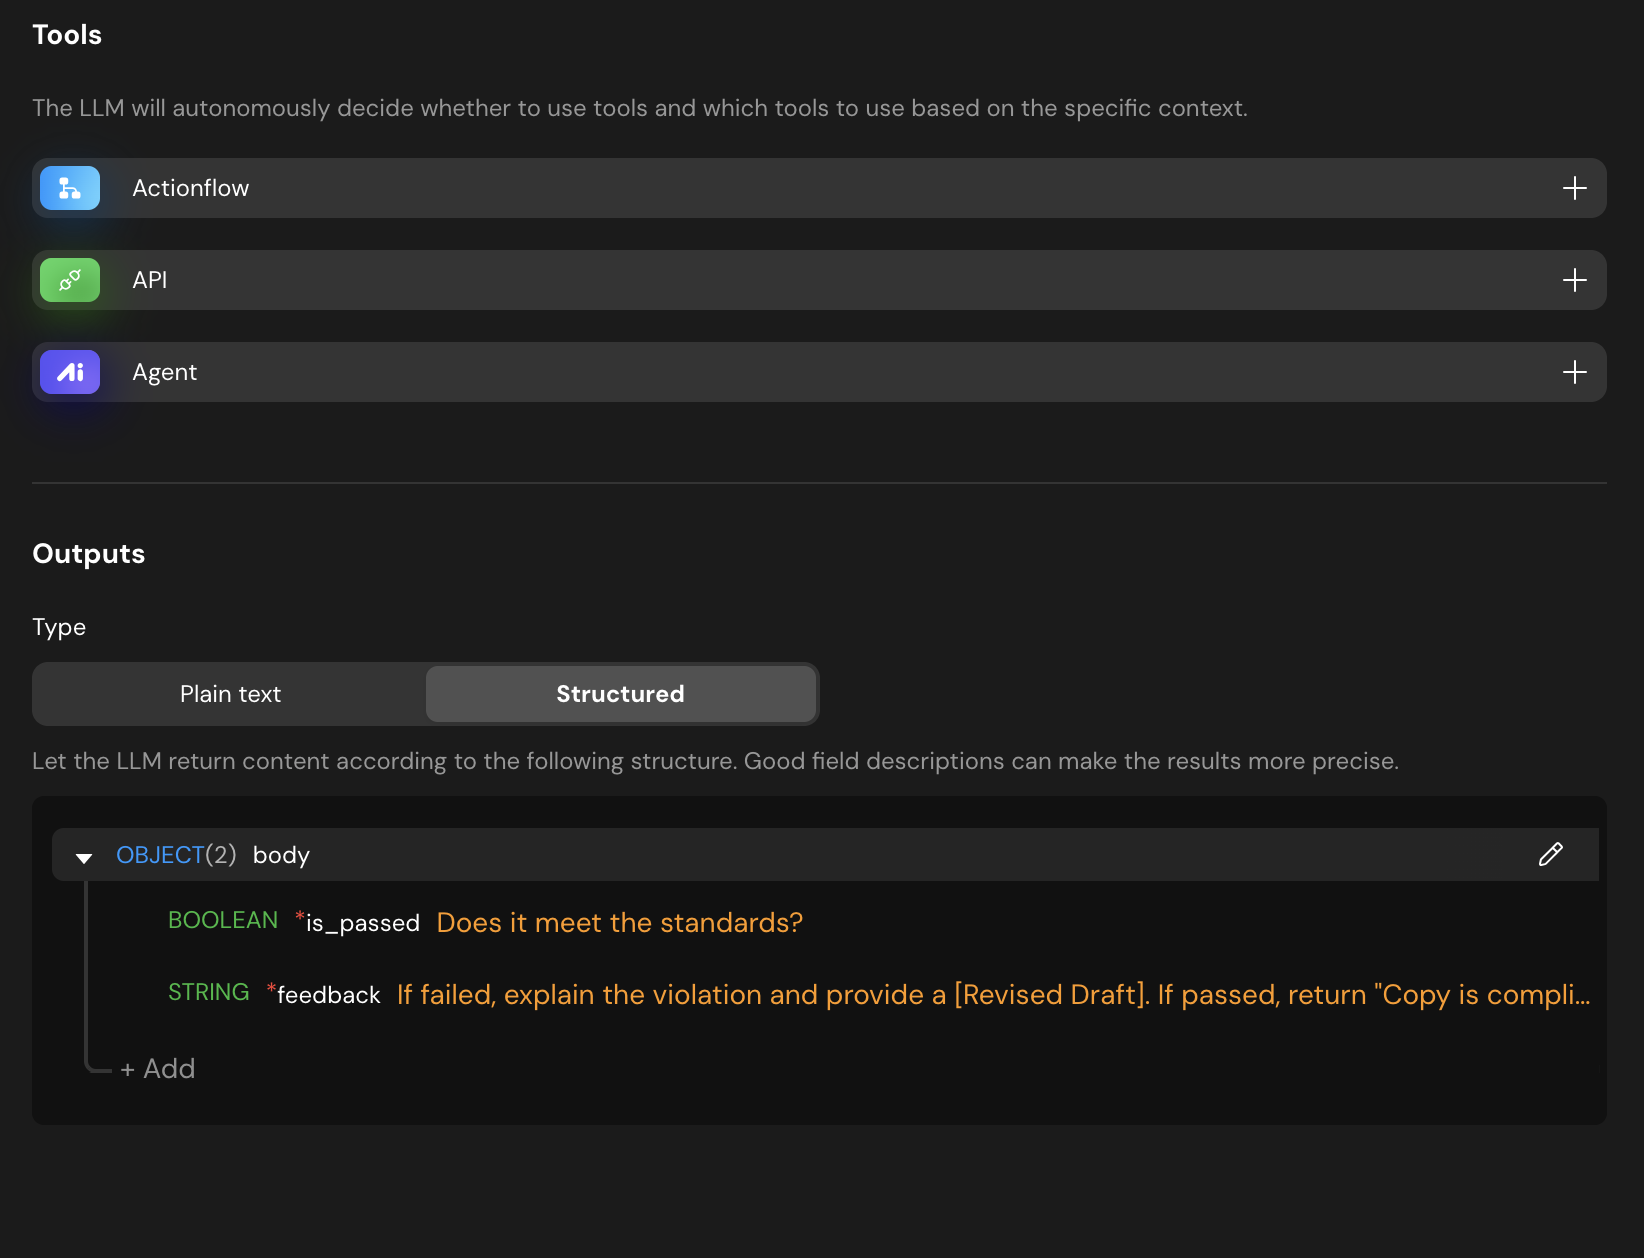
Using Structured Output allows the backend logic to directly map the AI’s response to database fields without manual parsing.
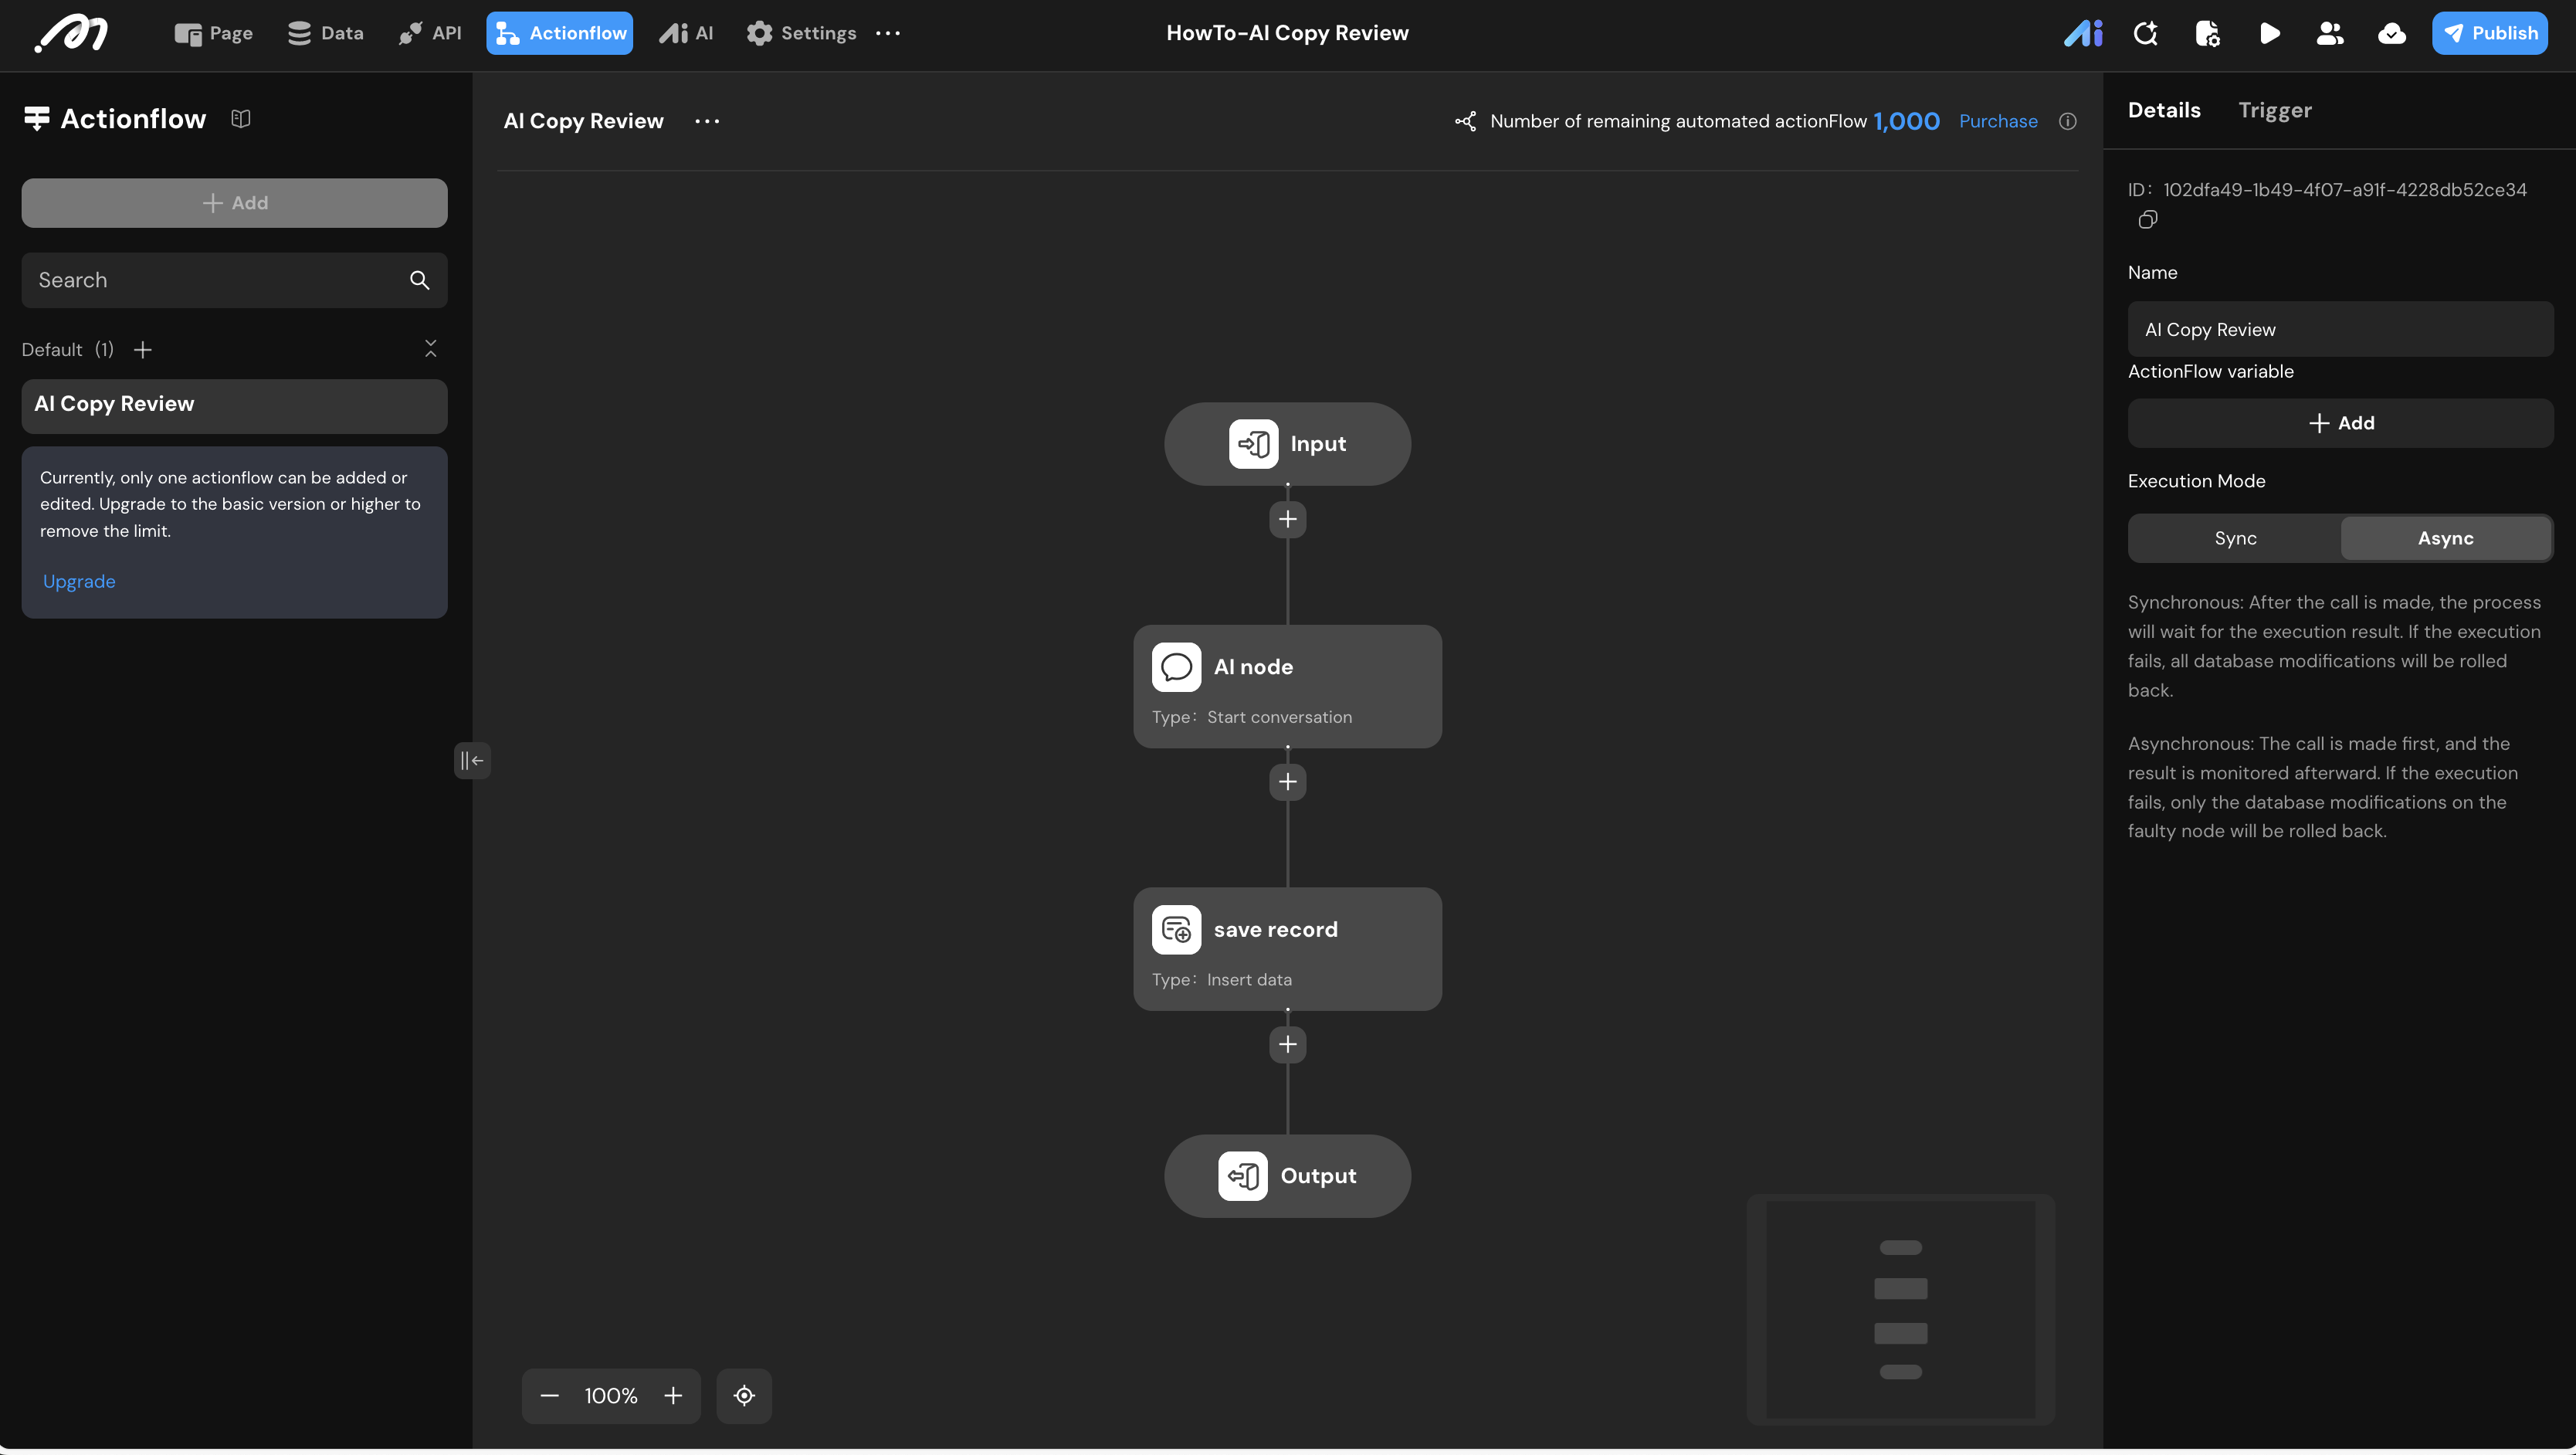
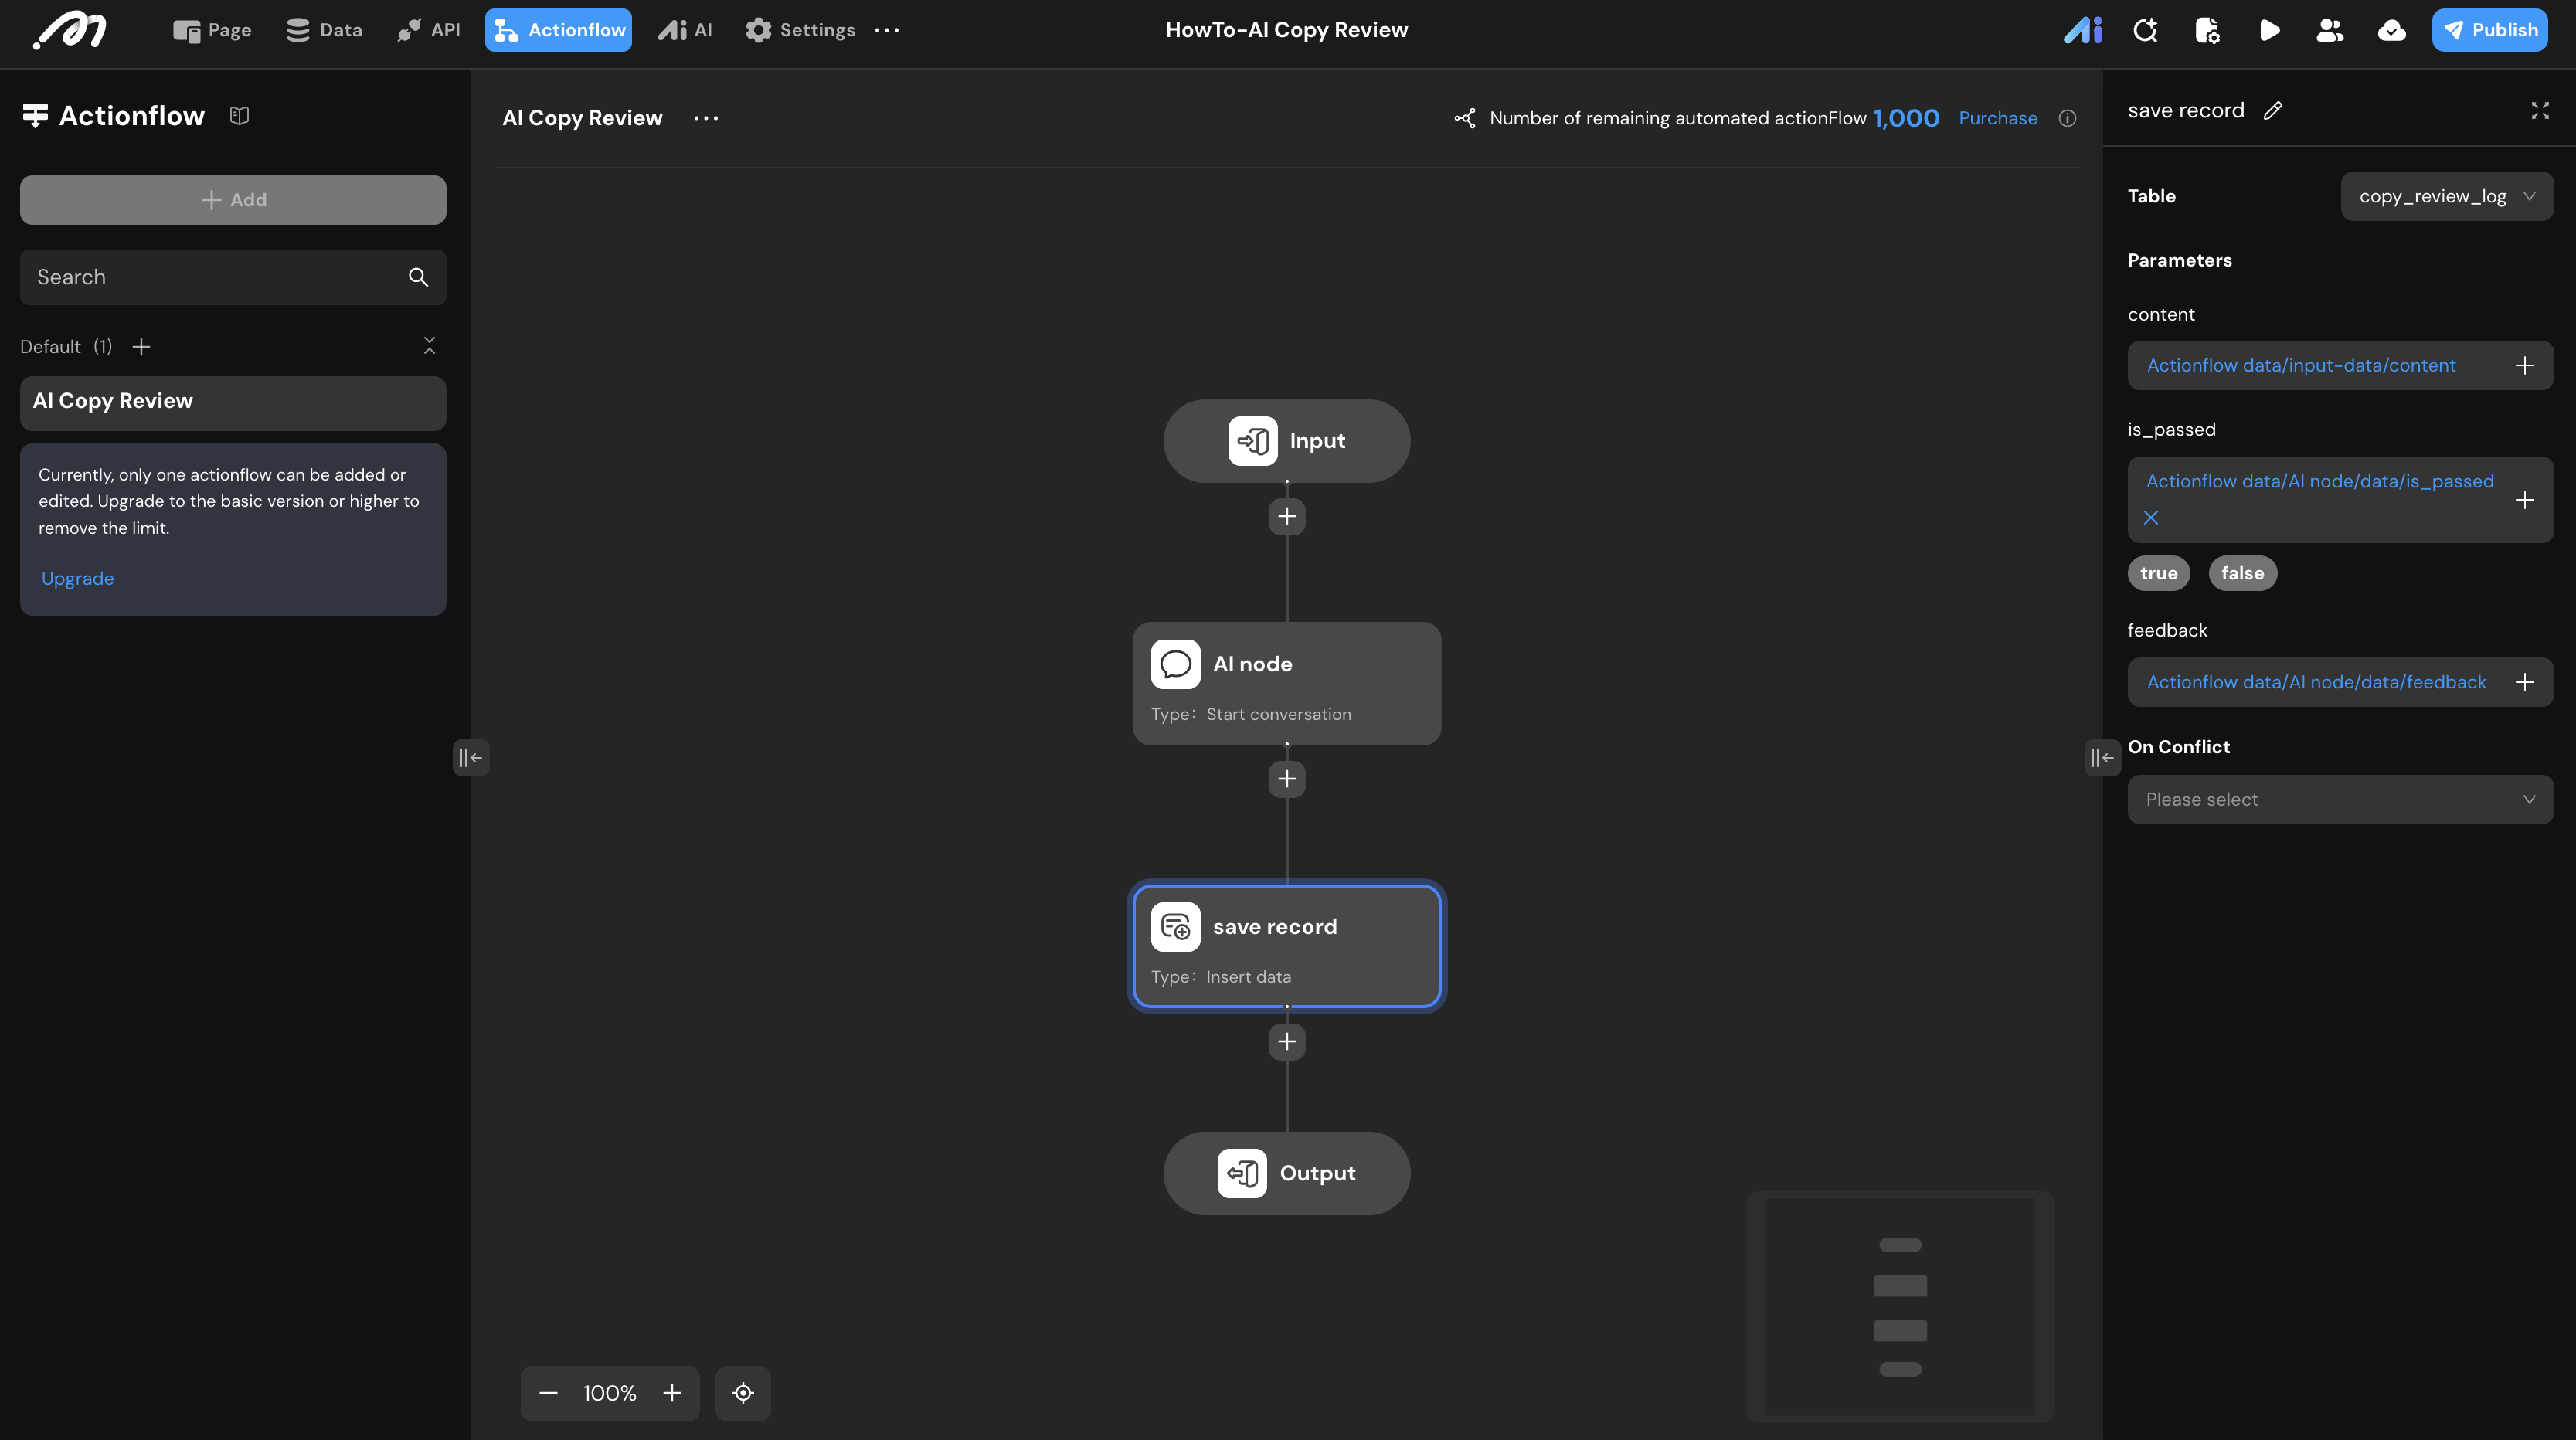
Actionflow Construction
- Trigger & Mode: Create an Actionflow named
AI Copy Review. Set the Execution Mode to Async (Asynchronous) in the right panel to handle the AI processing time smoothly. - Input Node: Define a parameter
content(Text). - AI node: Add a Start conversation node. Select
Agent_copy_reviewand bind thecontentparameter to the agent’s input. - save record: Add a Database -> Insert data node.
- Table:
copy_review_log. - Mapping:
content: Map fromActionflow data -> input-data -> contentis_passed: Map fromActionflow data -> AI node -> data -> is_passedfeedback: Map fromActionflow data -> AI node -> data -> feedback
- Table:
UI Construction & Interaction
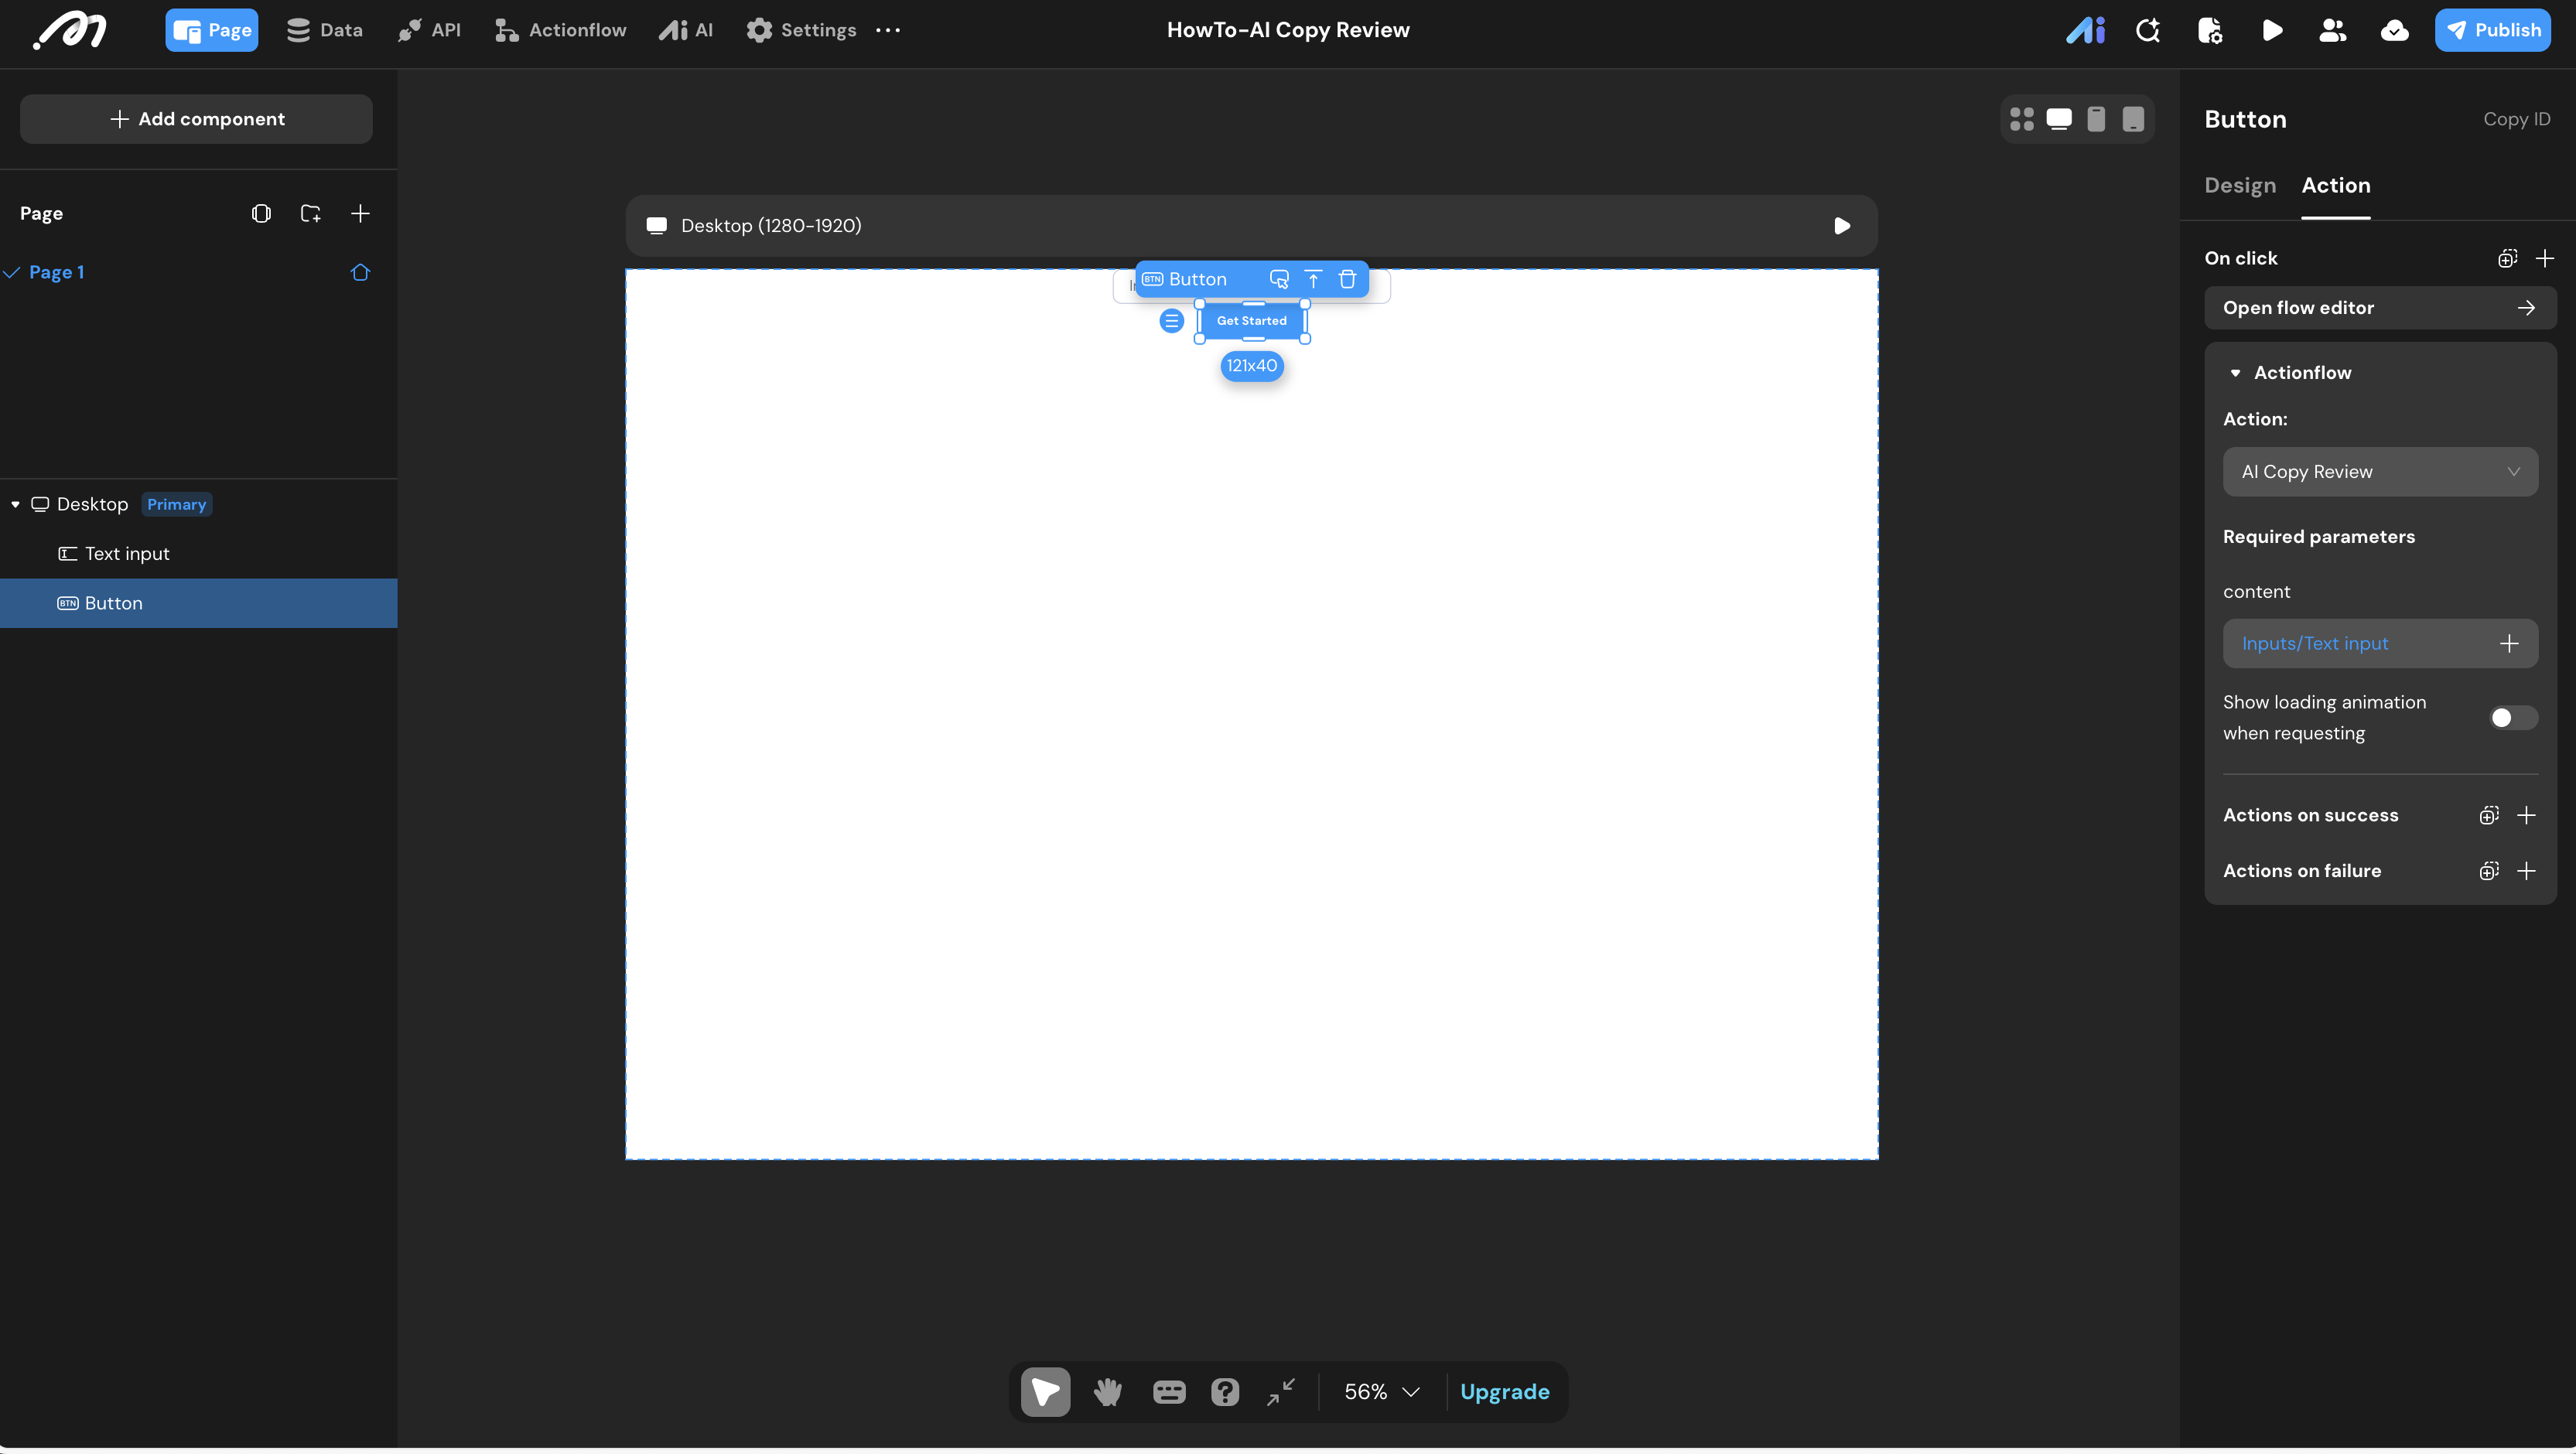
- Layout: In the Pages tab, drag a Text Input and a Button onto the canvas.
- Interaction:
- Select the Button.
- Go to the Interaction panel -> On click.
- Select Actionflow ->
AI Copy Review. - Binding: Map the
contentparameter to the value of the Text Input component.
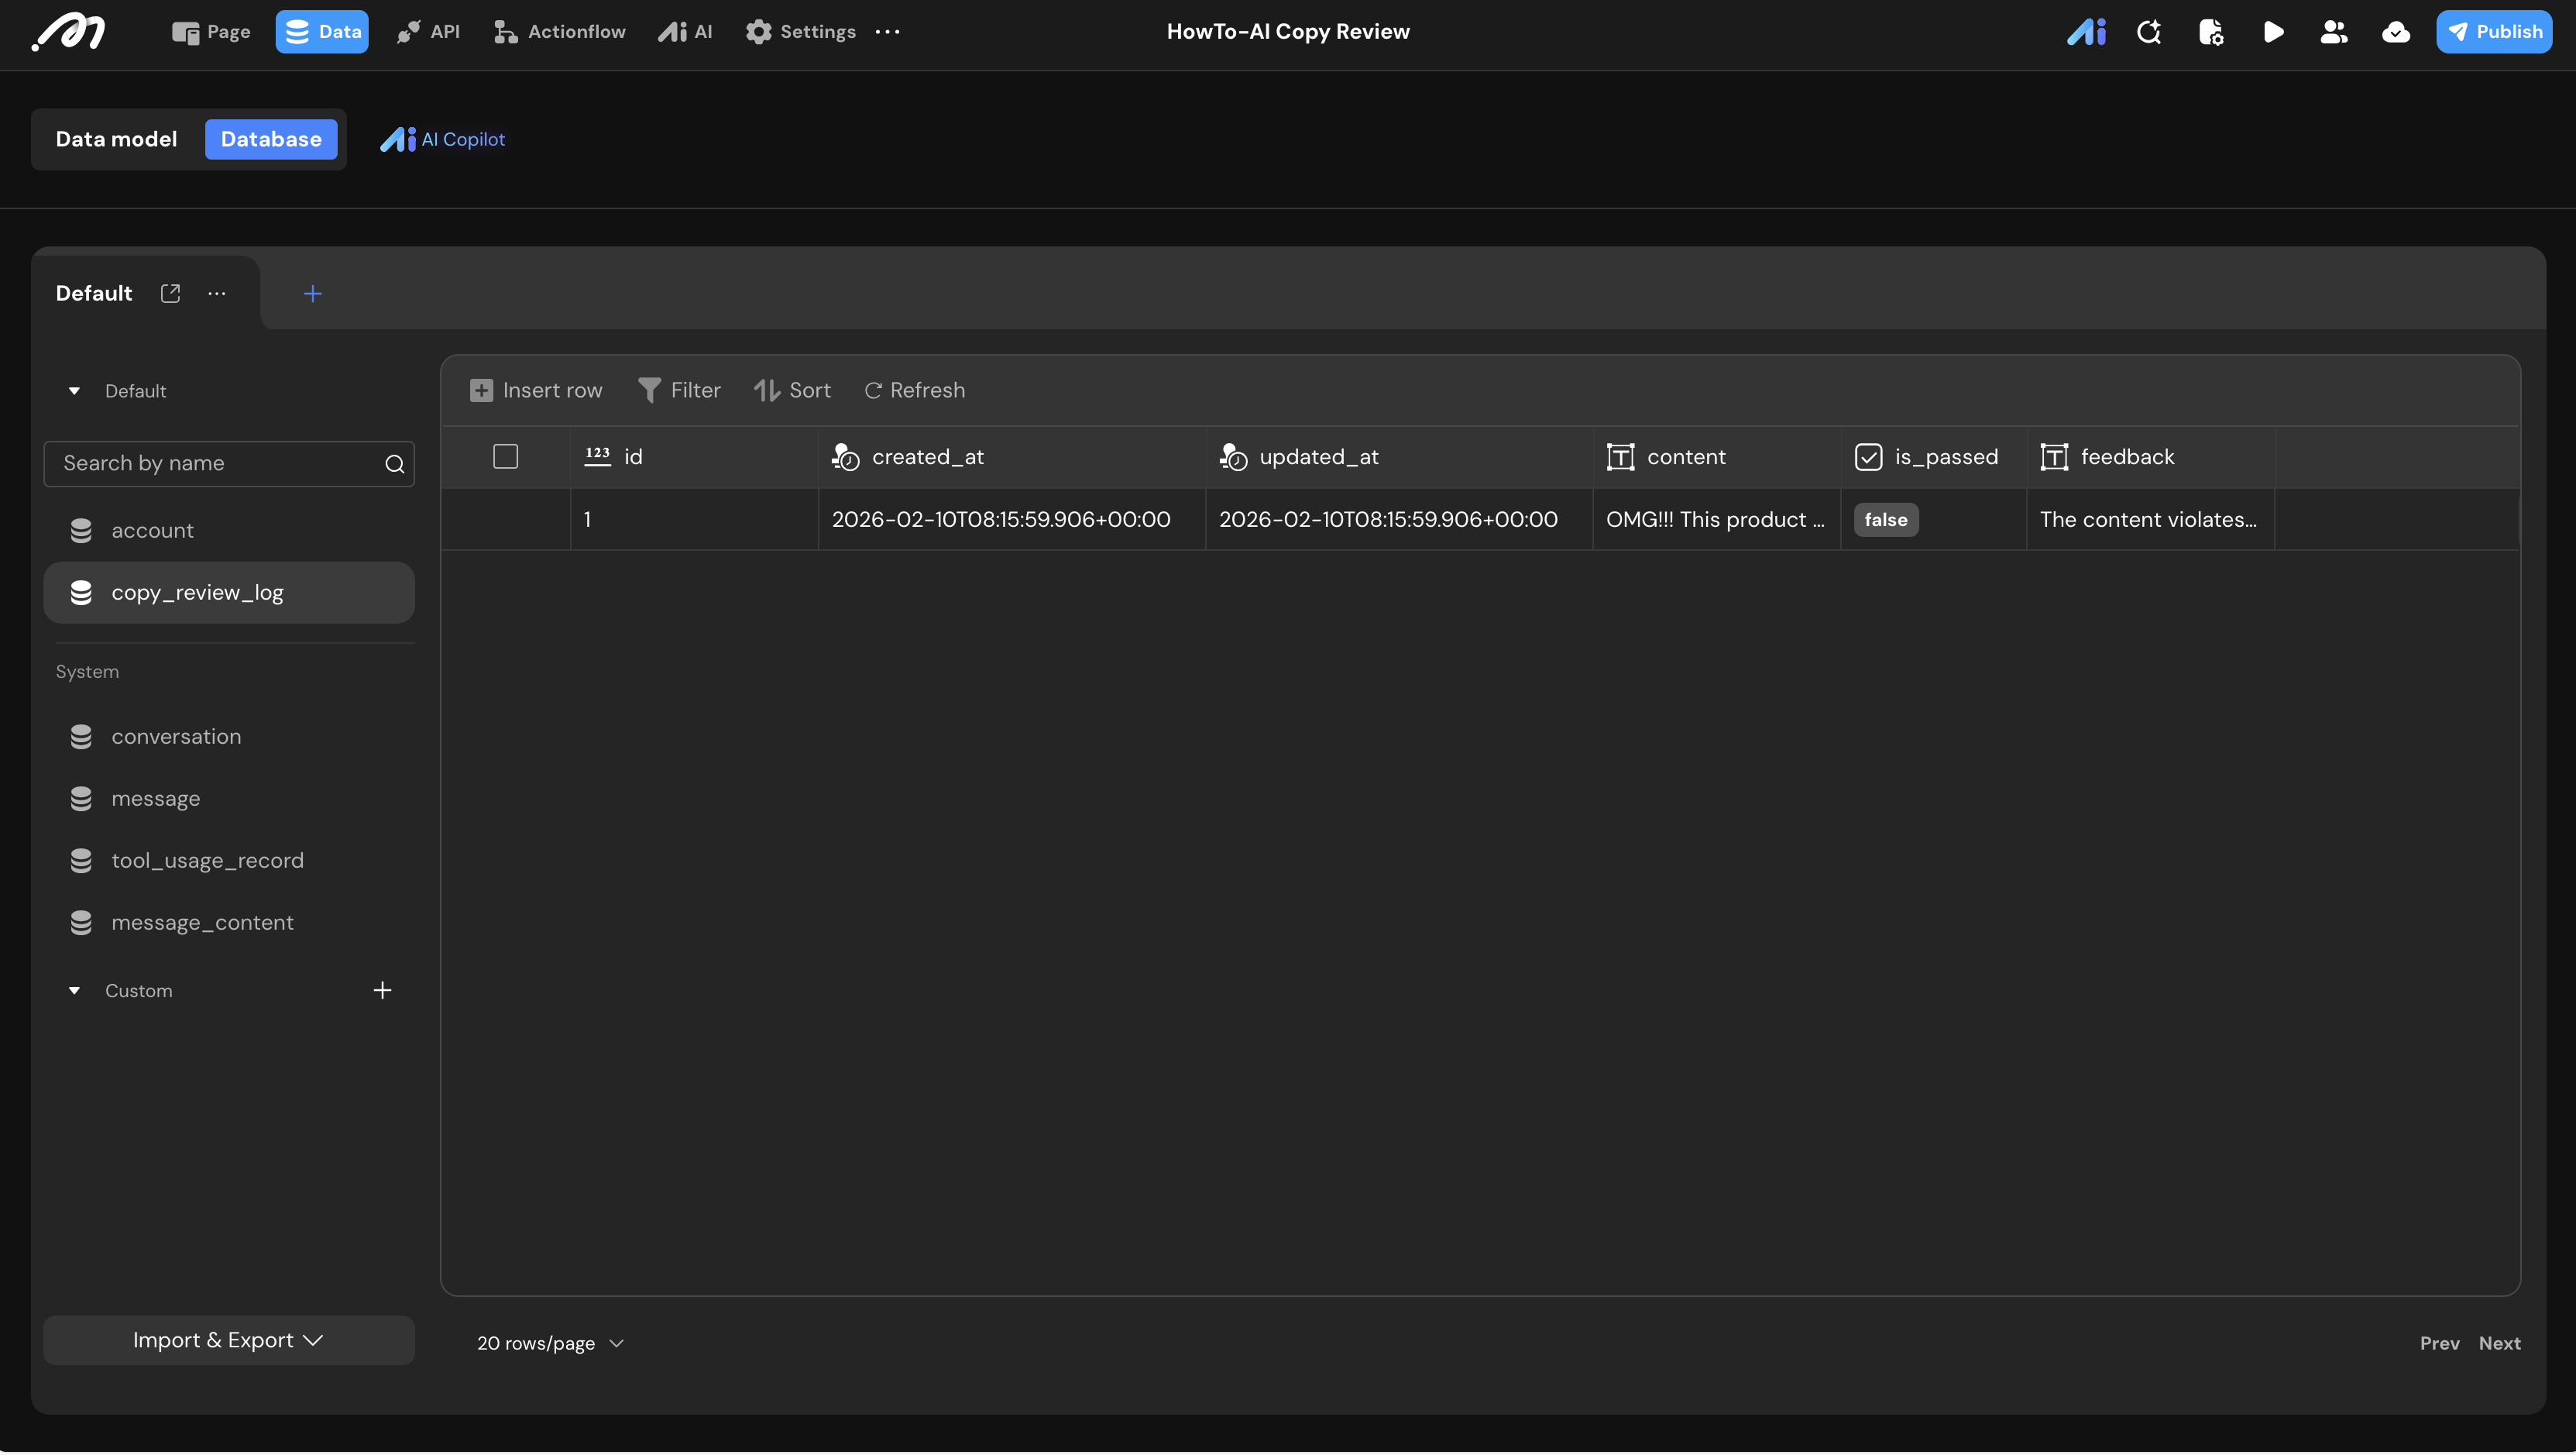
Verification
- Preview: Click the Preview button in the top bar.
- Test Case: Enter a non-compliant text, for example: “OMG!!! This product is literally the GOAT… you’re missing out big time!”
- Check Result: Click the button, then return to the Data -> Database view.
- Validation: You should see a new record where
is_passedisfalseand thefeedbackcontains a professional [Revised Draft].
Last updated on