AI Content Classifier
Project Access Link
https://editor.momen.app/tool/rmLyJ0Z0g6o/WEB?code=fB4OyxQKMdqrz&ref=0562398
Tutorial Video
https://www.youtube.com/watch?v=24wL7rQ4ft8
Introduction
- Goal: Automatically classify user feedback using AI and save the results to a database.
- Applicable Scenario: Customer service automation, sentiment analysis for support tickets, or automated feedback sorting.
- Core Logic: Capture user input through a Text Input -> Trigger a backend Actionflow -> Invoke an AI Agent with a structured output schema -> Insert the analyzed results (category, urgency, sentiment) into the database.
Steps
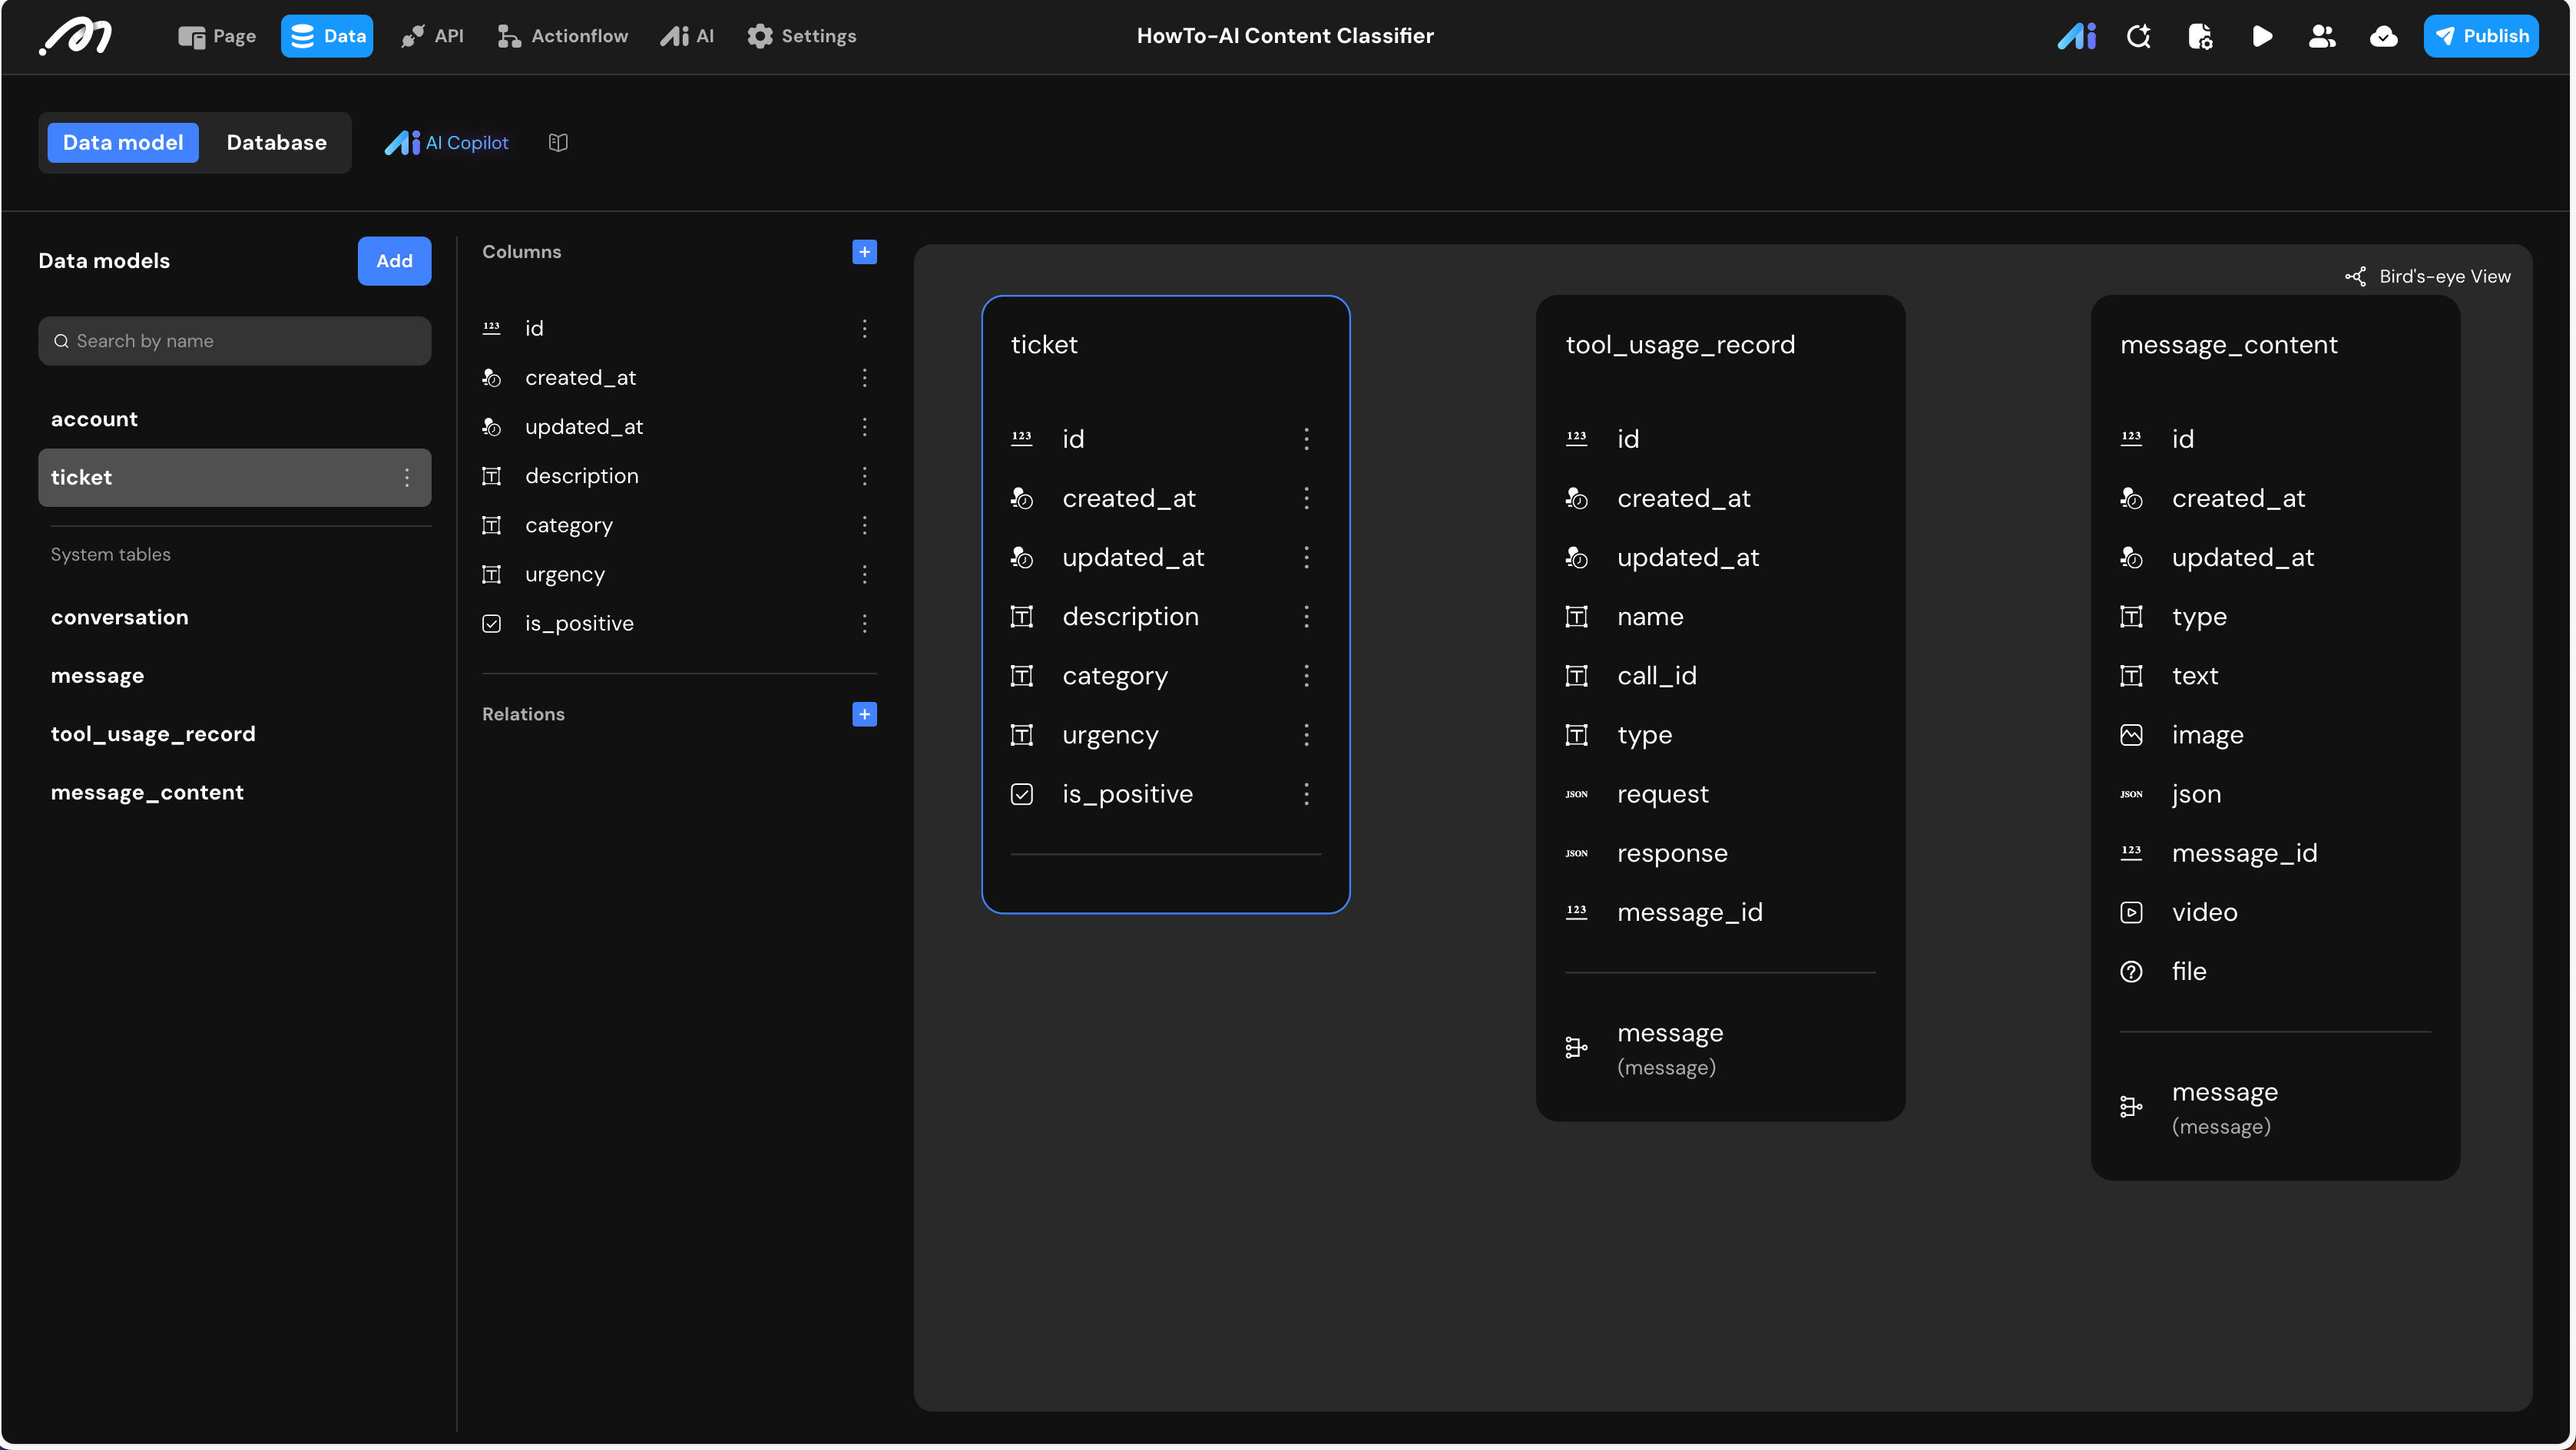
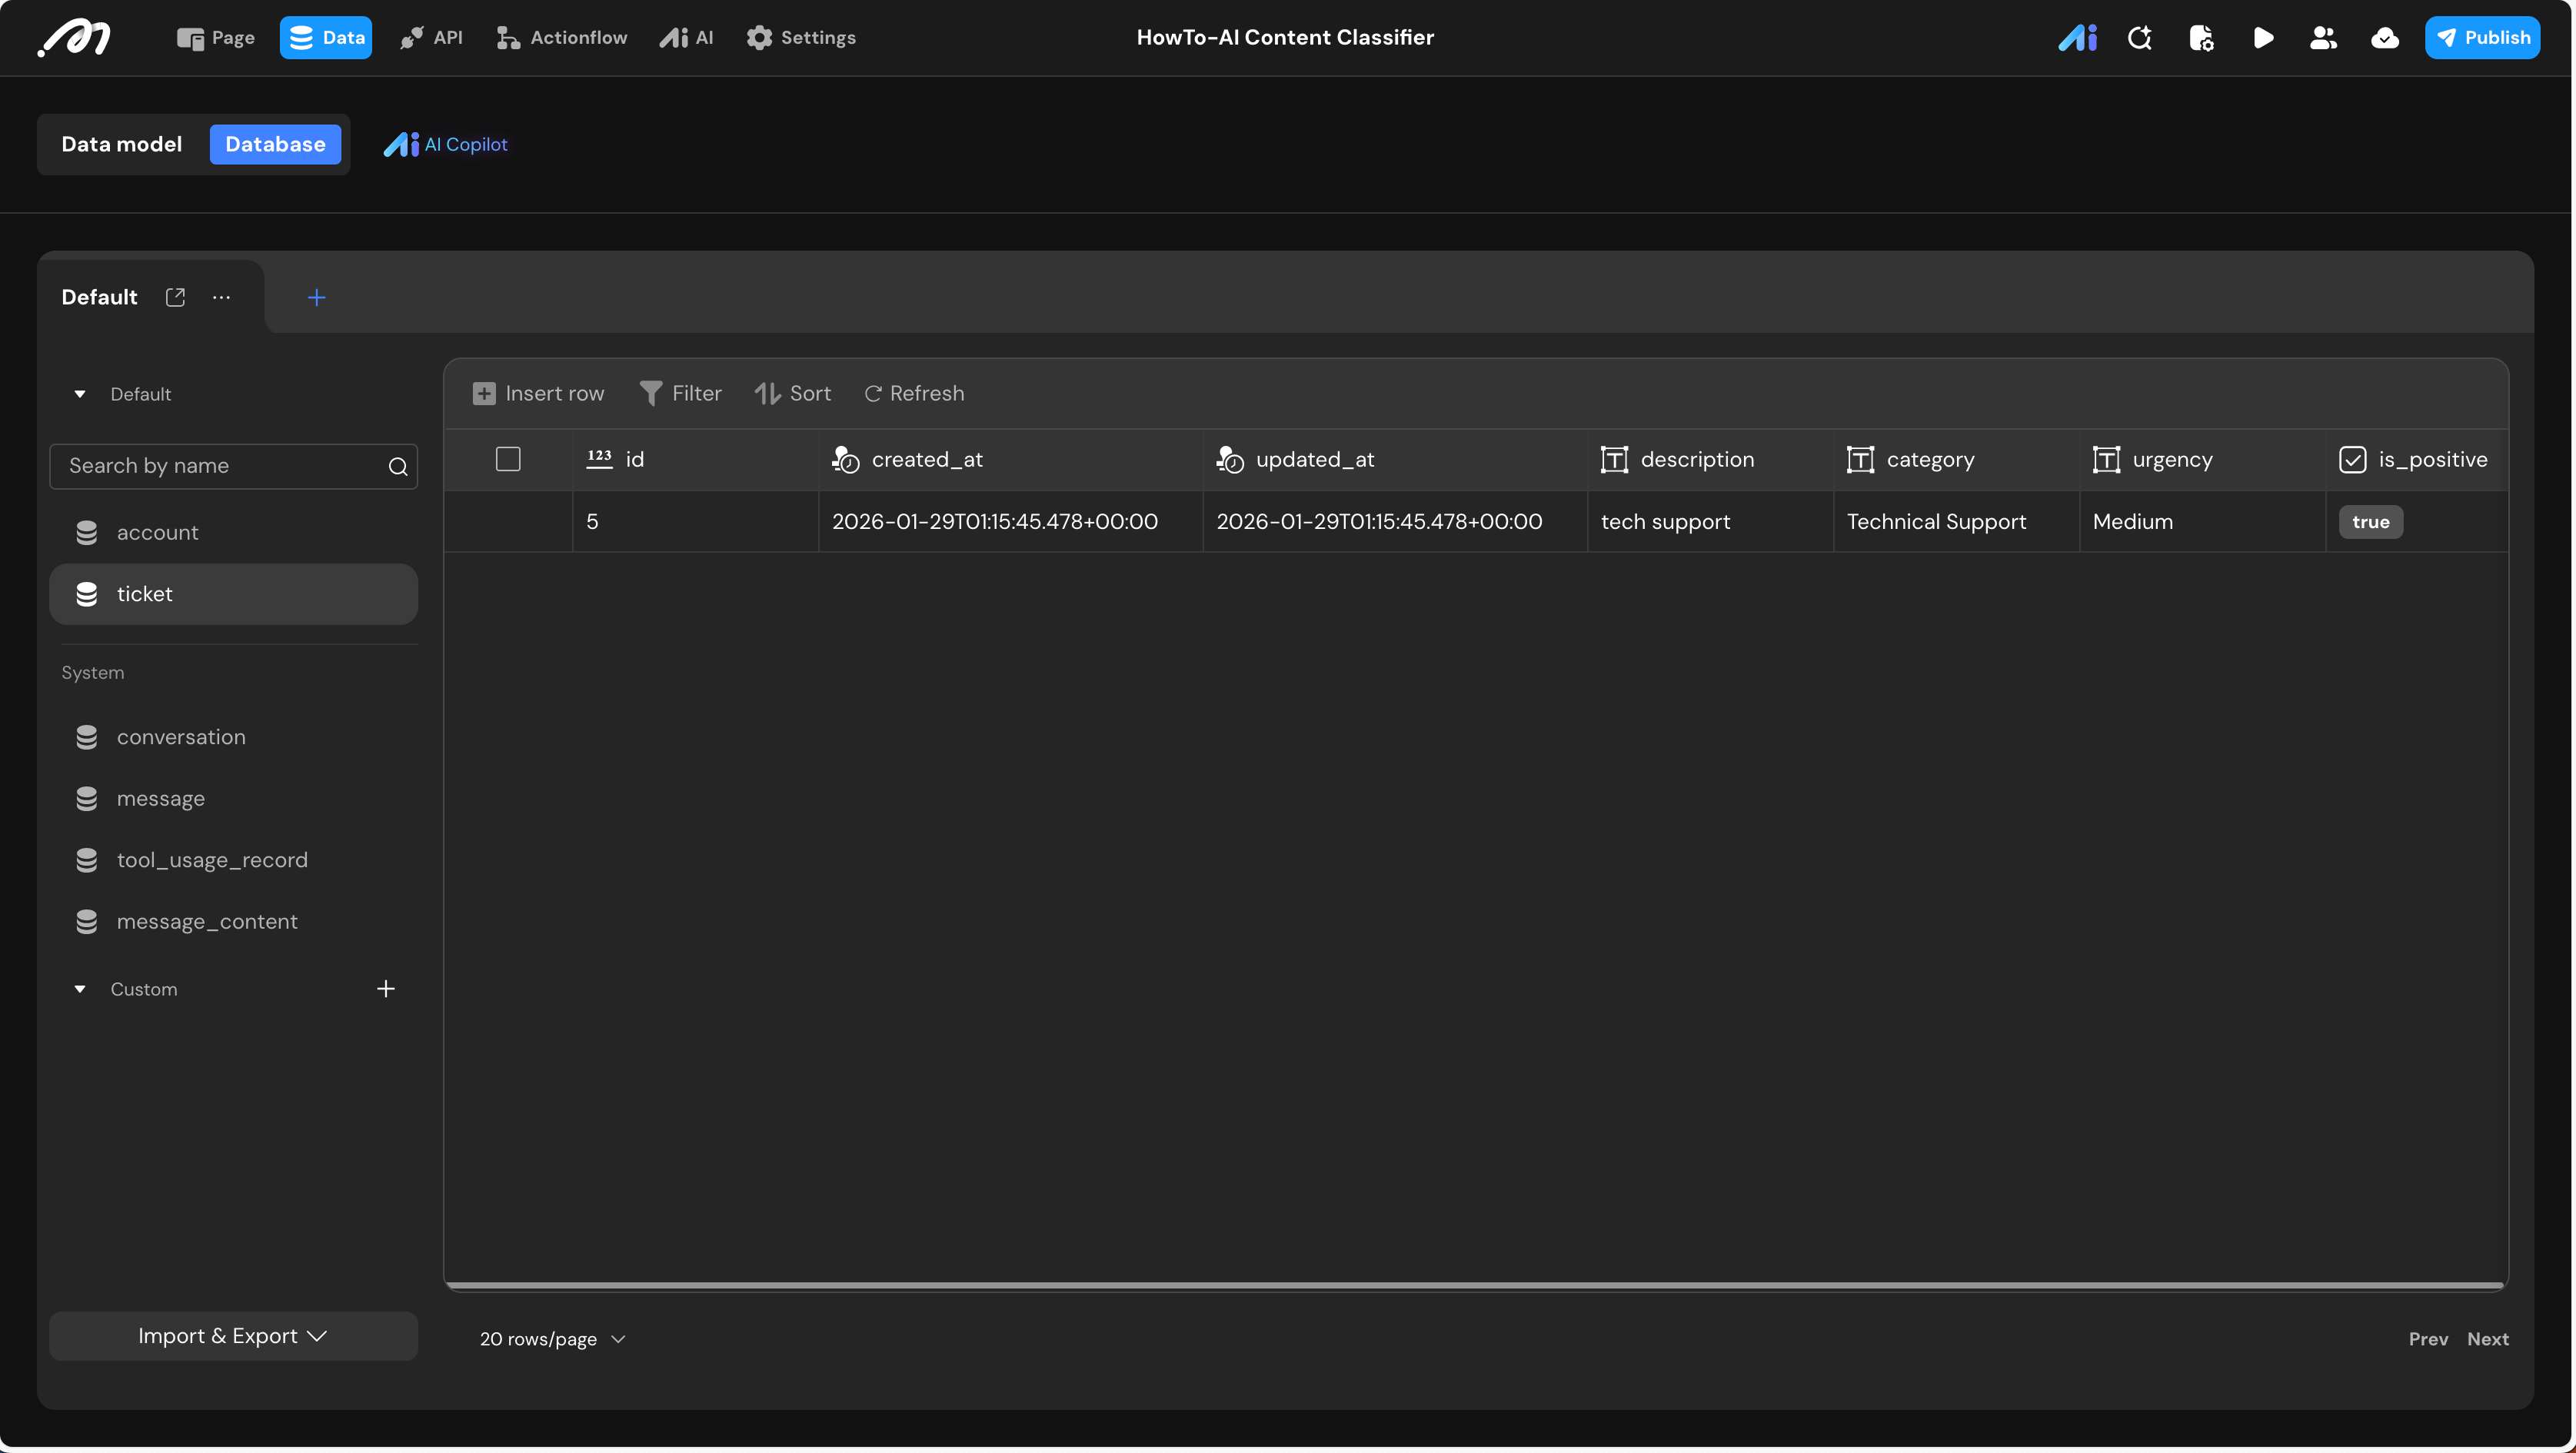
Data Storage
Create a table to store both the original feedback and the metadata generated by the AI.
- Data Model (Table Name: ticket):
| Field Name | Type | Note |
|---|---|---|
description | Text | Original feedback provided by the user. |
category | Text | AI-determined category (e.g., Billing Issue, Technical Support). |
urgency | Text | AI-determined priority level (High, Medium, Low). |
is_positive | Boolean | Sentiment analysis (True for positive/neutral, False for negative). |
Logic & State Configuration
AI Agent Configuration
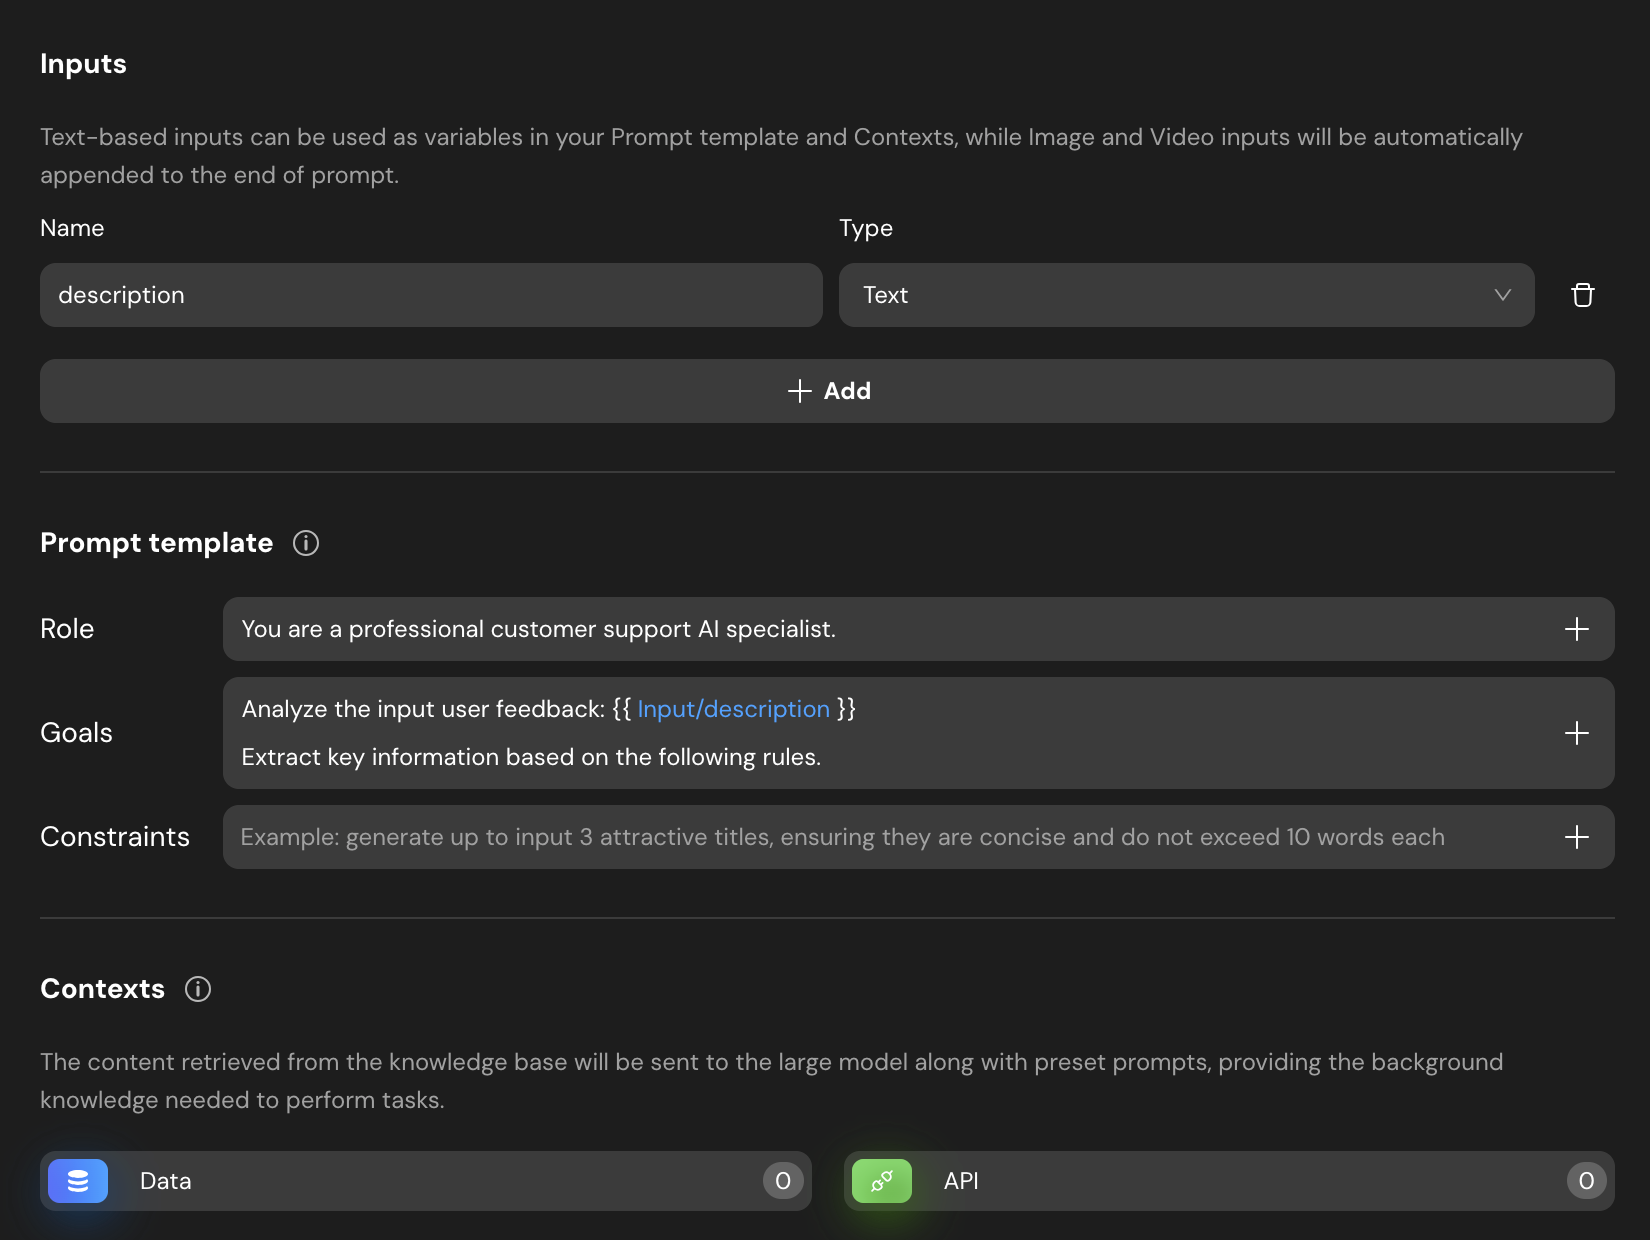
Navigate to the AI tab and create an AI Agent to handle the classification logic.
- Agent Name:
Agent_feedback - Inputs: Add an input named
description(Type: Text). - Prompt Template: Define clear rules to ensure the AI understands the business logic.
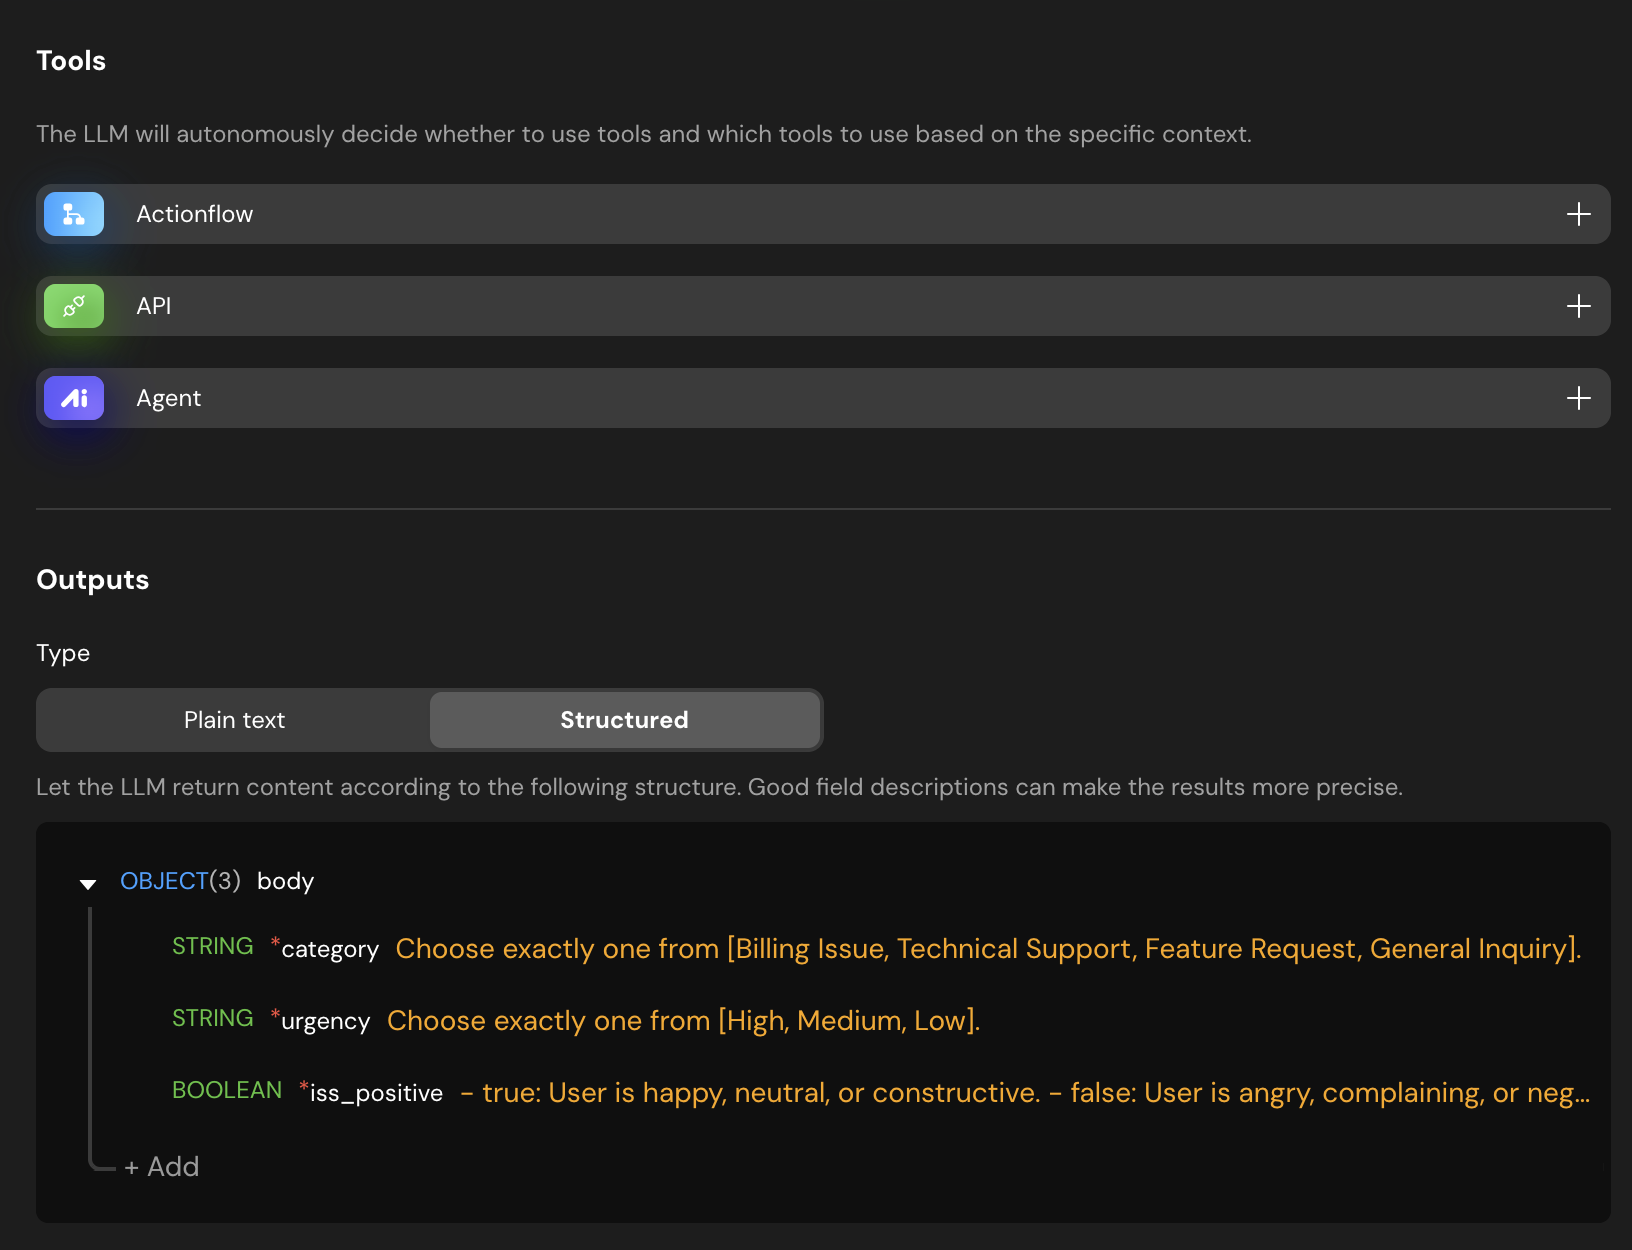
- Outputs (Structured):
Tip: You must select Structured output mode. This ensures the AI fills out a predefined “form,” providing valid JSON that the backend can process directly.
Define the following fields:
category(Text, Required)urgency(Text, Required)is_positive(Boolean, Required)
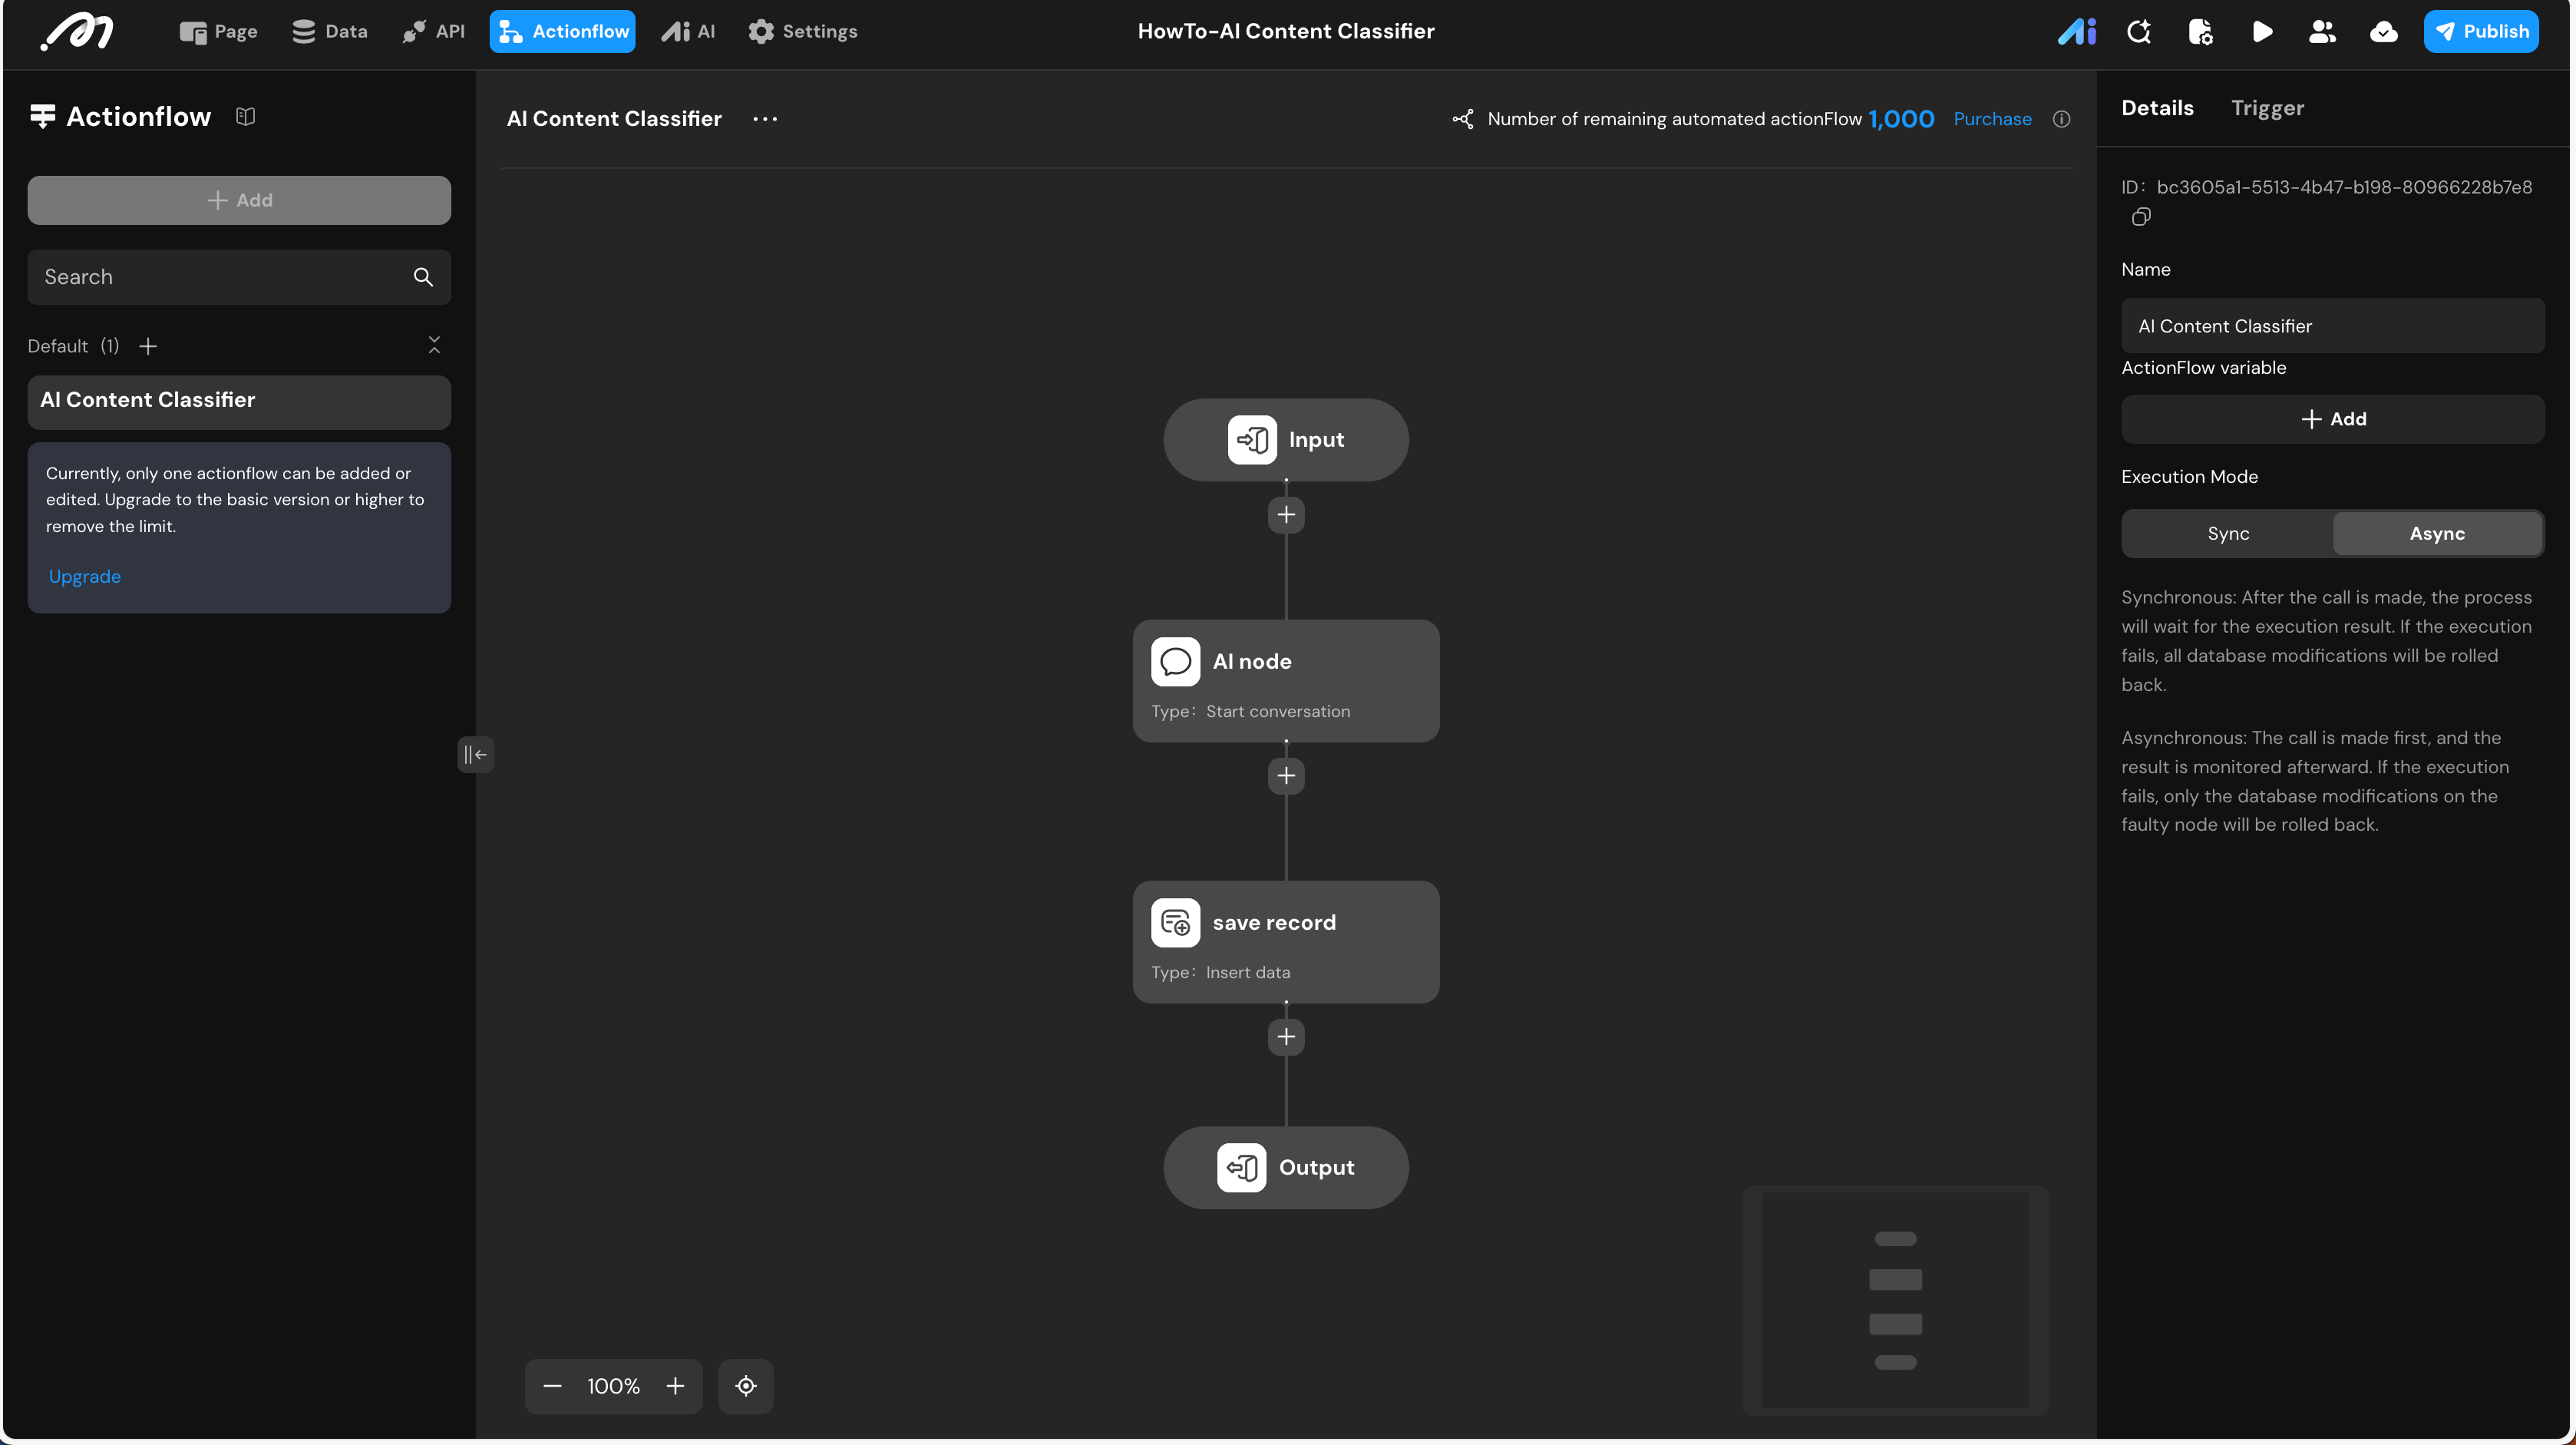
Actionflow Construction
Create an Actionflow to connect the UI, AI, and Database.
-
Actionflow Name:
AI Content Classifier -
Trigger/Input: Add a text input named
description. -
Execution Mode: Async (Required for running AI nodes effectively).
-
Action Steps:
- AI - Start Conversation:
- Select Agent:
Agent_feedback. - Binding: Map
descriptiontoActionflow data->Input->description.
- Select Agent:
- Database - Insert Data:
- Table:
ticket. - Field Bindings:
description:Actionflow data->Input->description.category:AI node->data->category.urgency:AI node->data->urgency.is_positive:AI node->data->is_positive.
- Table:
- AI - Start Conversation:
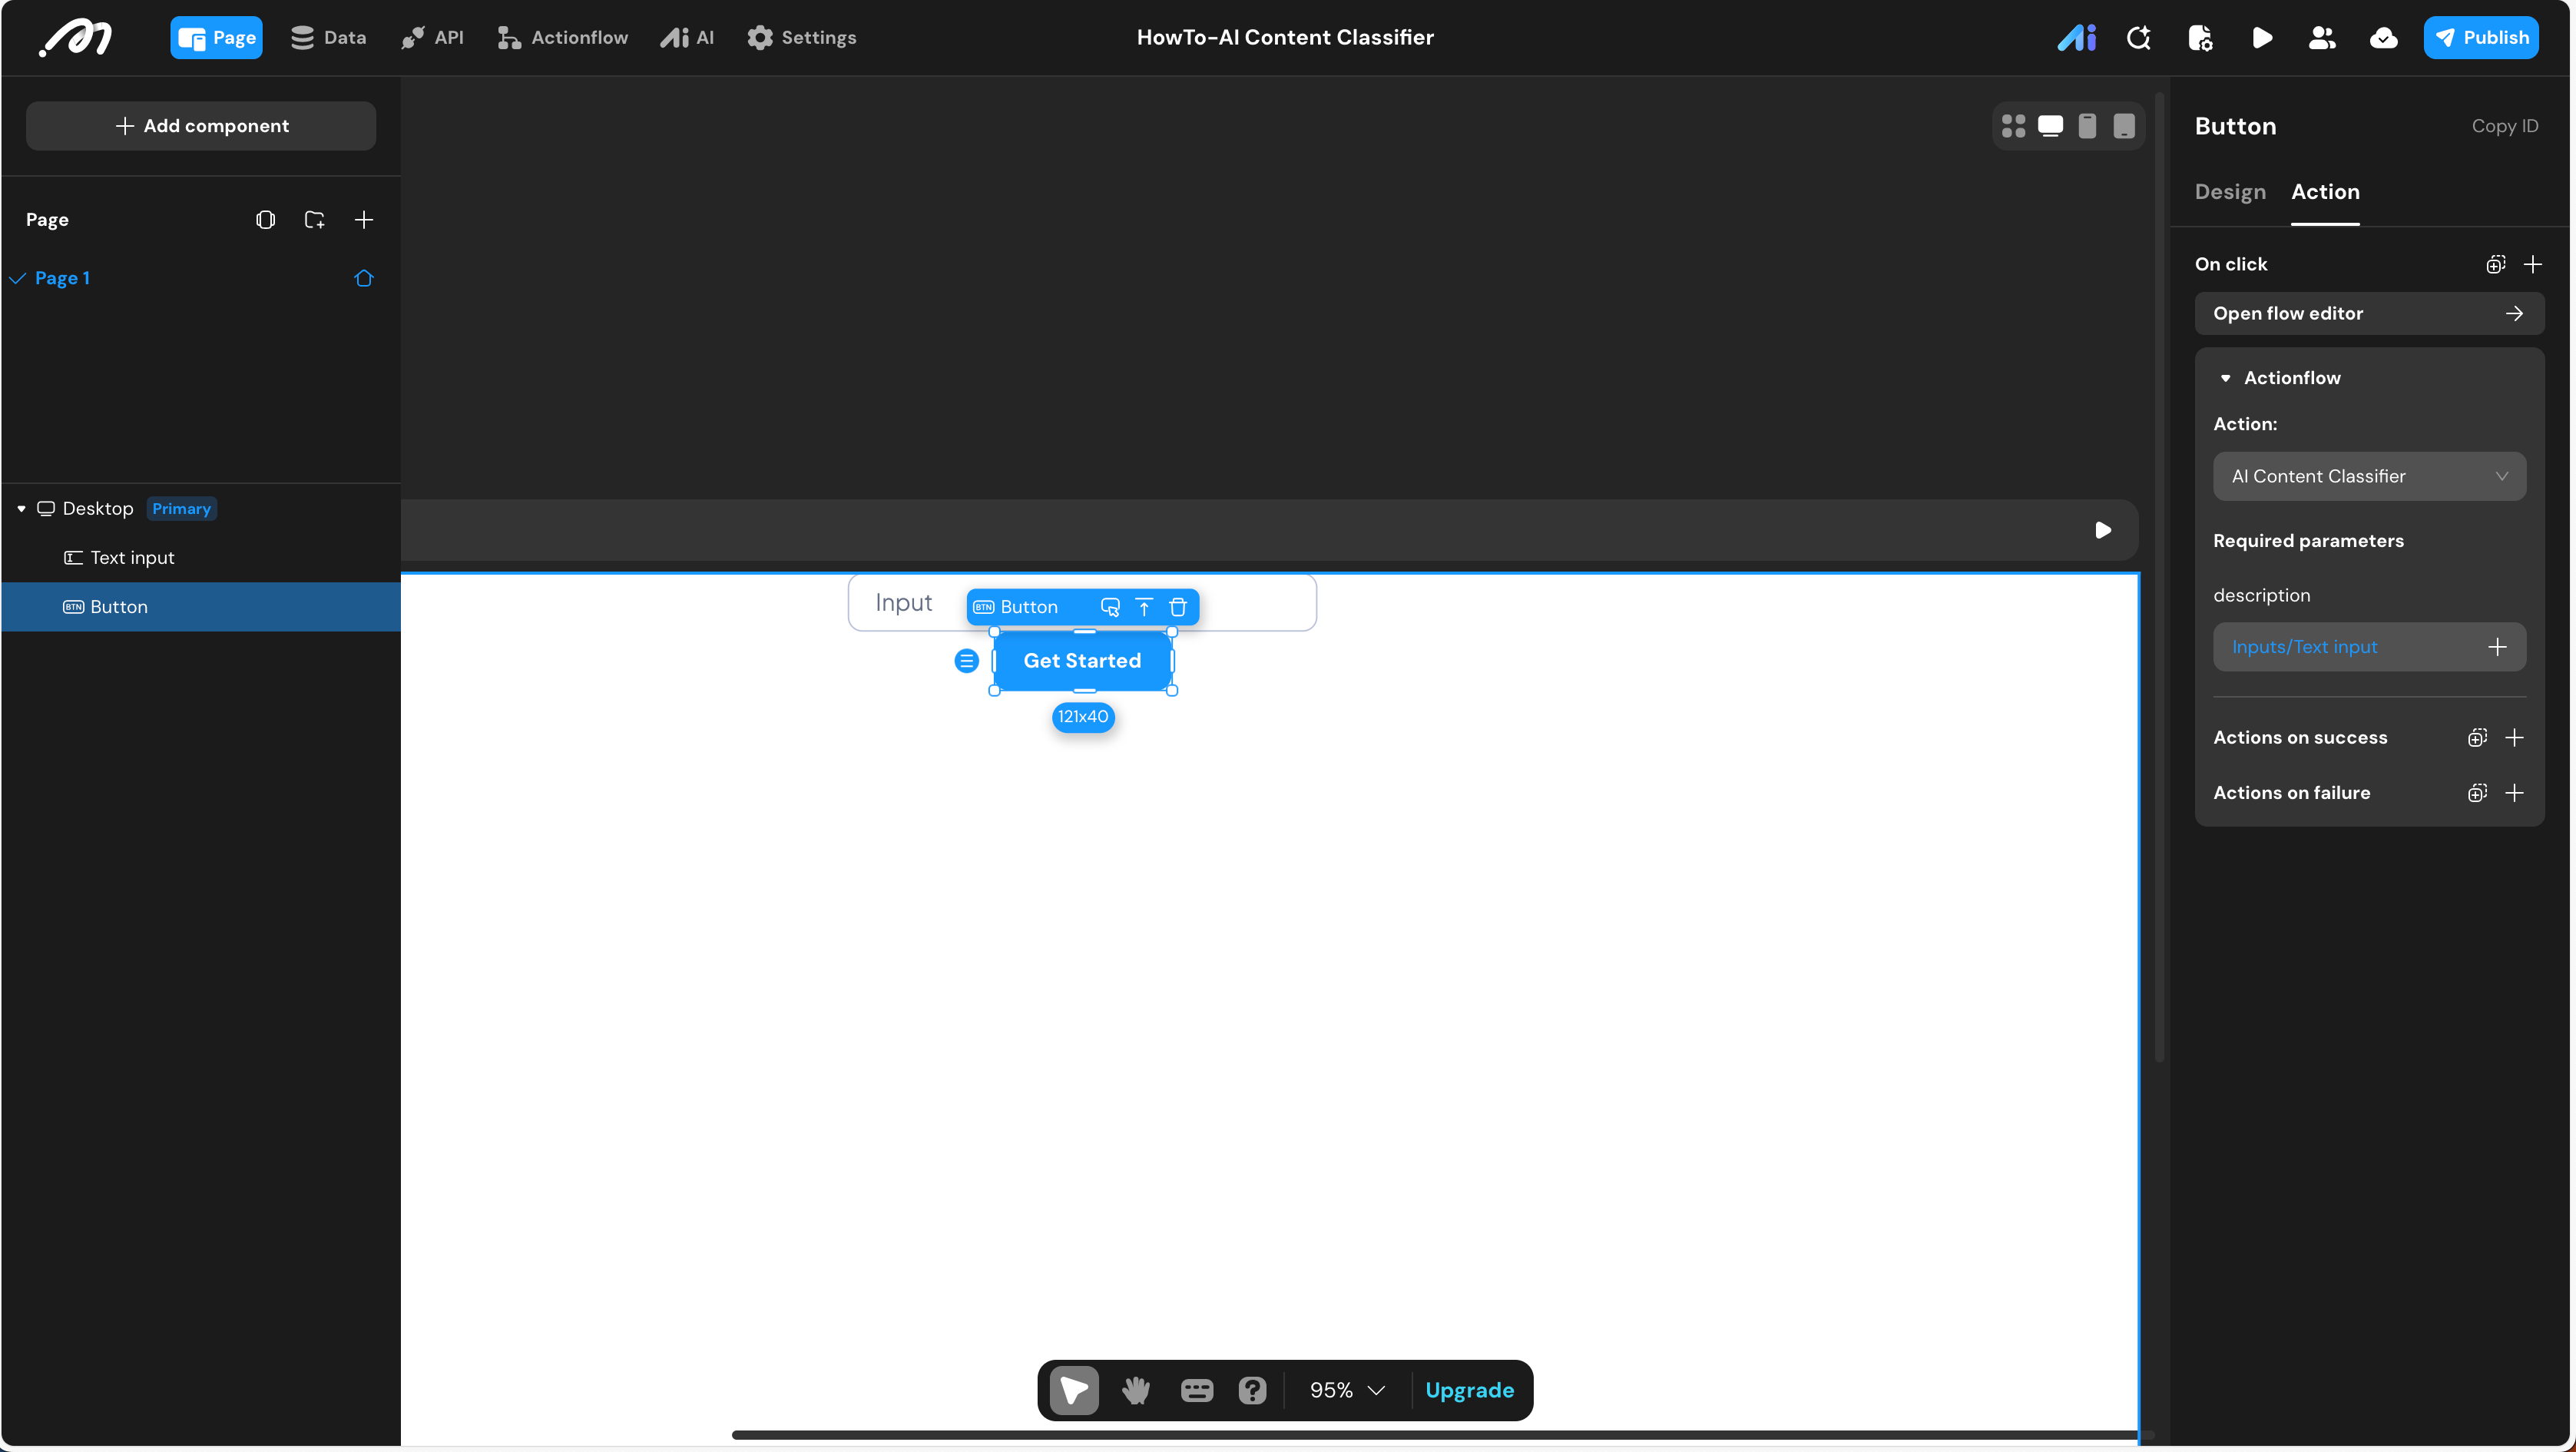
UI Construction & Interaction
Component Tree
- Page
- Text Input
- Button
Configuration Details
- Button Interaction:
- Trigger:
OnClick - Action:
Run Actionflow->AI Content Classifier. - Data Binding: Bind the
descriptionparameter of the Actionflow toInputs->Text Input->Value.
- Trigger:
Verification
- Preview Checklist:
- Open Preview mode.
- Enter “The app keeps crashing” into the Text Input.
- Click the Button.
- Navigate to Data Source -> Database ->
tickettable. - Verify a new record exists:
category: “Technical Support”urgency: “High”is_positive:false
Last updated on