How to Set Up Payment with Stripe Plugin
Introduction
This guide demonstrates how to configure Stripe payments in Momen using Stripe’s test mode.
Tip: Always complete the payment process in test mode before going live.
Example project: Stripe Payment Demo on Momen
.png)
Steps
Create a Stripe Actionflow in Momen
- Create an Actionflow for Stripe payments.
- Set up the Stripe Webhook as the trigger.
Configure Webhook in Stripe
- Go to Stripe Webhooks (test mode) or navigate to Developers → Webhooks in the Stripe dashboard.
- Create a new endpoint and enter the Webhook URL generated in Momen.
.png)
- Add the required events to the endpoint.
.png)
- After setup, your page should look like this. Click Add endpoint to start listening for events.
.png)
.png)
Configure Payment Settings in Momen
- Enter your Stripe Publishable Key and Secret Key (test mode) from Stripe API Keys .
- Set the Webhook URL (from Step 1) and the endpoint secret (from the Stripe webhook page).
| Momen Payment Settings | Stripe API Keys | Webhook URL and Endpoint Secret |
|---|---|---|
.png) | .png) | .png) |
- Save and deploy your database.
| Save Payment Settings | Deploy Project |
|---|---|
.png) | .png) |
Create a Data Model in Momen
Payment scenarios typically require an order model.
Note: Stripe allows multiple payments per order. If your logic requires one payment per order, implement restrictions to prevent duplicate payments.
Recommended data models:
- Payment: Records order ID, Stripe payment ID, status, amount, currency, description, payment method. Use the payment’s ID as the order ID for payment actions.
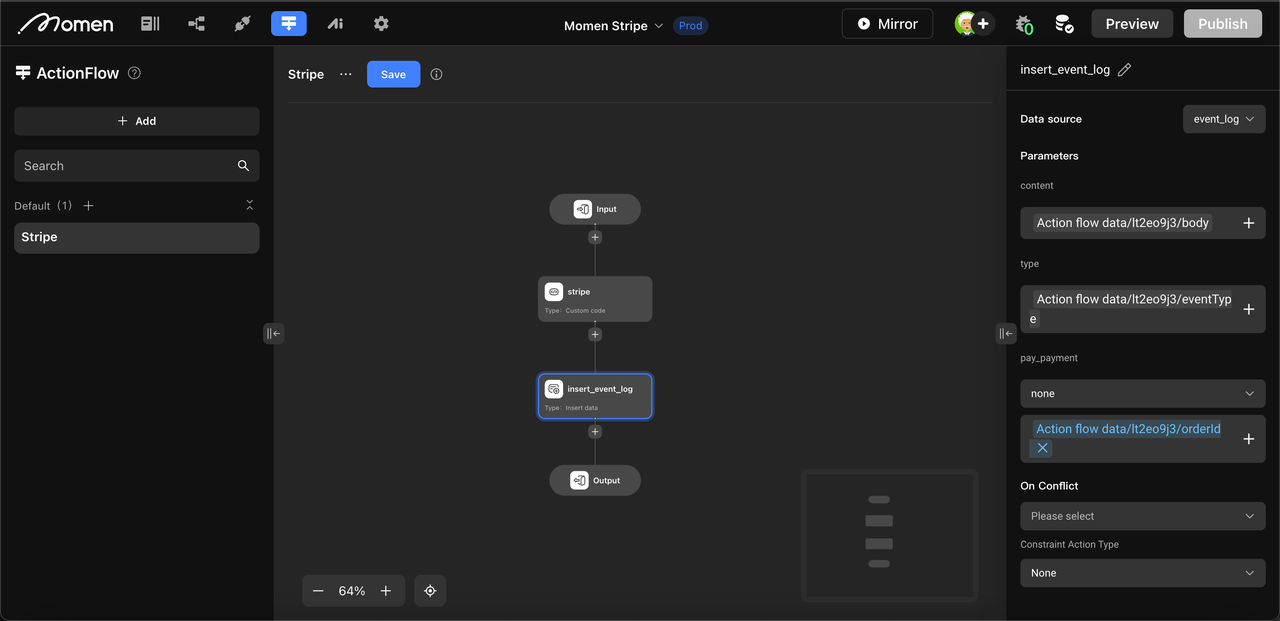
- Event Log: Tracks payment event stages (content, type, payment ID, Stripe payment ID), such as creation, in progress, failure, and success.
Example logic:
- On success: Add an event log, update payment status to “succeeded,” set Stripe payment ID, and mark the order as paid.
- On failure: Add an event log, update payment status to “payment_failed,” and set Stripe payment ID.
- For other statuses: Update Stripe payment ID and add an event log.
.png)
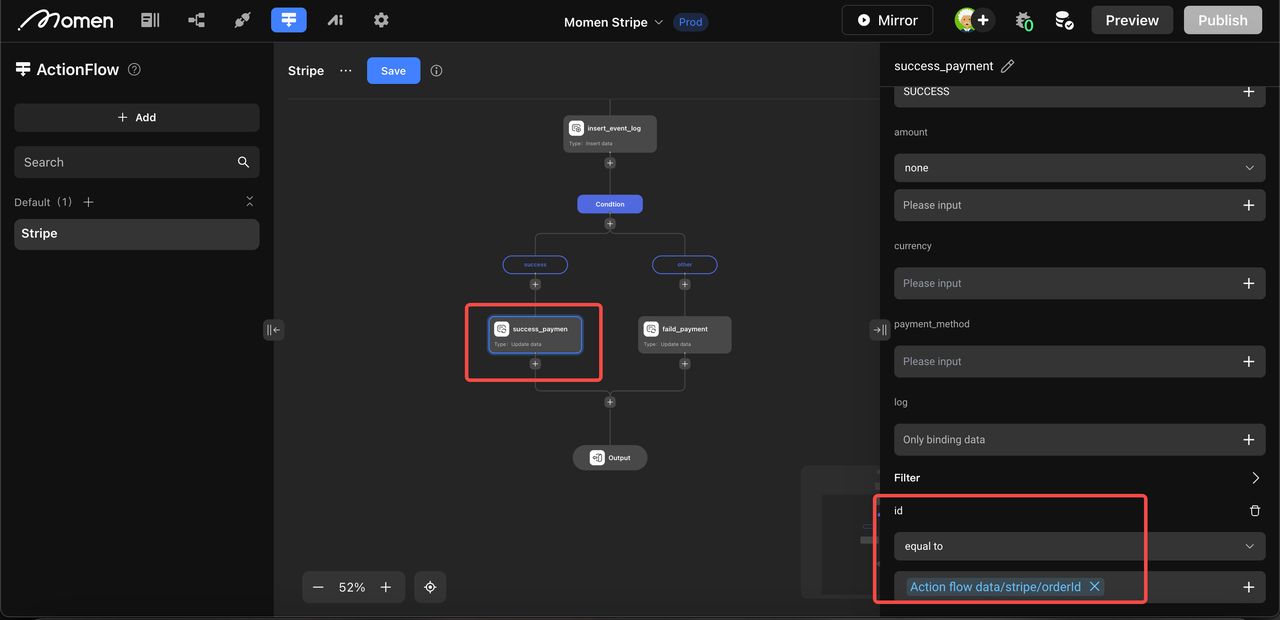
Modify the Actionflow in Momen
- After calling Stripe’s payment API, you need to parse and handle the payment result in the Actionflow.
- Add a custom code node to extract and return key parameters:
const body = context.getArg('fz_payment_webhook_input')
const eventType = body.type
const stripeObject = body.data.object
const stripePaymentId = stripeObject.id
const orderId = context.getOrderIdByStripePaymentId(stripePaymentId)
const paymentStatus = stripeObject.status
context.setReturn('eventType', eventType)
context.setReturn('orderId', orderId)
context.setReturn('paymentStatus', paymentStatus)
context.setReturn('body', JSON.stringify(body))- The
'fz_payment_webhook_input'parameter contains Stripe’s webhook data. The code above extracts and returns relevant fields for use in subsequent steps.
.png)
- Next, create an event log for the order.
- Finally, update the payment order based on the returned status using a conditional branch.
| Configure Order Update Condition | Handle Different Payment Results | Additional Result Handling |
|---|---|---|
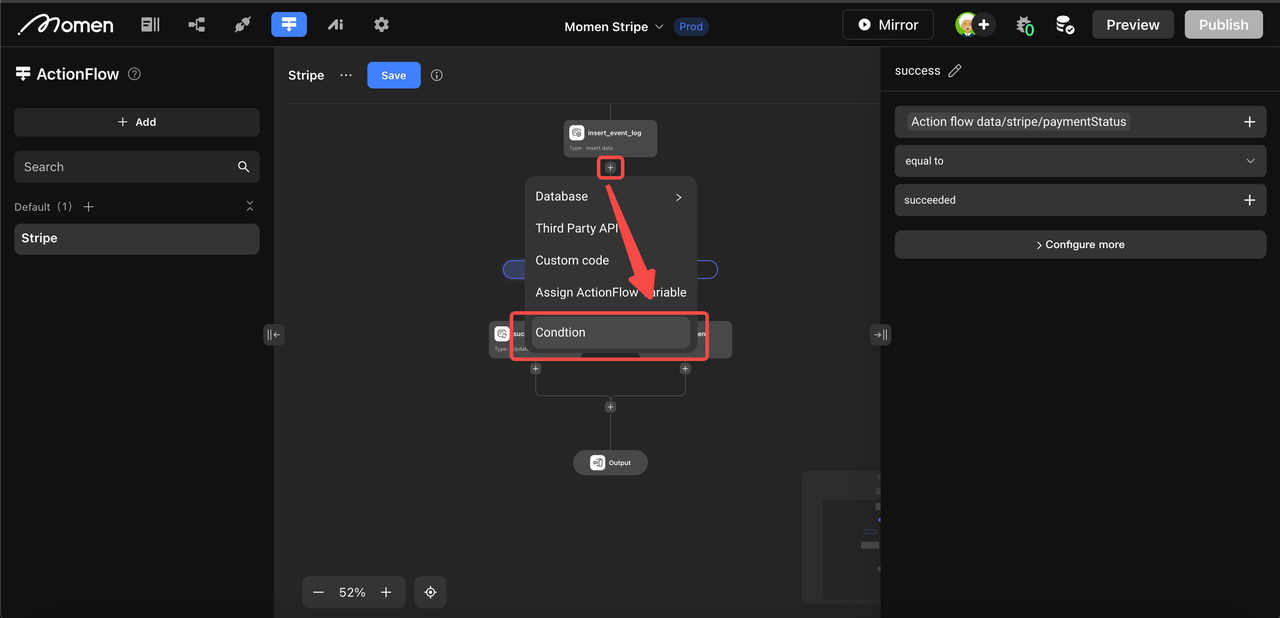 | 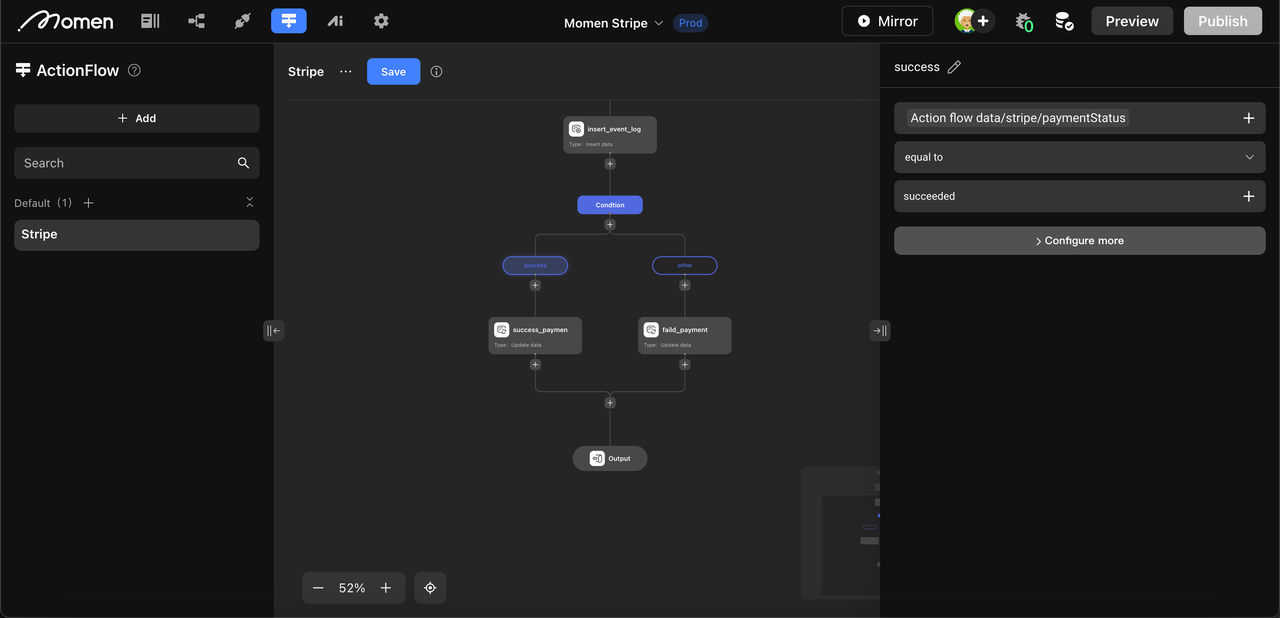 |  |
Call Stripe in Momen
- Typically, payments are initiated by a button click.
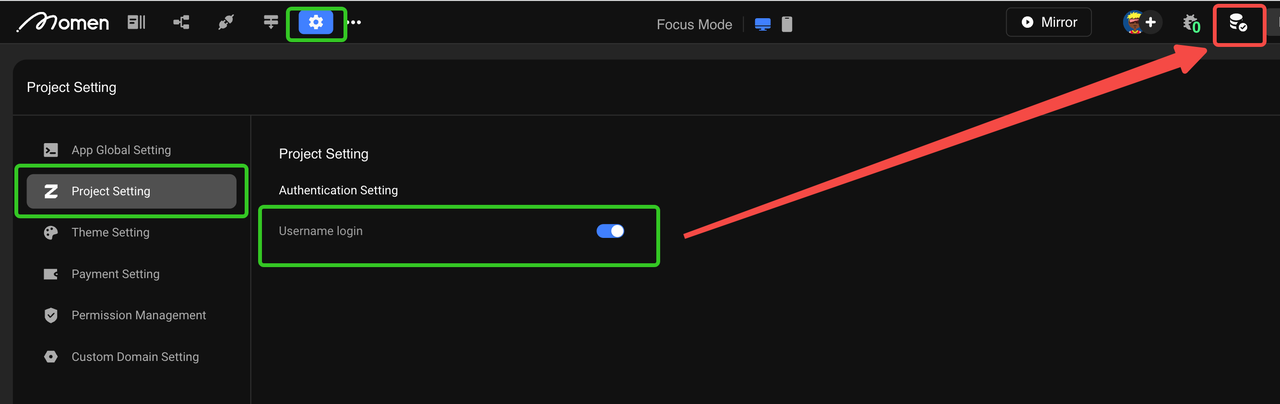
- Important: Users must be logged in before making a payment. Ensure registration and login actions are configured.
Configuration steps:
-
Enable user login in settings and deploy the database.
-
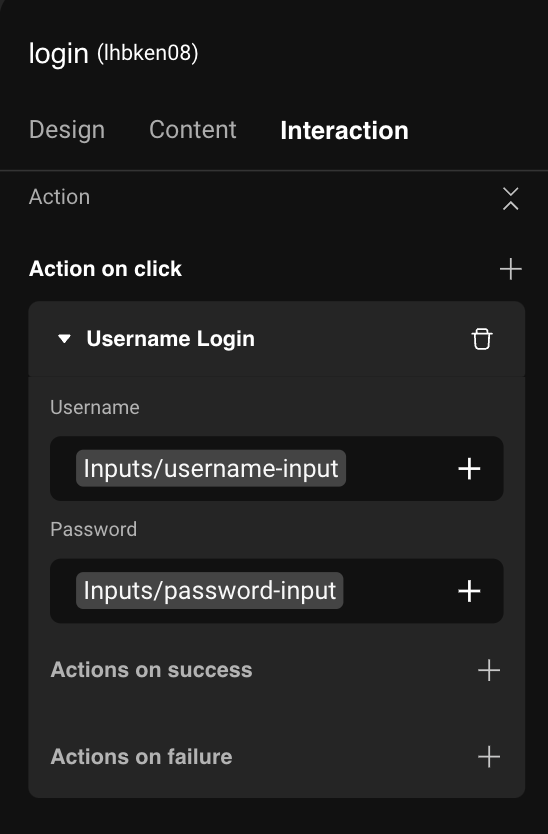
Add registration and login actions to the appropriate buttons.
Add Registration Login Actions Example 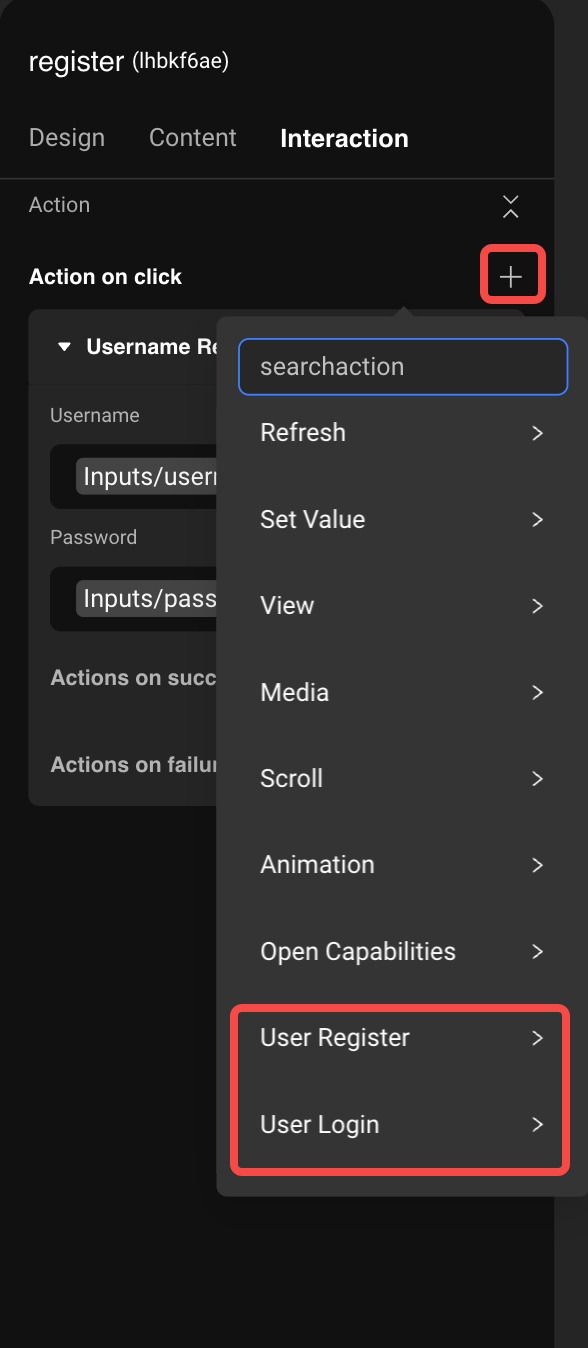

-
After login is set up, configure the Stripe payment action.
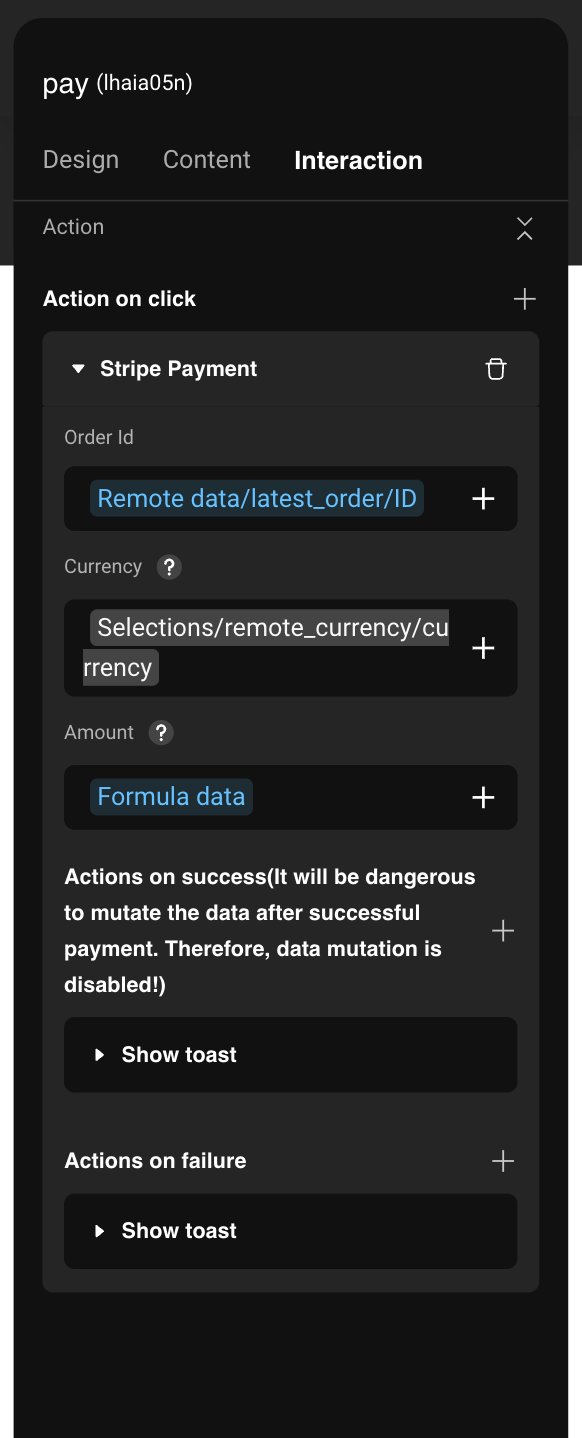
- Order ID: A long integer. The same order can be paid multiple times unless restricted by your logic.
- Currency: Supported currencies: Stripe Supported Currencies
- Amount: Must be in the smallest currency unit.
- Payment method: Defaults to bank cards; no need to specify unless required.
- Actions on success/failure: Configure actions such as showing a toast notification.
Last updated on