Database Configuration
Momen provides a powerful relational database built on PostgreSQL with high performance, high flexibility, and enterprise-level functionality. This article will introduce from the following four aspects:
- Data Model: Manage data tables, field types, and inter-table relationships.
- Constraint Settings: Set uniqueness constraints for fields to ensure data accuracy.
- Vector Storage: Enable AI functionality for efficient vector storage and retrieval.
- Permission Configuration: Configure data access rules for fine-grained data security management.
Data Model
Data model is the foundation of the database, defining the overall appearance of data. Momen supports convenient table management.
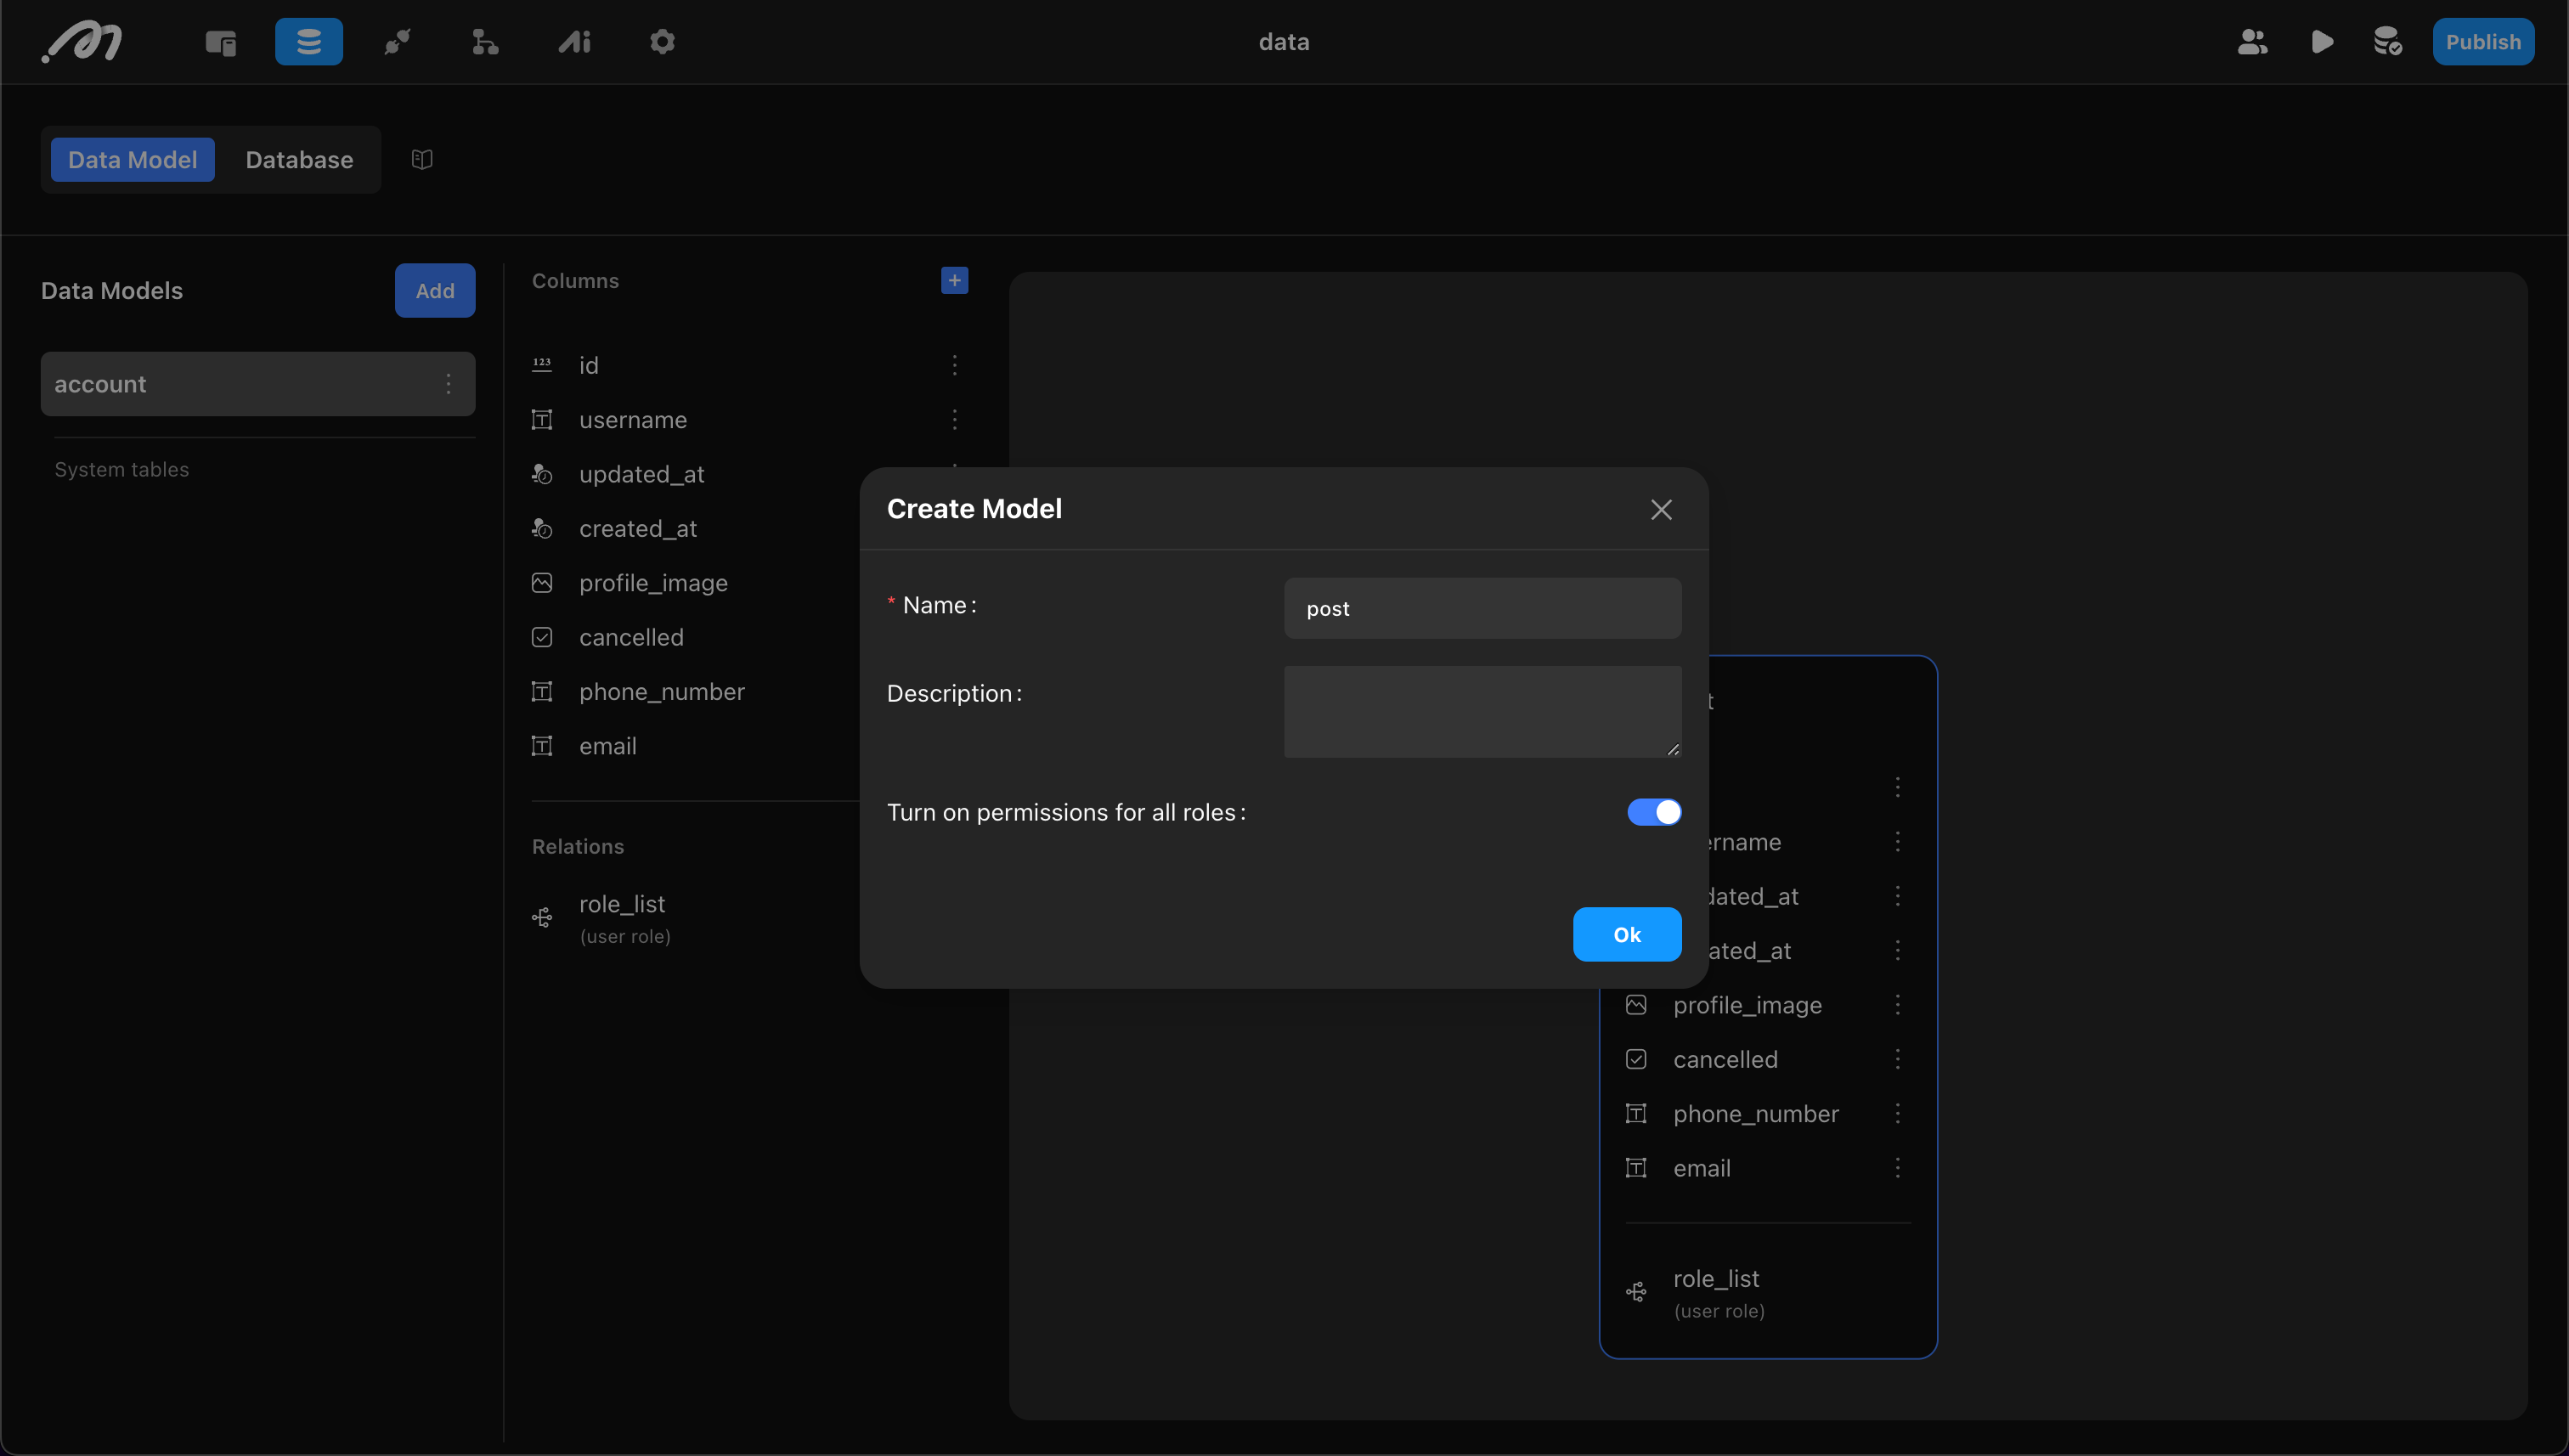
Add Table
Each project includes multiple system tables, such as: account table, payment table, etc. System tables cannot be deleted, and system tables other than the account table cannot be modified.
When adding a table, you need to set the following properties:
- Name: Prohibited from using reserved words like “log”, “column”, “index”
- Description: Table description (optional)
- Turn on permissions for all roles: Whether to grant table CRUD permissions to all roles
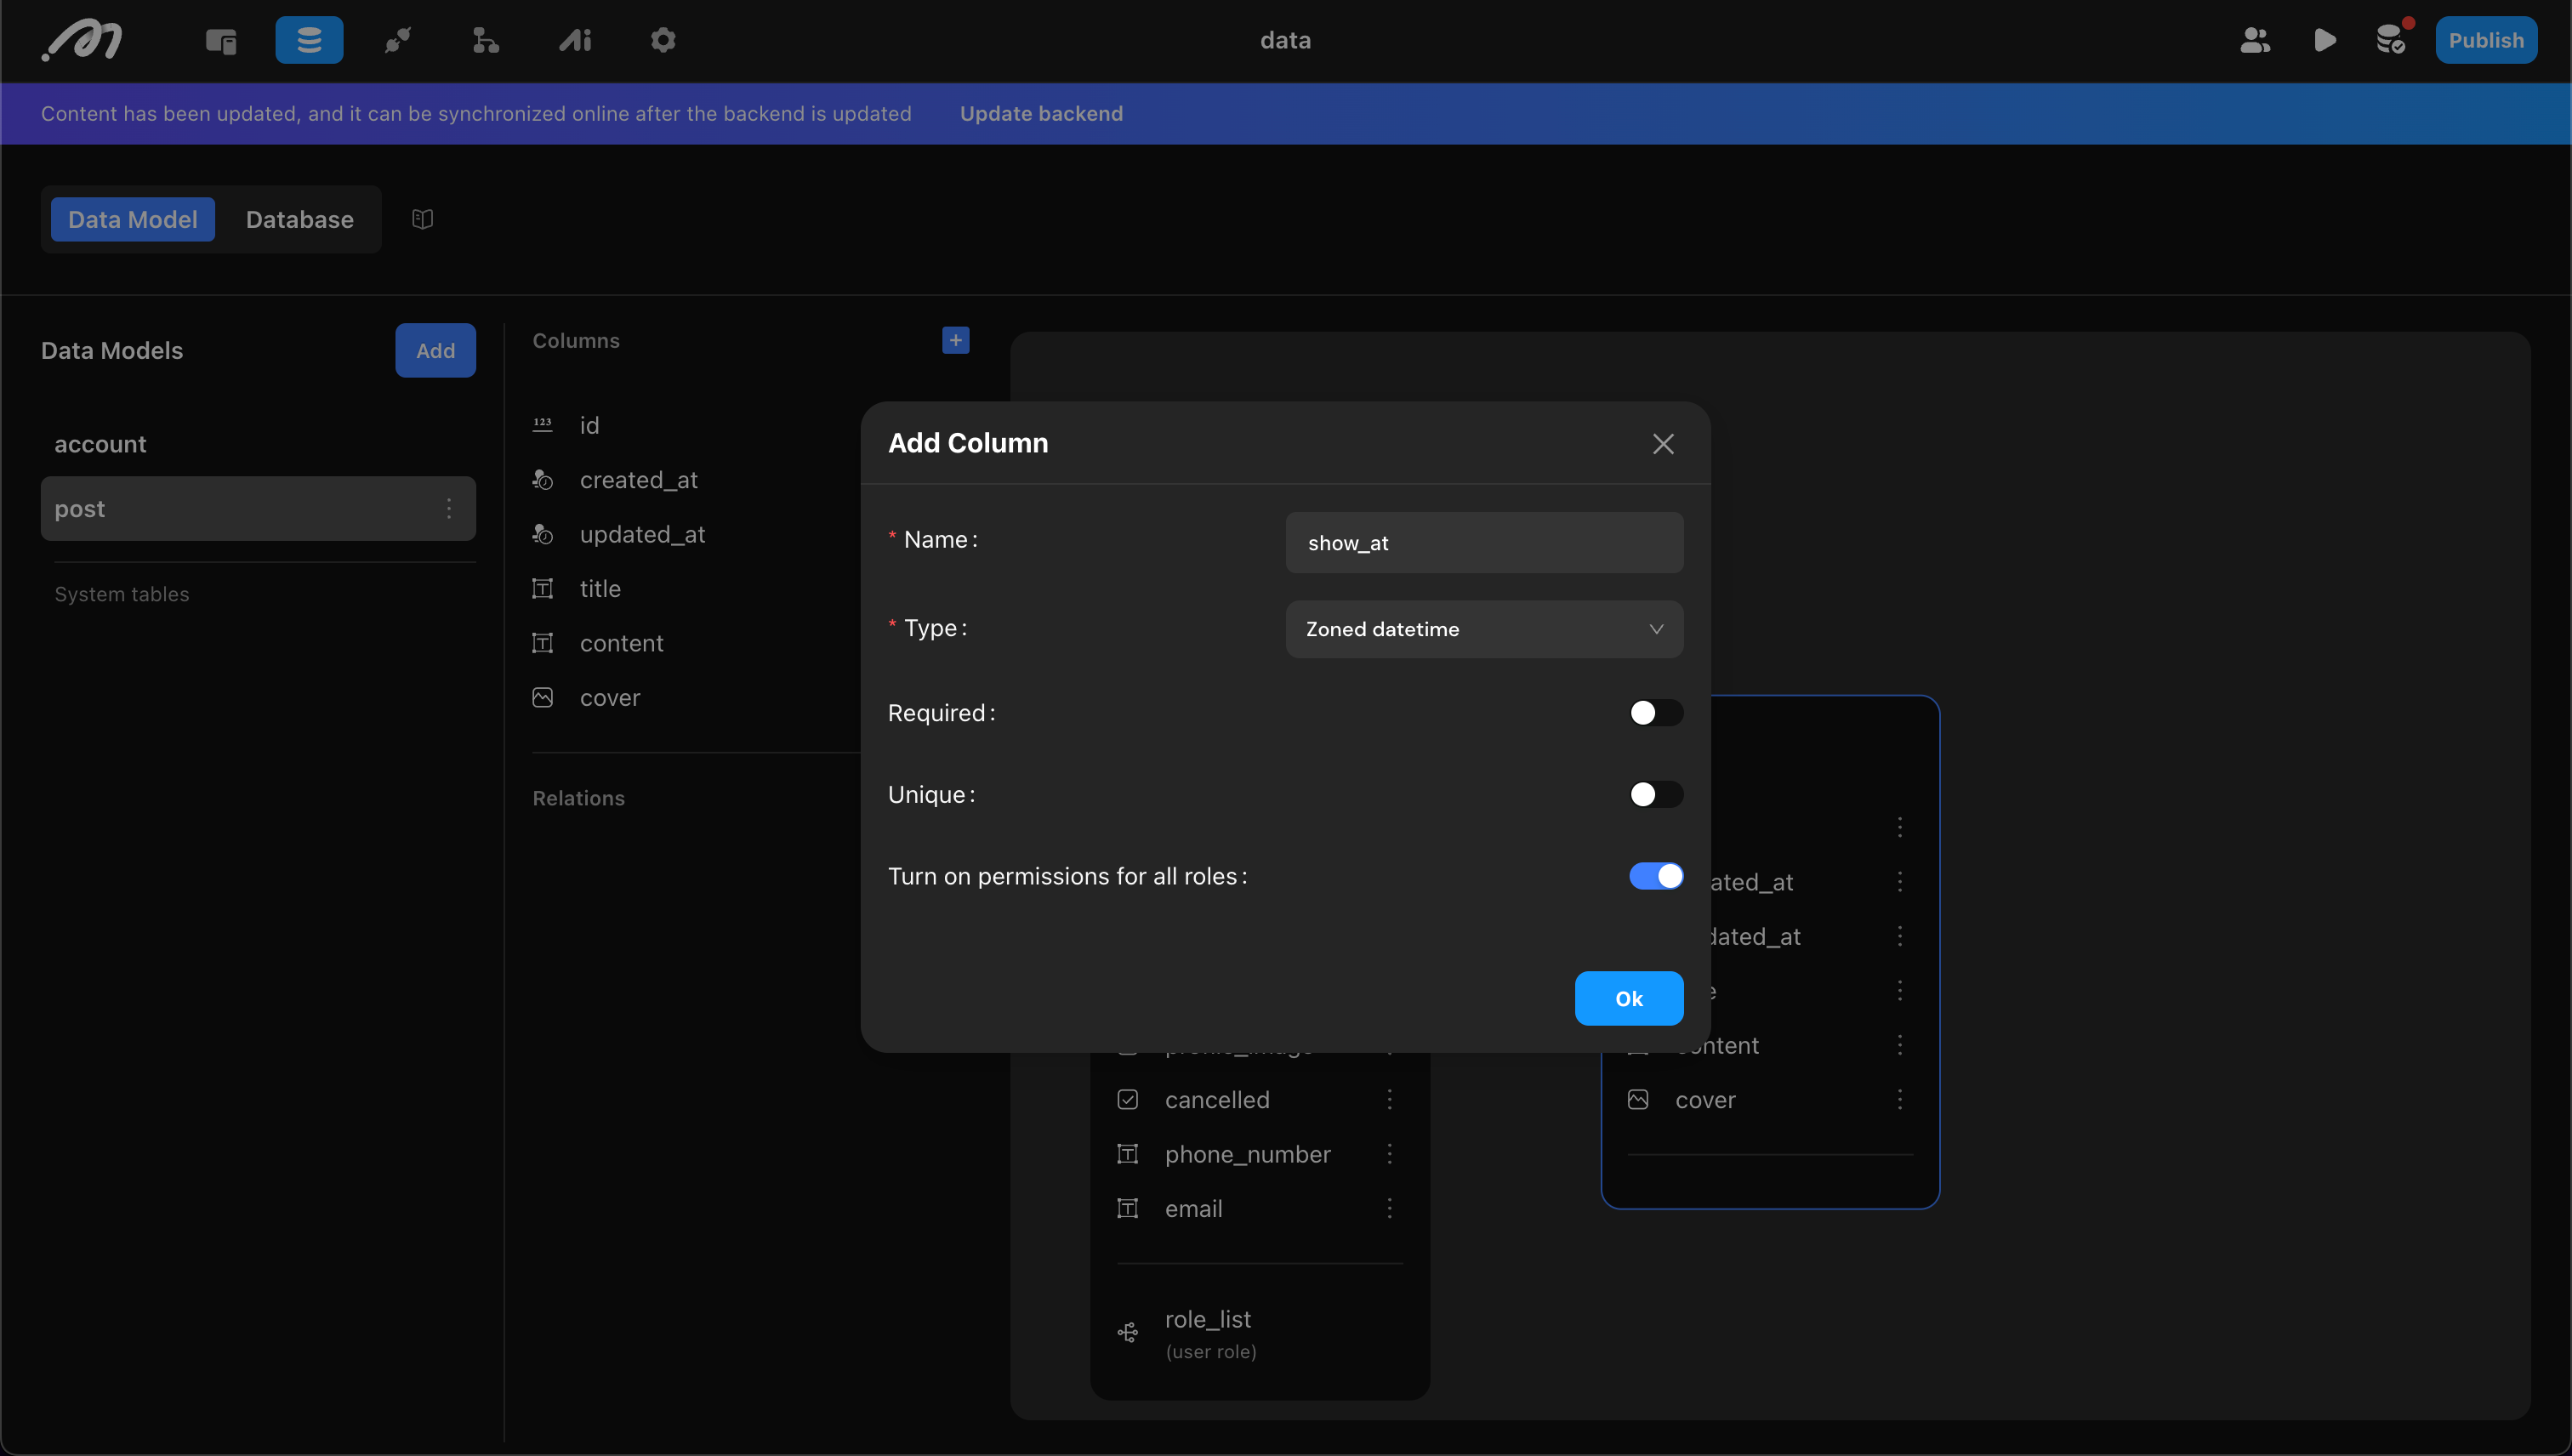
Add Fields
Each table includes id, created_at, and updated_at columns by default (maintained automatically by the system, cannot be modified/deleted).
When adding fields, you need to set:
- Name: Avoid using reserved words like “column”
- Type: Supports the following types: text, integer, decimal, datetime with timezone, date, time with timezone, image, video, file, geo point, JSONB
- Required: Whether the field is nullable
- Unique: Whether it’s unique (like username)
- Turn on permissions for all roles: Whether to grant field CRUD permissions to all roles
Momen database uses Decimal to ensure accurate numerical storage. However, if using double-precision floating point types in APIs, Webhooks, or processing data with custom code (whether integers or decimals, JavaScript uniformly uses double-precision floating point representation), precision loss may occur.
For example, the database stores two completely precise numbers: 0.1 and 0.2.
When custom code reads these two numbers, it converts them to approximate floating point numbers for processing.
At this time, adding these two approximate floating point numbers will produce a tiny error, resulting in 0.30000000000000004.
Saving the result of this addition in a database will store the exact value 0.30000000000000004.
For example, add title, content, cover, show_at to the blog table
Add Table Relationships
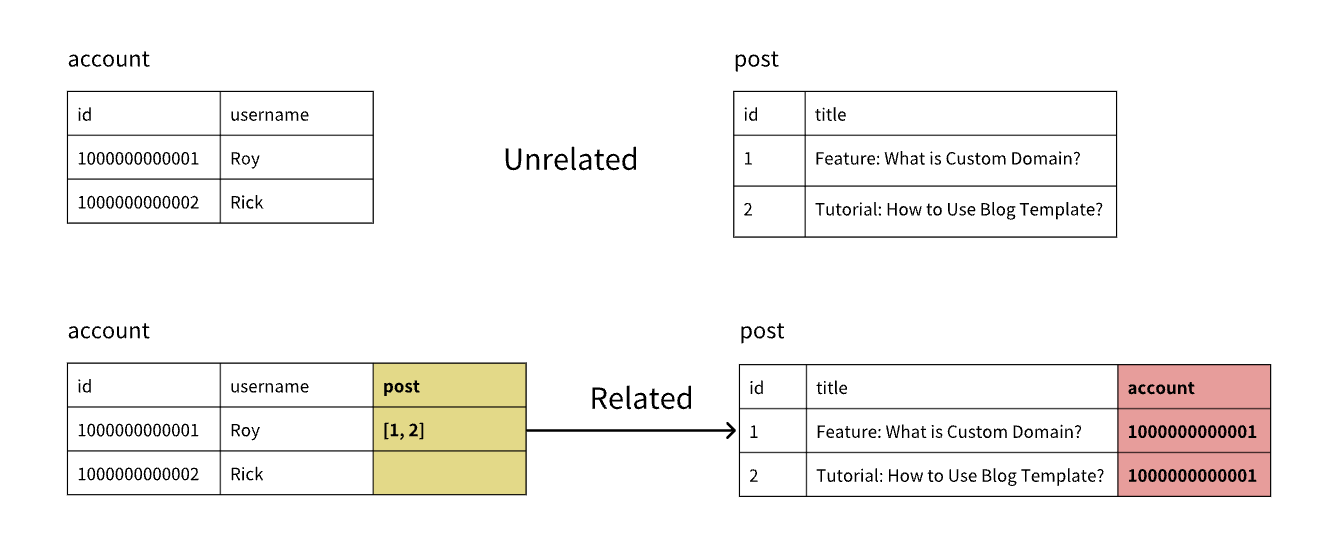
Tables can establish relationships through id. For example, the account table and blog post table need to establish a relationship to represent the author of blog posts. After establishing the relationship, a new column will be added to the blog post table to save the account table’s id.
When building relationships, you need to clarify:
-
Target Table: The table to be related
-
Relationship Type: One-to-one, one-to-many
-
Relationship Name (Target Table/Current Table): Field name in the corresponding table
-
Turn on permissions for all roles: Permission management, when enabled, all roles have editing permissions for this field
Using the previous example, the account table needs to establish a relationship with the blog table:
- Target table is the blog table
- Since one user can have multiple blogs, the relationship type is one-to-many
- The relationship name in the account table is “blog”, and in the blog table is “user”. (In actual use, the system will automatically add table name suffix to related tables, such as “user_account”, the suffix is omitted here for convenience.)
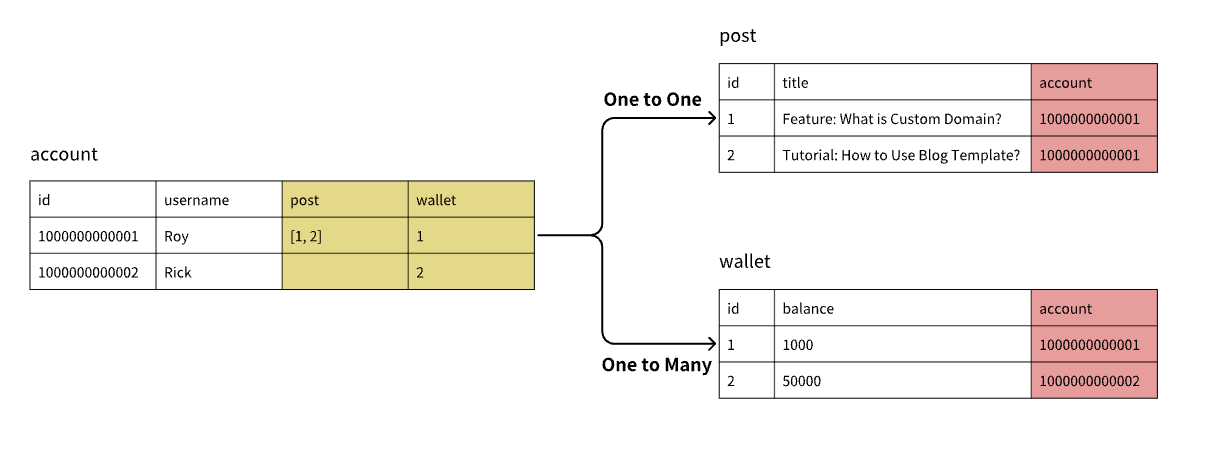
Relationships are an important and complex part of the data model. Let’s explain in detail. Relationship types are divided into the following three types:
-
One-to-one: One row of data in table A can be related to 1 row of data in table B. For example, one user has only one wallet
-
One-to-many: One row of data in table A can be related to multiple rows of data in table B. For example, one user can own multiple blogs
-
Many-to-many: One row of data in table A can be related to multiple rows of data in table B, and simultaneously one row of data in table B can be related to multiple rows of data in table A. For example: one blog can have multiple tags, and one tag can have multiple blogs.
The system provides one-to-one and one-to-many relationship types that can be easily created.
If you need to establish many-to-many relationships, follow these steps:
- Create an intermediate table to save the correspondence between table A and table B.
- Both table A and table B establish one-to-many relationships with the intermediate table.
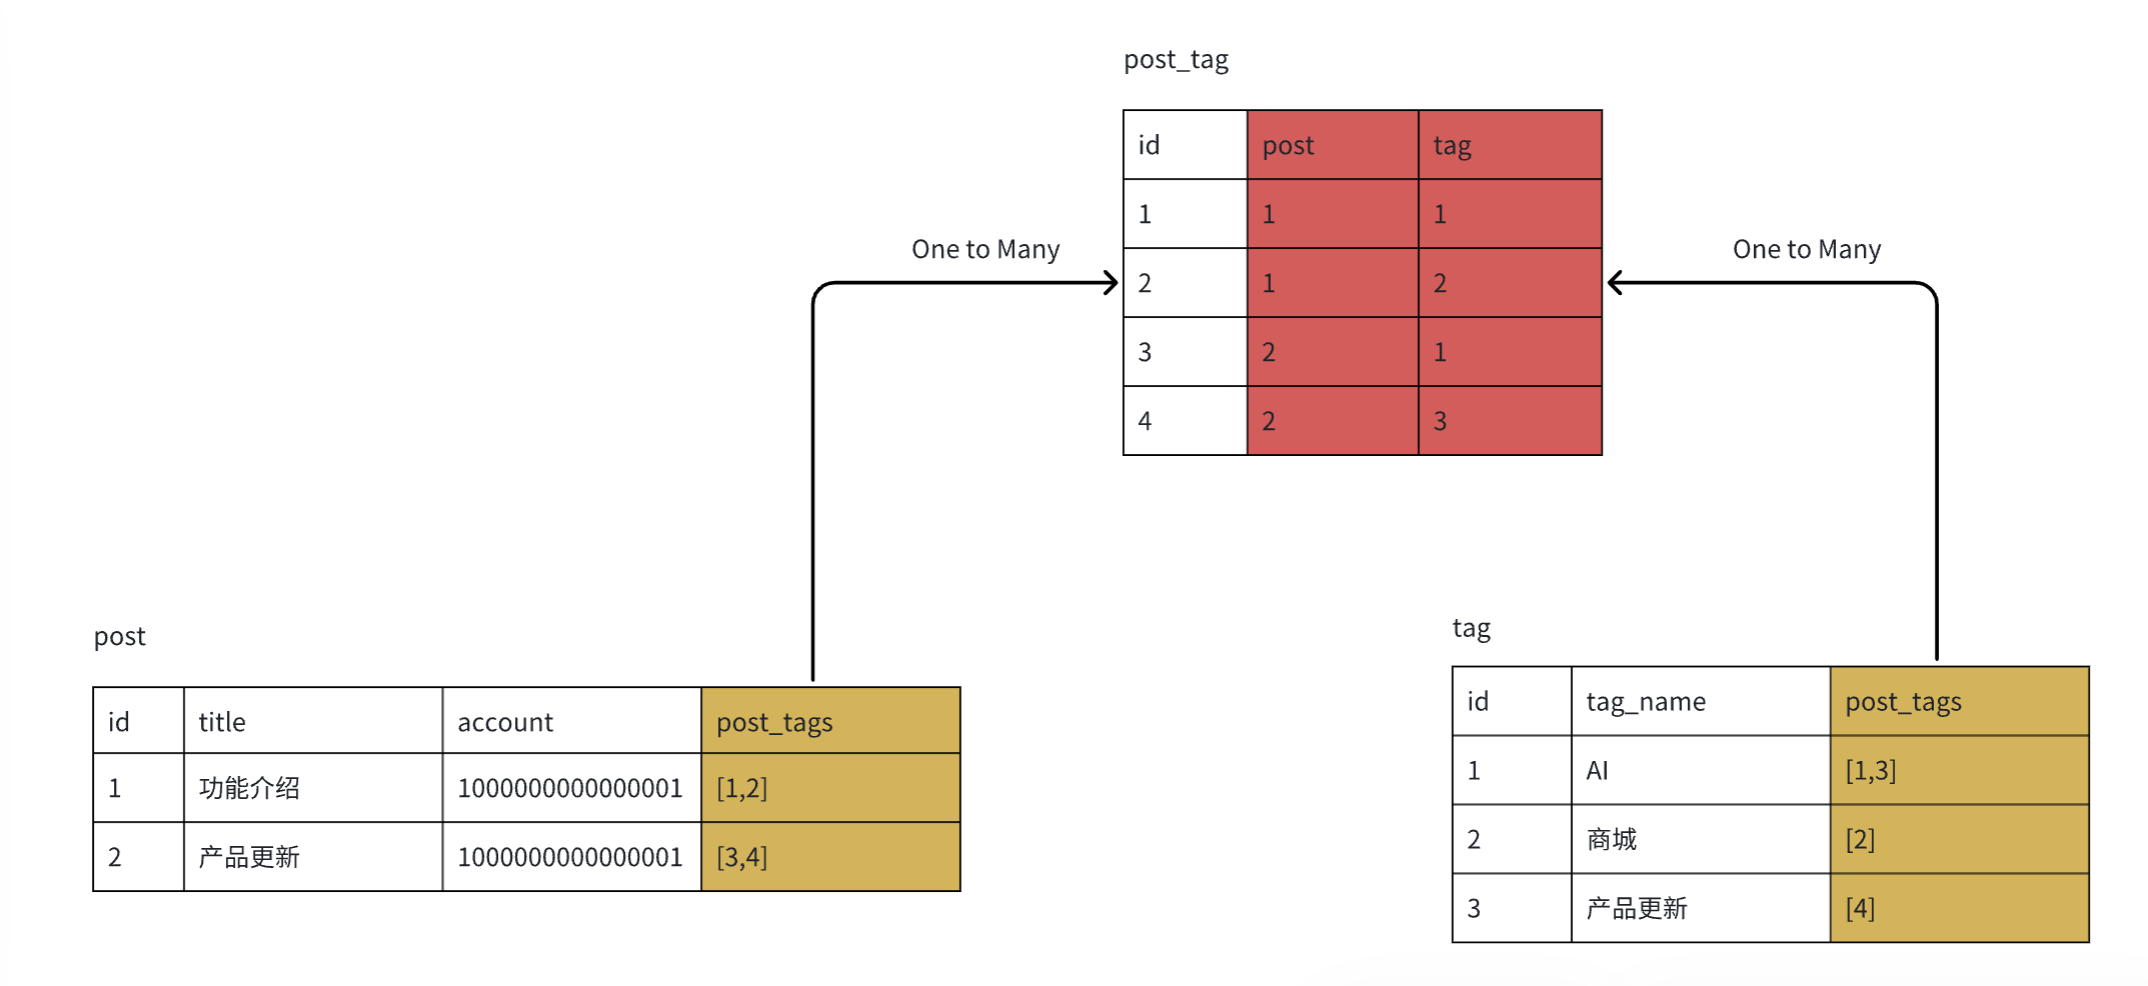
For example, if you have two tables: blog table and tag table, and want to establish a many-to-many relationship between them:
- First create intermediate table “blog tag”
- Both blog table and tag table establish one-to-many relationships with the intermediate table. At this time, two new columns are added to the intermediate table to save blog id and tag id respectively. Each row of data represents a correspondence, thus implementing many-to-many relationships.
Sync Backend
Sync backend to make data model changes take effect online.
If your application is already live, changes to the data model may cause online requests to fail. Please operate with caution.
Constraint Settings
Supports “unique constraint” settings, allowing you to specify that certain fields or field combinations cannot be repeated.
Open Constraint Settings
In the table’s modification menu, click “Edit Constraints” option to open constraint settings.
Add Constraints
Each table has a default id constraint to ensure id uniqueness.
When adding constraints, you need to determine:
- Constraint Name: Cannot be repeated, prohibit uppercase letters
- Column Set: Indicates which columns need to be constrained, can select single or multiple columns. If single column, the values in that column cannot be repeated. If multiple columns, the combination of these columns cannot be repeated.
- Storage Limit:The total size of the data in the constrained columns for any single row must not exceed 8,191 bytes.The actual character capacity depends on the string encoding (e.g., UTF-8 can use 1 to 4 bytes per character).
For example, to ensure each user cannot have posts with duplicate titles, you can set constraint: combination of
titleanduser_accountcannot be repeated.
Sync Backend
After syncing backend, constraint settings take effect online. Note:
- If existing data violates unique constraints, it will cause backend sync to fail
- Once successfully synced to backend, constraints cannot be edited
- If you want to delete constraints, you need to delete one of the columns in the constraint column set
Vector Storage and Sorting
Currently only supports text type vectorization.
Vector storage refers to converting text fields to vectors through large models, enabling similarity-based sorting.
For example, you can vectorize post content to implement article recommendations:
- User inputs content of interest
- Calculate vector distance between input and article content, sort by distance
- Get the most relevant articles
Enable Vector Storage
In the text field’s modification menu, click “Select model to enable vector storage” option and choose the corresponding word embedding large model. The system provides the Ada large model, and users can also add other large models in AI configuration.
Use Vector Sorting
When retrieving data, use fields with vector storage enabled for sorting, i.e., sort by vector distance. Currently supports two distance algorithms:
- EUCLIDEAN (Euclidean Distance): Suitable for absolute difference scenarios, such as logistics path optimization
- COSINE (Cosine Distance): Suitable for directional similarity scenarios, such as text recommendations
Permission Management
Data is the core asset of projects. Momen combines RBAC (Role-Based) and ABAC (Attribute-Based) permission systems to ensure data security and achieve flexible control. See Permissions for details.
Data Management and Usage
After database configuration is complete:
- Can be used in other parts of the system, see Data Binding for details
- Can manage data in the data backend, see Data Management for details