Data Model and Database
Getting Started
Open the “Data” section at the top left of the Editor.
- Data Model: Manage tables, including creating tables, adding columns, establishing relationships, etc.
- Database: Manage data records.
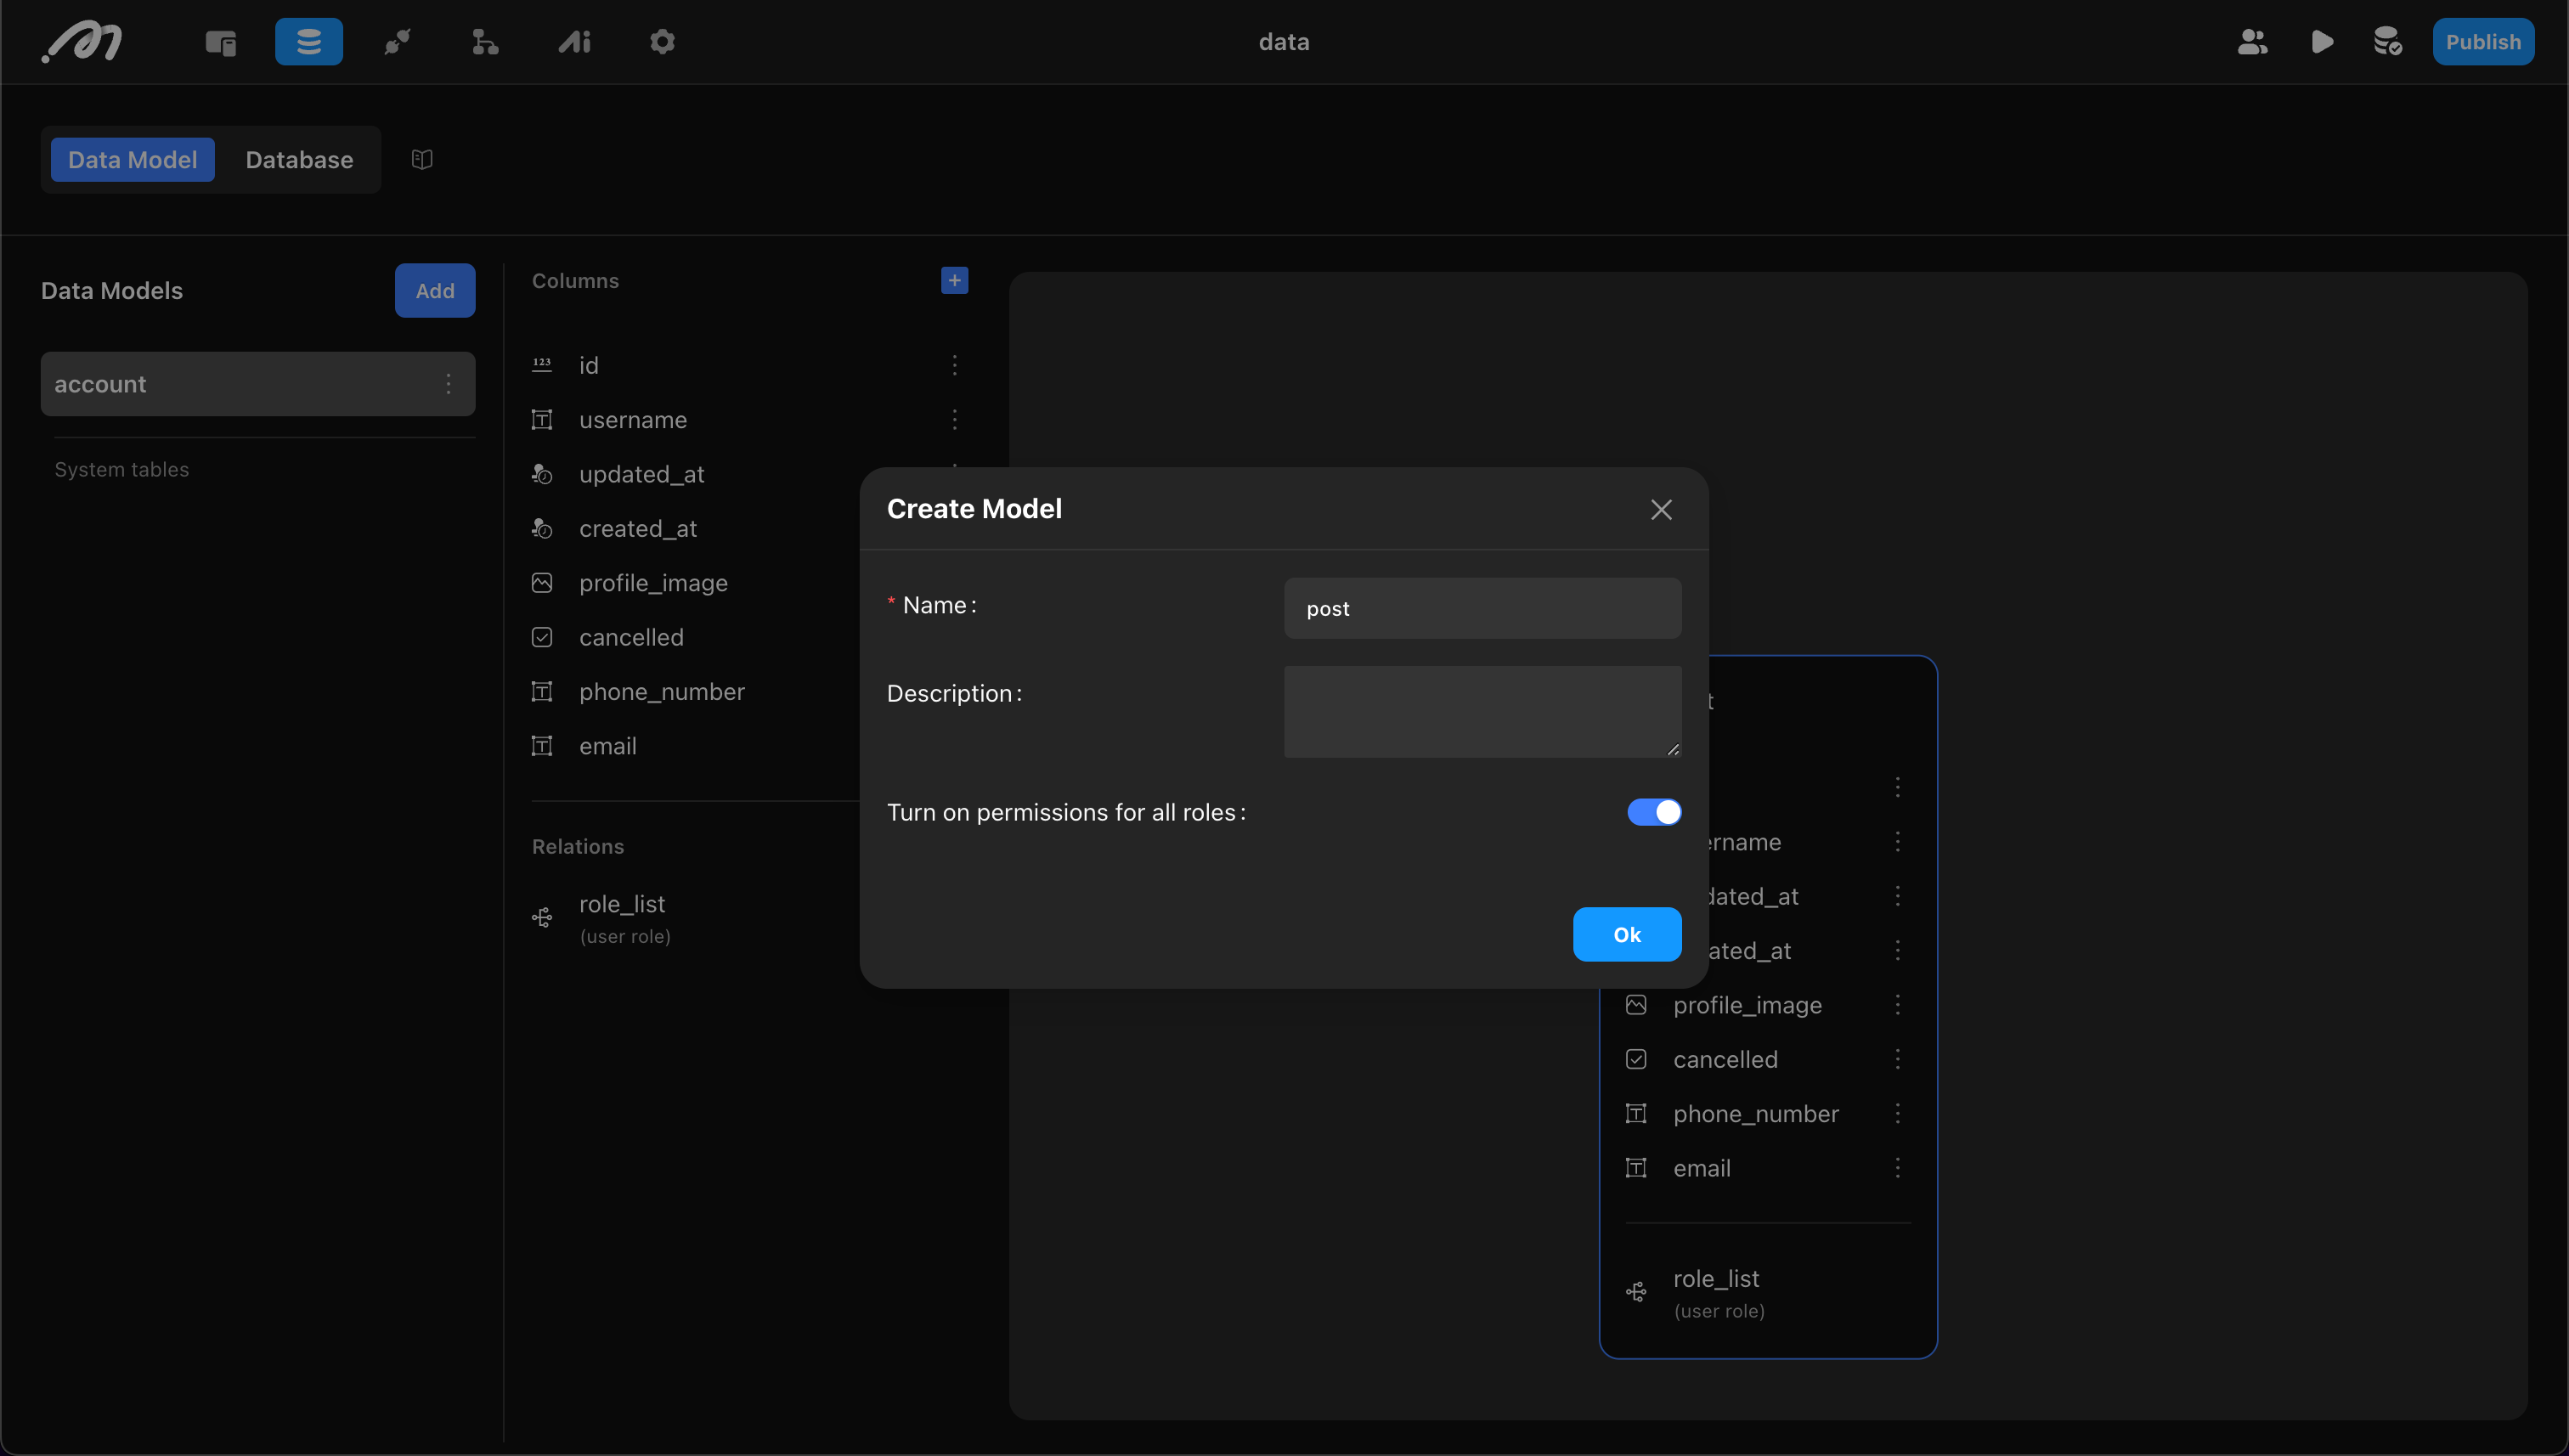
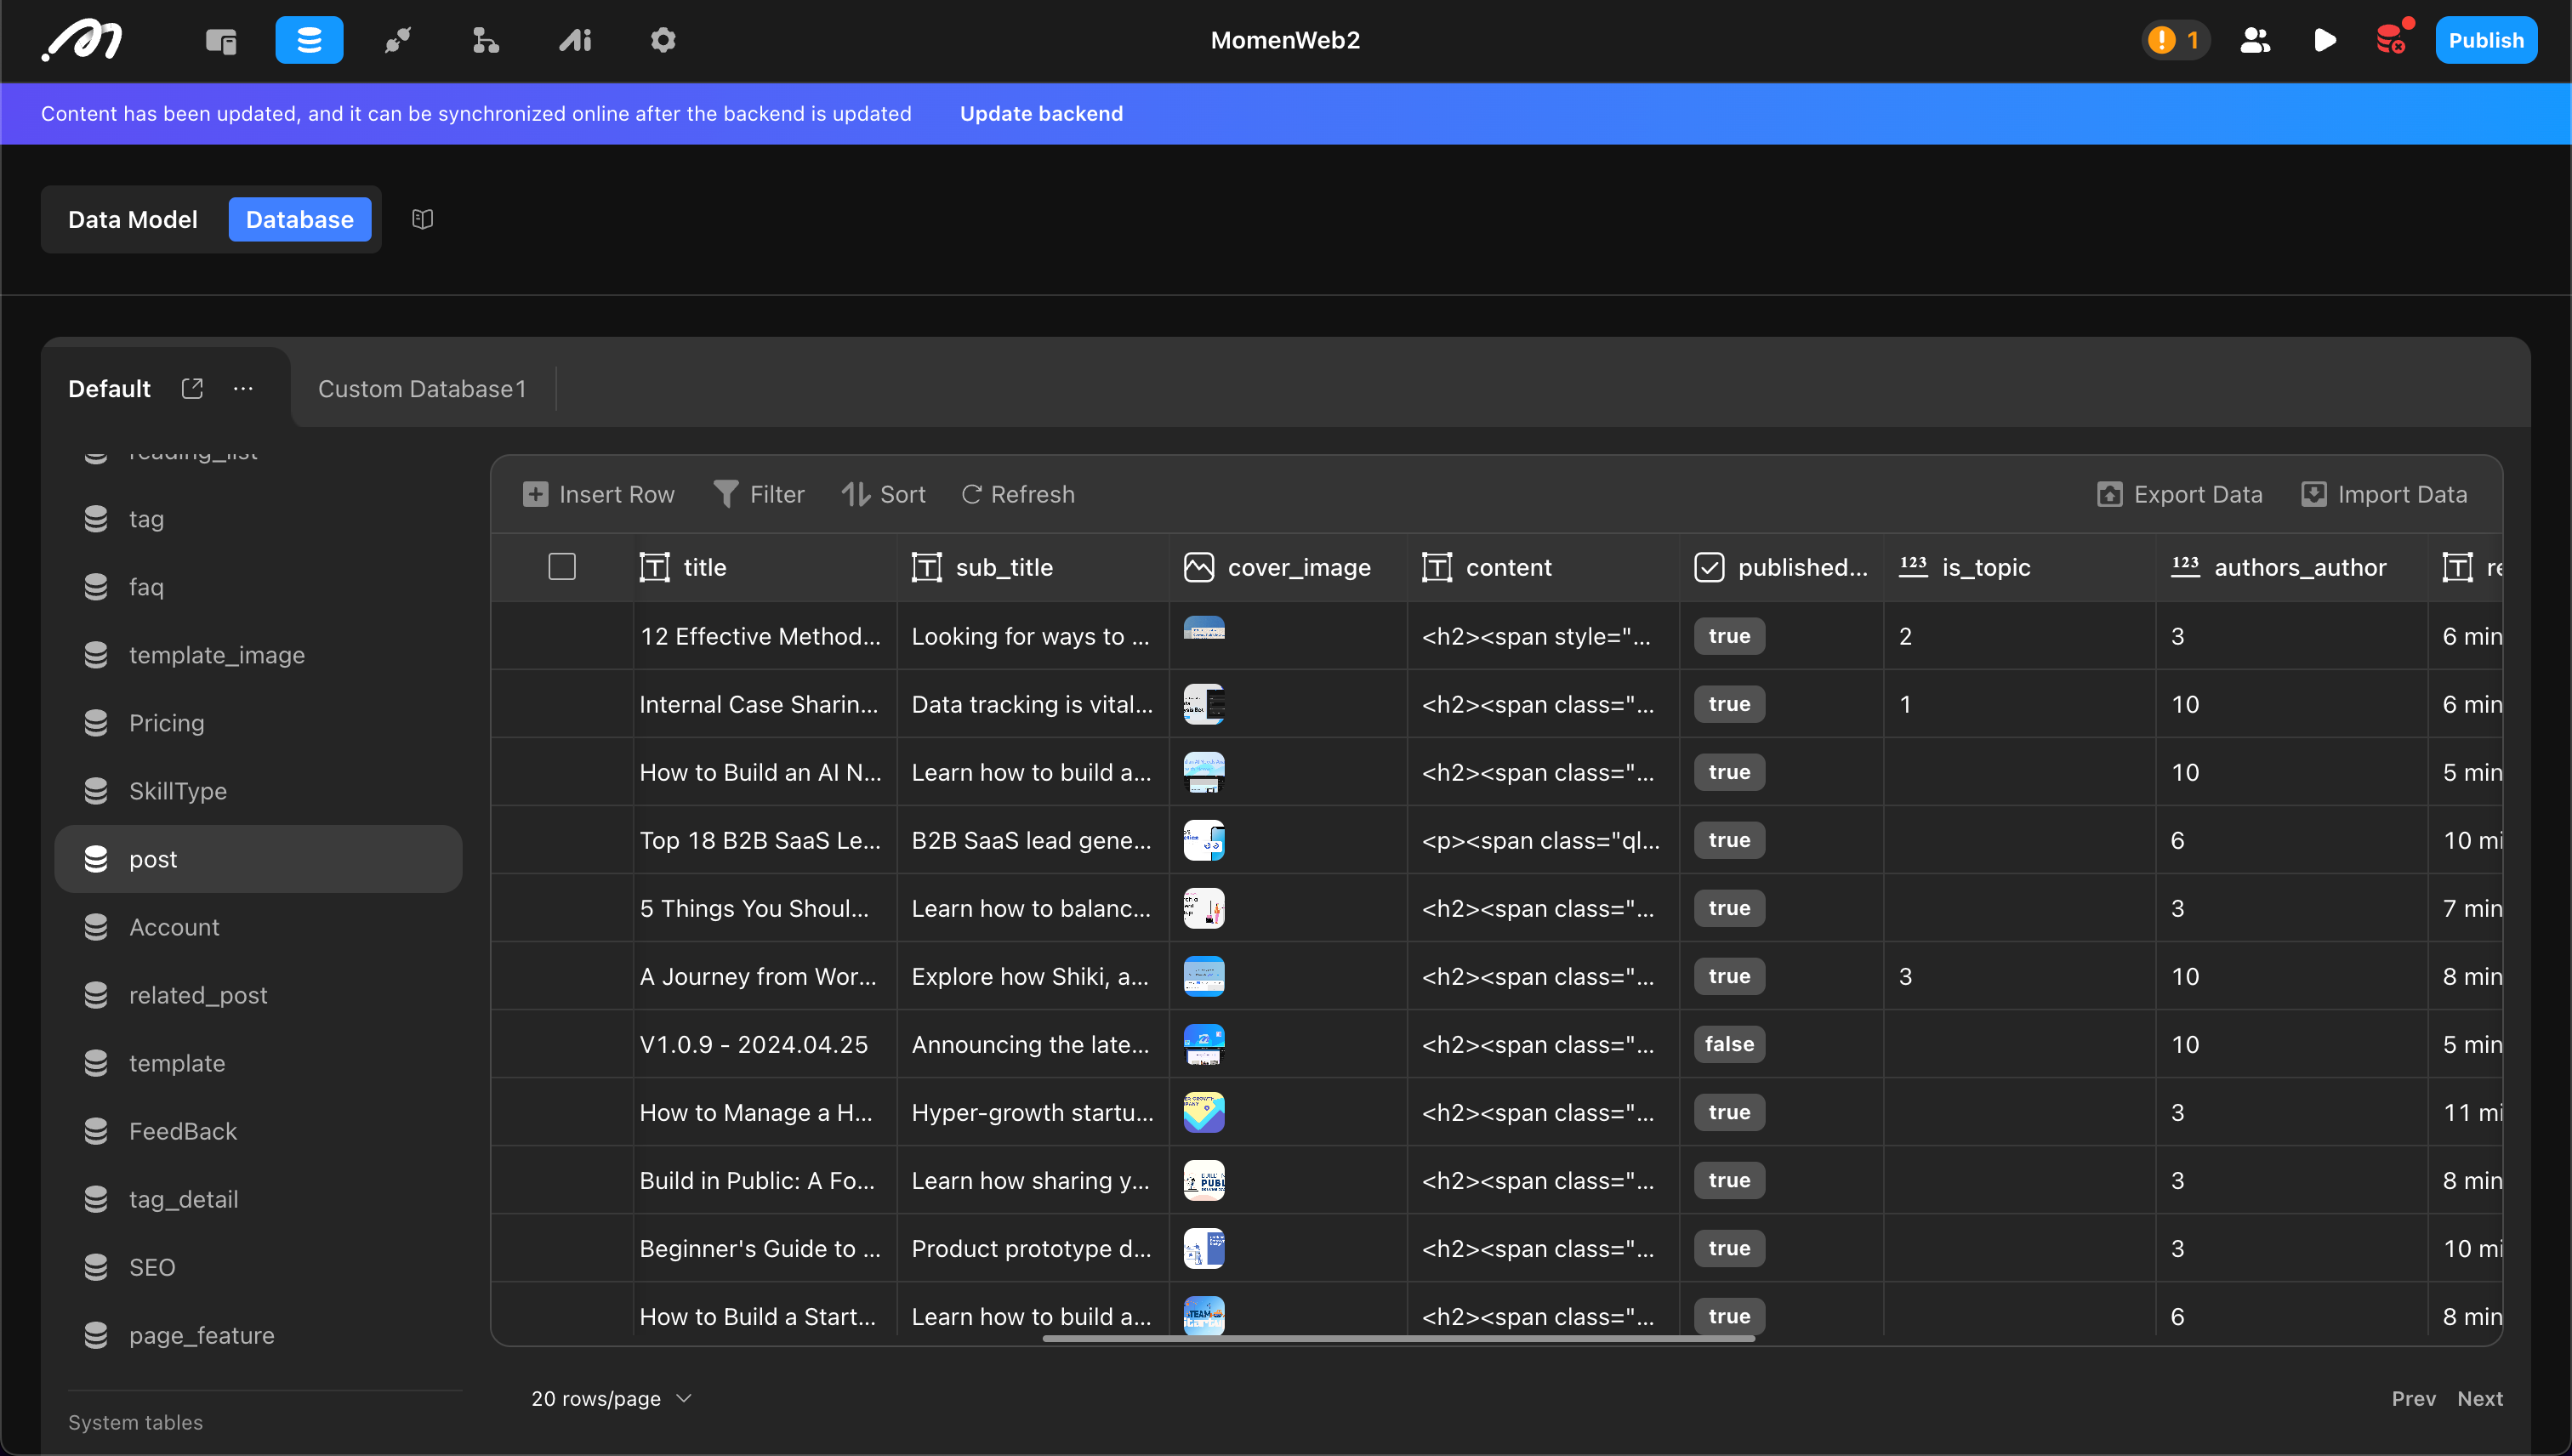
Table Management
Tables are the core of the data model, where structured data is stored. Managing tables in Momen is straightforward.
Create a Table
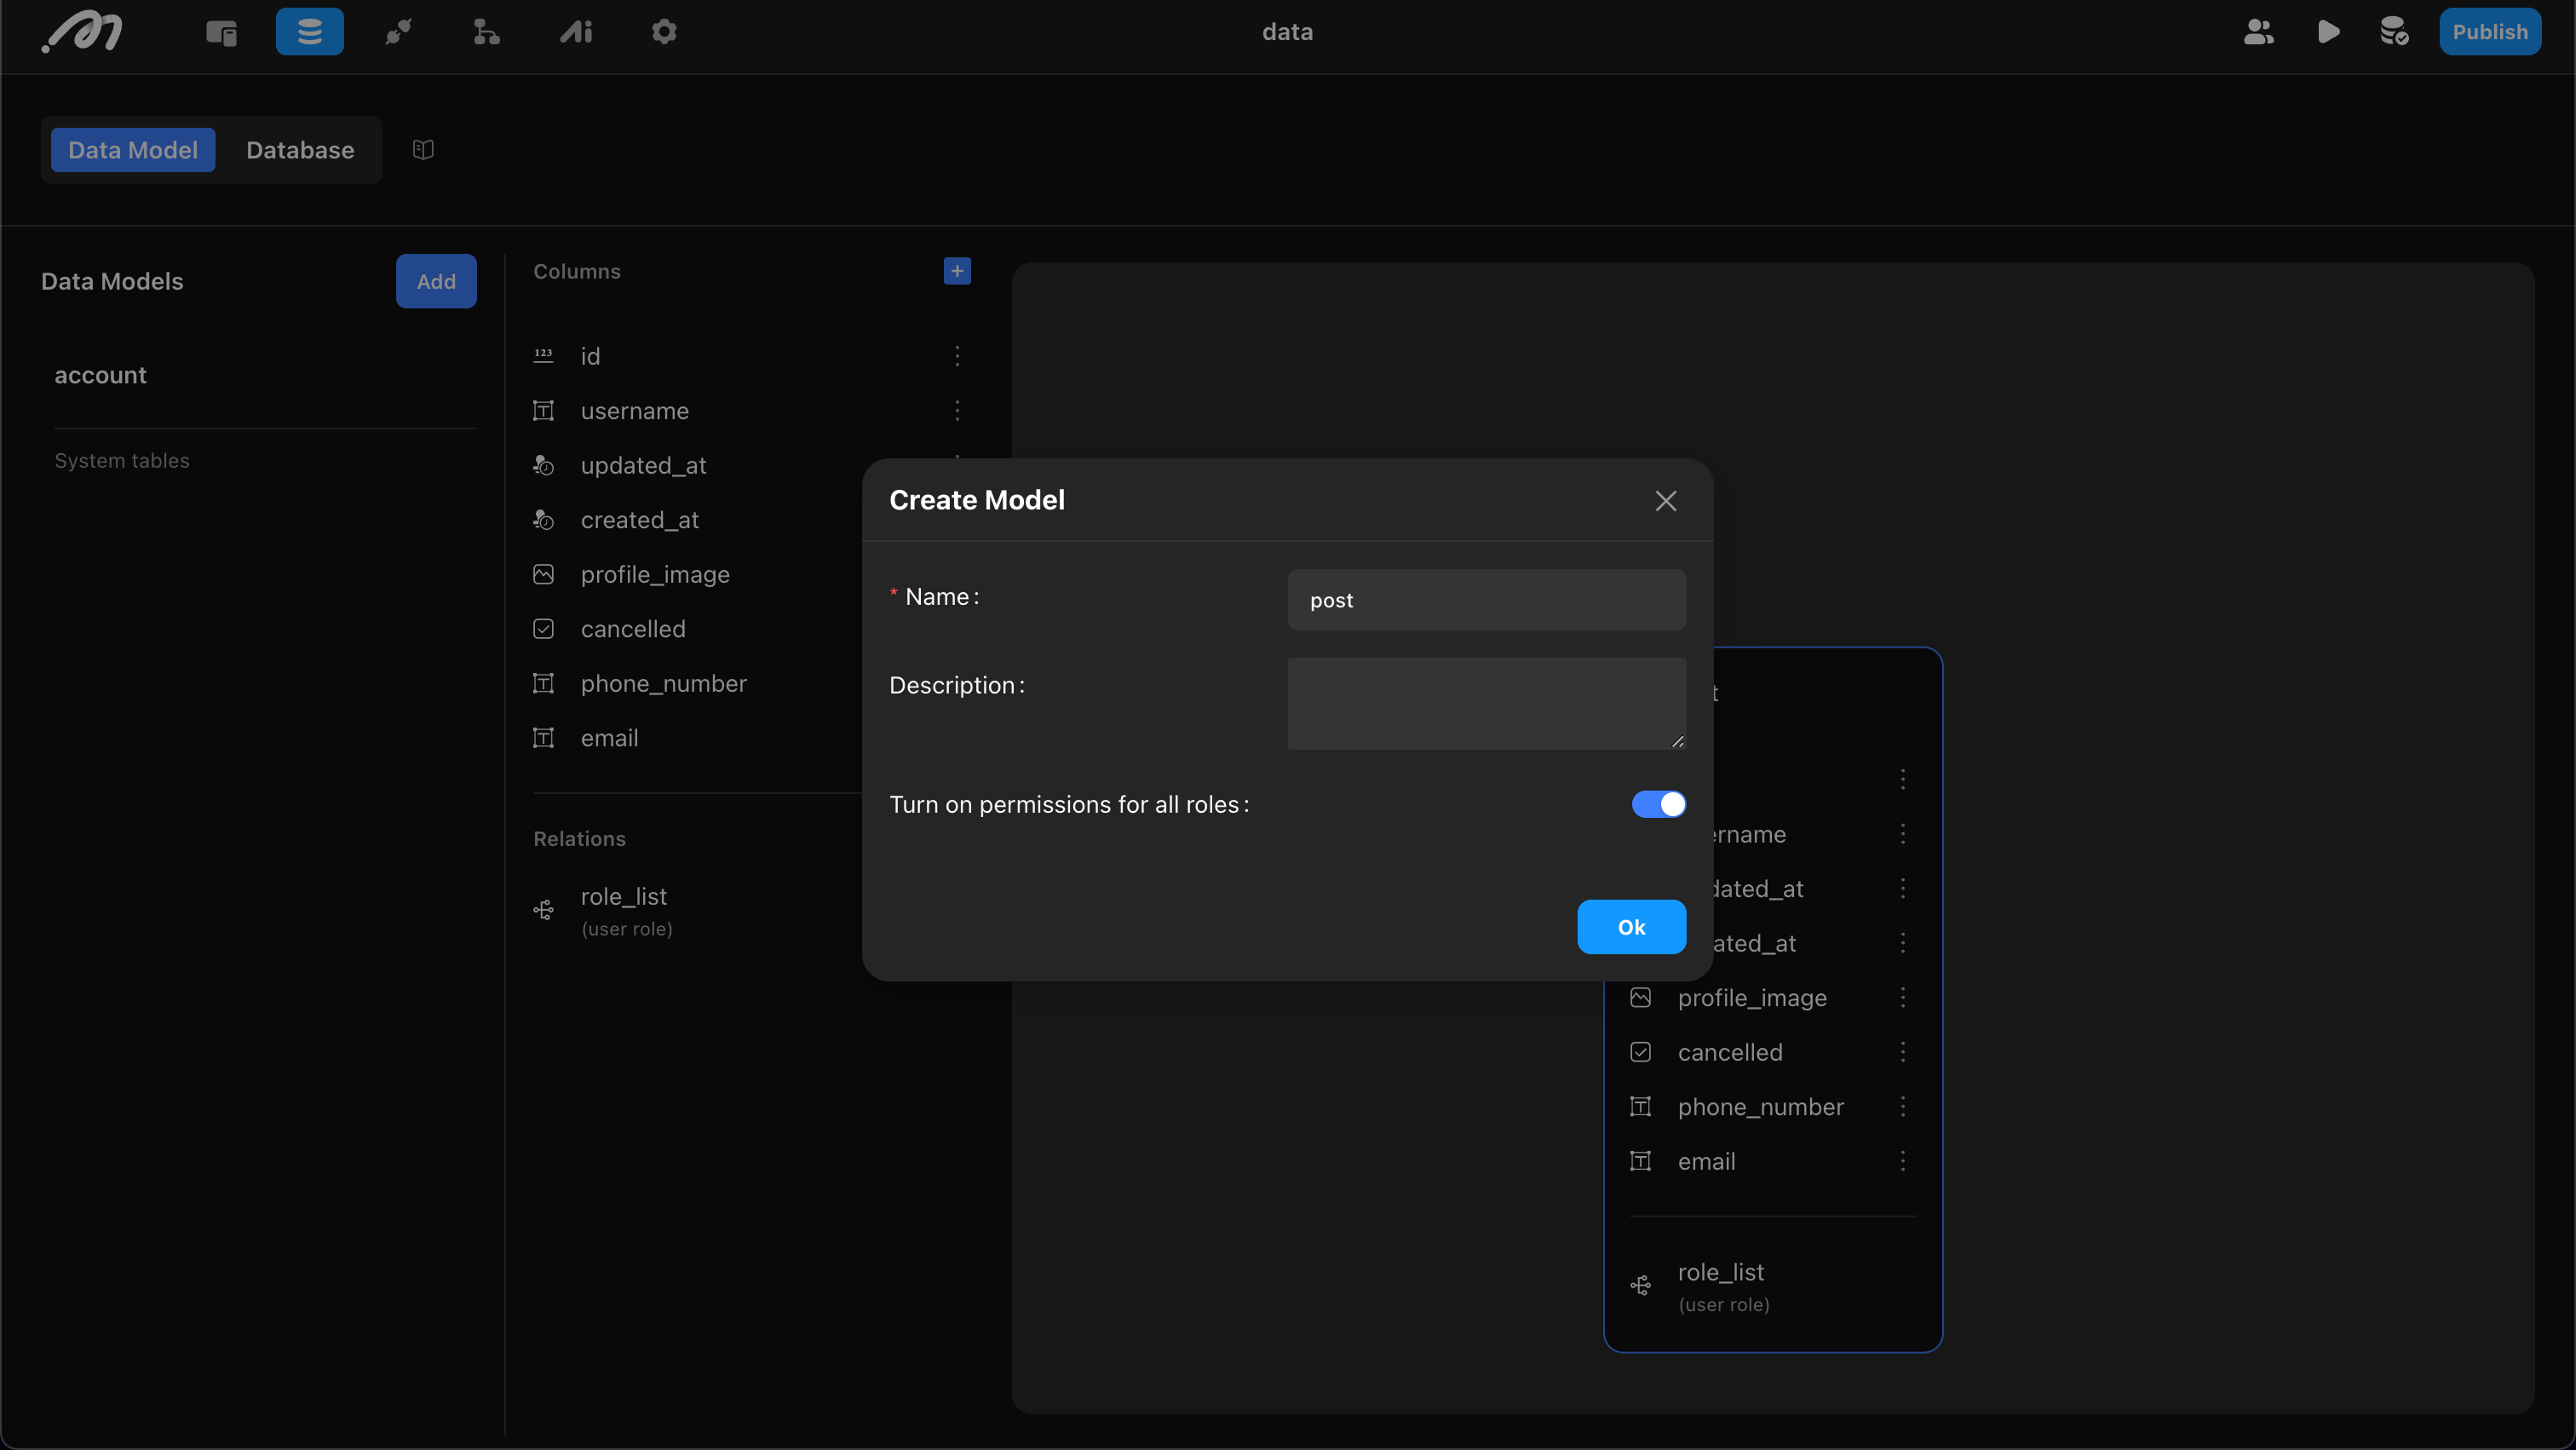
Click “Add” and define the table’s properties:
- Name: Cannot use reserved words like “log”,“column”,“index”.
- Description: Optional table description.
- Turn on permissions for all roles: Table permission management. When enabled, all roles have permission to add, delete, modify, and query. For details, see: Permissions .
Example: Create a “post” table.
Add Columns
Each table is created with three default columns: id, created_at, and updated_at. These cannot be modified or deleted, and data is written by the system. The id is a unique identifier for each row, used to locate records and establish relationships between tables.
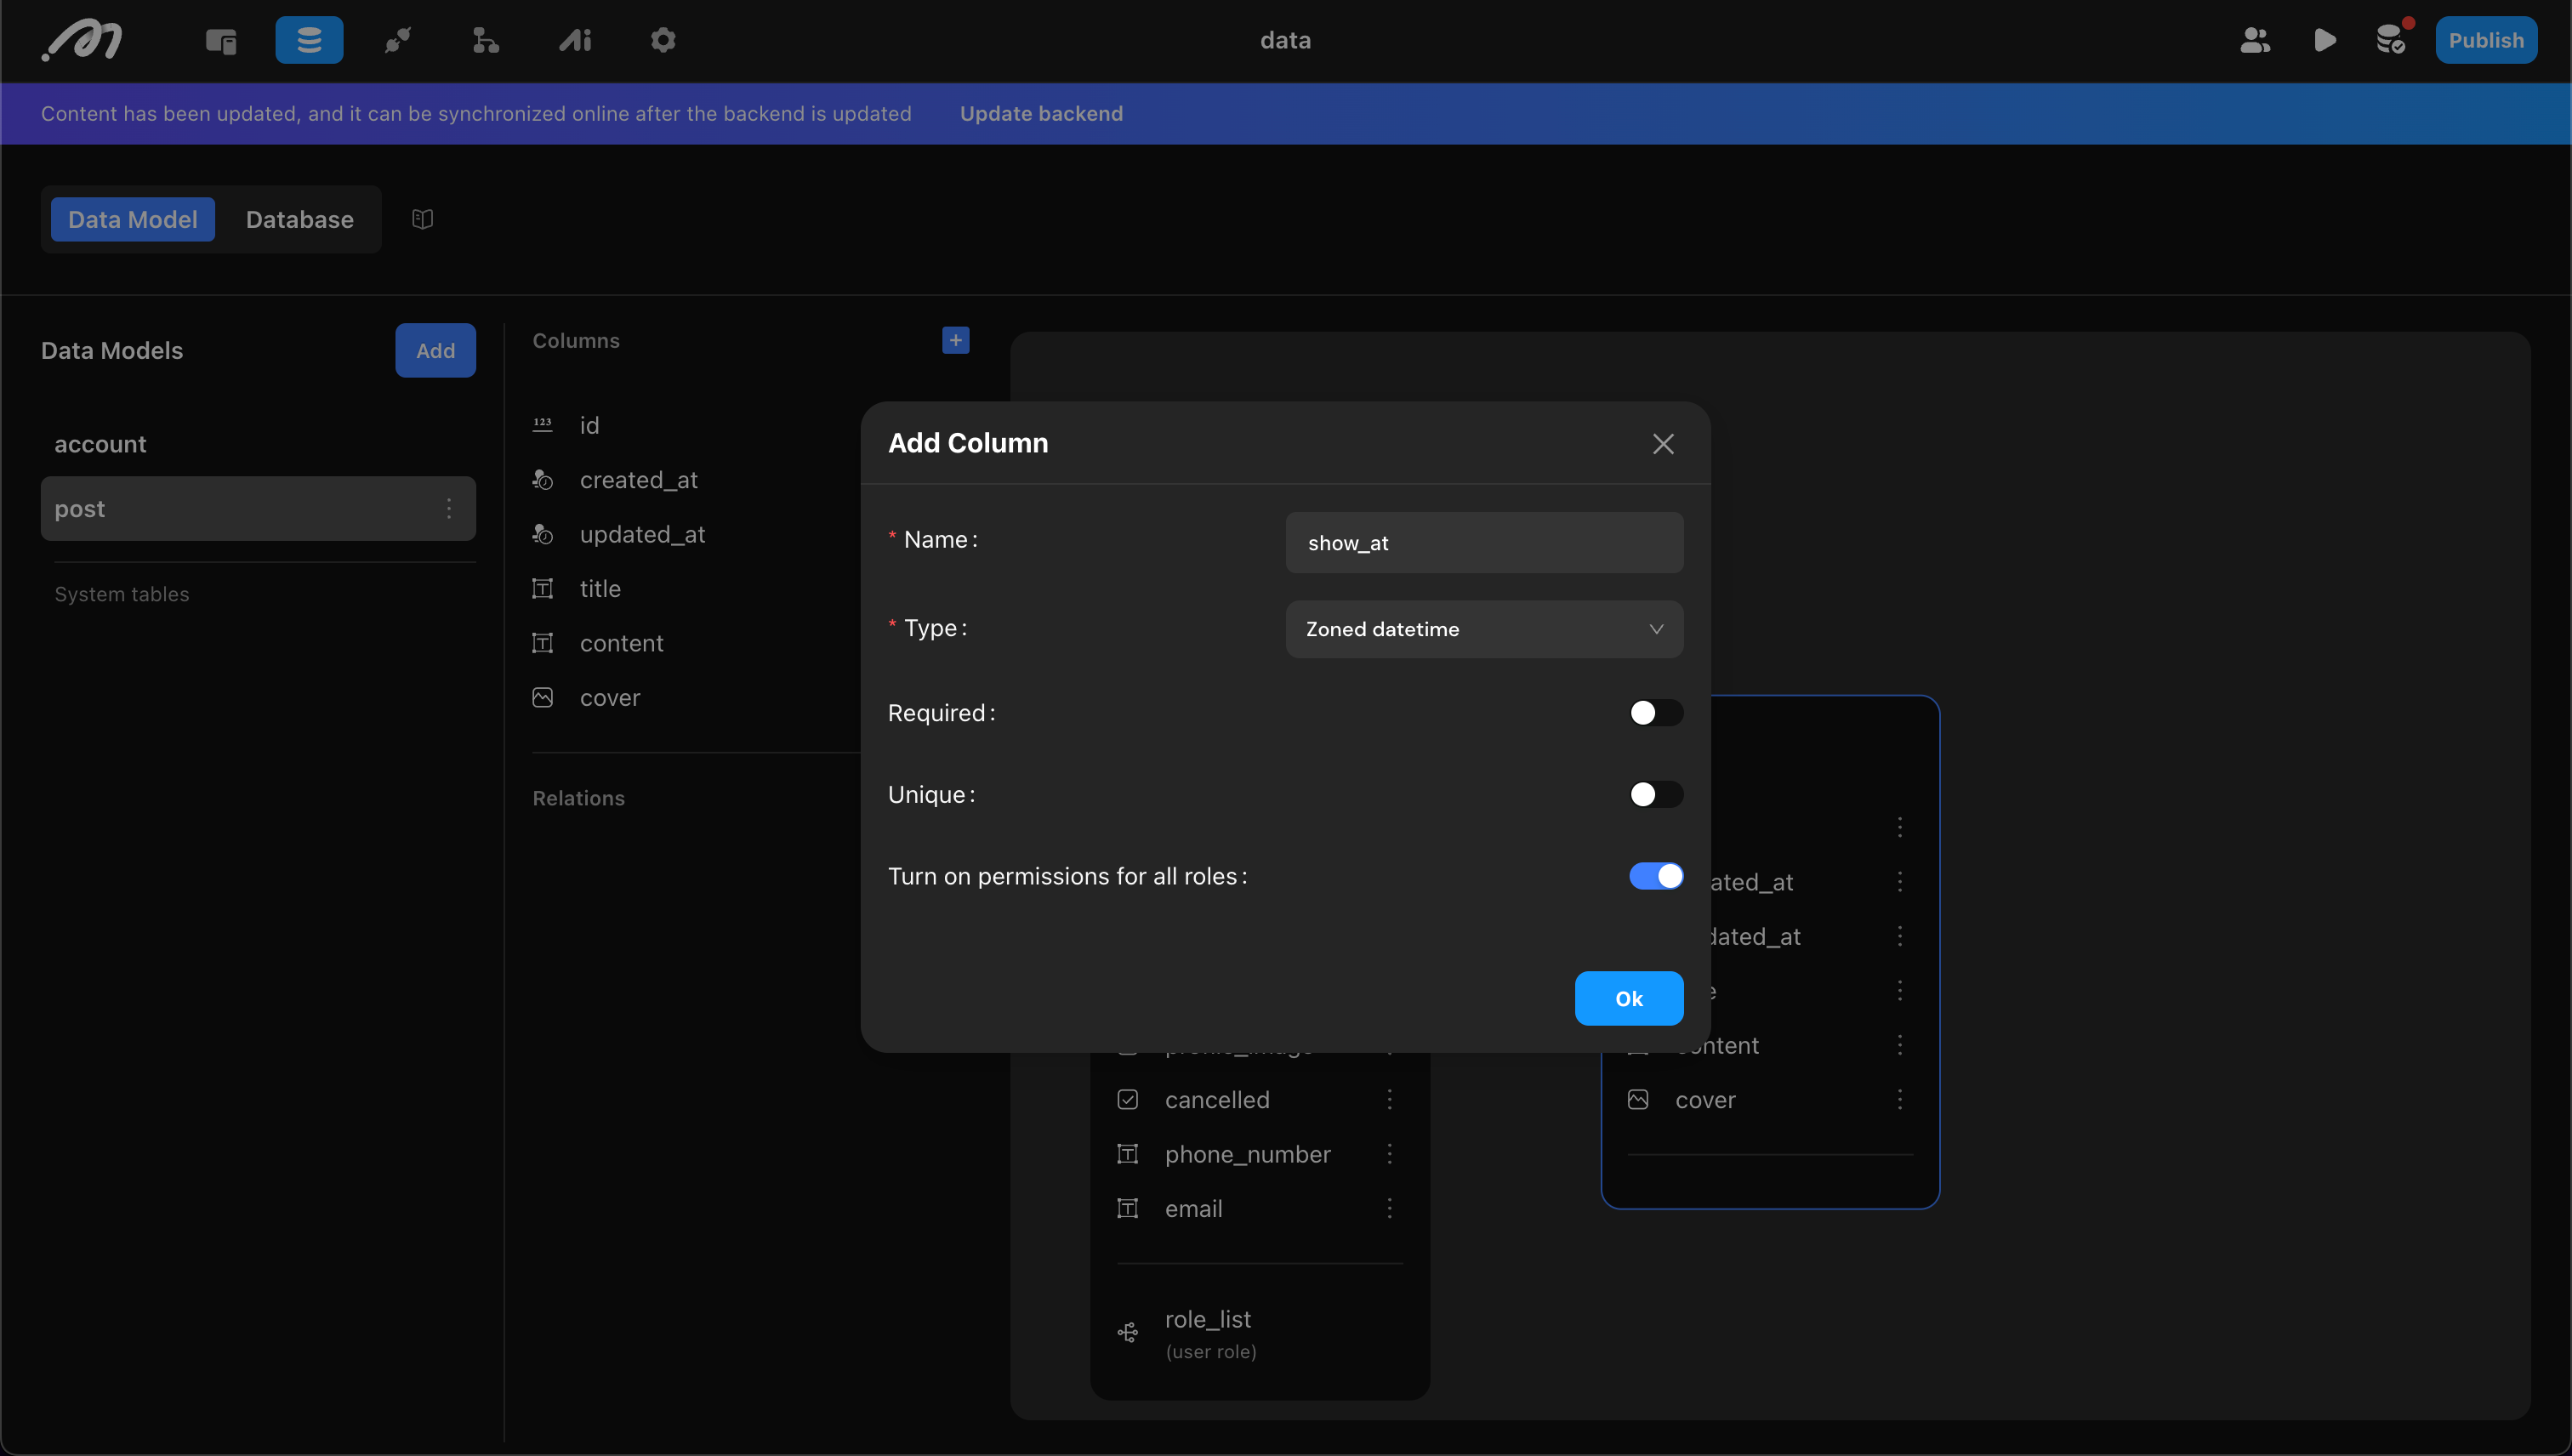
When adding columns, confirm the following properties:
- Column Name: Cannot use reserved words like “column.”
- Type: Supports types such as Text, Integer, Image, etc. Momen enforces strict type validation. For example, “Date,” “Zoned time,” and “Zoned datetime” are all time-related but cannot be mixed. The data table is foundational, so choose types carefully.
- Required: Indicates whether the field can be empty when adding or modifying data. Generally turned off.
- Unique: Indicates whether this column’s data must be unique (e.g., username in an Account table).
- Turn on permissions for all roles: Permission management for the column. For details, see: Permissions .
In the post table, add
title(Text),content(Text),cover(Image), andshow_at(Zoned datetime).
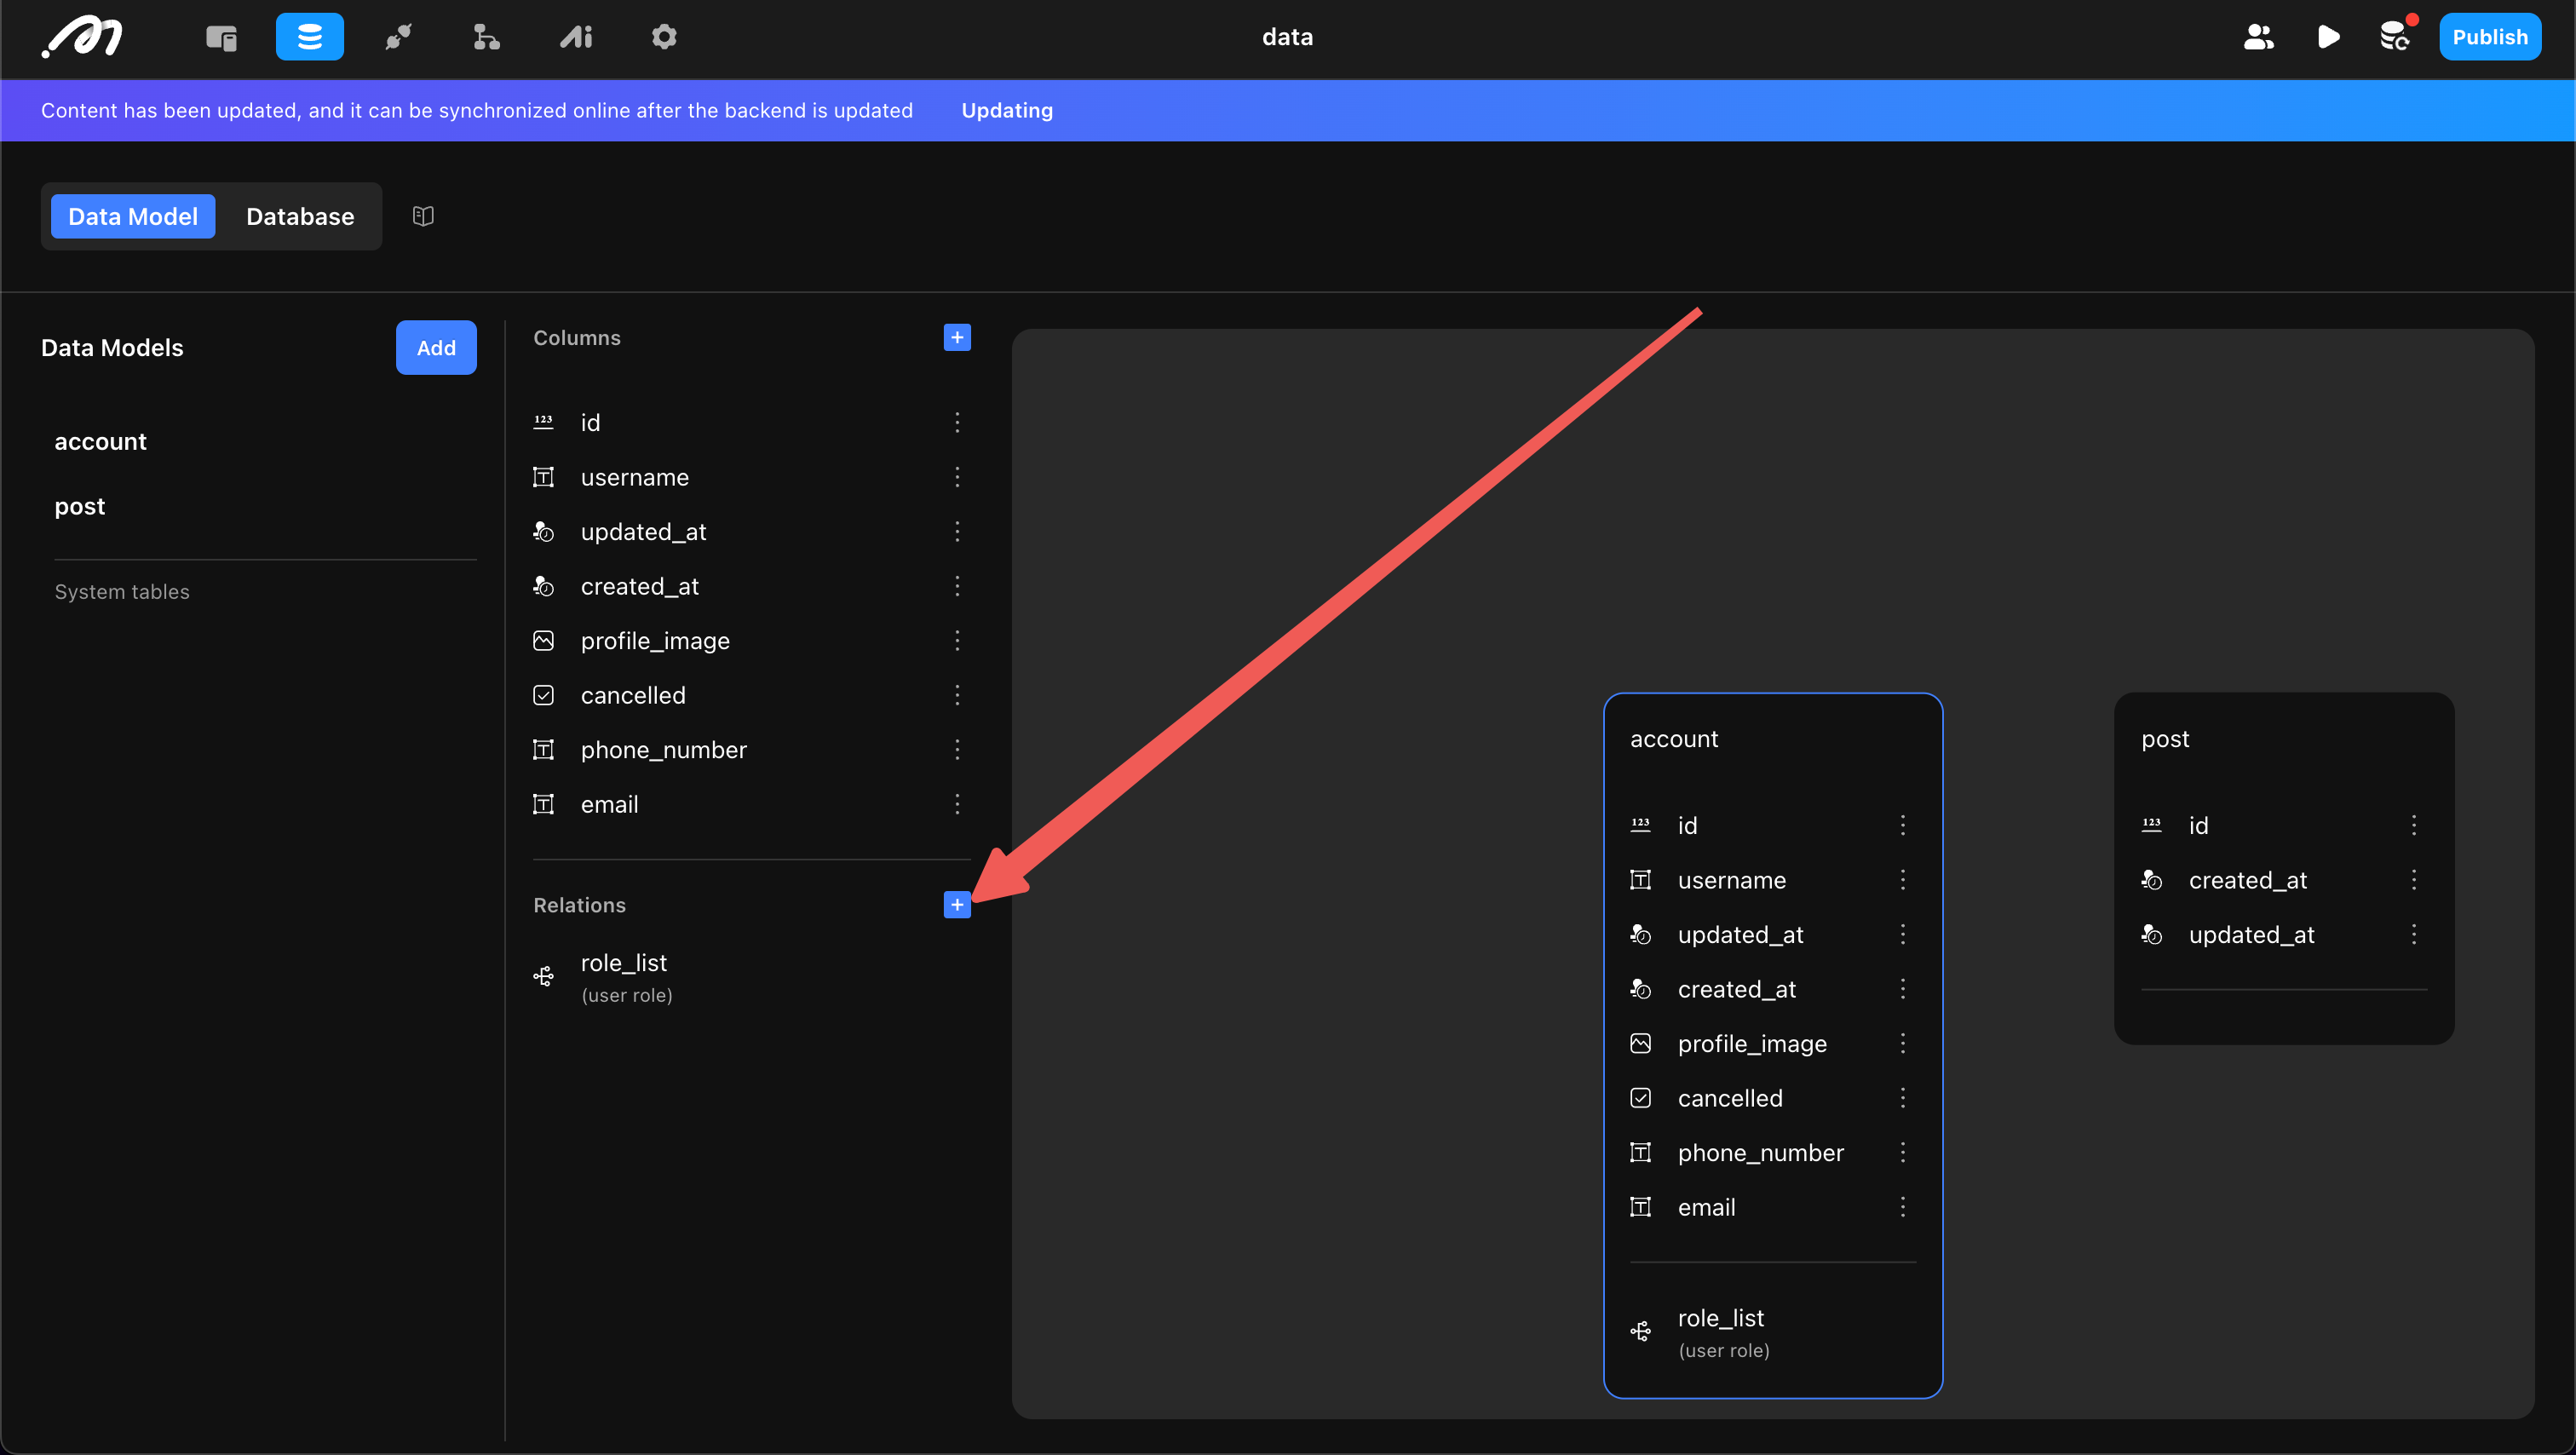
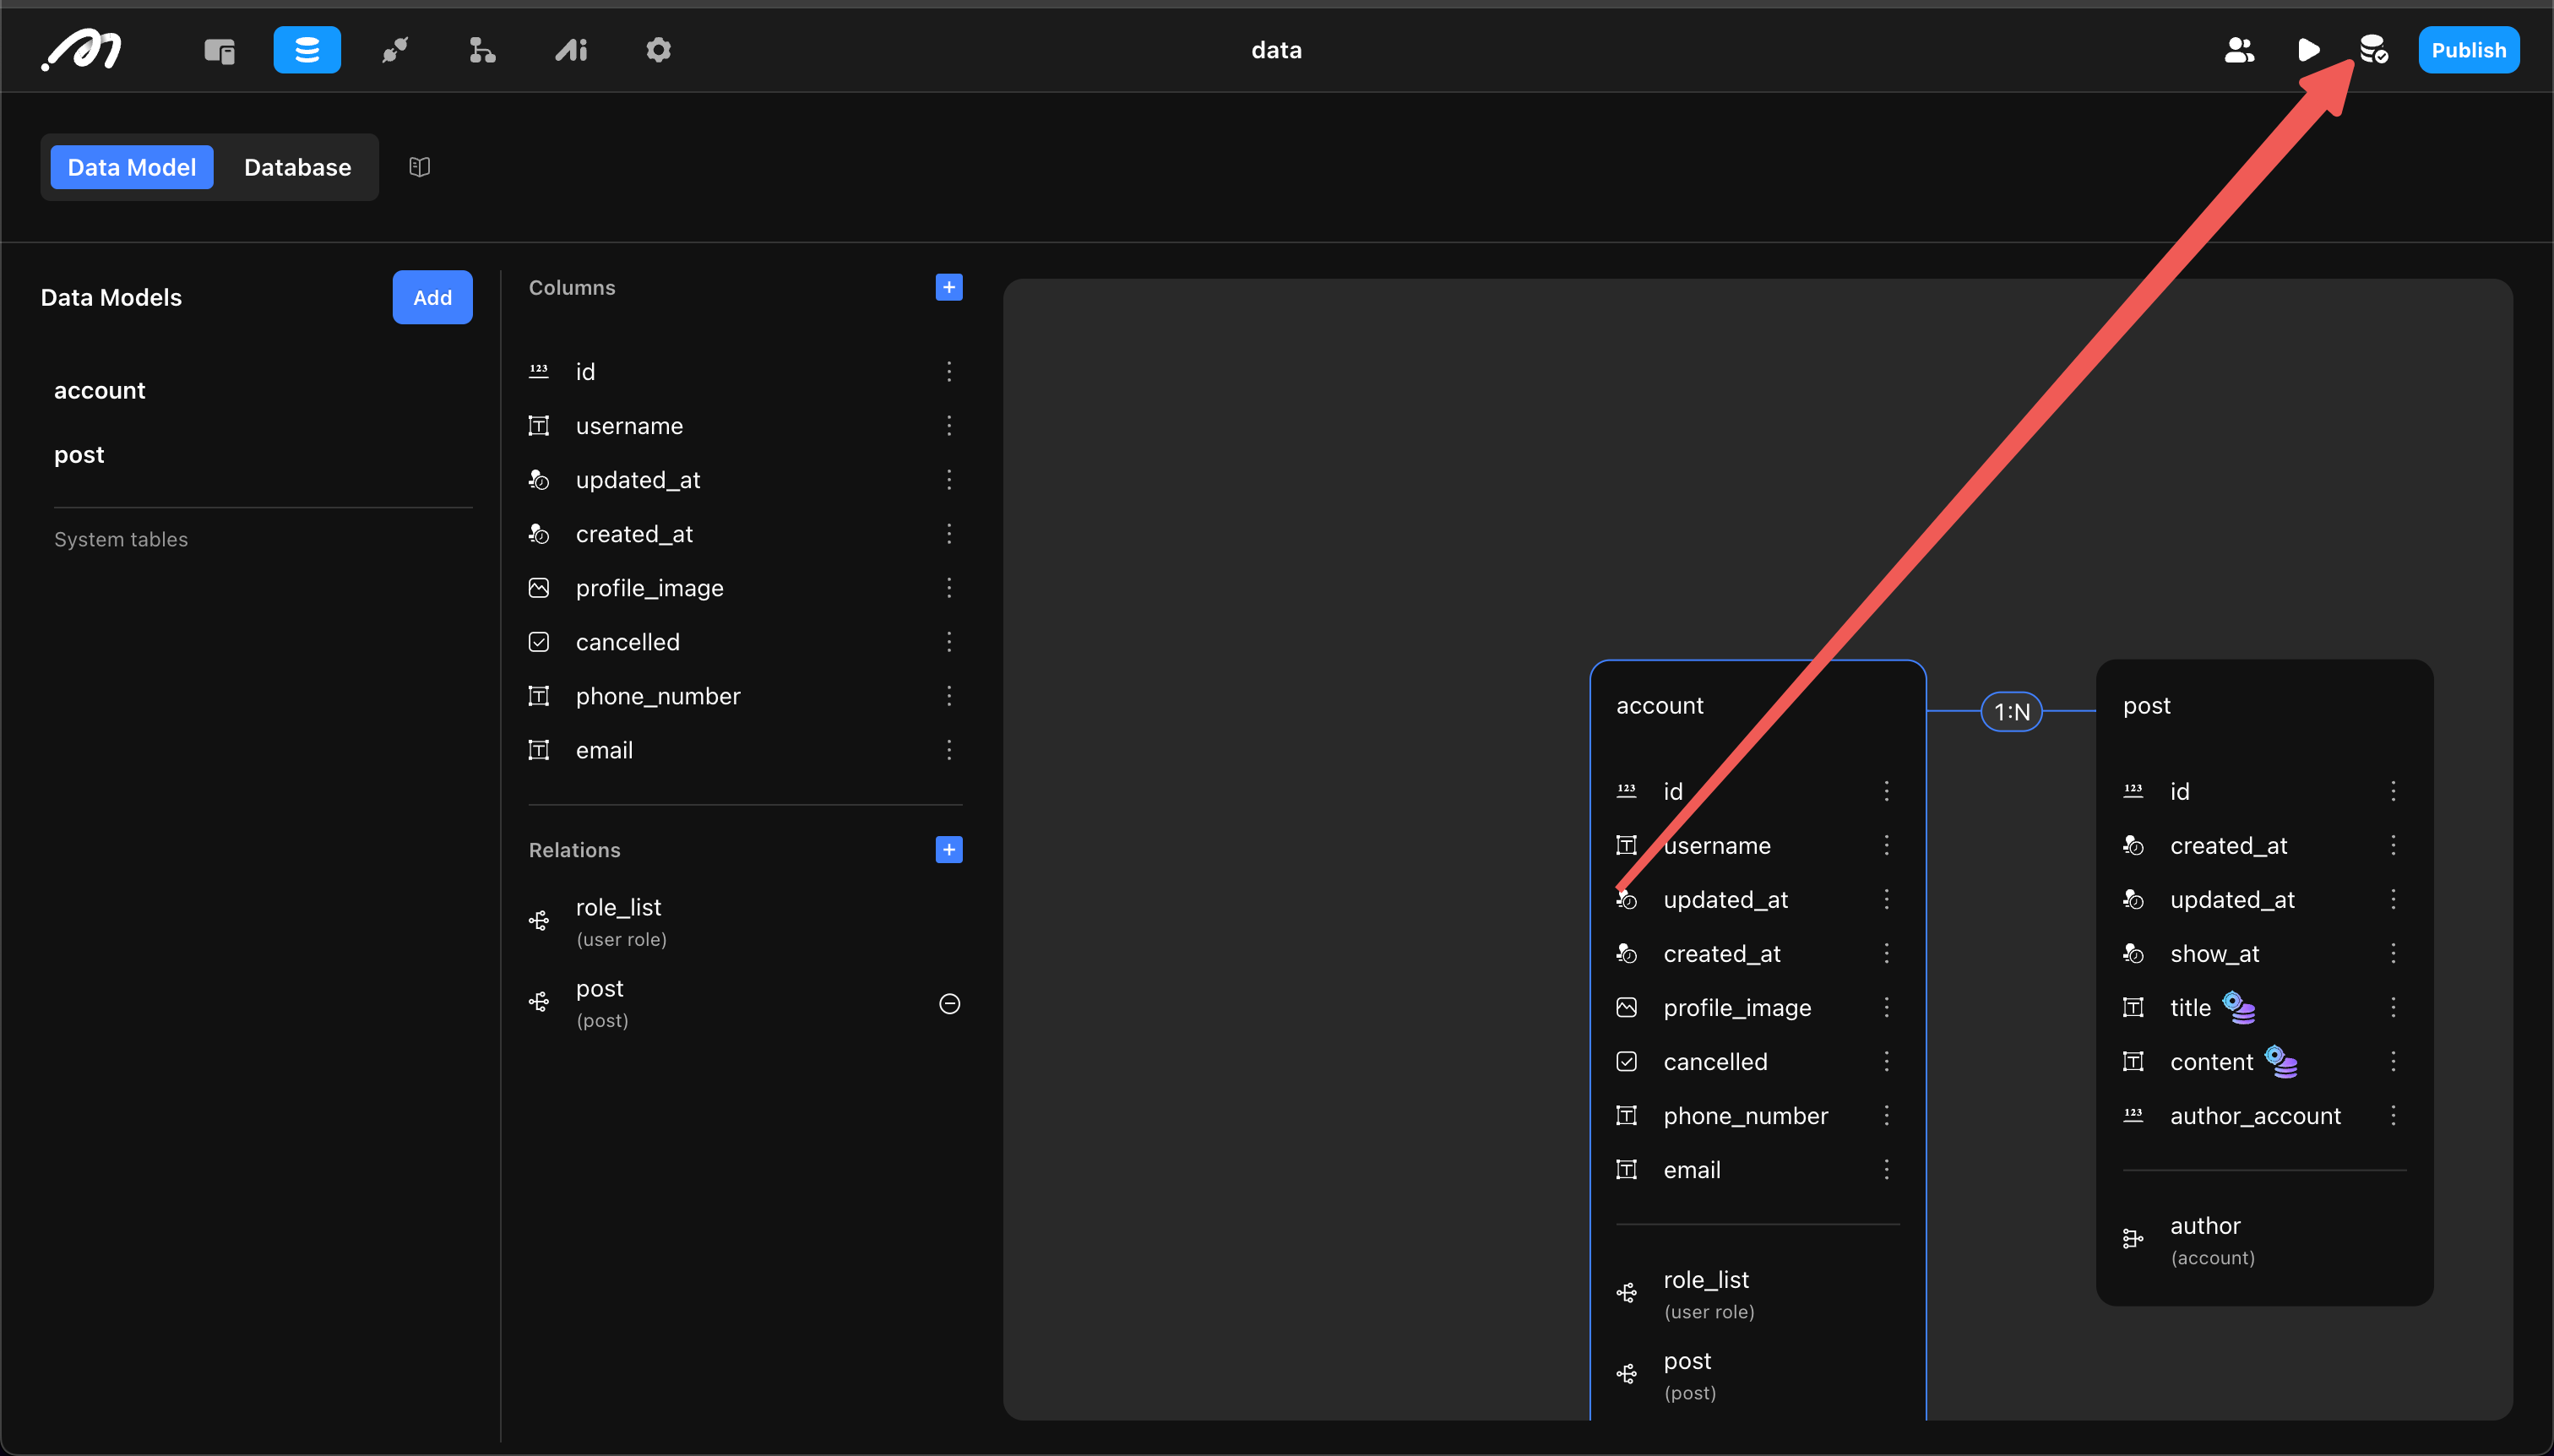
Add Relations
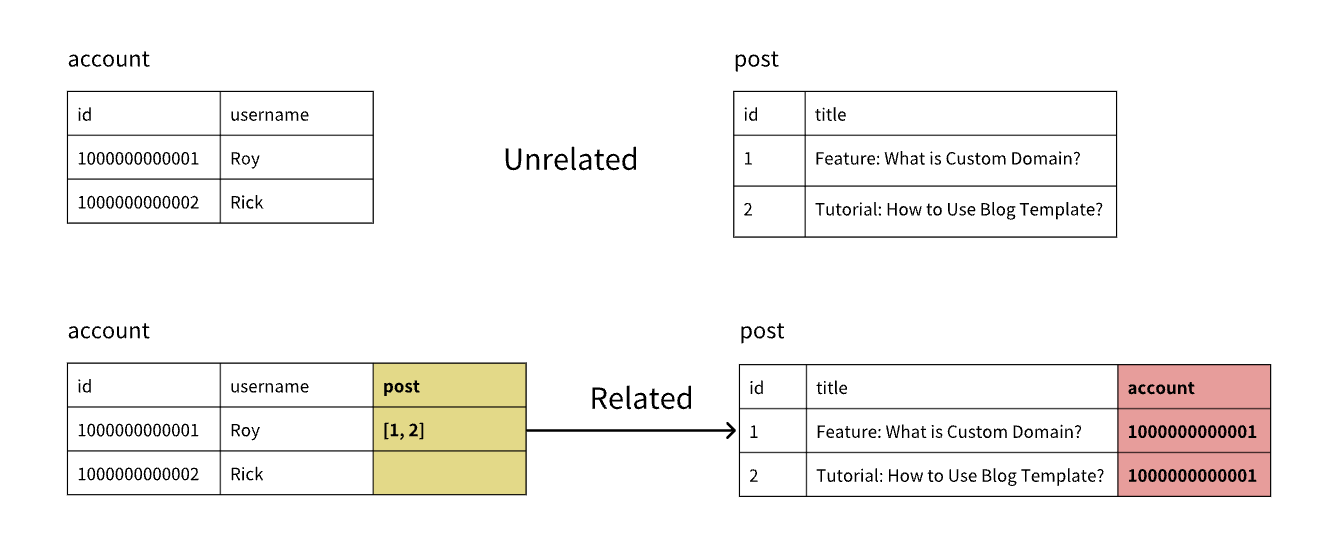
Tables can establish relationships through id. For example, after the Account table establishes a relation with the post table, a new column is added to the post table to store the Account’s id. Both blog posts below belong to “Roy.”
When establishing relationships, consider:
- Relation Direction: Which table establishes the relation with which (e.g., Account to post).
- Relation Type:
- One-to-many: One record in Table A can be associated with multiple records in Table B.
- One-to-one: One record in Table A can be associated with only one record in Table B.
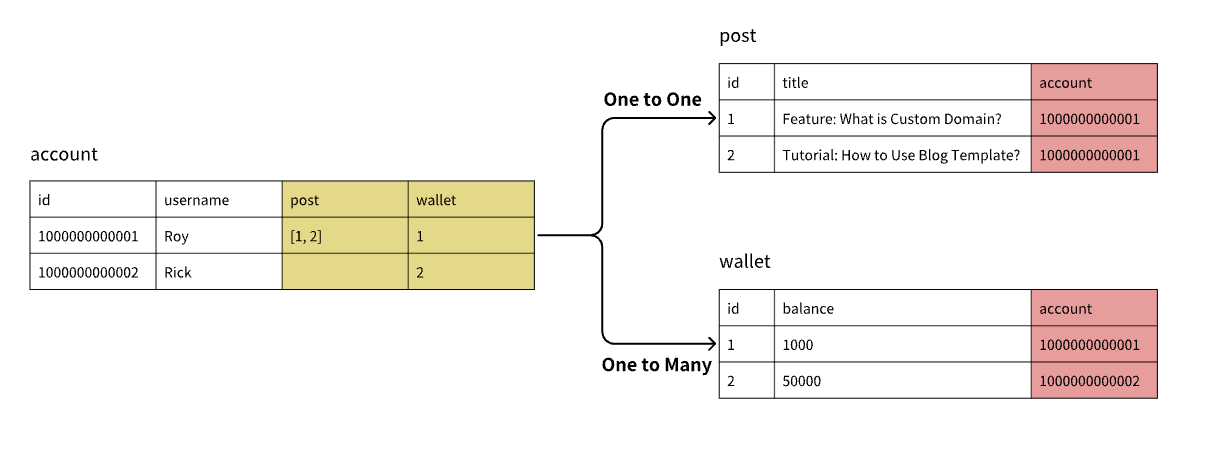
Example: A user can have multiple posts (One-to-many) but only one wallet (One-to-one).
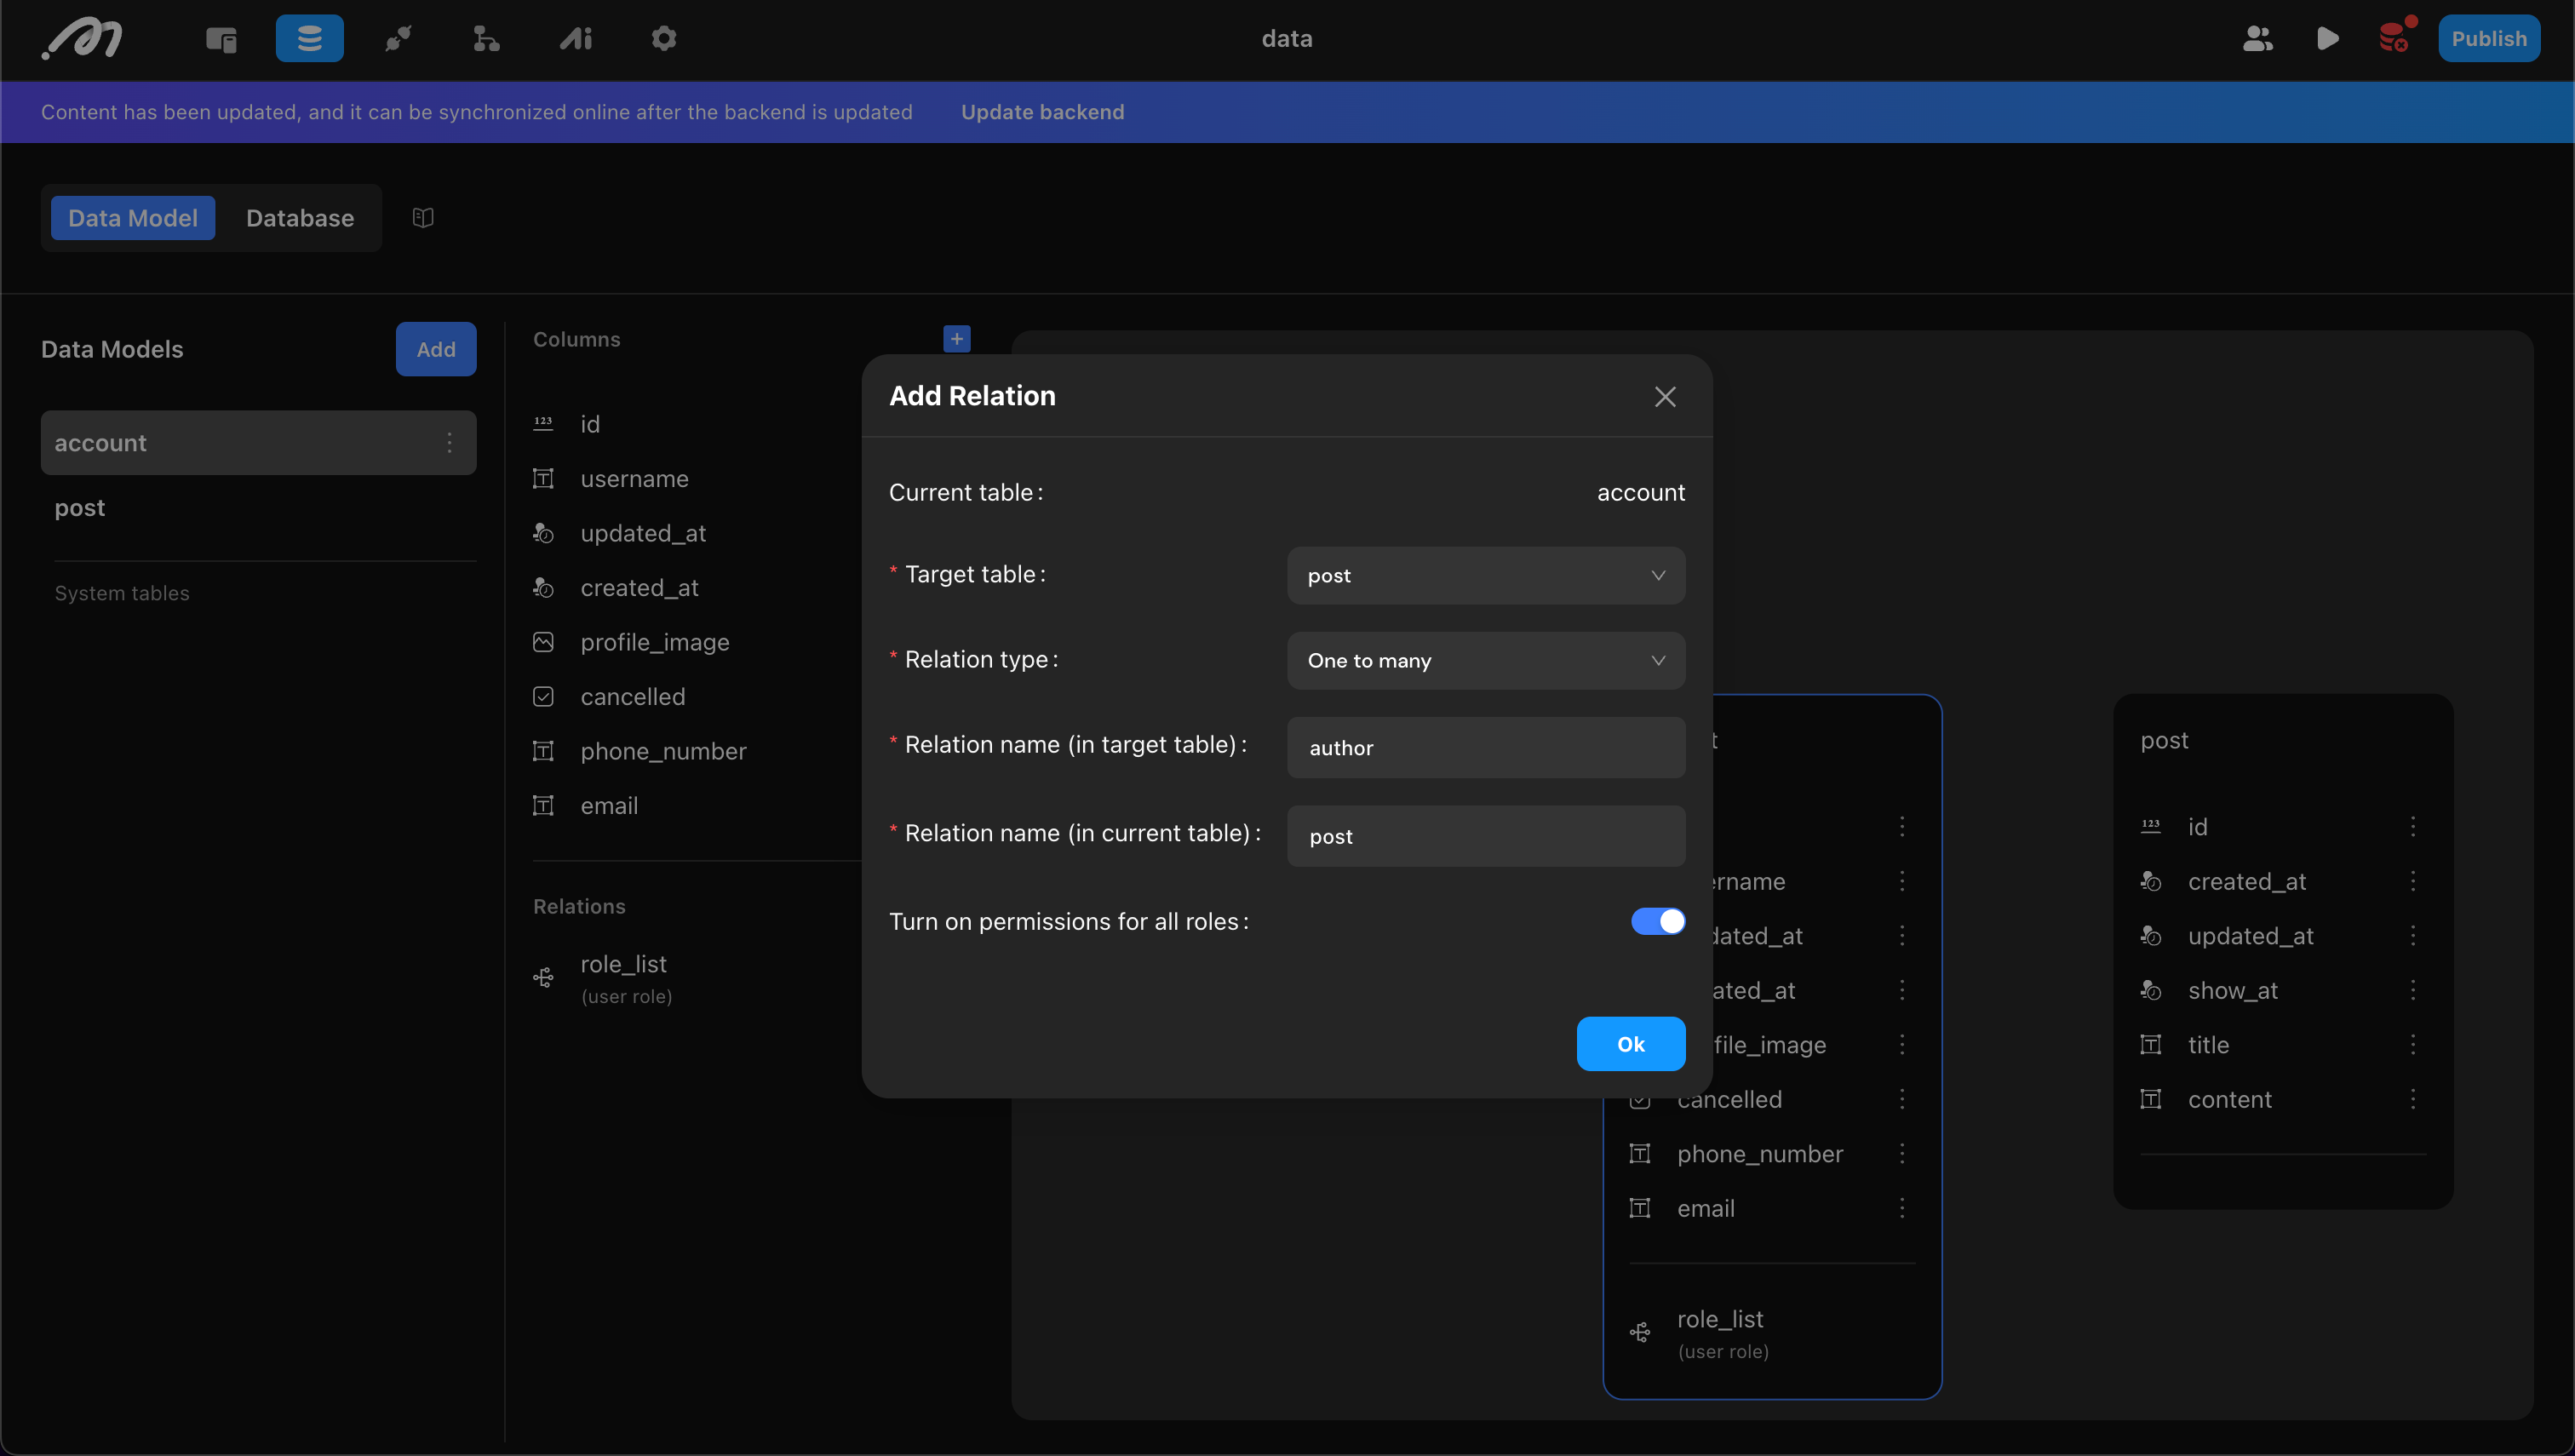
Add the relation in the starting table (Account in this example), then set:
- Target Table: The table to associate with (post in this example).
- Relation Type: One-to-one or one-to-many.
- Relation Name (in target table): Name of the new column in the associated table (e.g., “Author”).
- Relation Name (in current table): Name of the new column in the starting table (e.g., “Post”).
- Turn on permissions for all roles: Table permission management. For details, see: Permissions .
Constraints
Currently, only “unique constraint” is supported, specifying that certain columns’ data cannot be duplicated.
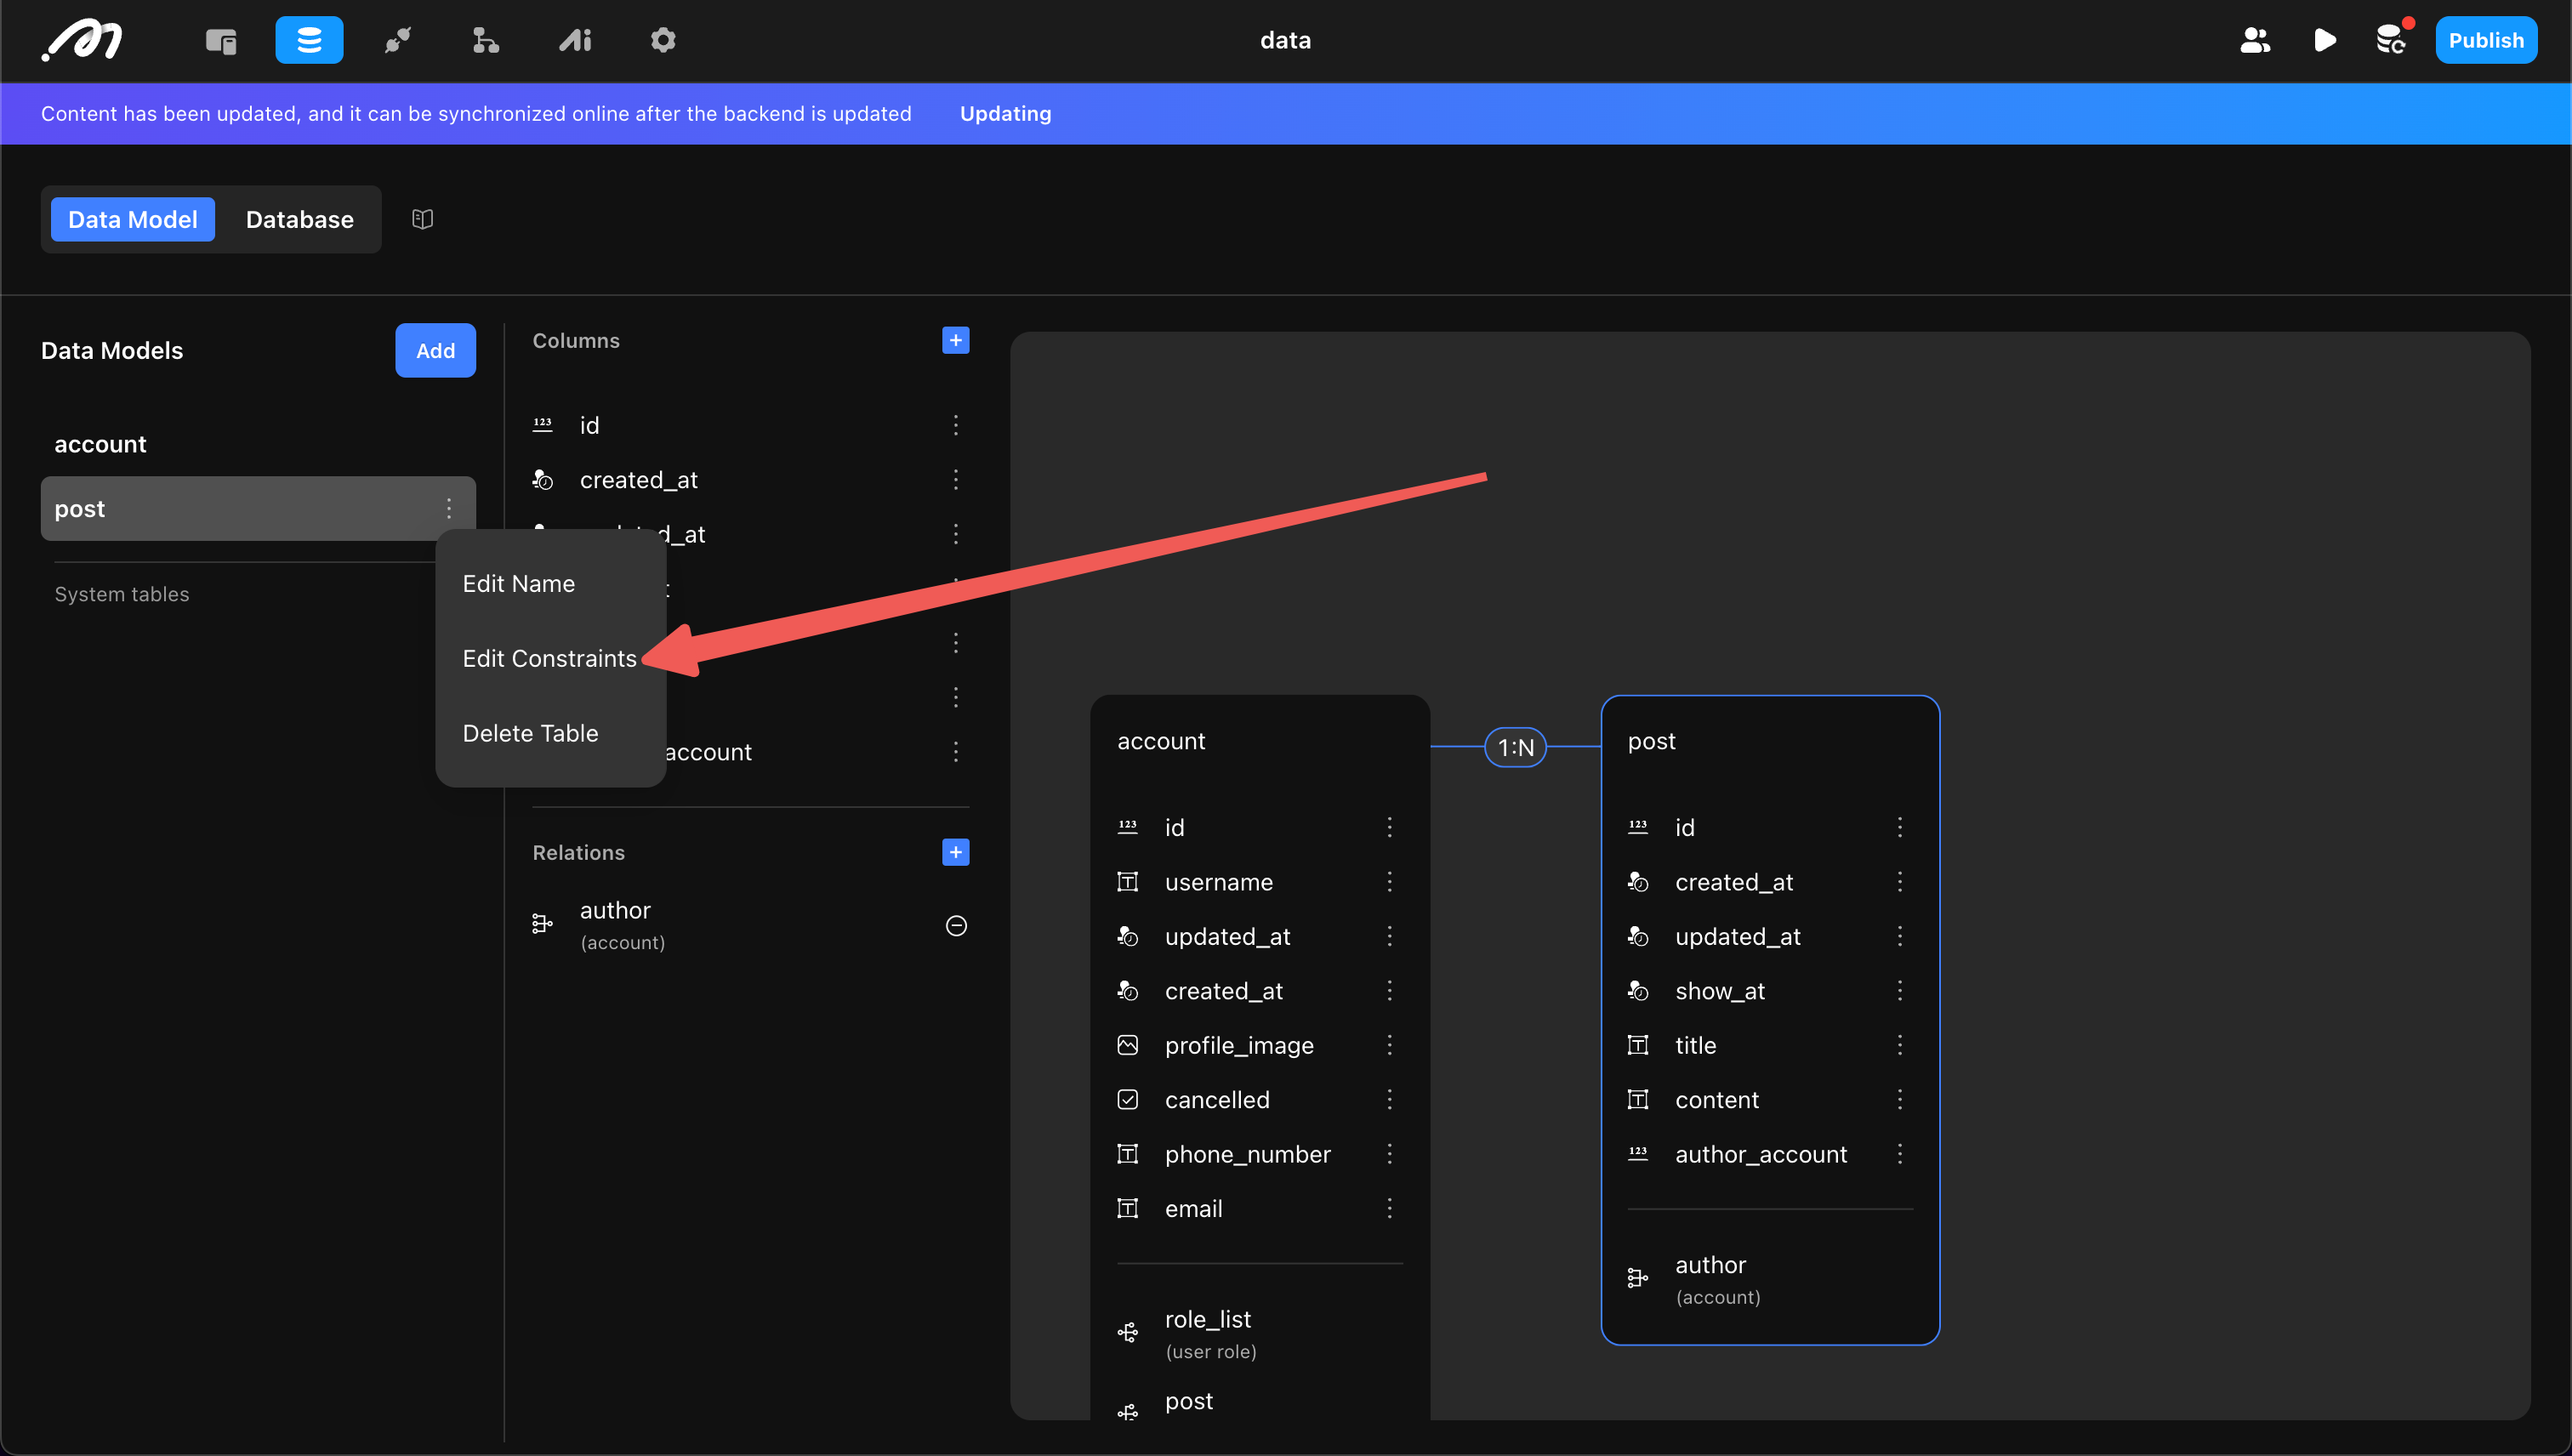
Each table has a default unique constraint on id.
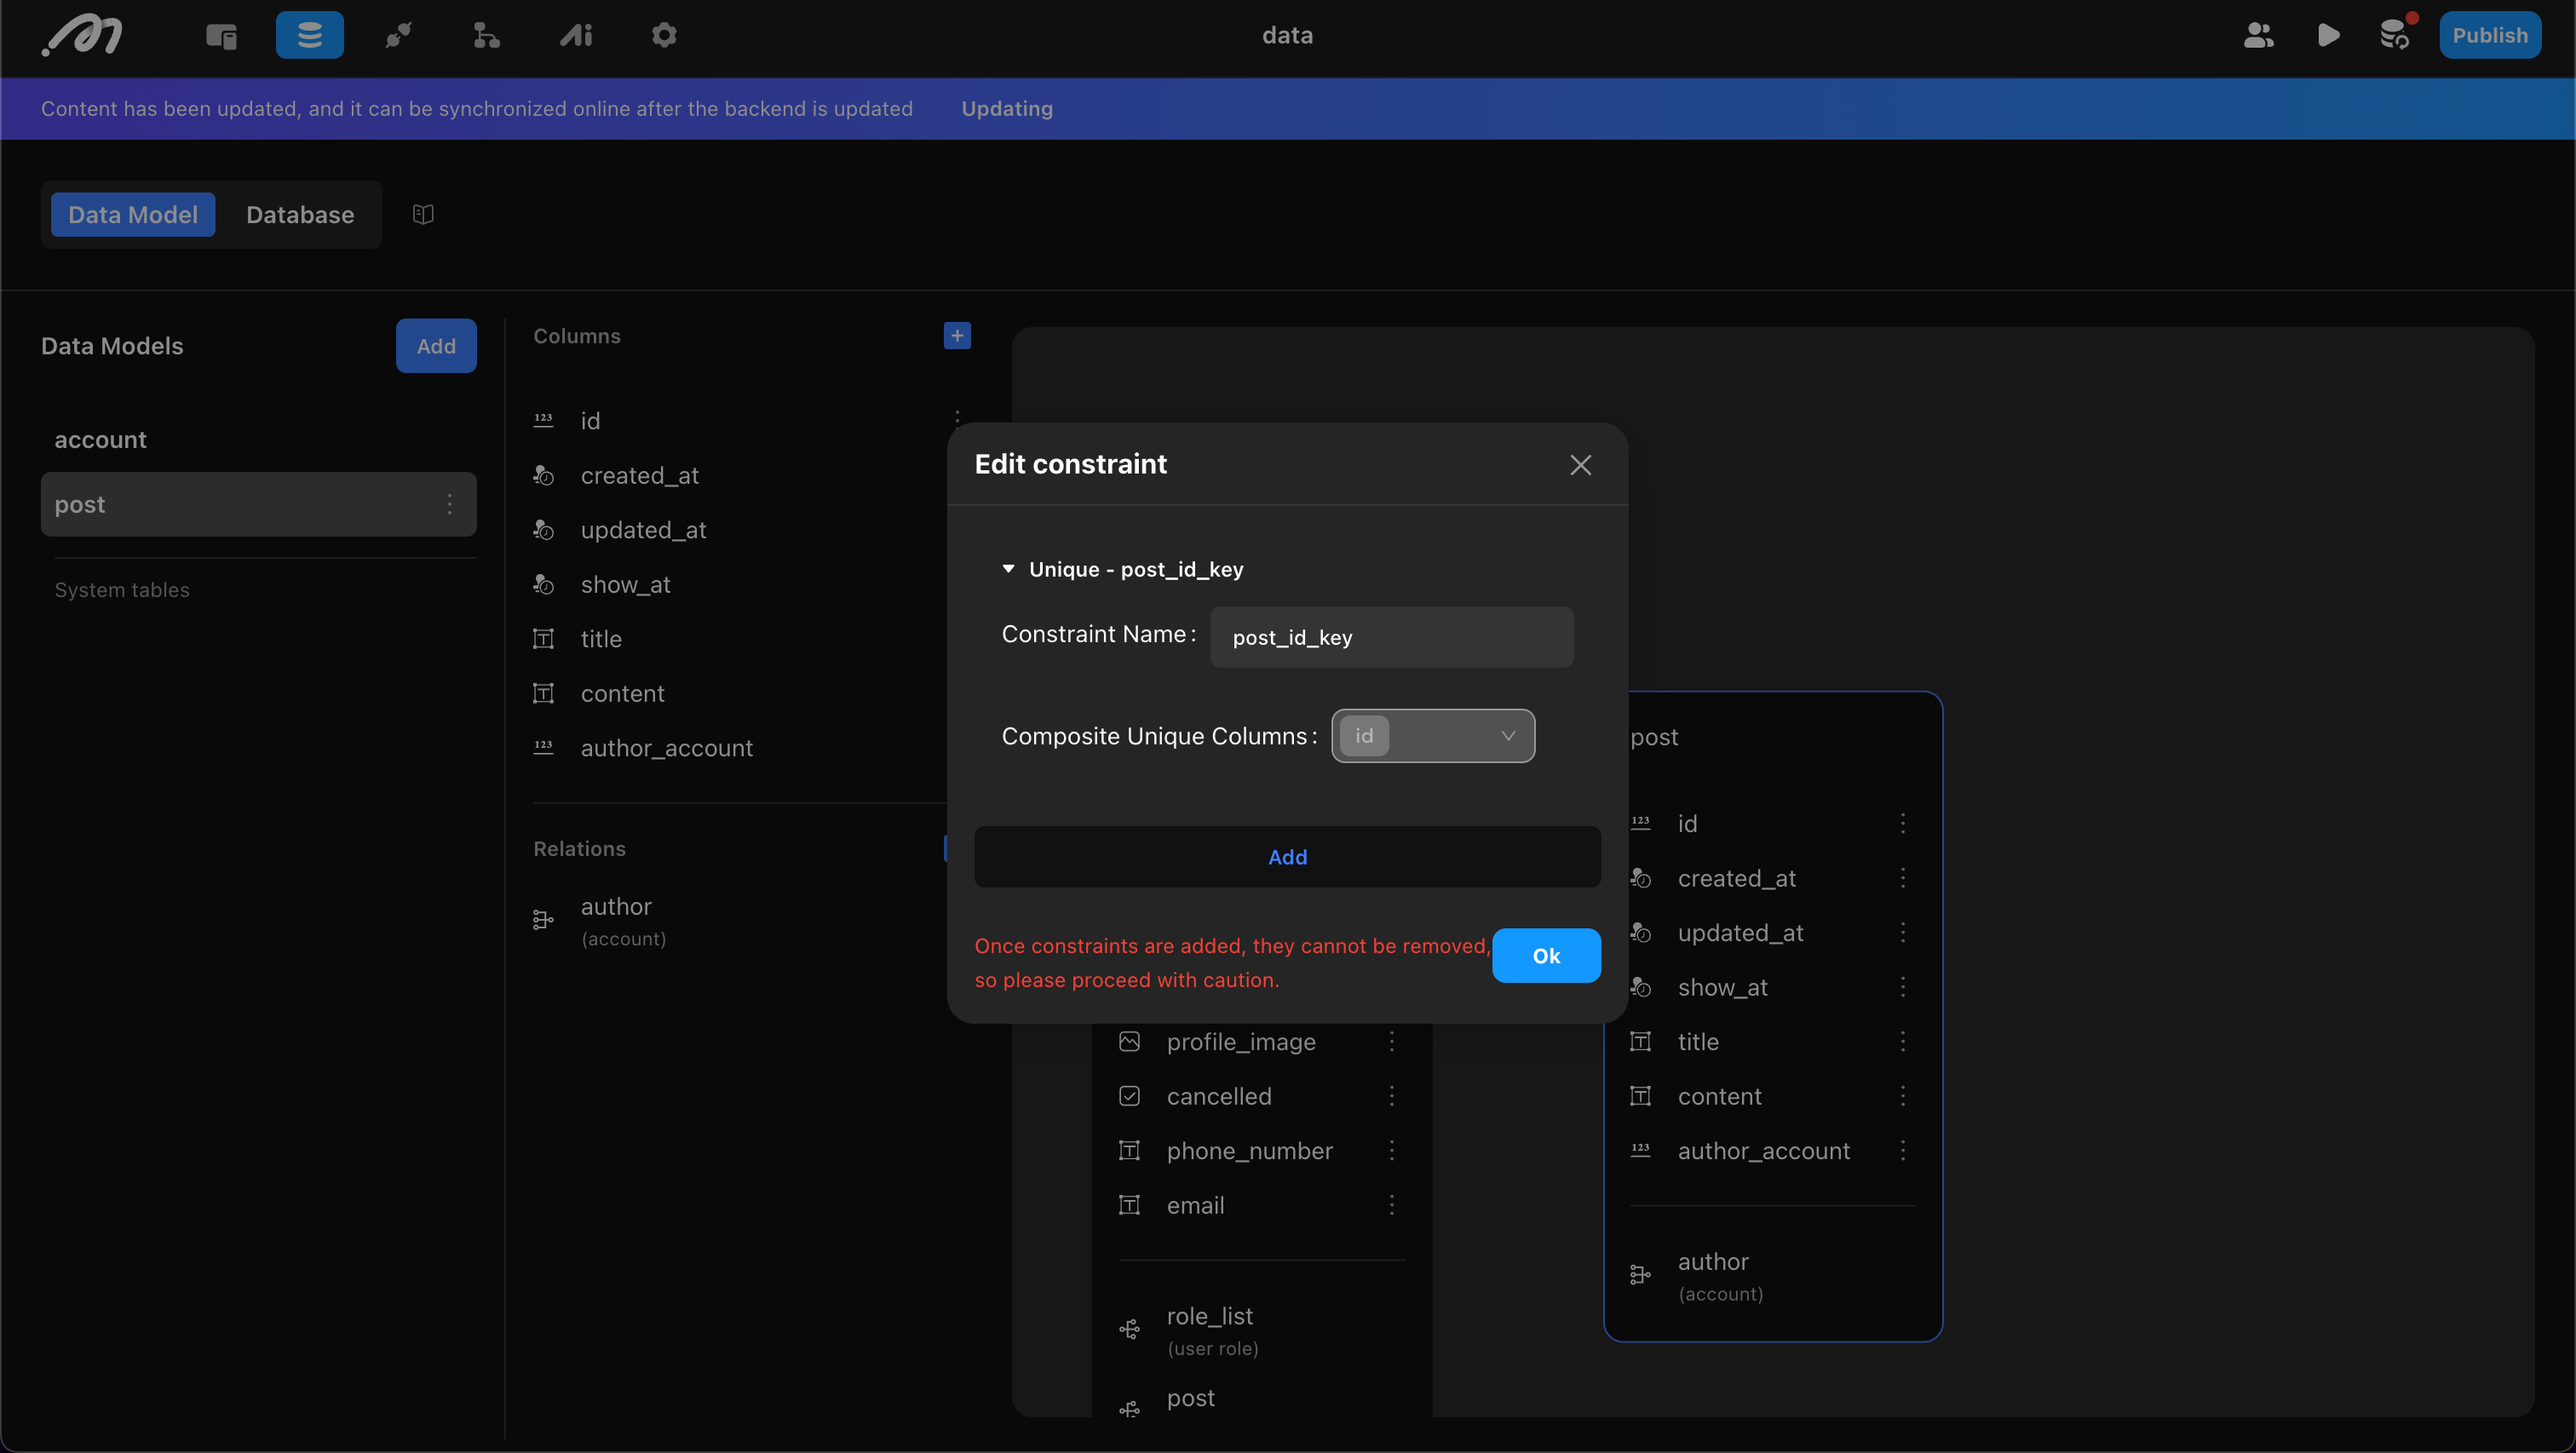
Developers can add custom constraints. When adding, confirm:
- Constraint Name: Must be unique and use only lowercase letters.
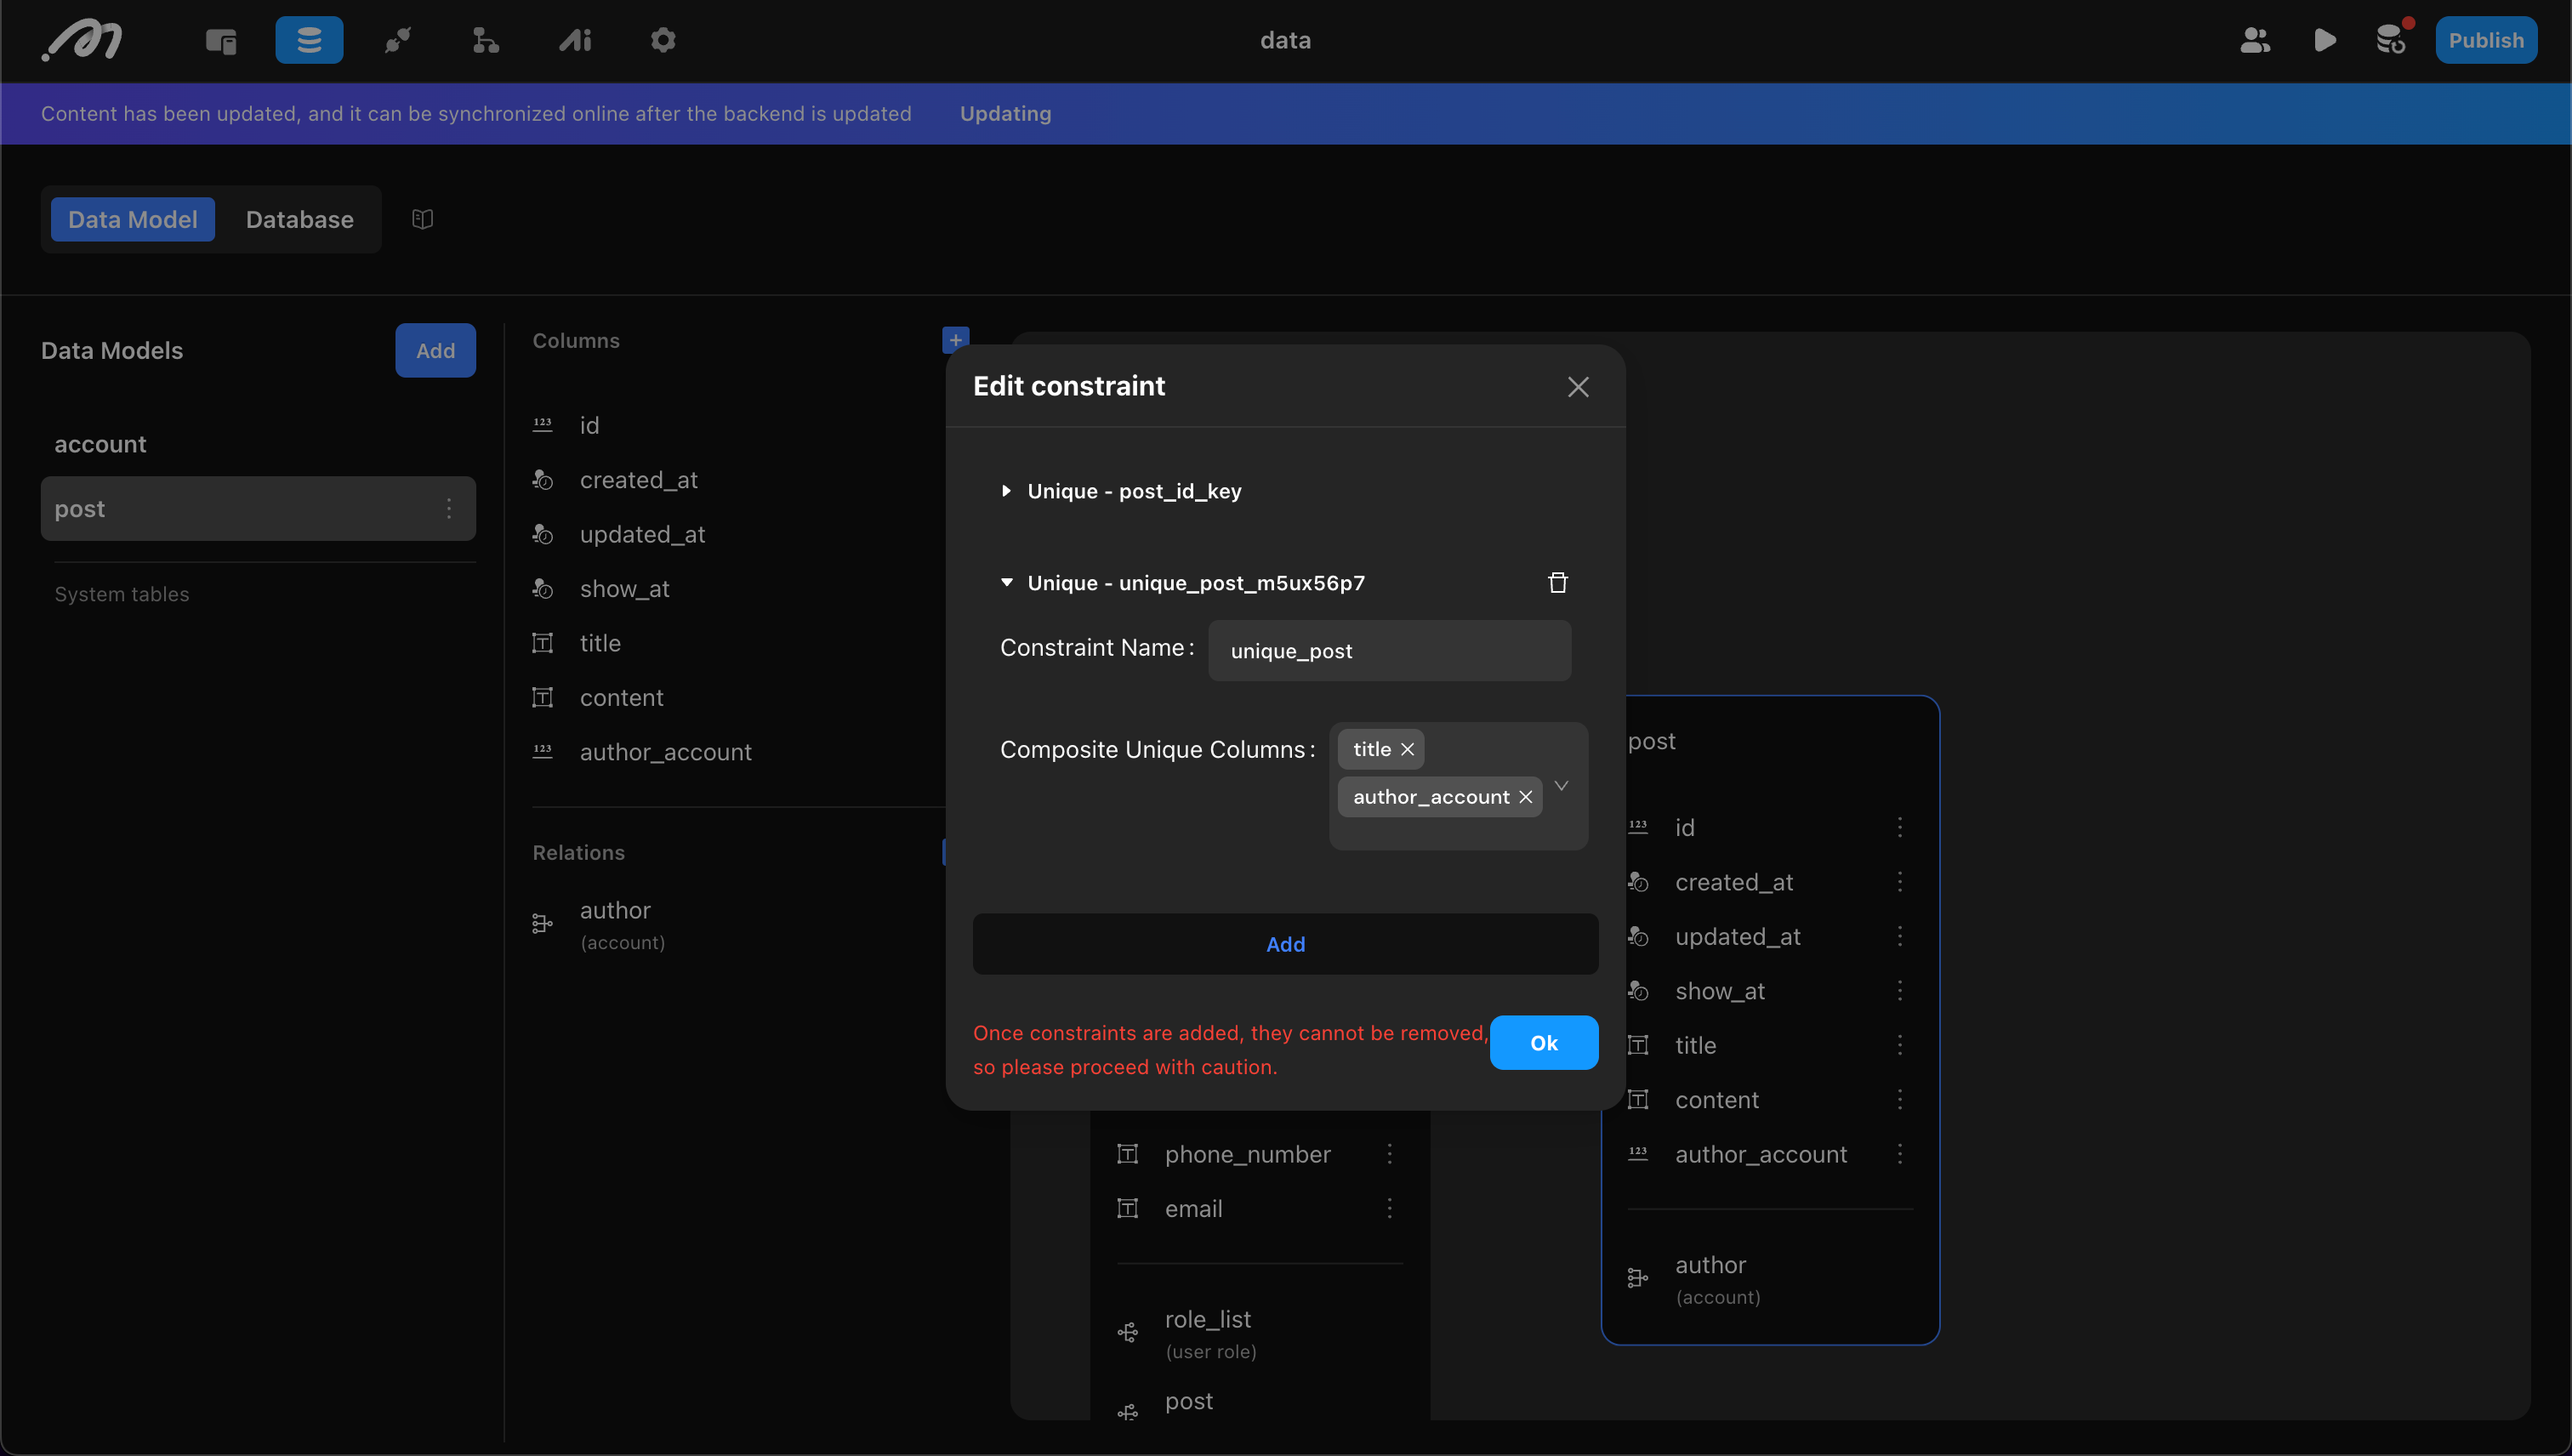
- Set of Columns: Select one or more columns. Selecting one means the column’s data must be unique; selecting multiple means the combination must be unique. To delete a constraint, remove one of the columns from the set.
Example: A unique constraint on “title” and “author” means the same author cannot use a duplicate title.
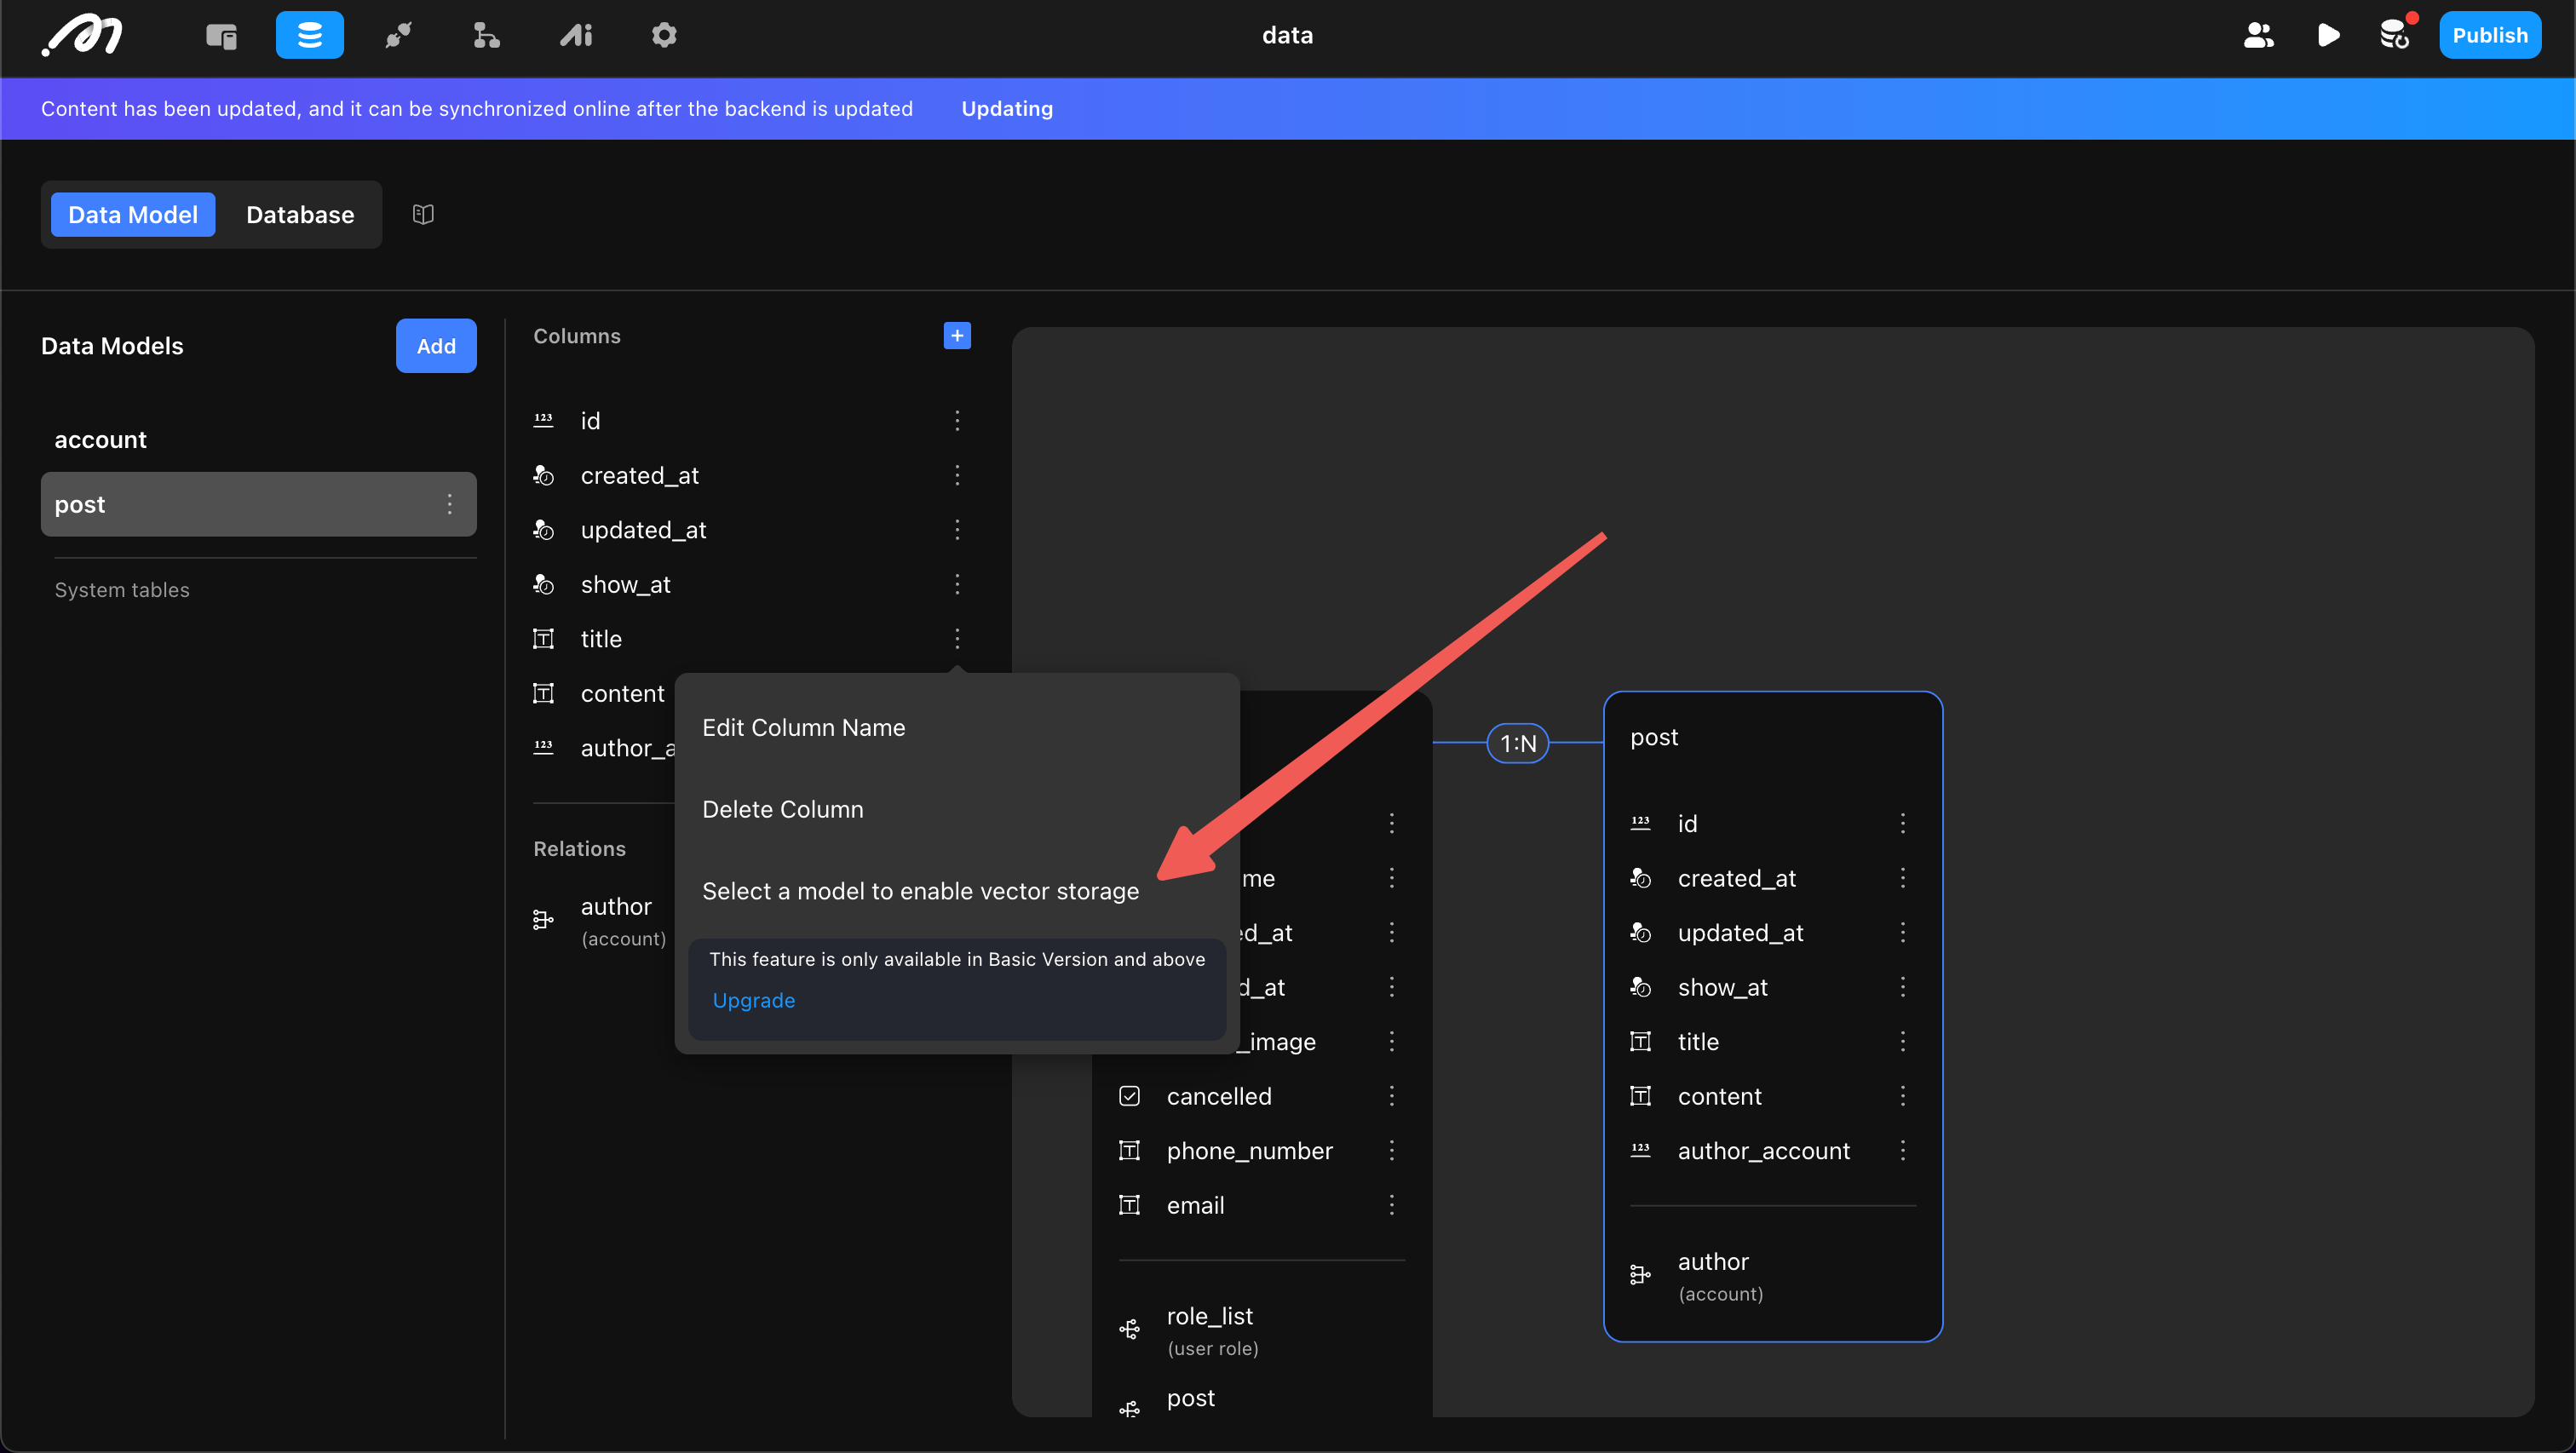
Vector Storage and Sort
Vector storage means vectorizing a column’s data using a large model and storing the result in the database (invisible to developers).
After vectorization, you can use vector sort. Traditional sorting uses clear rules (e.g., numeric size, alphabetical order), but cannot handle similarity. Vector sort converts objects into vectors and sorts by similarity.
Example: By vectorizing the “Content” column in the “post” table, you can implement “Article Recommendation”:
- User inputs the content they want to read.
- Calculate vector distance between input and posts, sort by distance.
- Select articles with the closest distance.
Momen currently supports vector storage for Text types only.
After configuring vector storage, you can enable vector sort when retrieving data.

Momen provides two vector distance calculation methods: COSINE and EUCLIDEAN.
- EUCLIDEAN: Measures absolute differences, suitable for scenarios like navigation, logistics, or physiological parameter comparison.
- COSINE: Measures direction similarity, suitable for search engines, text classification, and recommendation systems.
Synchronize Modifications to Online
All modifications to tables and columns are synchronized online after updating the backend. If your project is published and in use, modifying tables may cause some online requests to fail.
Permissions
Data is the most important asset of an application. Permission settings specify user access to data, preventing unauthorized access and data leakage.
Momen provides a permission management system combining role-based access control (RBAC) and attribute-based access control (ABAC). For details, see: Permissions .
Data Usage
Once tables are created, they can be referenced or modified elsewhere. The following uses a blog website as an example to illustrate CRUD operations.
First, create a “Blog” table in the Data model to store articles, including:
- show_at (Publication date)
- title
- sub_title
- cover_image
- content
- published_status
- authors_author (Author’s account ID)
.png)
Create Data
Create a blog upload page and add components: inputs, Image Picker, subtext Editor, Date & Time Picker, and button.
Bind the “add post” action to the button and bind field values to the corresponding components.
.png)
Read Data
Display blog articles in a List format, showing cover image, title, author, publication date, etc.
Add a List component, select “Blog” as the data source, enable Load more, set limit to 3, and sort by show_at descending.
.png)
Components within the List item also need to bind data. The data selection path is: In-component data -> post_list (List component name) -> item. “Item” represents each entry’s data.
.png)
Update Data
To update blogs, support changes to title, subtitle, cover, and content.
Create a blog modification page and add components: inputs, Image Picker, subtext Editor, and button.
Add a Data source to the page, select “Blog”, set limit to 1, and add a filter: ID equals the Query parameter blog_id.
.png)
Once the article is loaded, bind its data to the components for display. For example, set the default value of the title input to the article’s title.
.png)
Bind the “Update post” action to the modification button, bind fields to components, and add a filter: ID equals the blog’s ID in the Data source.
When modifying or deleting, always check and confirm filter conditions to avoid updating or deleting all data.
.png)
Delete Data
To delete articles, add the “Delete blog” action to the delete button, and set the filter: ID equals the blog’s ID in the Data source.
.png)
Data Import
Momen database provides efficient data import and export capabilities. See Data Import and Export .