Actions
An Action is a set of events and is one of the fundamental building blocks of software in Momen. By configuring actions, you can implement app interactions such as page navigation, data operations, and complex business processes. With APIs and Actionflows, you can create custom actions and automate workflows to meet various business scenarios.
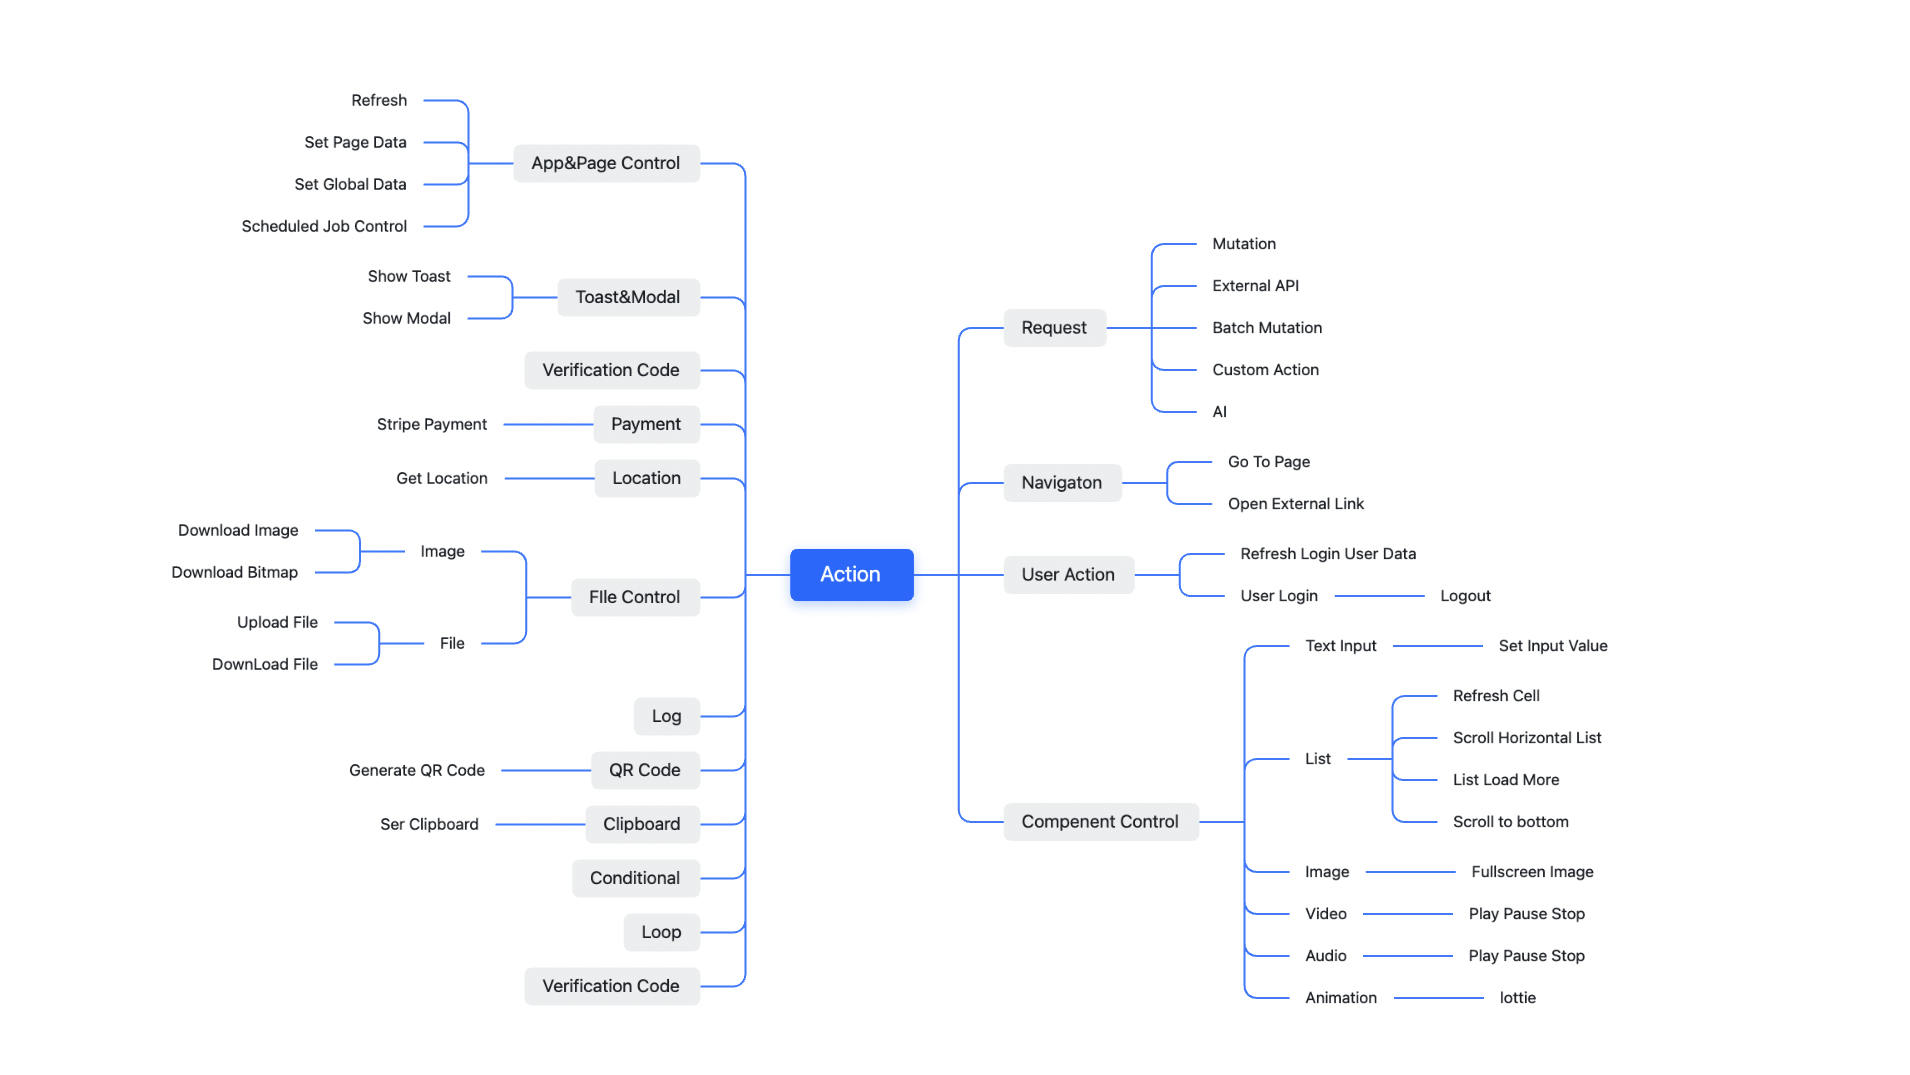
Types of Actions
Built-in Actions
Momen provides 16 categories and over 100 types of built-in actions, covering common interaction needs such as triggering AI, payments, sharing, navigation, and operations on pages or components. Common built-in actions include:
- Request: For CRUD operations on data tables, invoking pre-configured APIs, and triggering Actionflows.
- Navigation: Enables navigation between internal pages or to external URLs.
- AI: Requires prior configuration of AI models via the AI feature. Once configured and tested, AI actions can be triggered on the frontend or in Actionflows.
- Login: Allows building user authentication systems by configuring login methods (username/password, email, phone, or SSO) in “Settings > Login Settings” and adding login actions to components.
- Payment: Supports monetized apps by enabling payment features in settings and adding payment actions to components for user transactions, including payments and refunds.
Custom Actions via API
In addition to built-in actions, you can also create custom actions using the API feature. After adding a custom API, you can execute it in the application with the “Request - API” action. See detail: API
Automating Business Processes with Actionflow
Actionflow allows you to connect multiple action nodes to form a complete workflow. It supports a variety of nodes, including database operations (add, delete, modify), calling third-party APIs, executing code blocks, and AI operations. You can also set conditional branches to handle different business logic paths. Actionflows can be triggered in various ways, including button clicks, scheduled triggers, data changes, and webhooks, making it easy to build automation. See detail: Actionflow
How to Add an Action
- Select a component that needs configuration and click “Action” to add new actions.
- To configure follow-up actions, add new actions in the [Actions on success] or [Actions on failure] section.
Execution Order of Multiple Actions
- Actions added under “On Success” or “On Failure”: Subsequent actions will wait for the execution result of the preceding action before executing. This corresponds to the top-to-bottom arrangement in the action popup.
- Actions added only in the post-position: There is a strict start order, but subsequent nodes do not wait for the execution result of preceding nodes to return. This corresponds to the left-to-right arrangement in the action popup.
When configuring multiple actions, you can click “Component > Action > Action Editor” to open an independent popup for editing.